A collection of walks, discoveries, insights and pictures of exploring Dartmoor National Park
November 23, 2022
Eylesbarrow (Ailsborough) Tin Mine
Dartmoor has been exploited for tin from pre-roman times and around the Eylebarrow area from at least the 12th or 13th century. Underground mining technology had been available for many centuries, but it is likely that the joint problems of the hardness of the granite rock and the amount of underground water together with the relatively easy pickings from near the surface made deep mining unviable until the late 18th century. There were around 50 mines known to have started up on Dartmoor in the late 18th and 19th centuries with Eylesbarrow being the largest of them.
Eylesbarrow Mine became operational in 1814 but had closed by 1852, although Wheal Katherine which was part of the sett continued working until October 1856. The mine is spread over a large area (approx. 2km east-west if Wheal Katherine is included and approx. 1km north-south) and there is plenty of industrial archaeological evidence of interest to keep any Dartmoor enthusiast occupied for a day or two. The remains include: over 25 shafts, 4 adits, 7 stamping mills (incl Wheal Katherine), a smelting house, numerous buildings, 2 Engine Wheelpits with flat rod remains (for underground pumping) , 6 horse whims, numerous tramways, numerous tinners’ reservoirs and leats.
The history of the “modern mining era” started in 1814, when the ‘Ailsboro Mines Company’ commenced work at Eylesbarrow by virtue of continuing the work of previous ventures. New shafts and deep adits were sunk and underground pumping was established through the completion of the Engine Leat and the first Engine Wheelpit (with associated flat rods). Three new stamping mills and a smelting house (which had both a blast and reverberatory furnace) were installed (these were in addition to a number of stamping mills which were extant when the mine was set up). By 1822 ‘Ailsborough Co’ commenced coining tin at Tavistock but tin smelting is known to have ceased at Eylesbarrow in 1831, when production stopped due to the low price of tin.
There was a change of ownership around 1836 with ‘Dartmoor Consolidated Tin Mines’ taking over after the mine had re-opened in 1835. During this time a little tin was smelted until 1841. There were further unsuccessful attempts to make the mine a going concern between 1844 and 1852. In 1847, ‘Dartmoor Consols’ completely reorganised the mine and moved the Engine Wheelpit (with associated flat rods), dug two new shafts and built a nine-headed stamping mill, but this too proved unlucrative. For a period around 1851 the mine was known as Wheal Ruth before closure a year later in 1852.
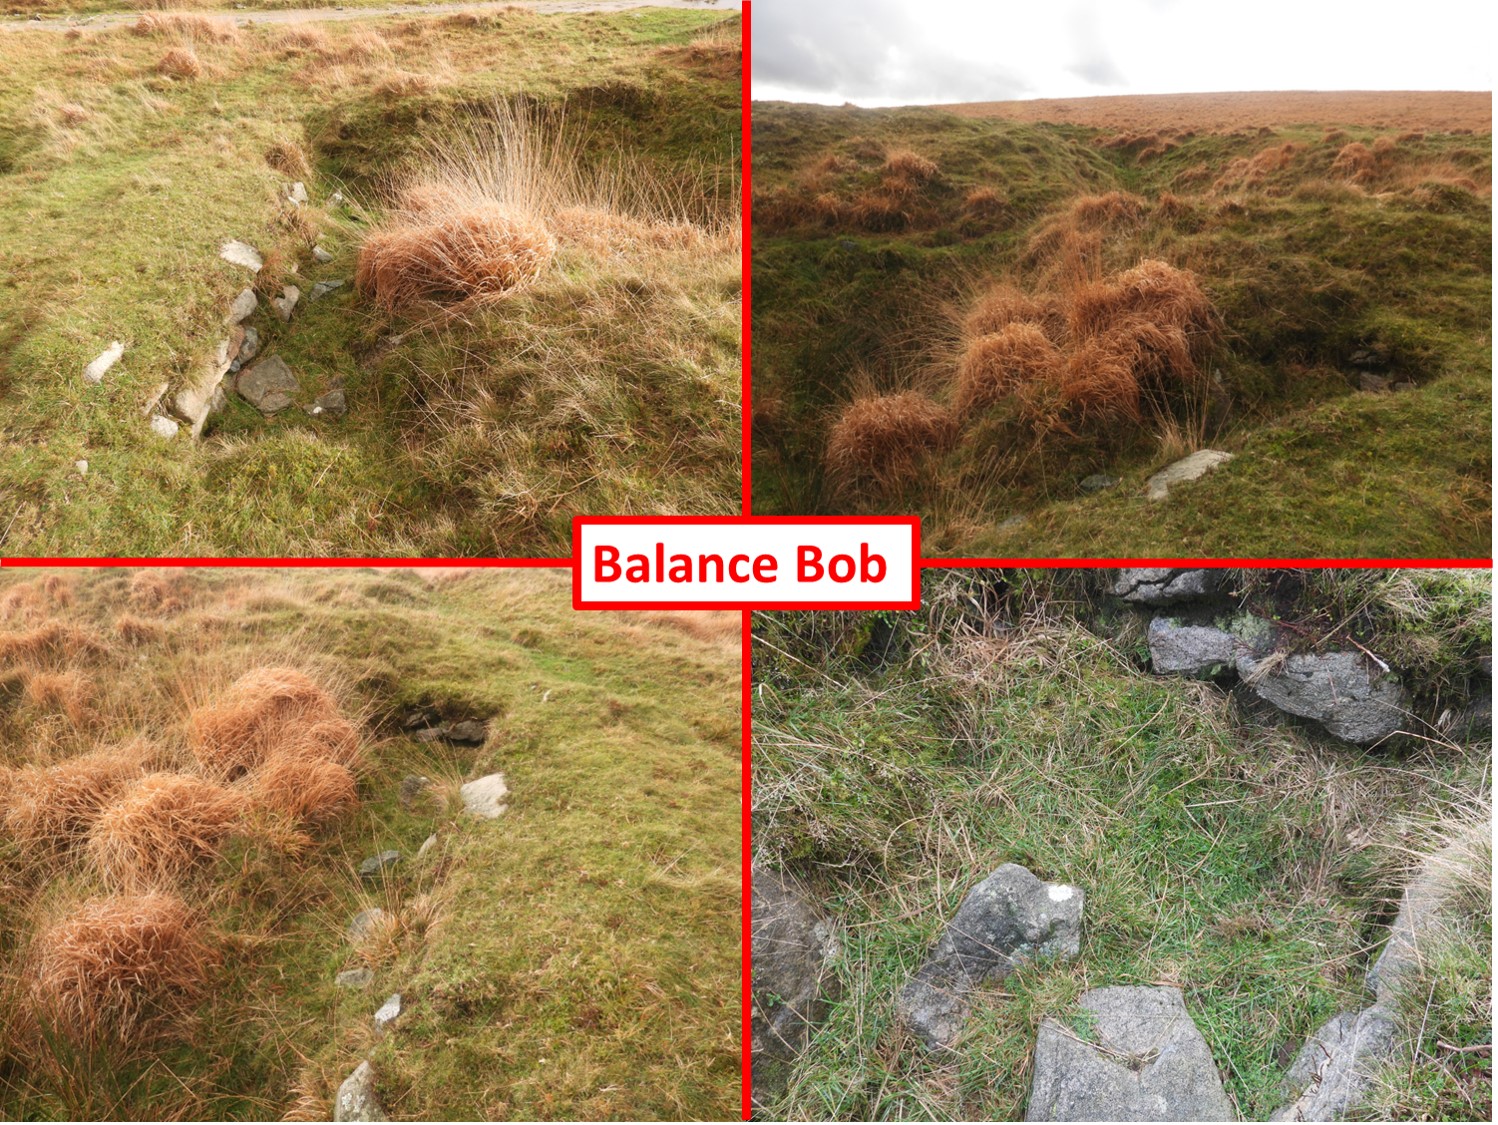
A final footnote regarding the mine appeared in the Mining Journal on Saturday 25th September 1852, where it was recorded: “VALUABLE MINING MATERIALS FOR SALE – AILESBOROUGH MINE, SHEEPSTOR, DEVON TO BE SOLD BY PUBLIC AUCTION, by Mr William Monk, on THURSDAY, the 30th day of September, inst. at 10 O’clock in the morning at Ailesborough Mine”. Items for sale included; ‘an excellent WATER-WHEEL built in 1848, 50ft diameter and 3ft breast……three balance bobs, pumps, new whim….NEW STAMPS WHEEL 17ft diameter and 2ft breast, 20 fms of launders…’ Any prospective purchaser would have been able to view the plant and materials on application to Captain Gregory at the mine.
Cook, R. M. L., 1974, Eylesbarrow (1814- 1852): A Study of a Dartmoor Tin Mine
Whitbourne, A., 2001, Visit to Eylesbarrow Mine
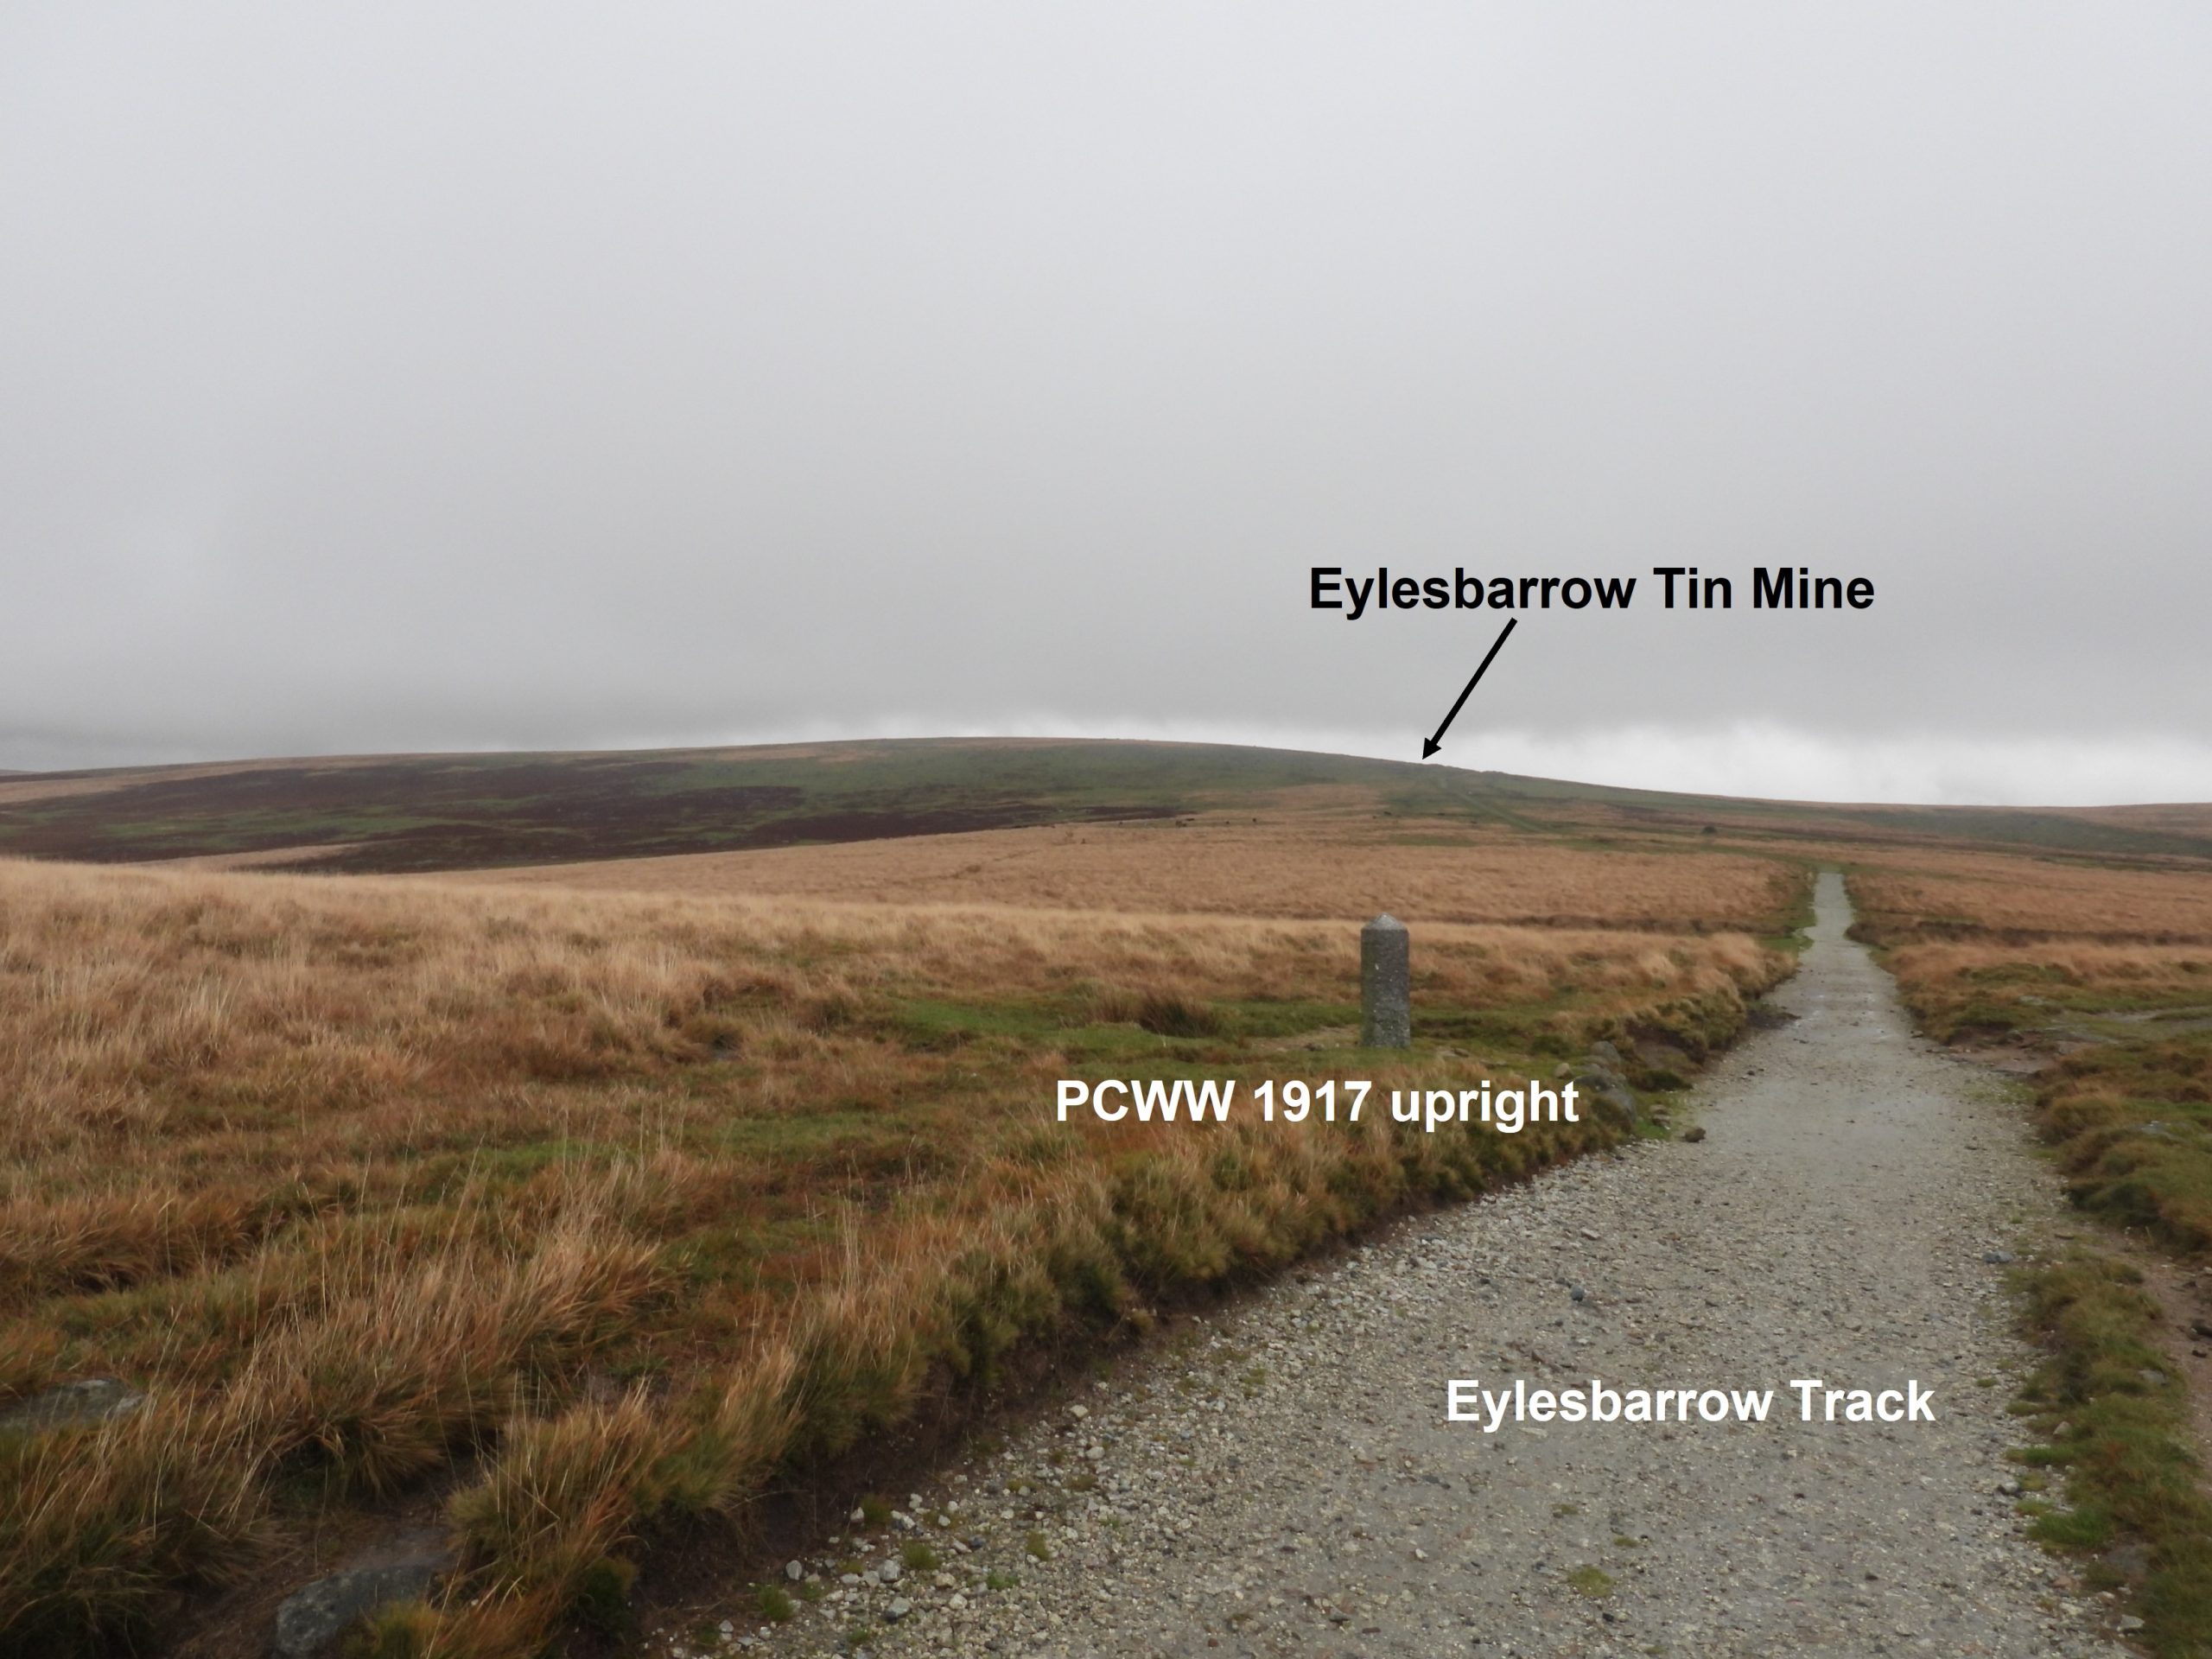
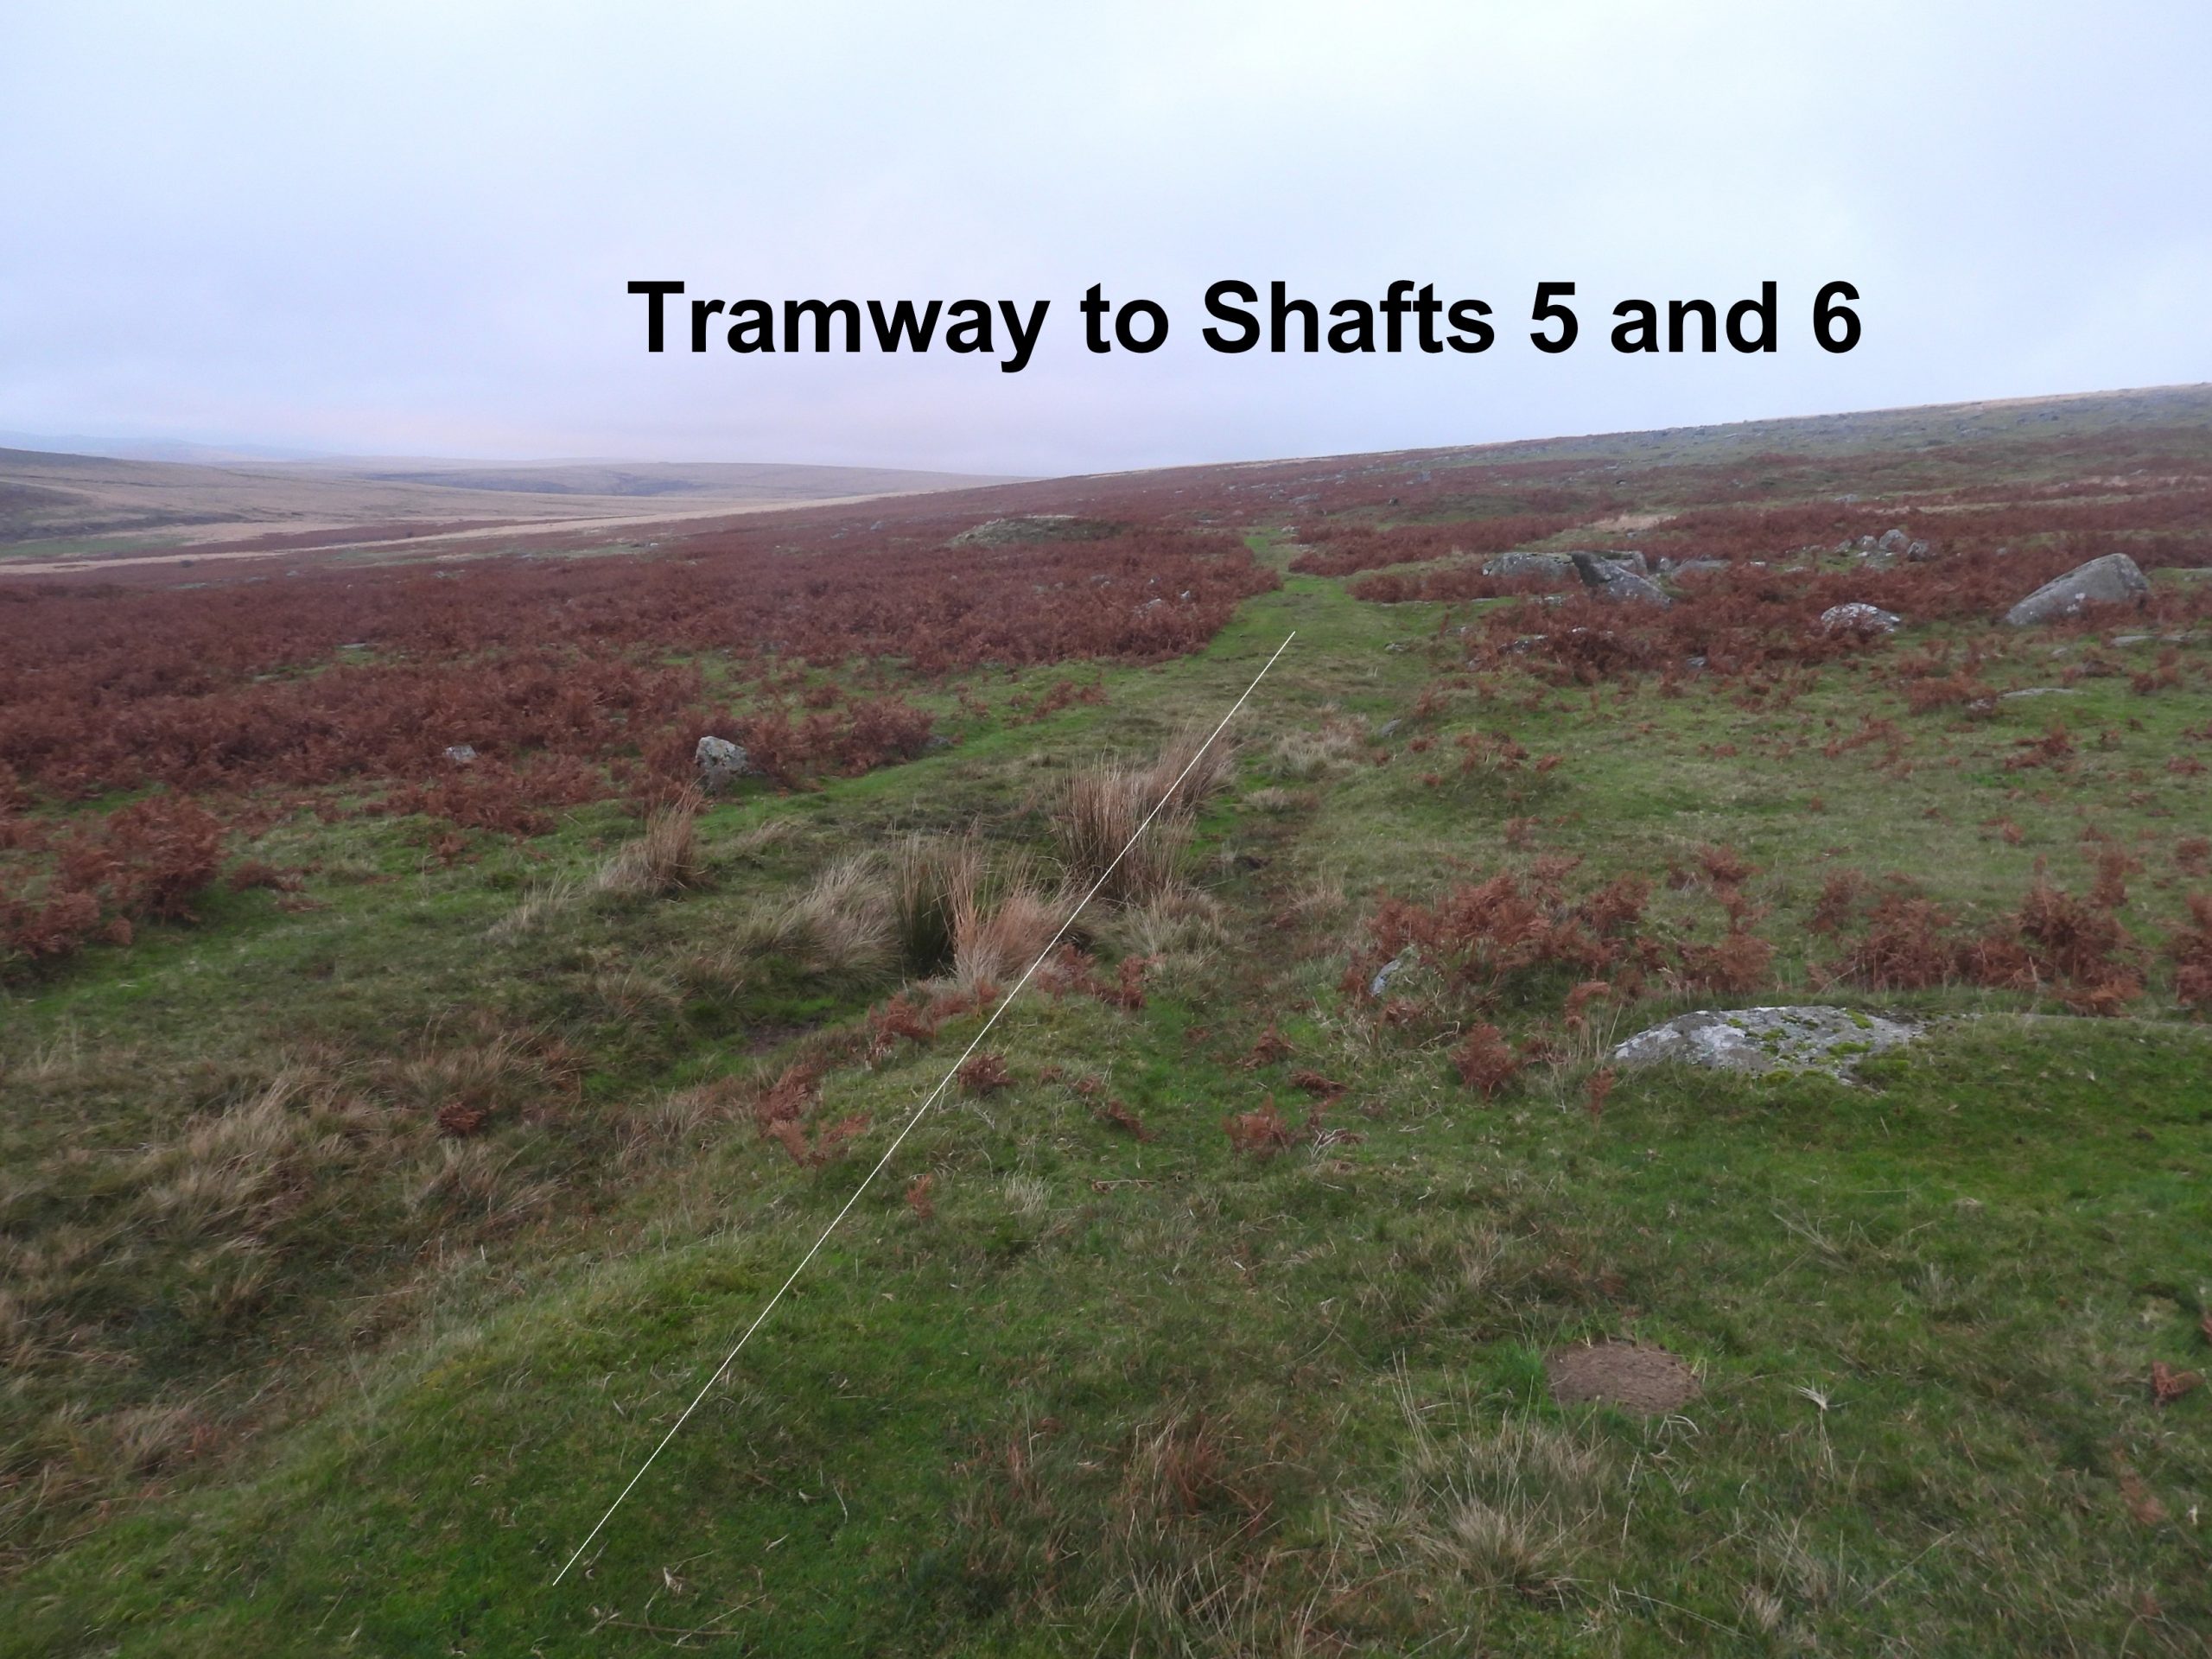
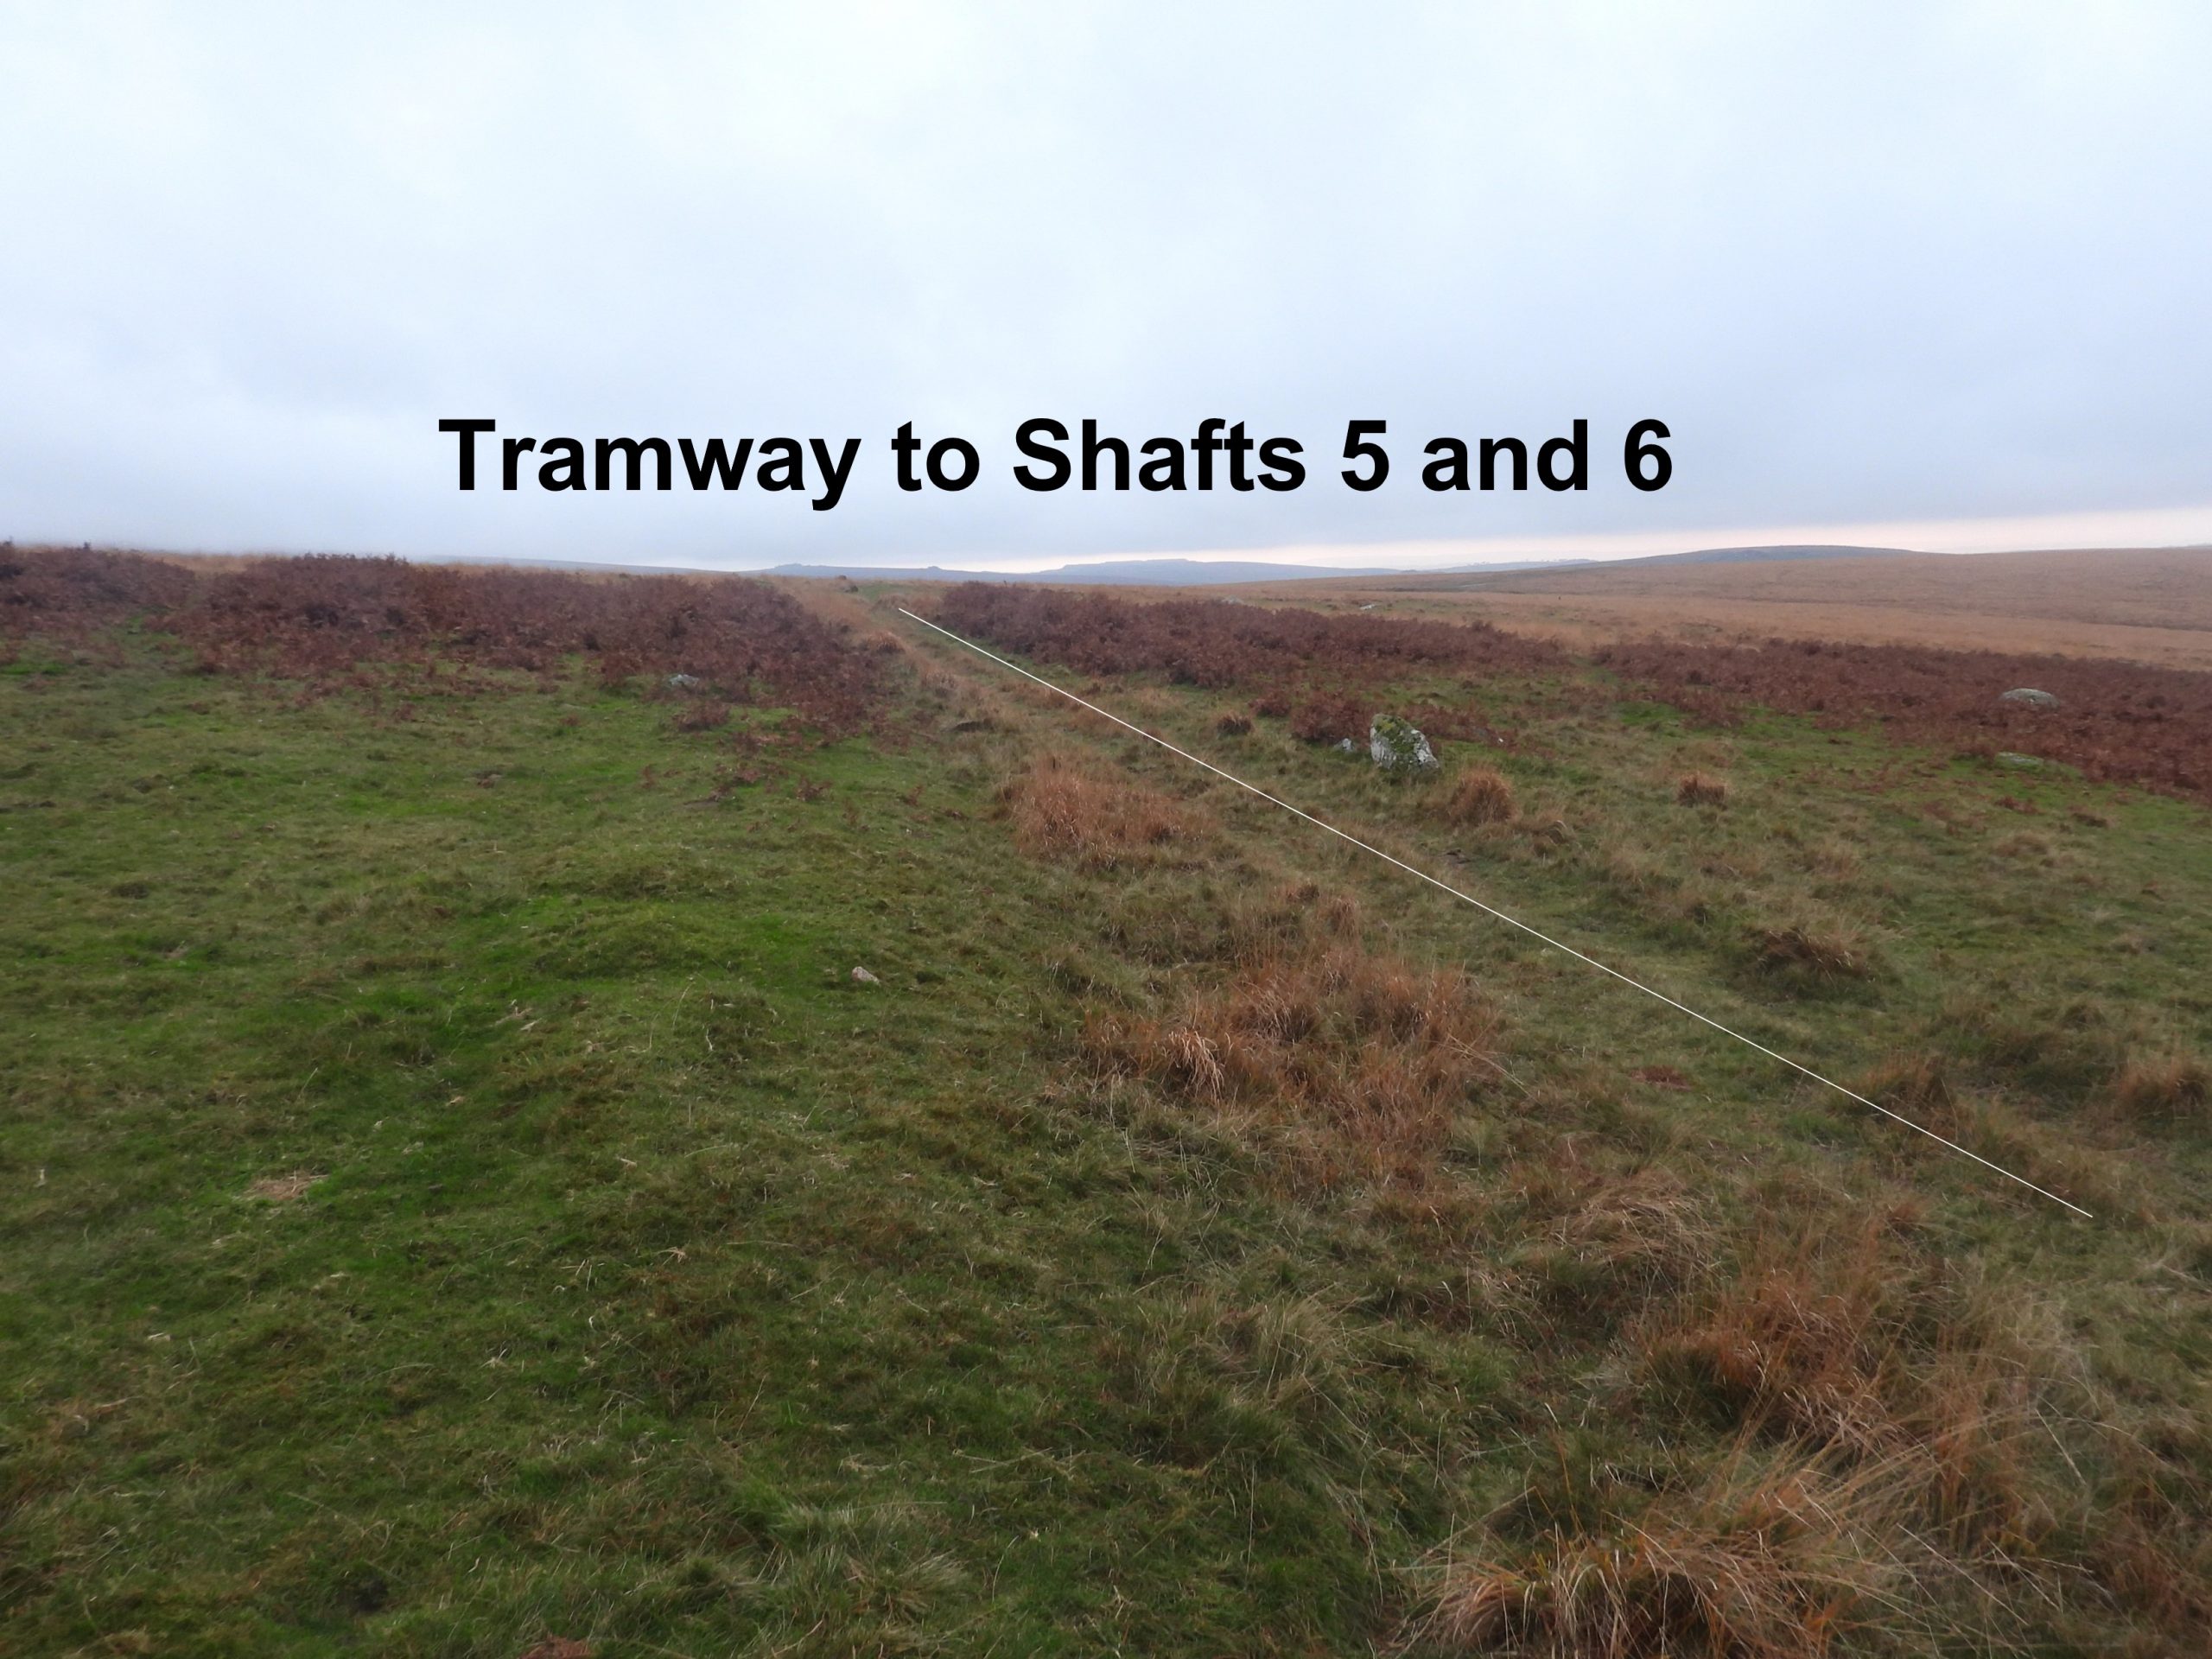
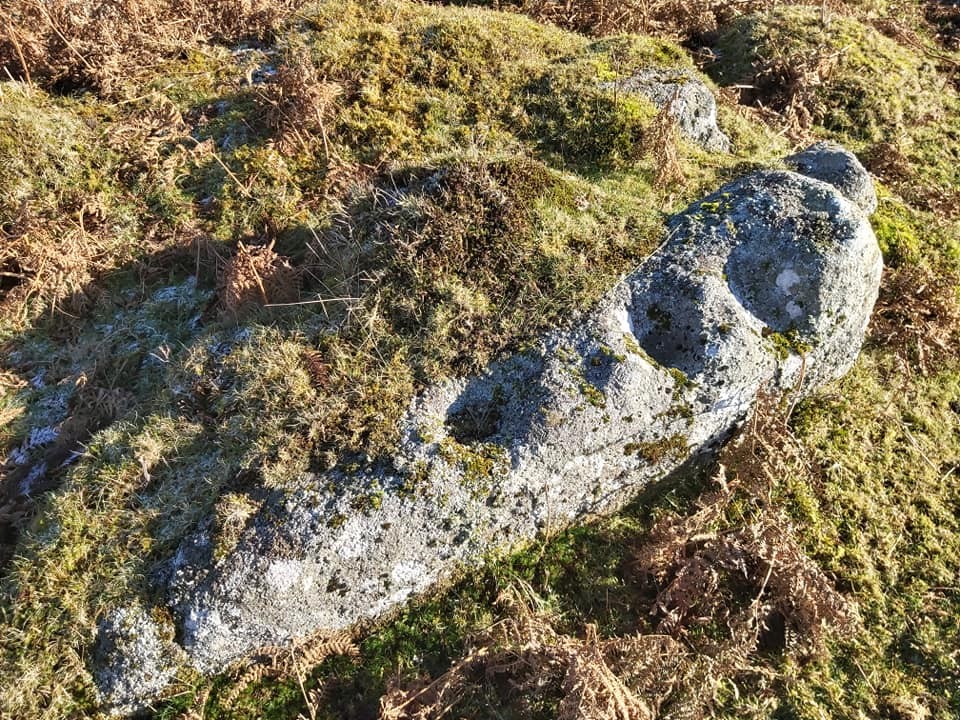
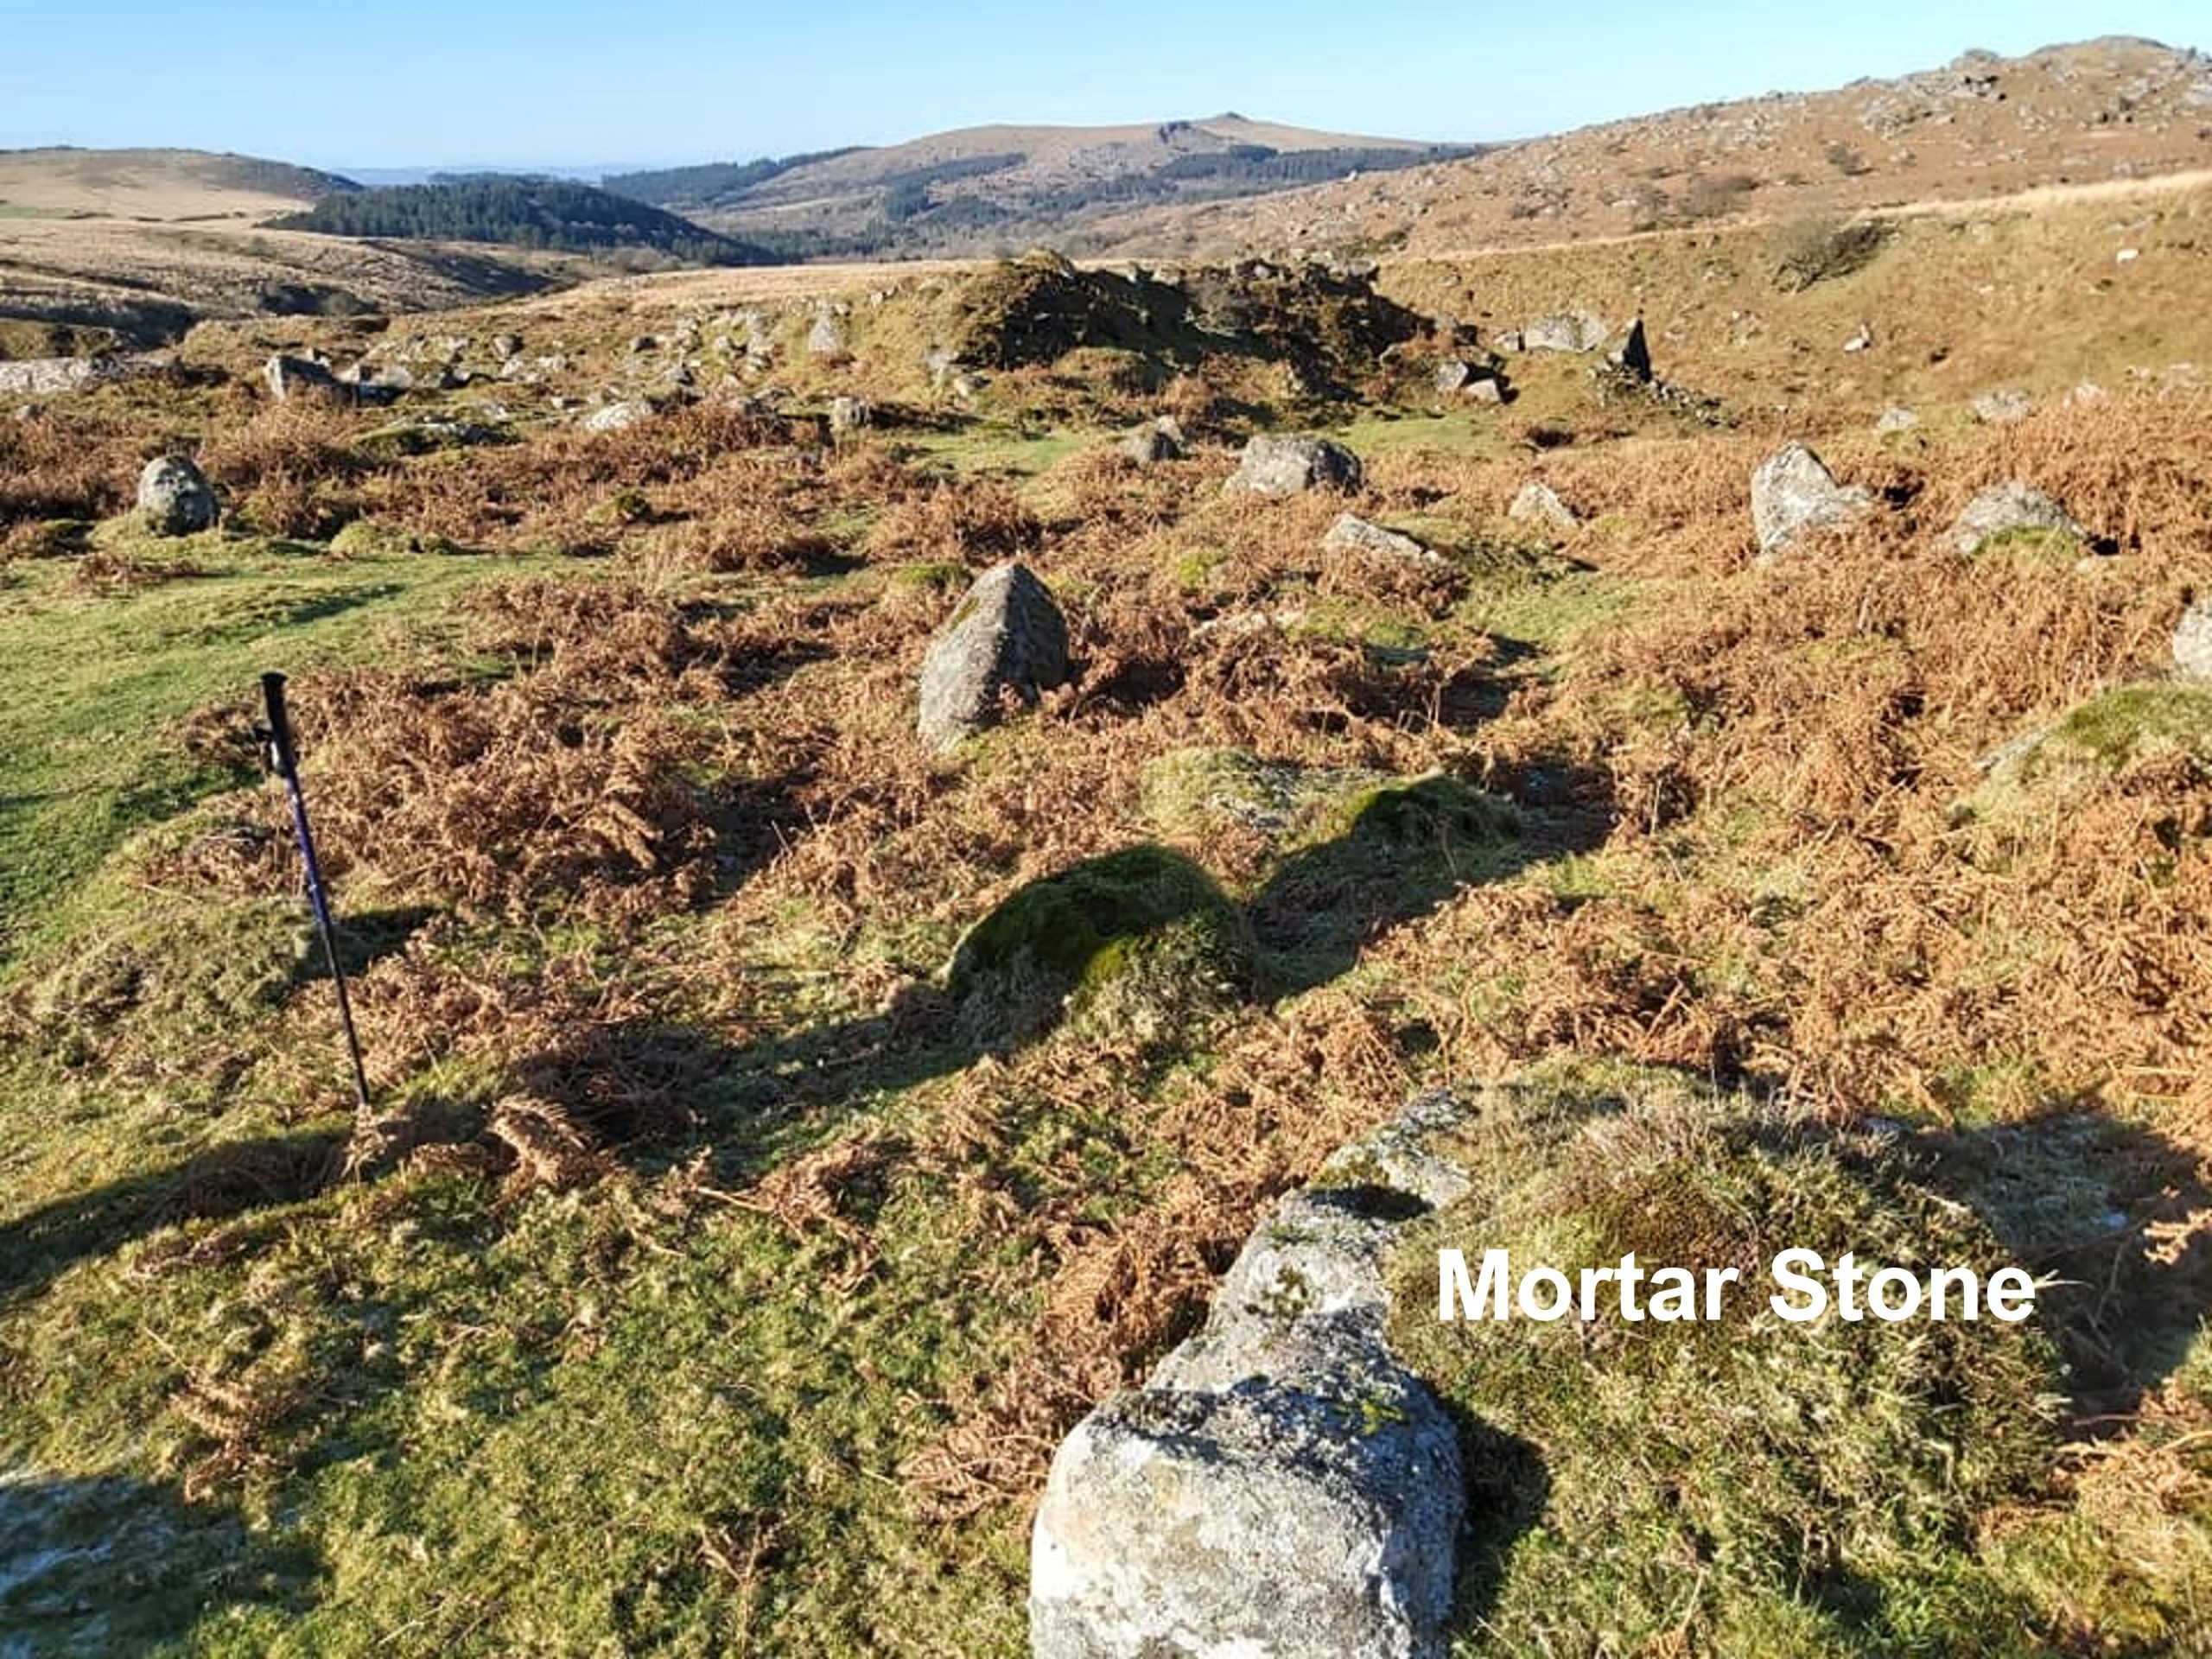
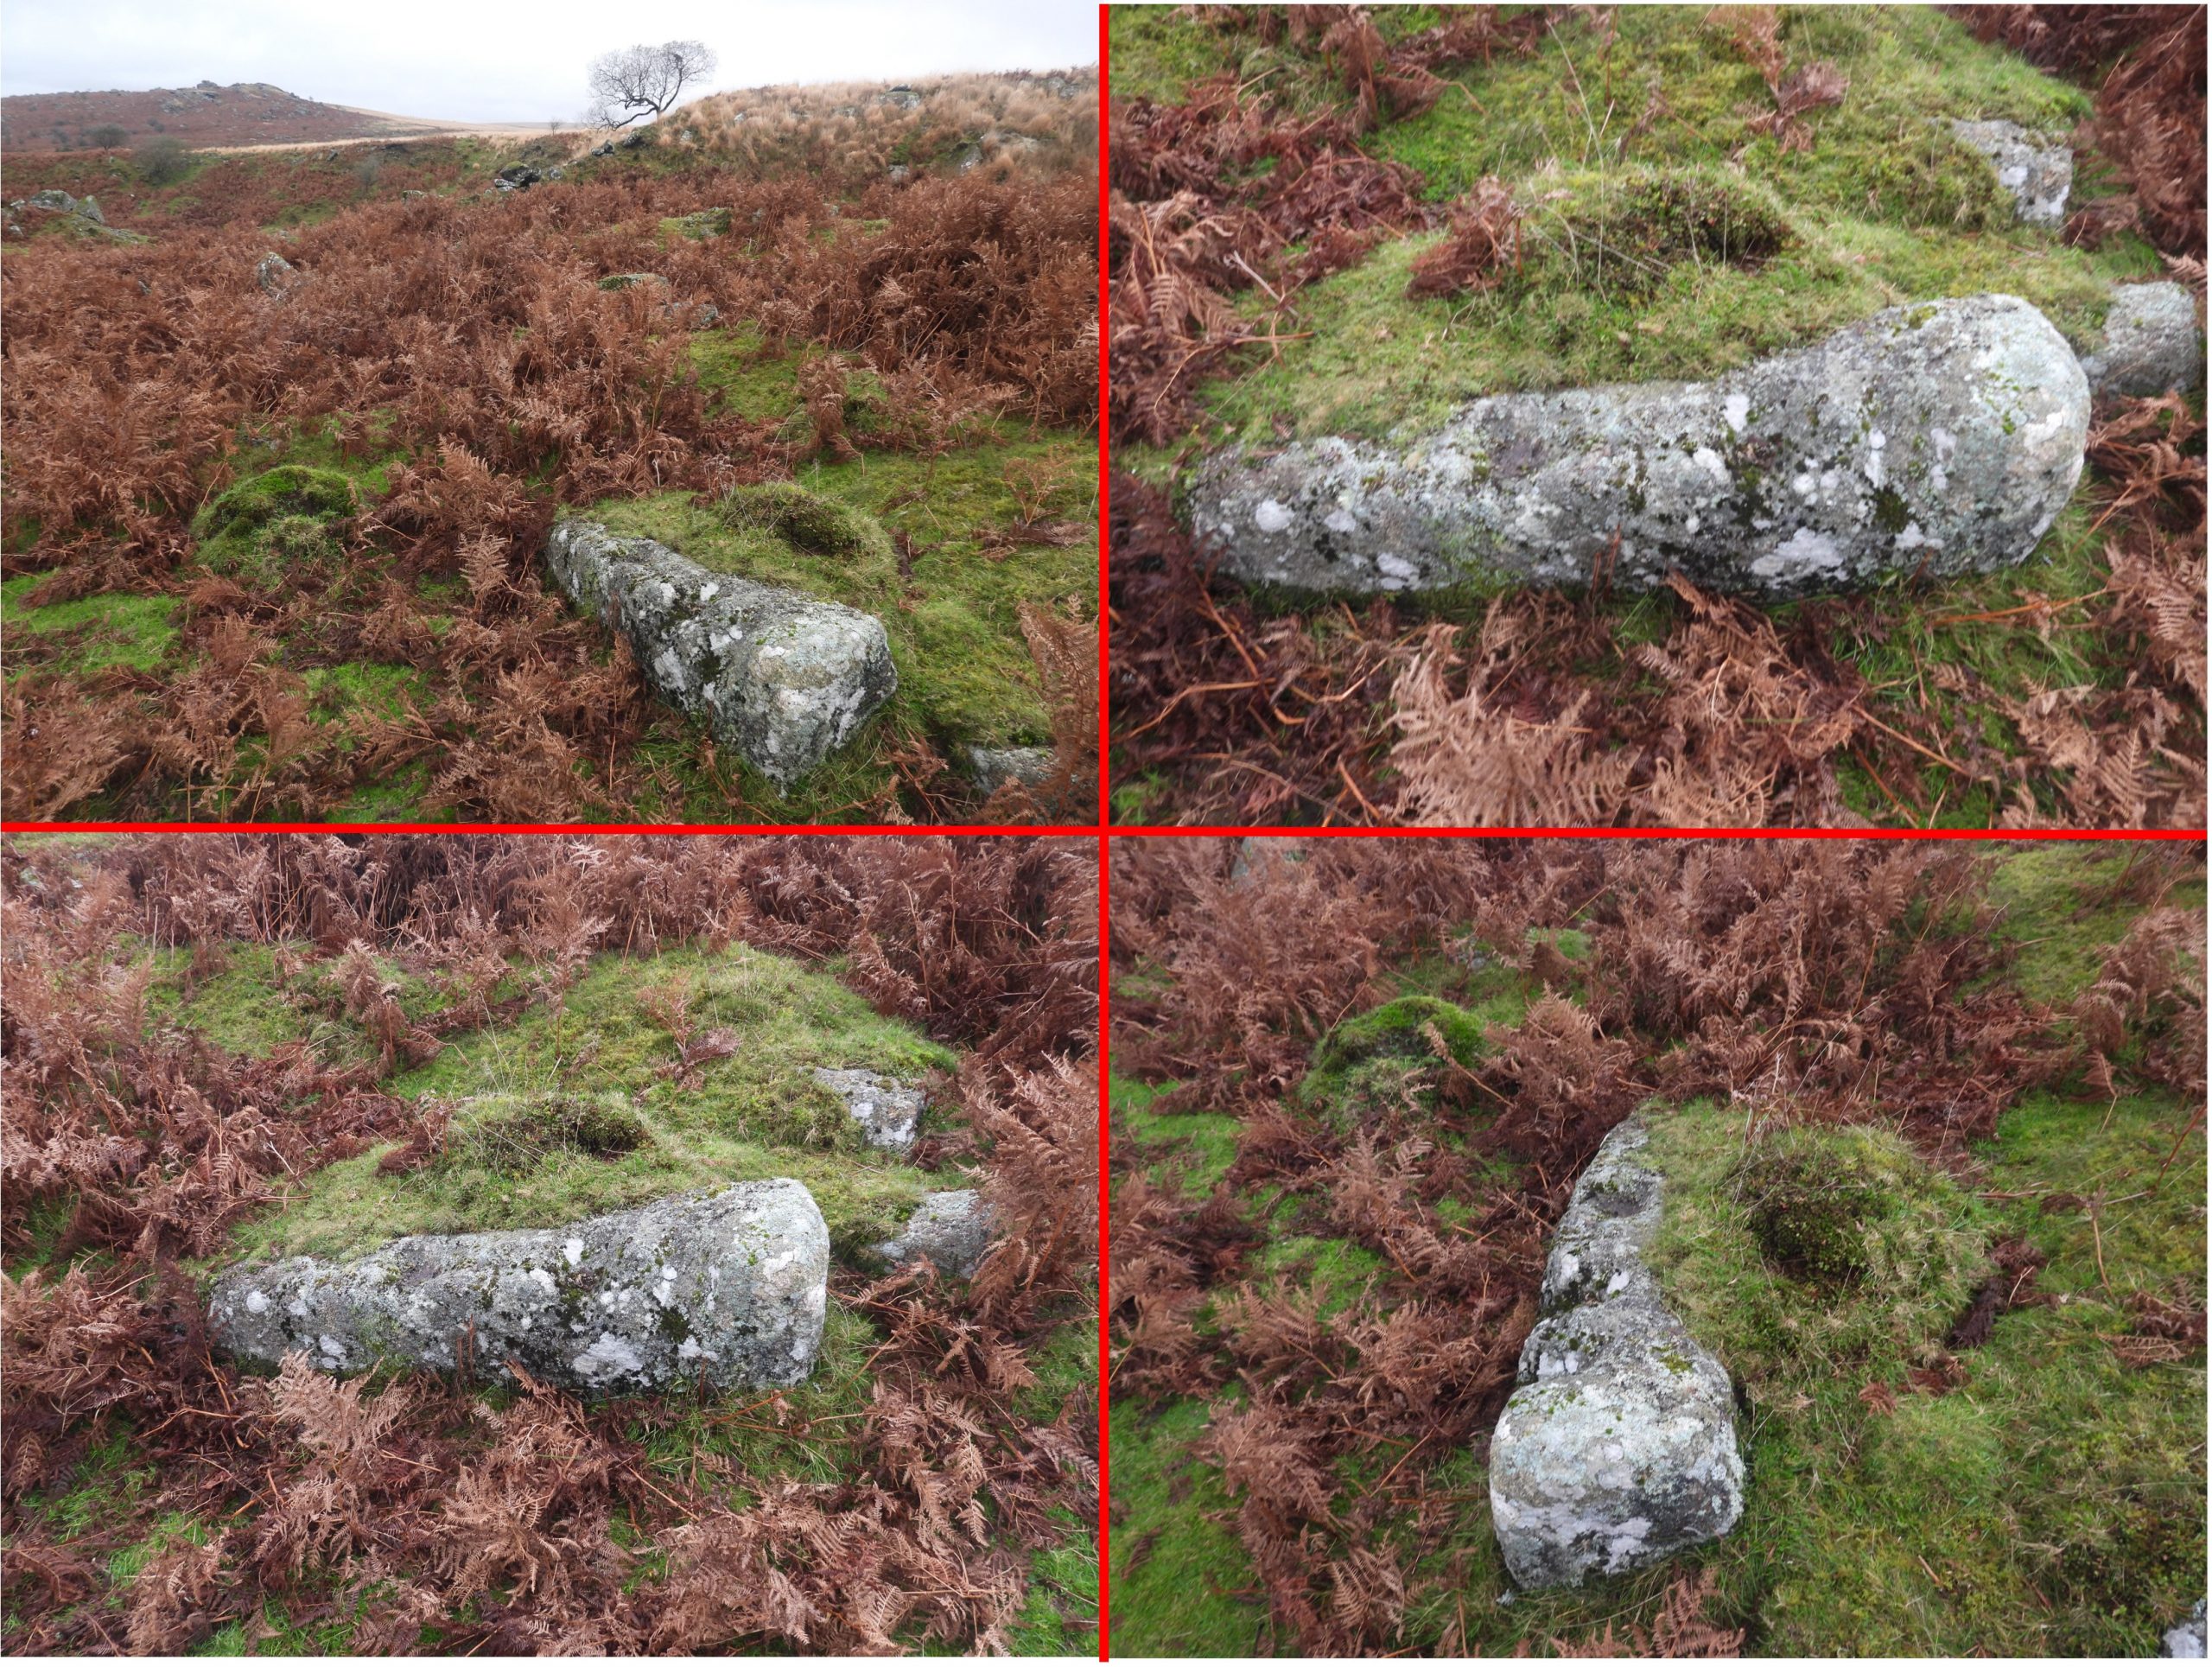
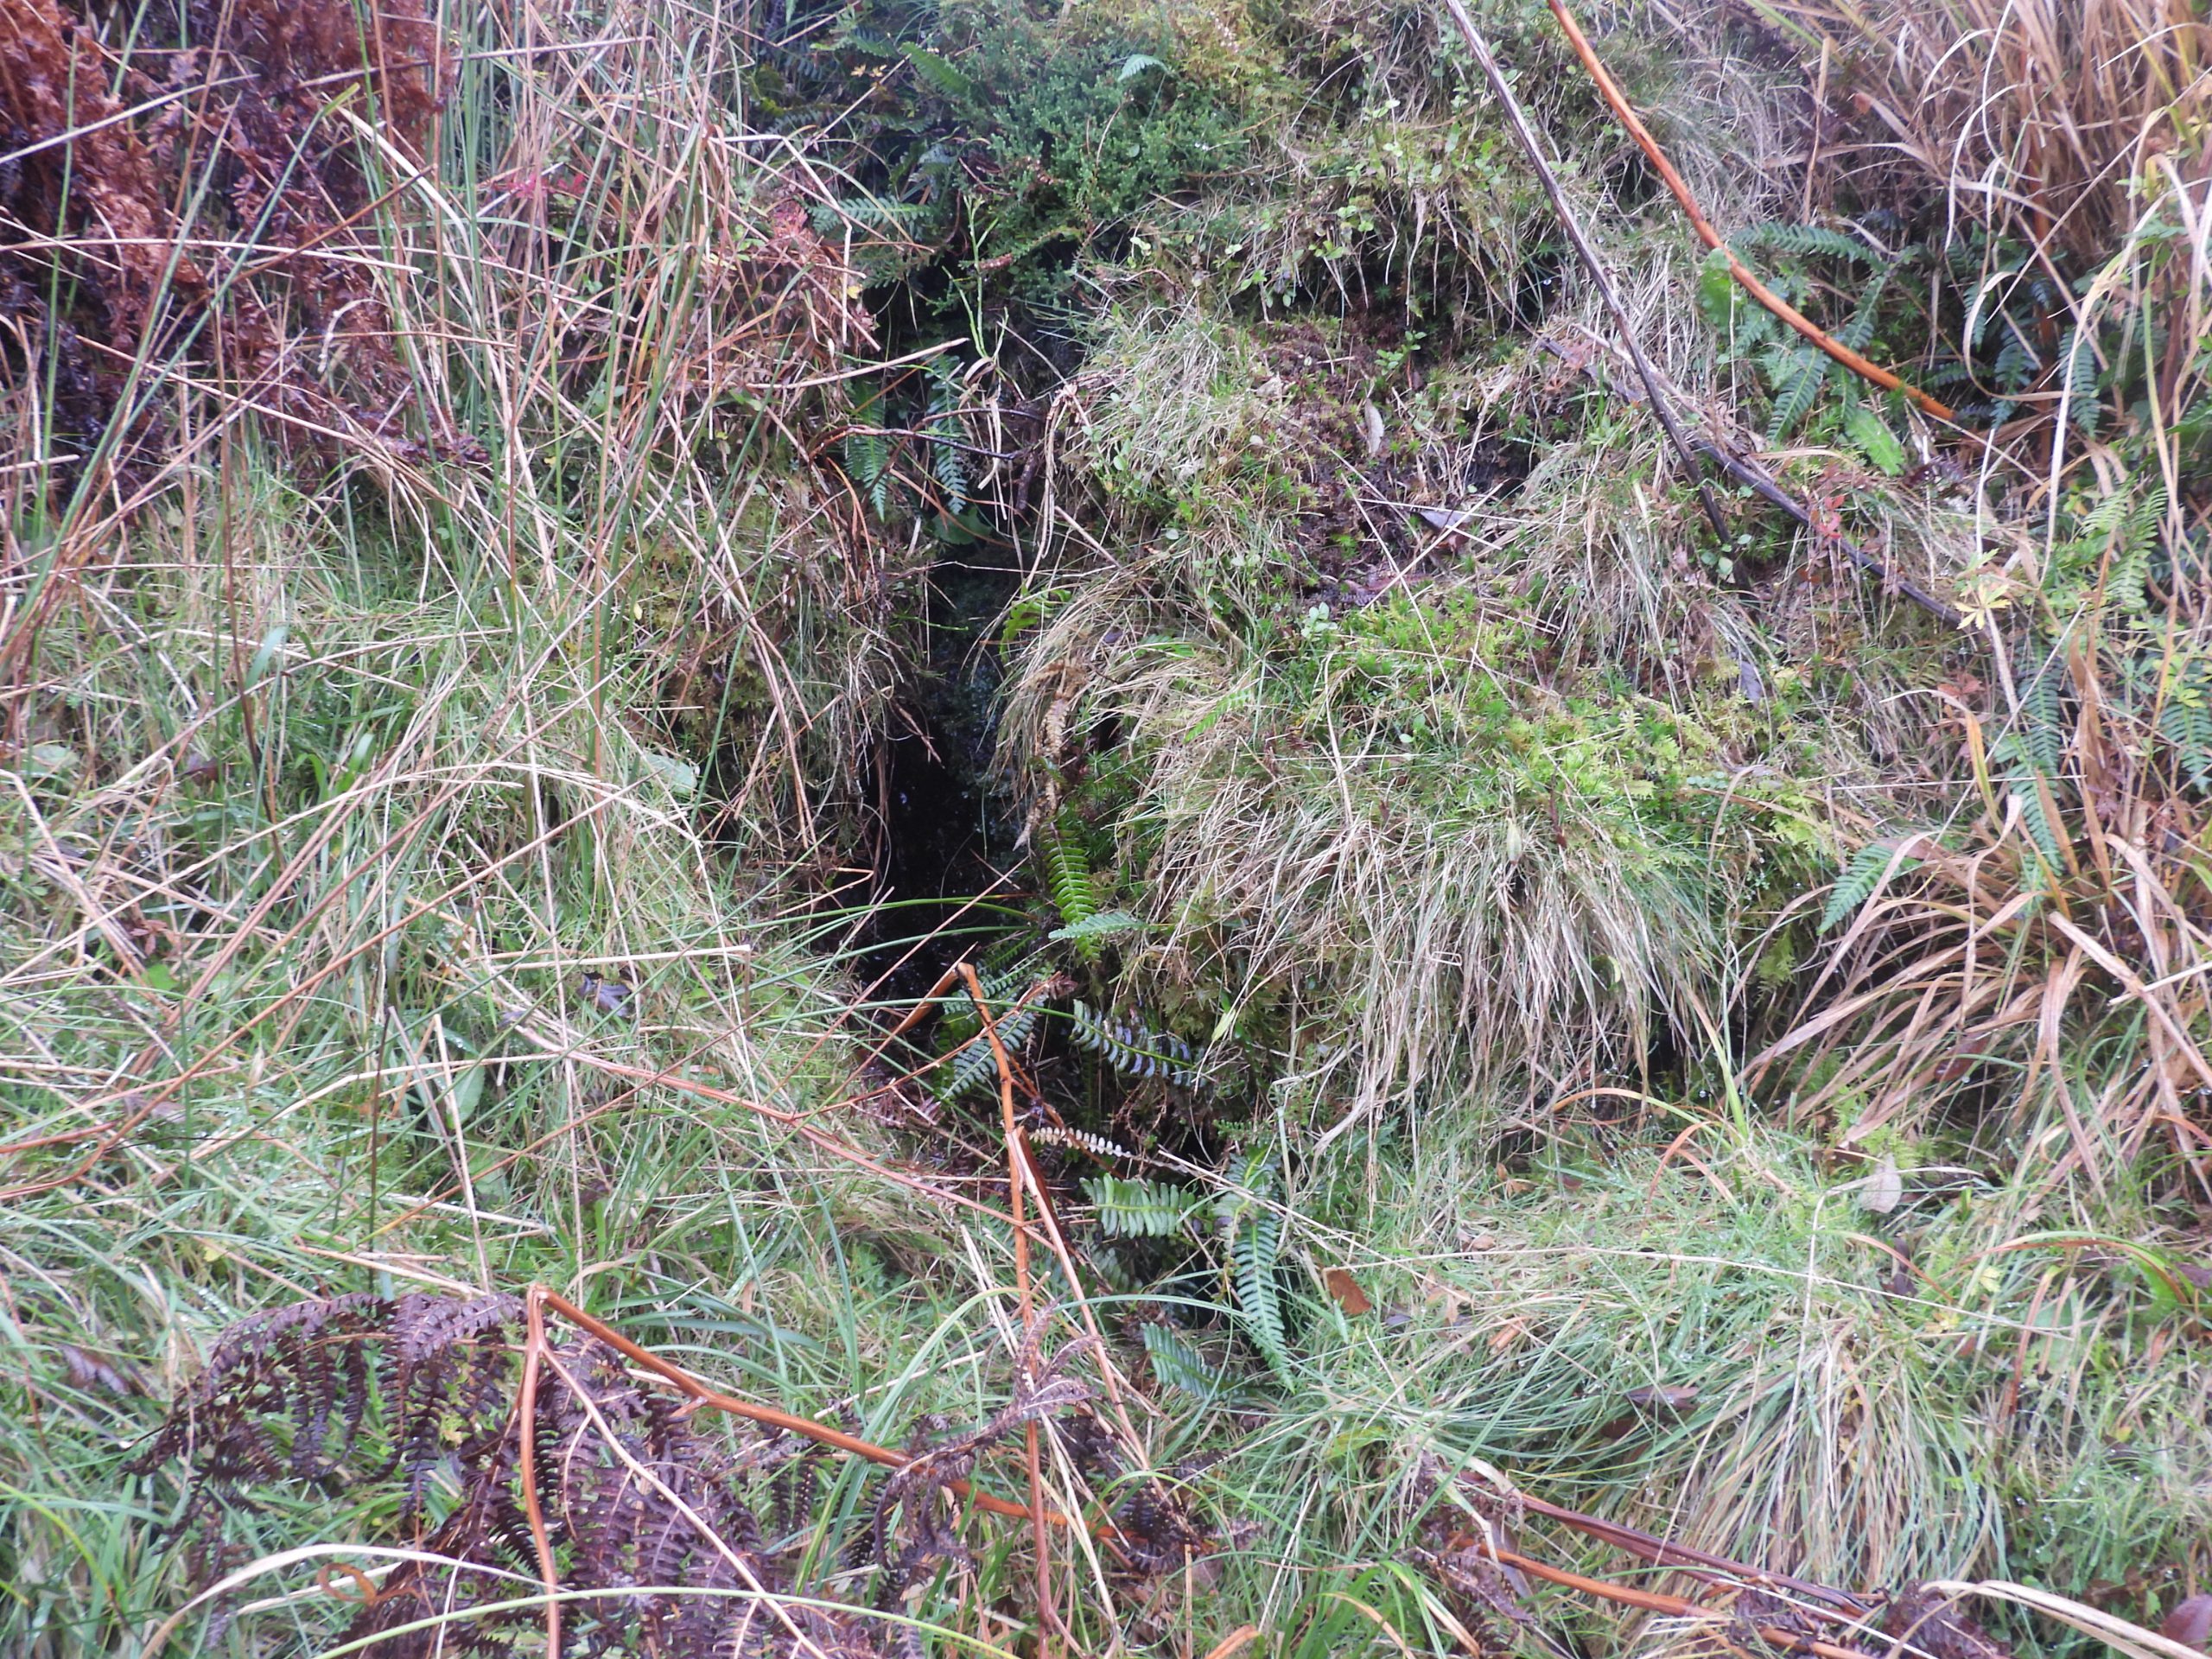
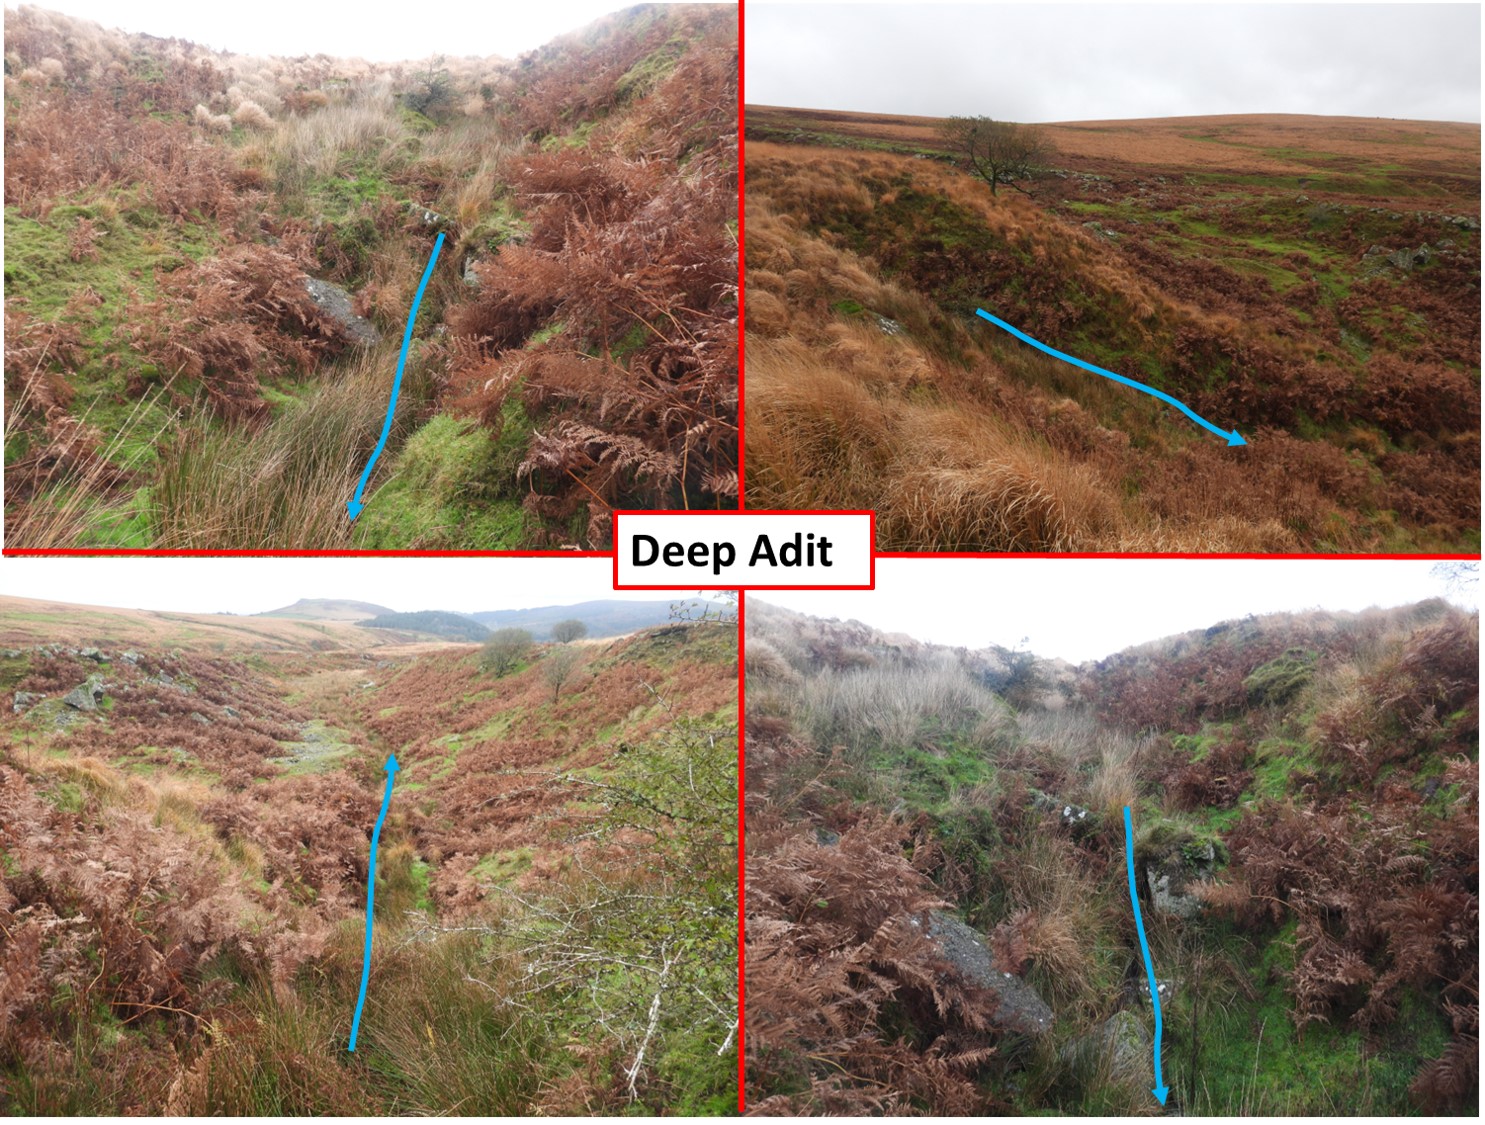
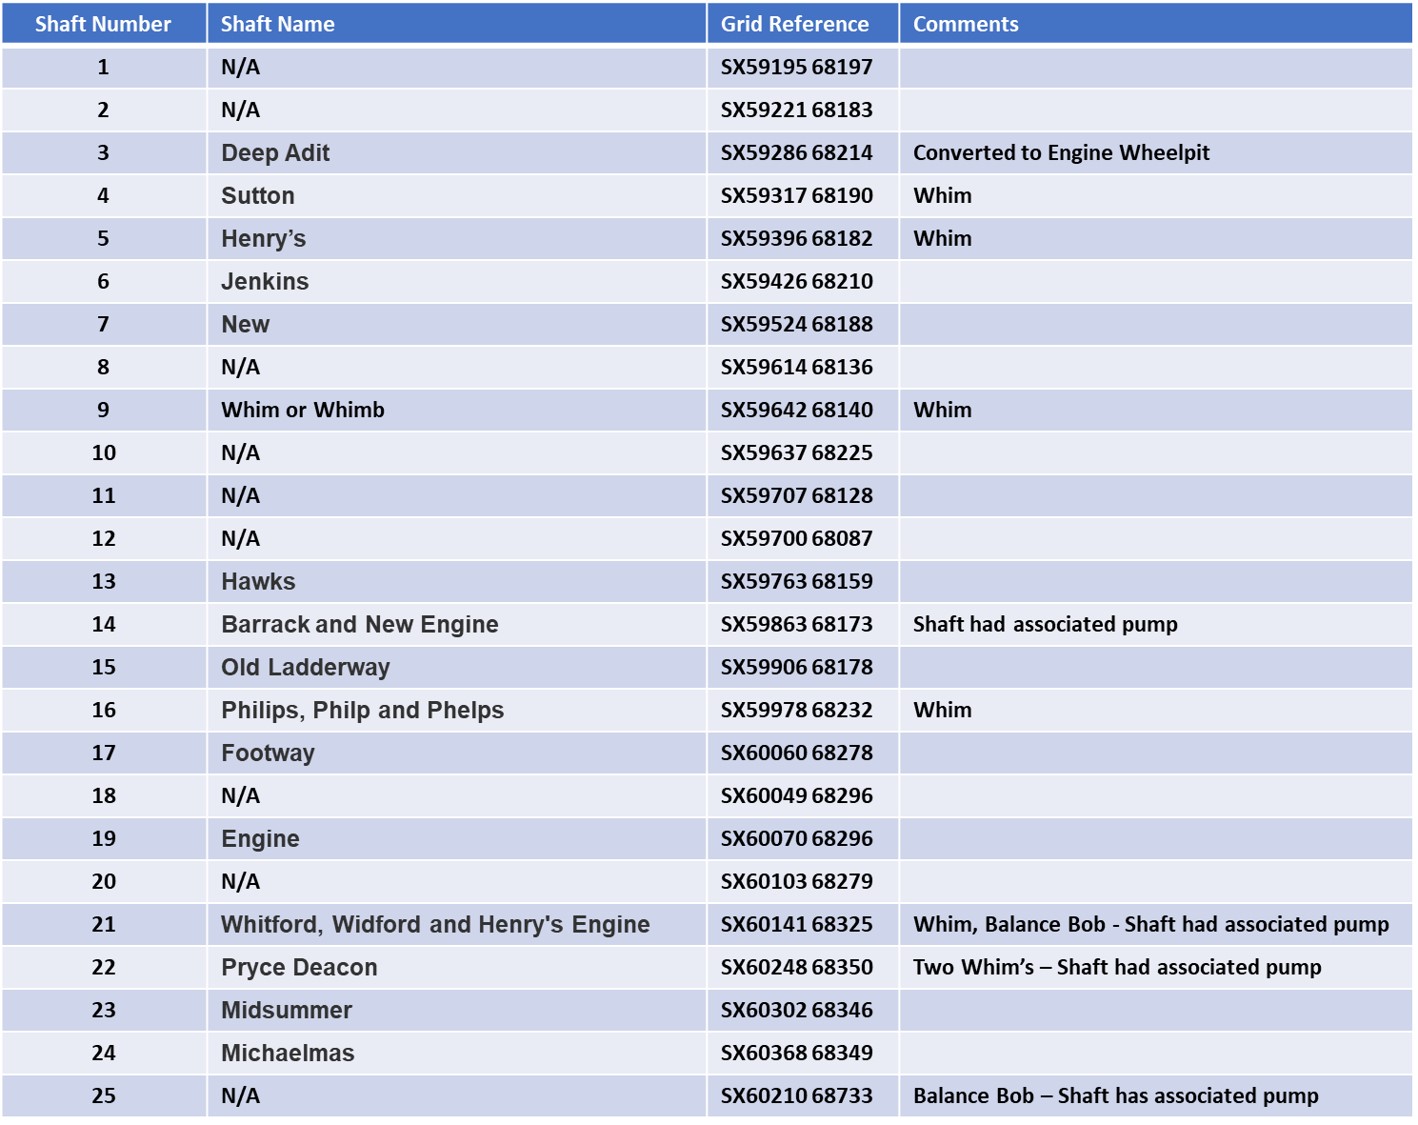
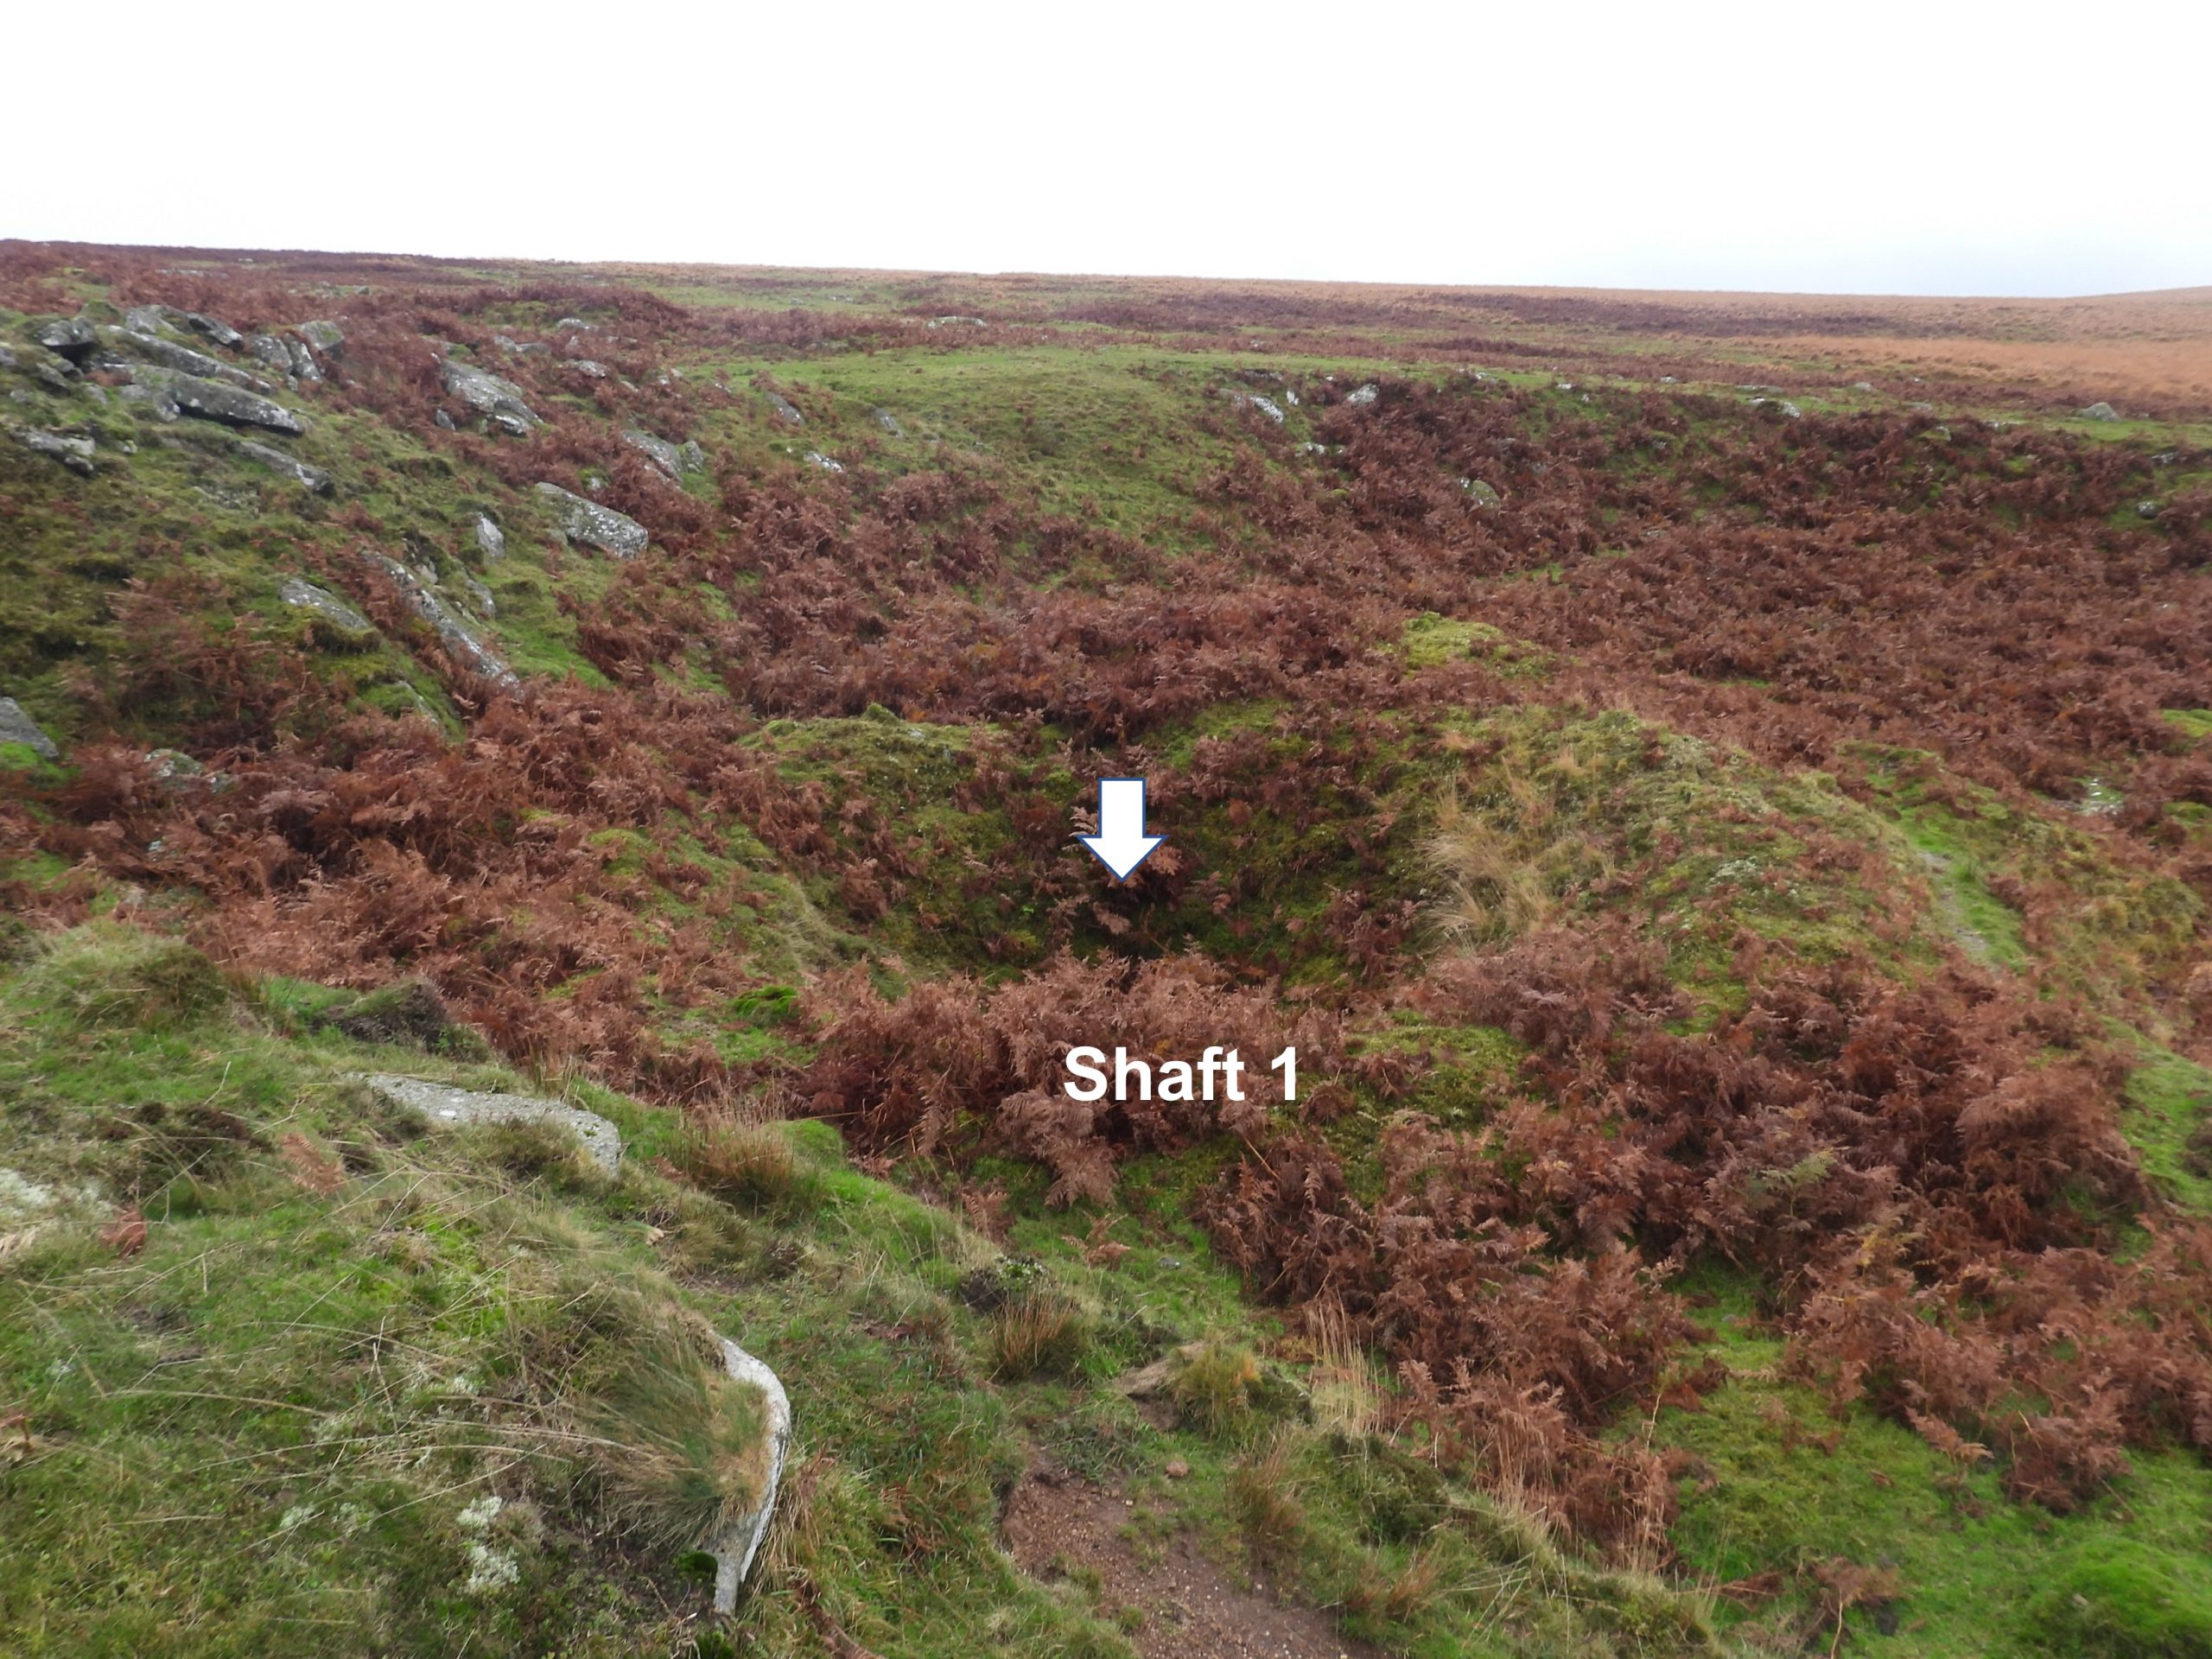
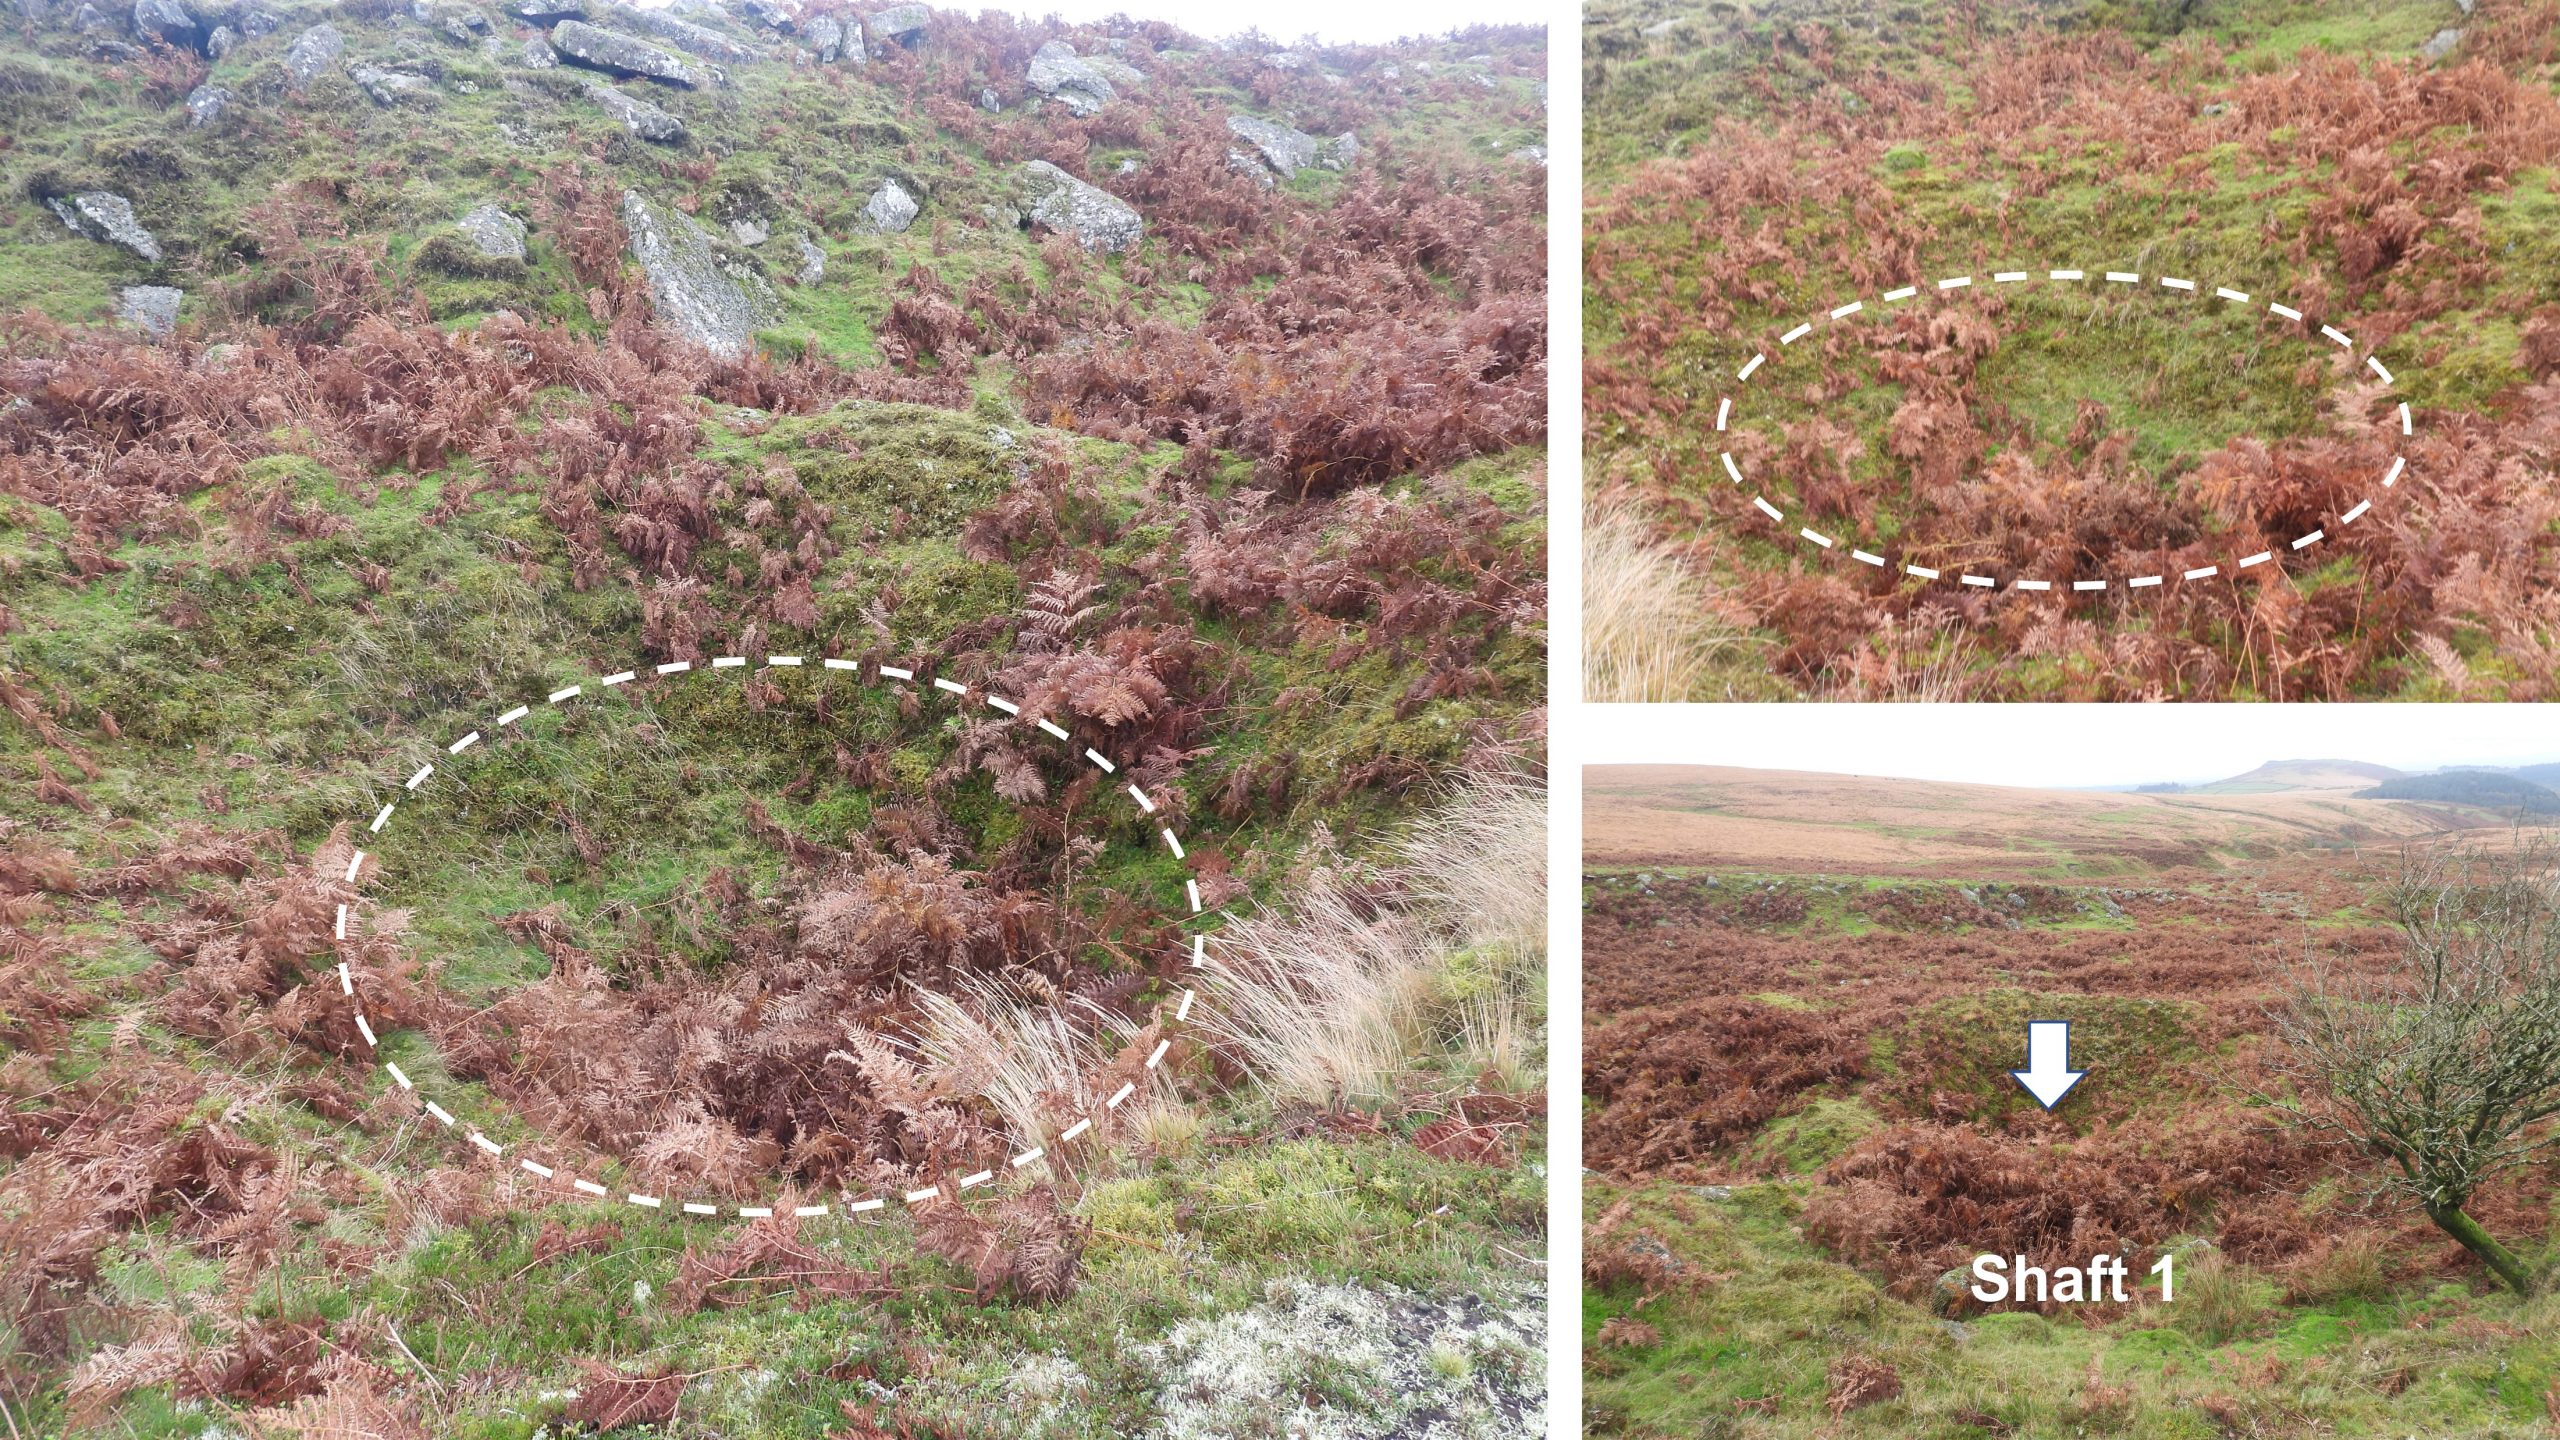
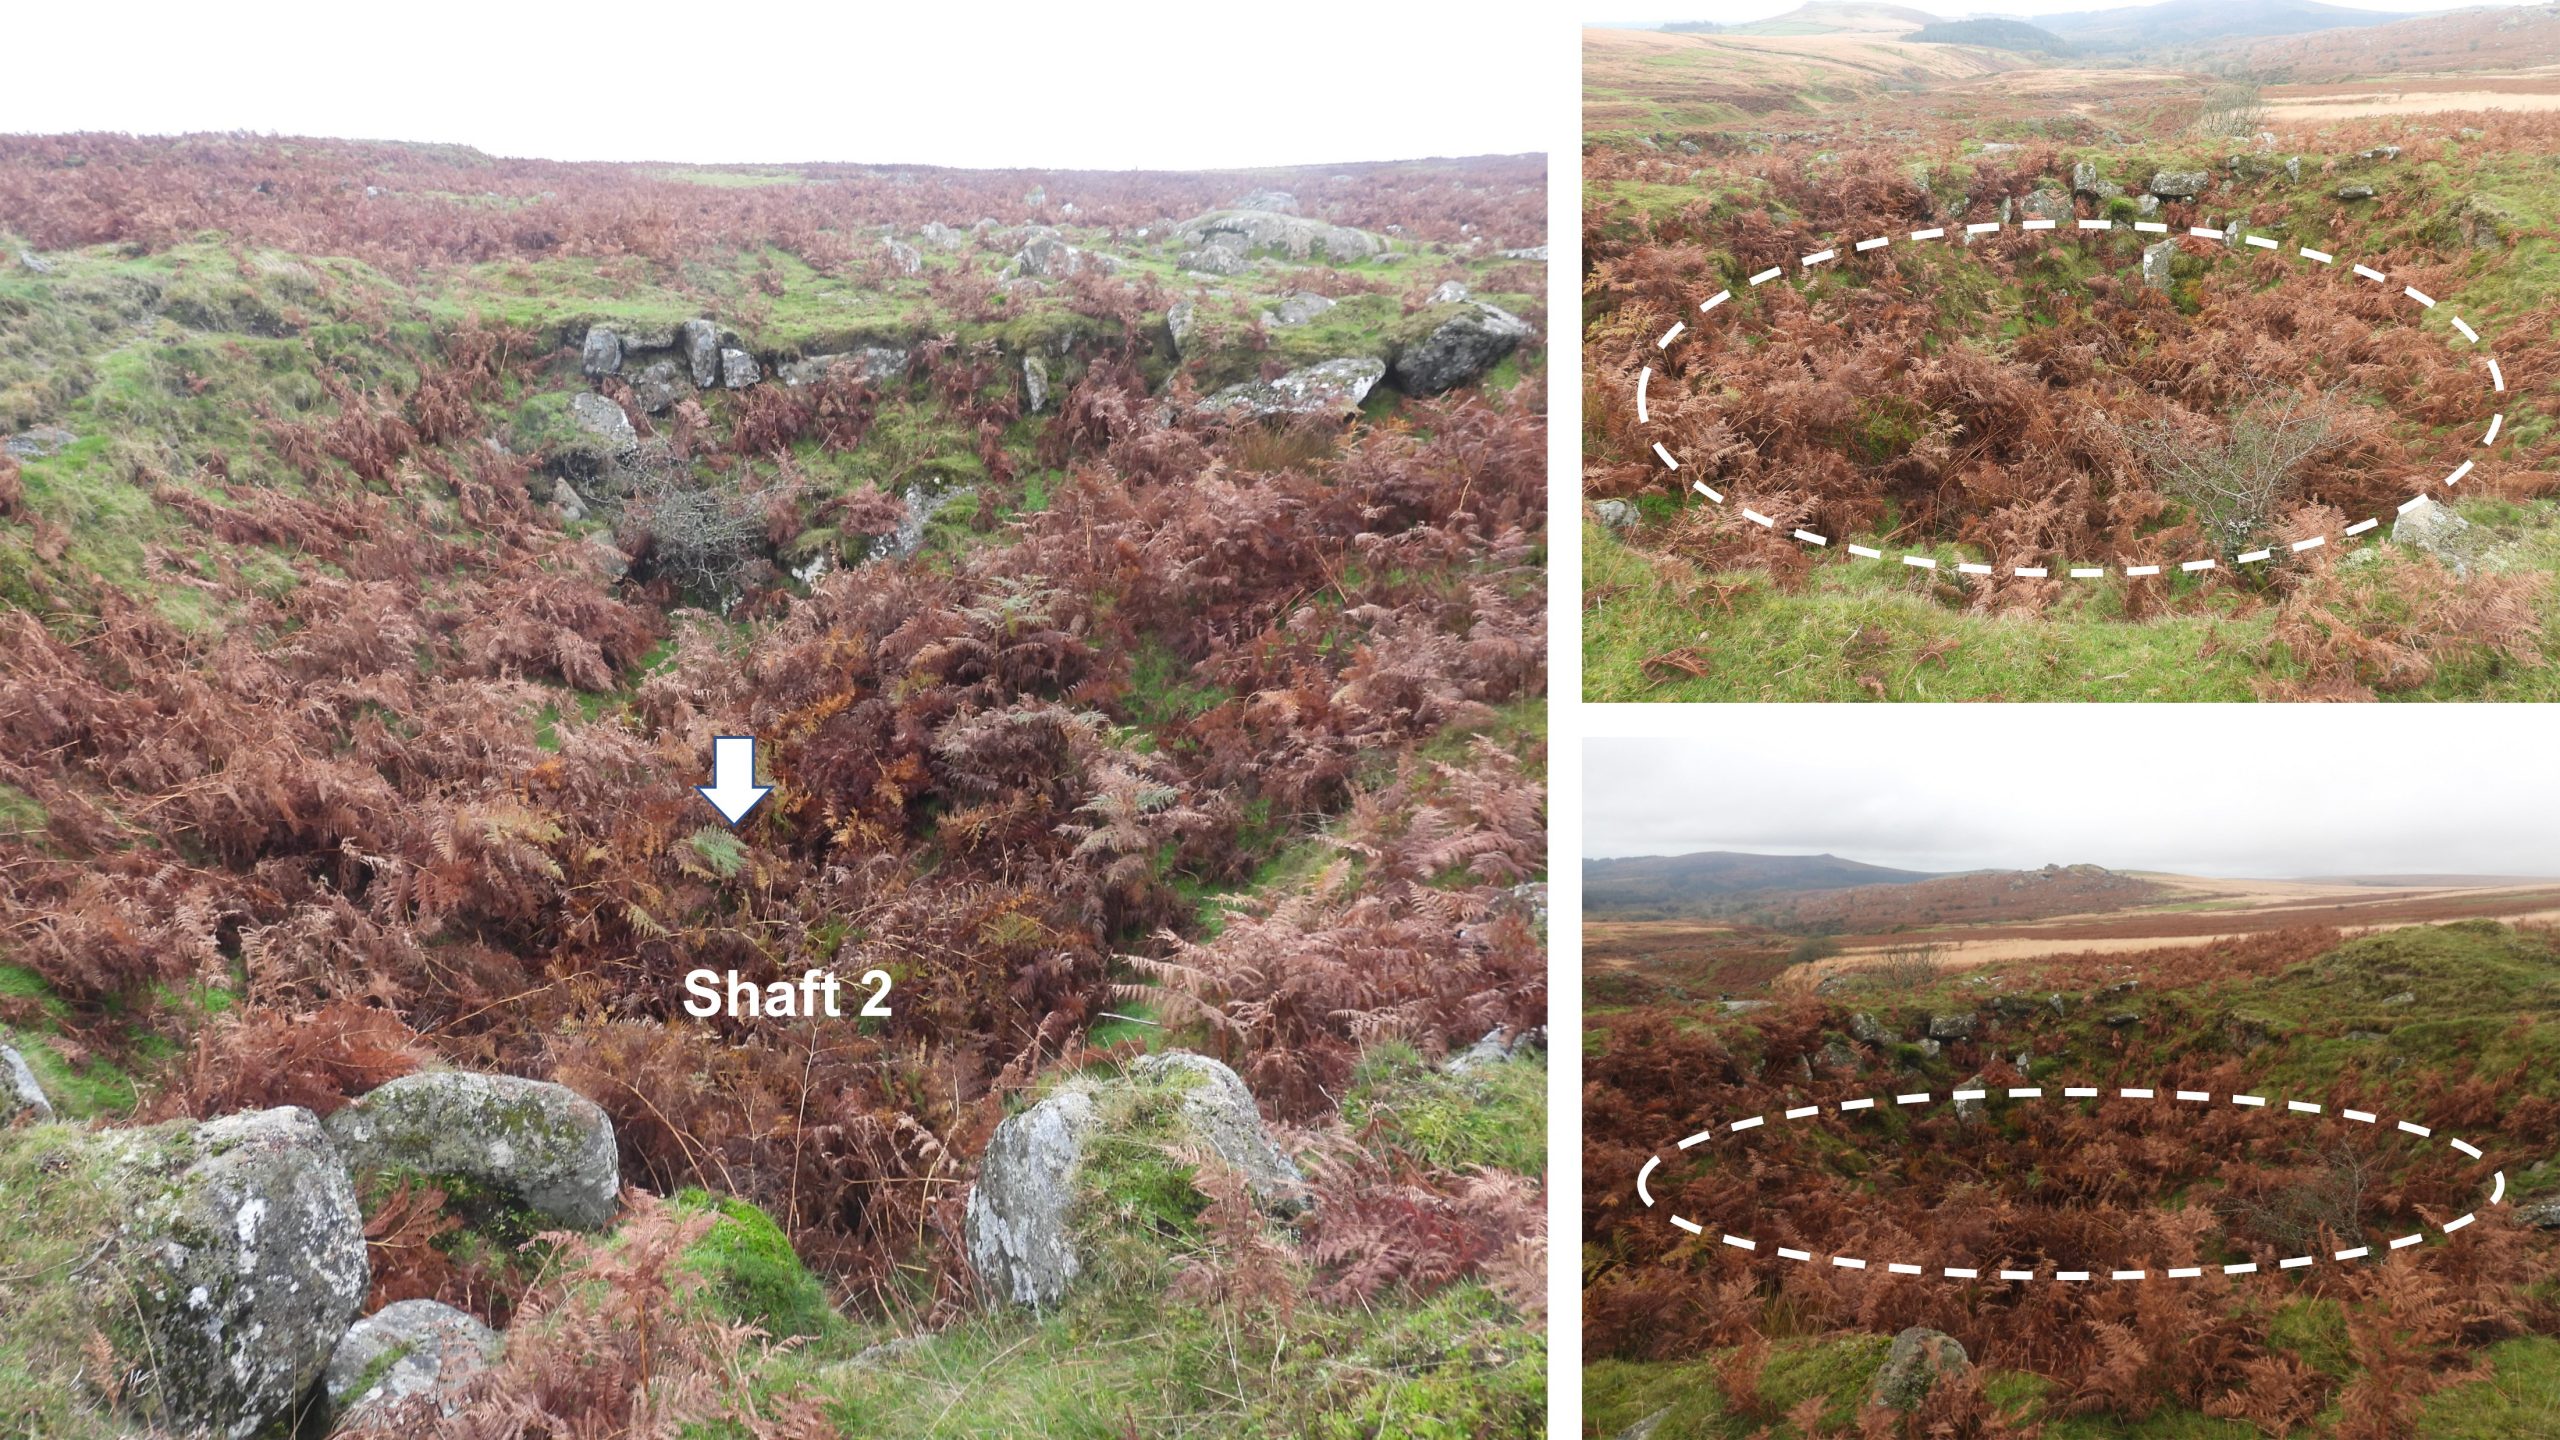
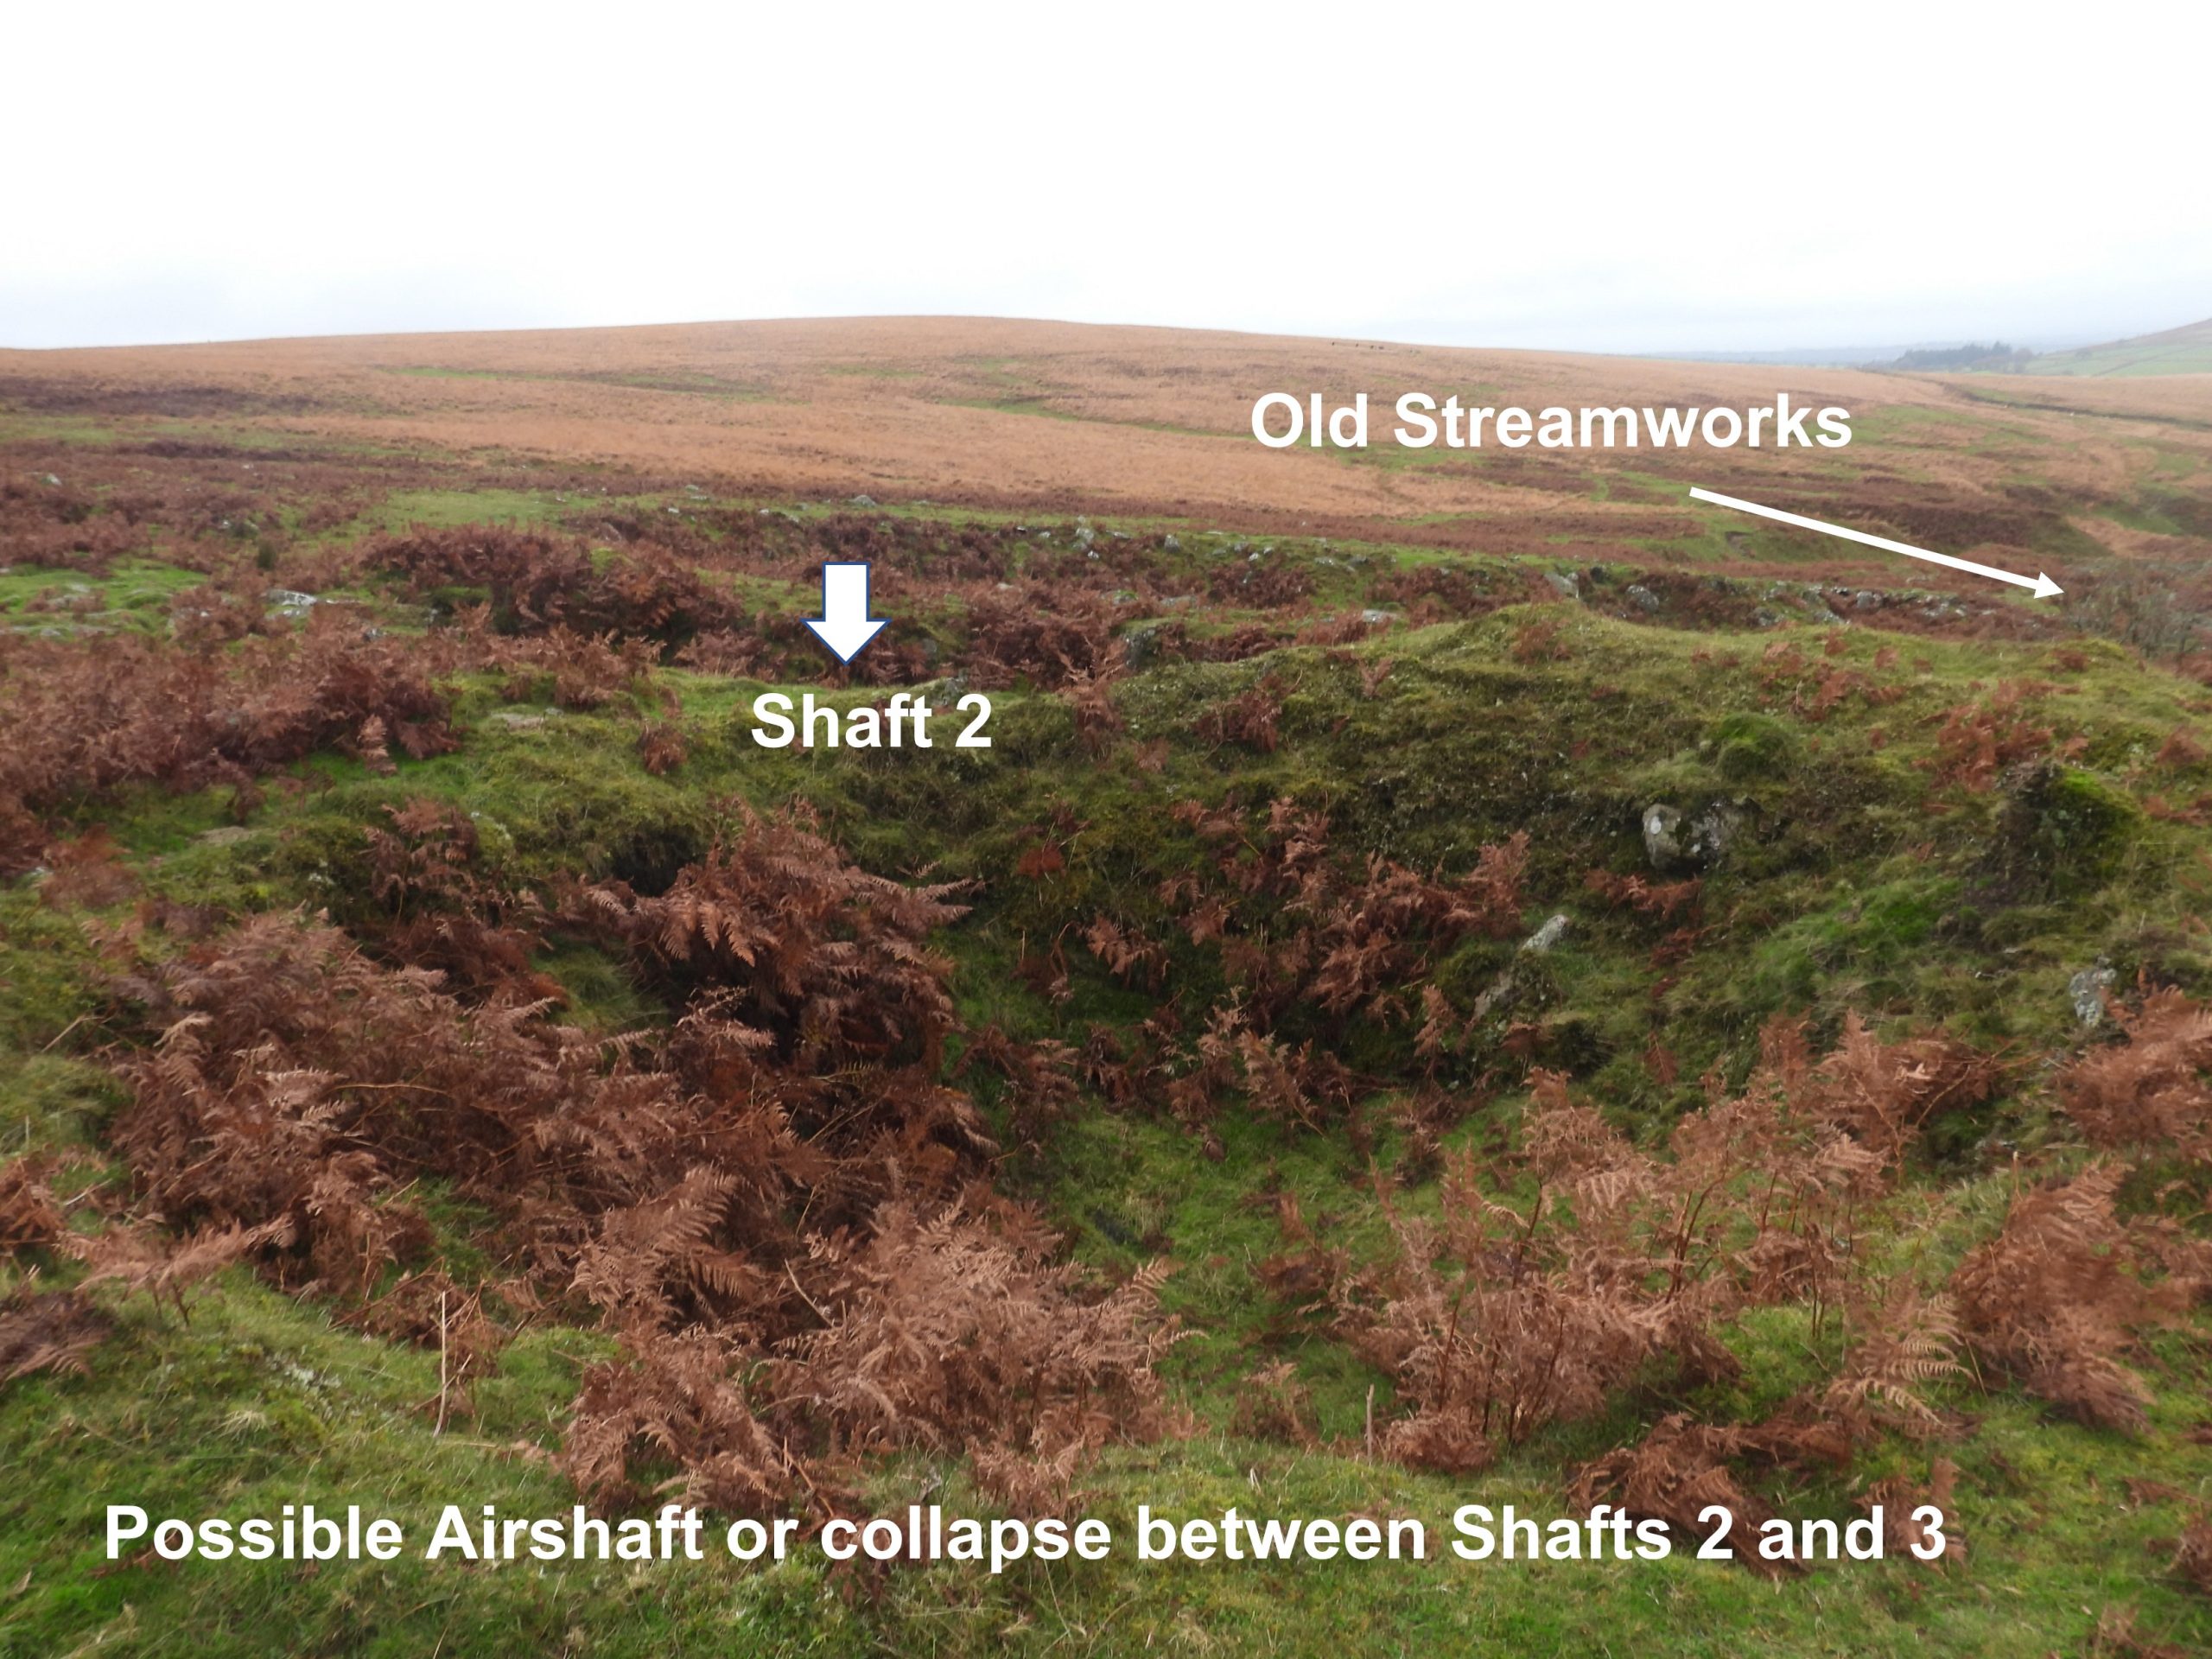
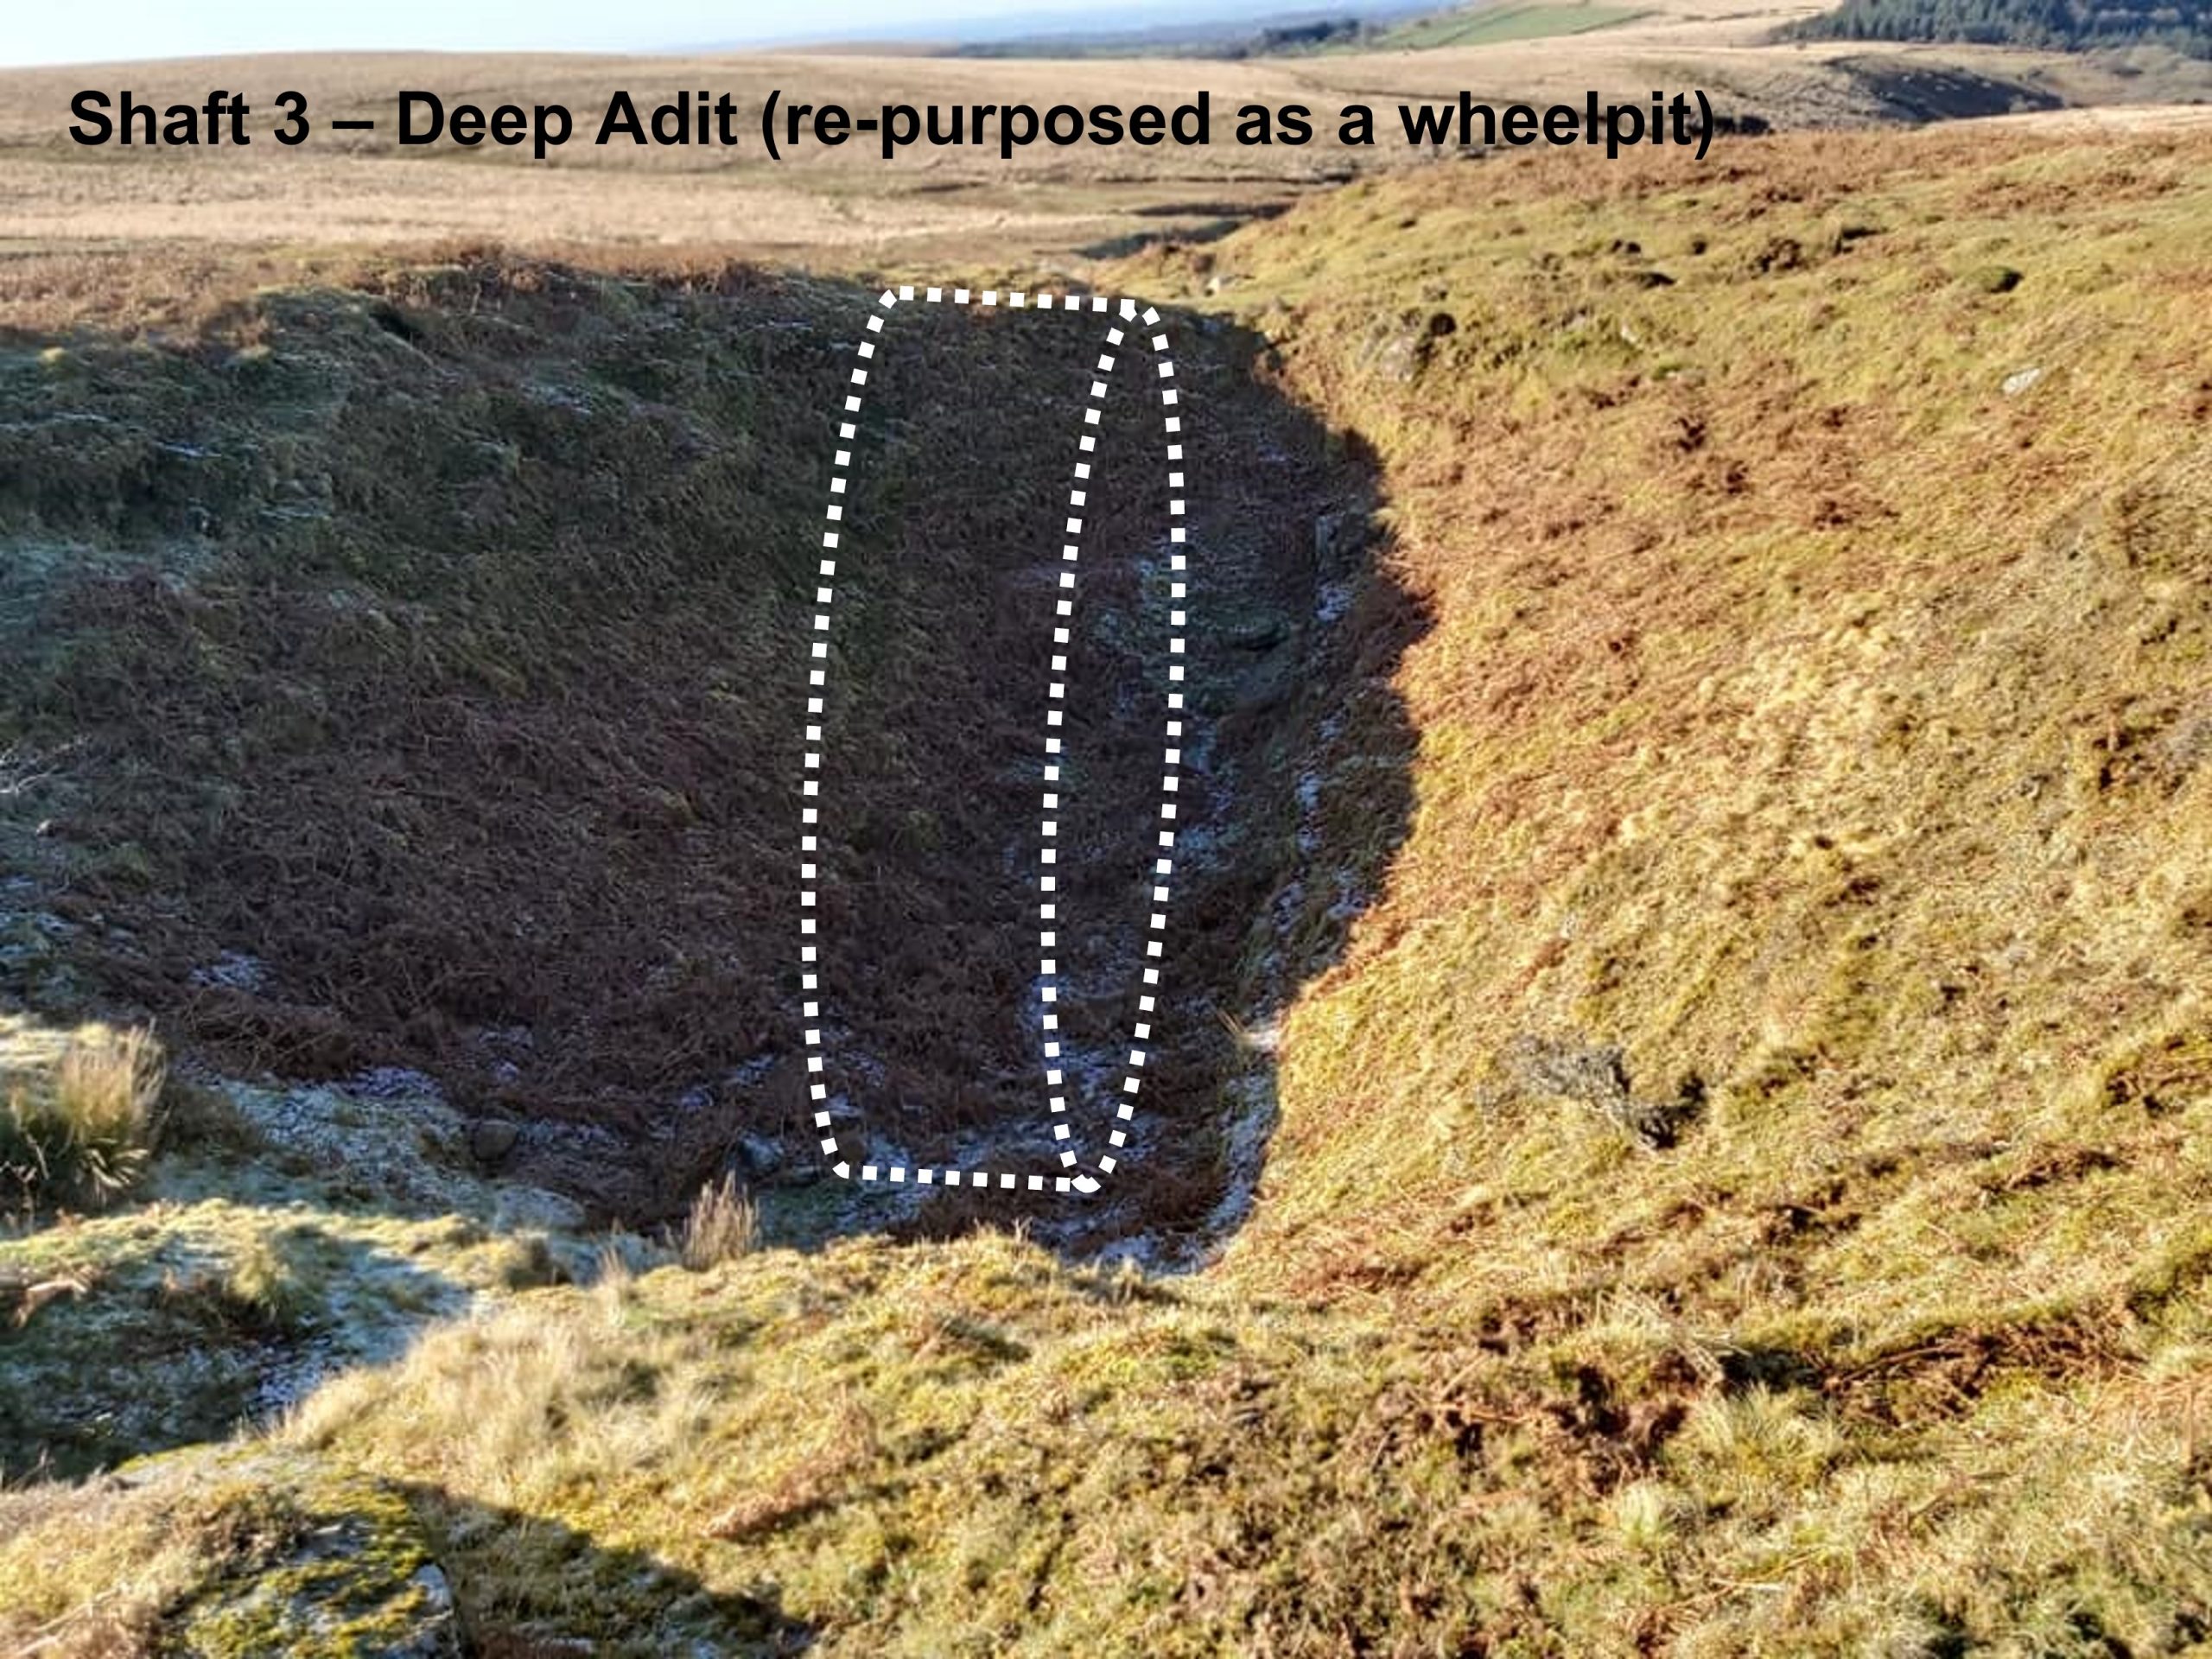
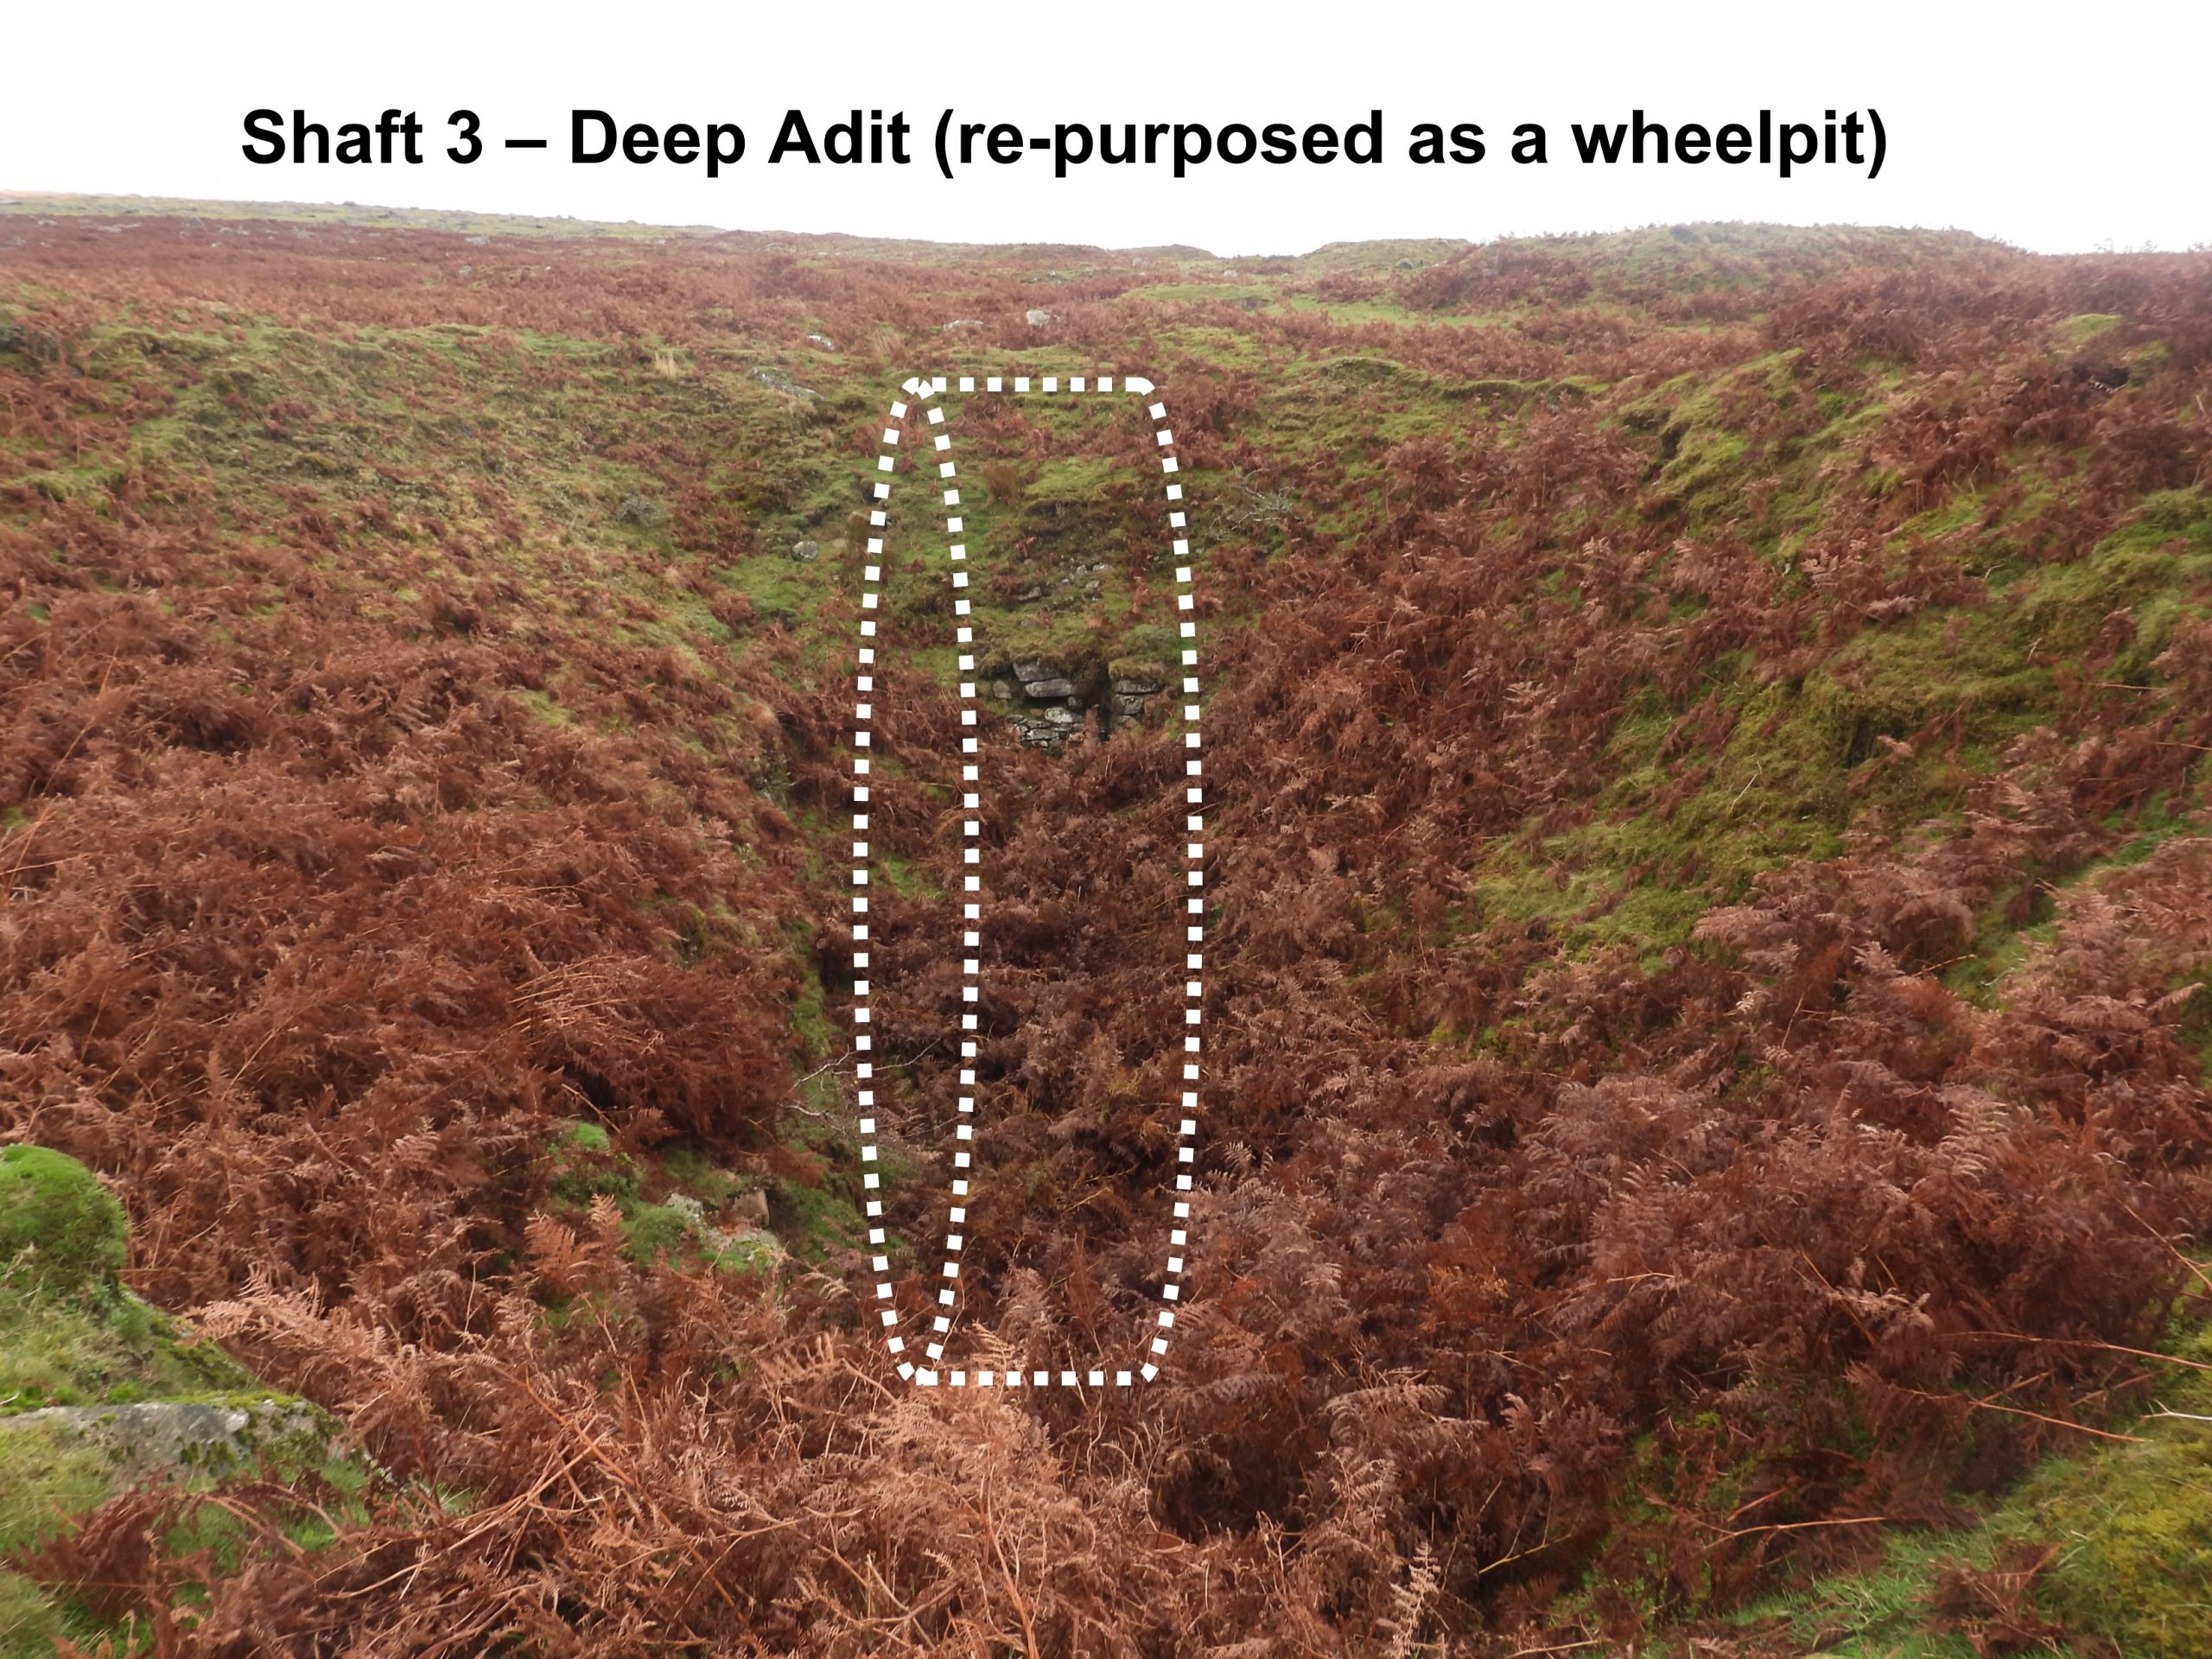
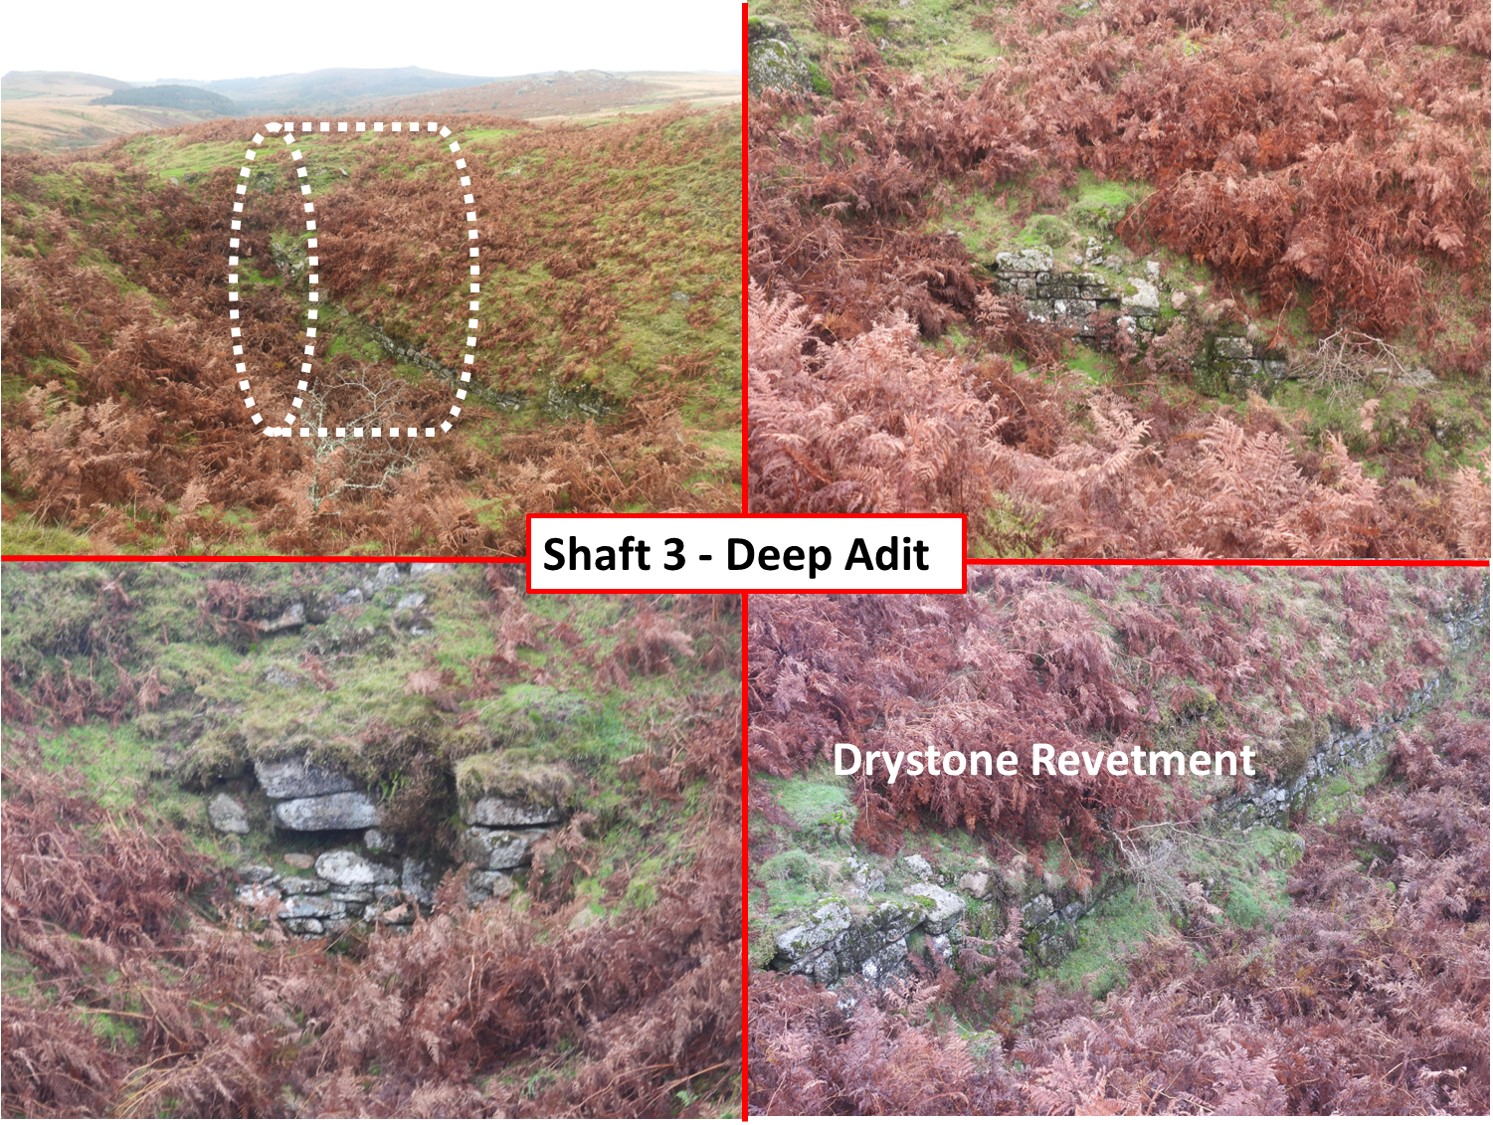
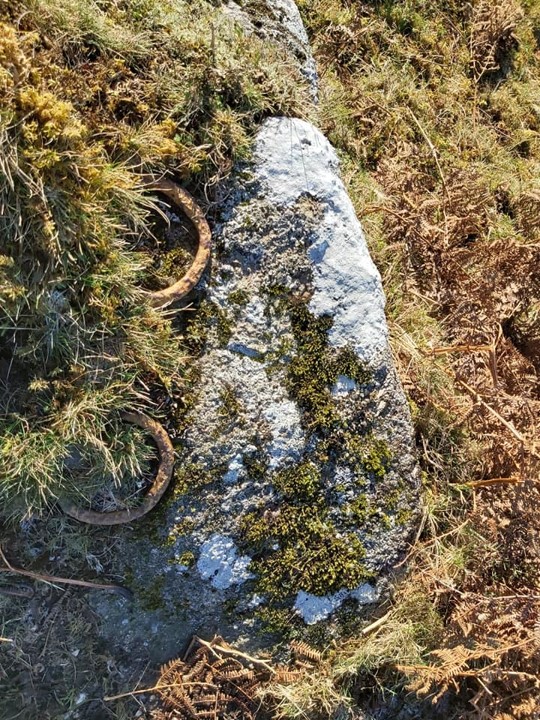
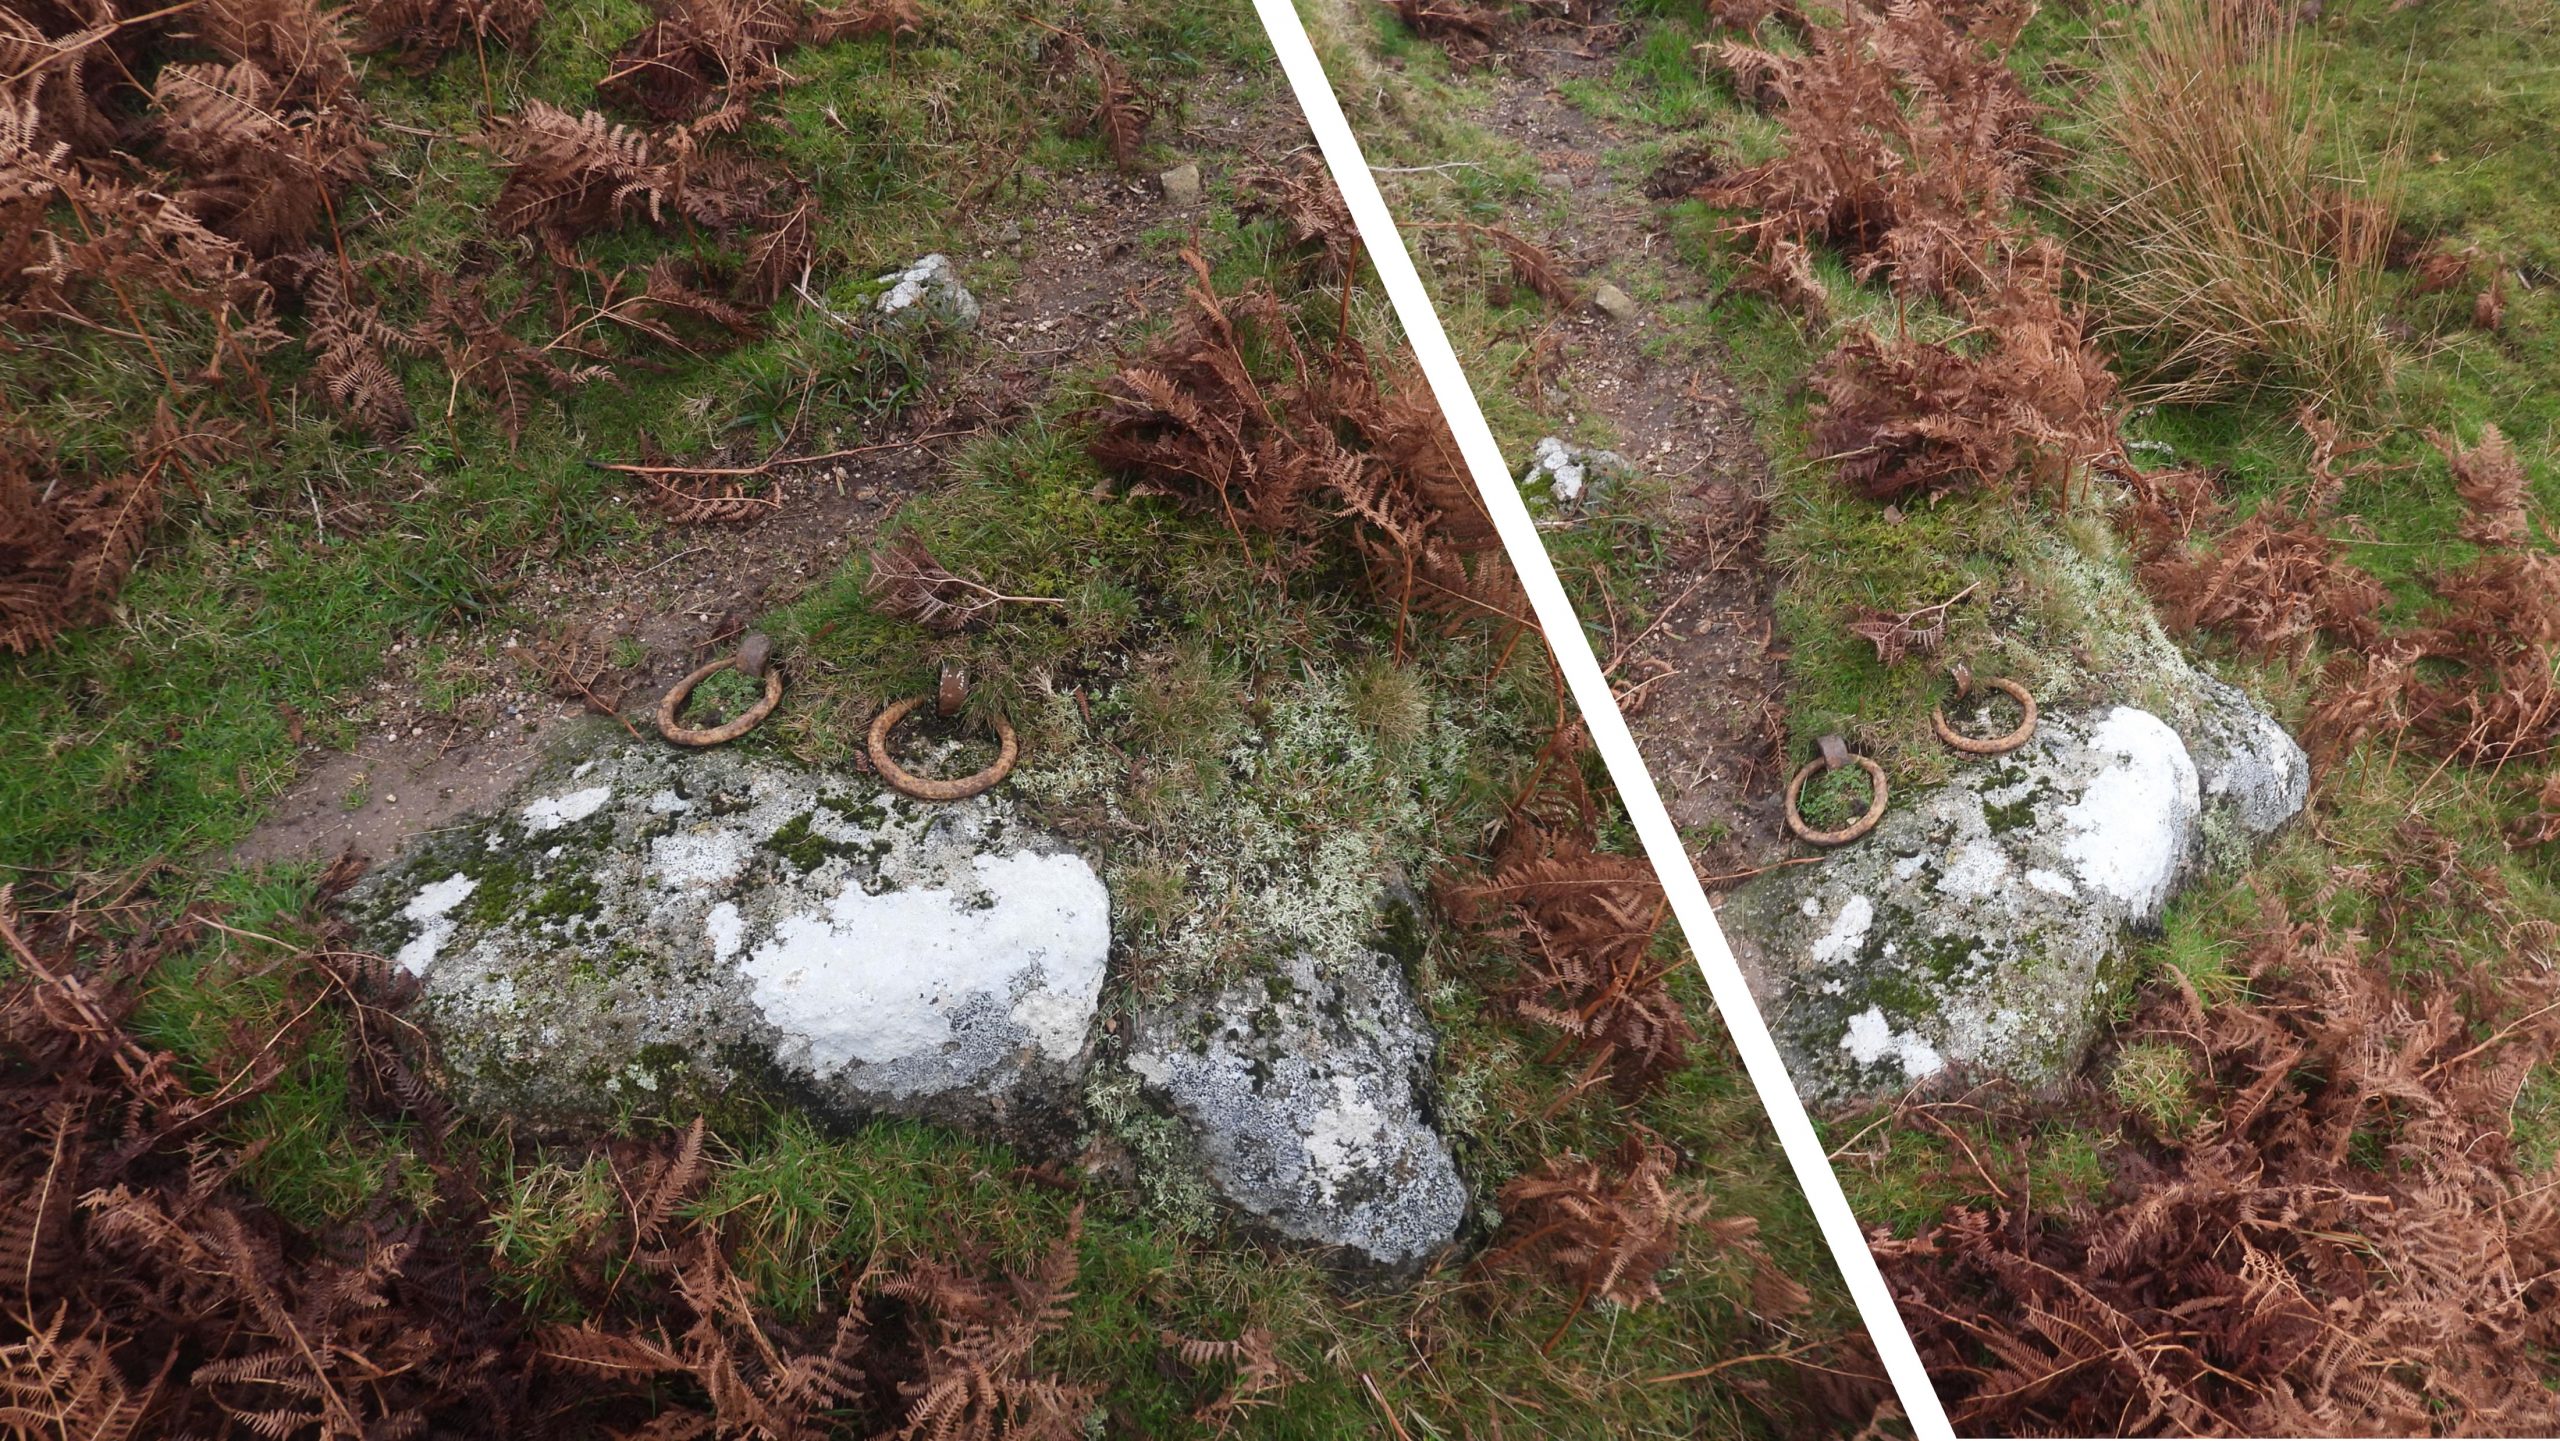
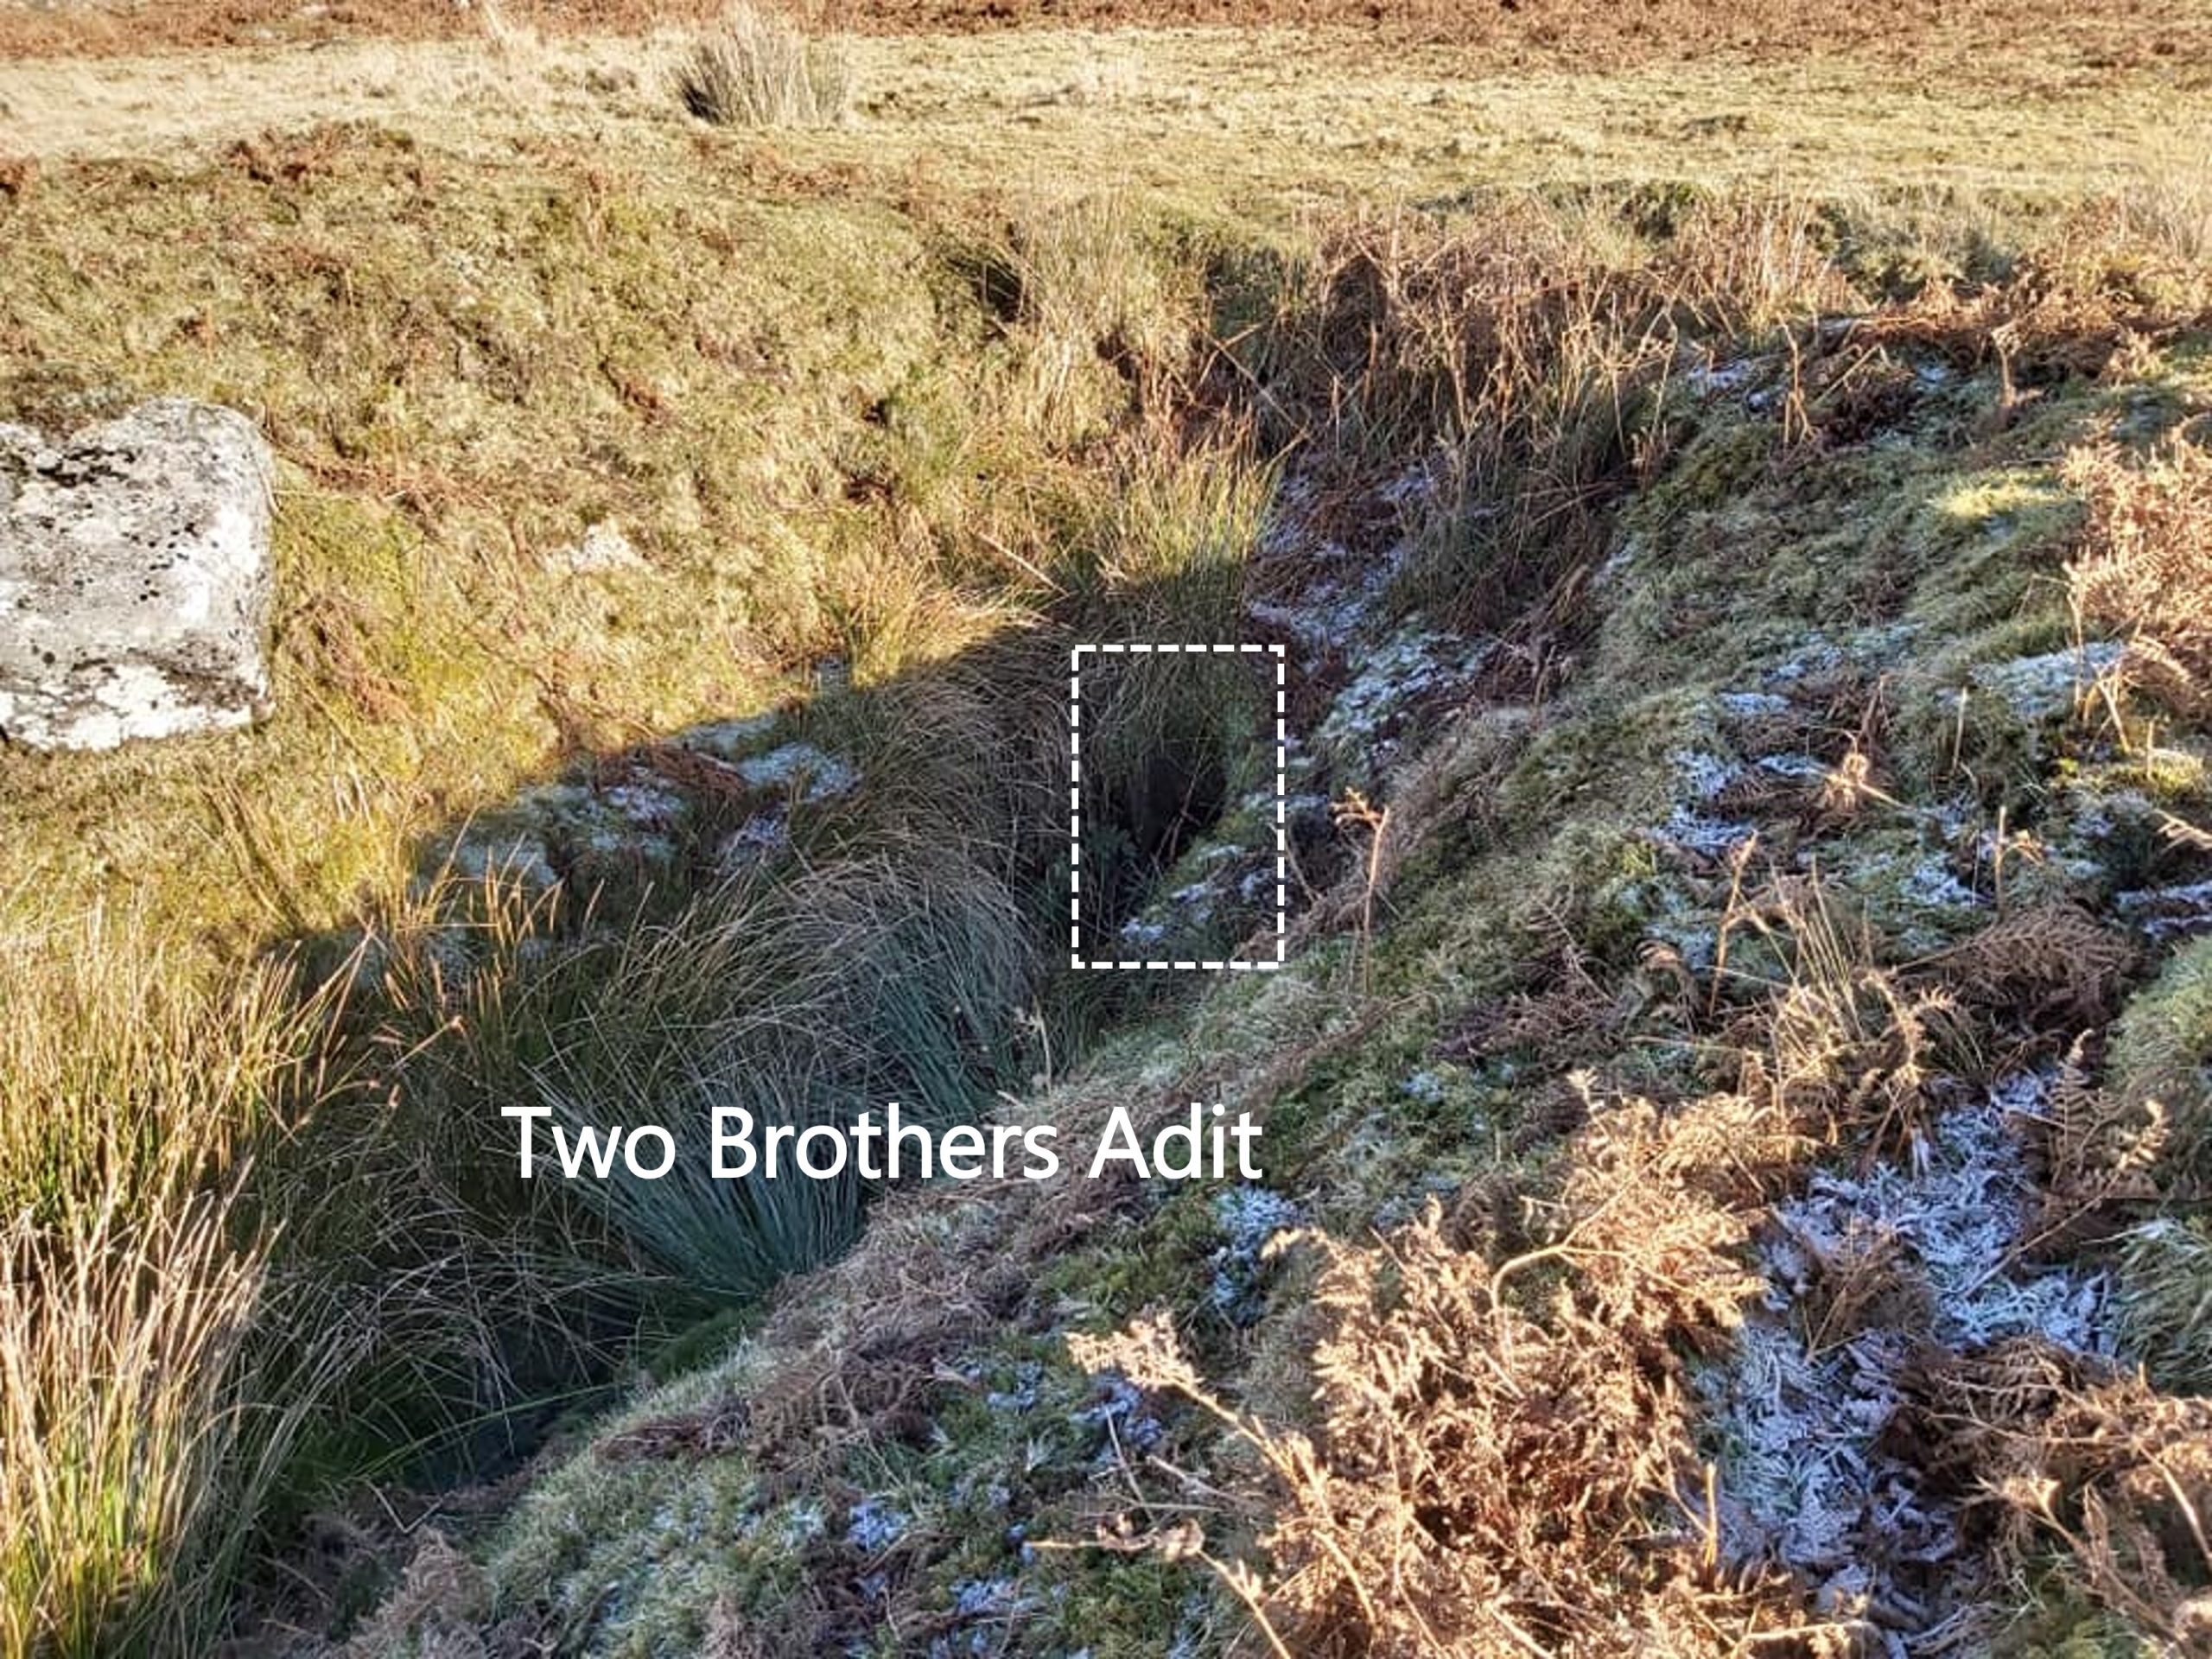
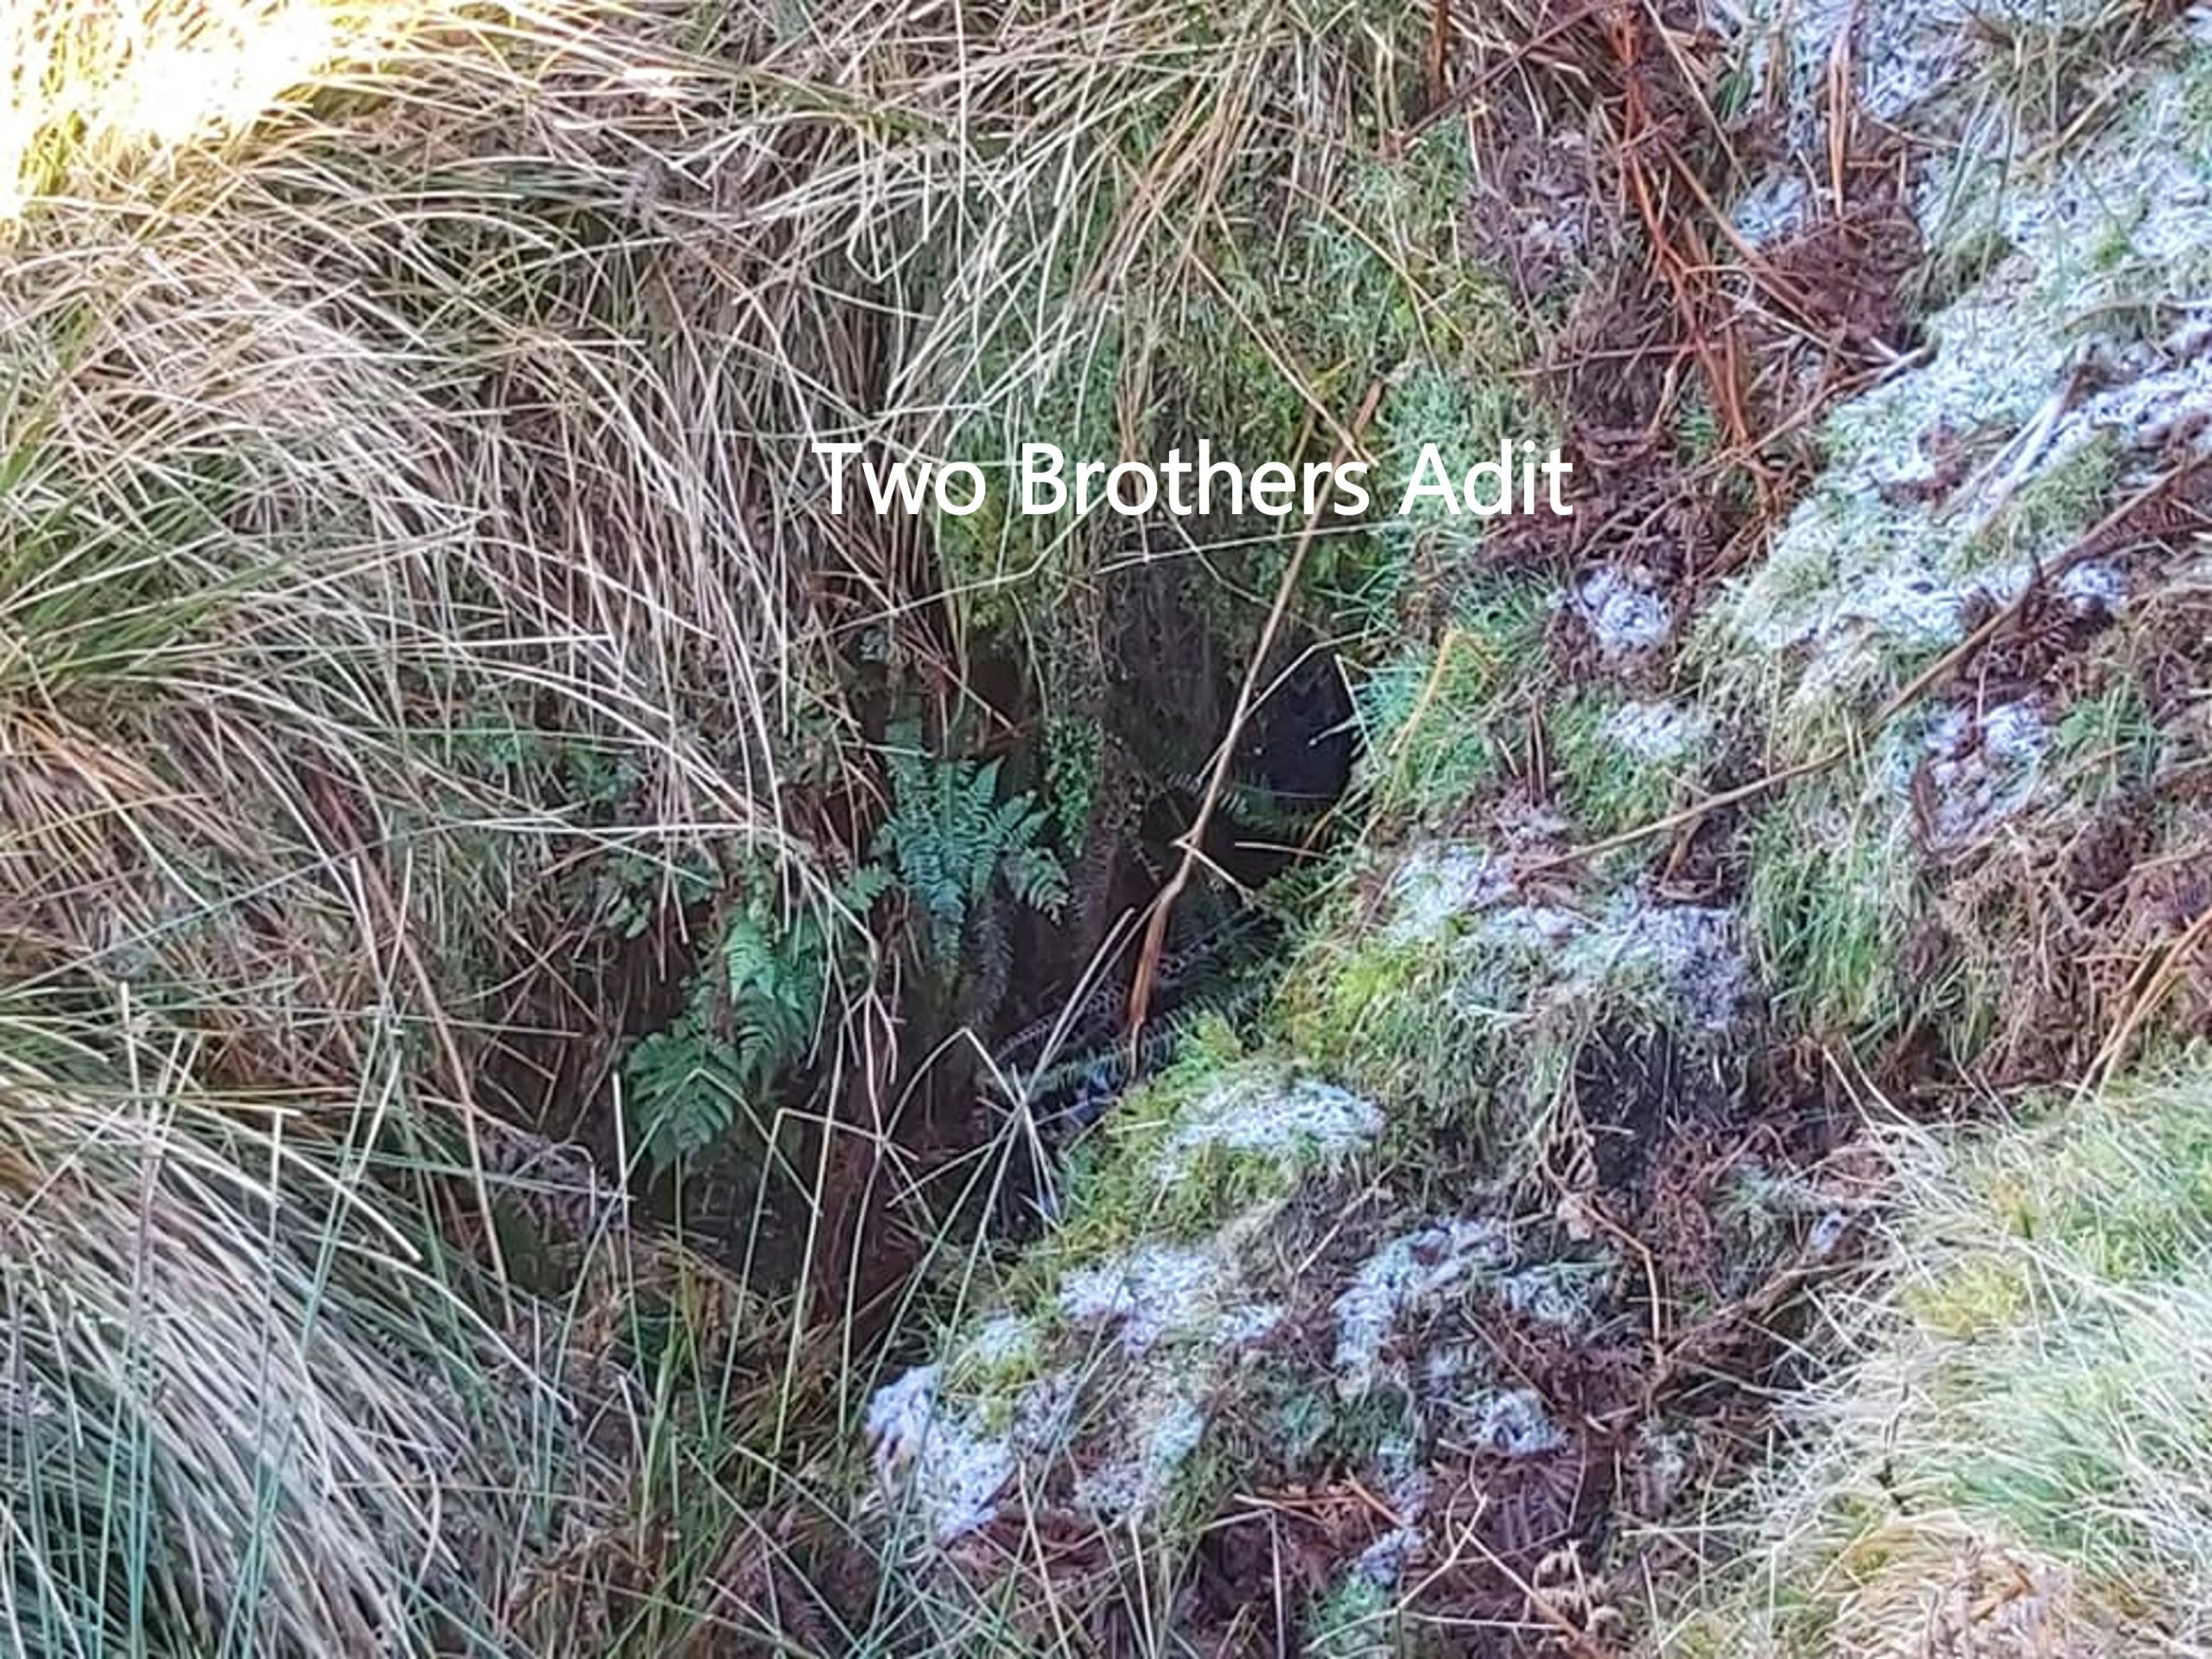
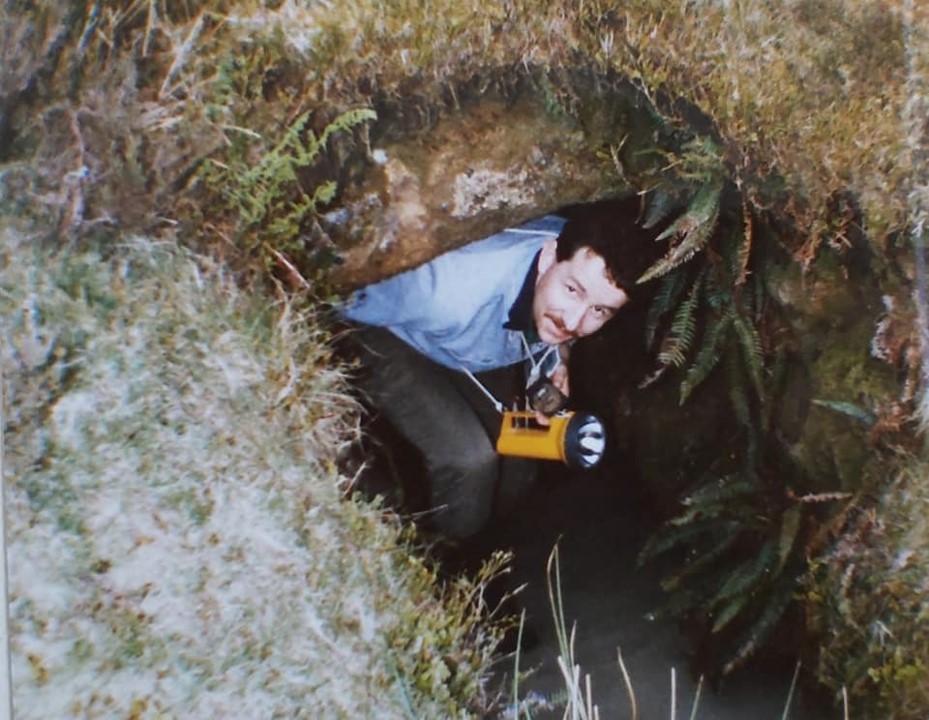
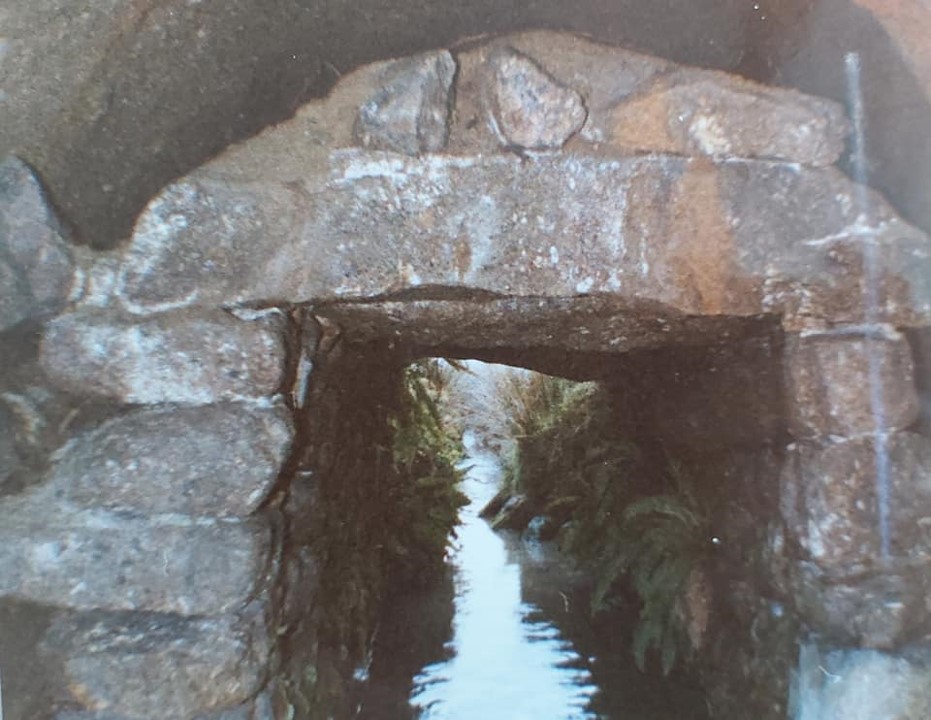
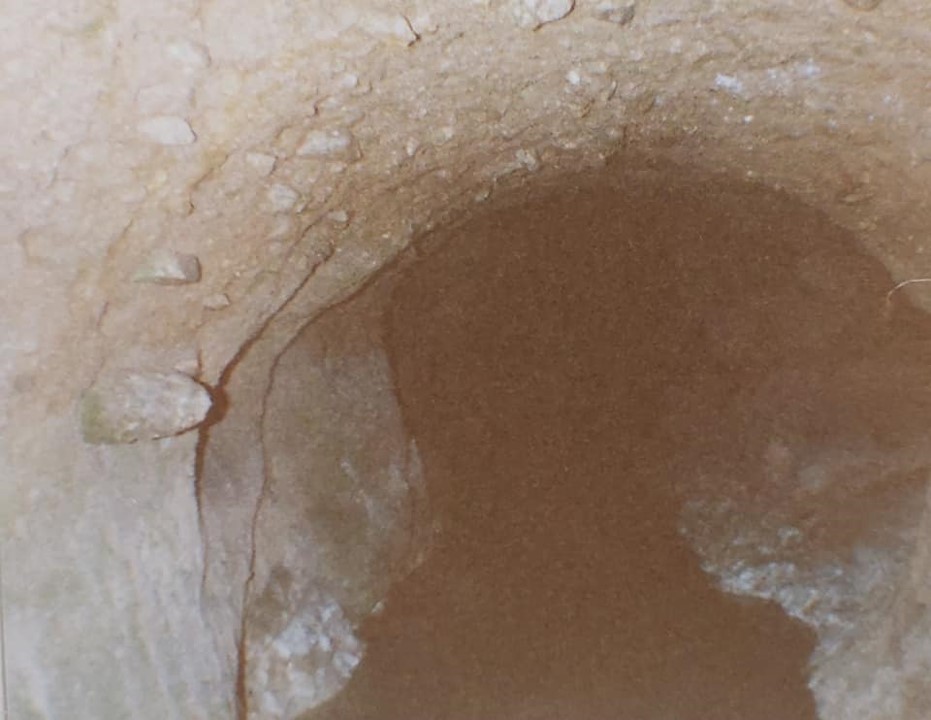
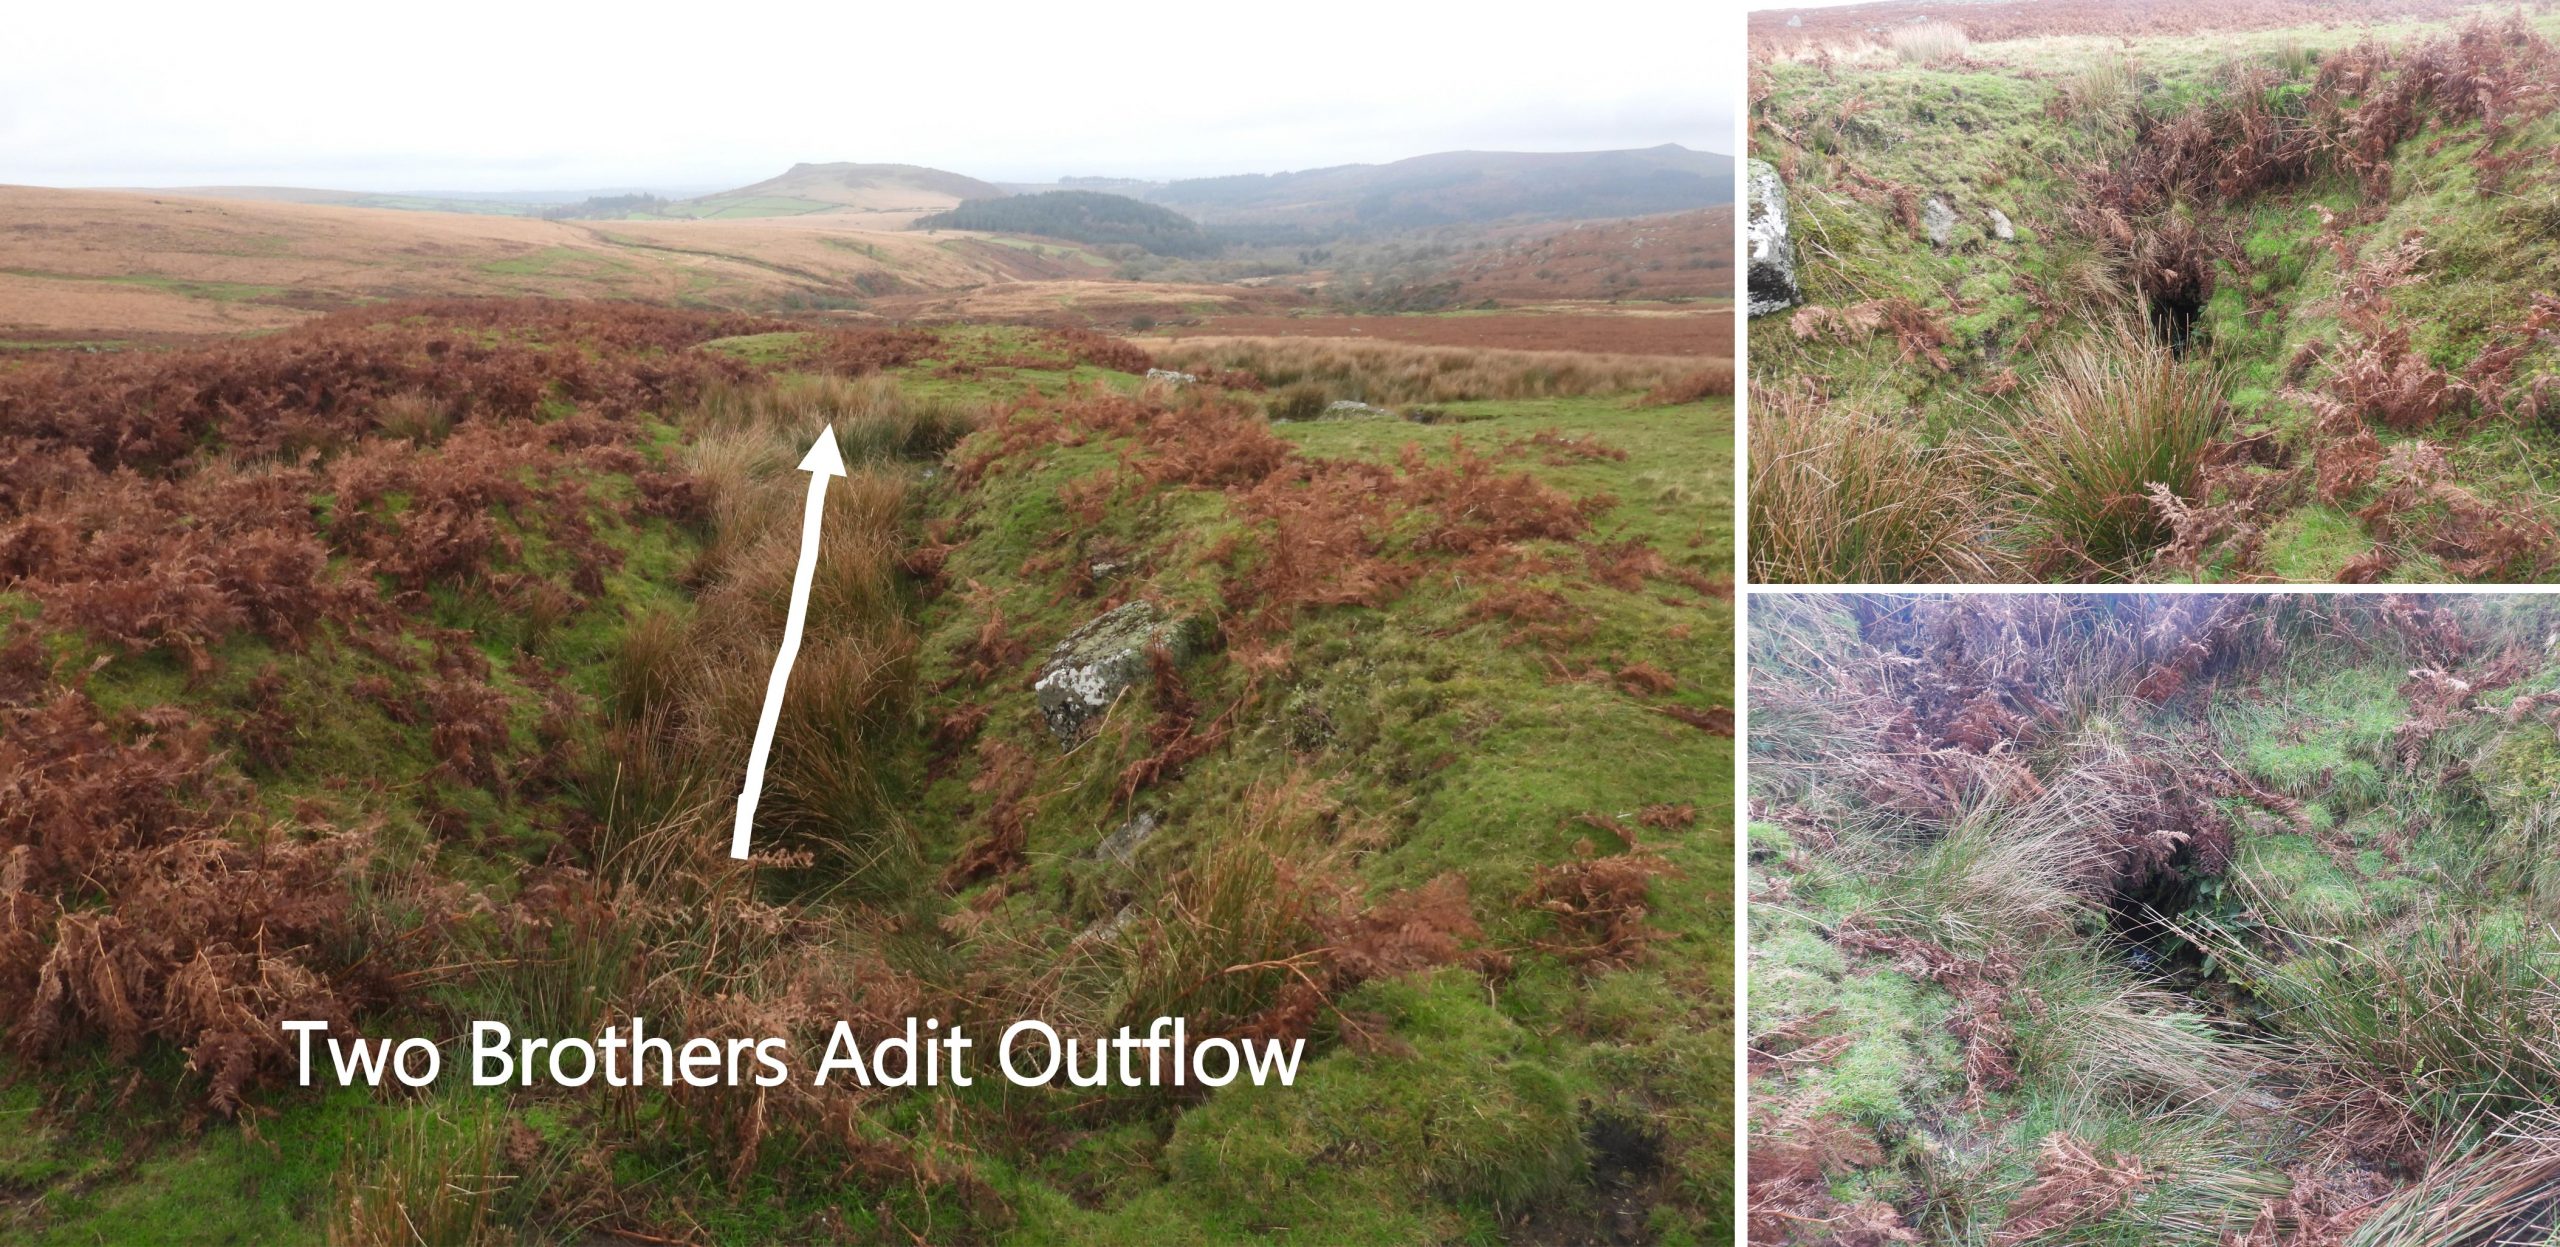
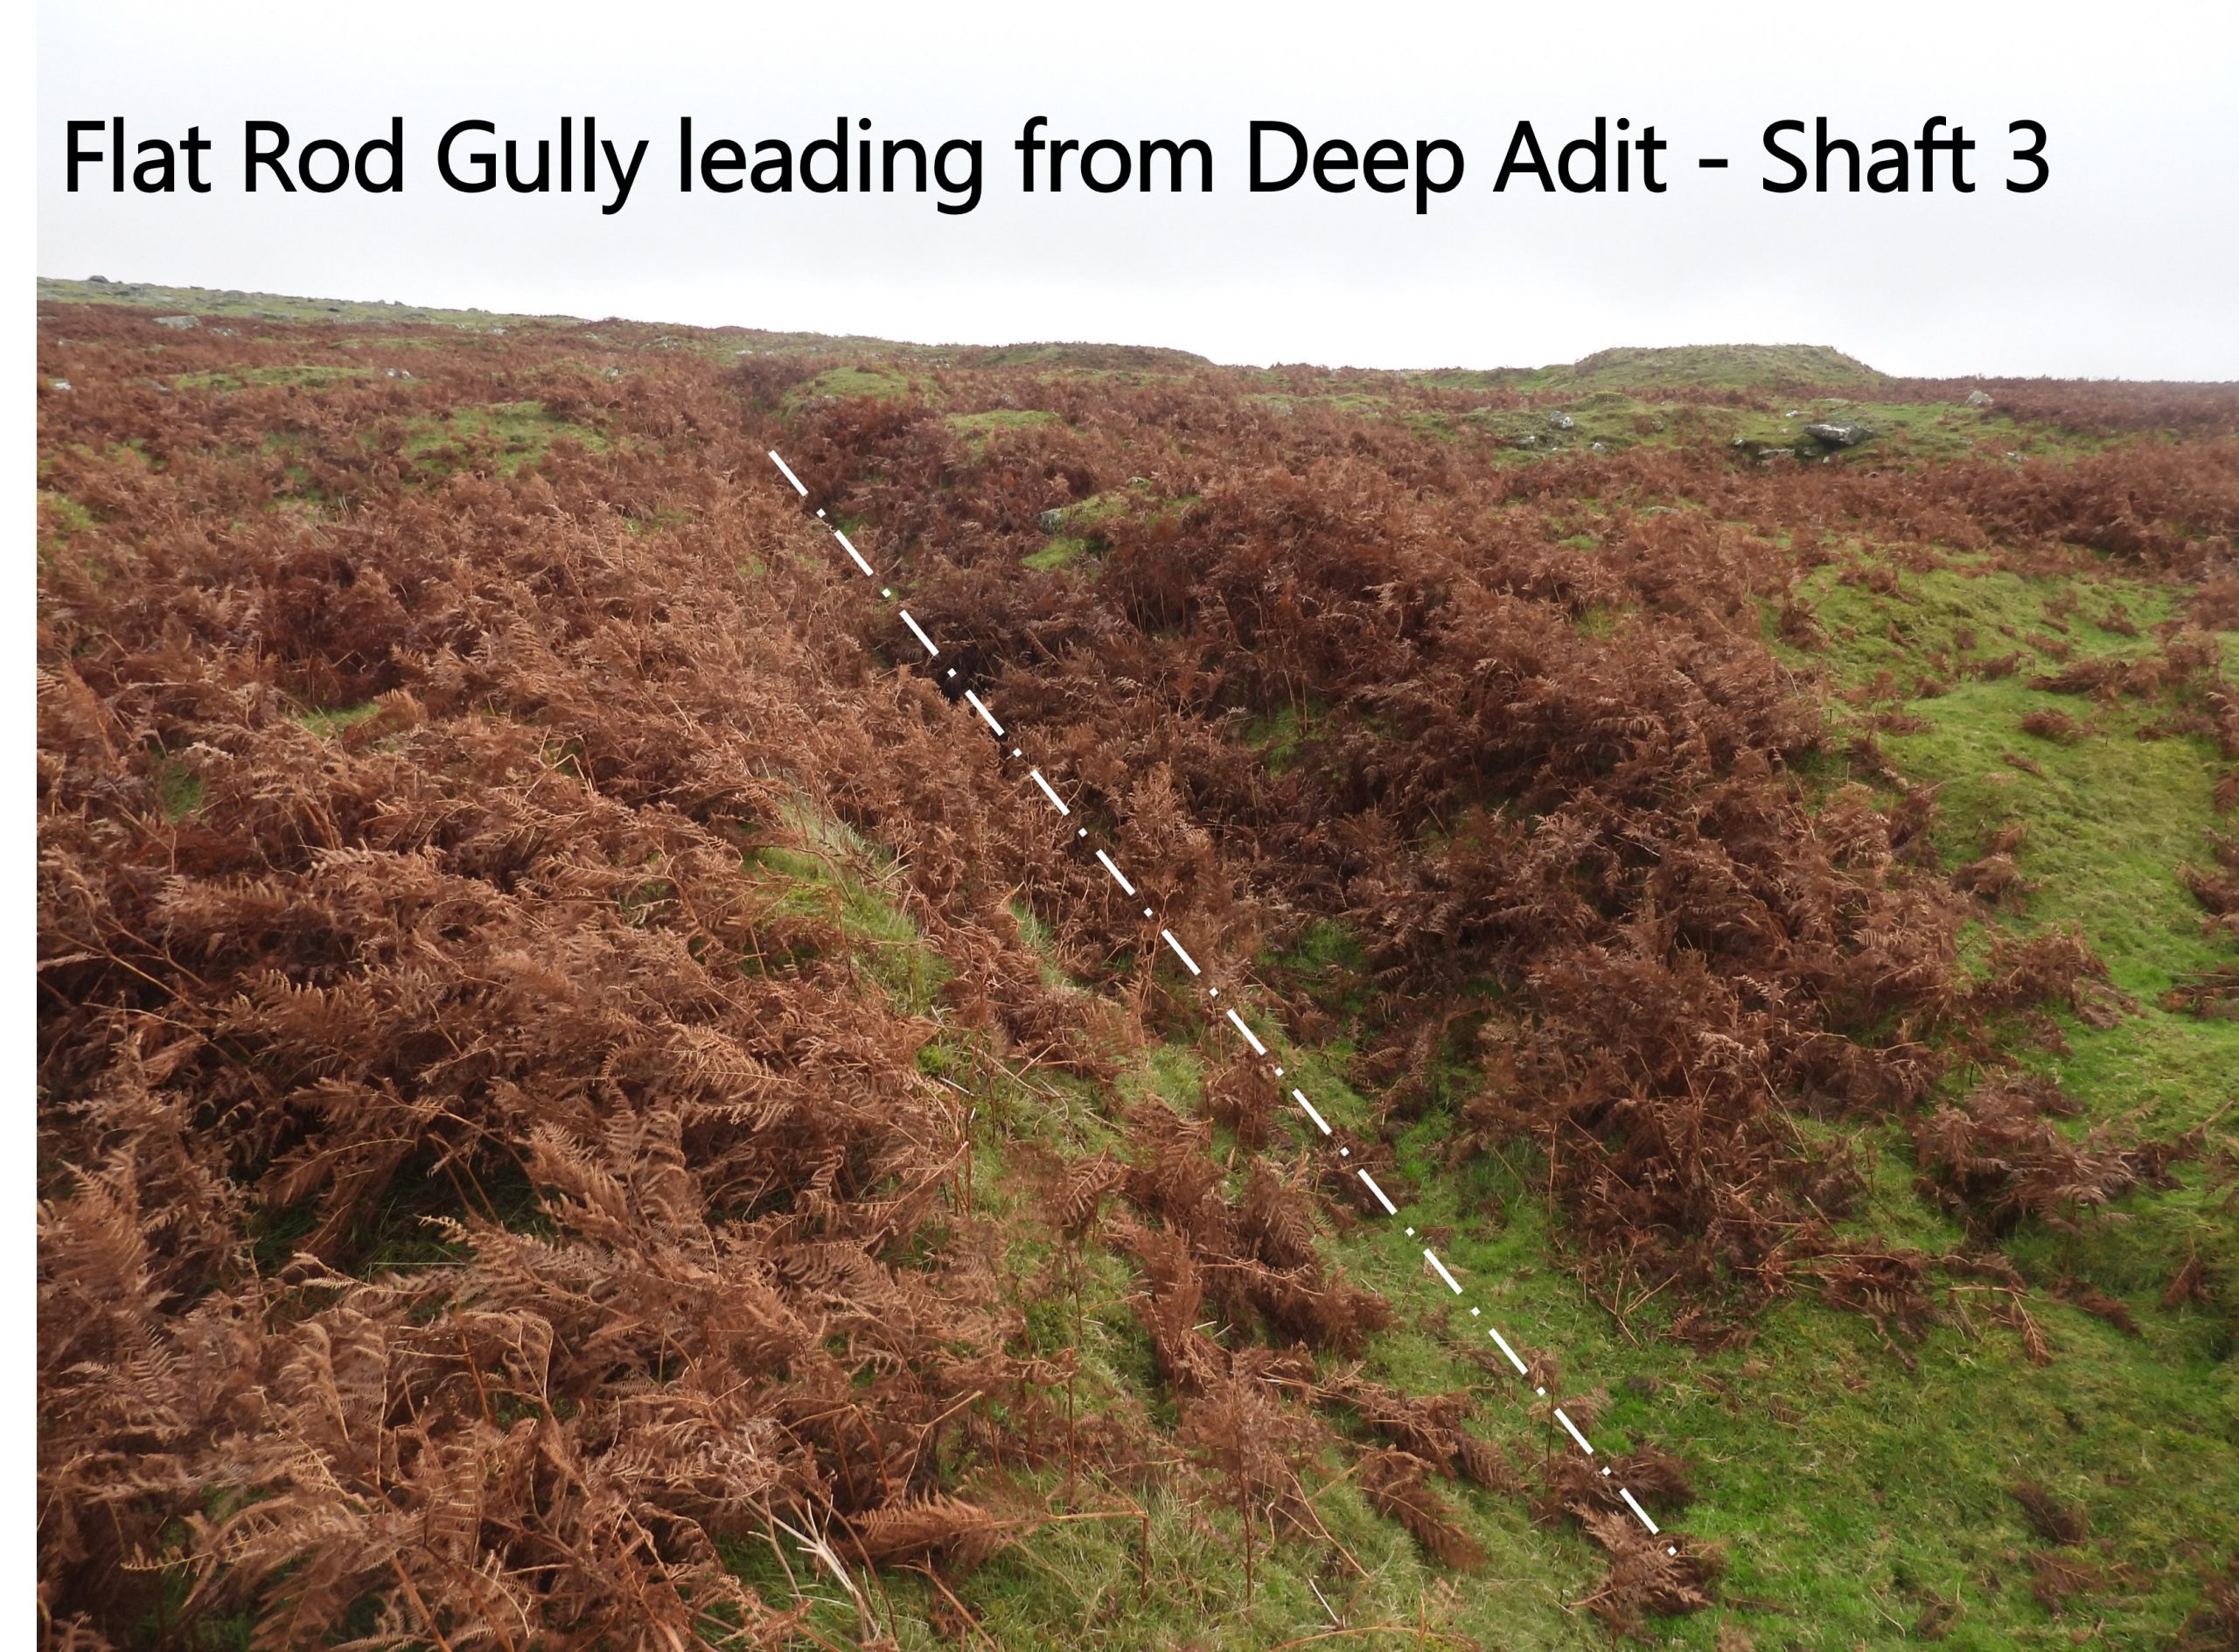
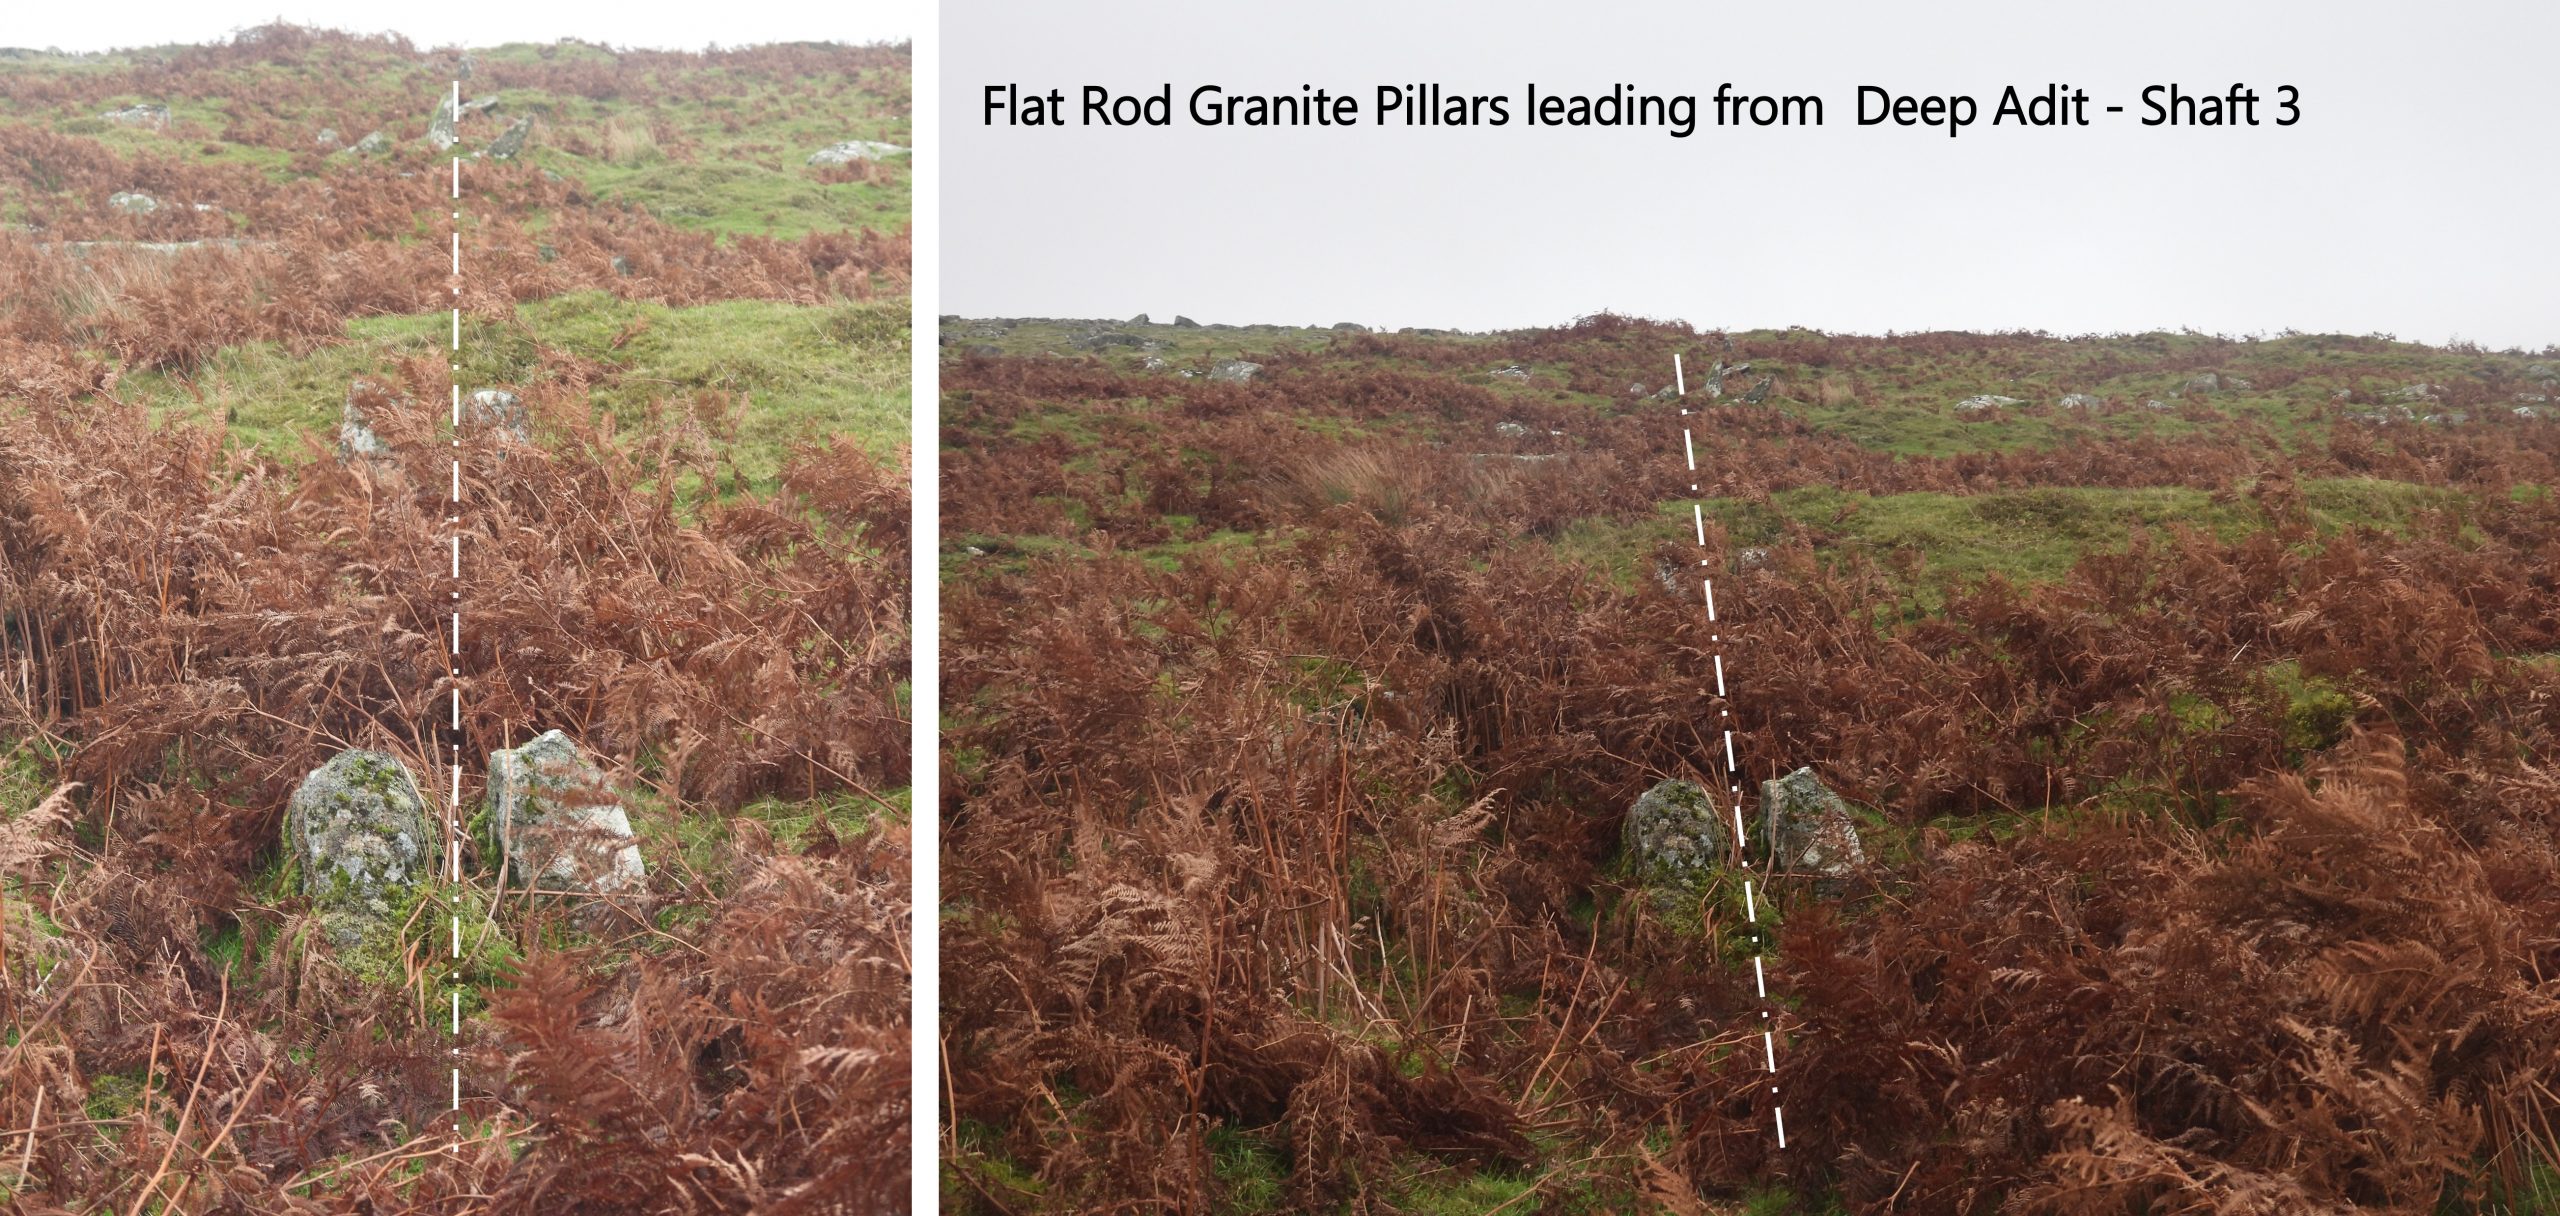
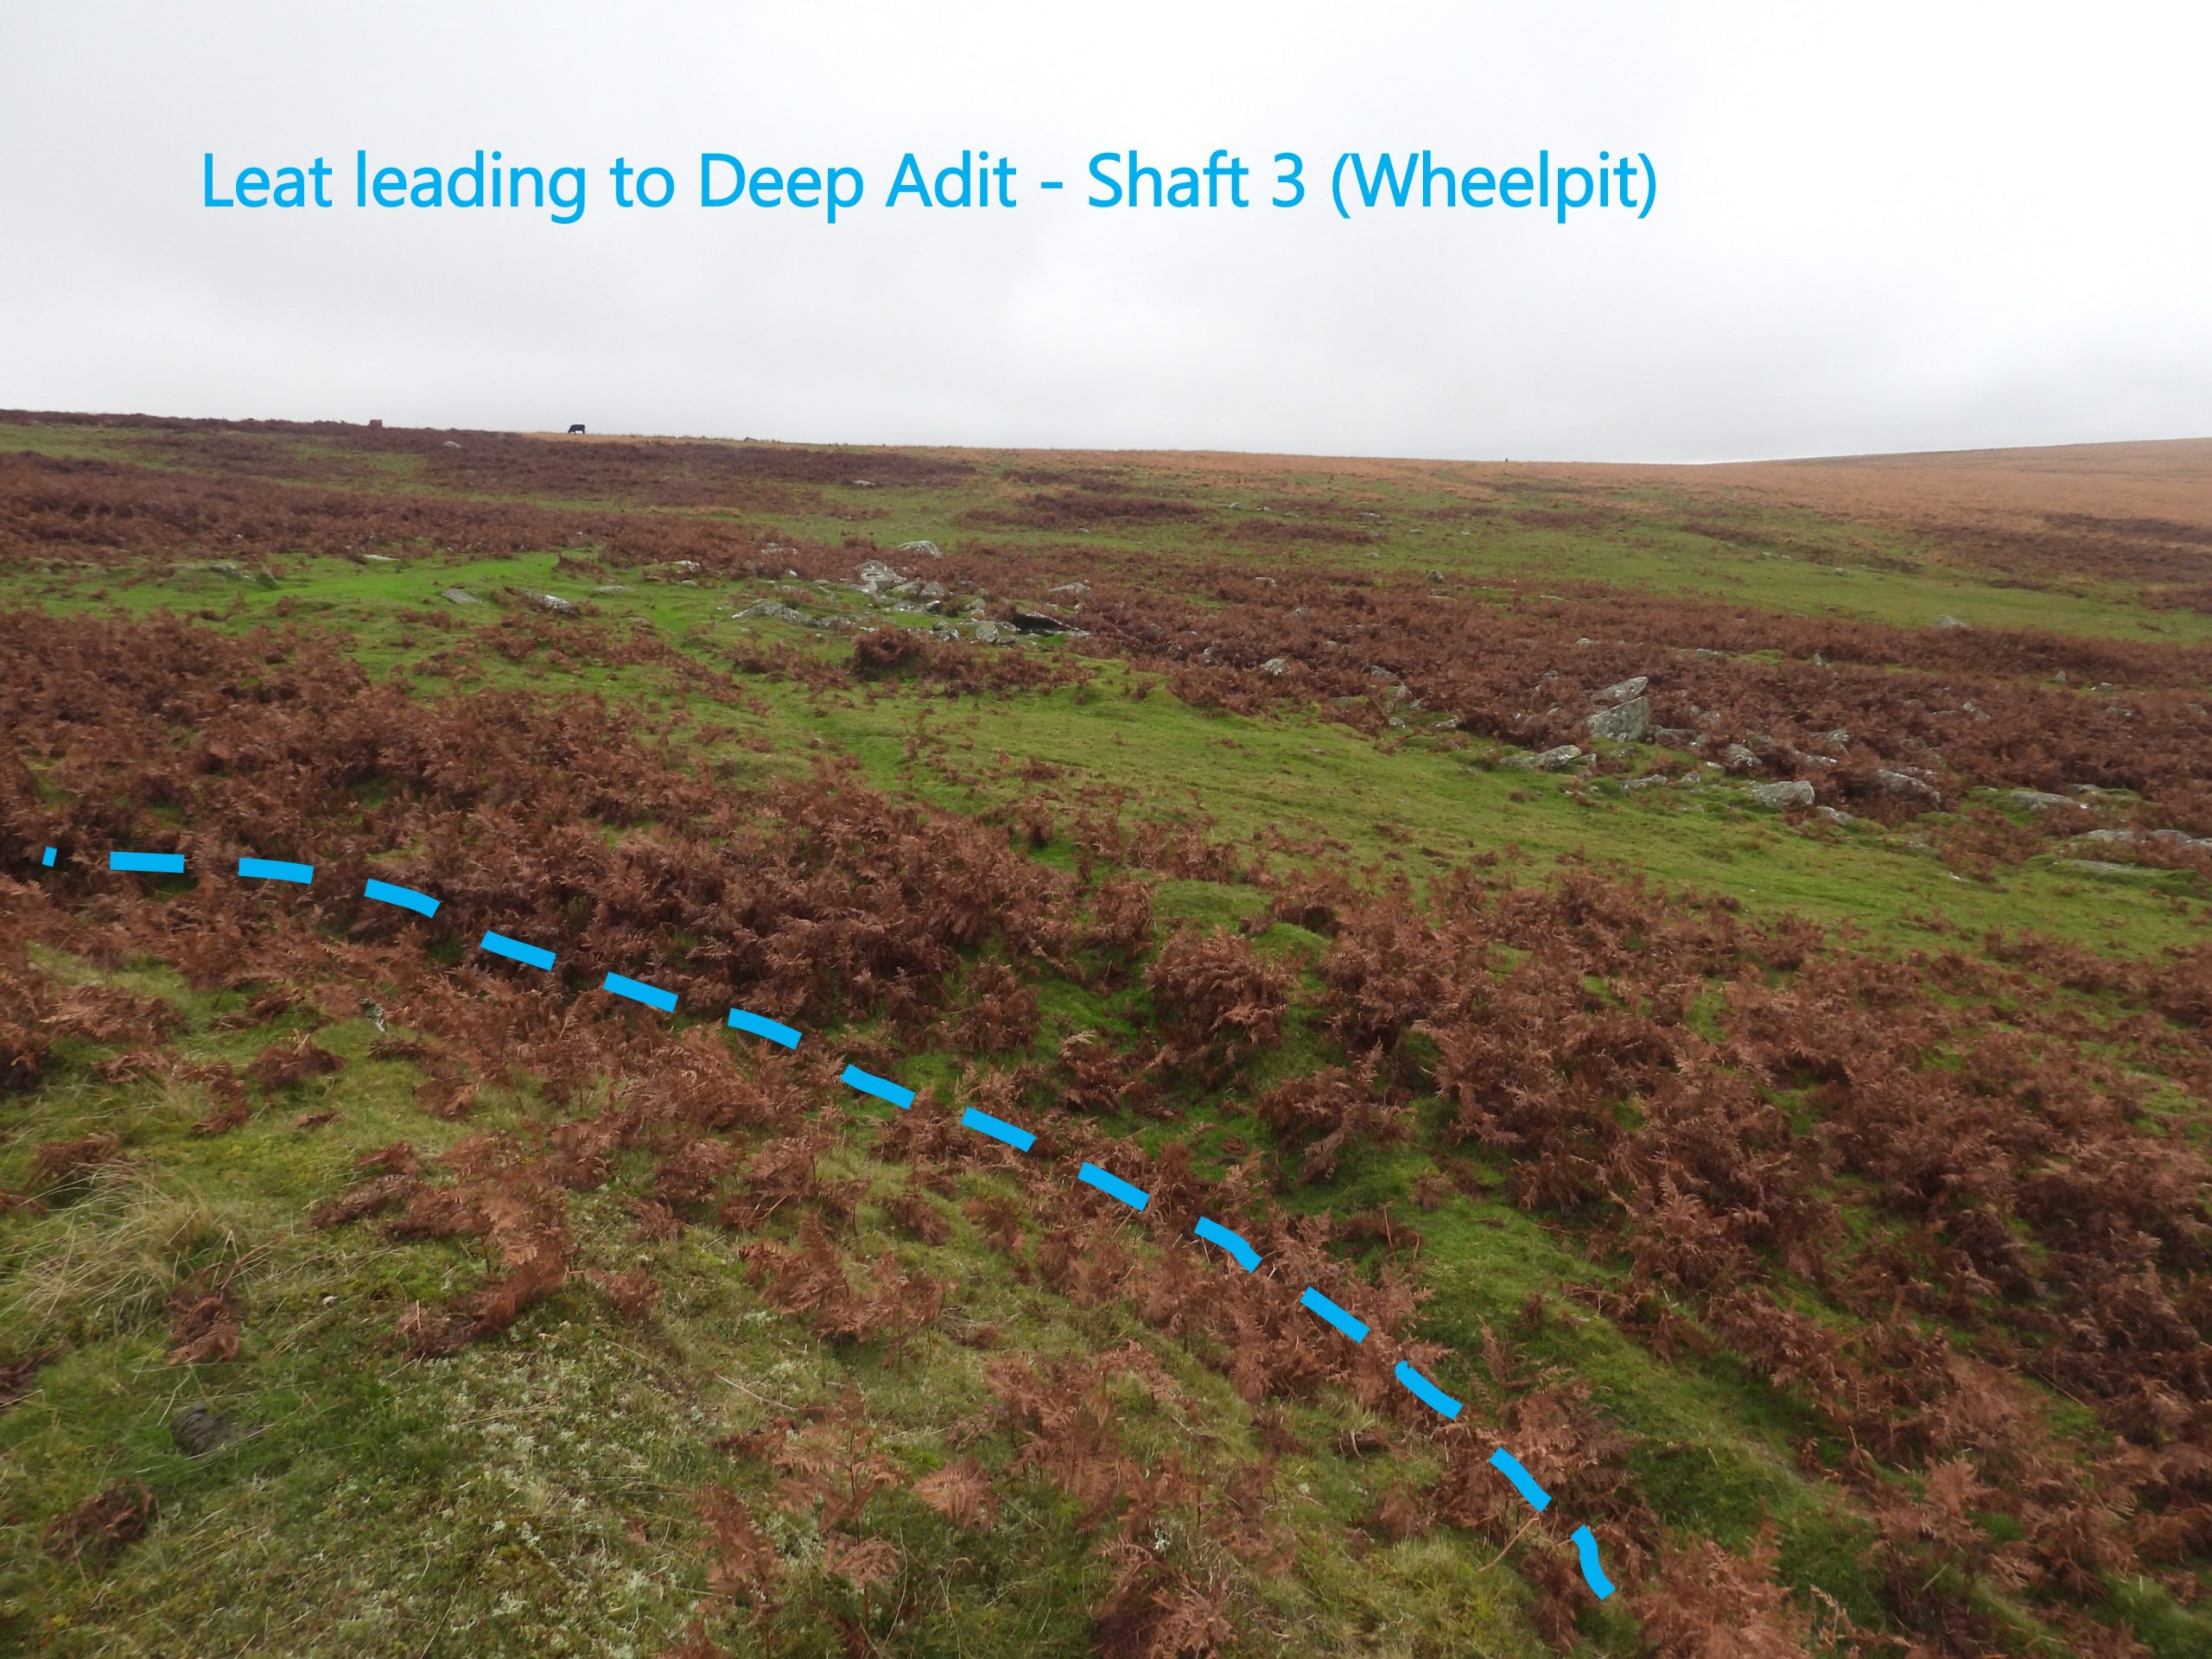
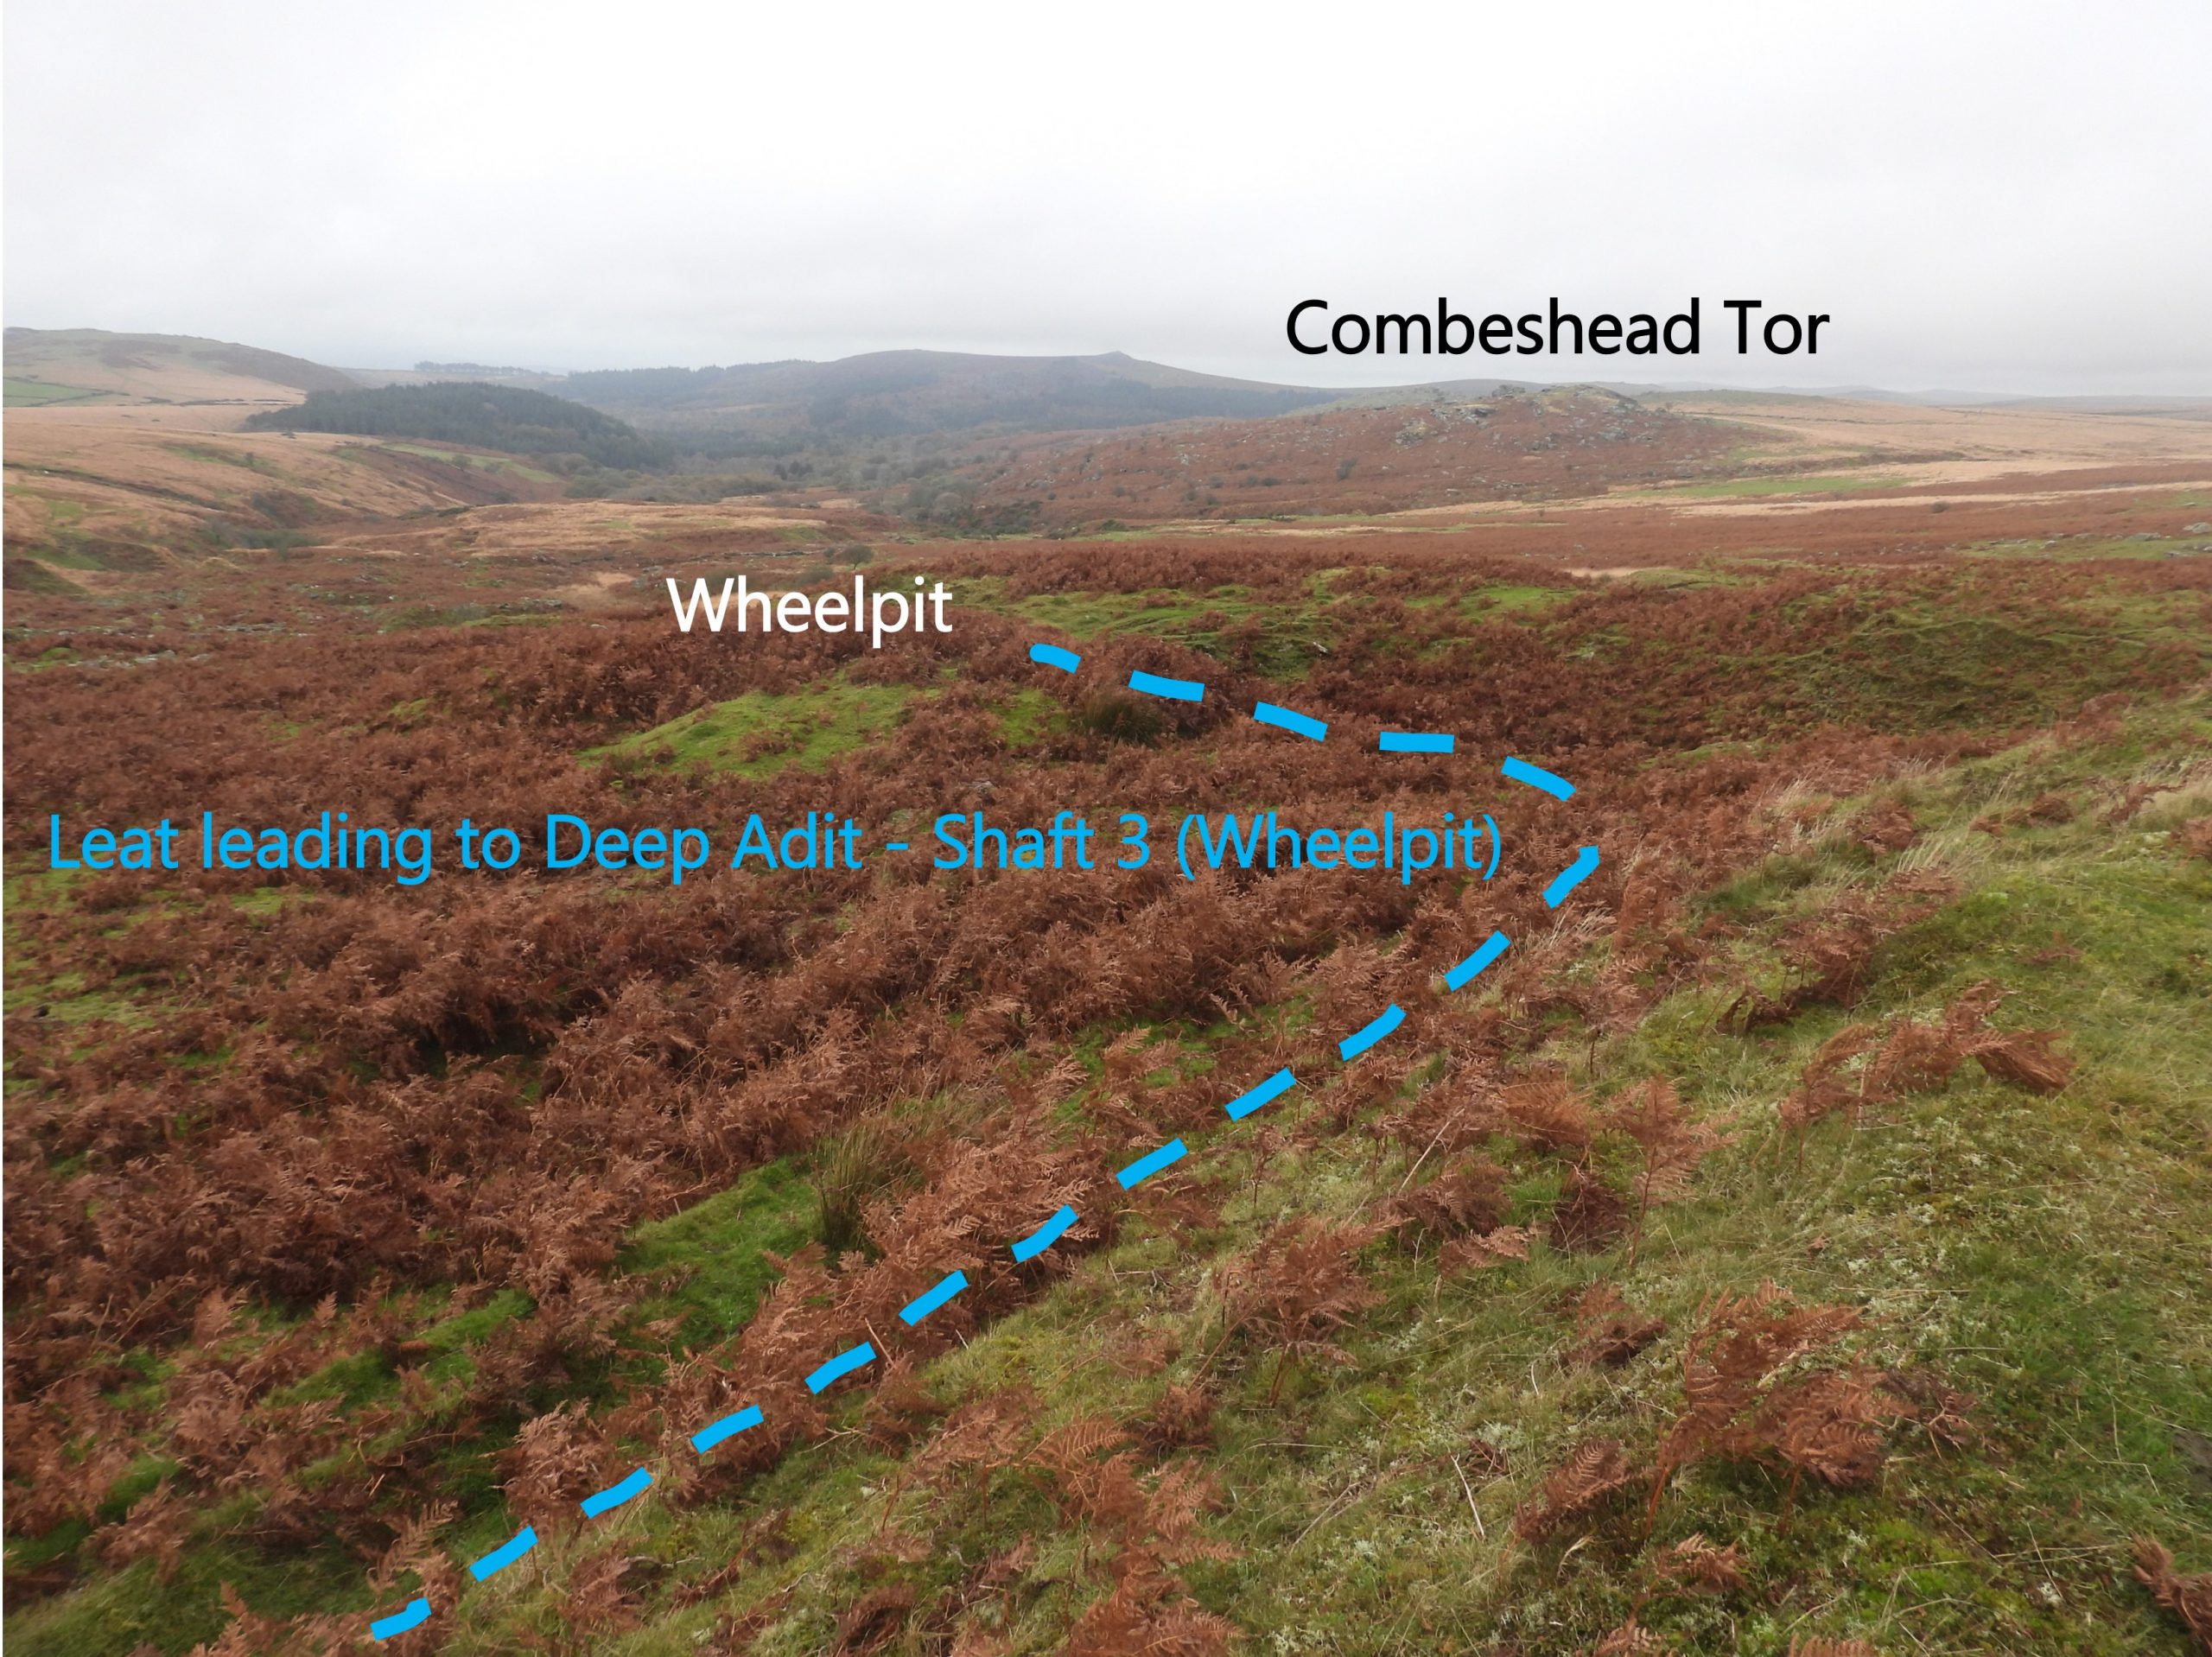
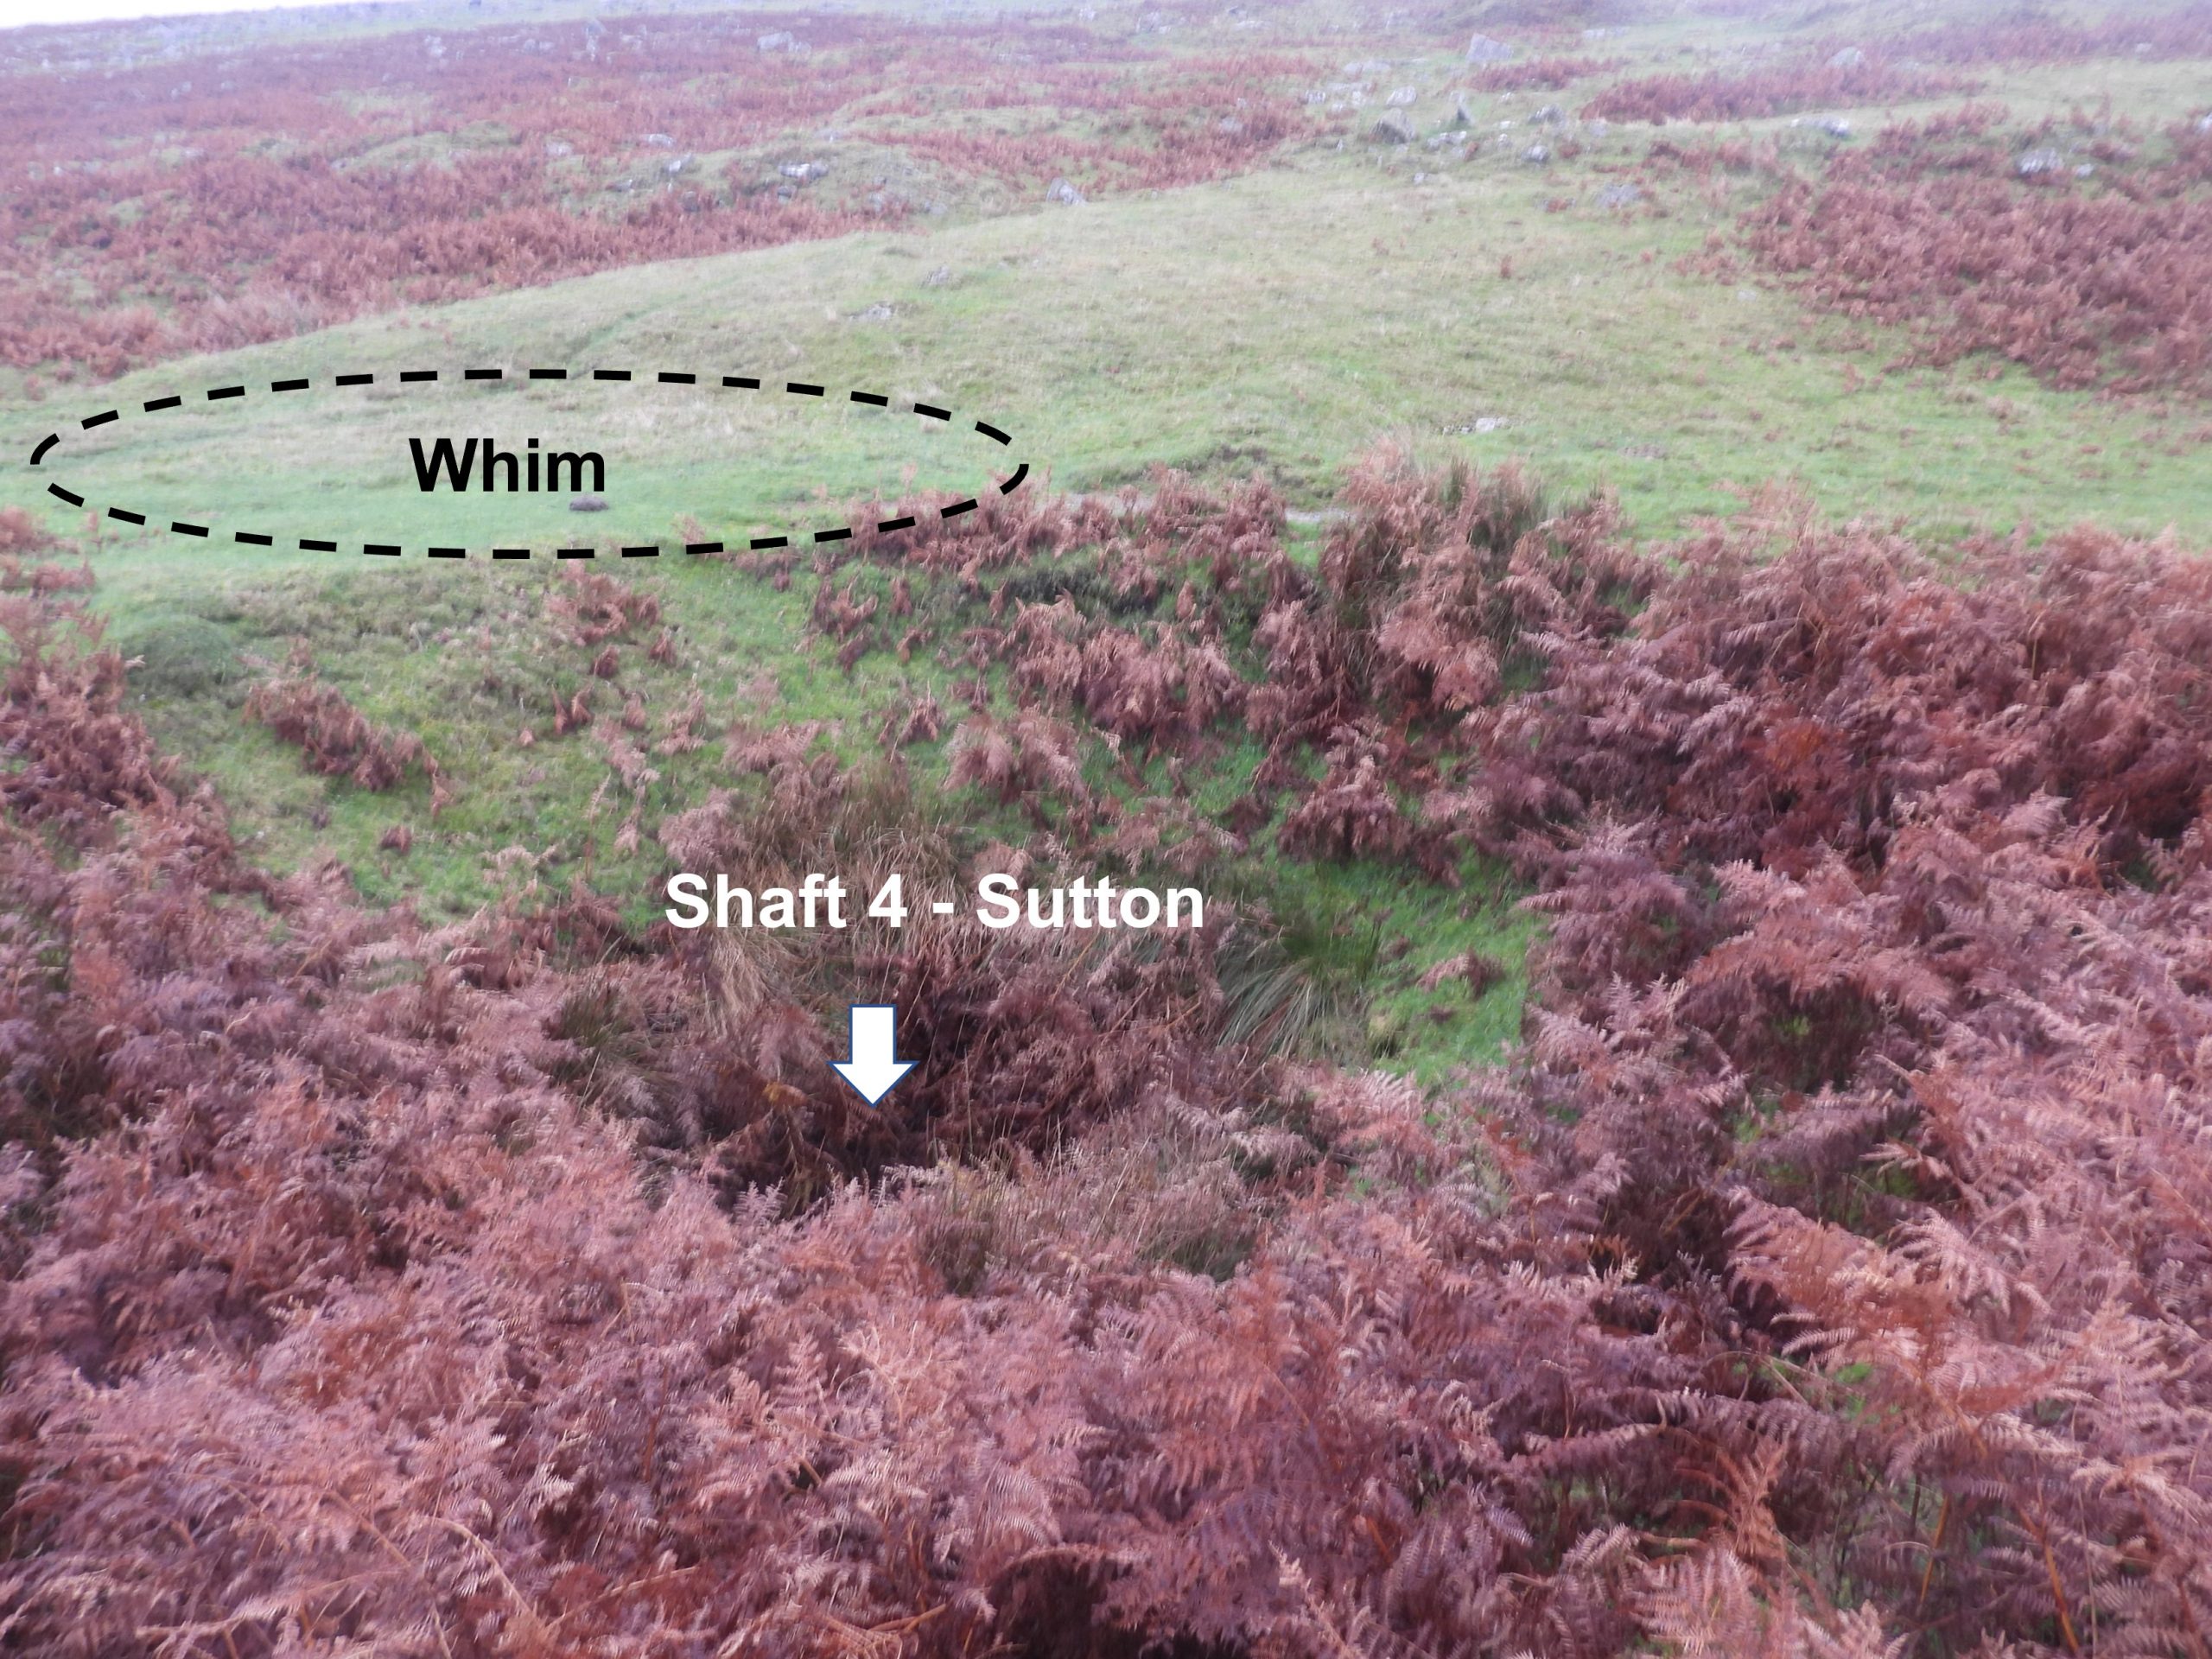
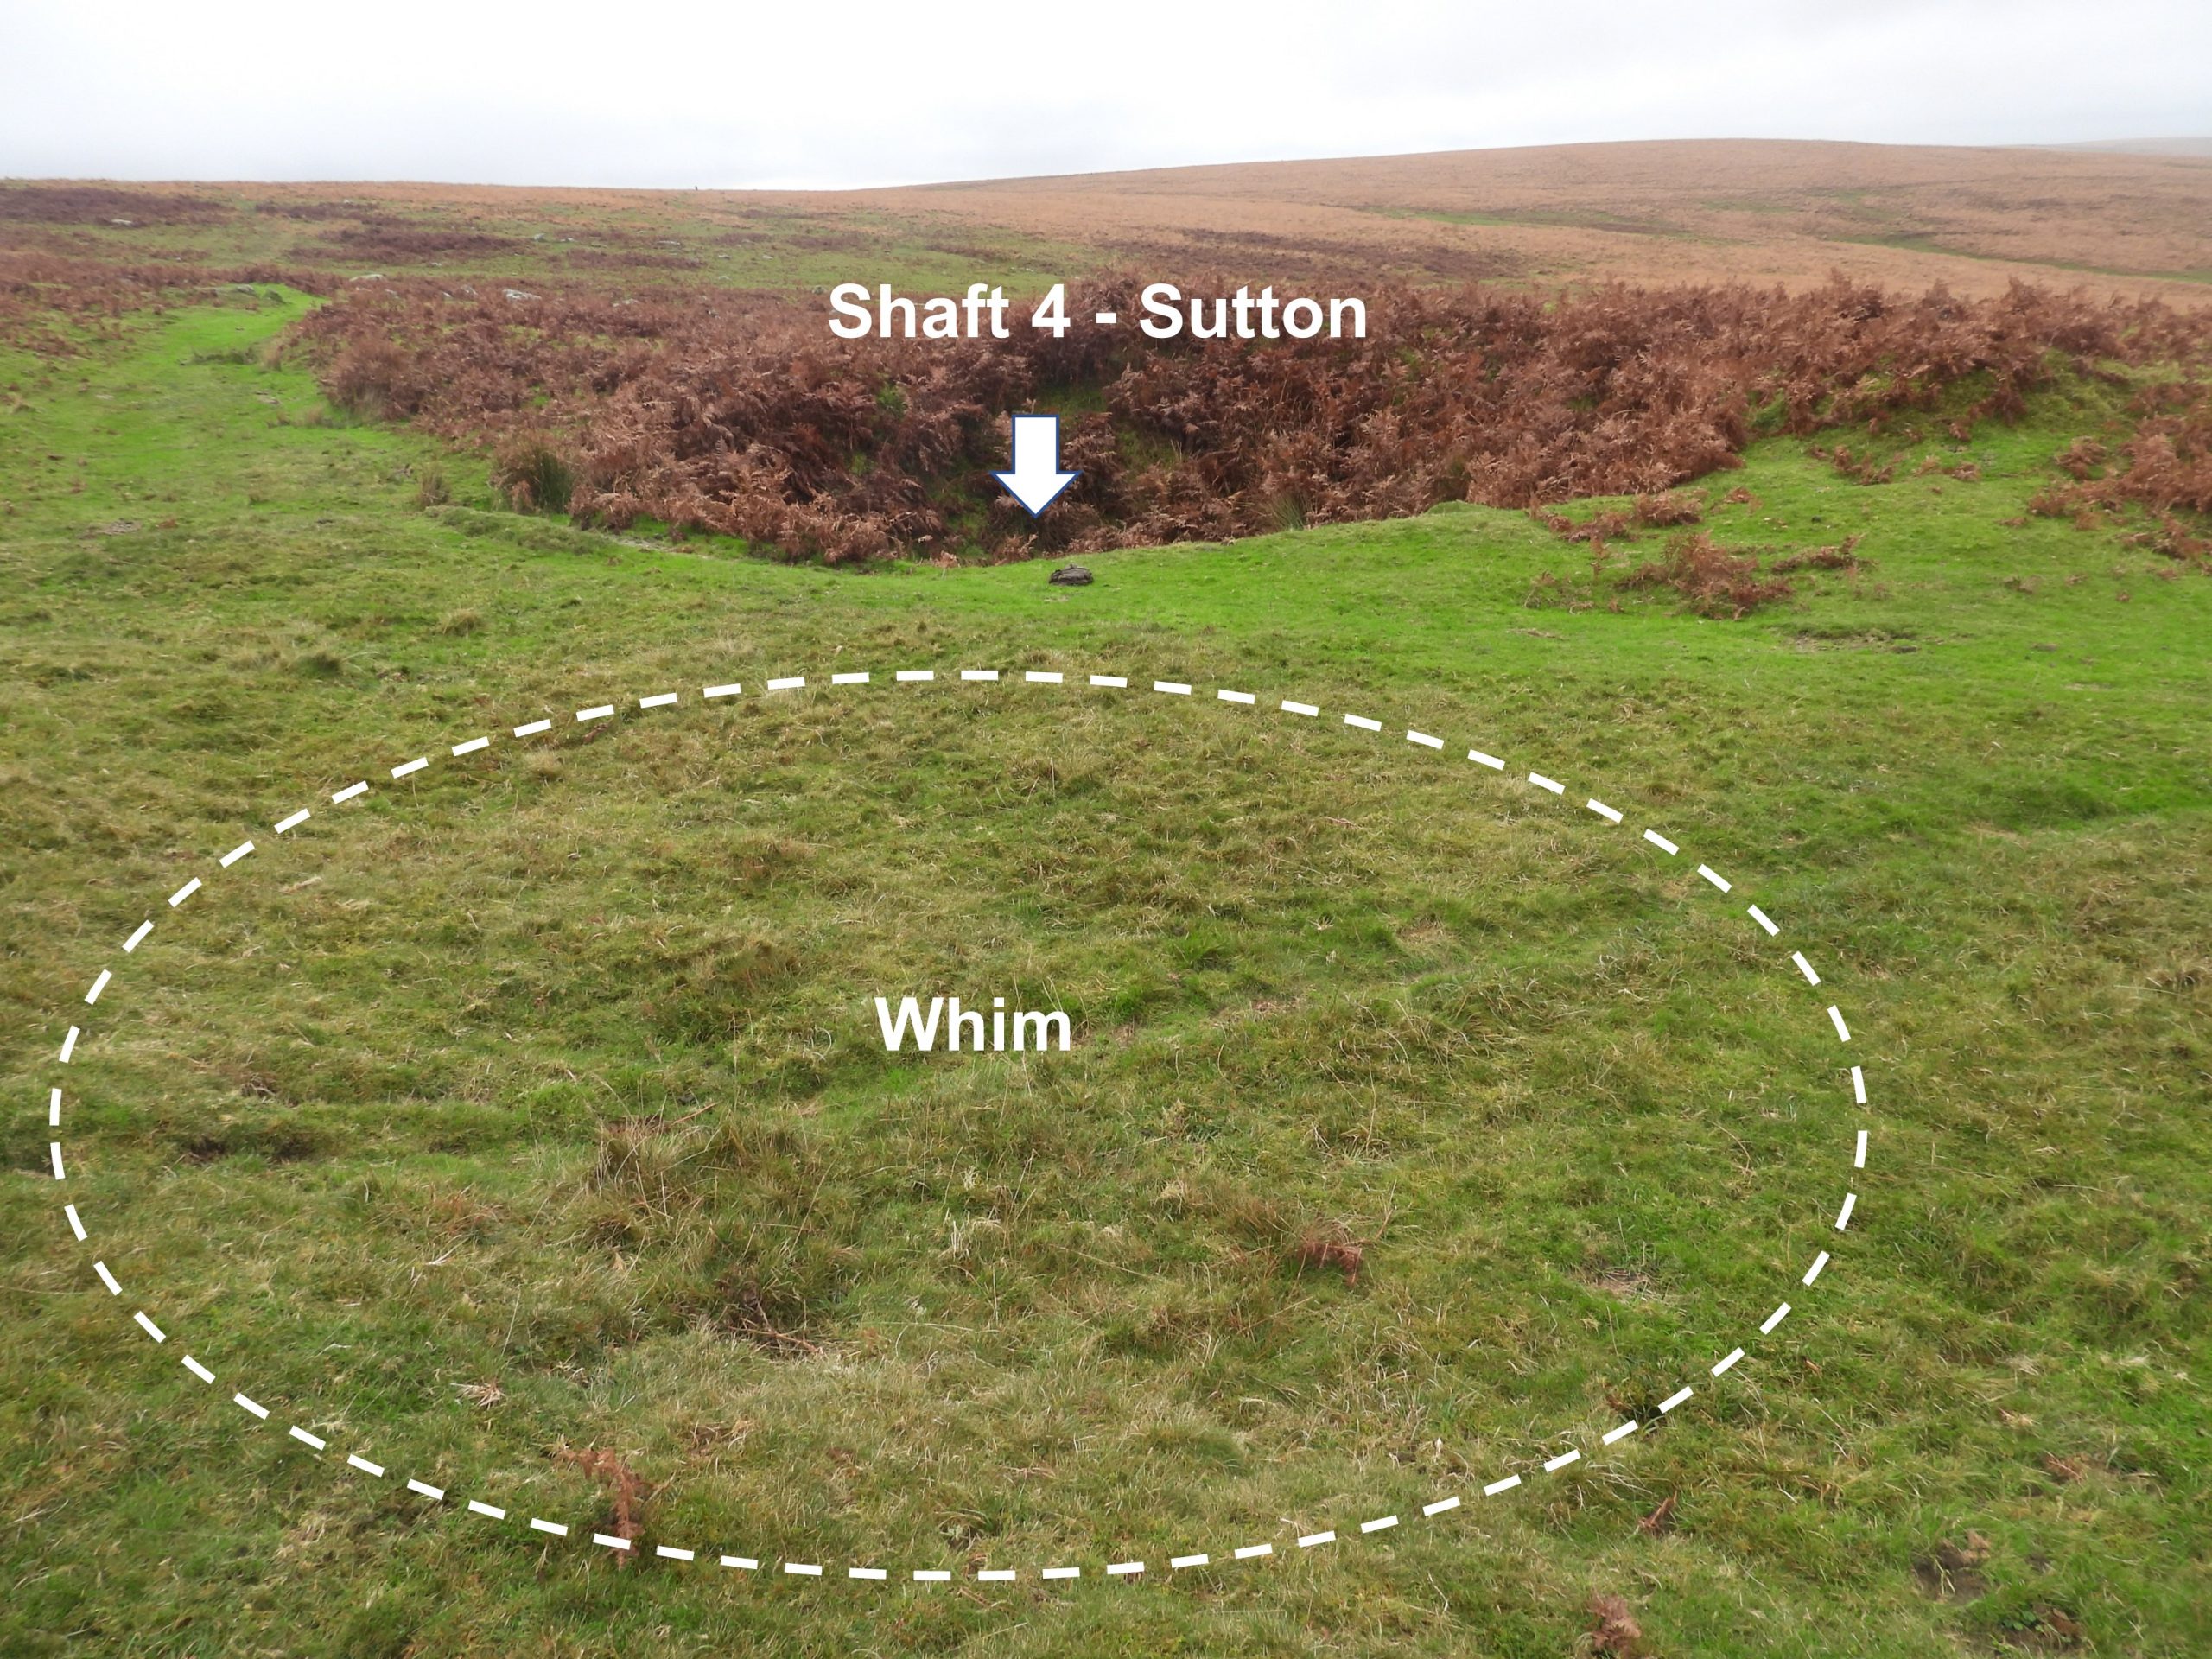
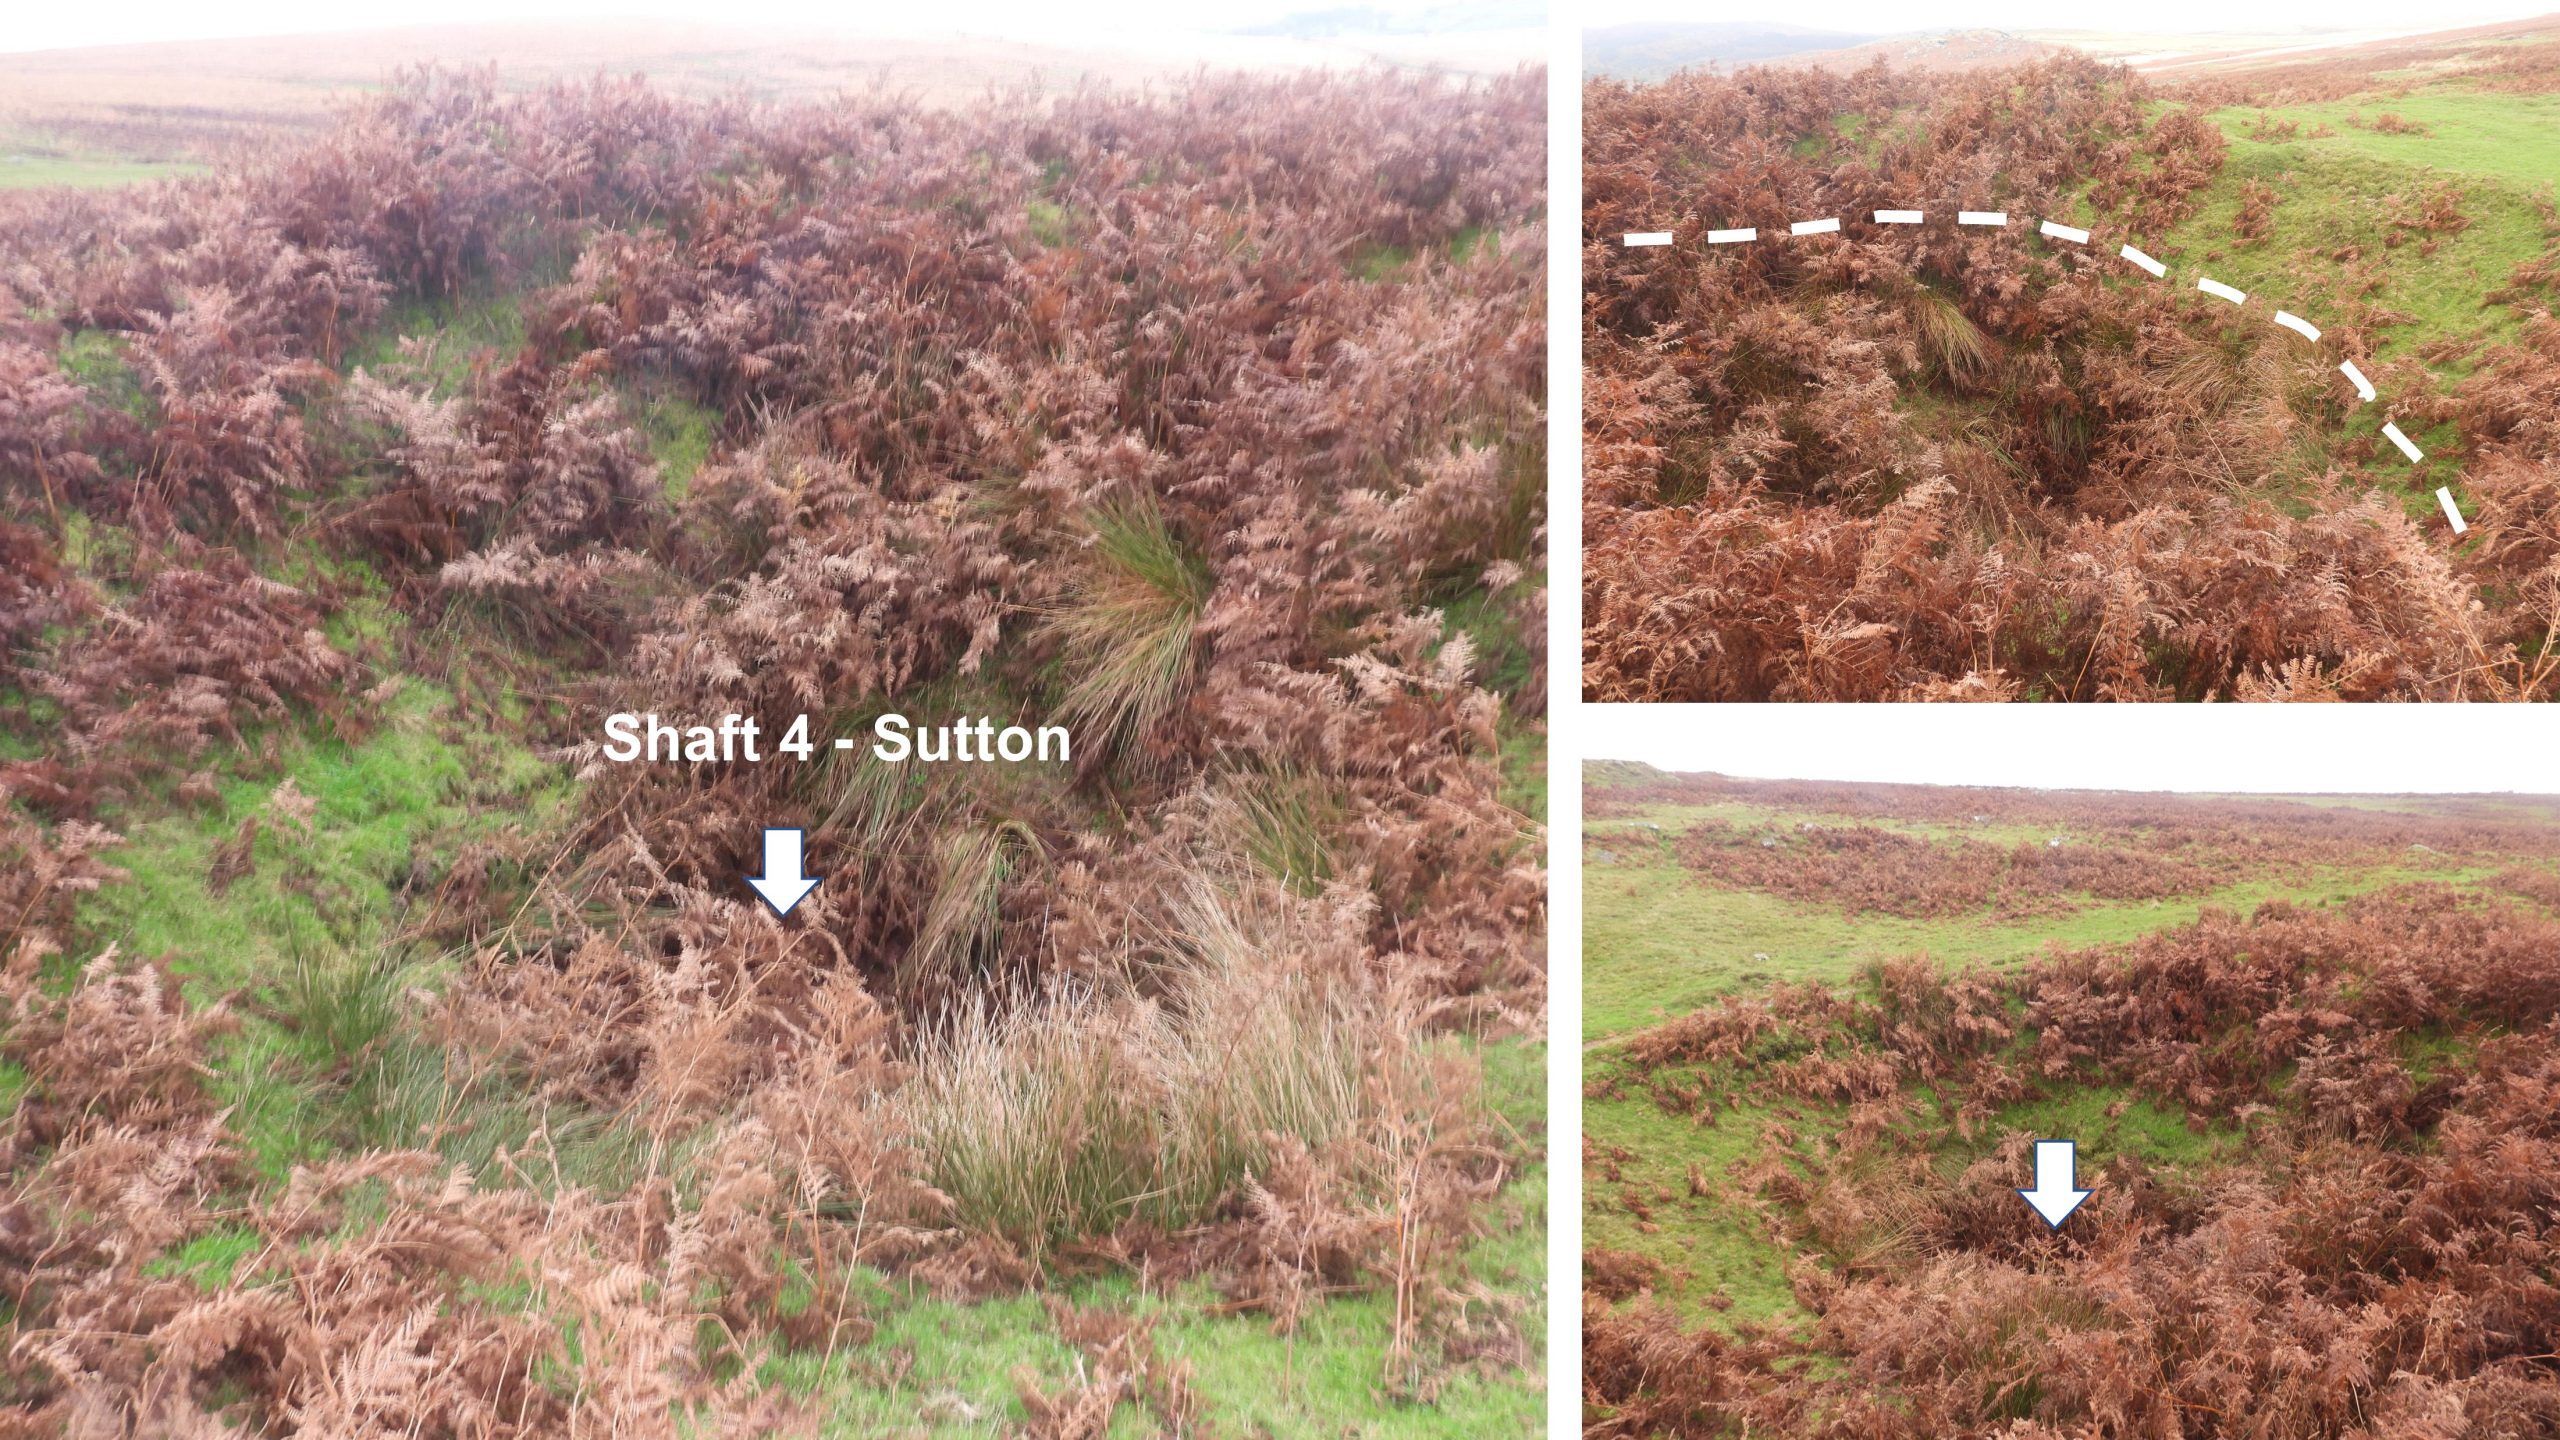
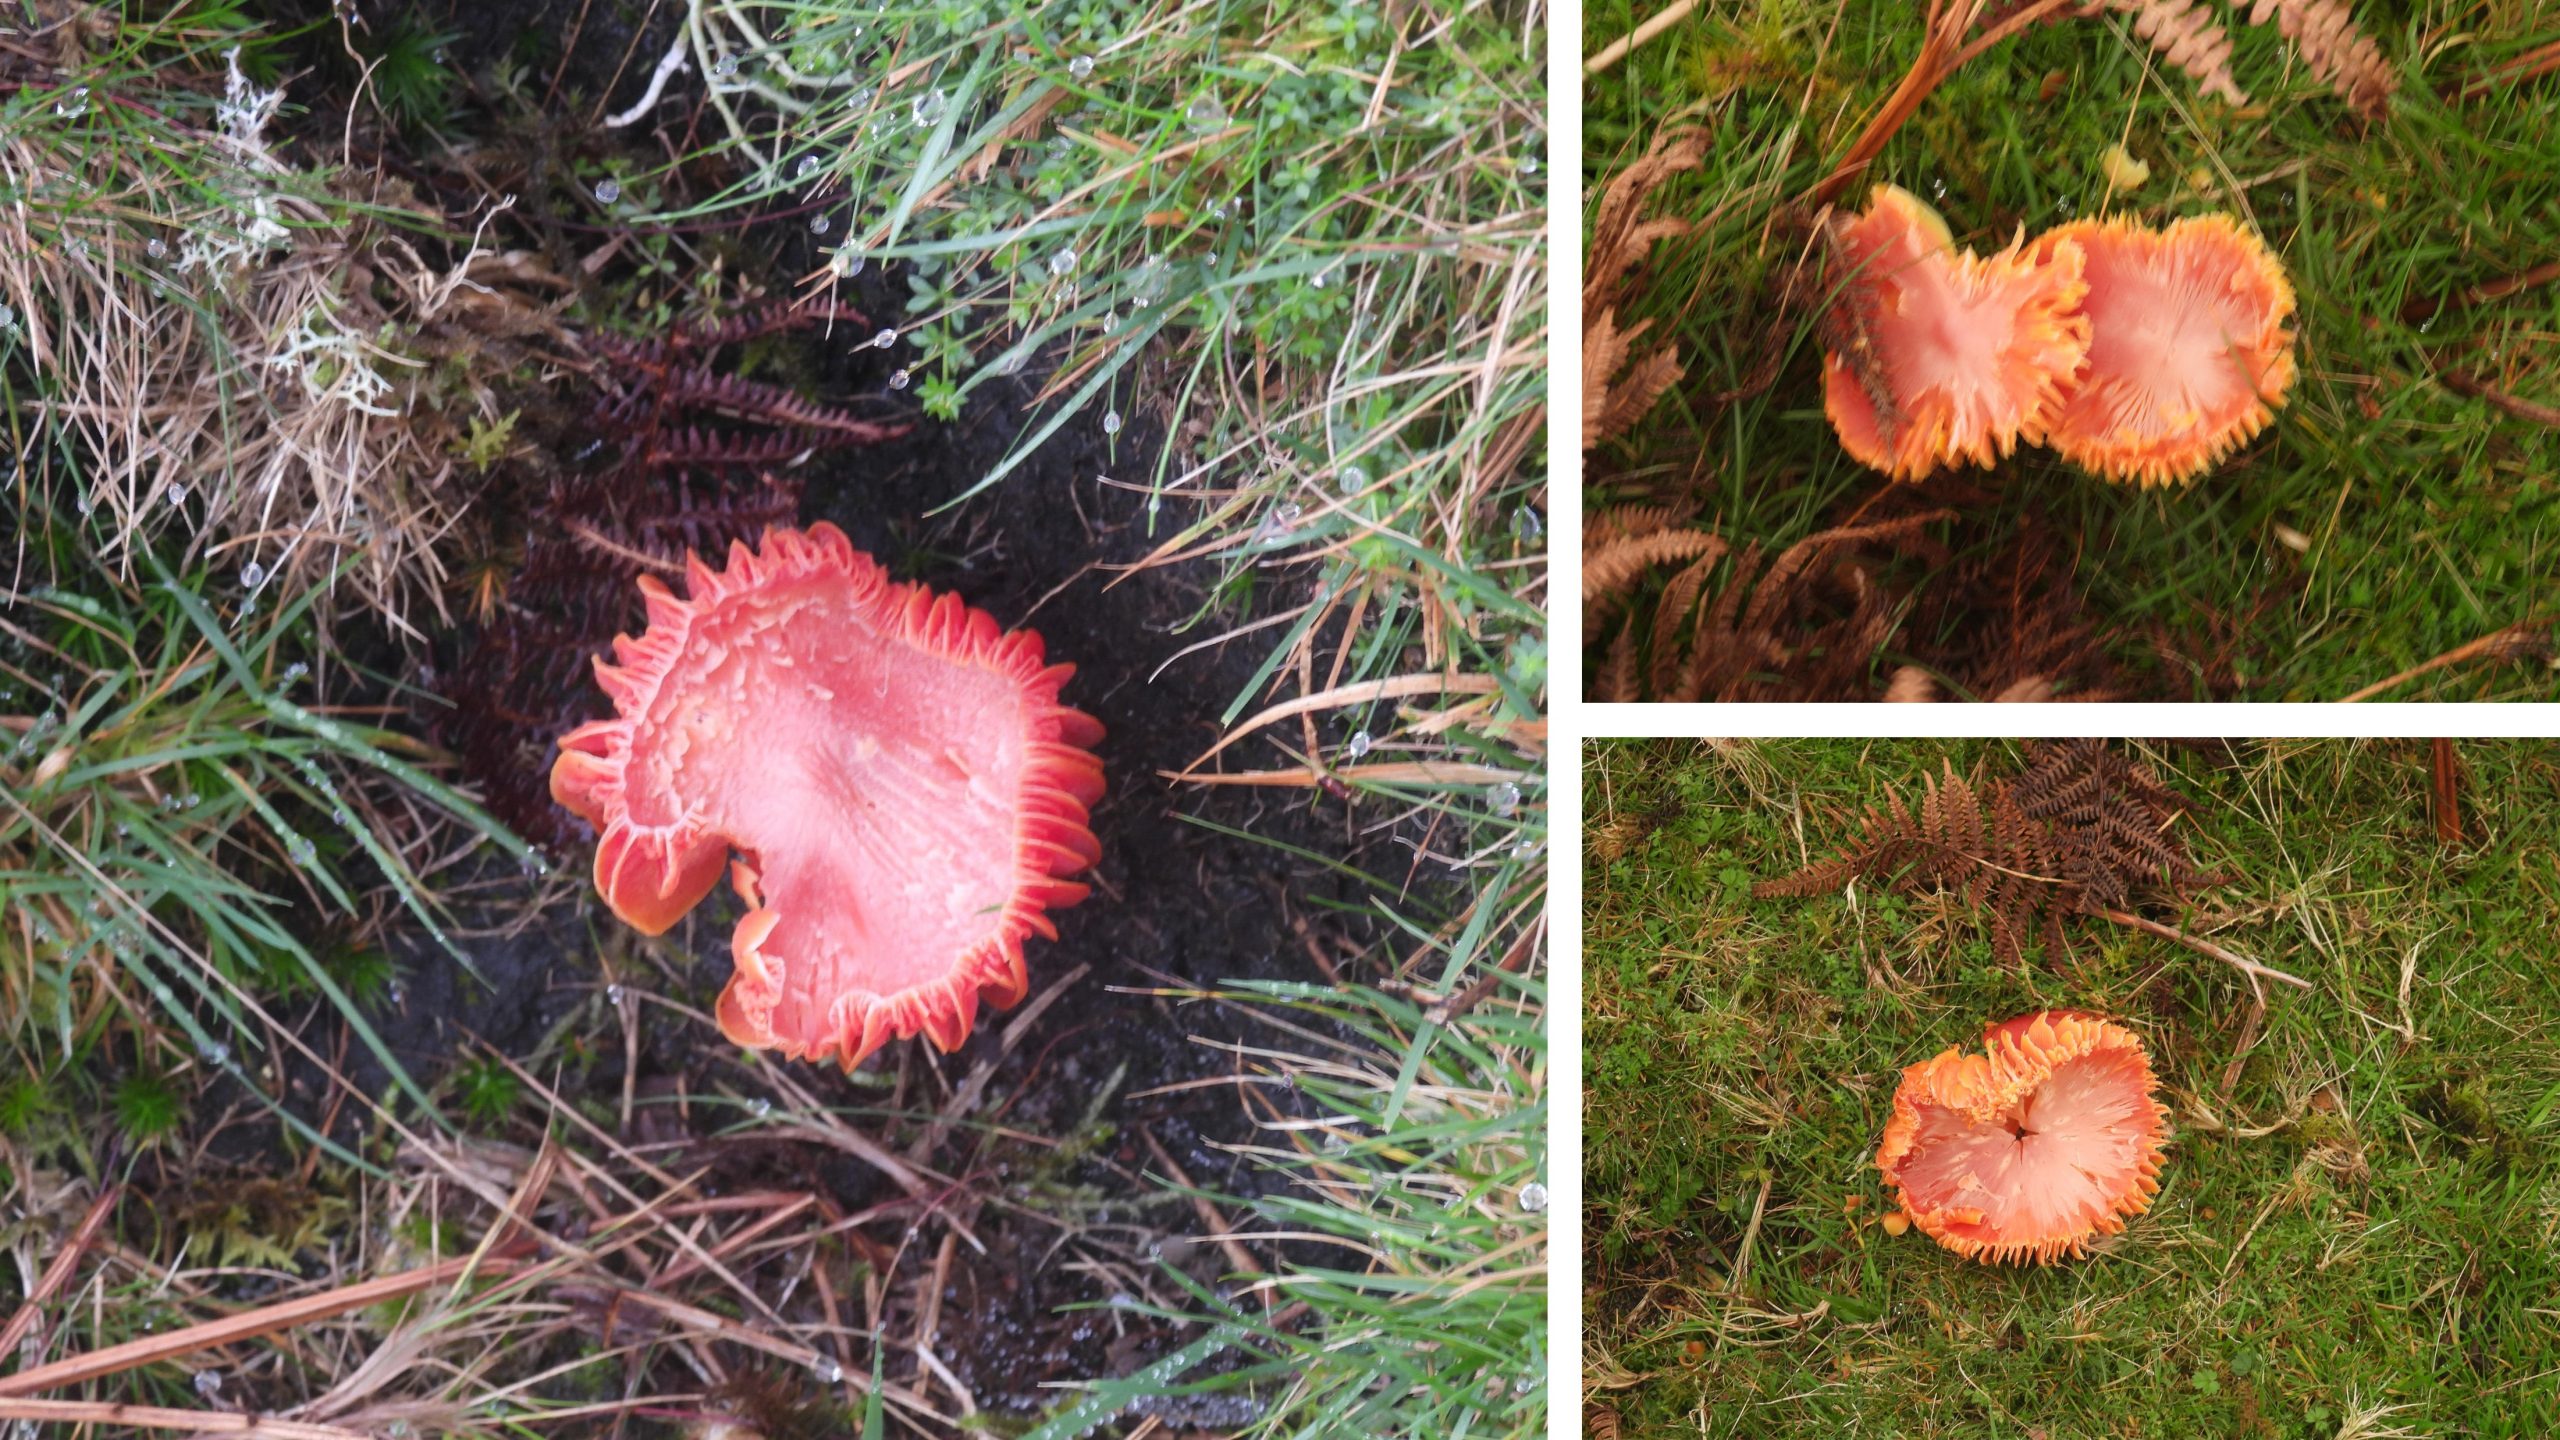
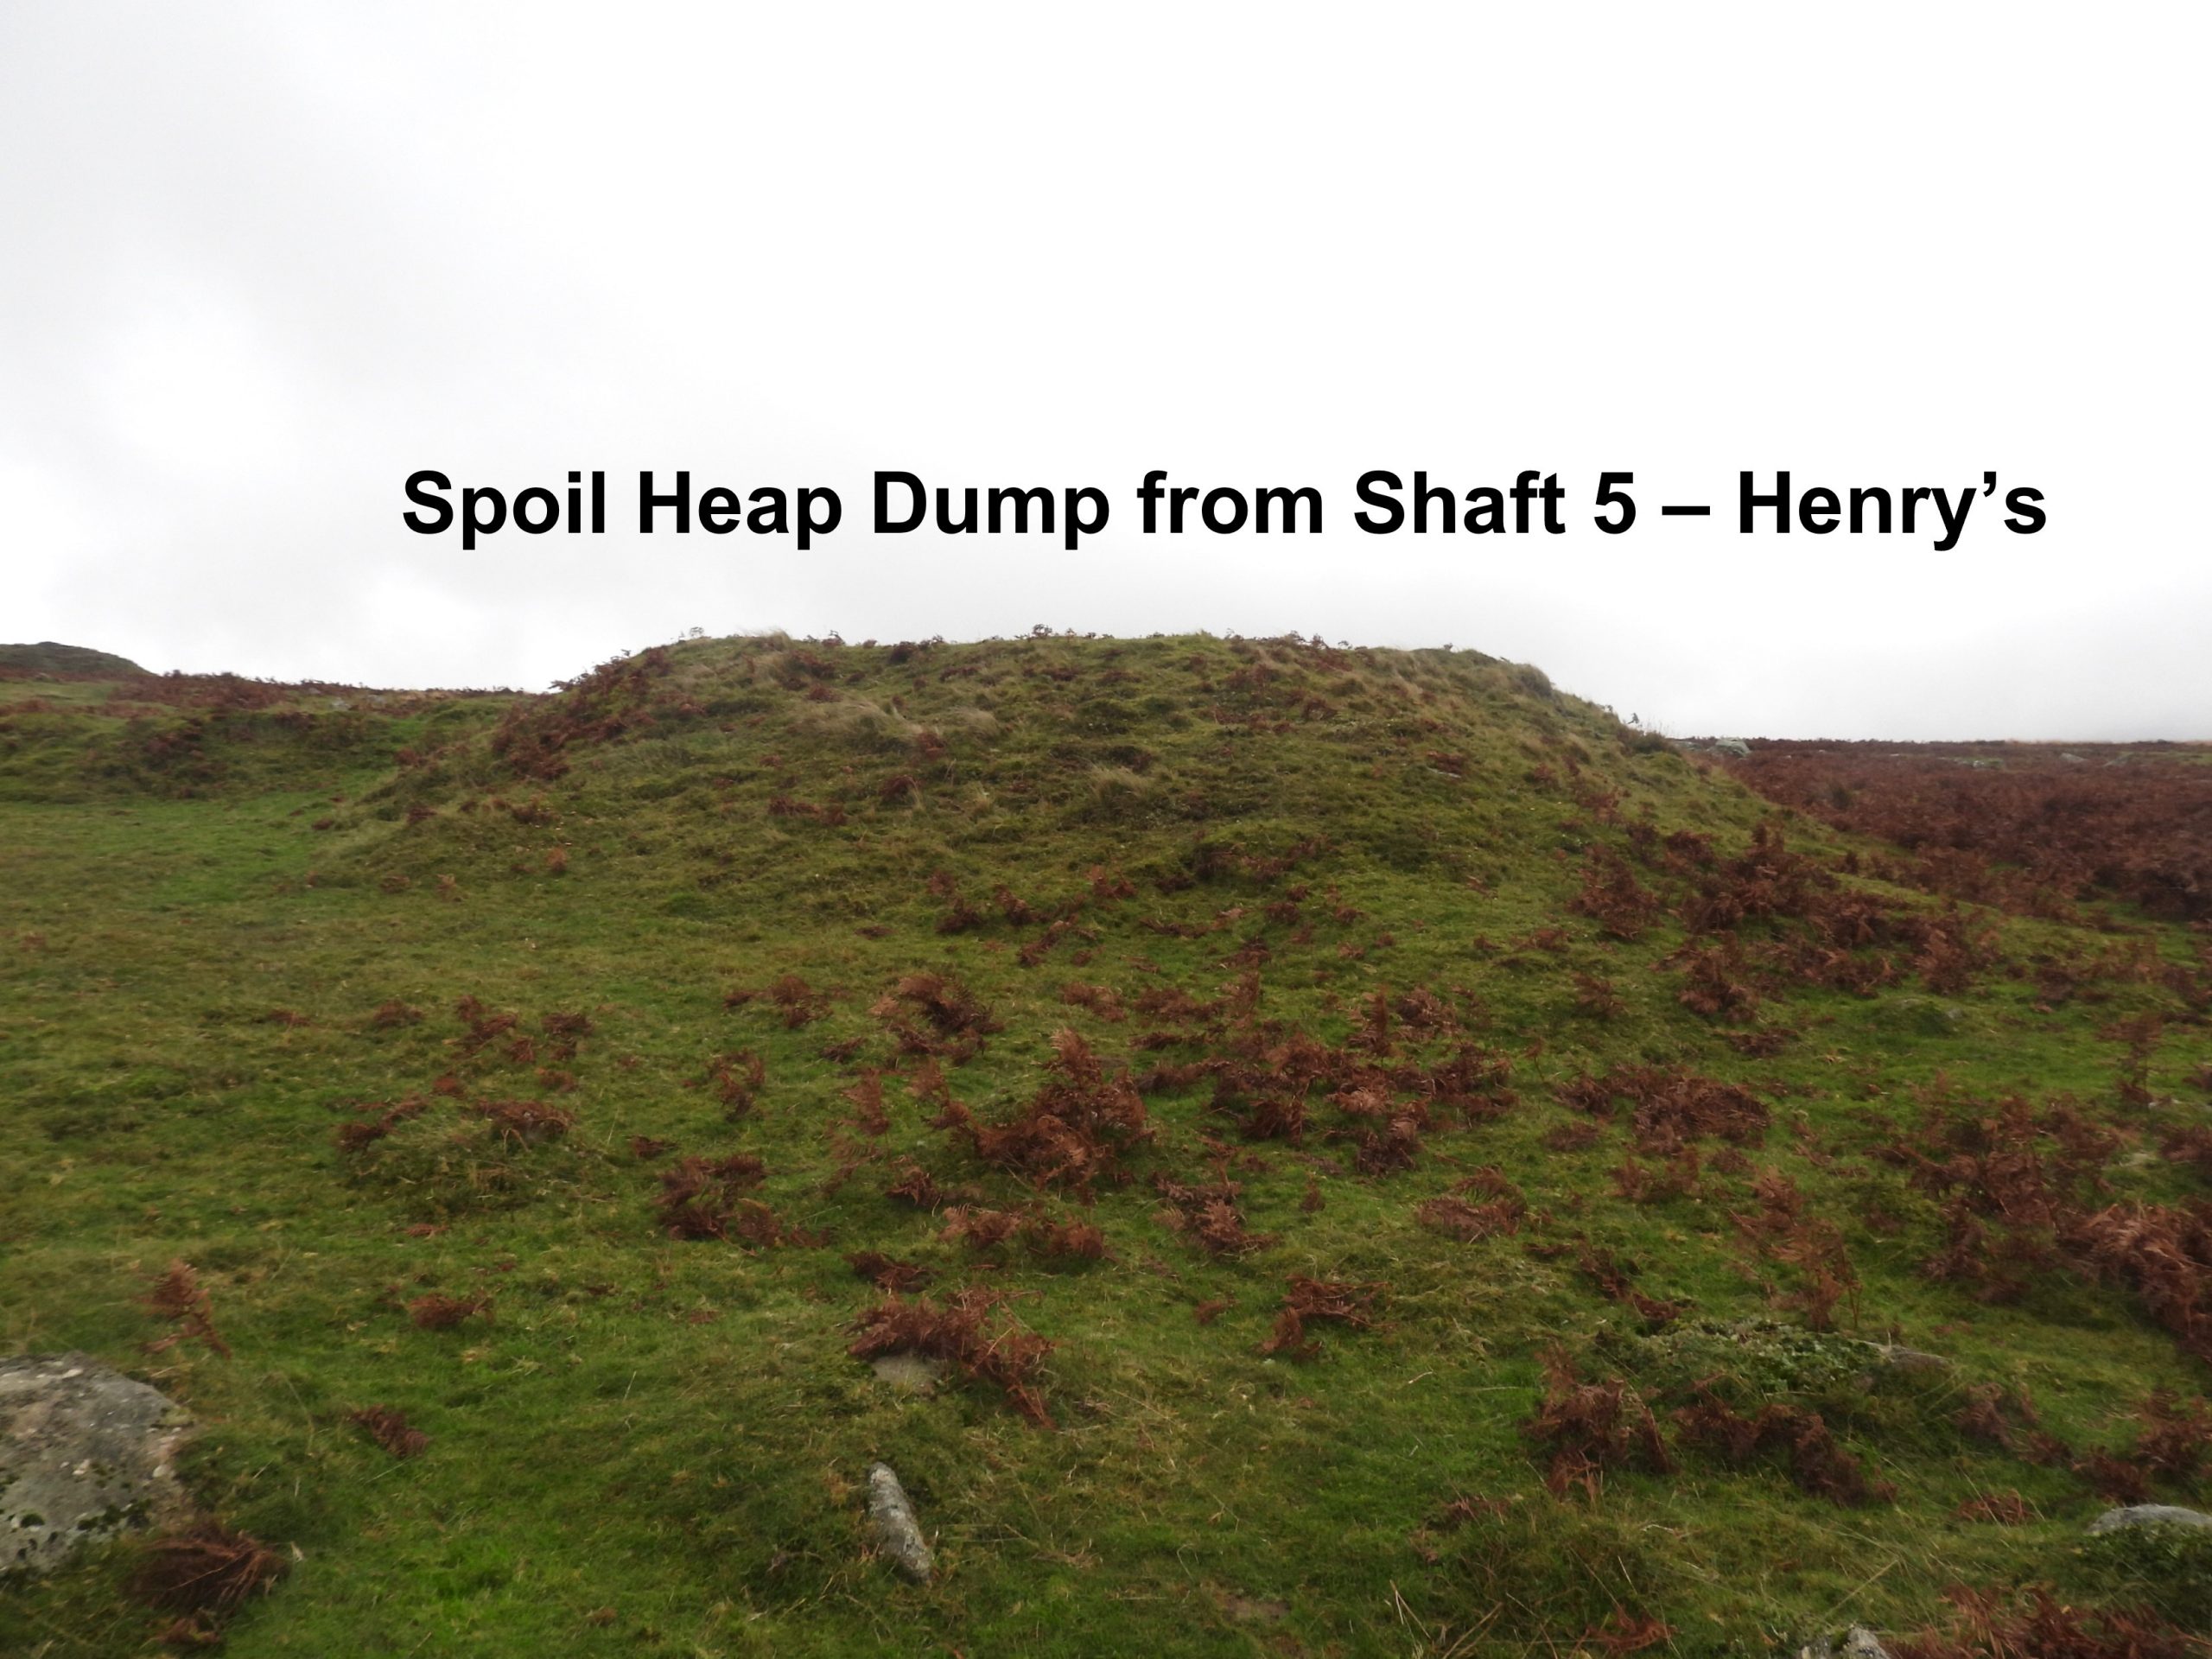
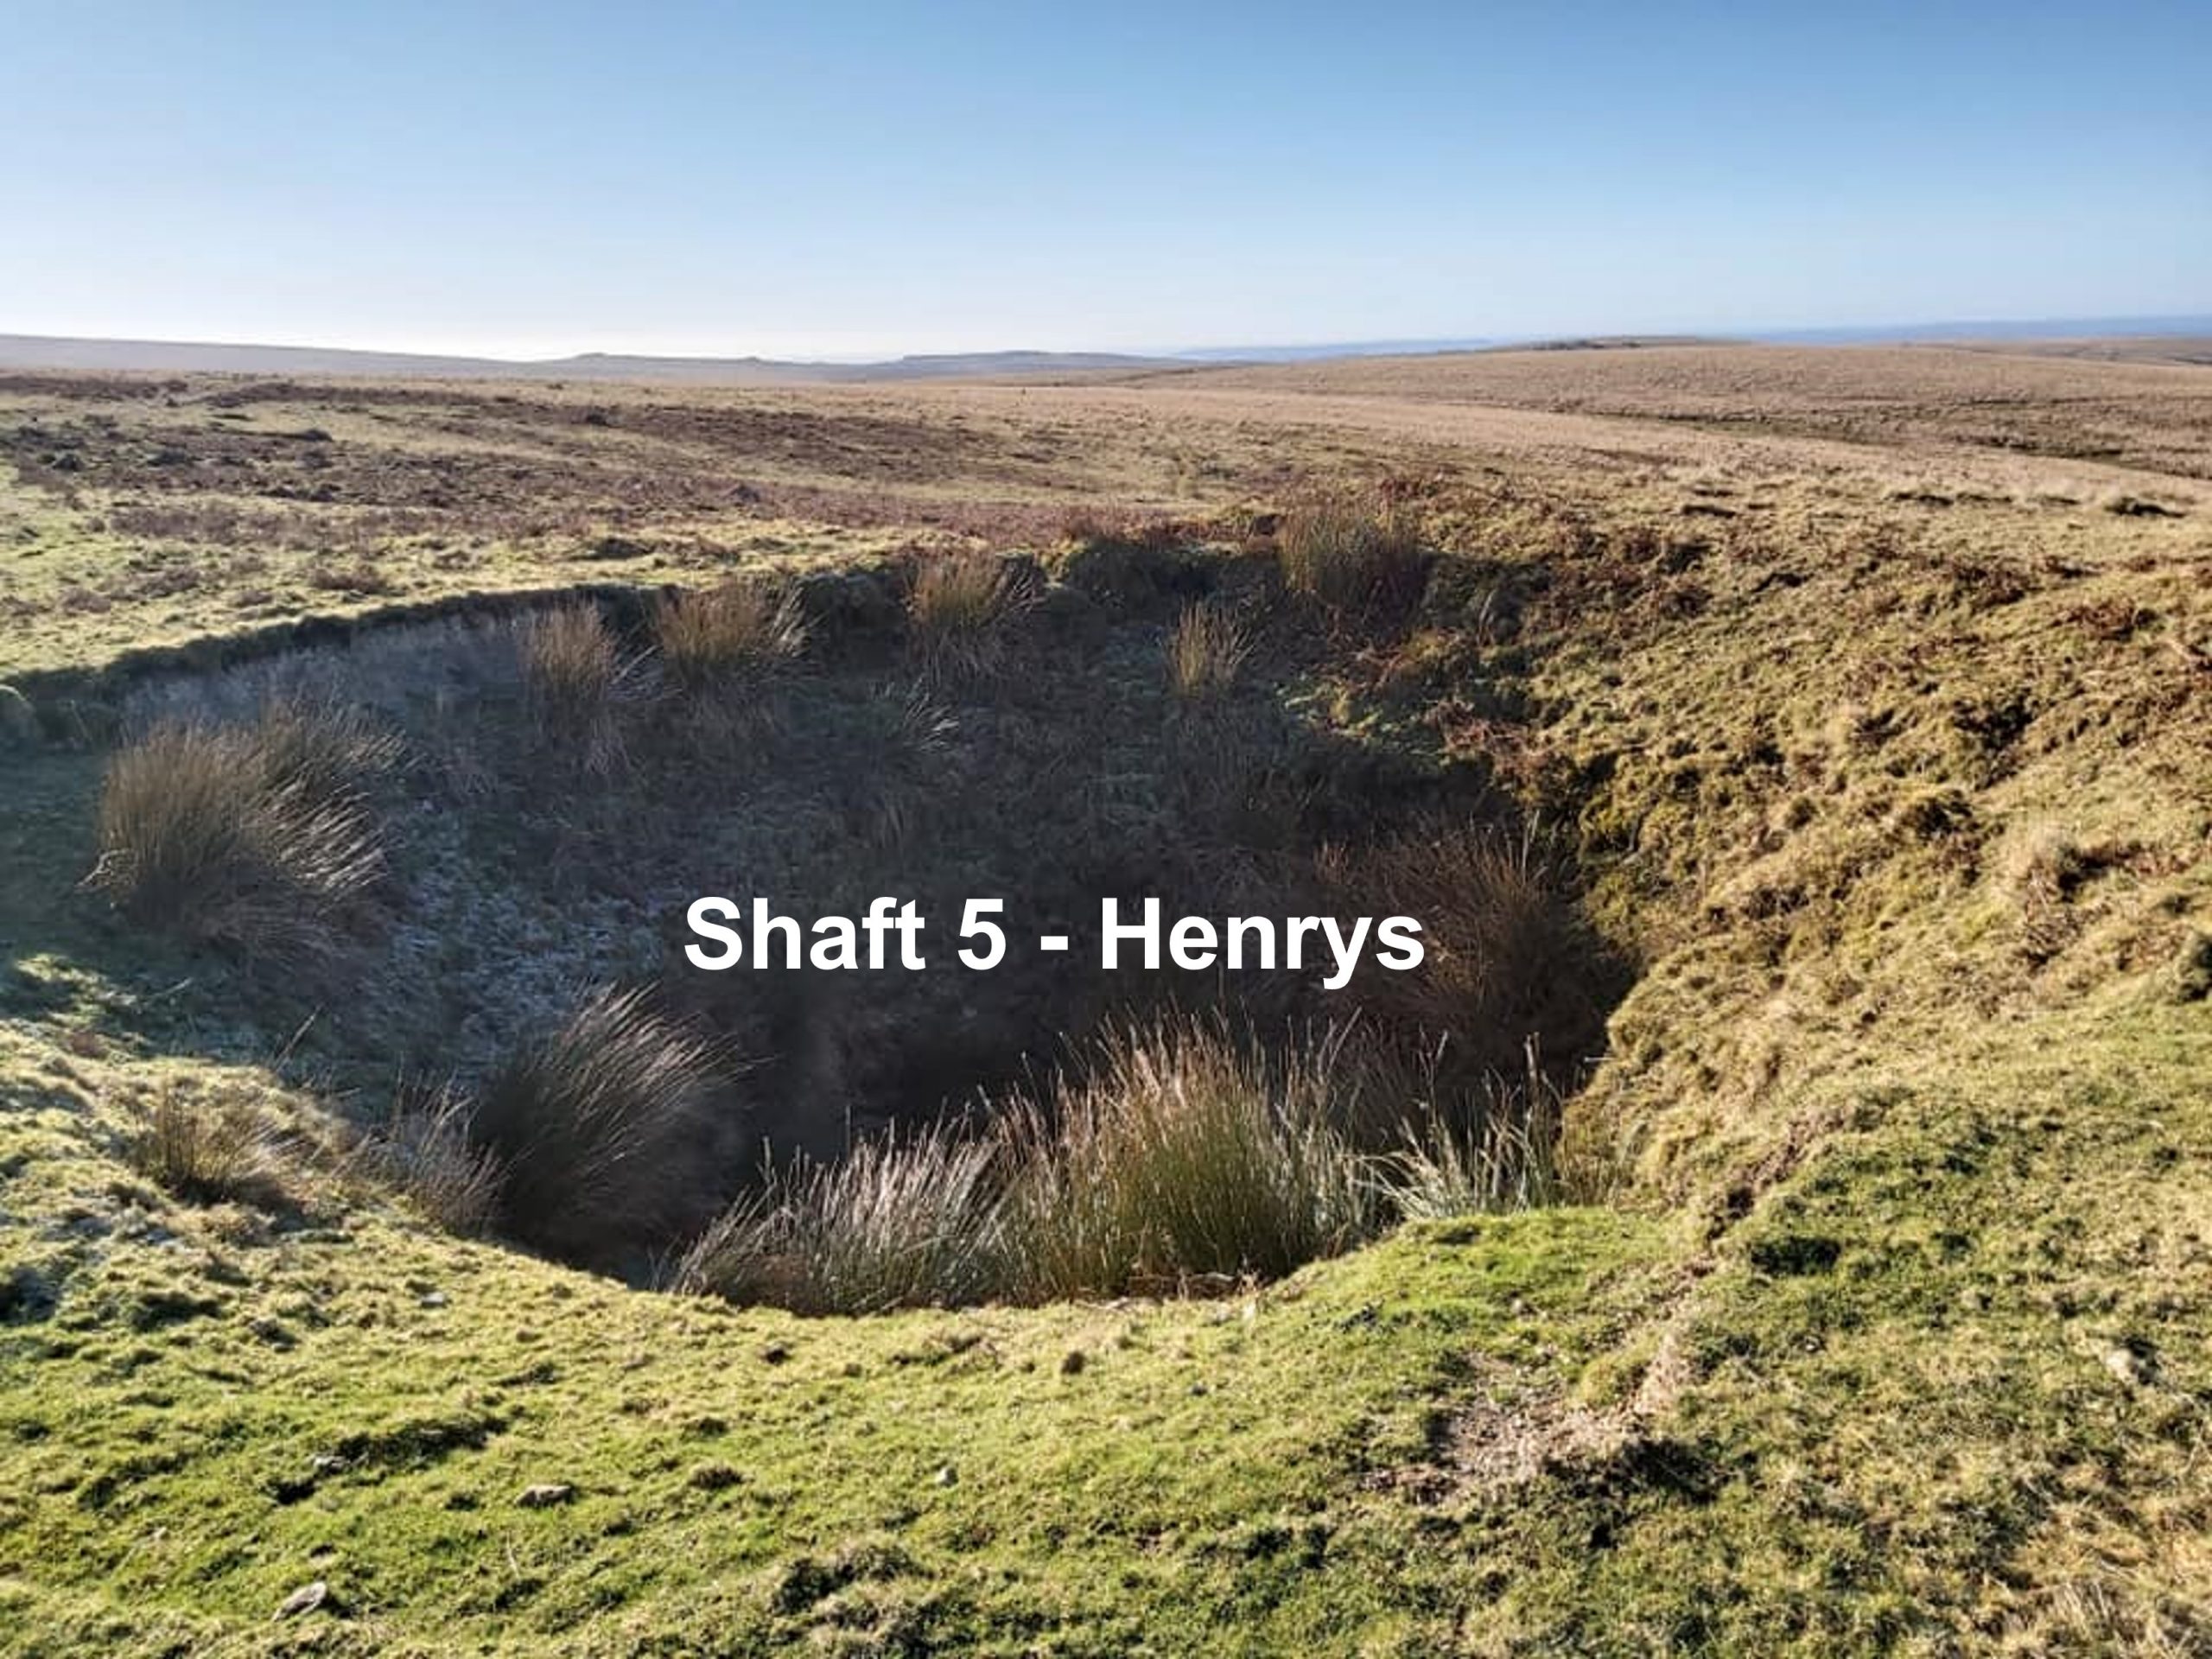
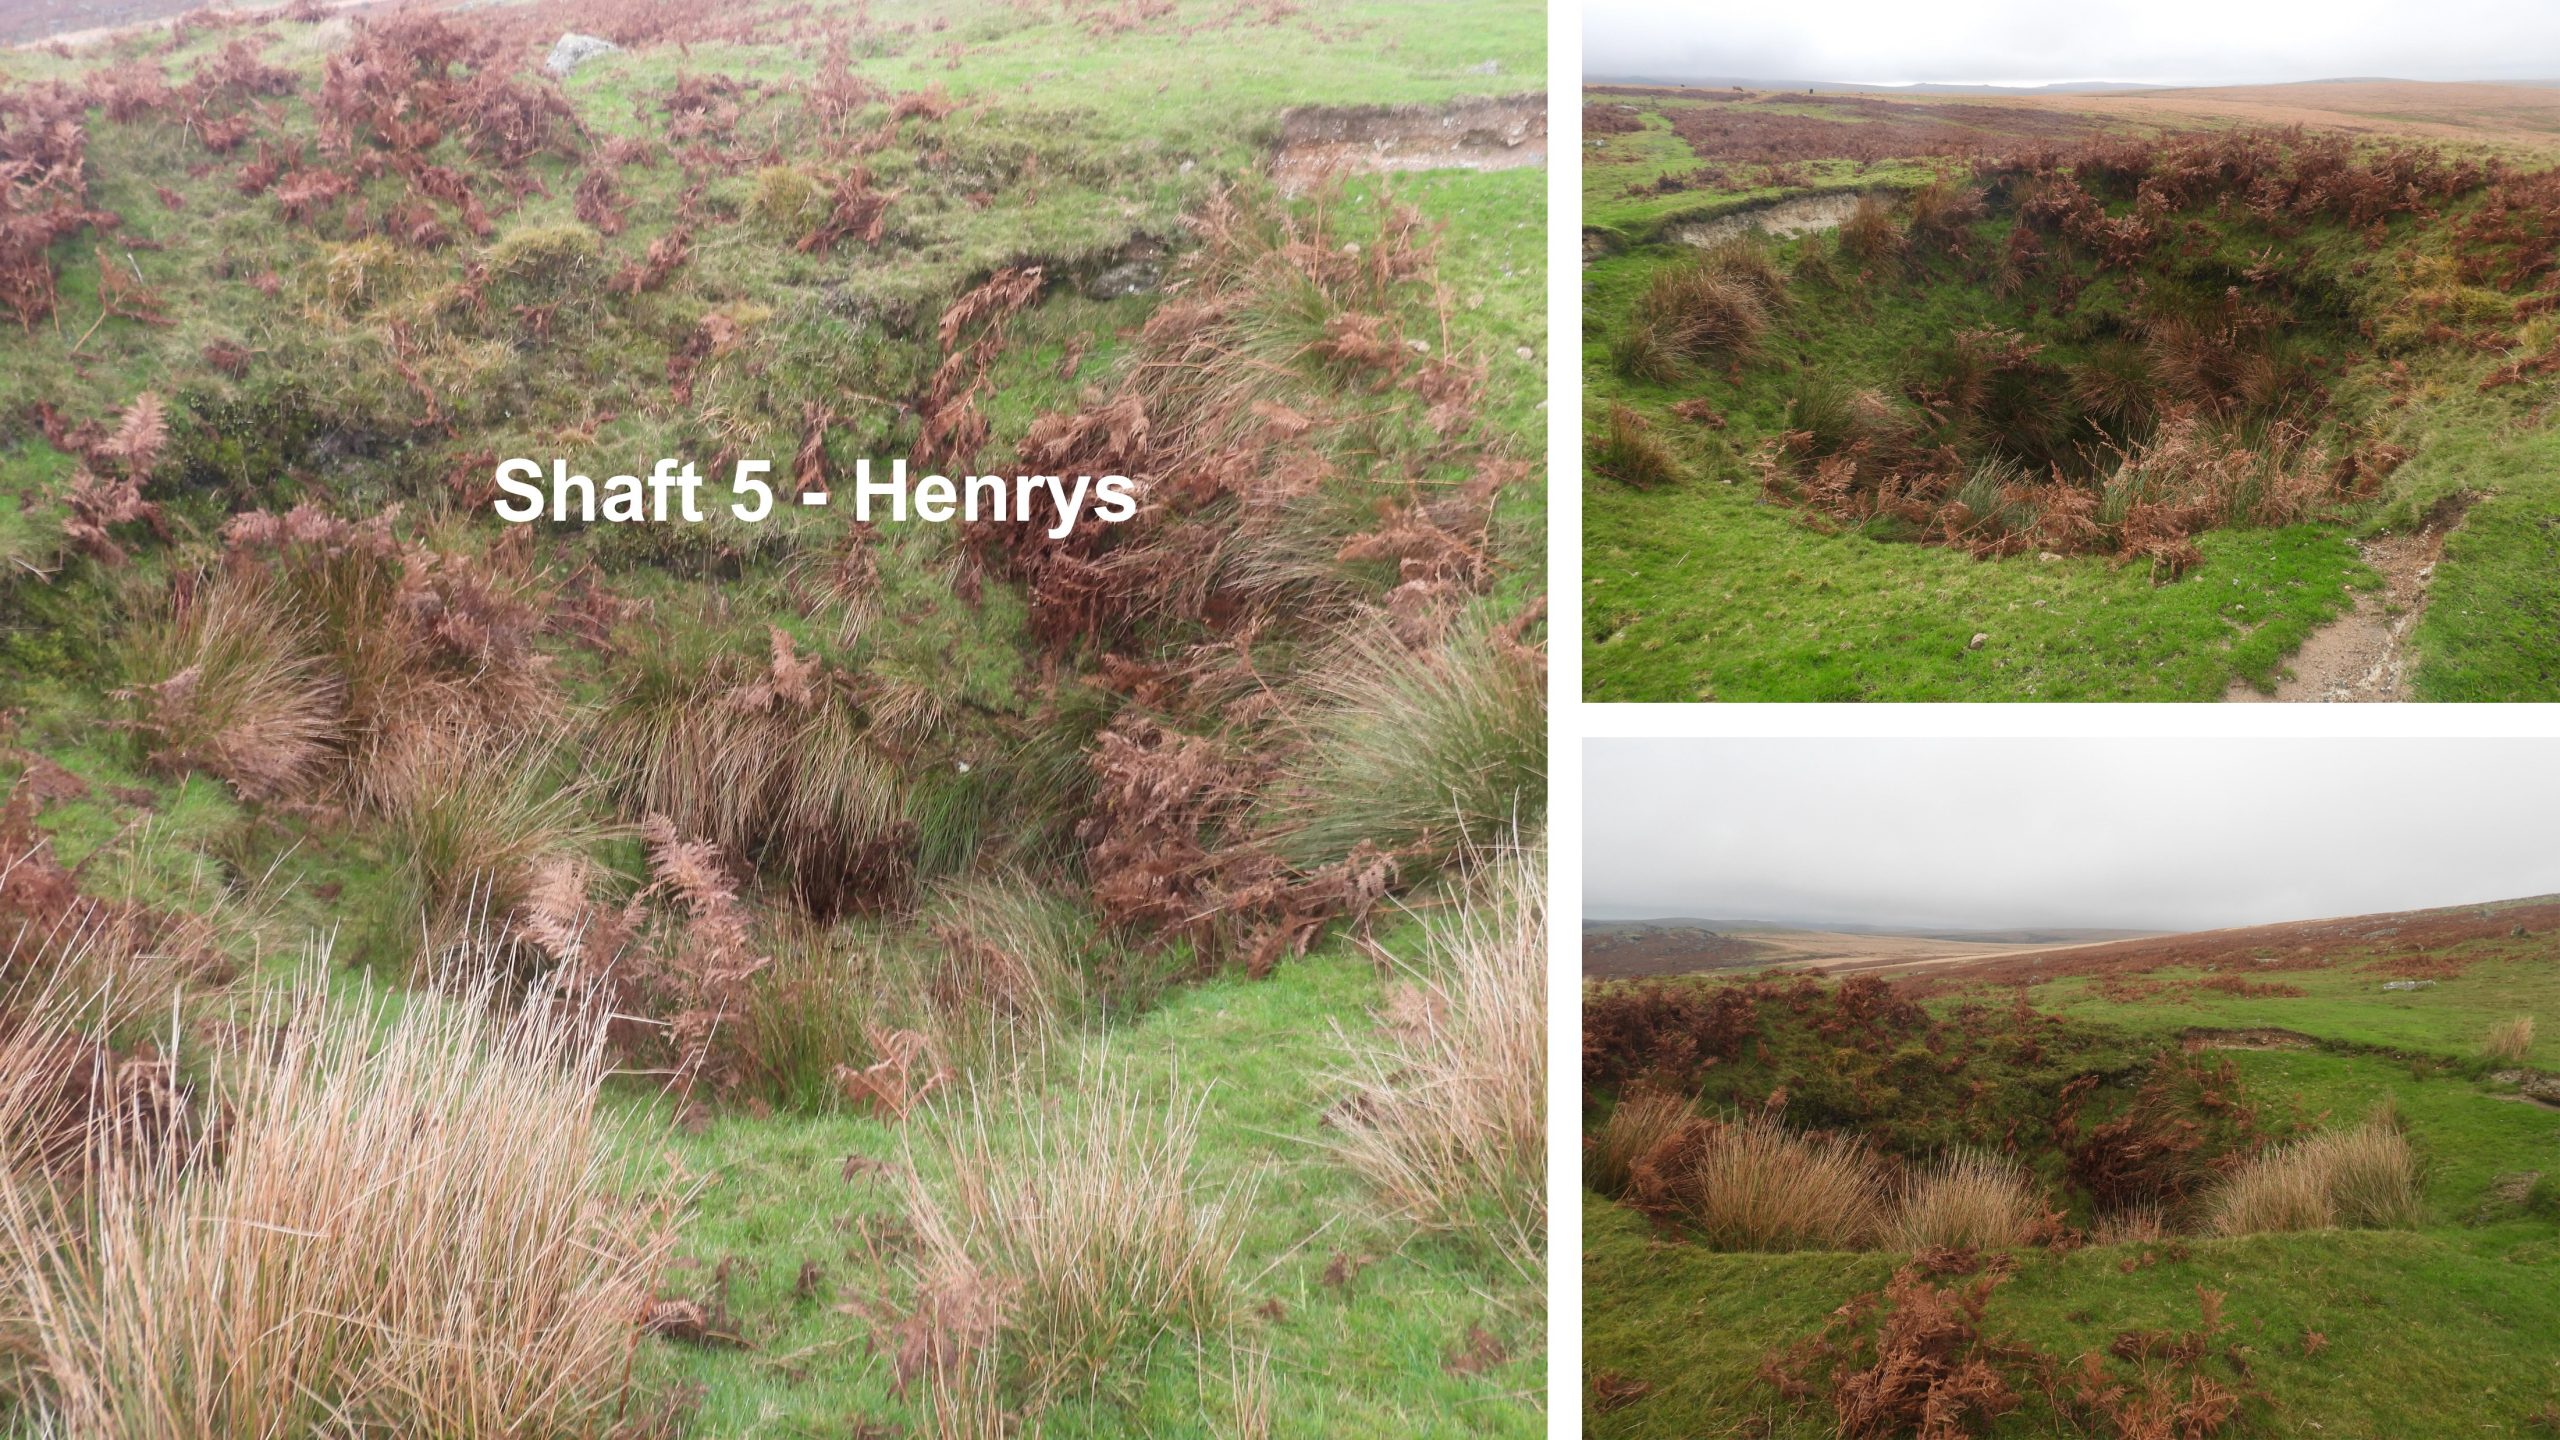
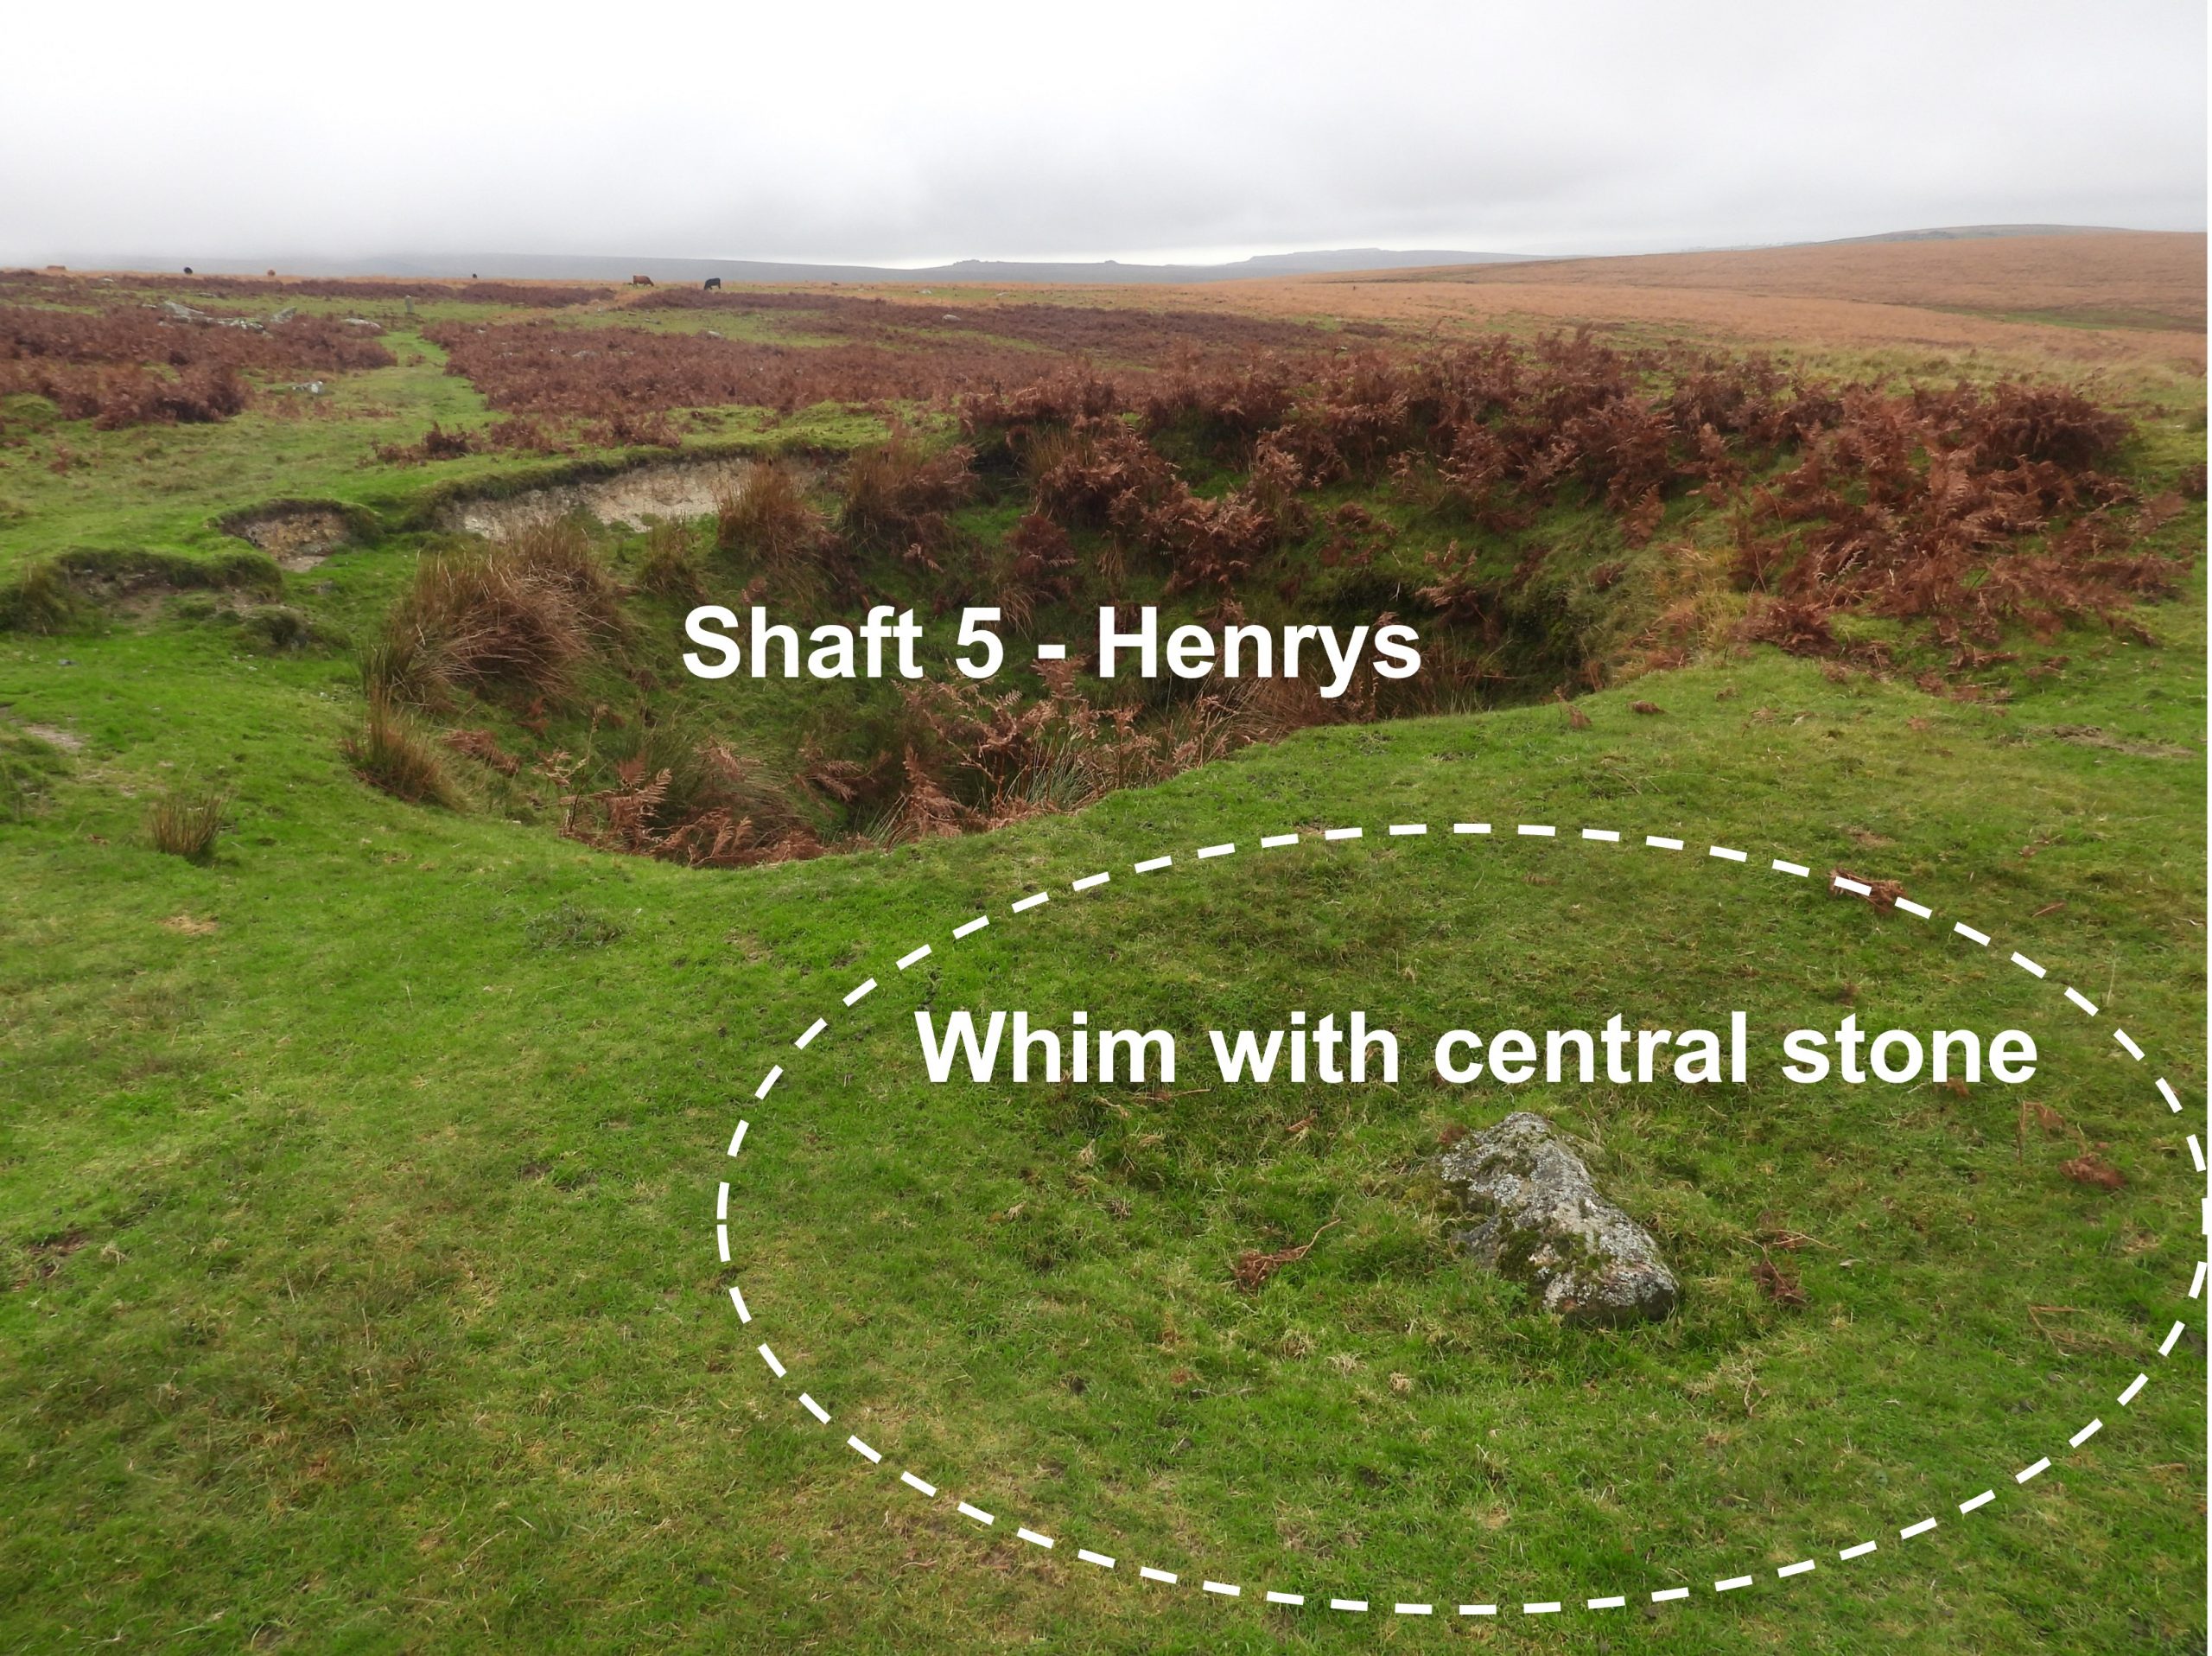
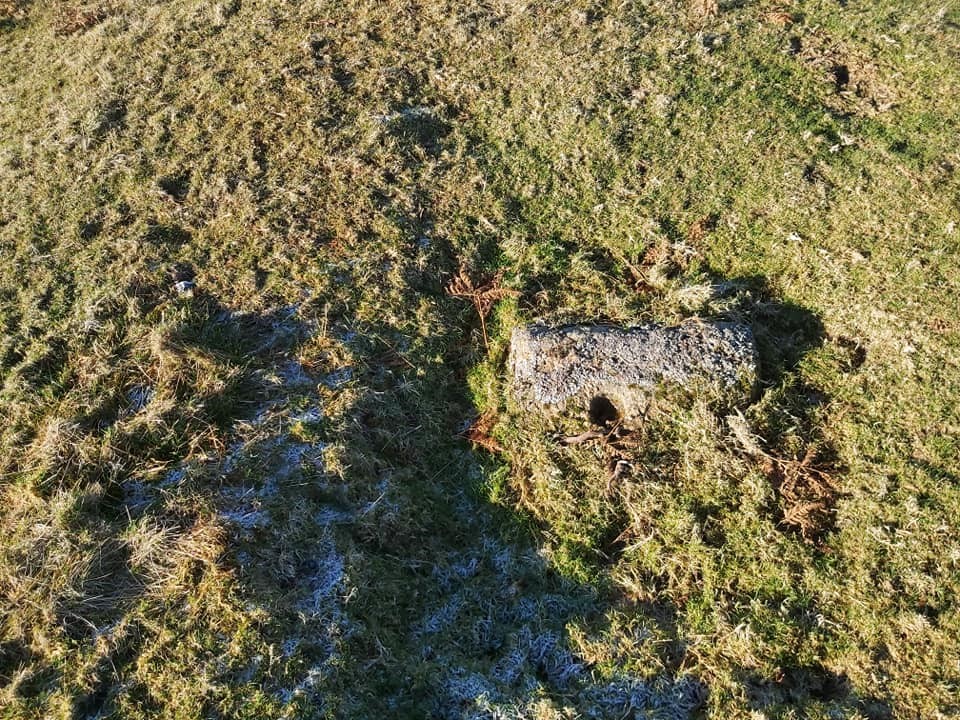
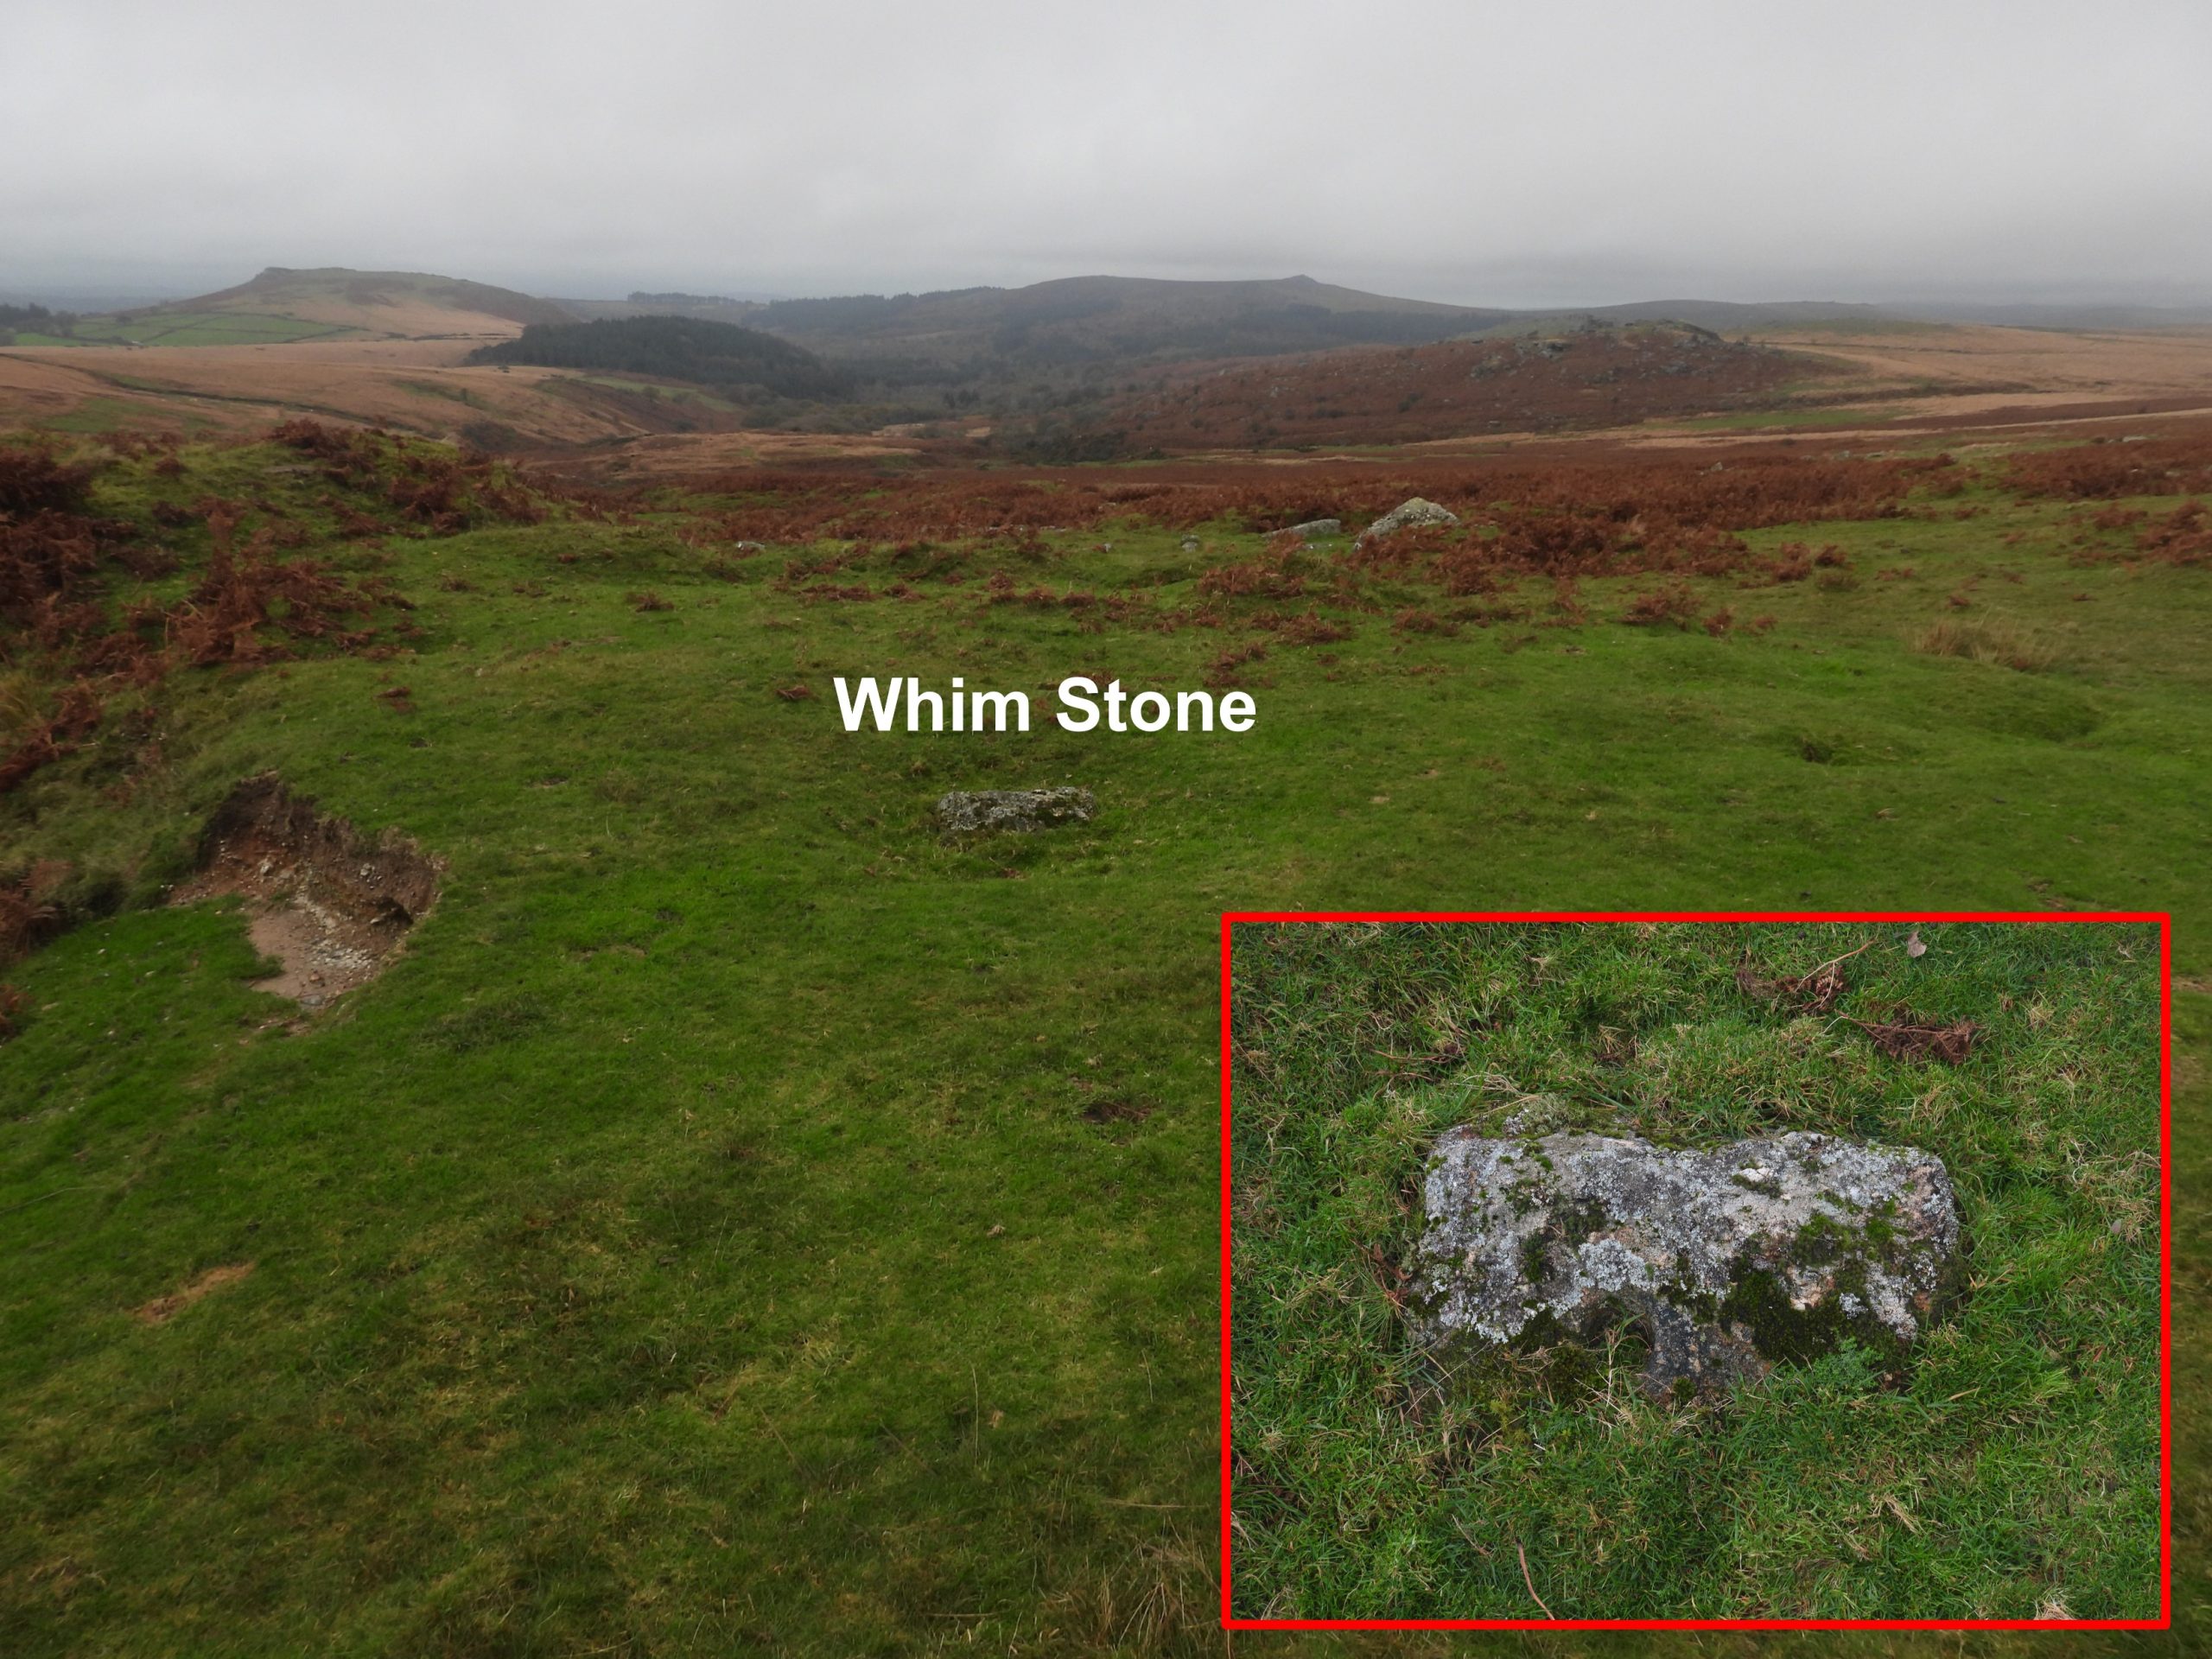
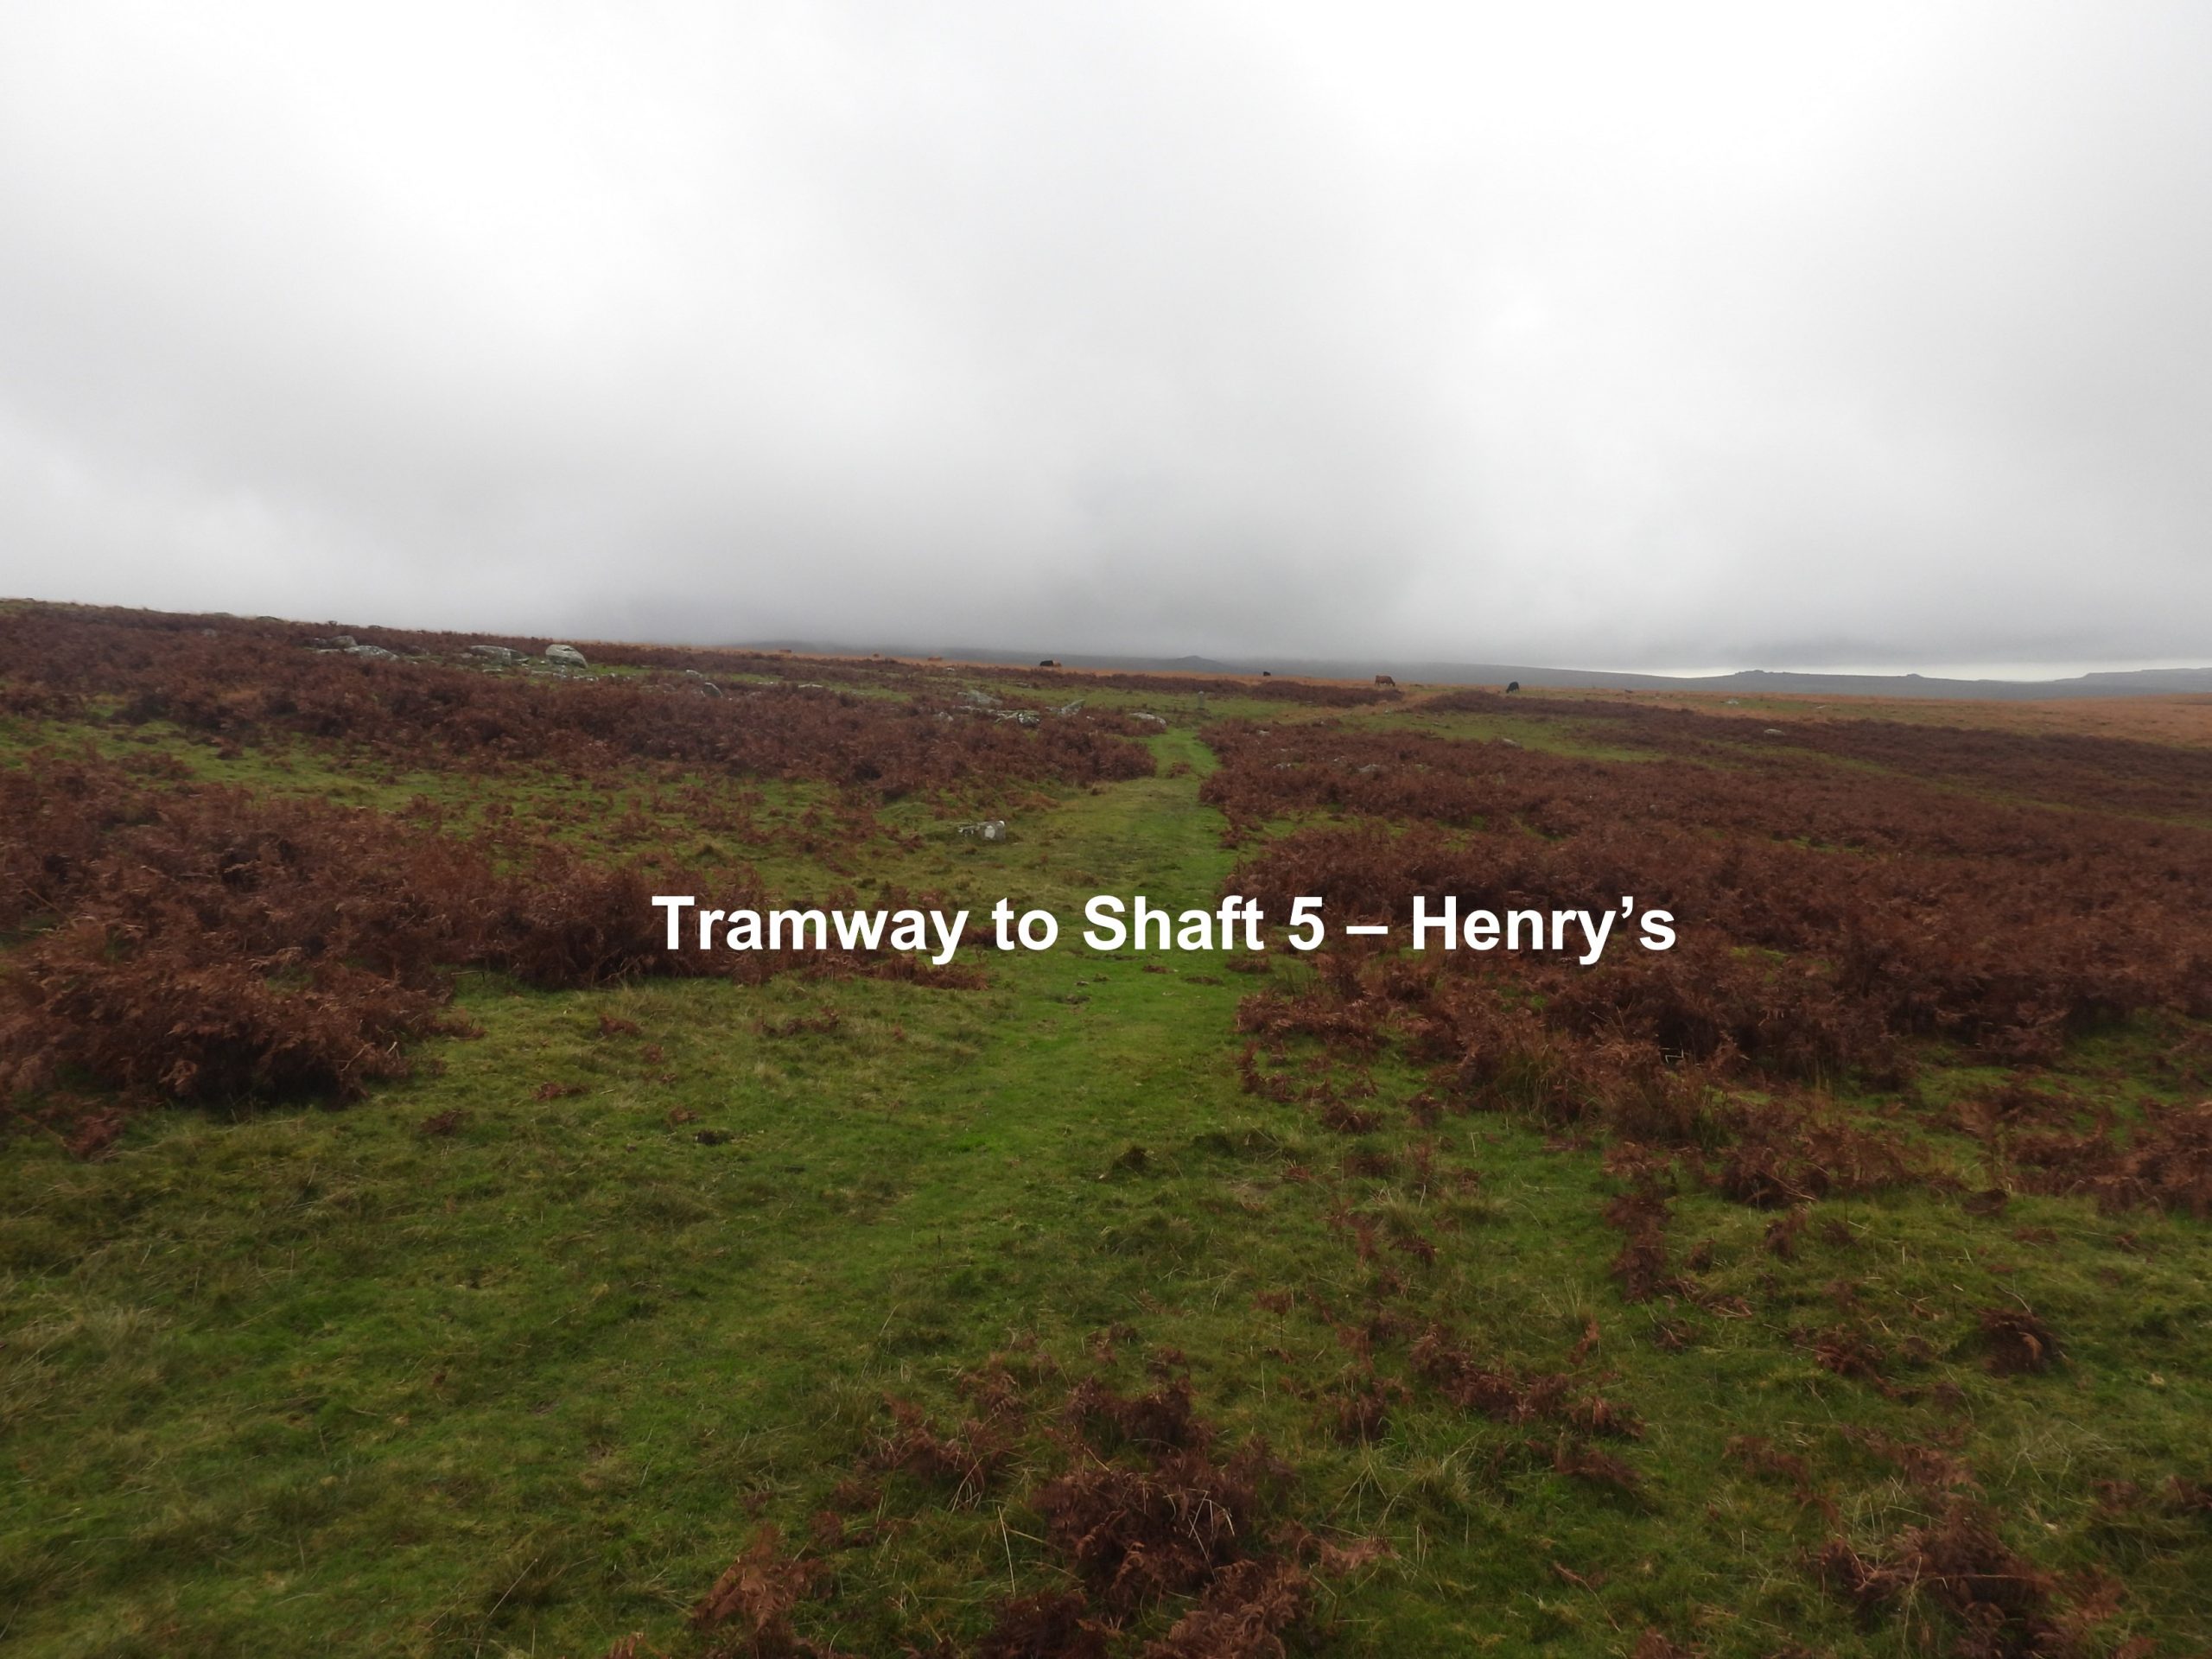
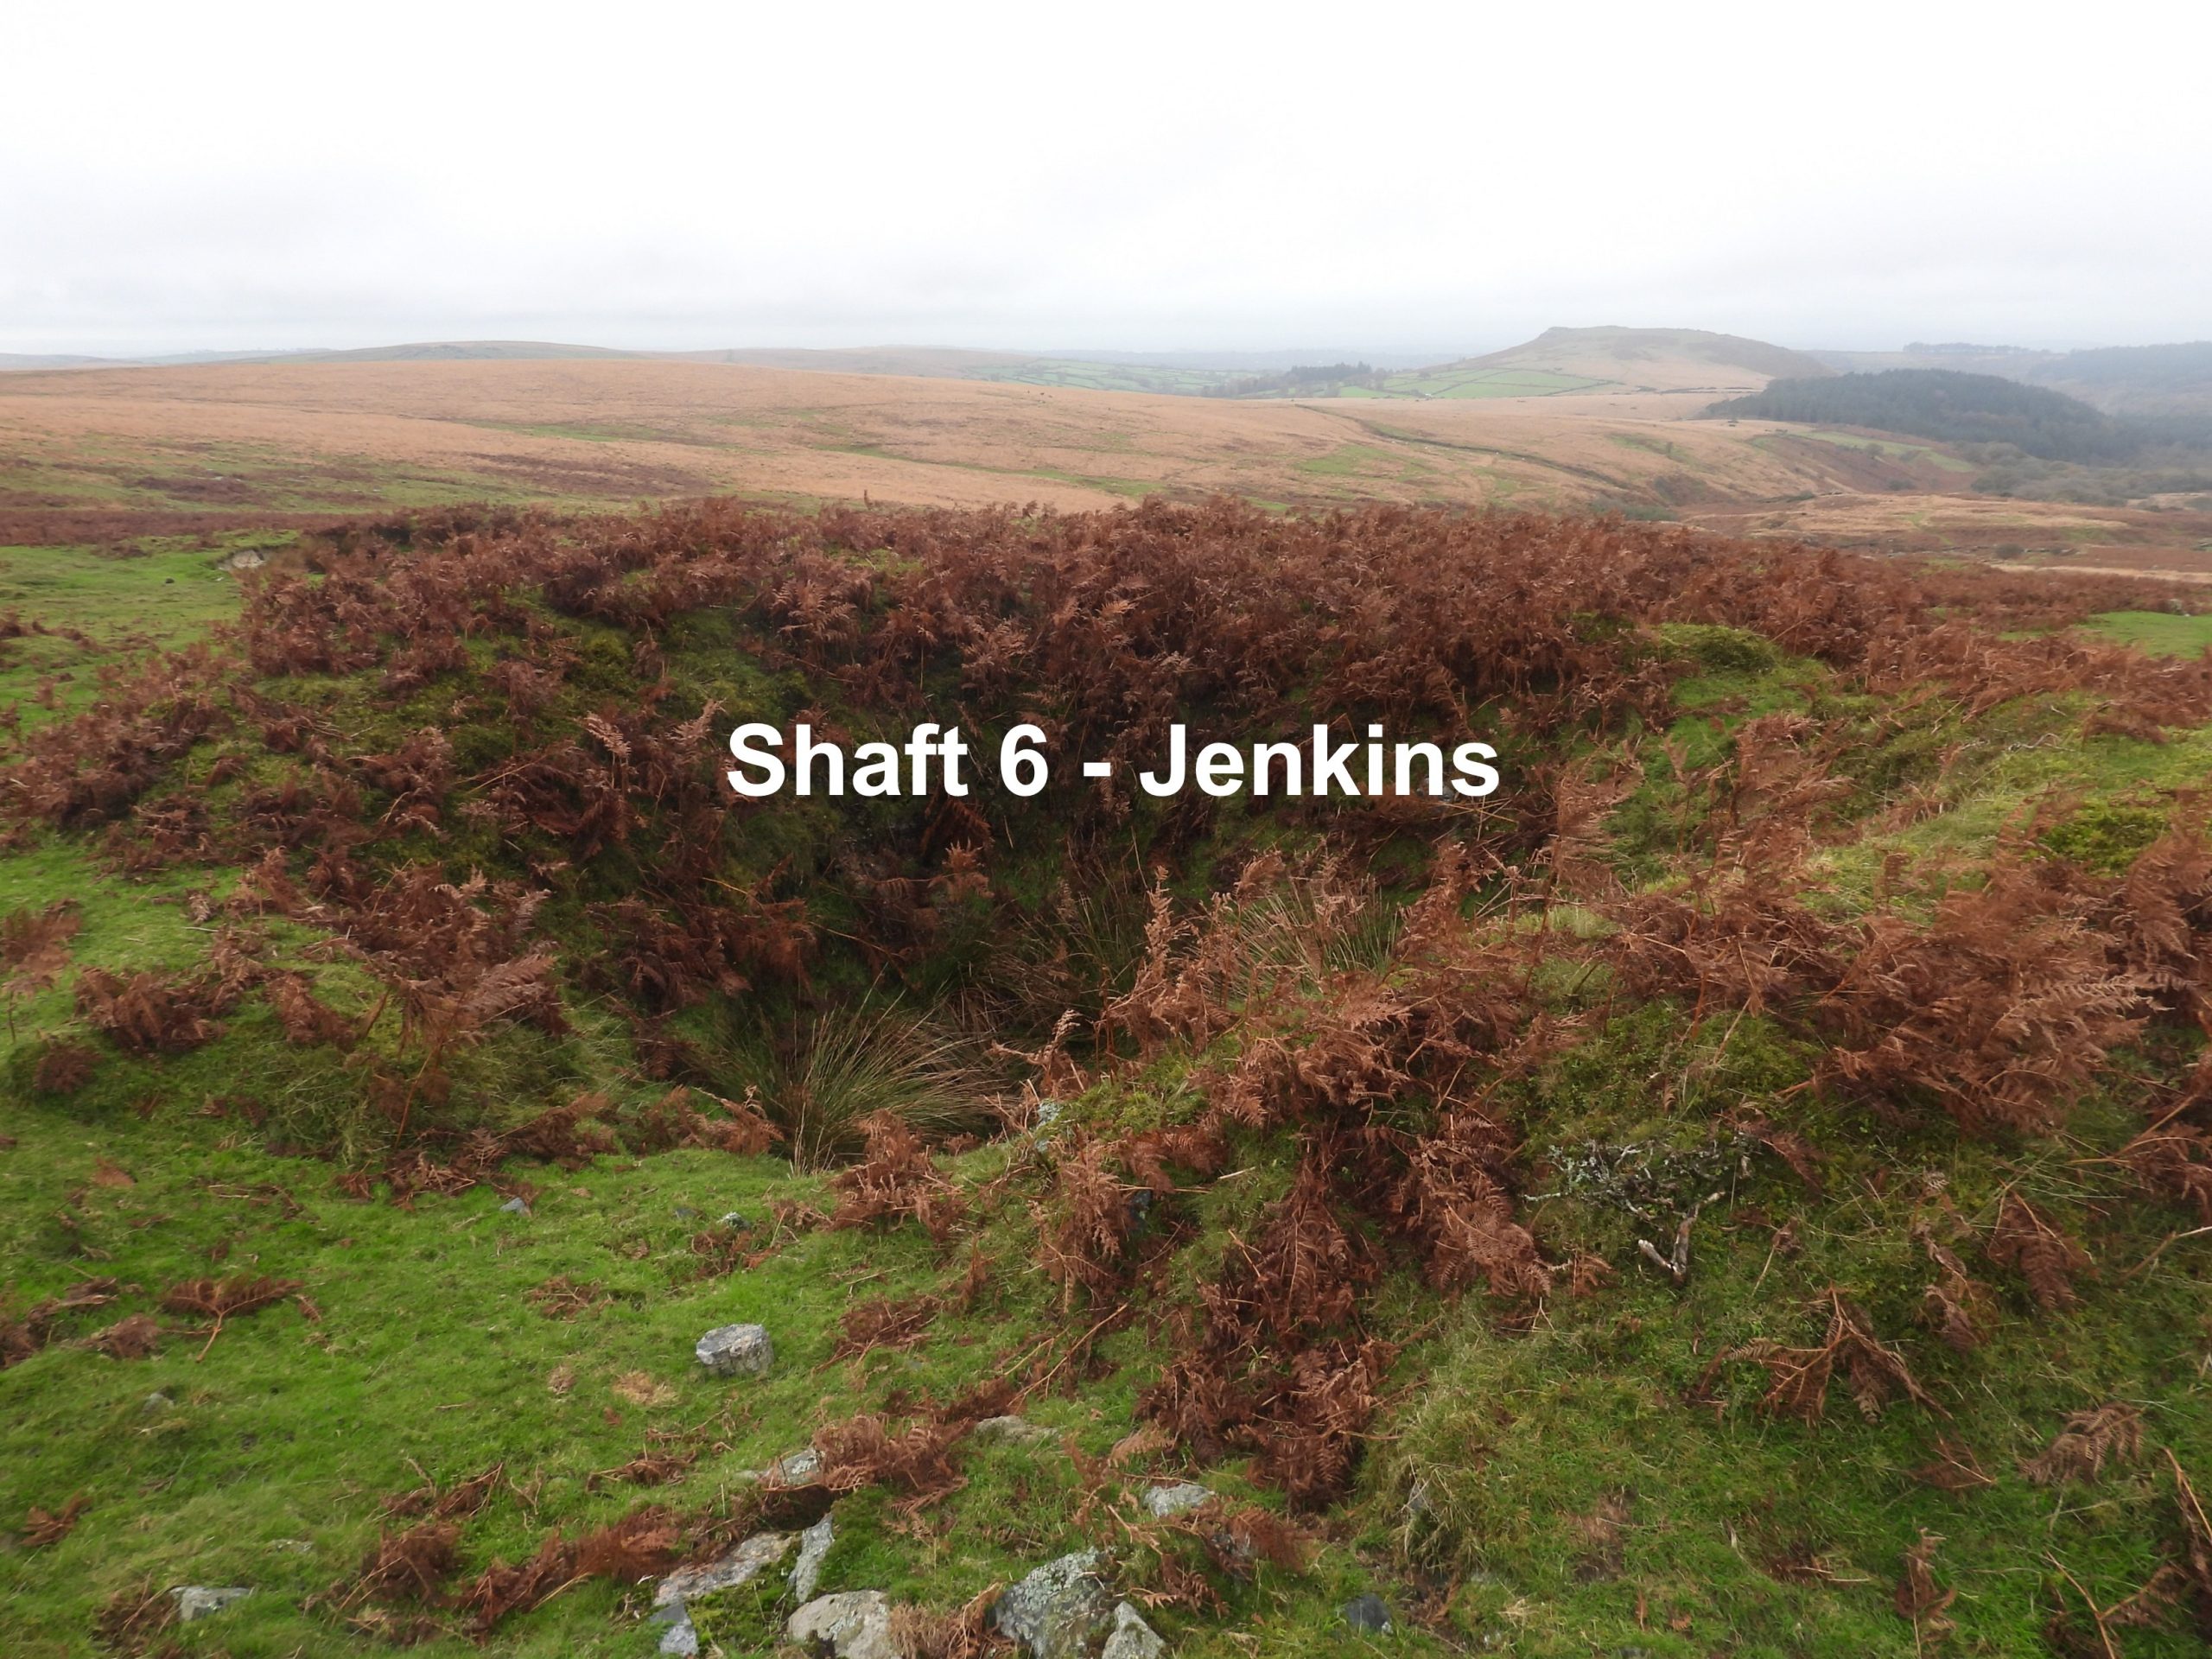
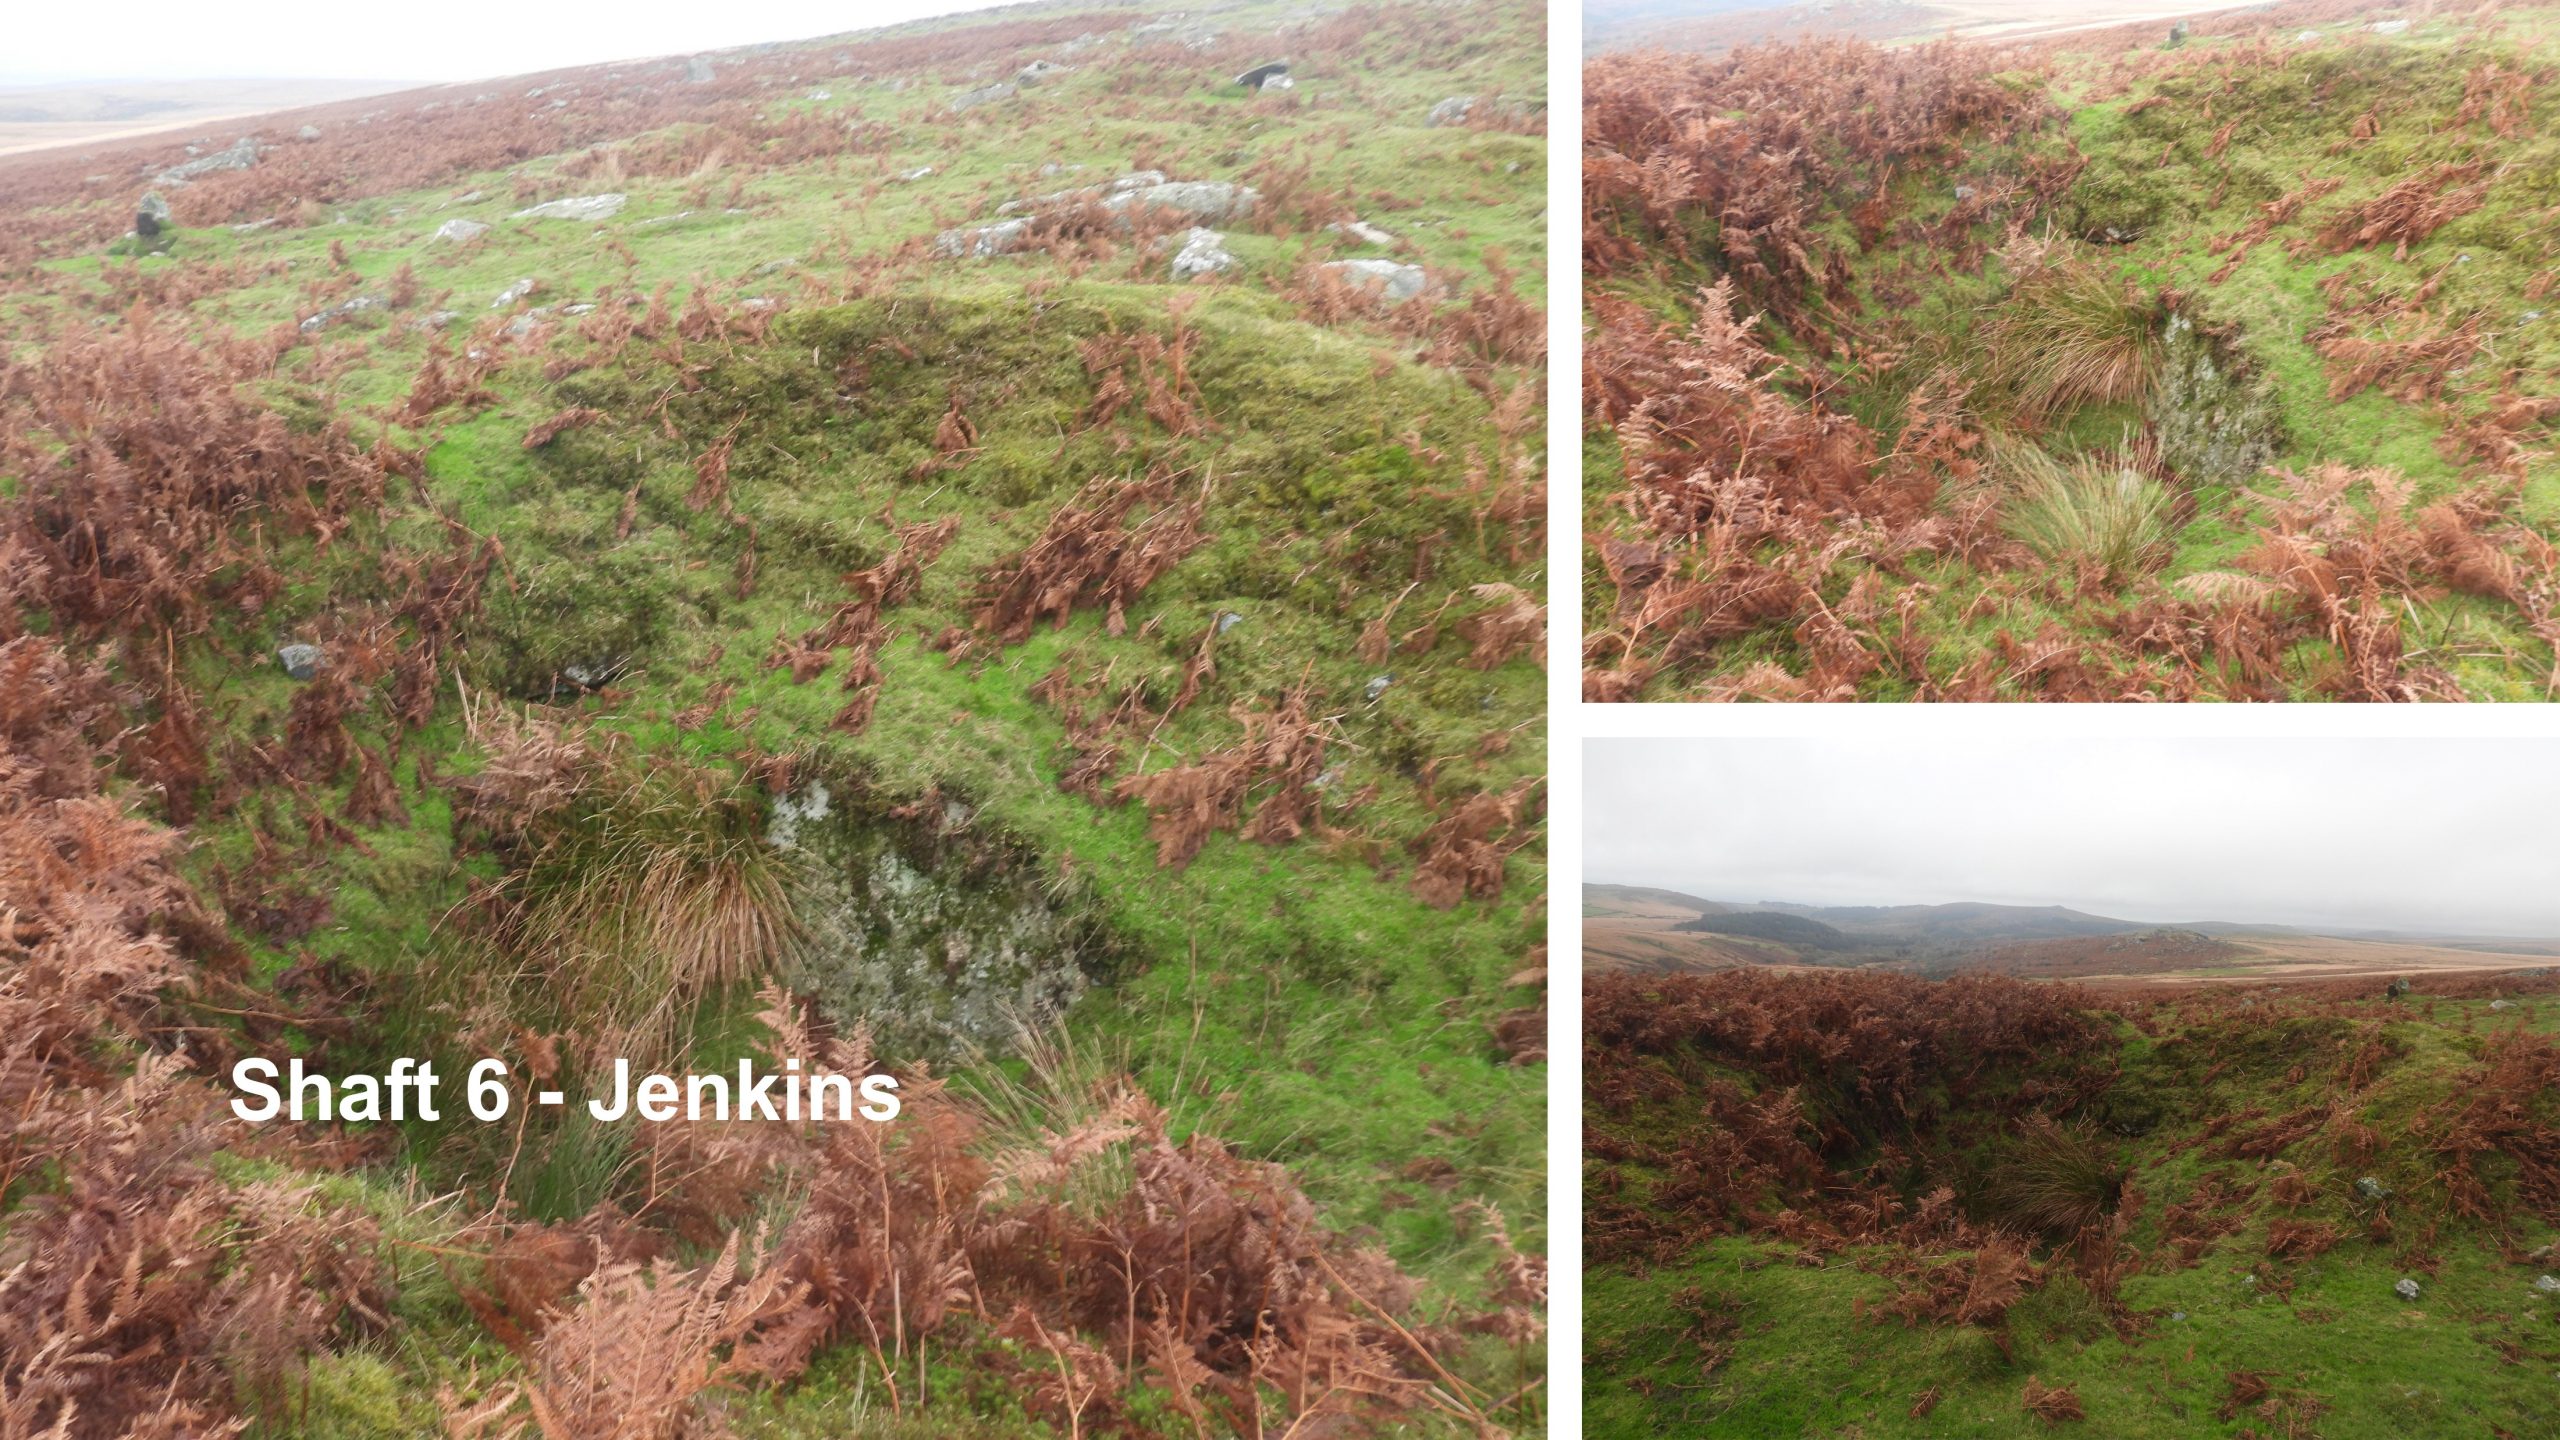
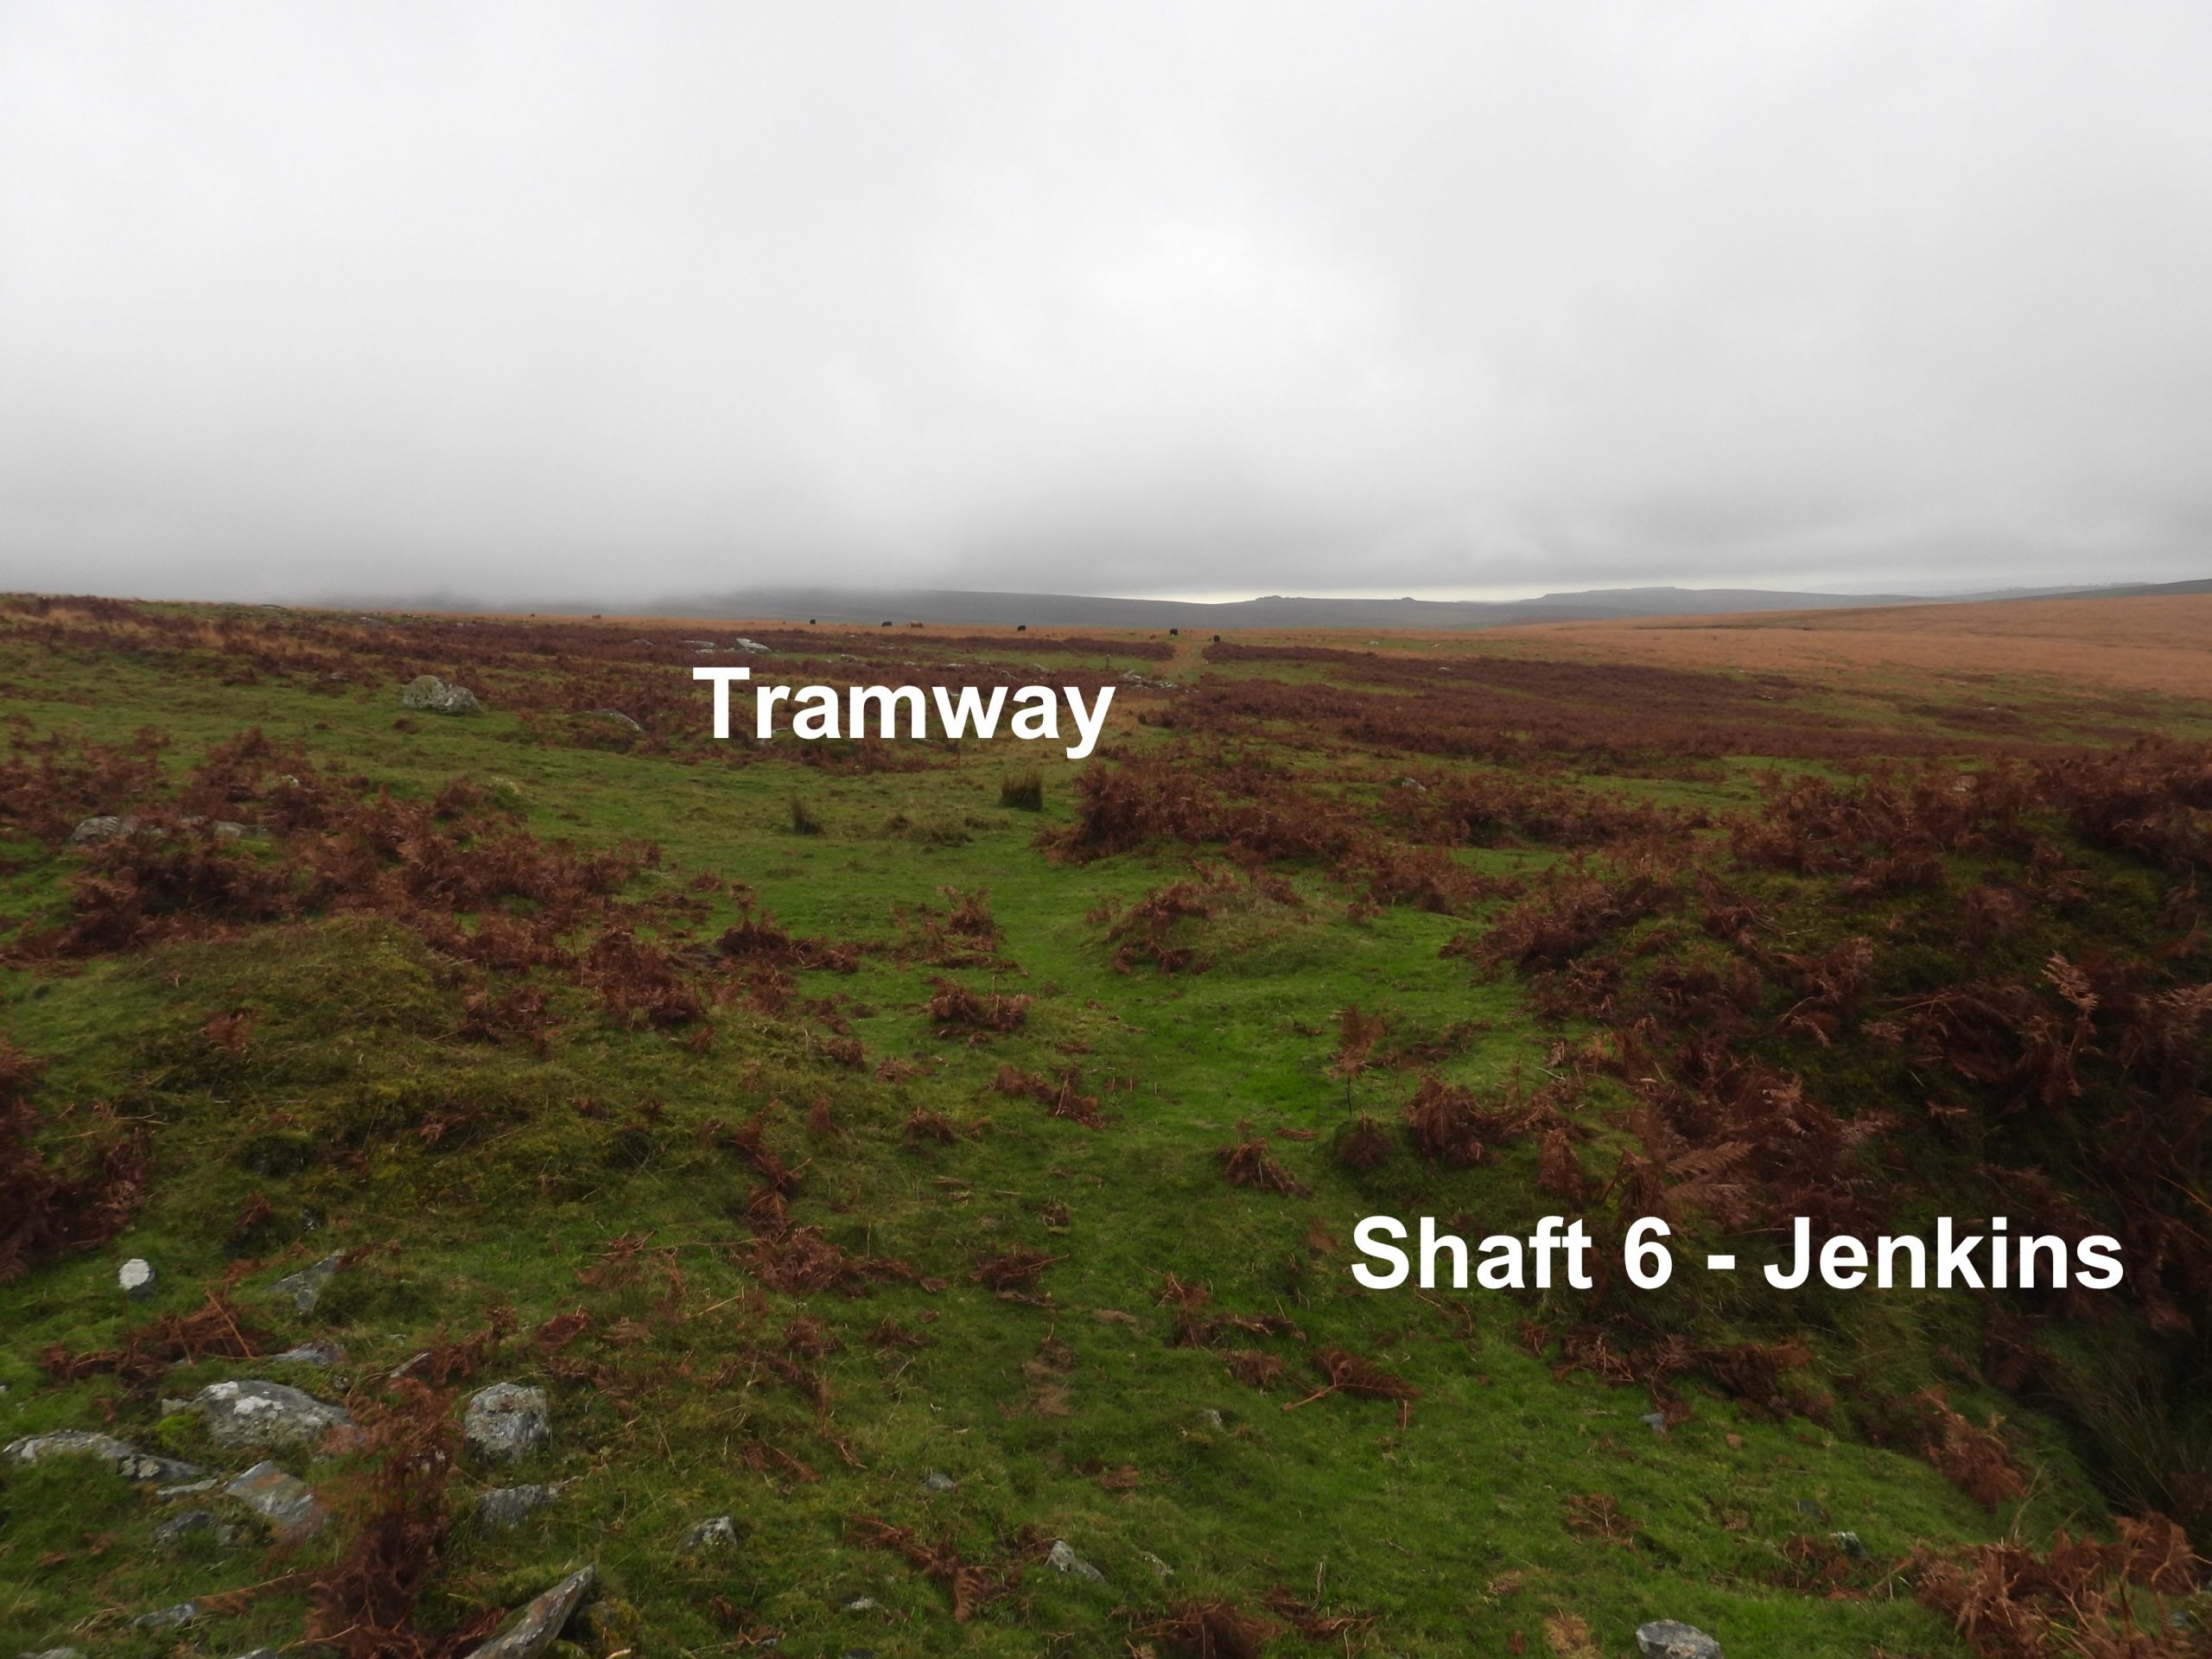
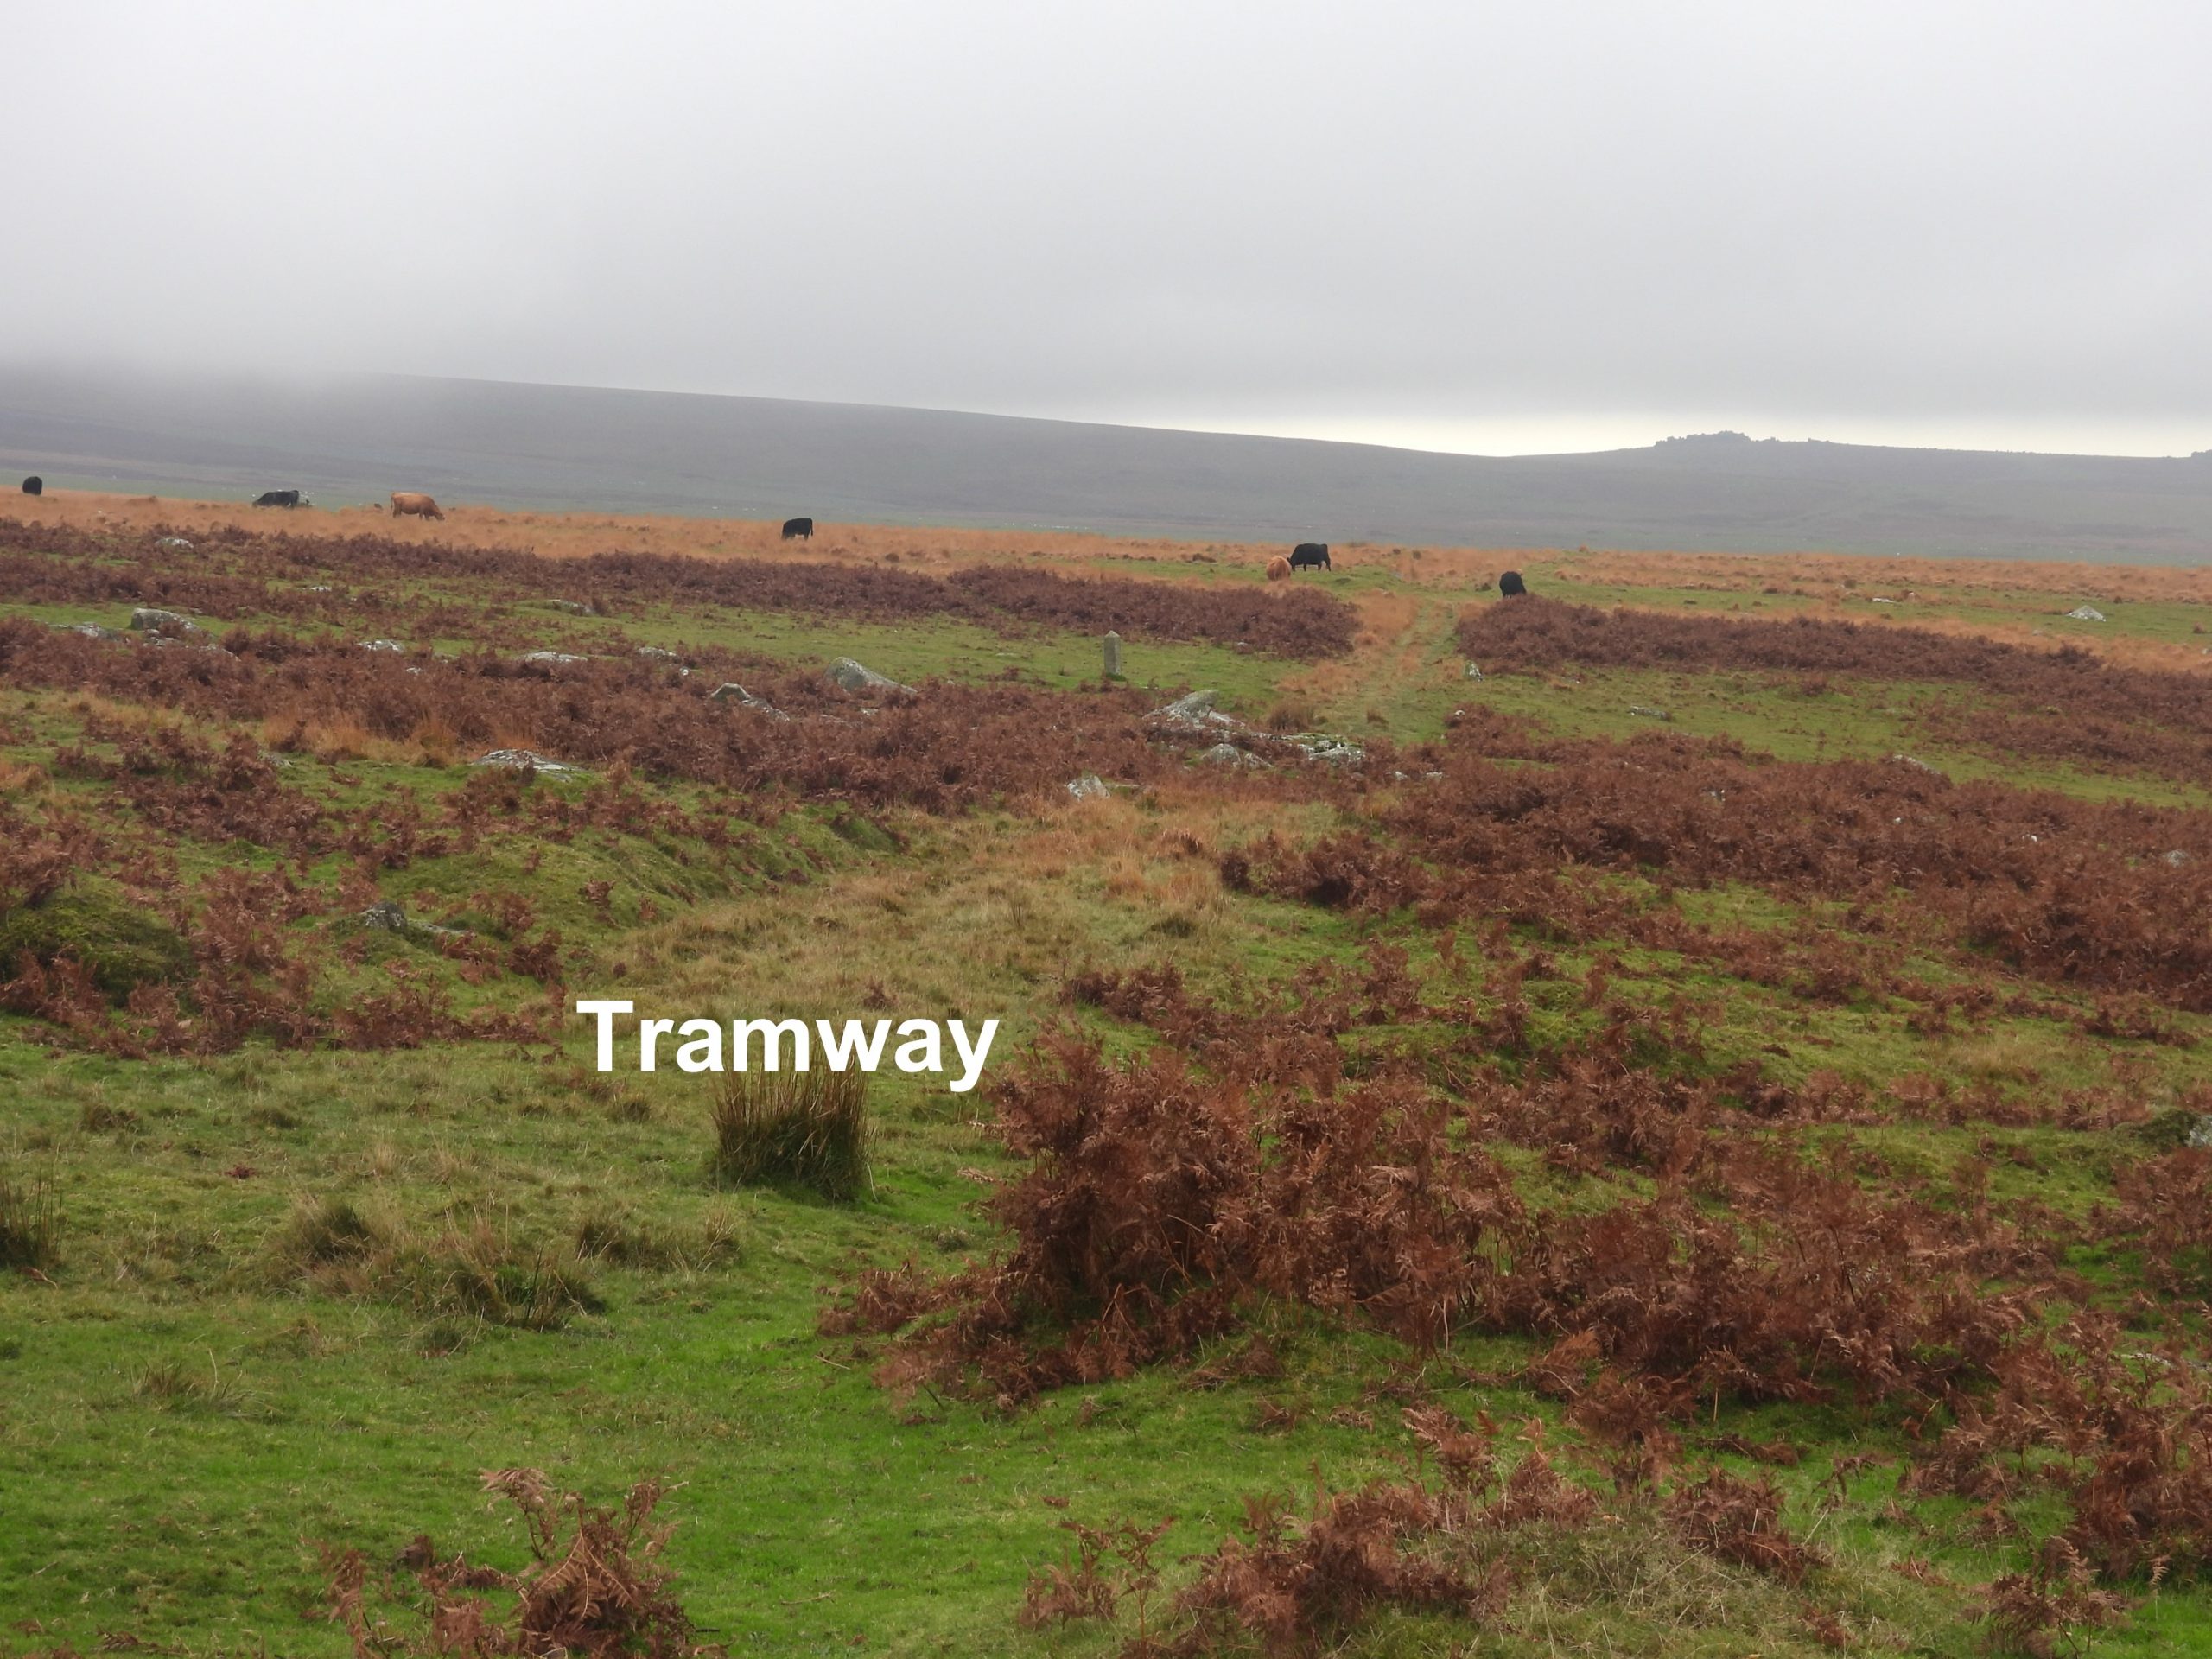
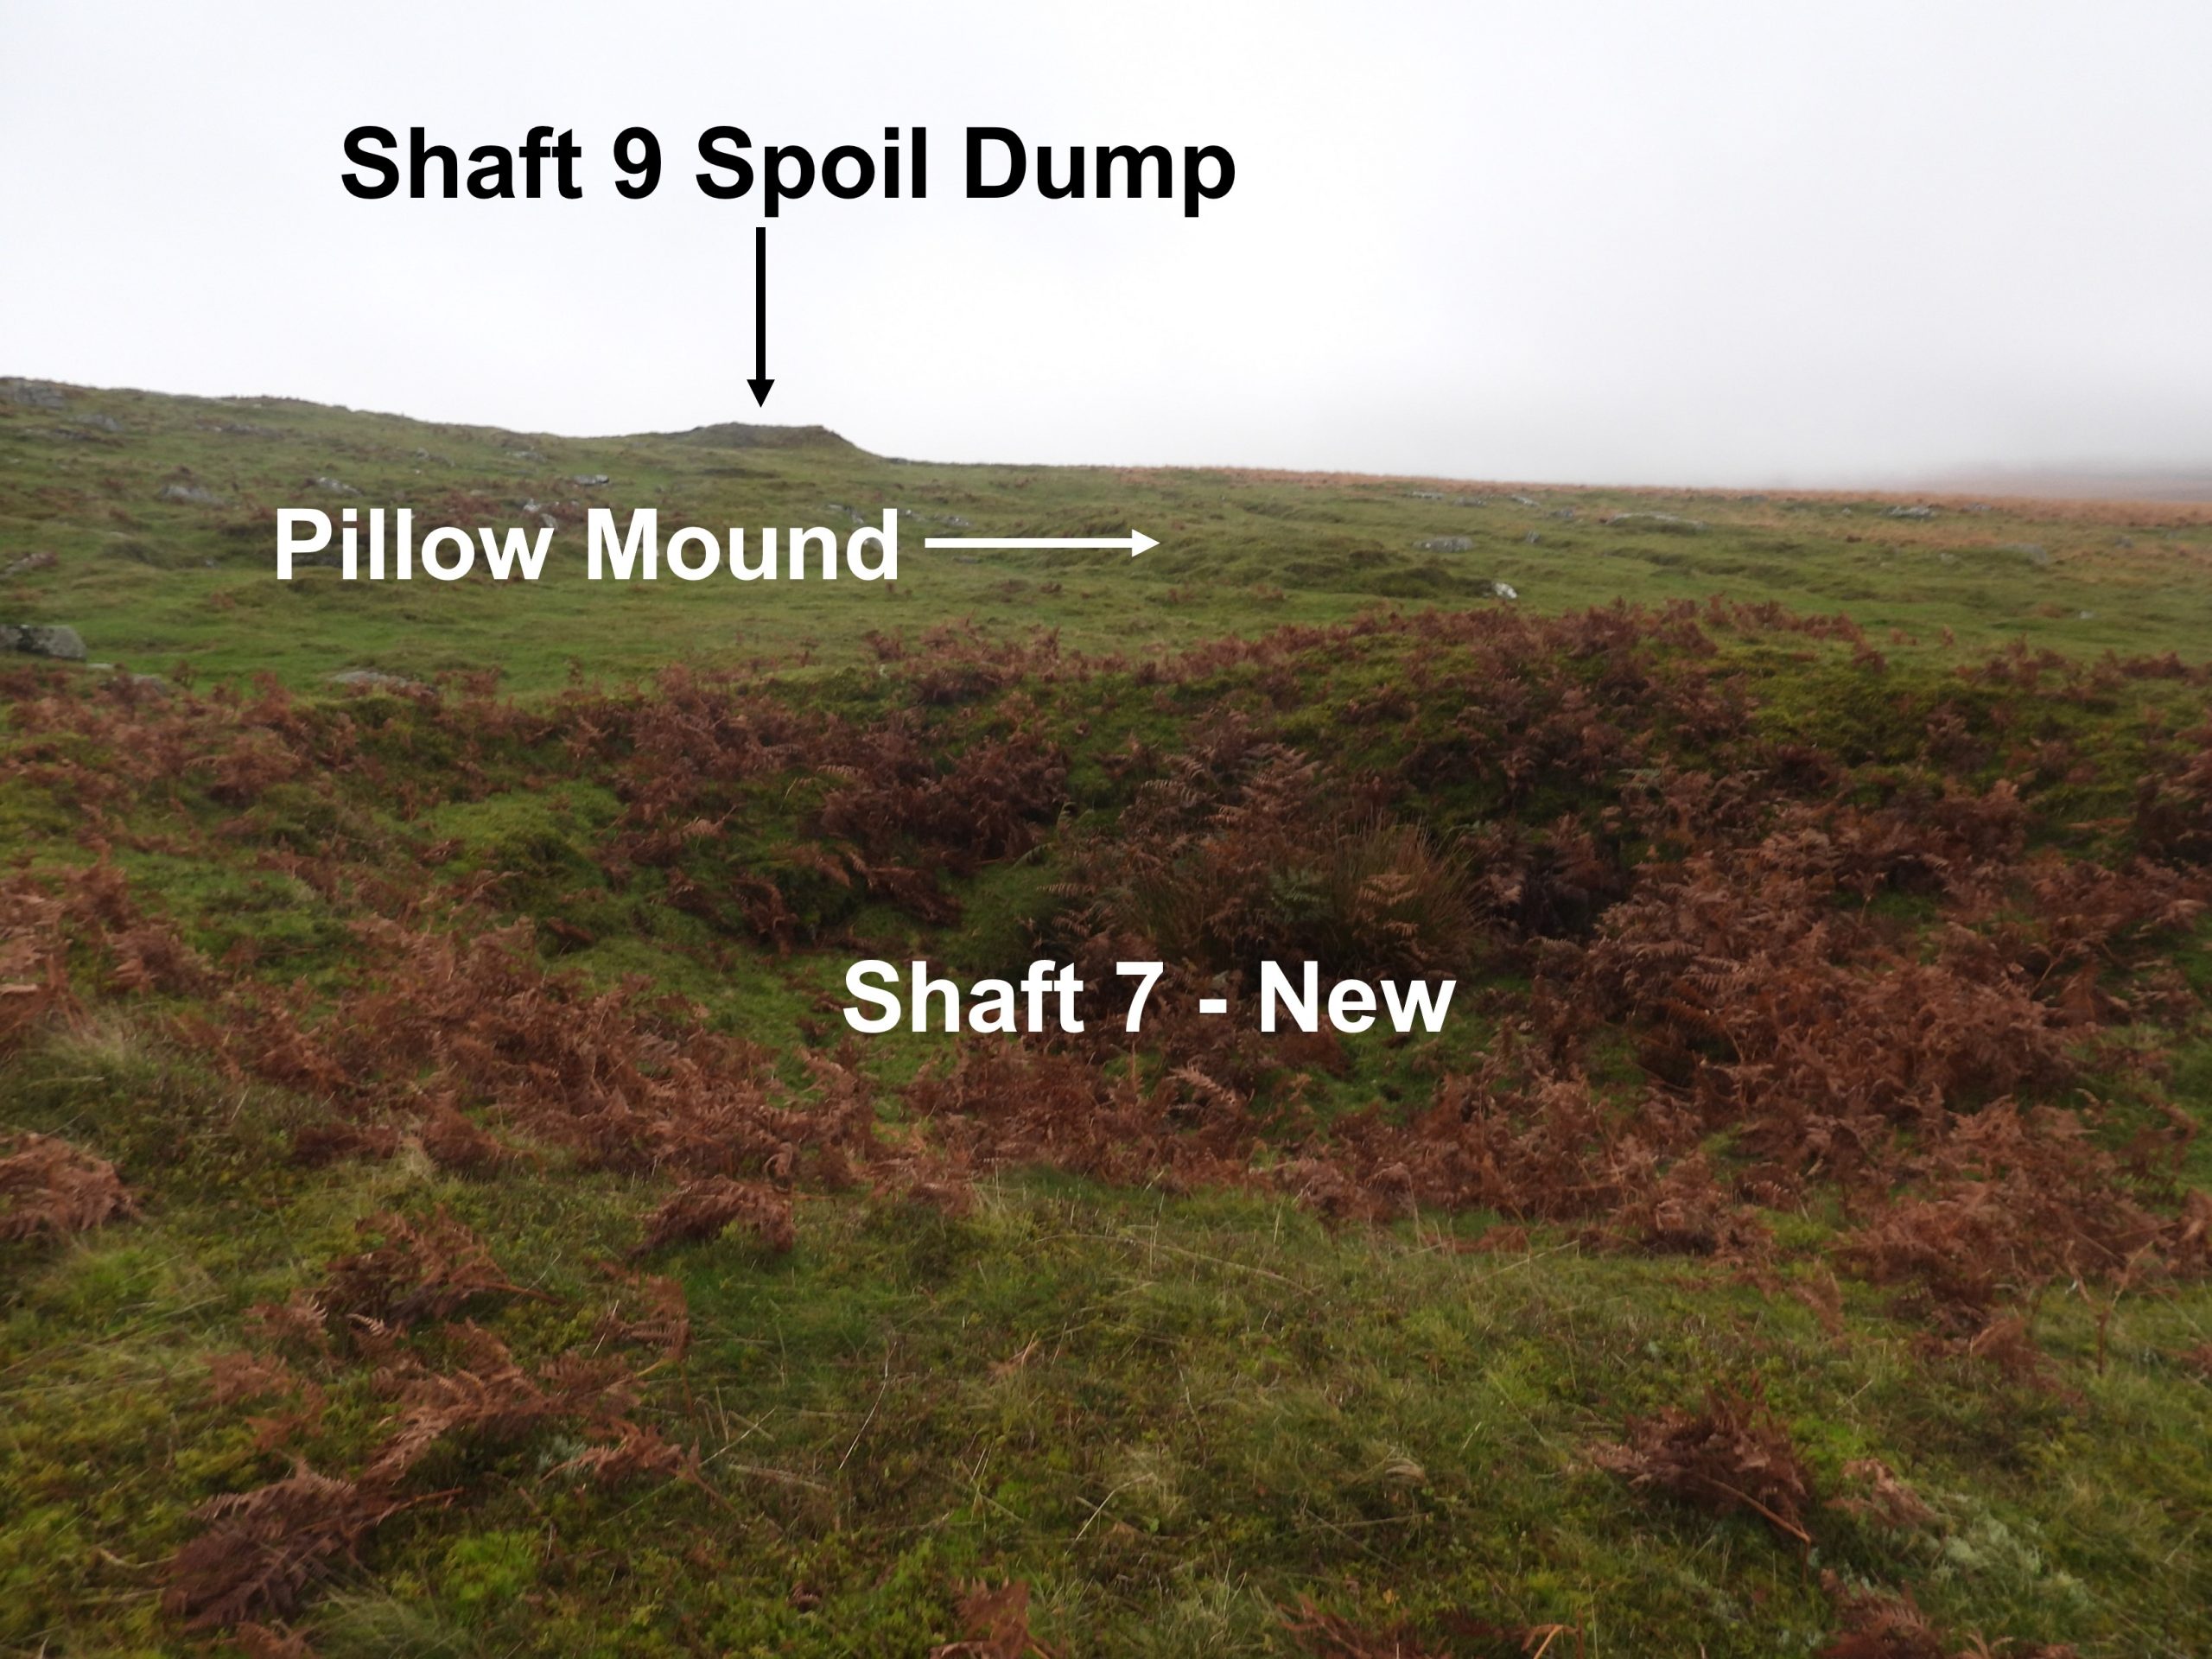
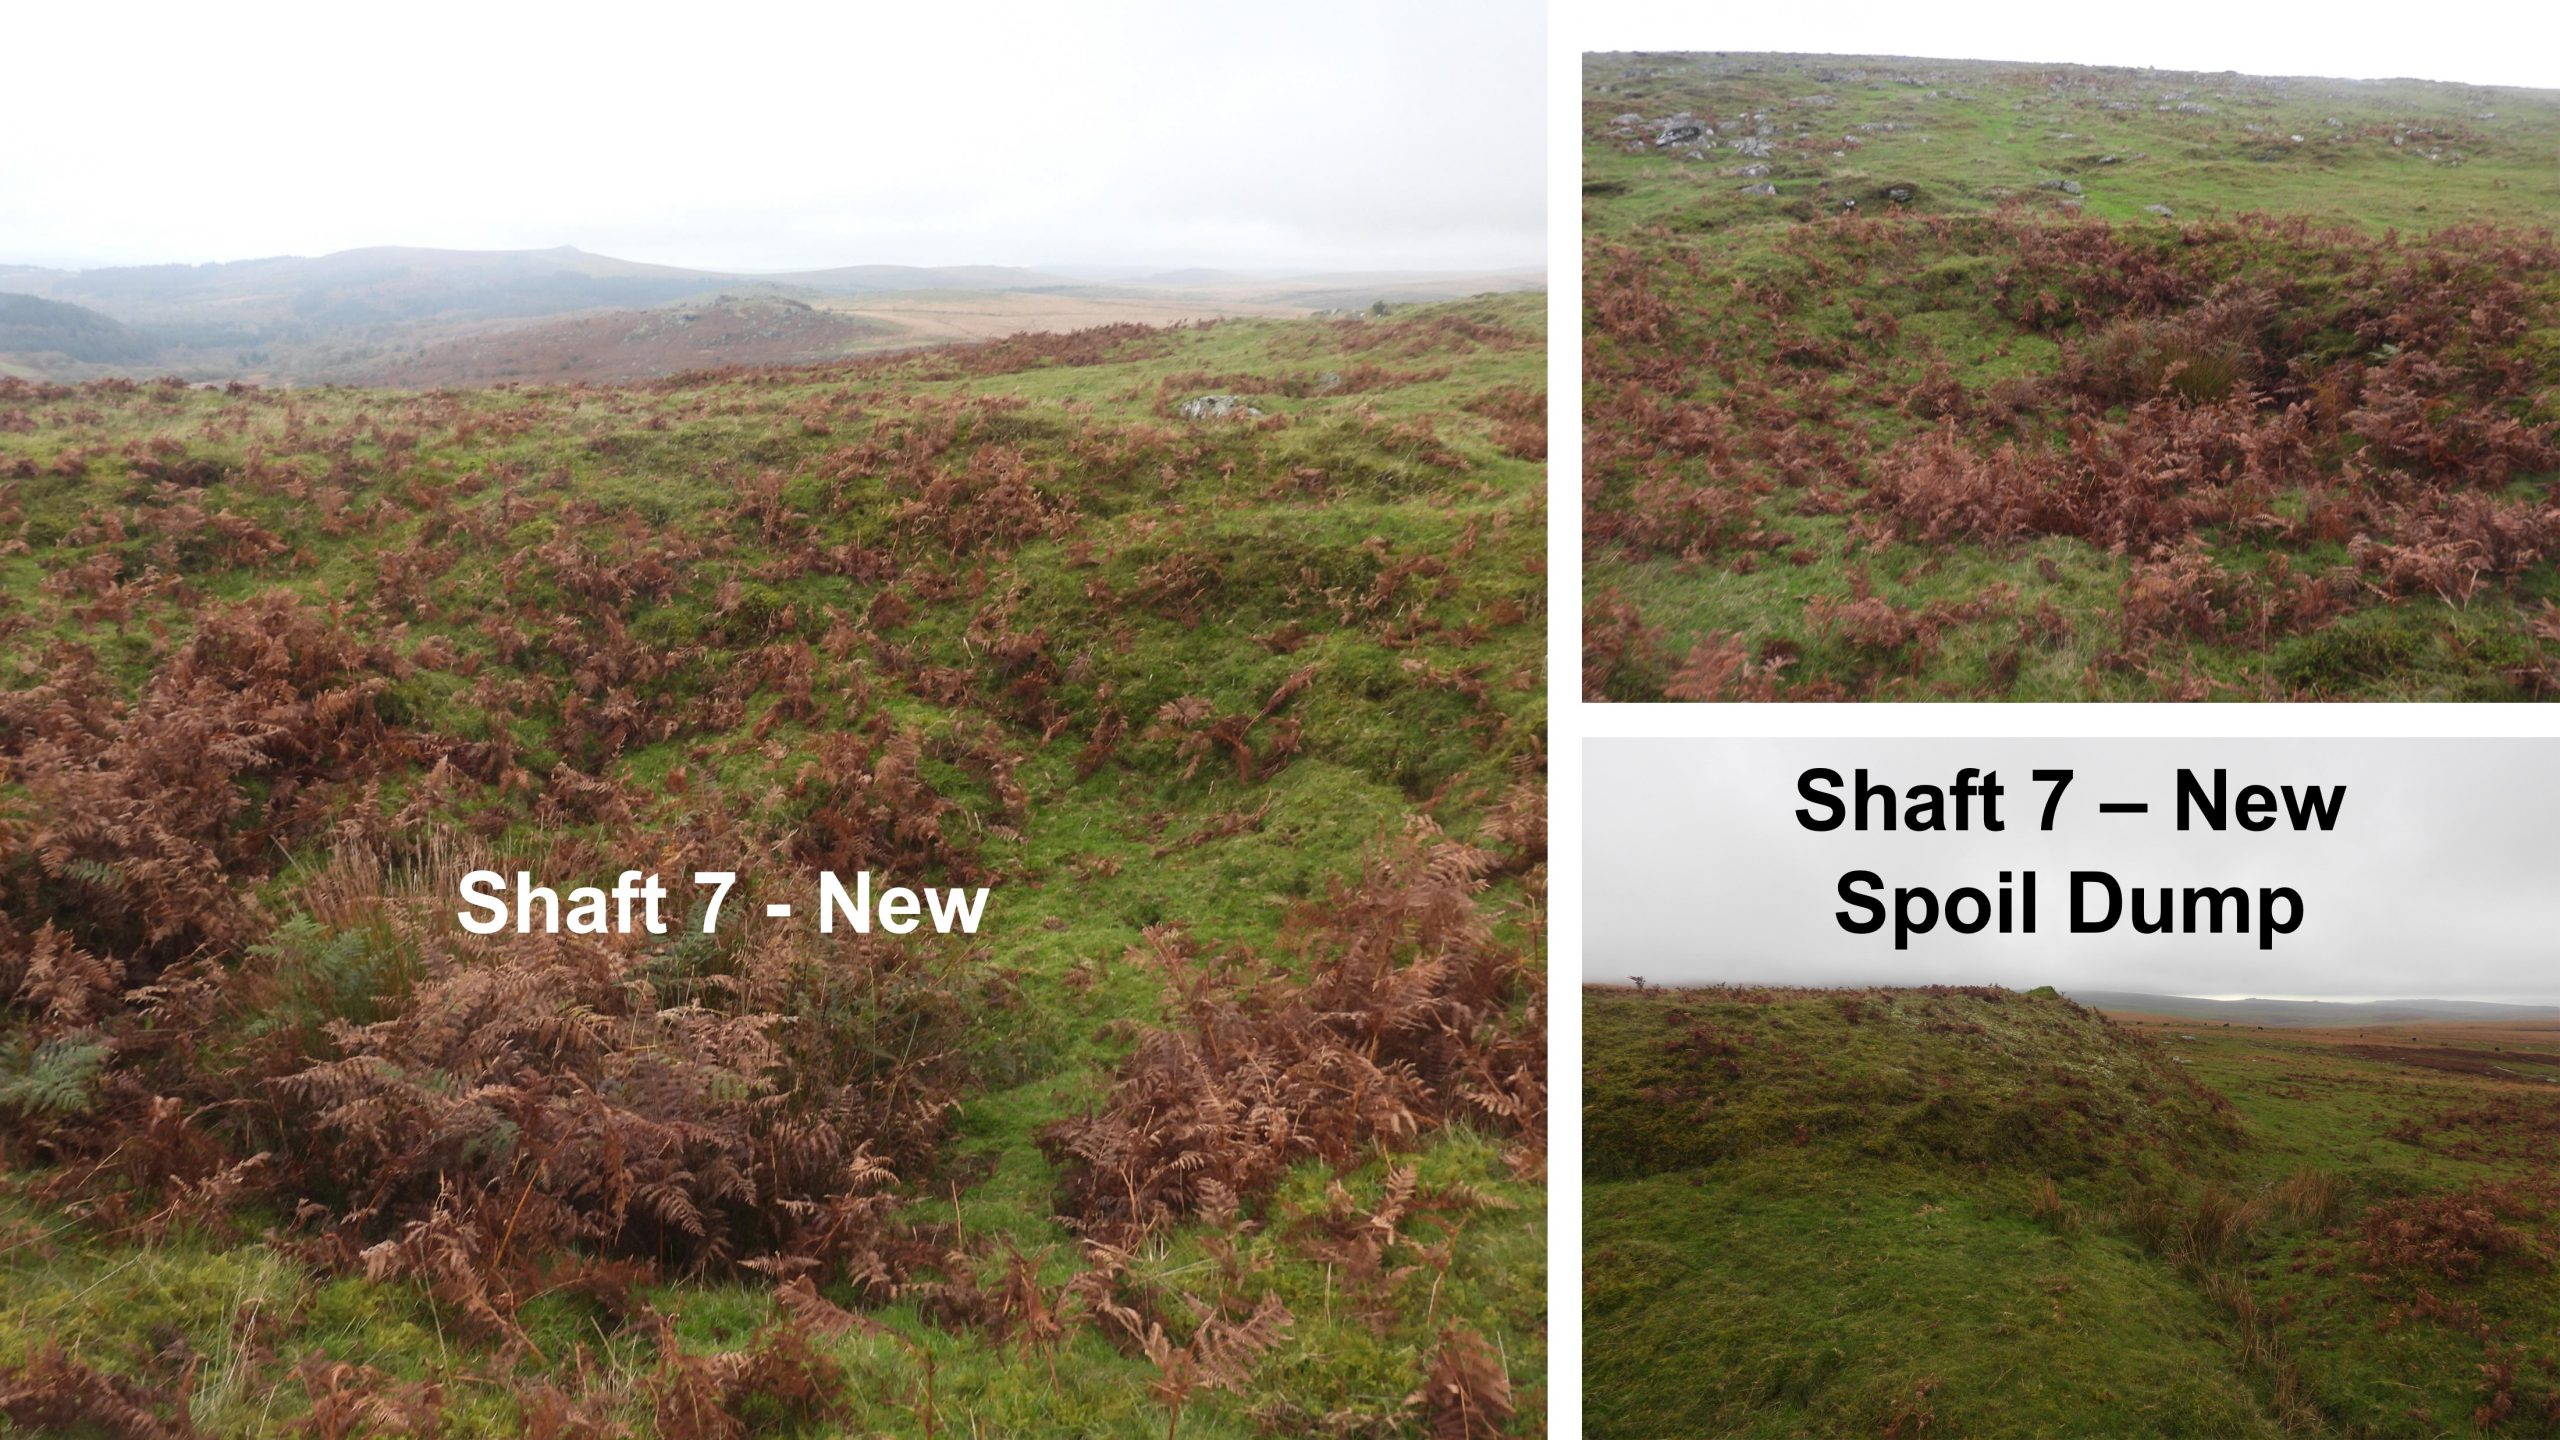
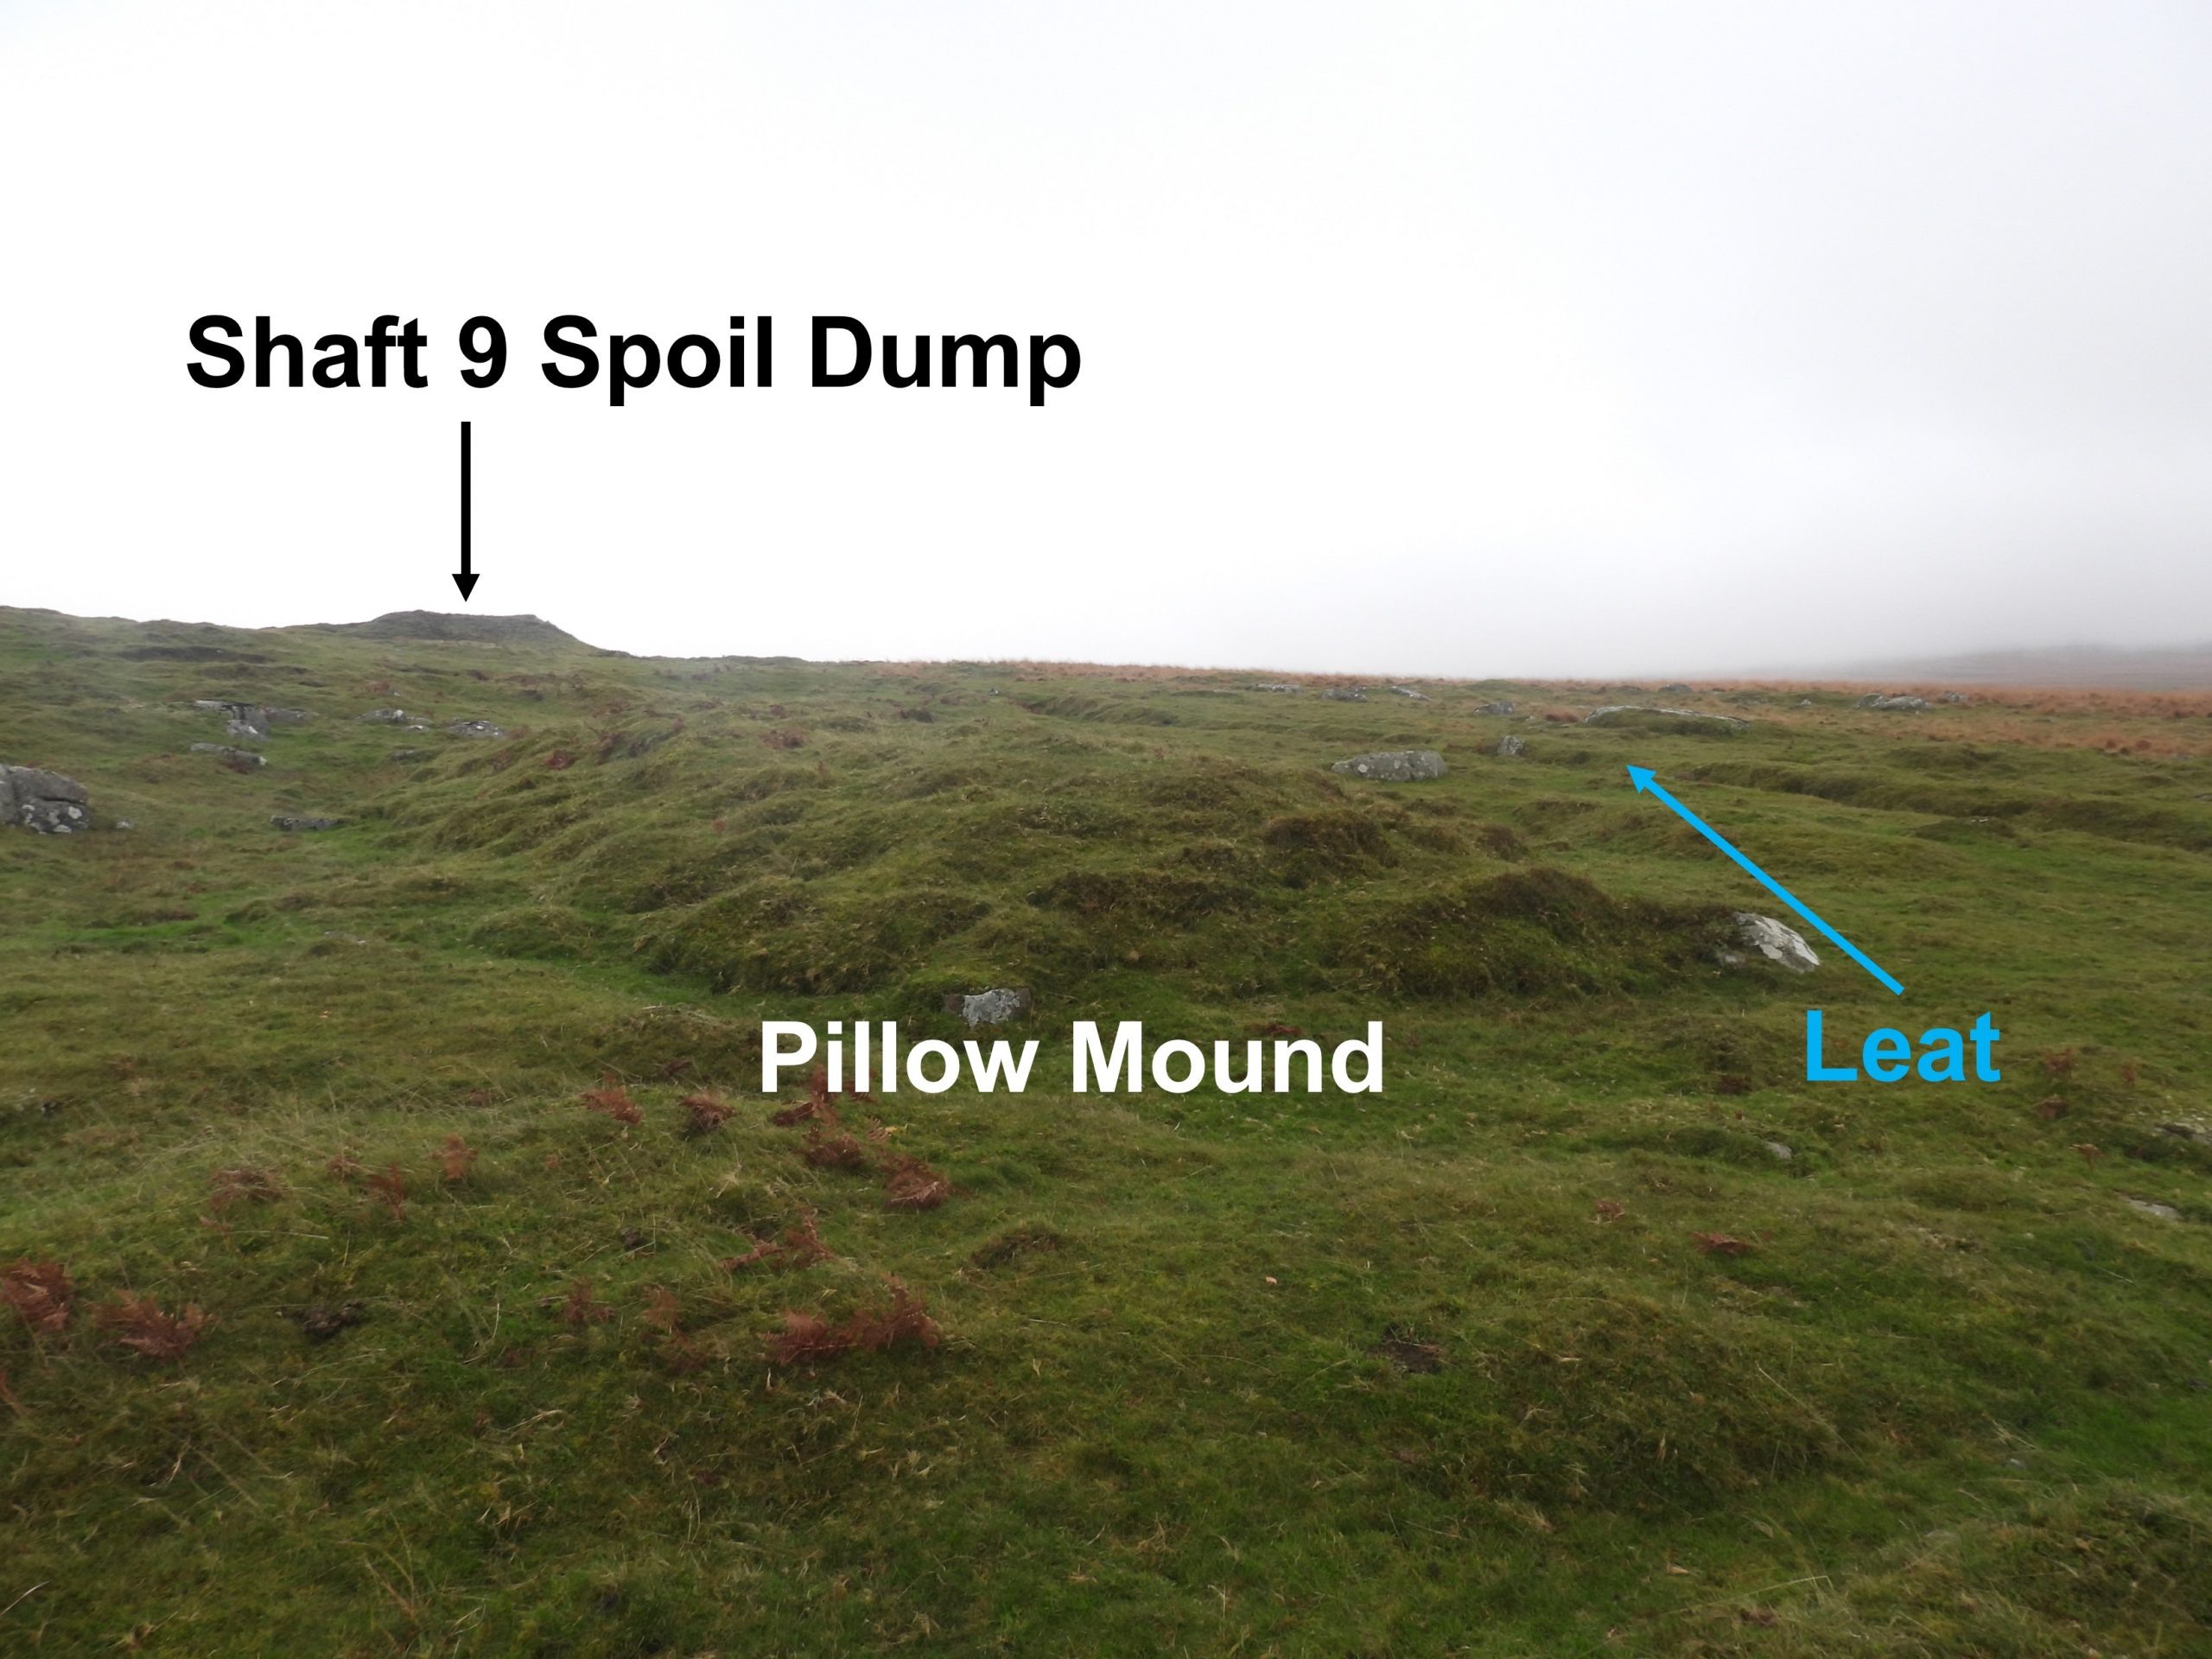
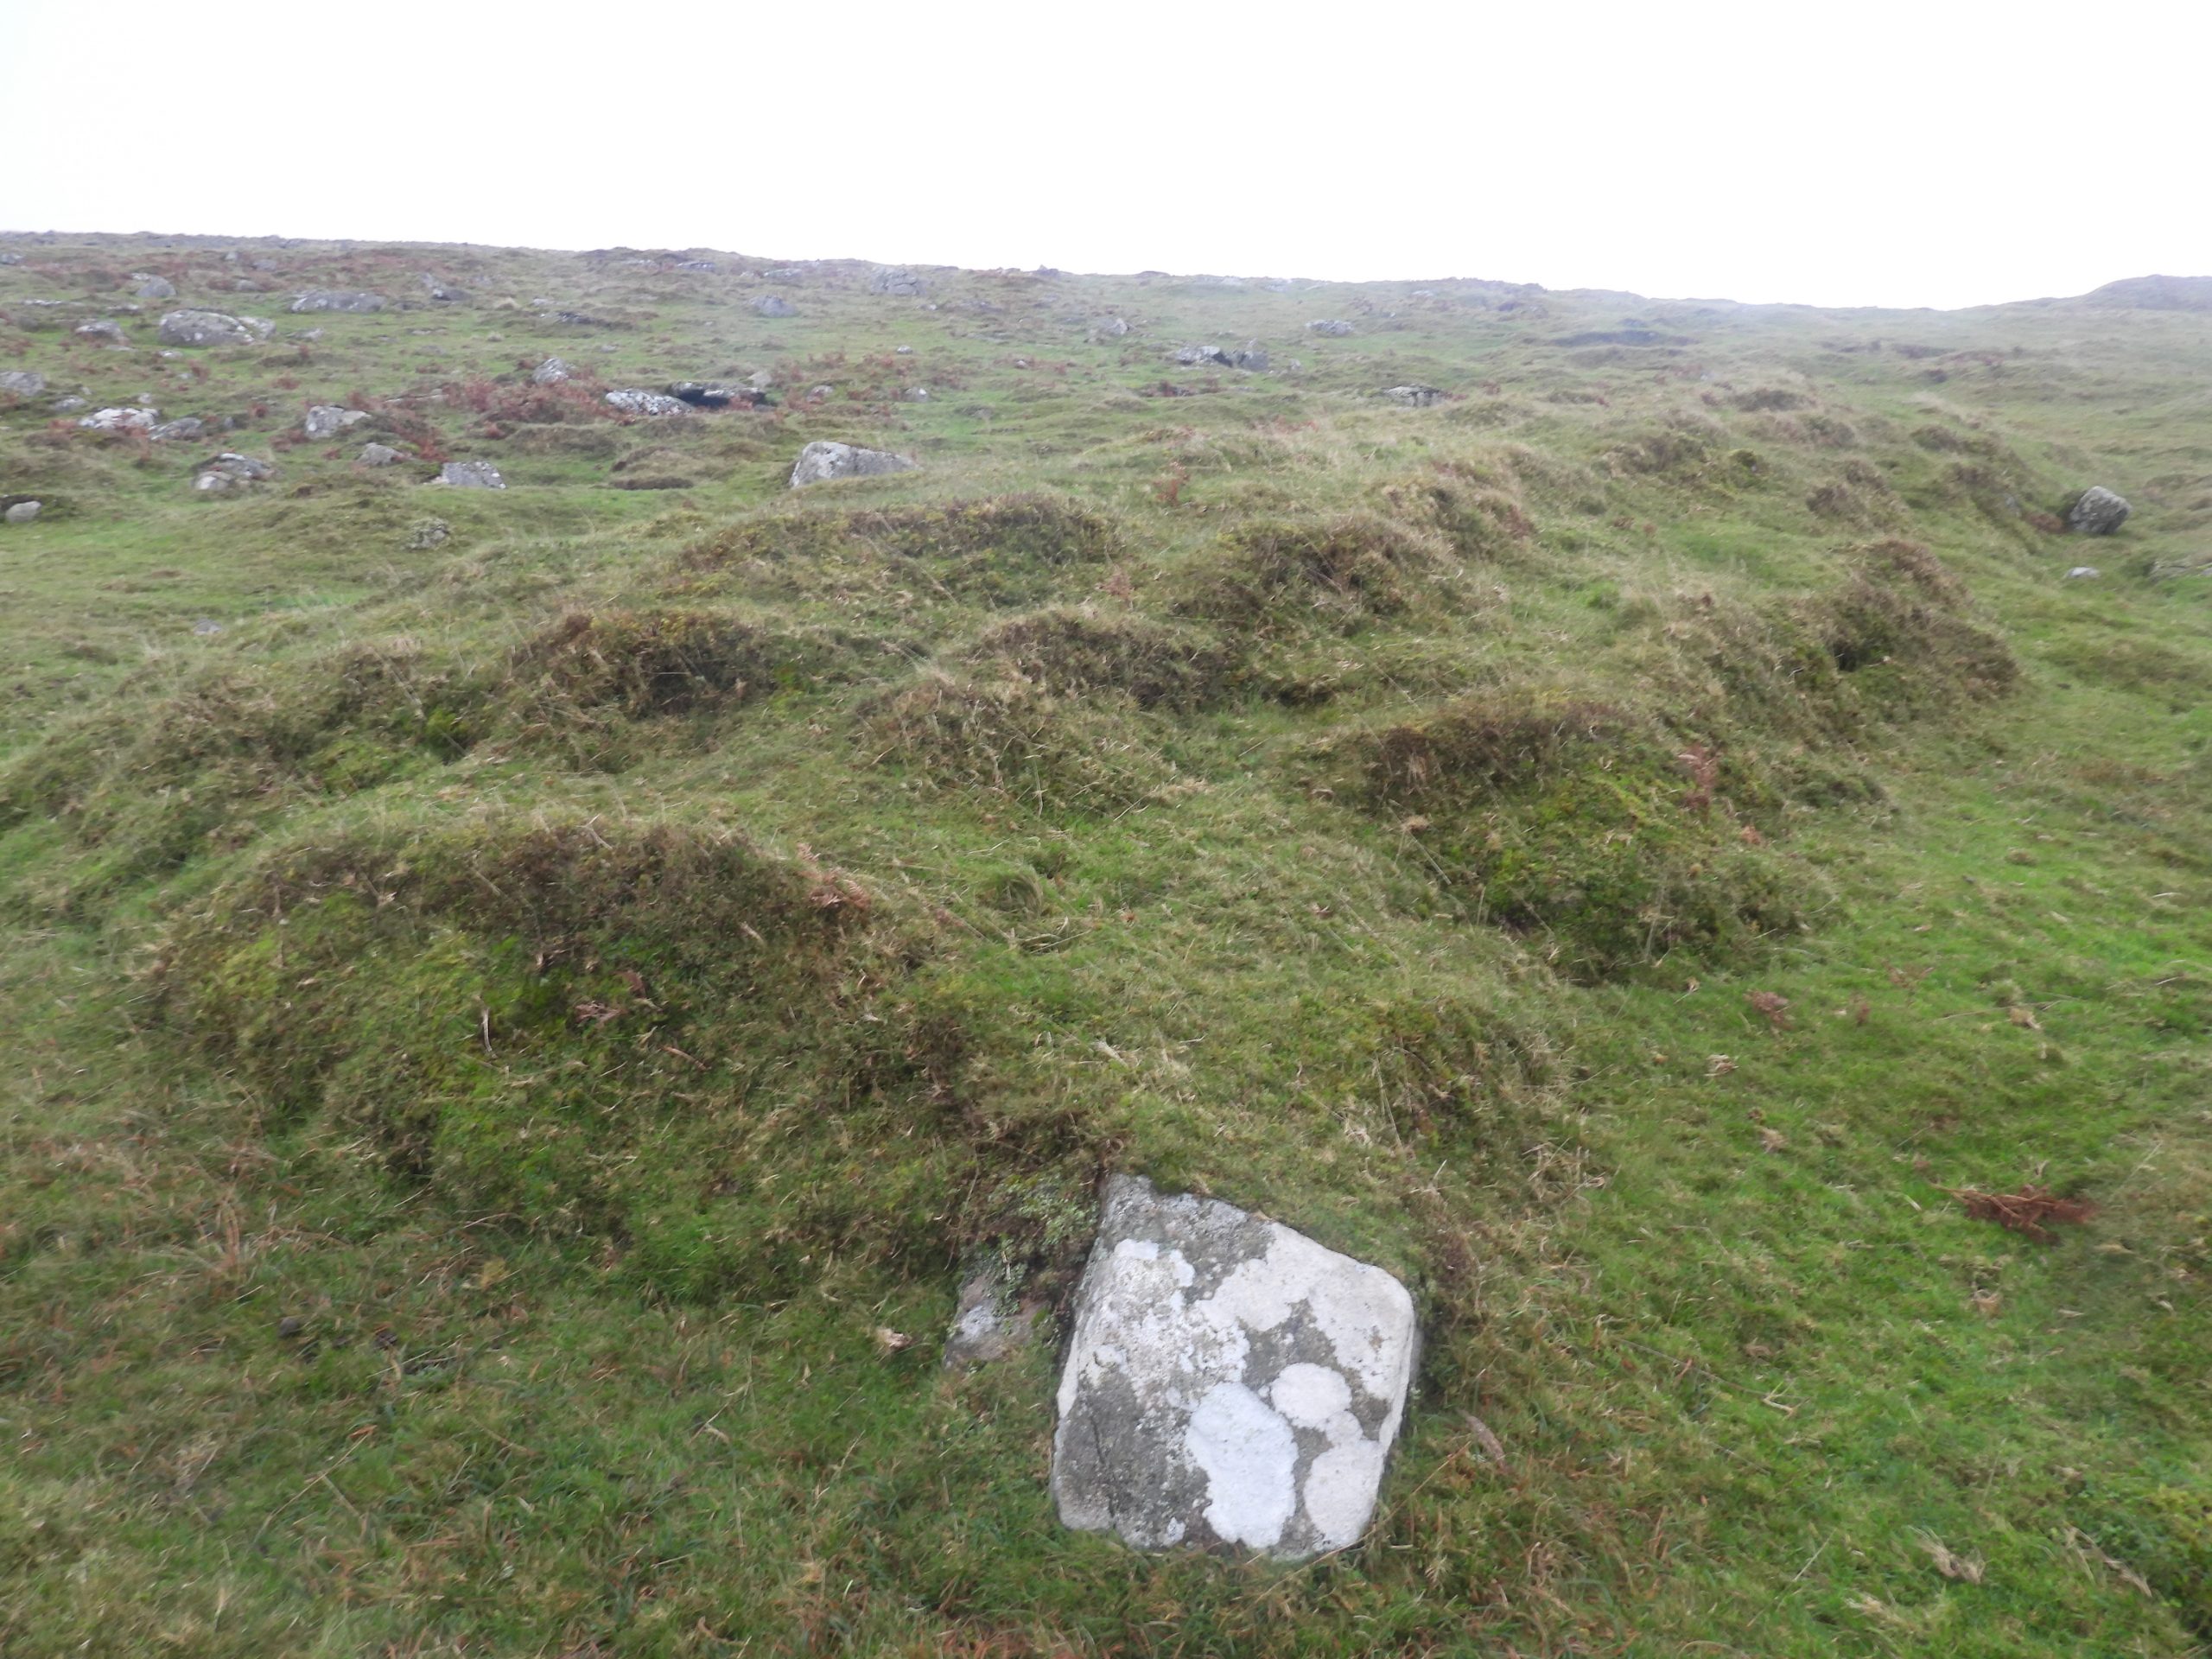
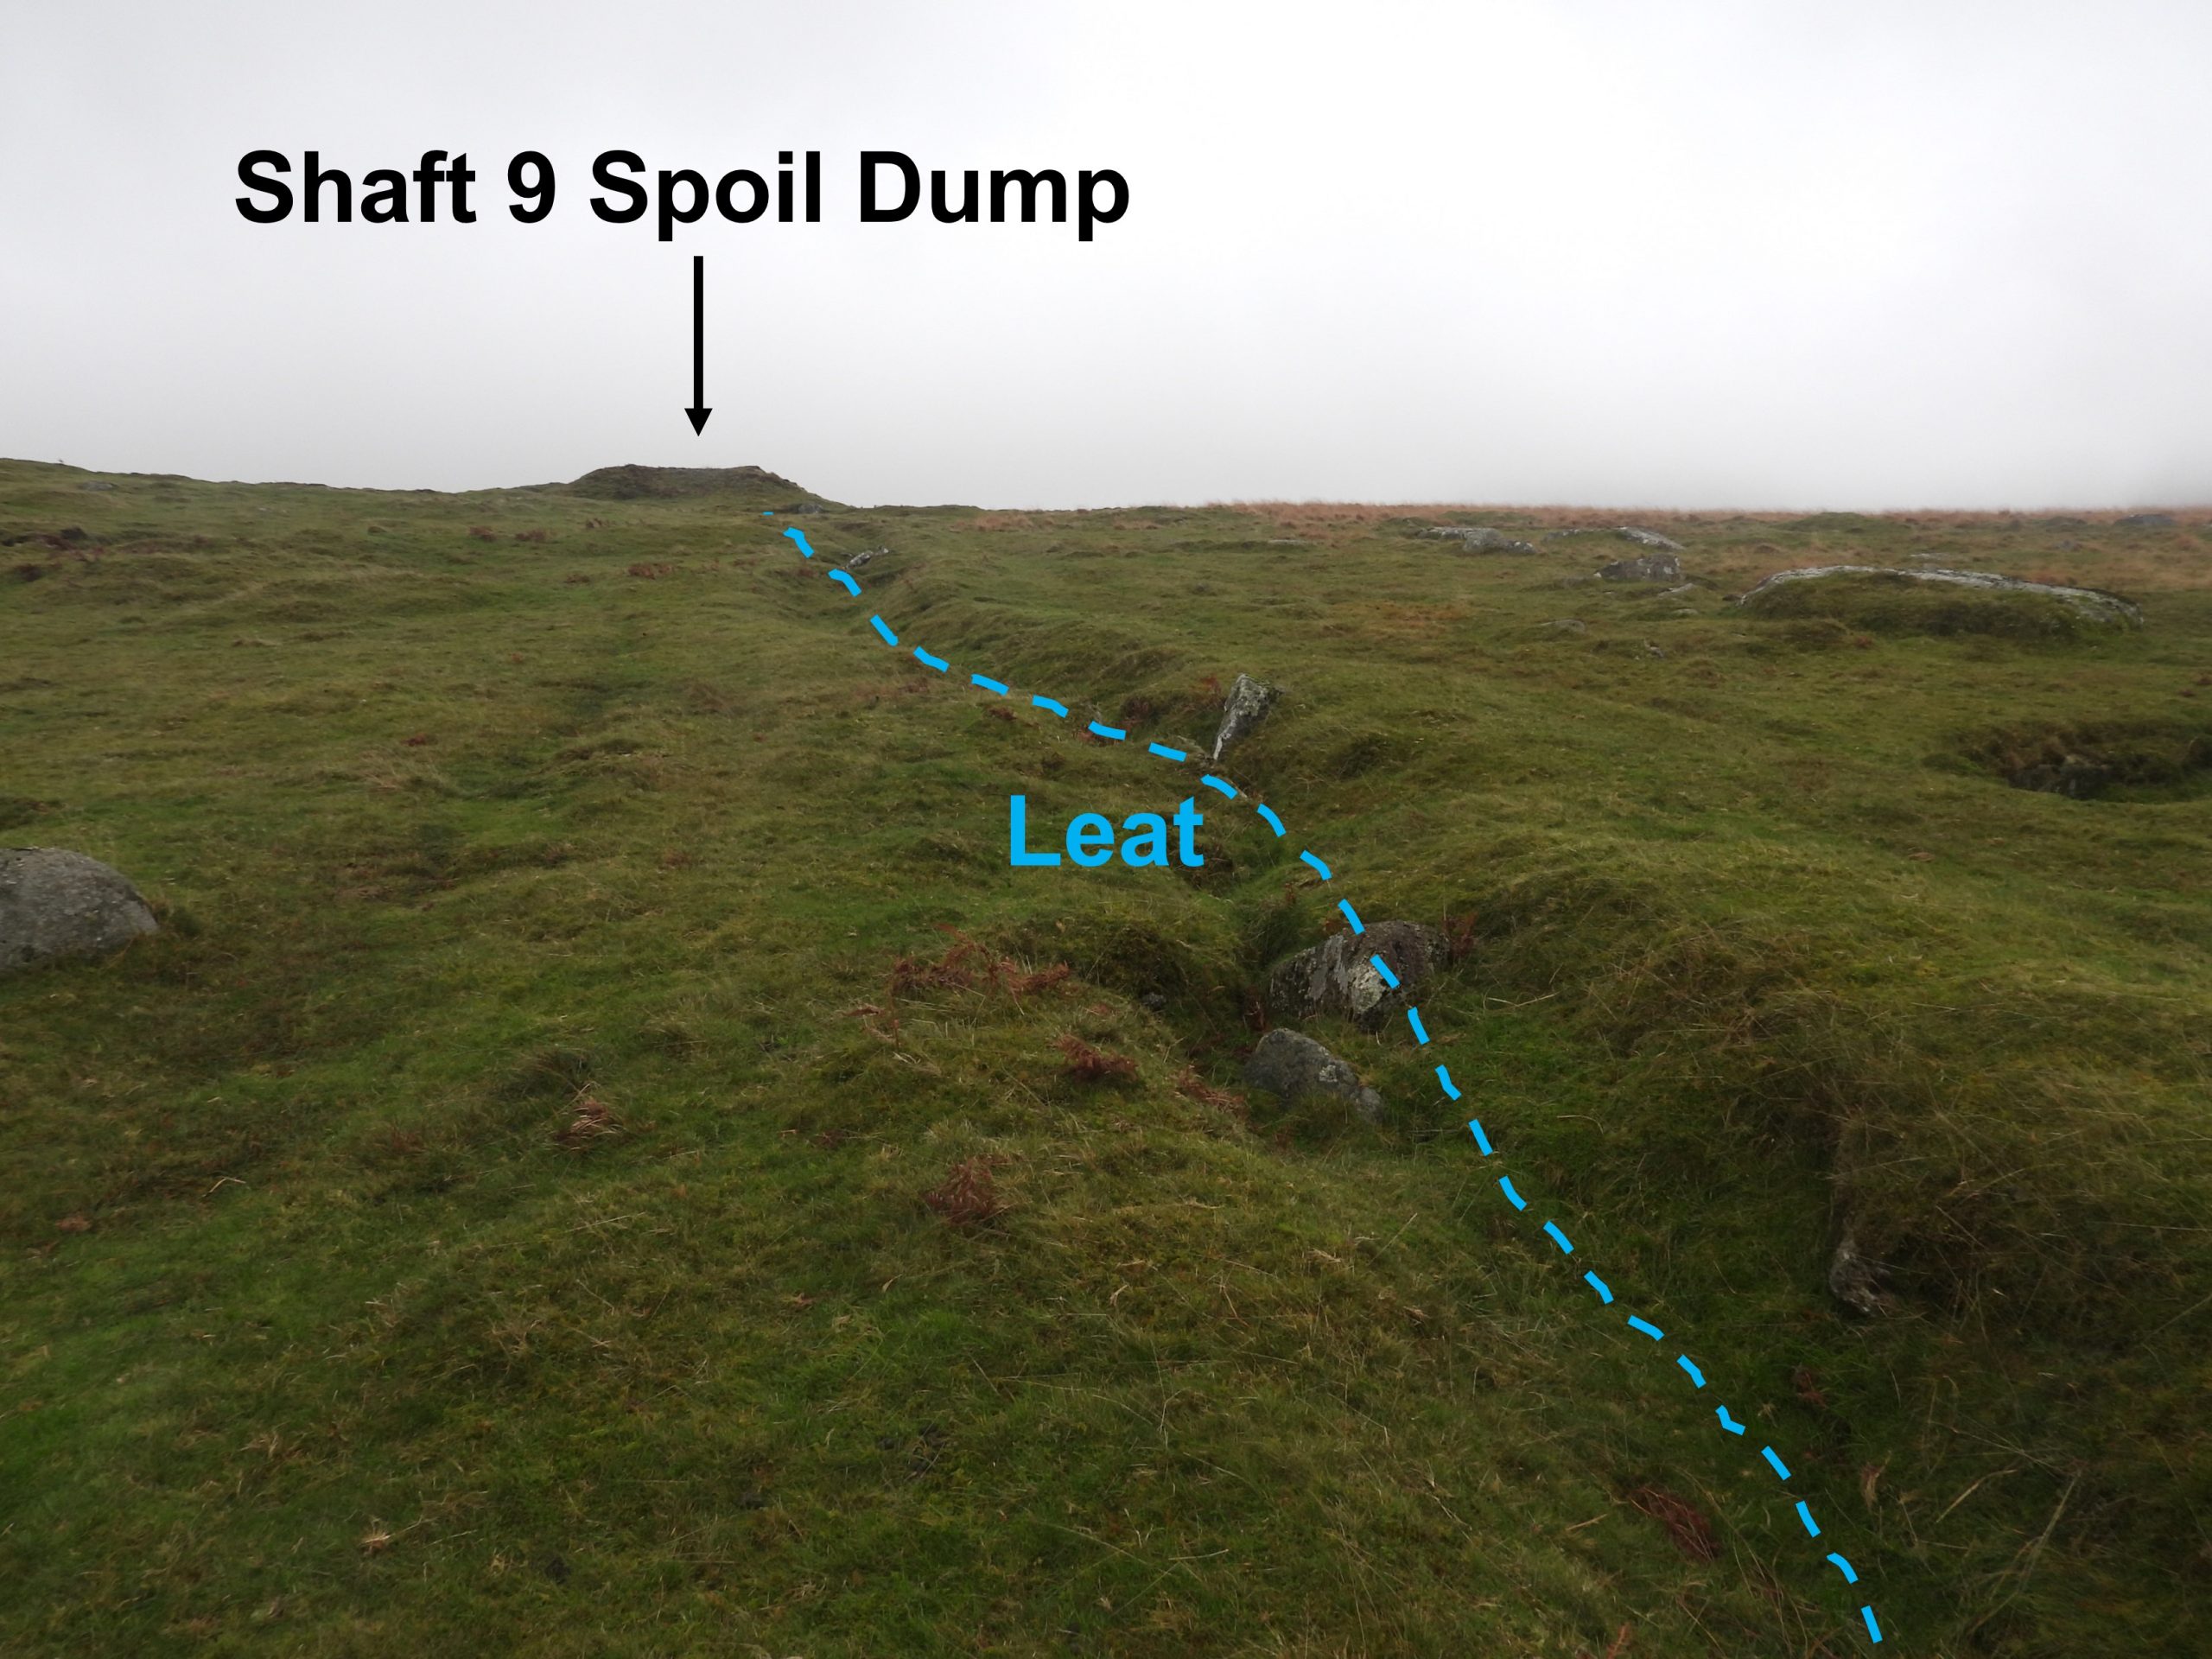
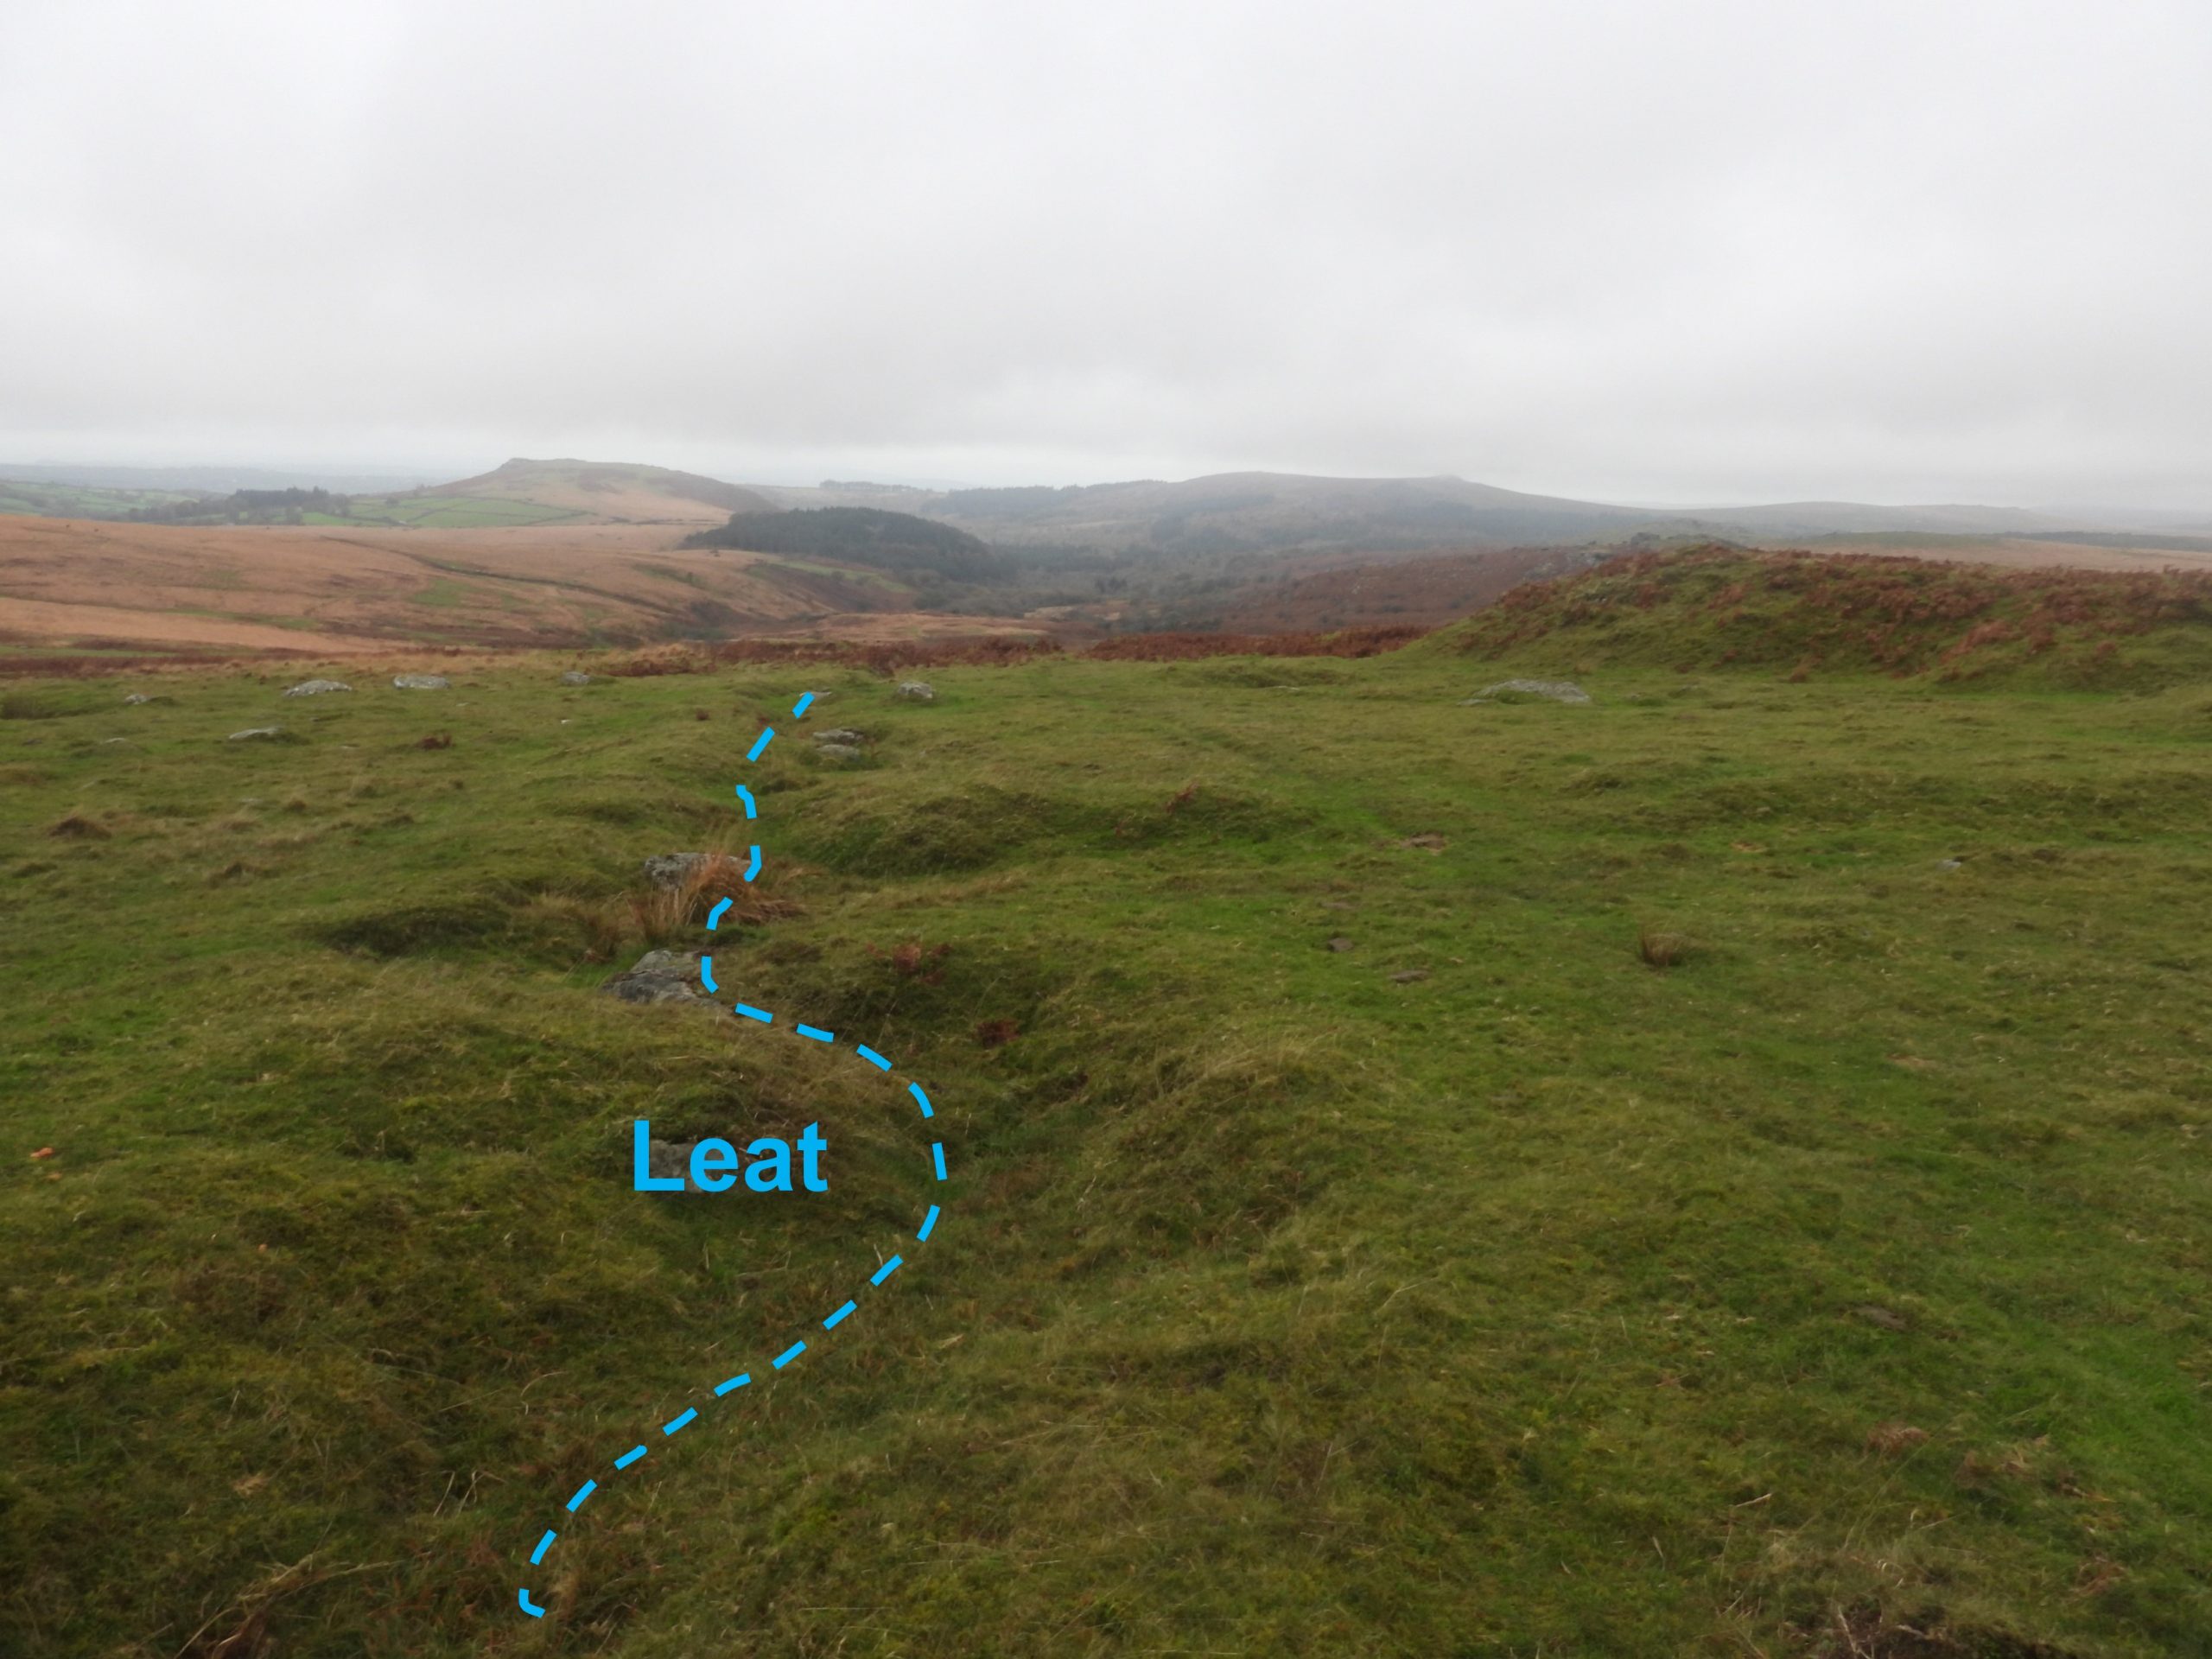
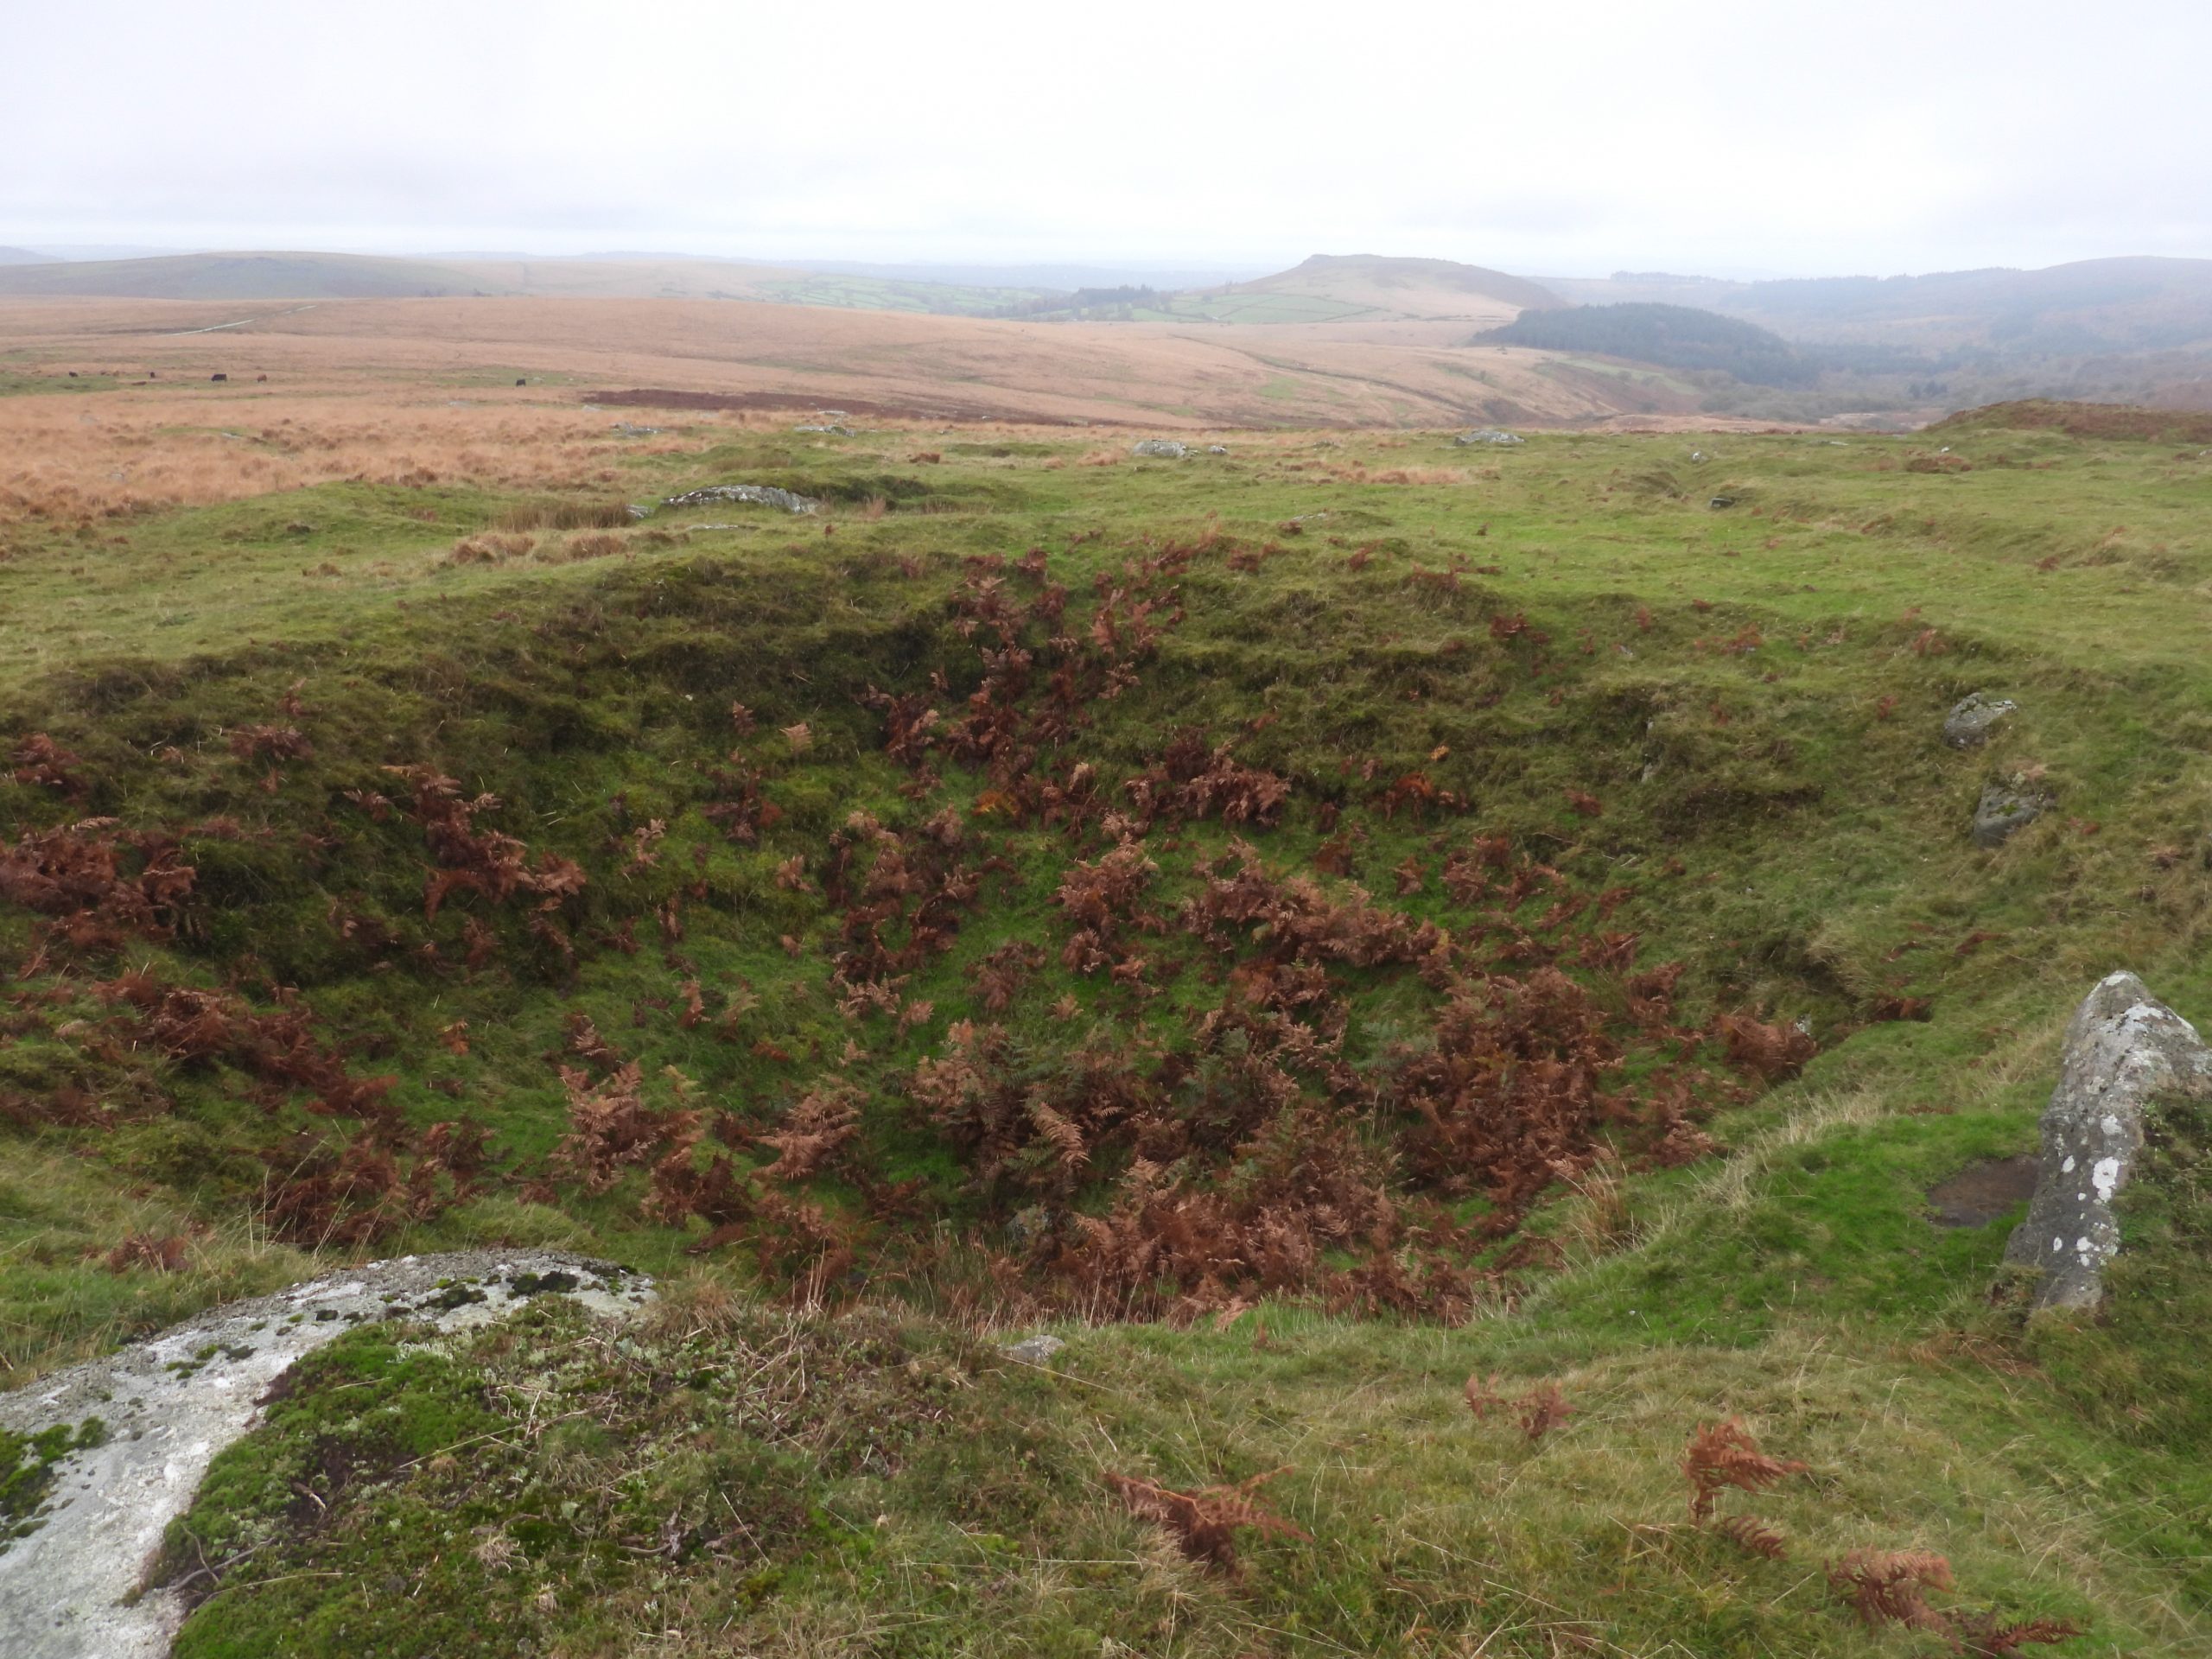
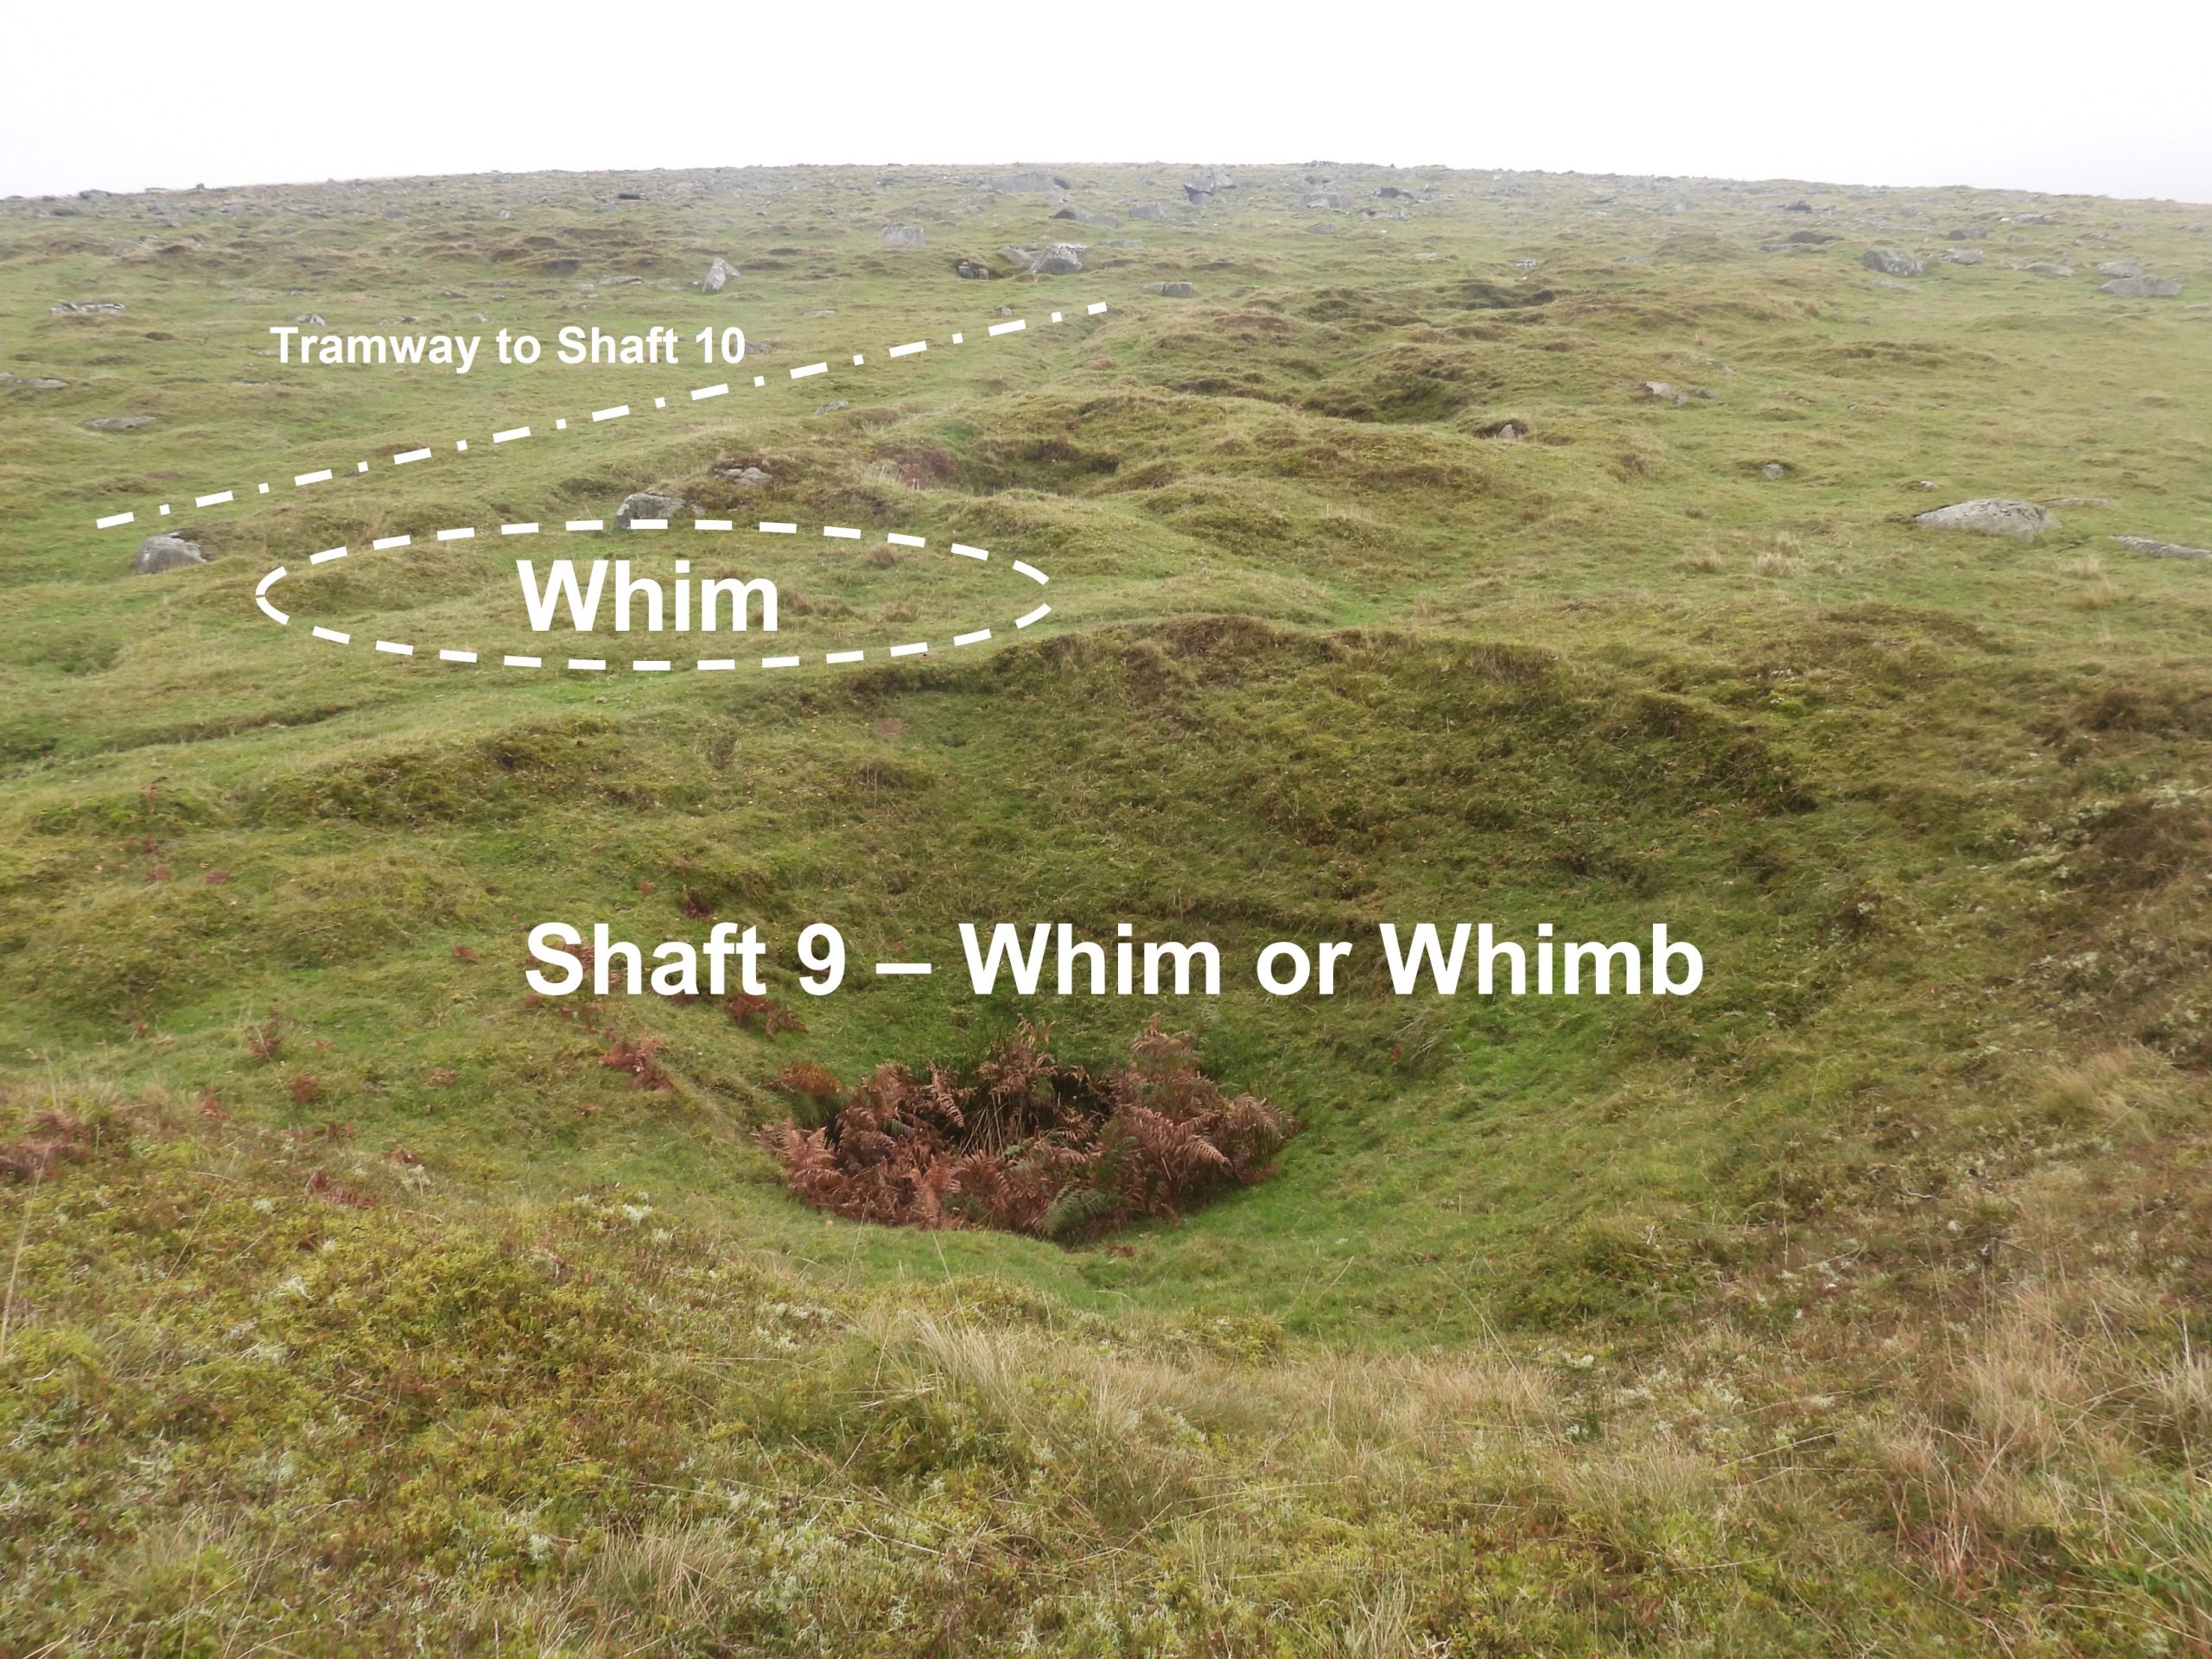
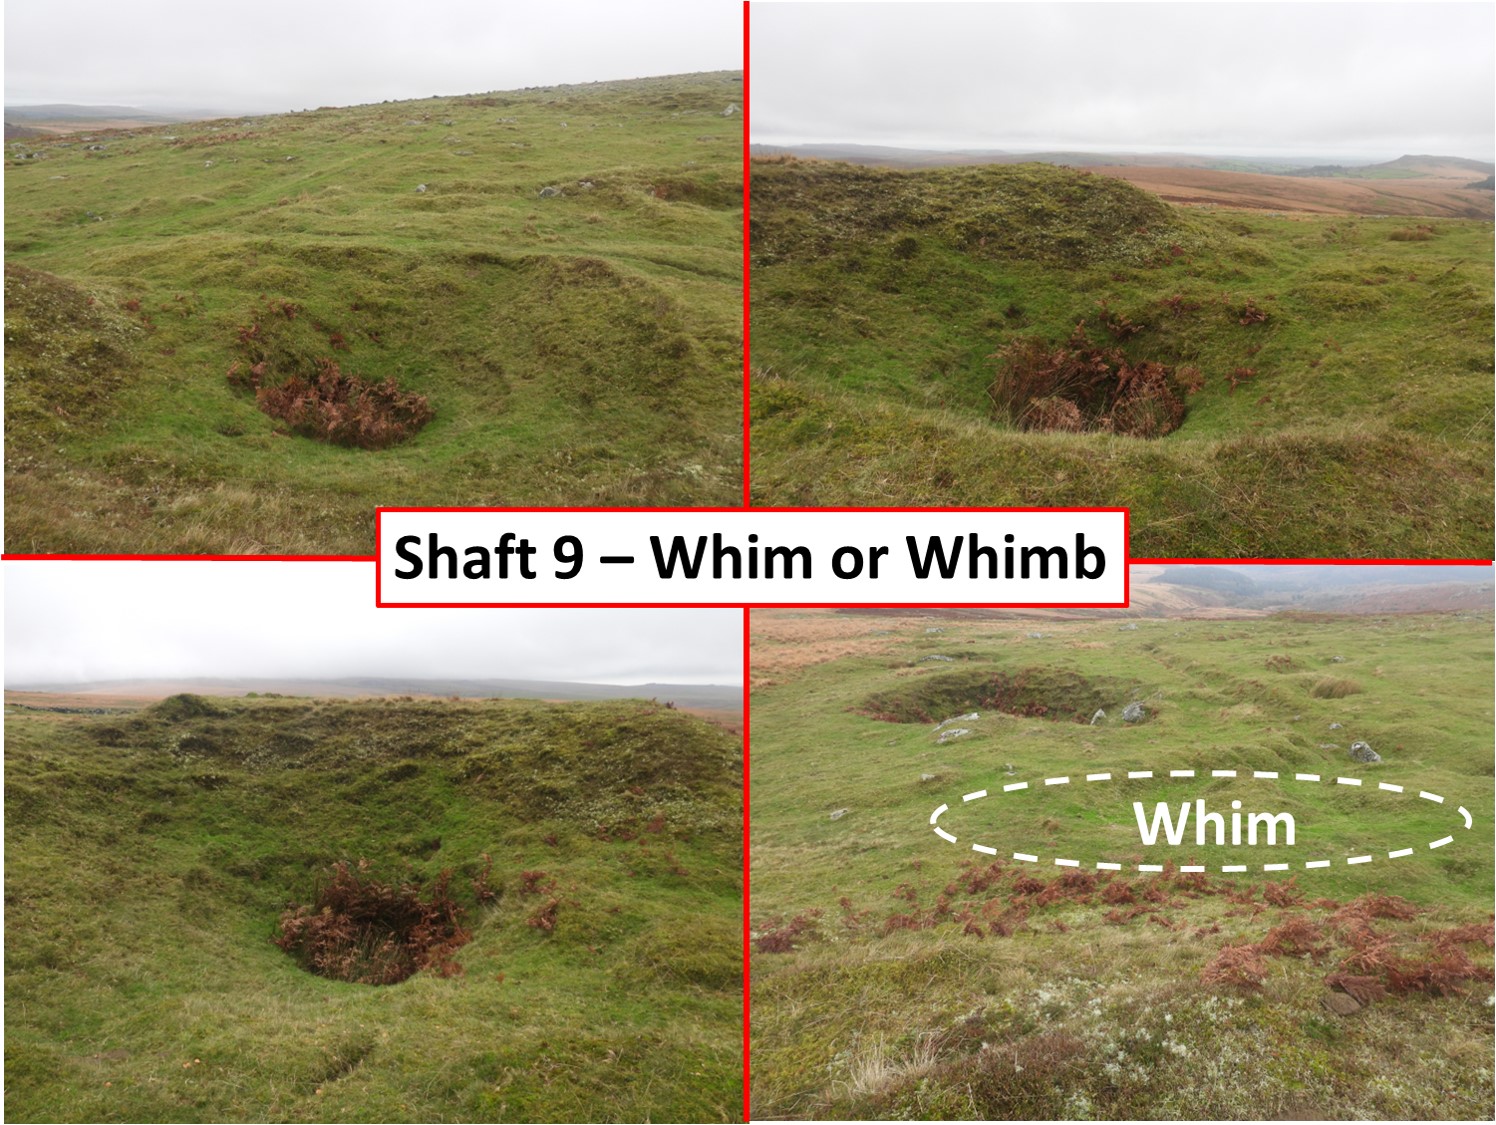
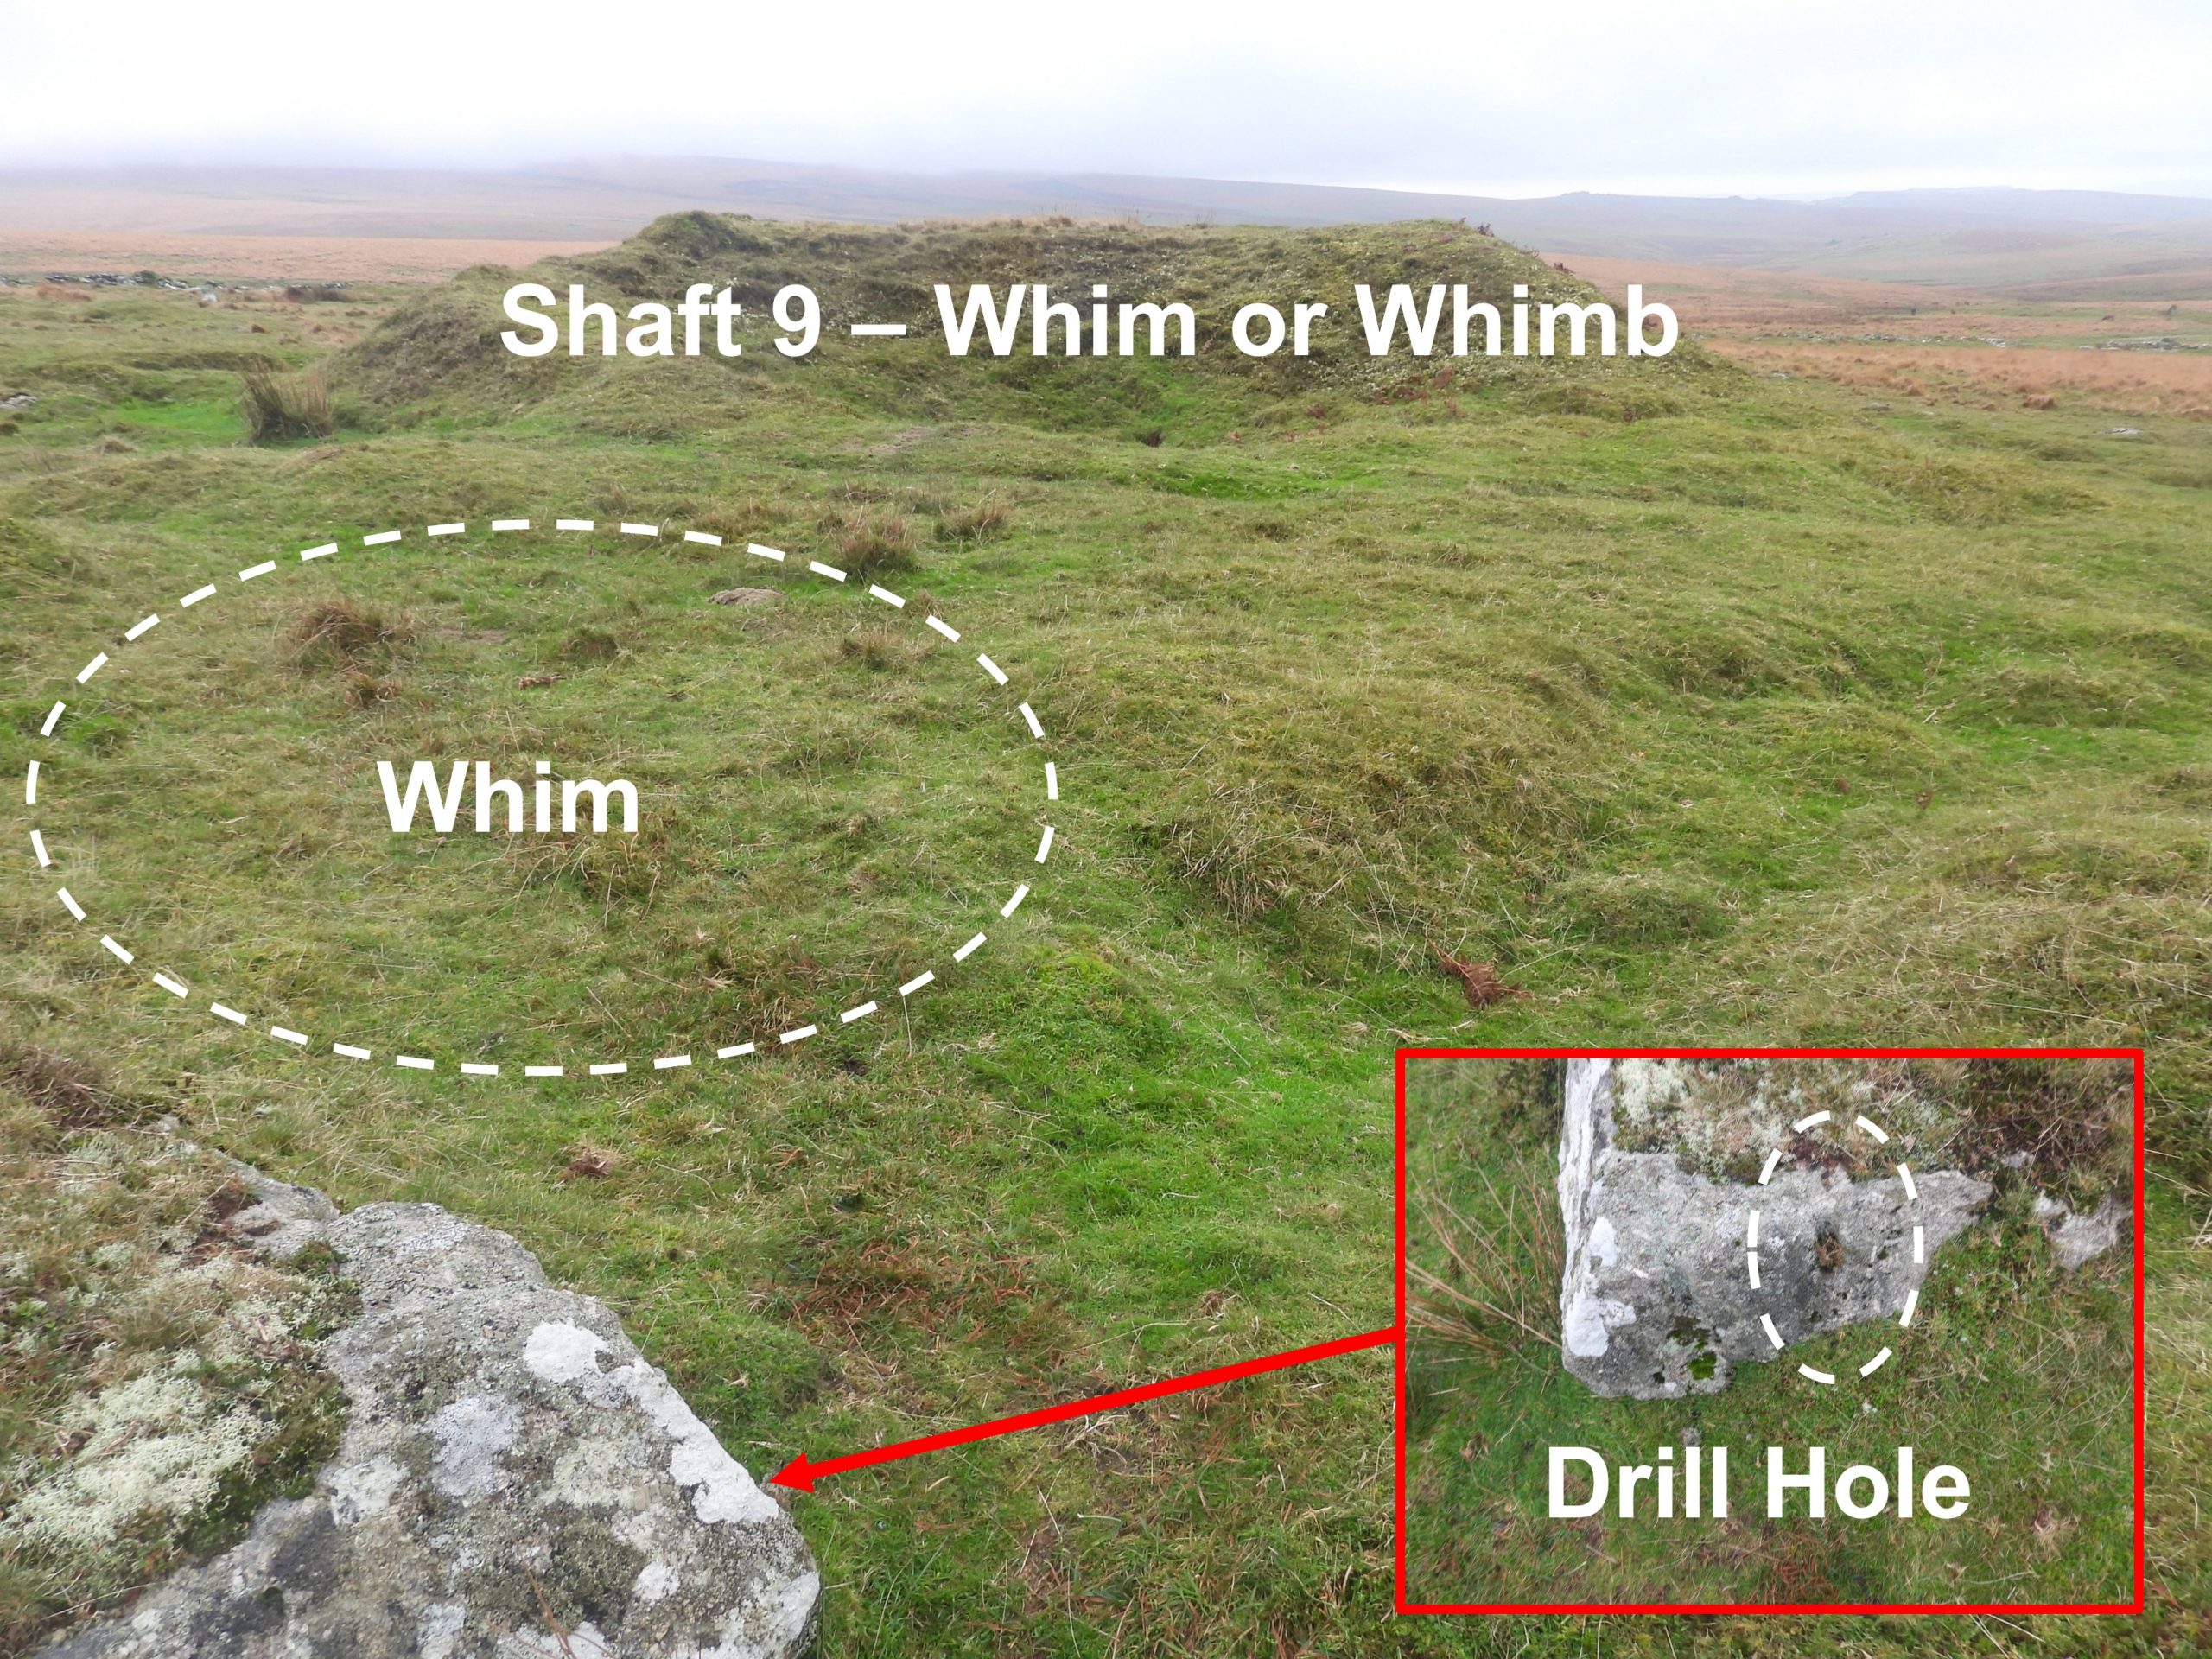
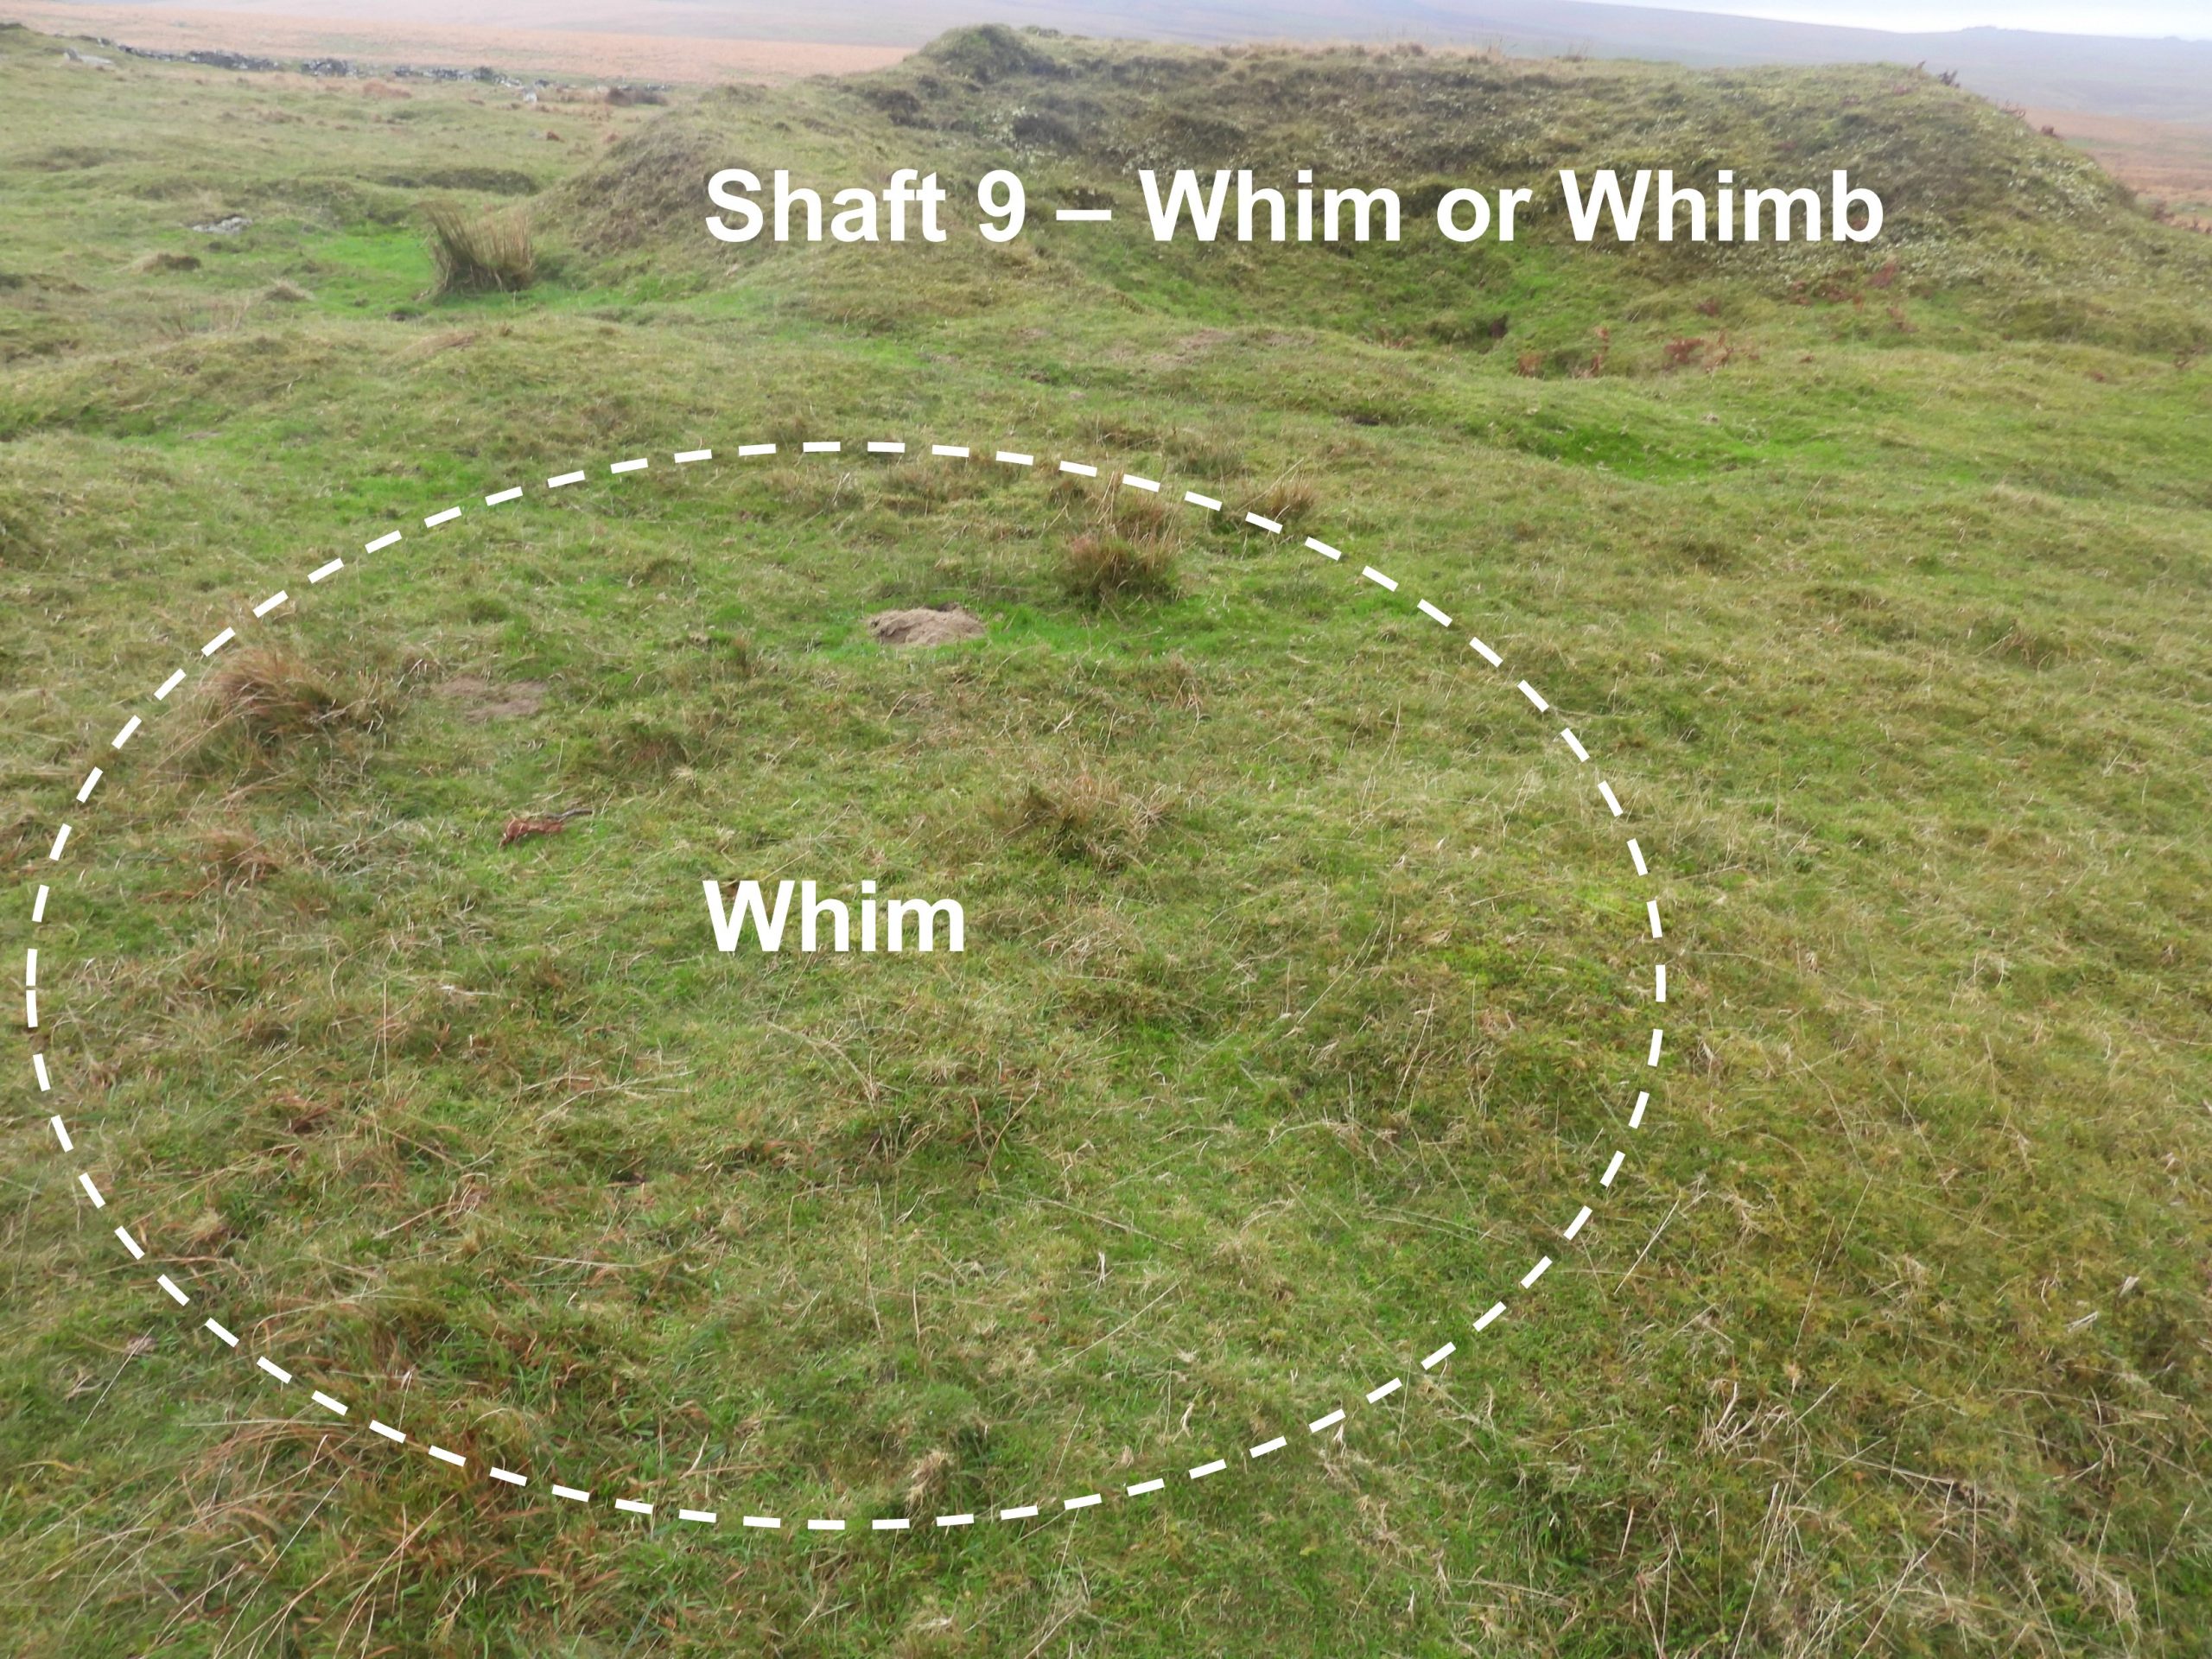
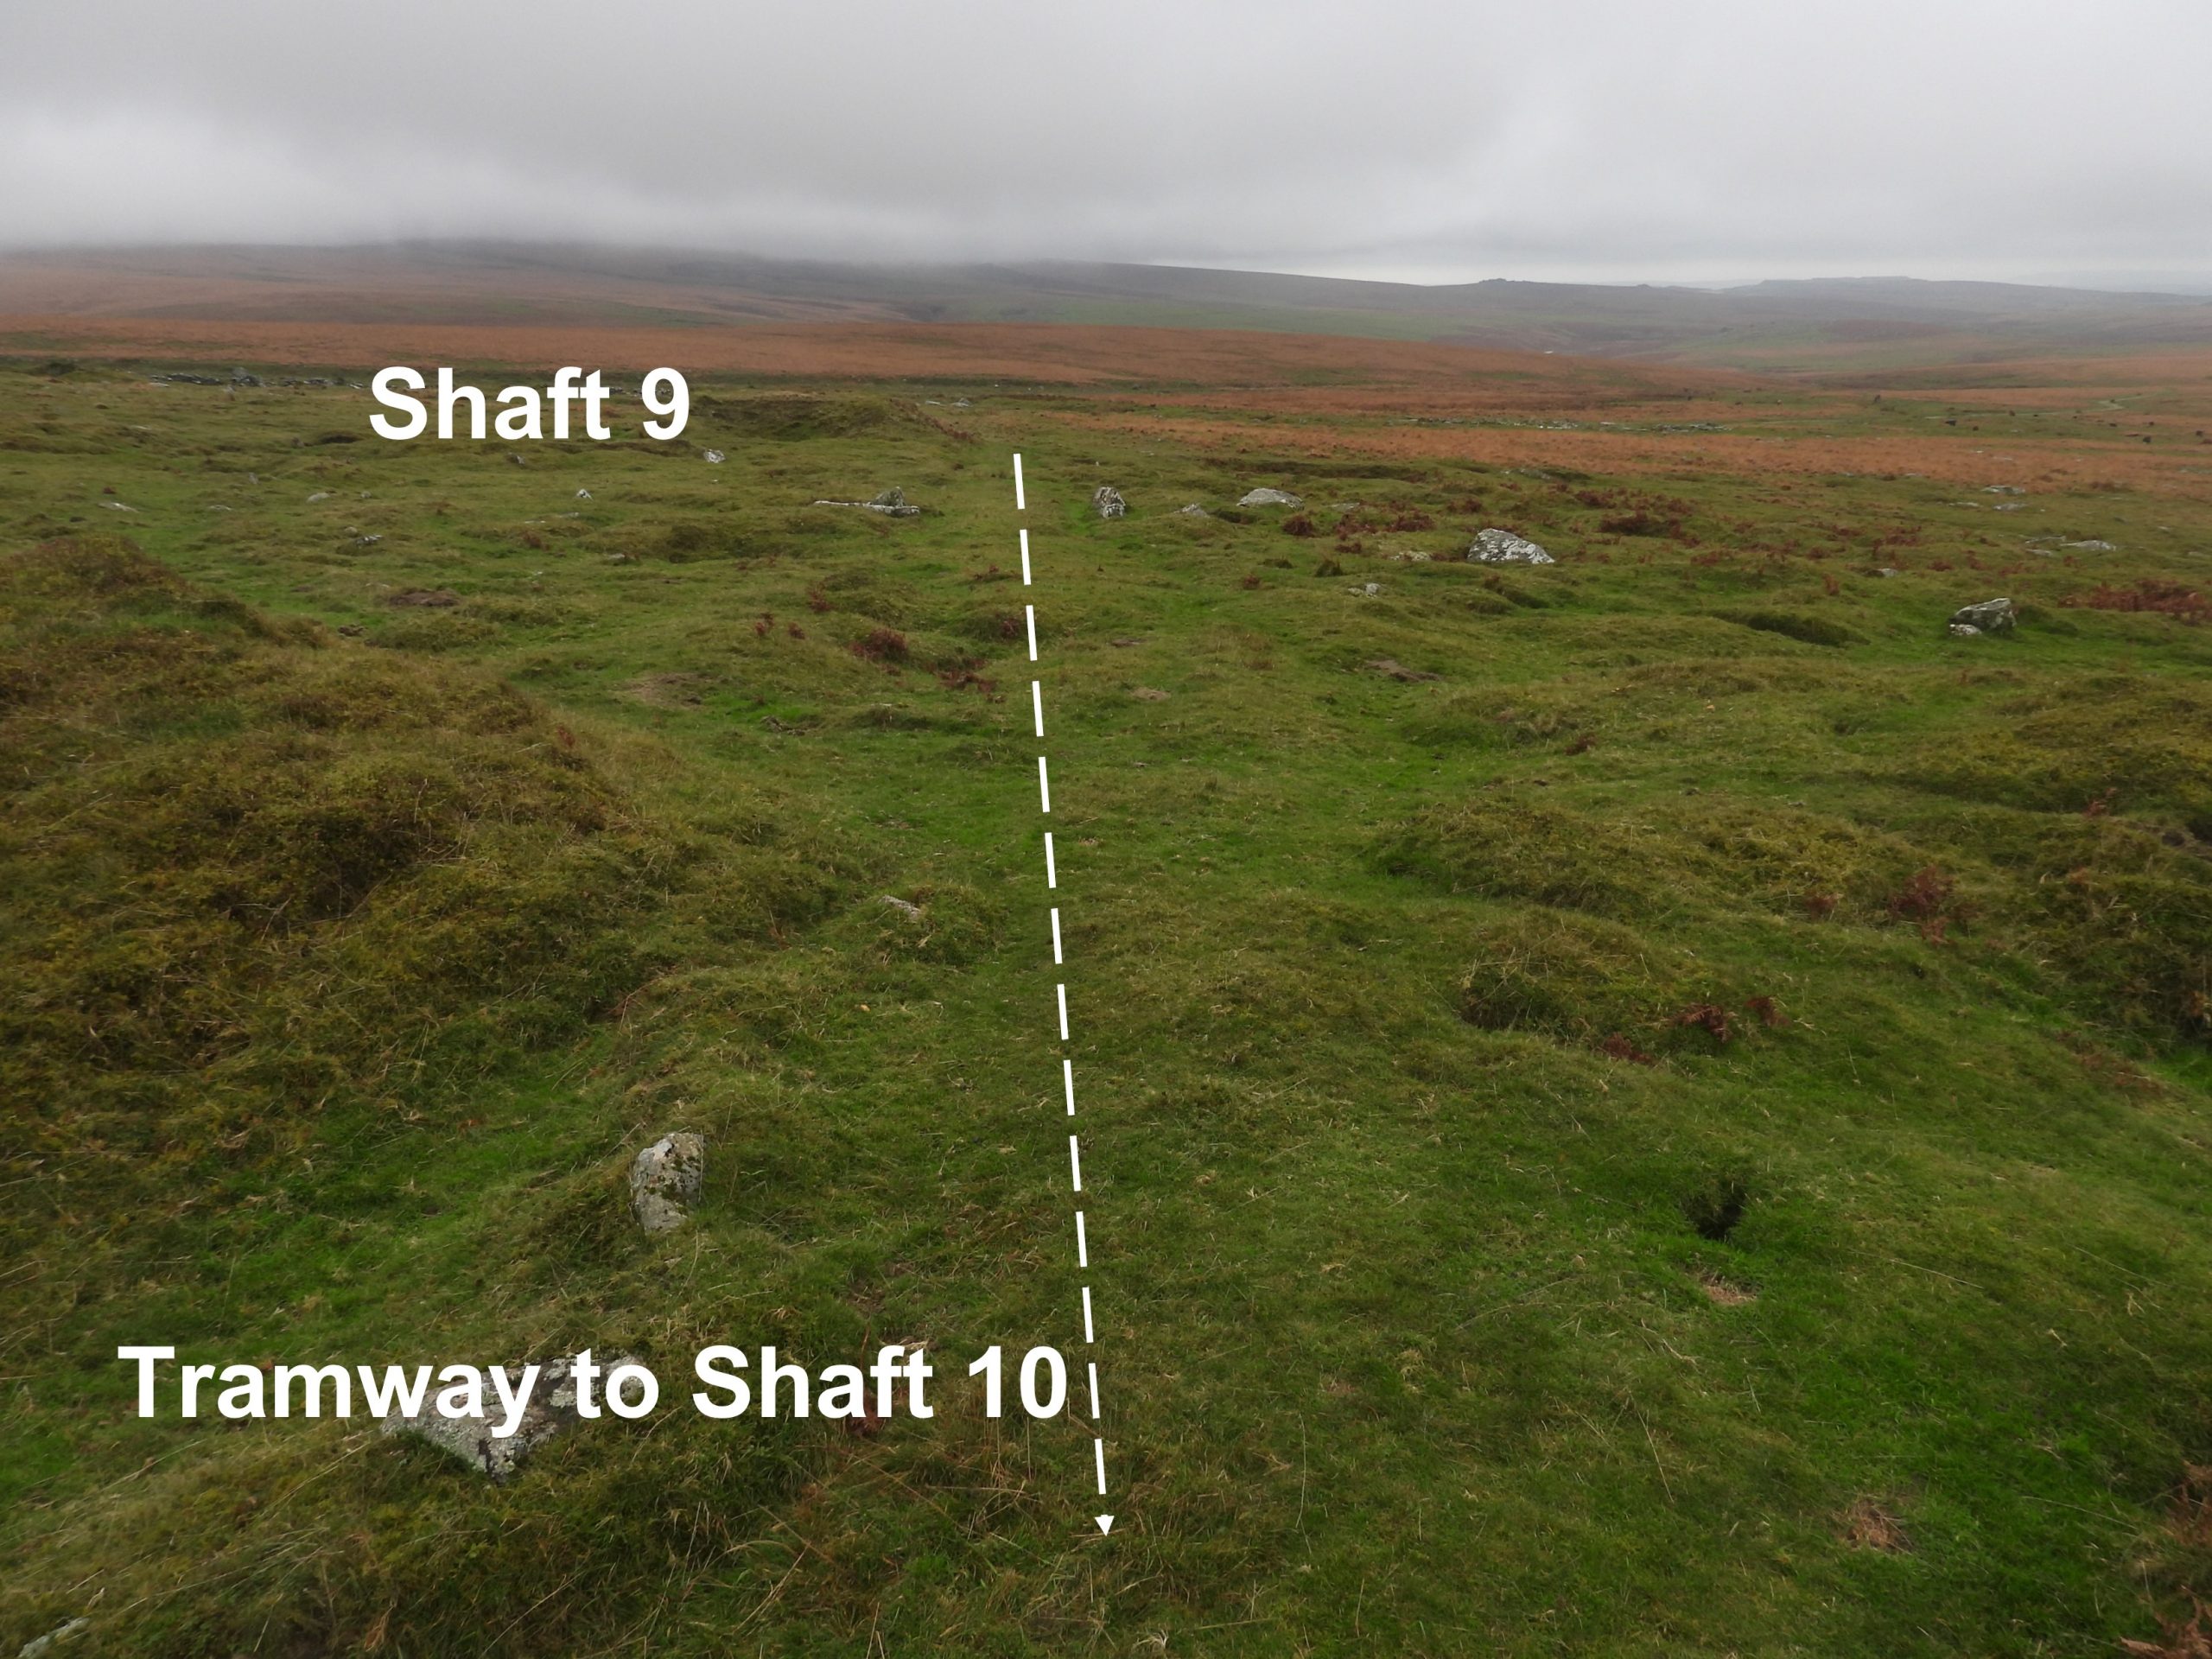
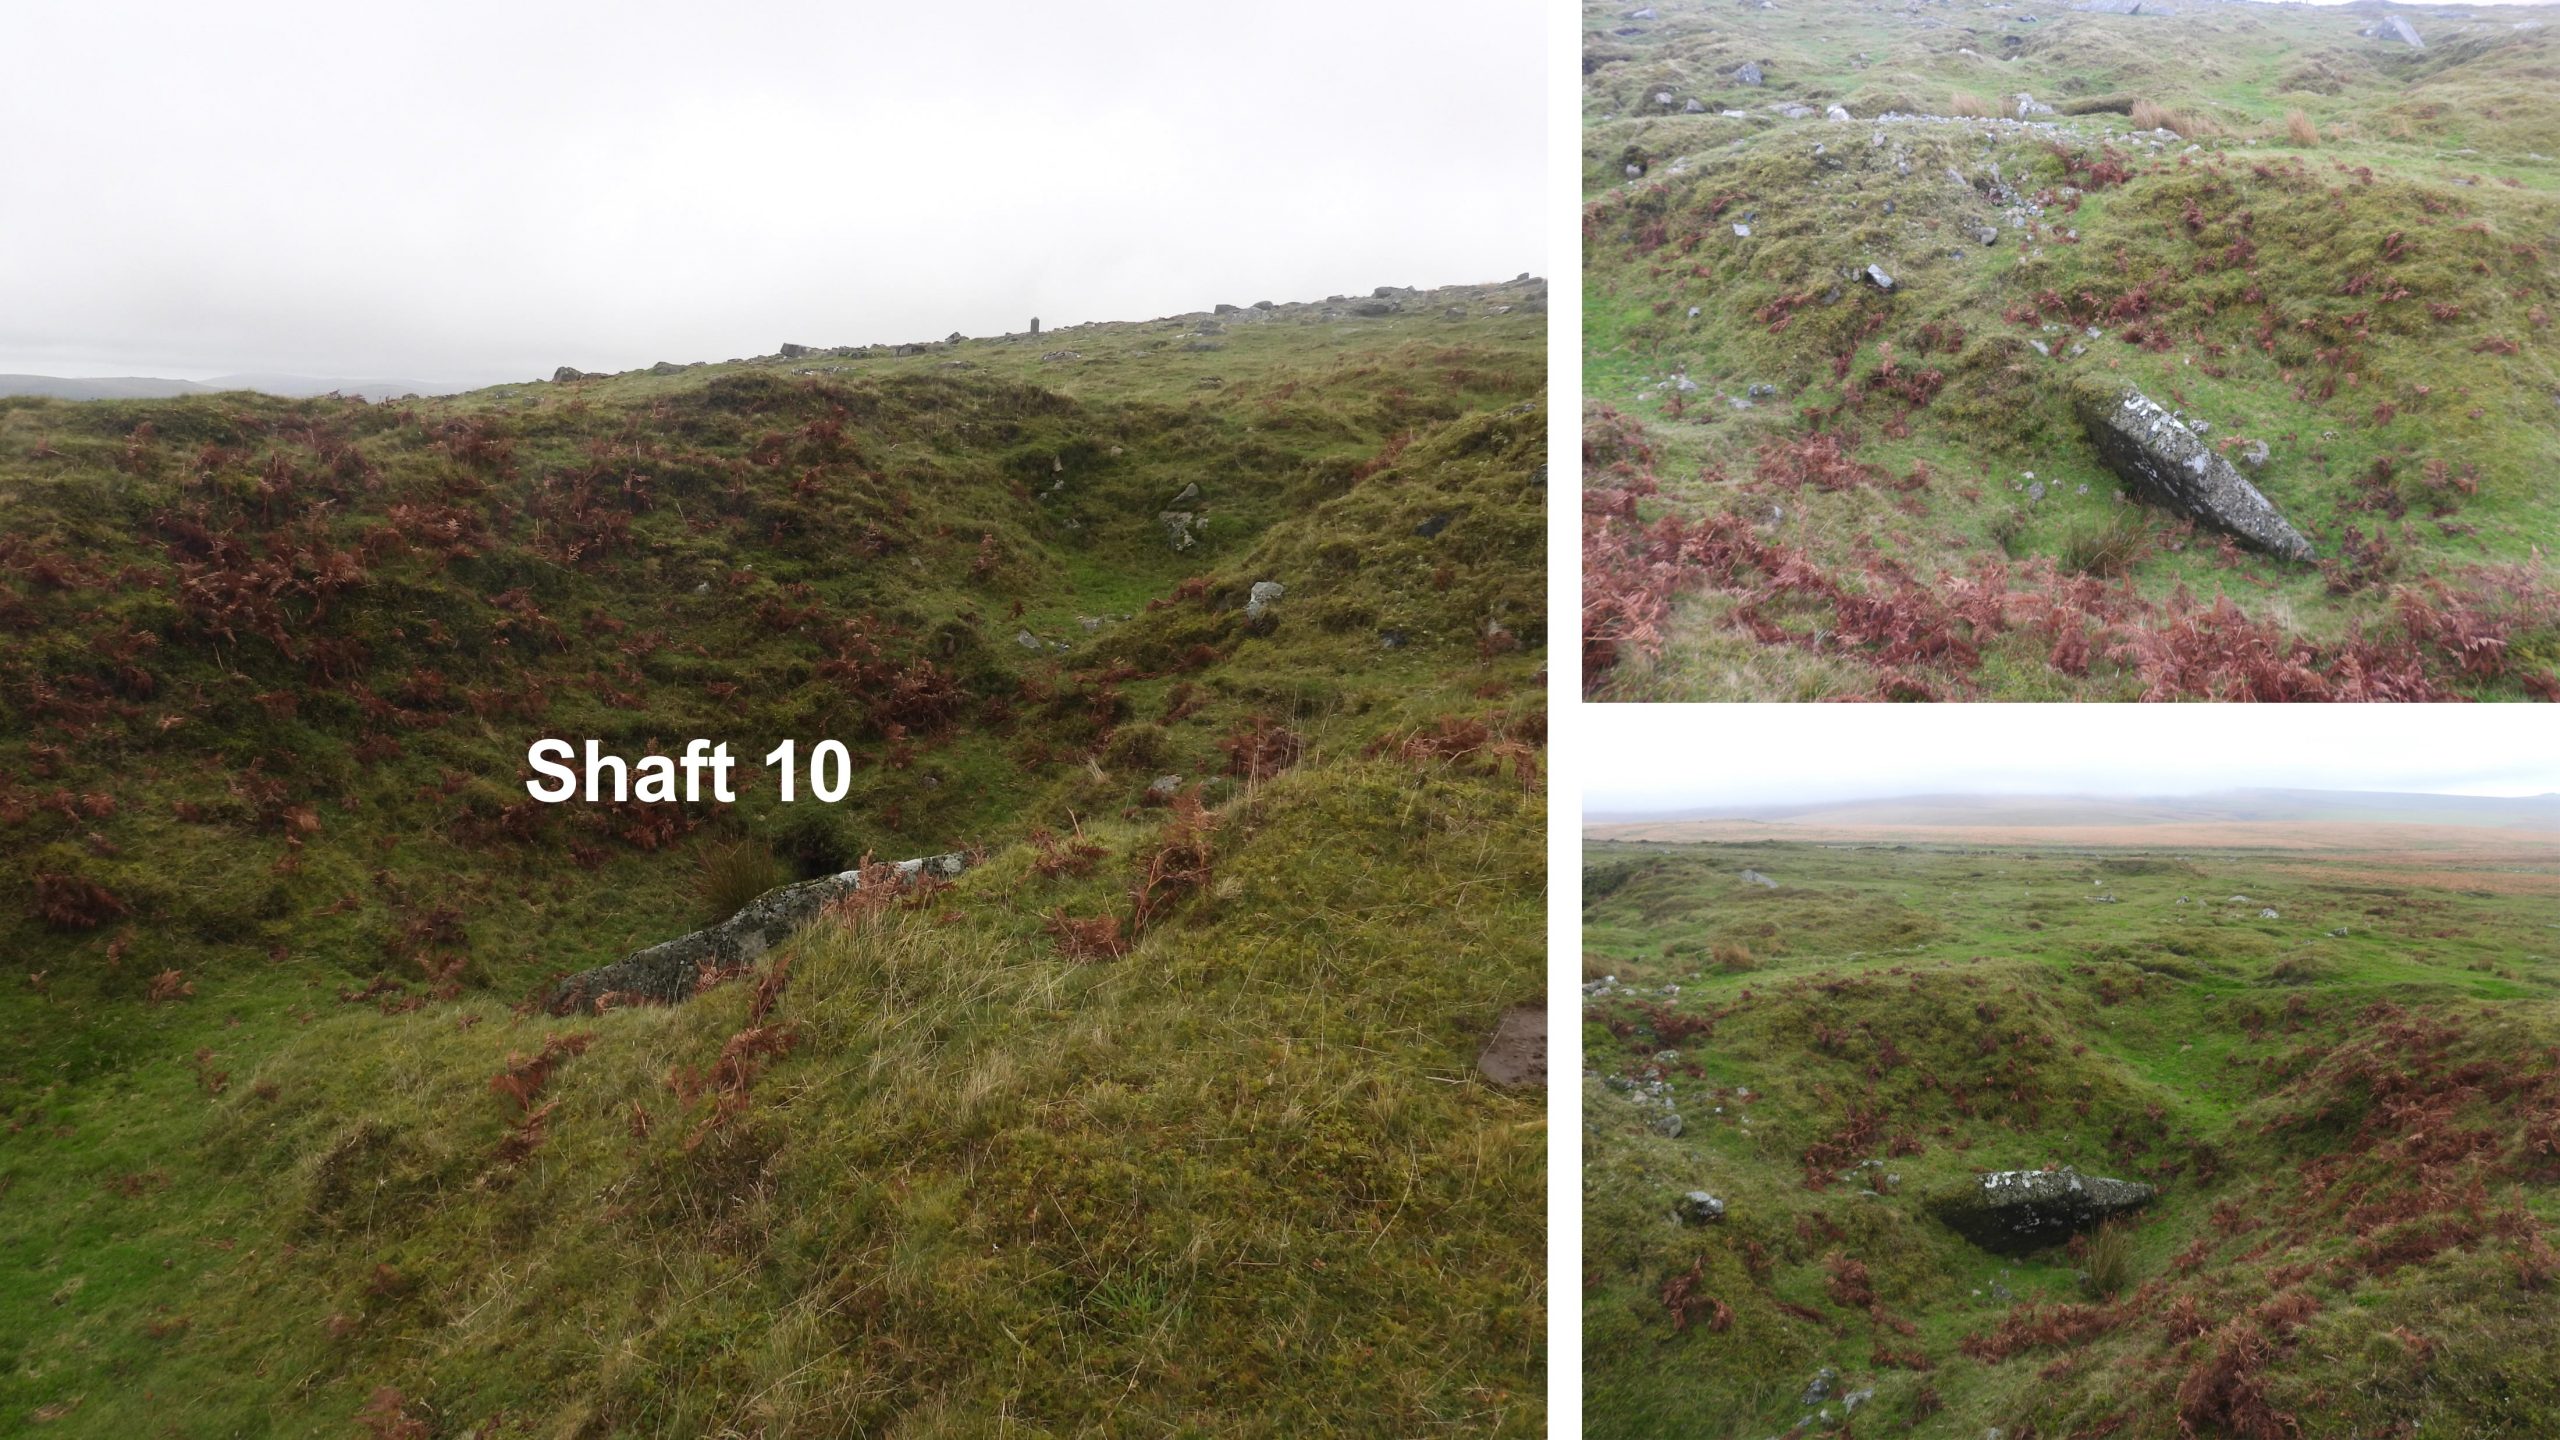
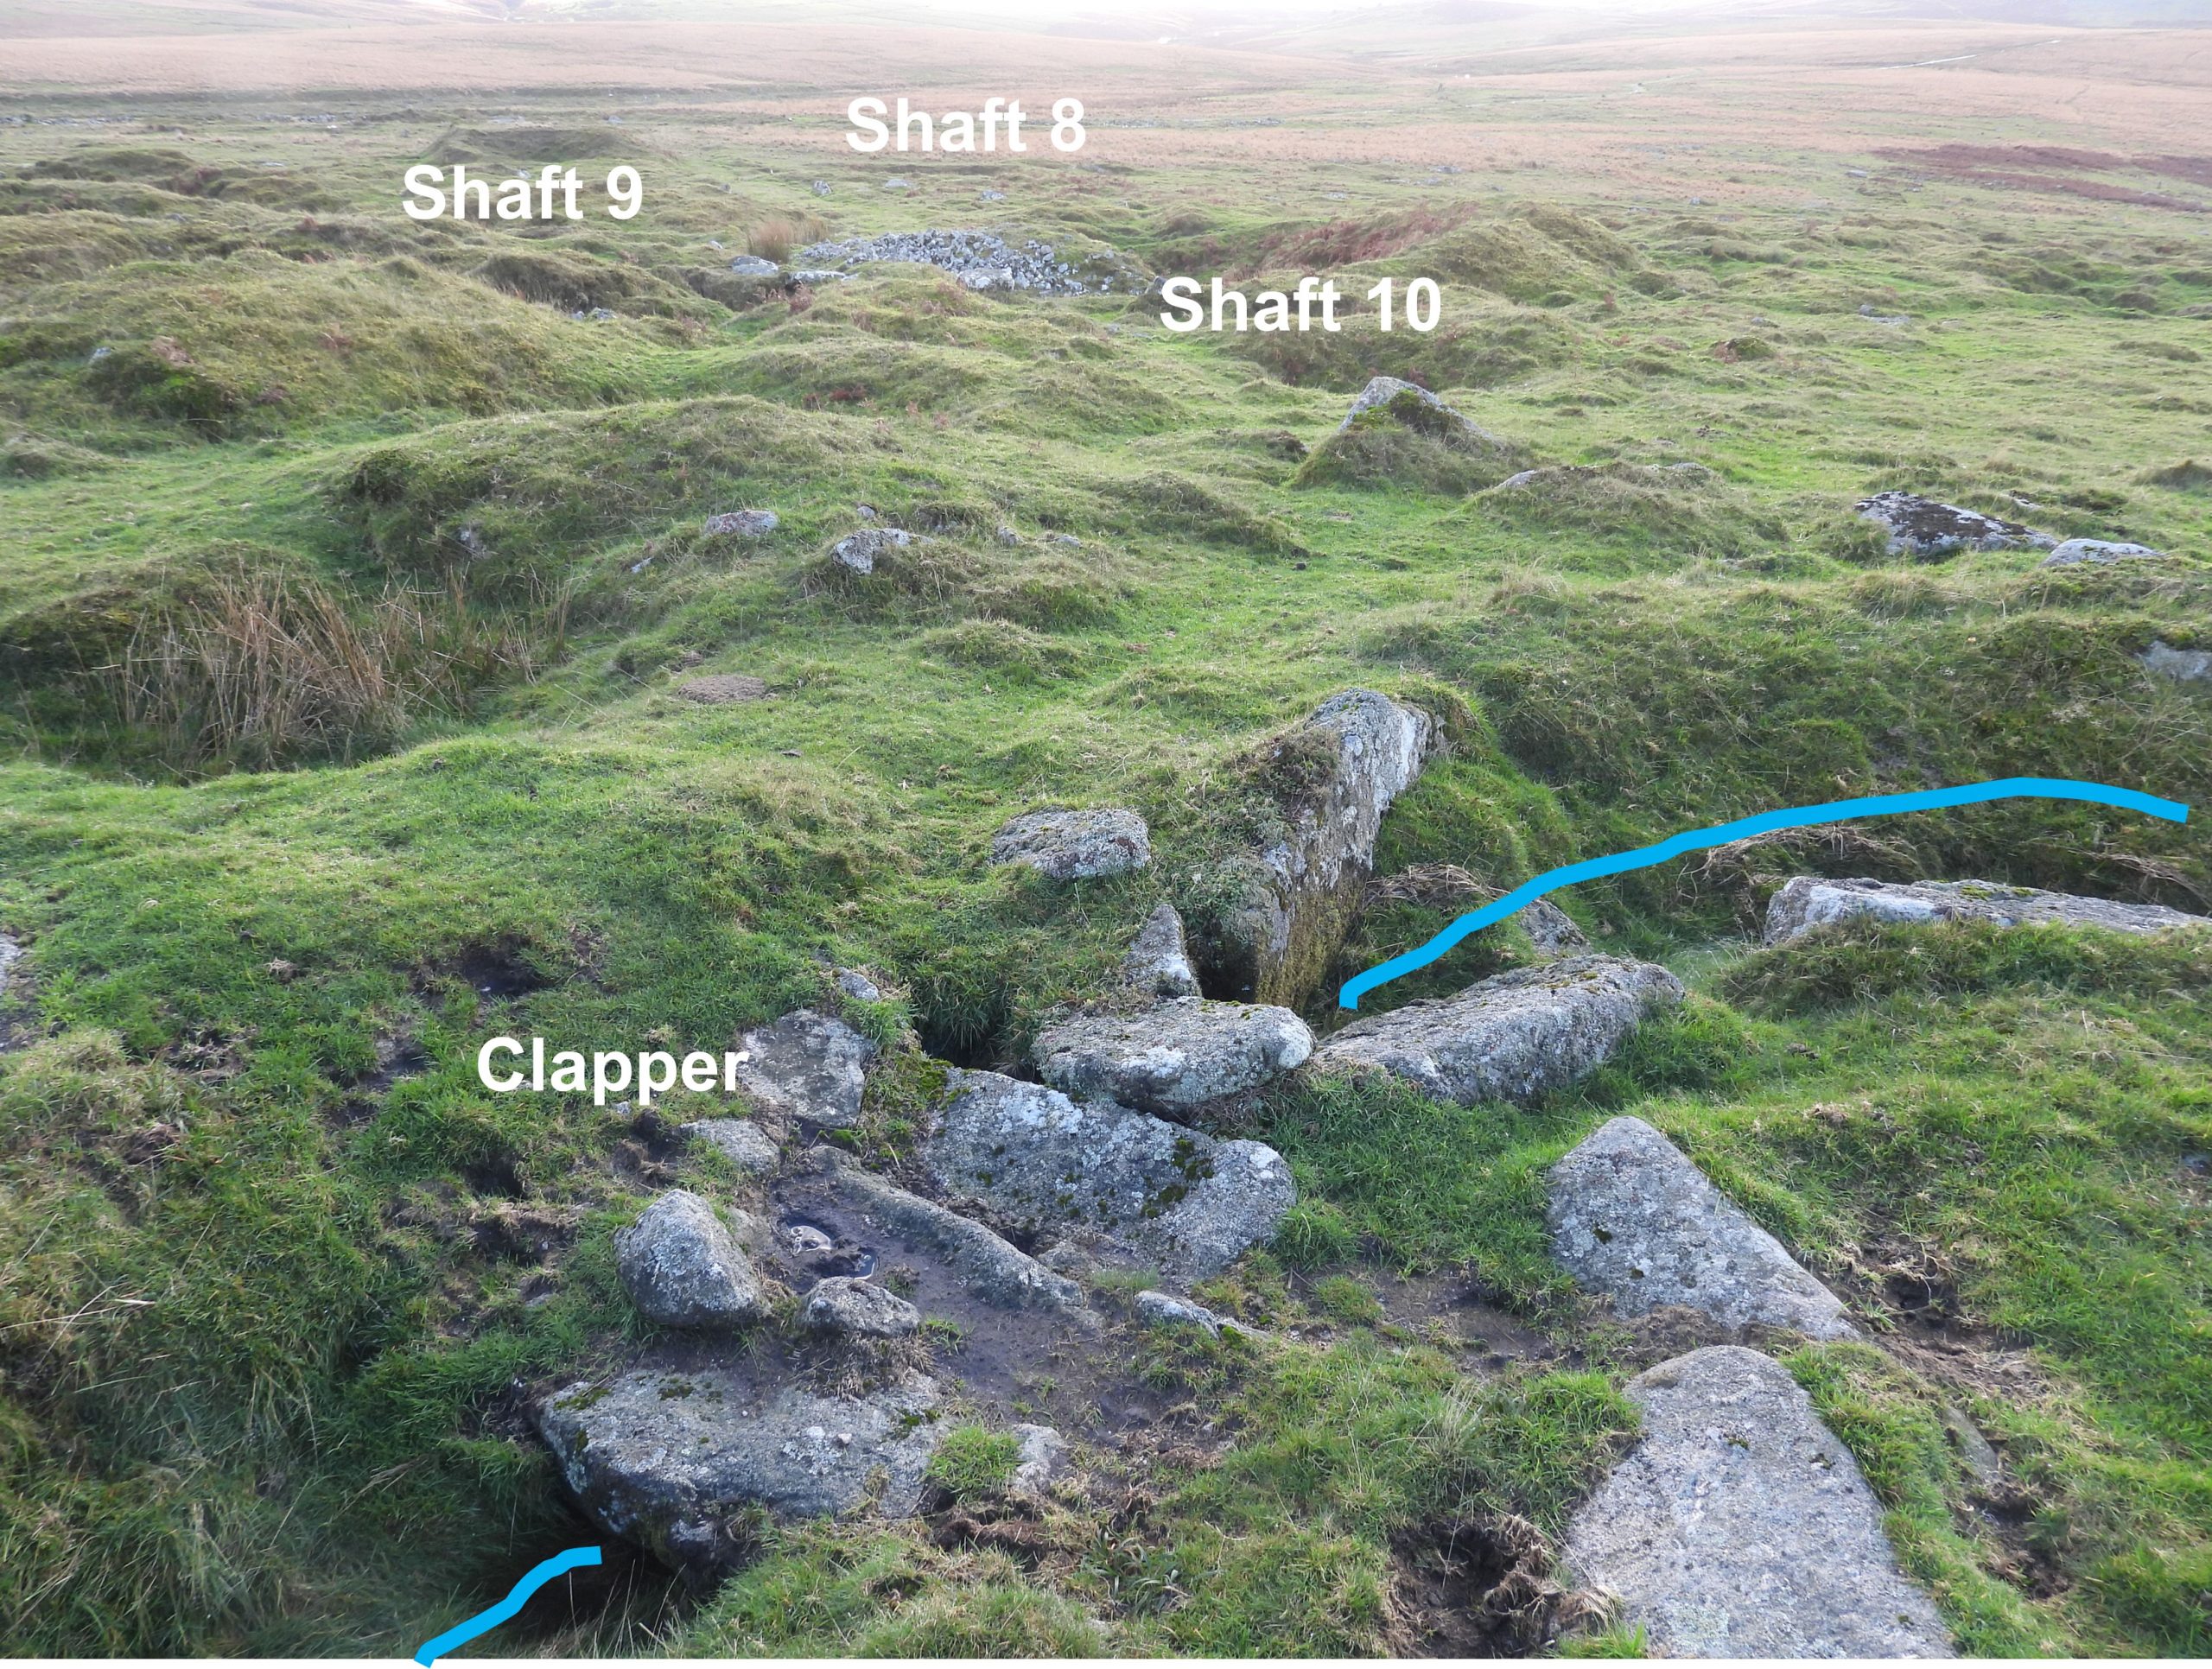
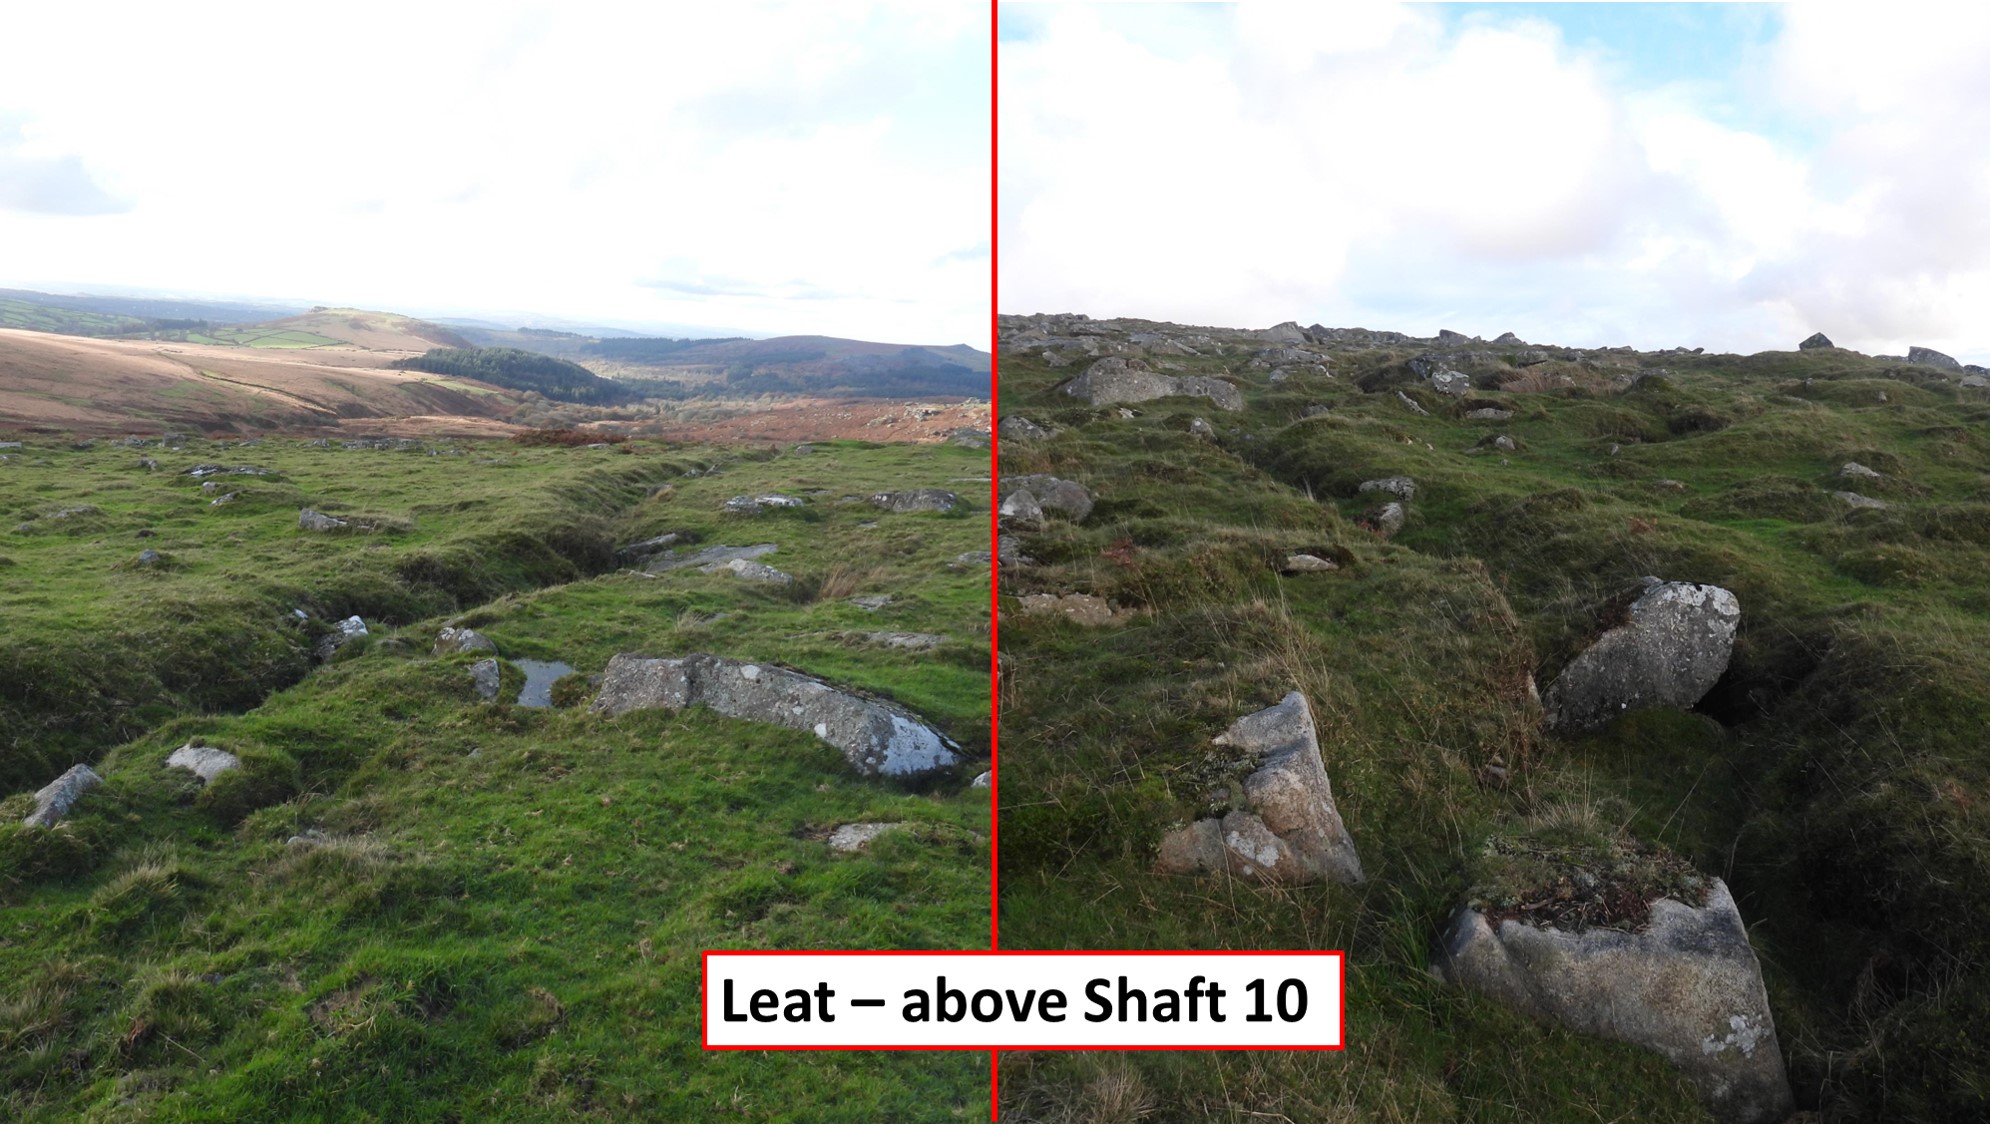
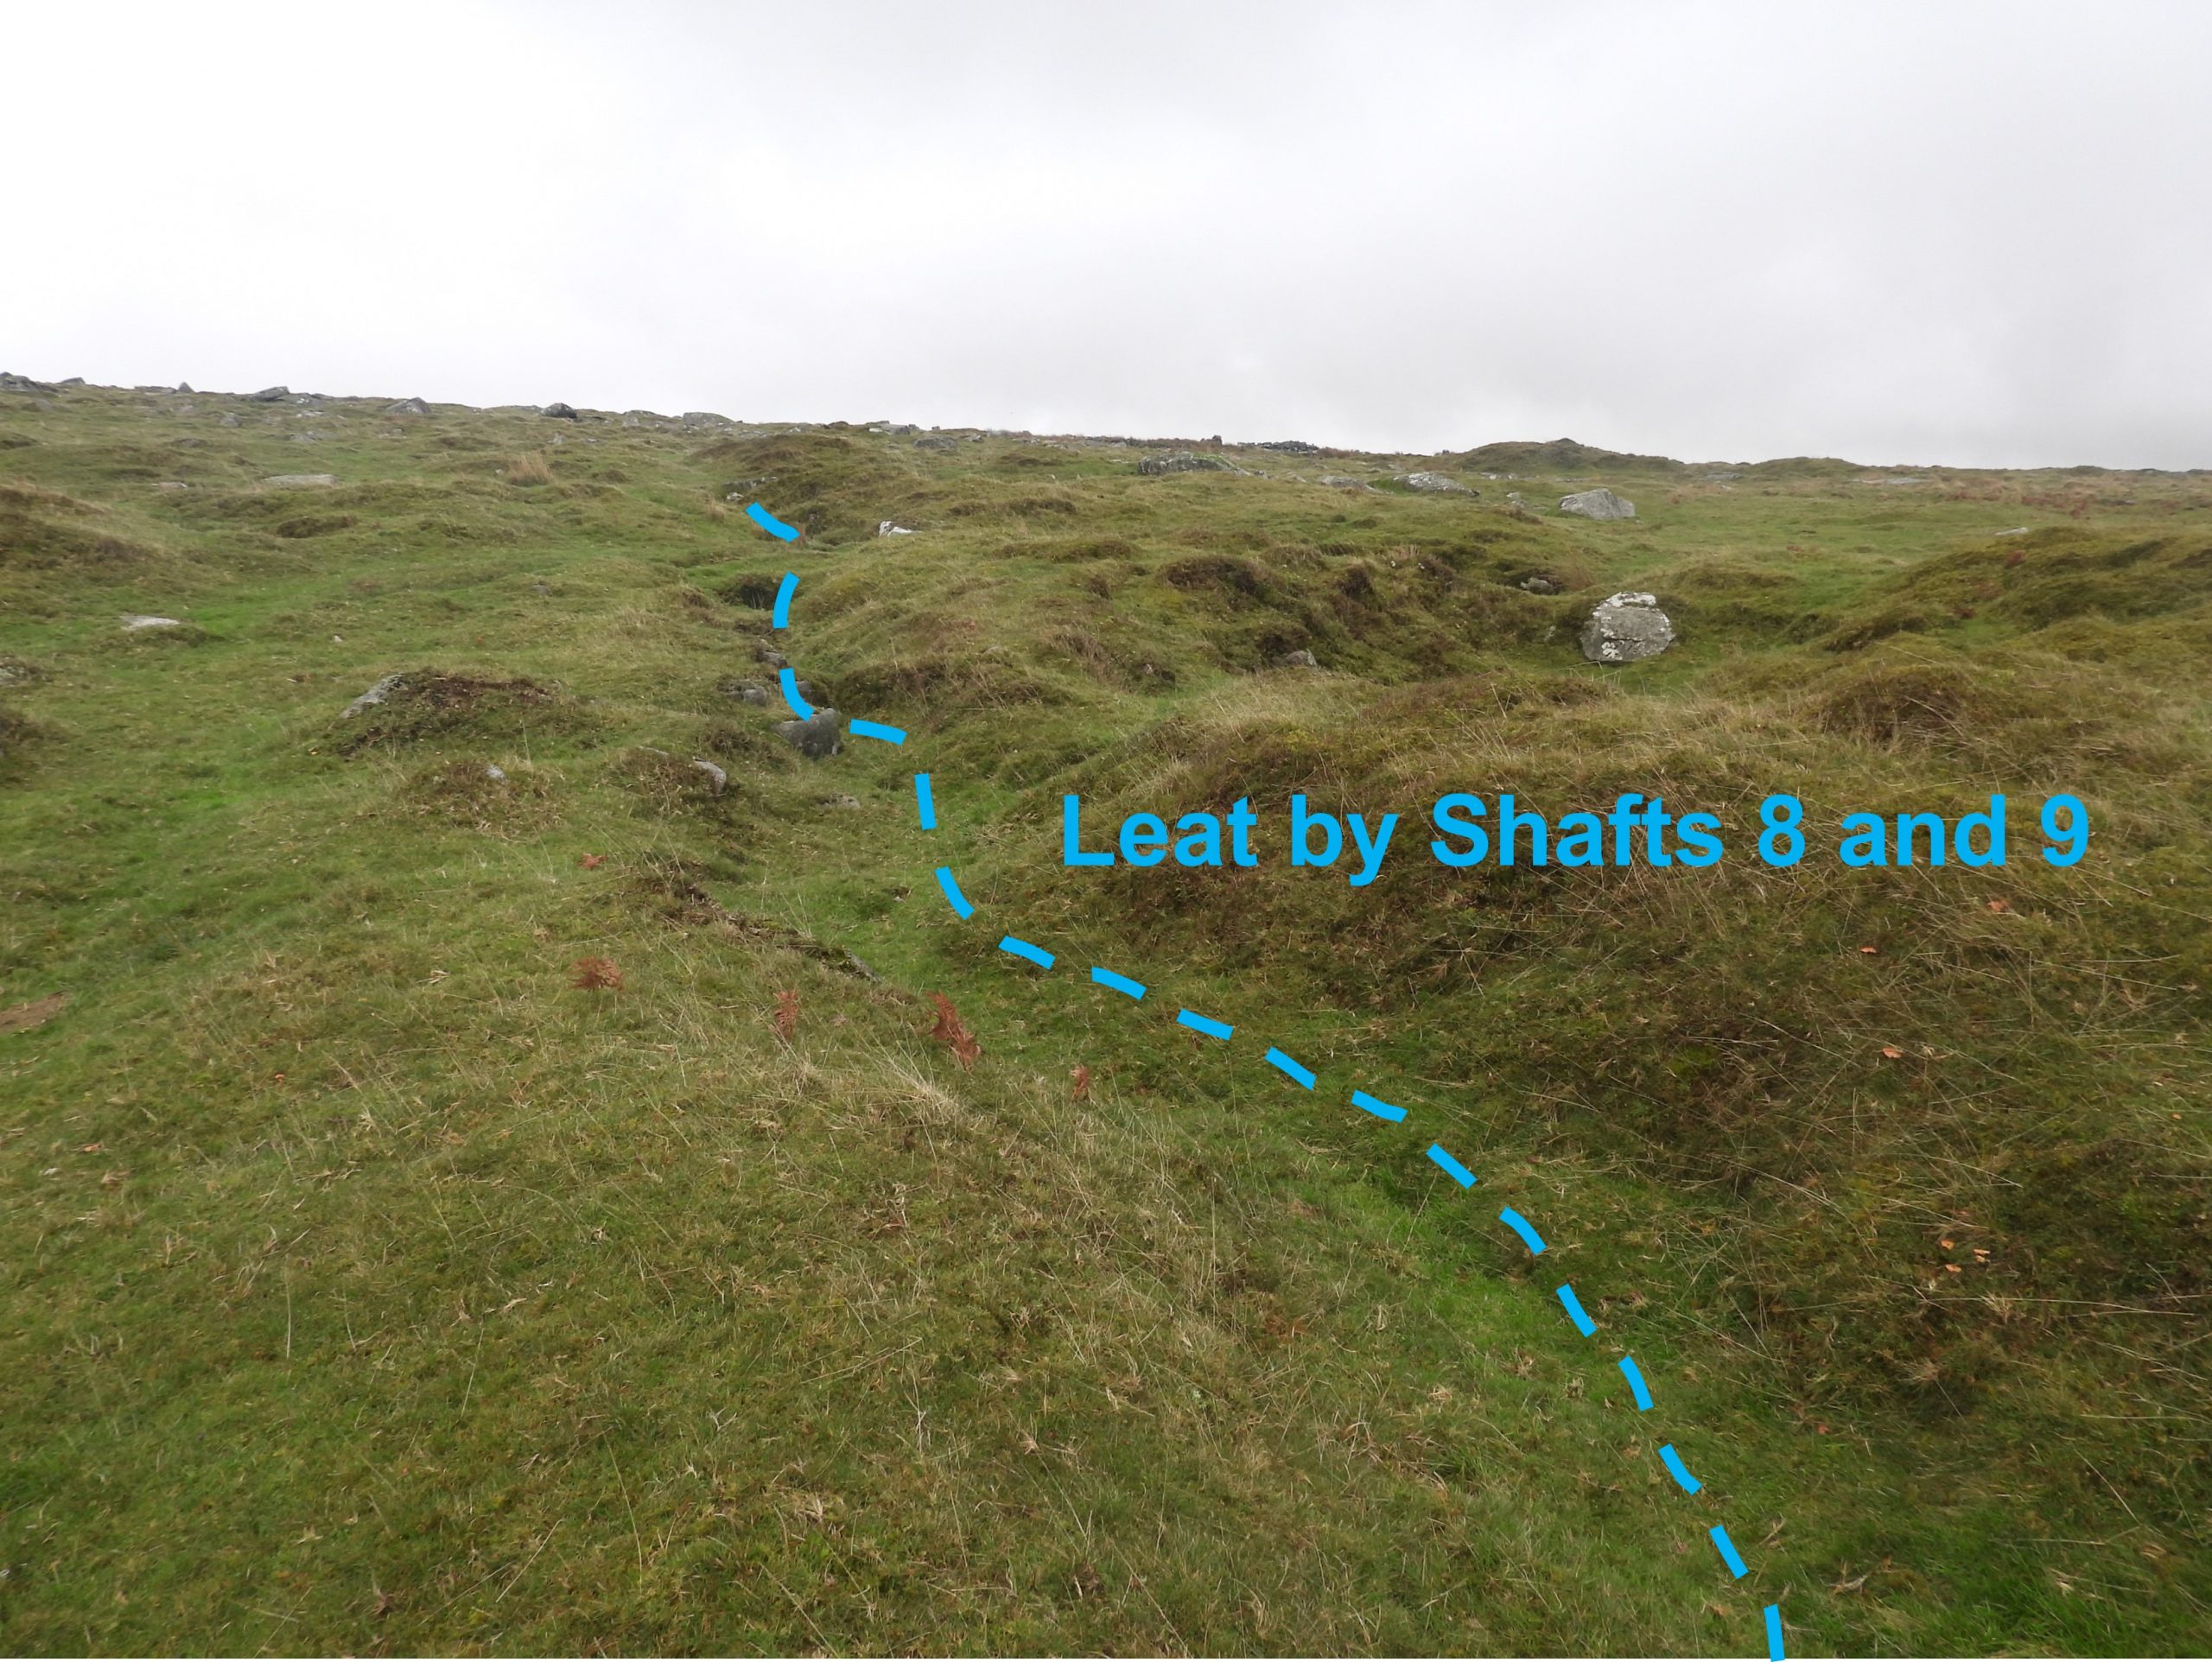
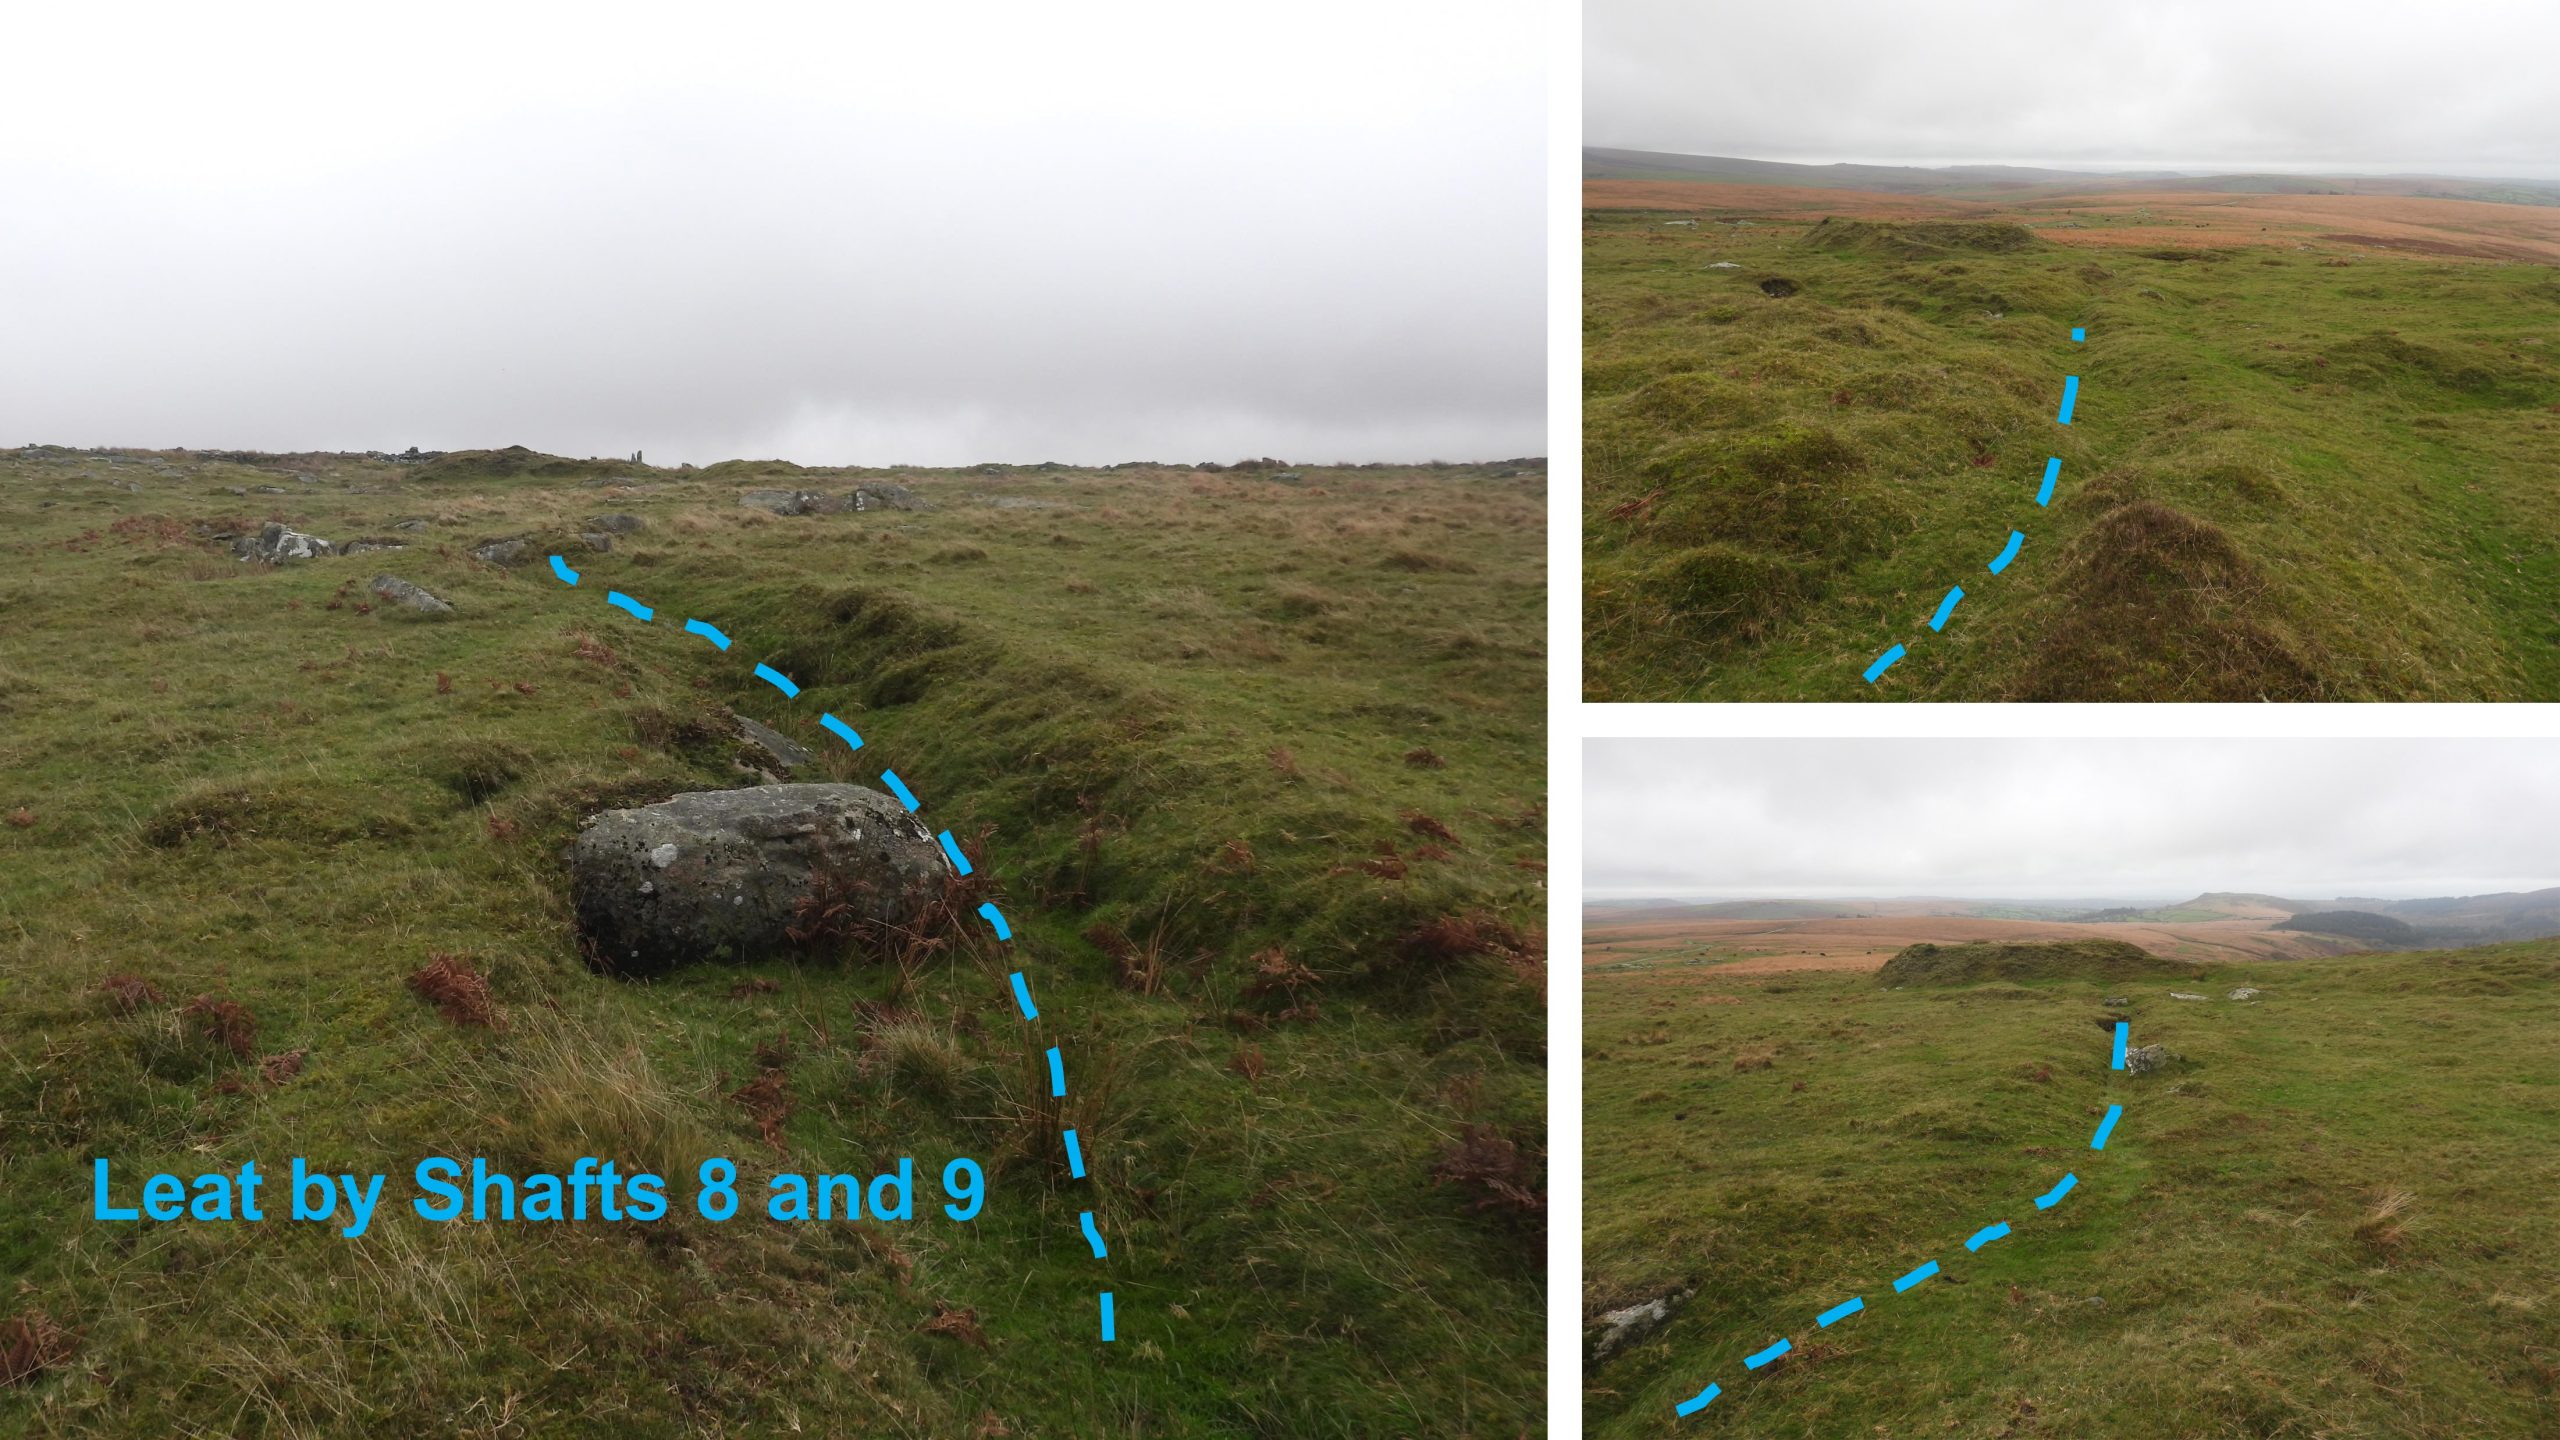
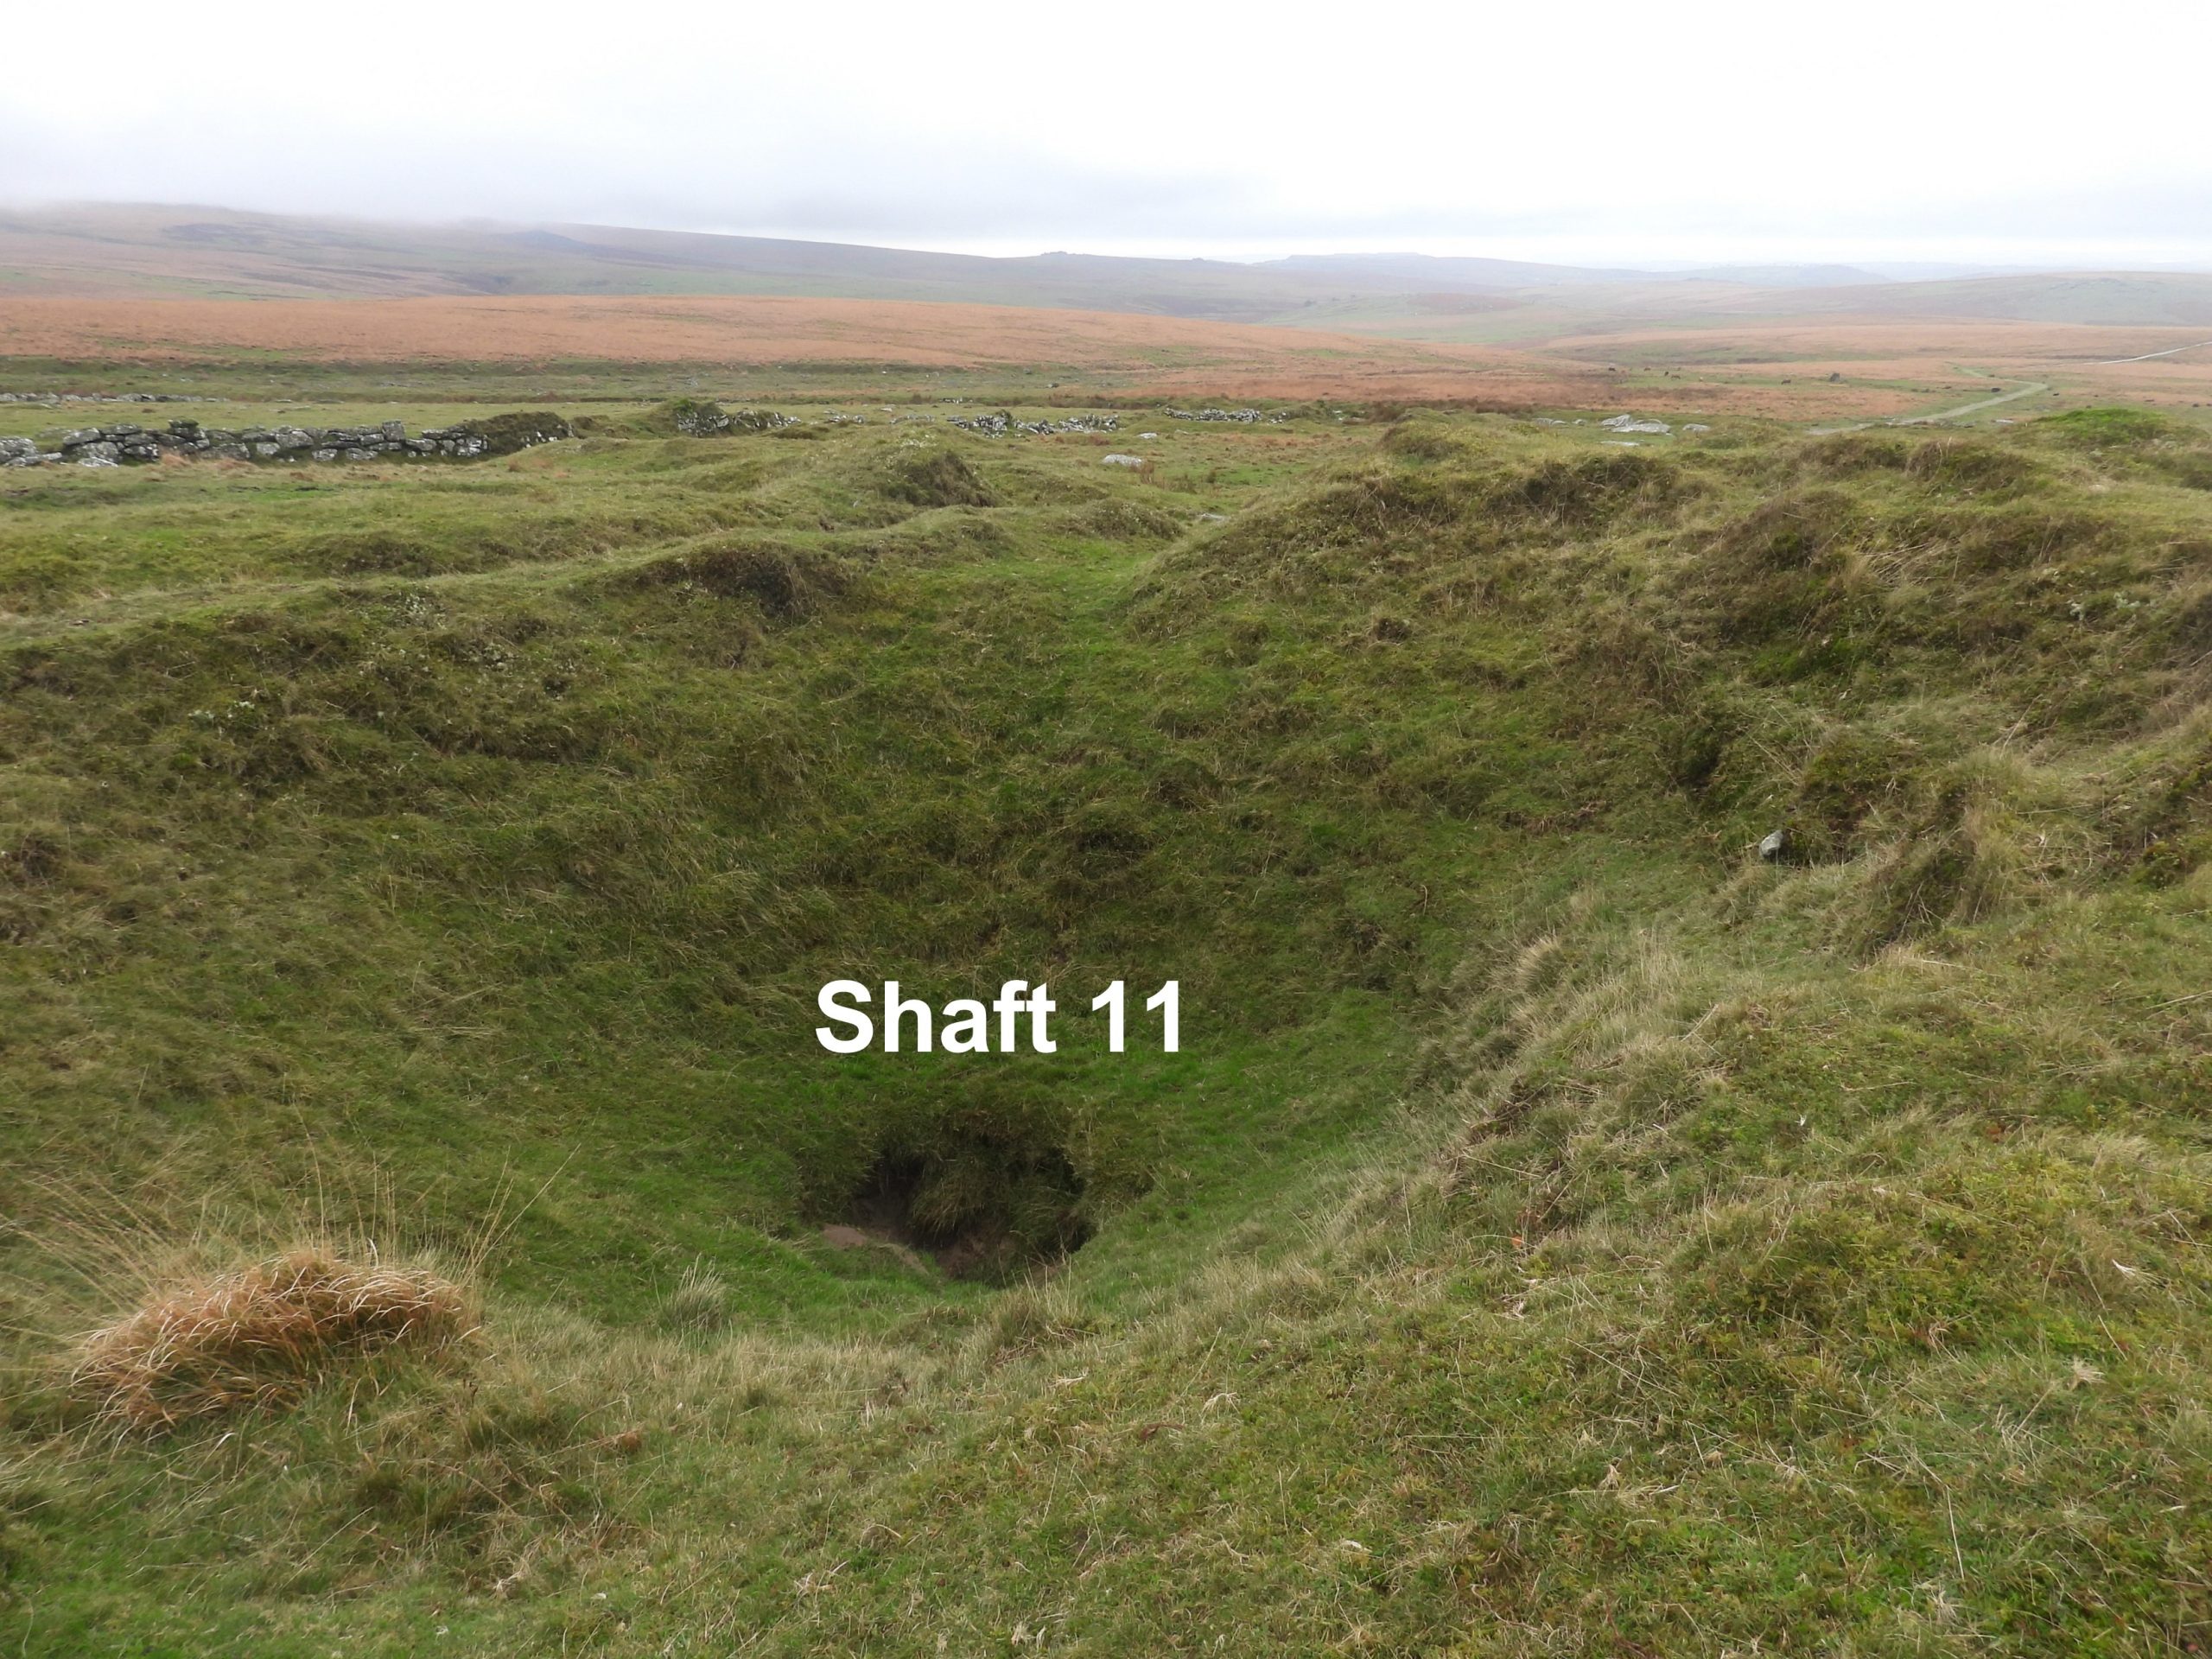
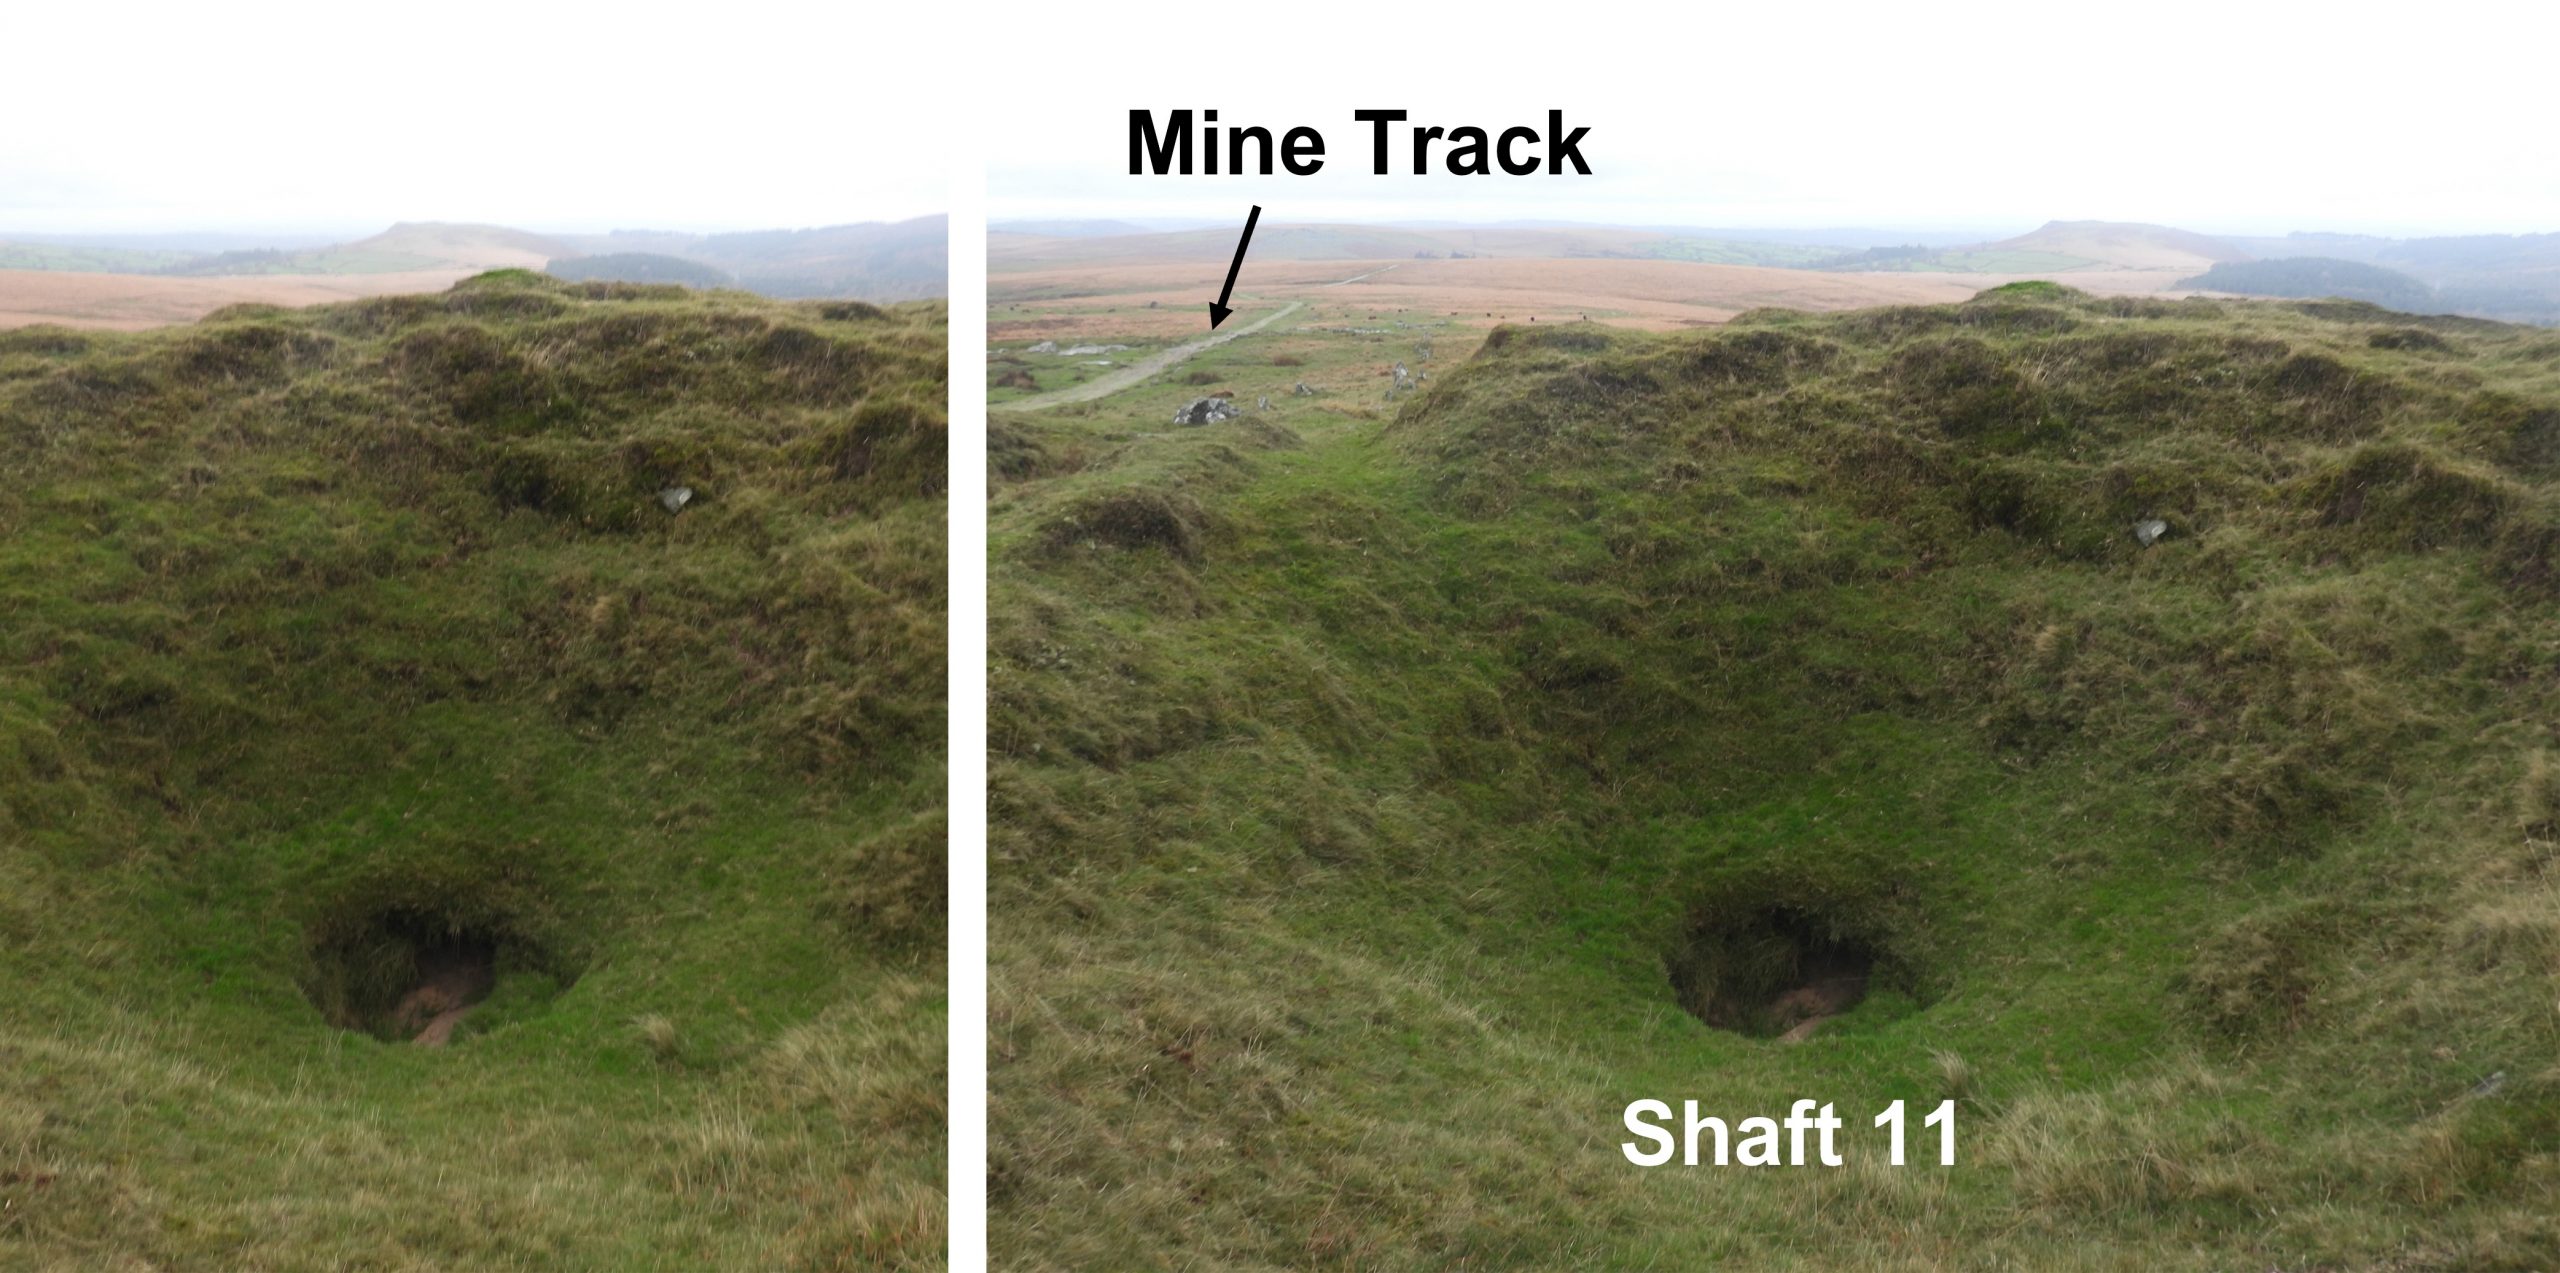
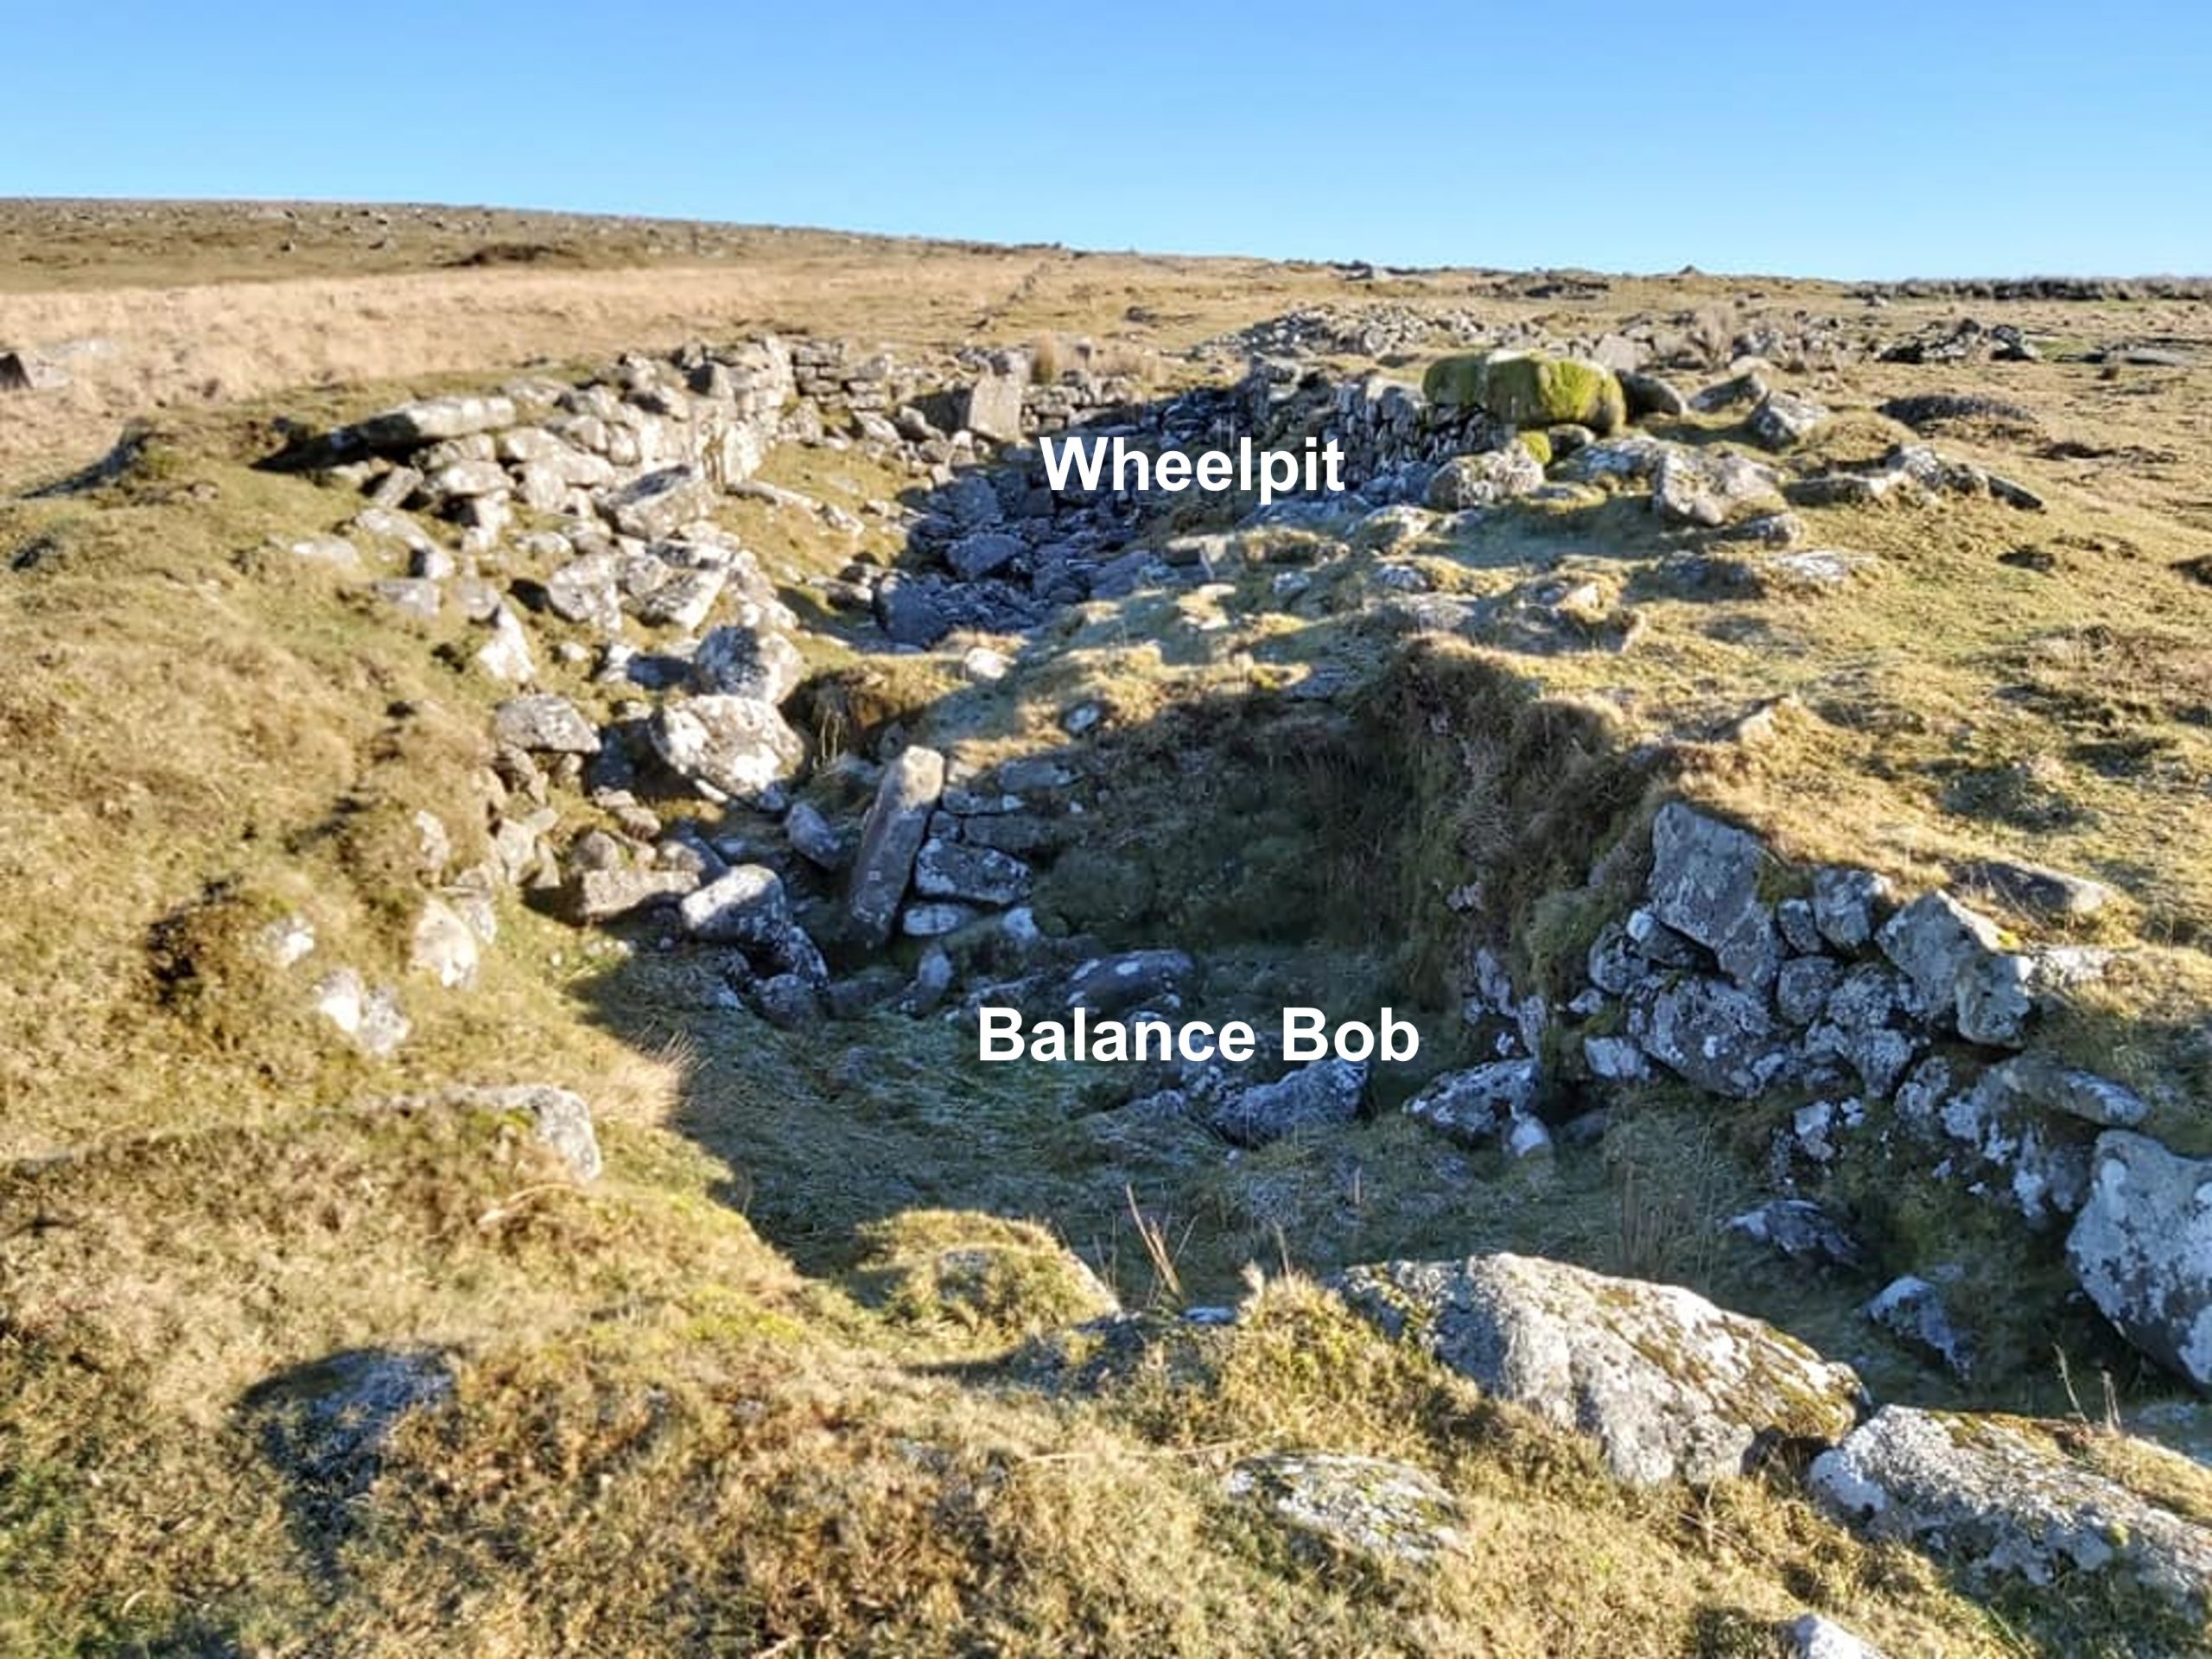
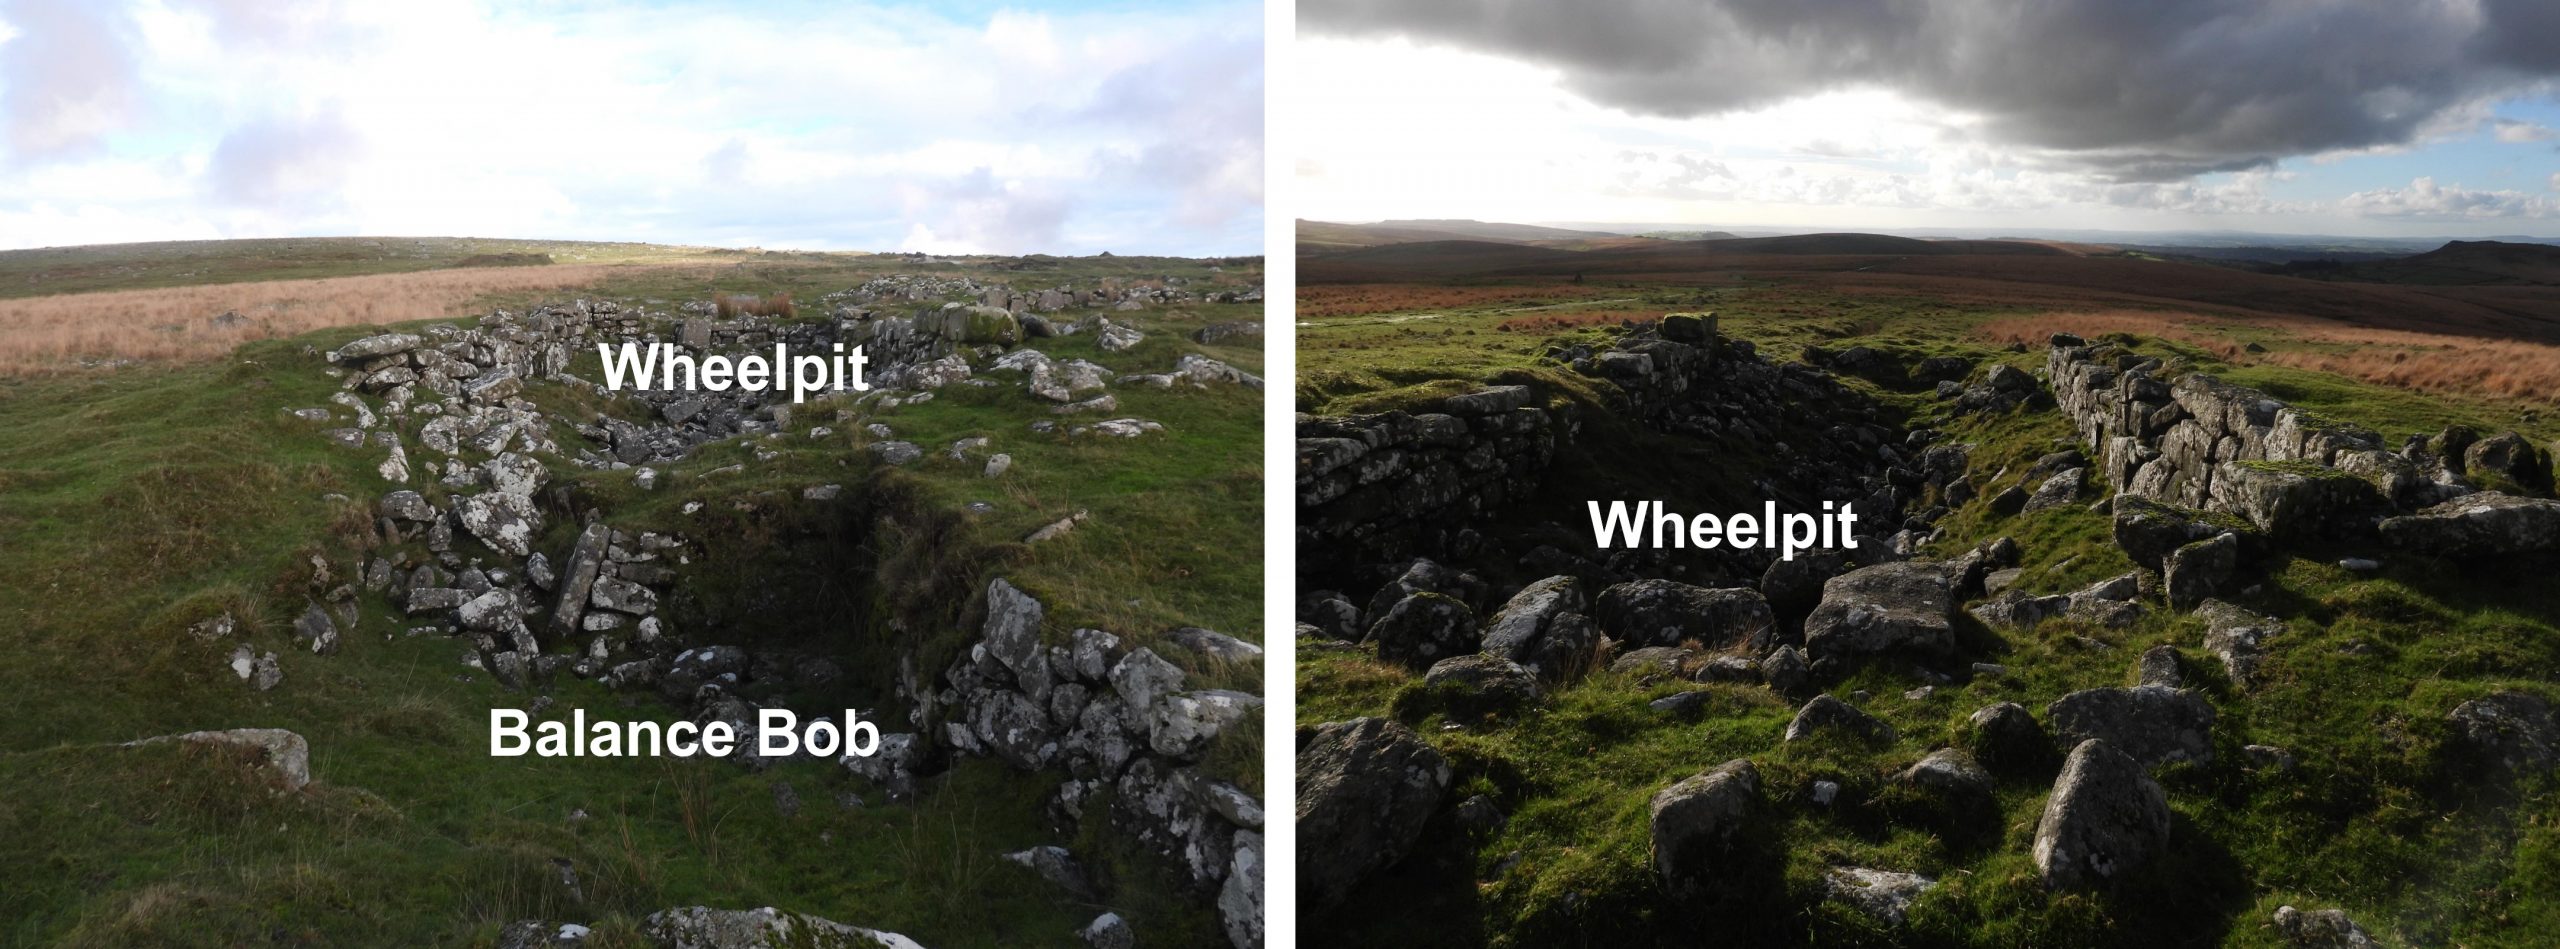
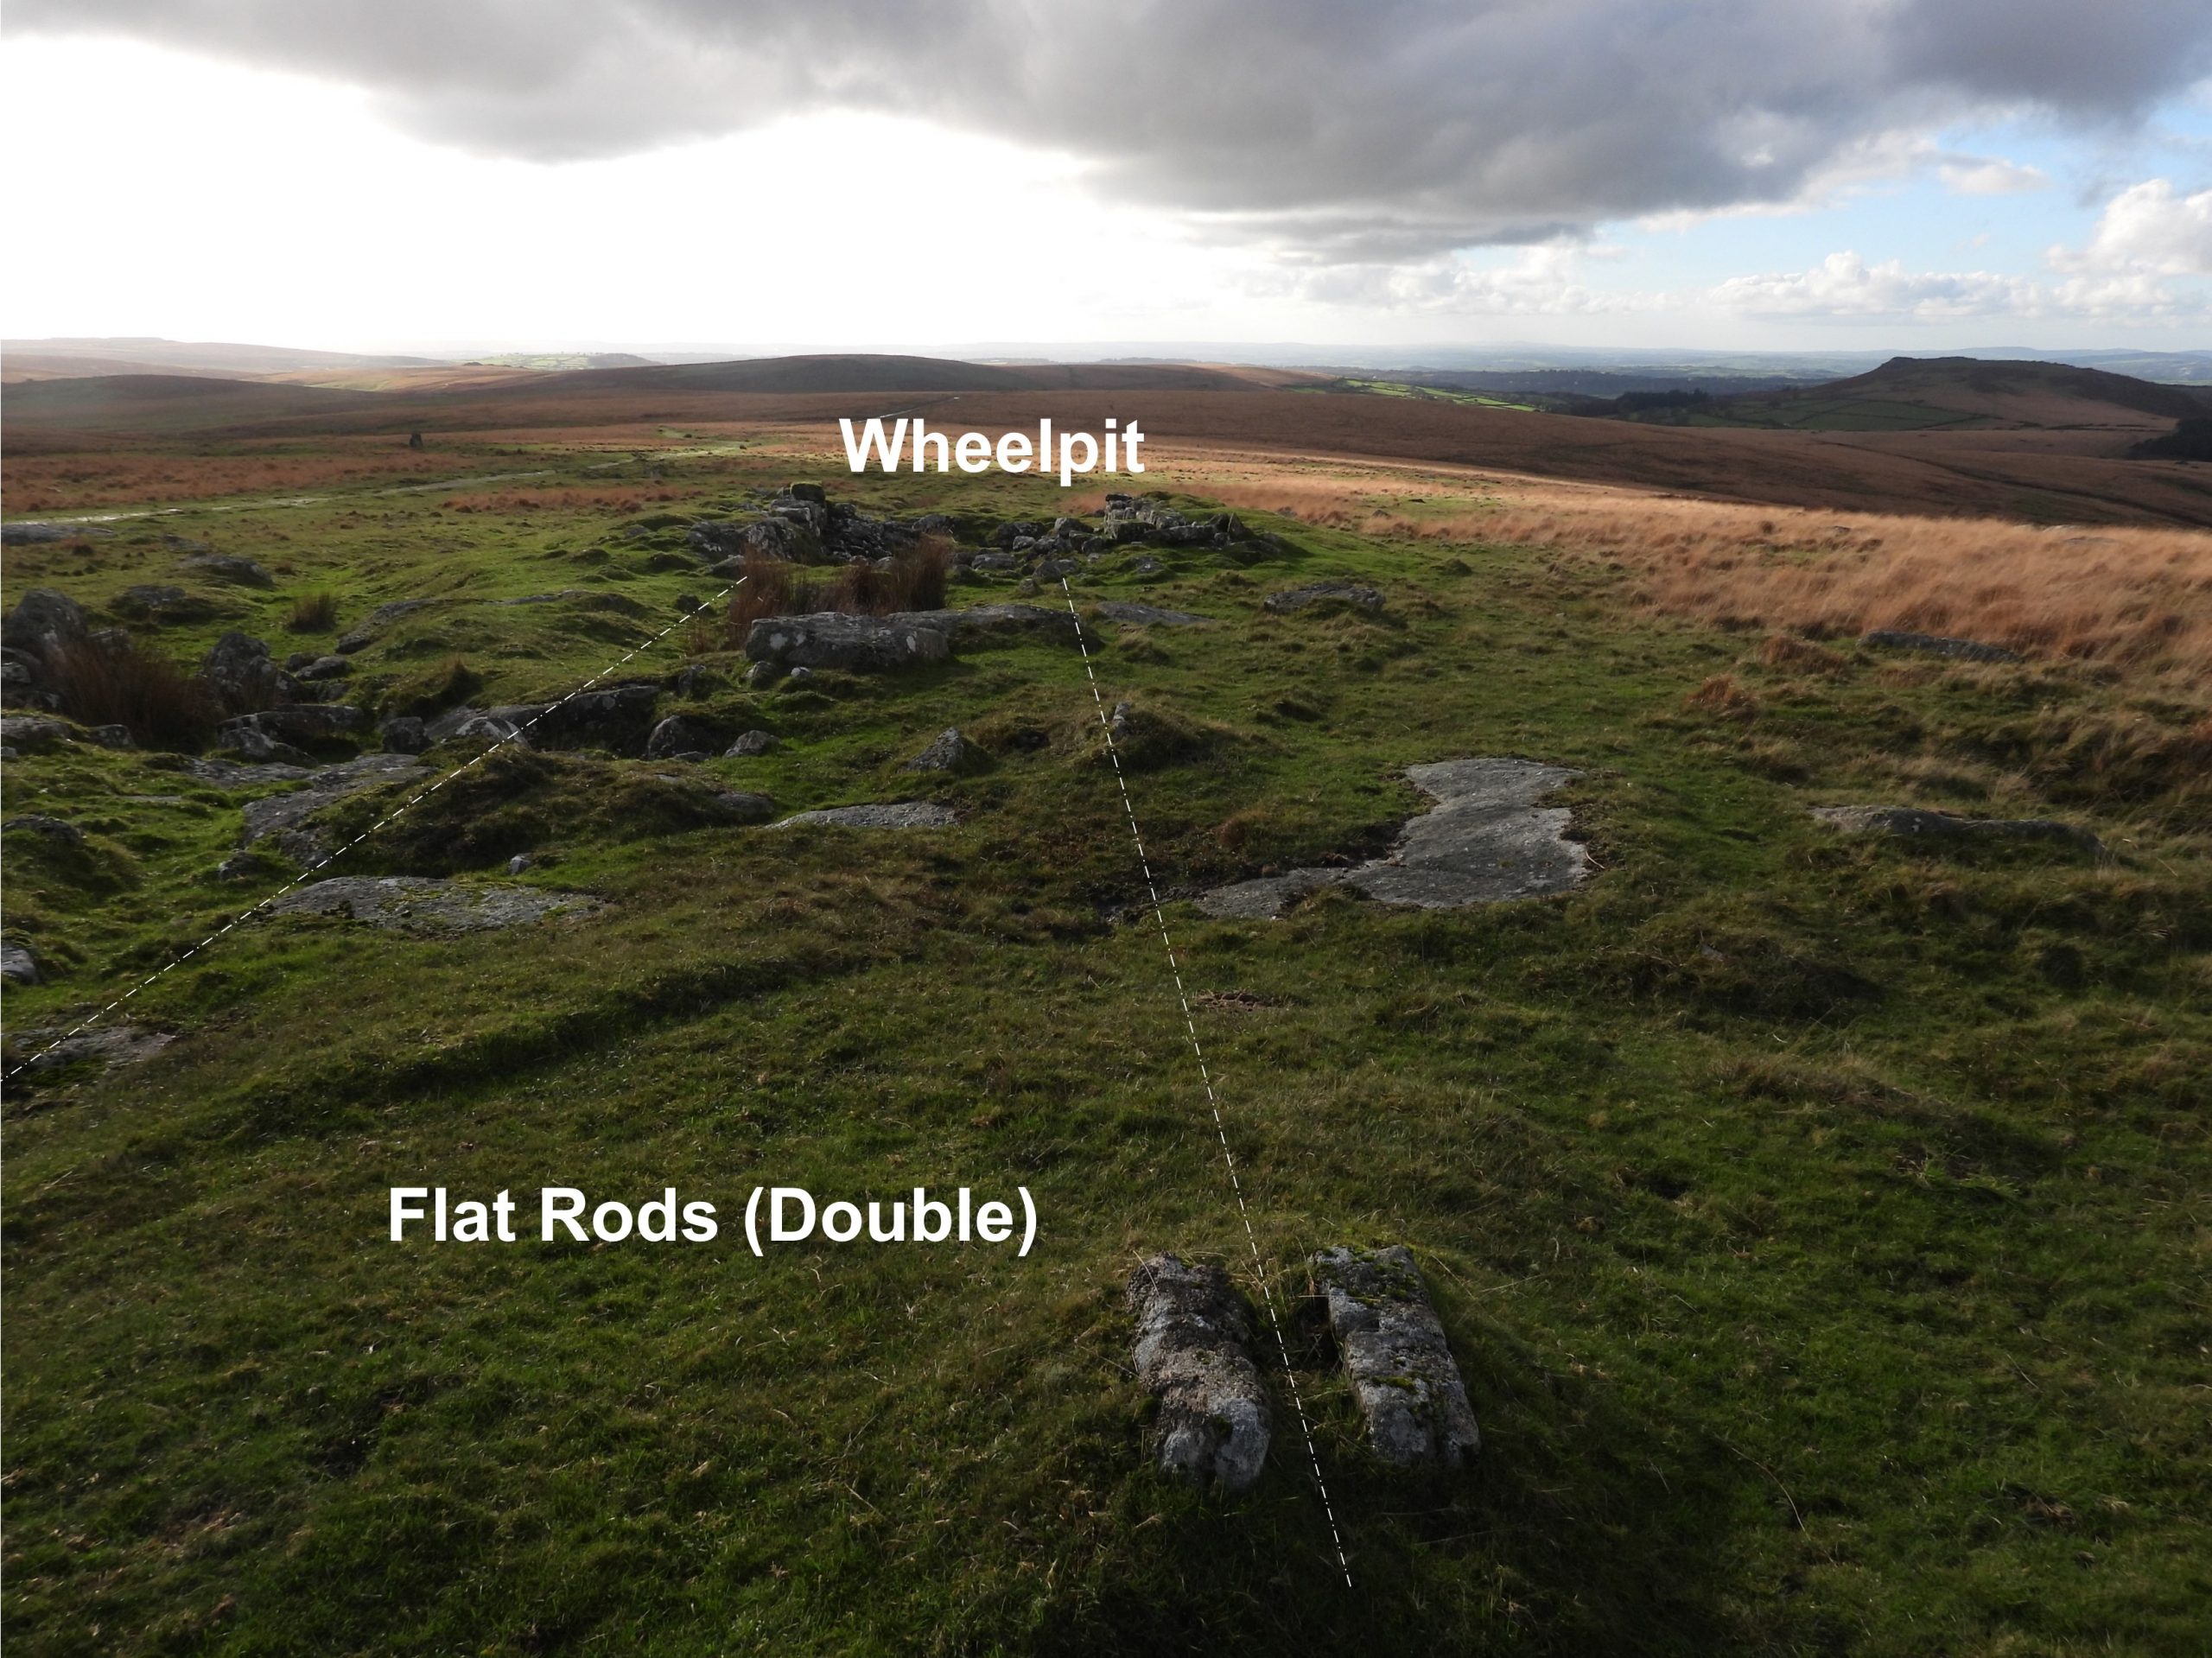
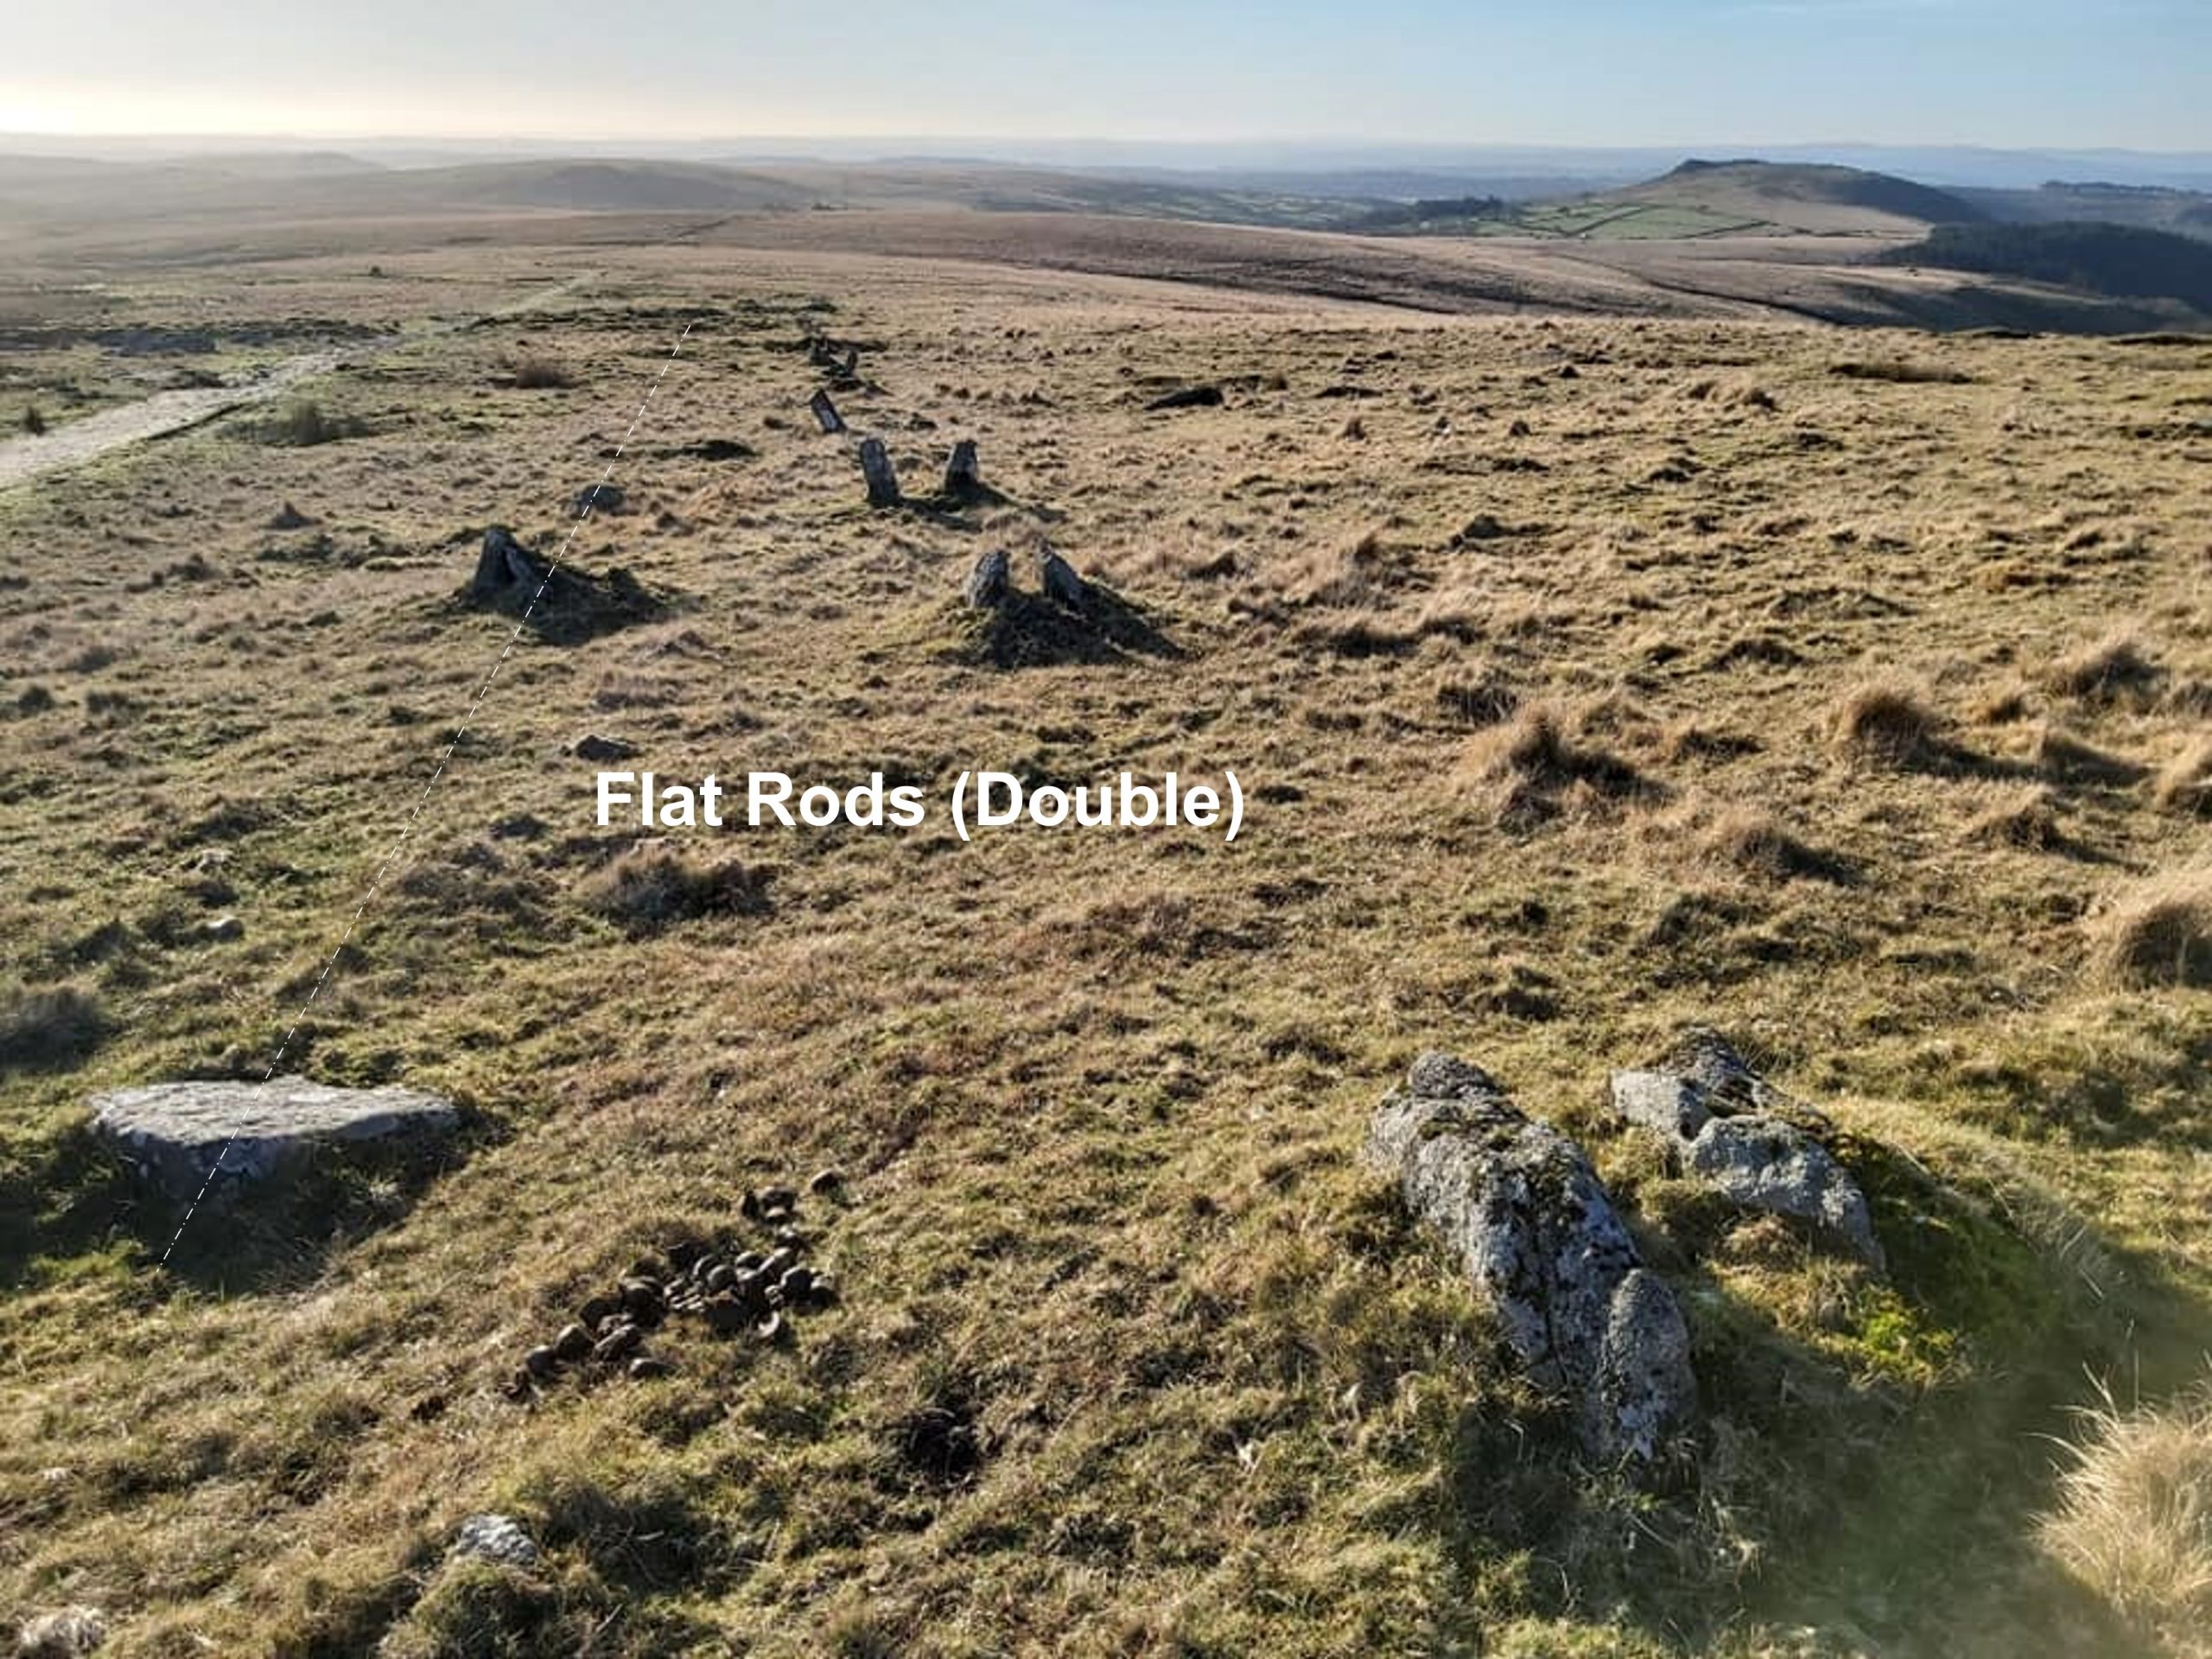
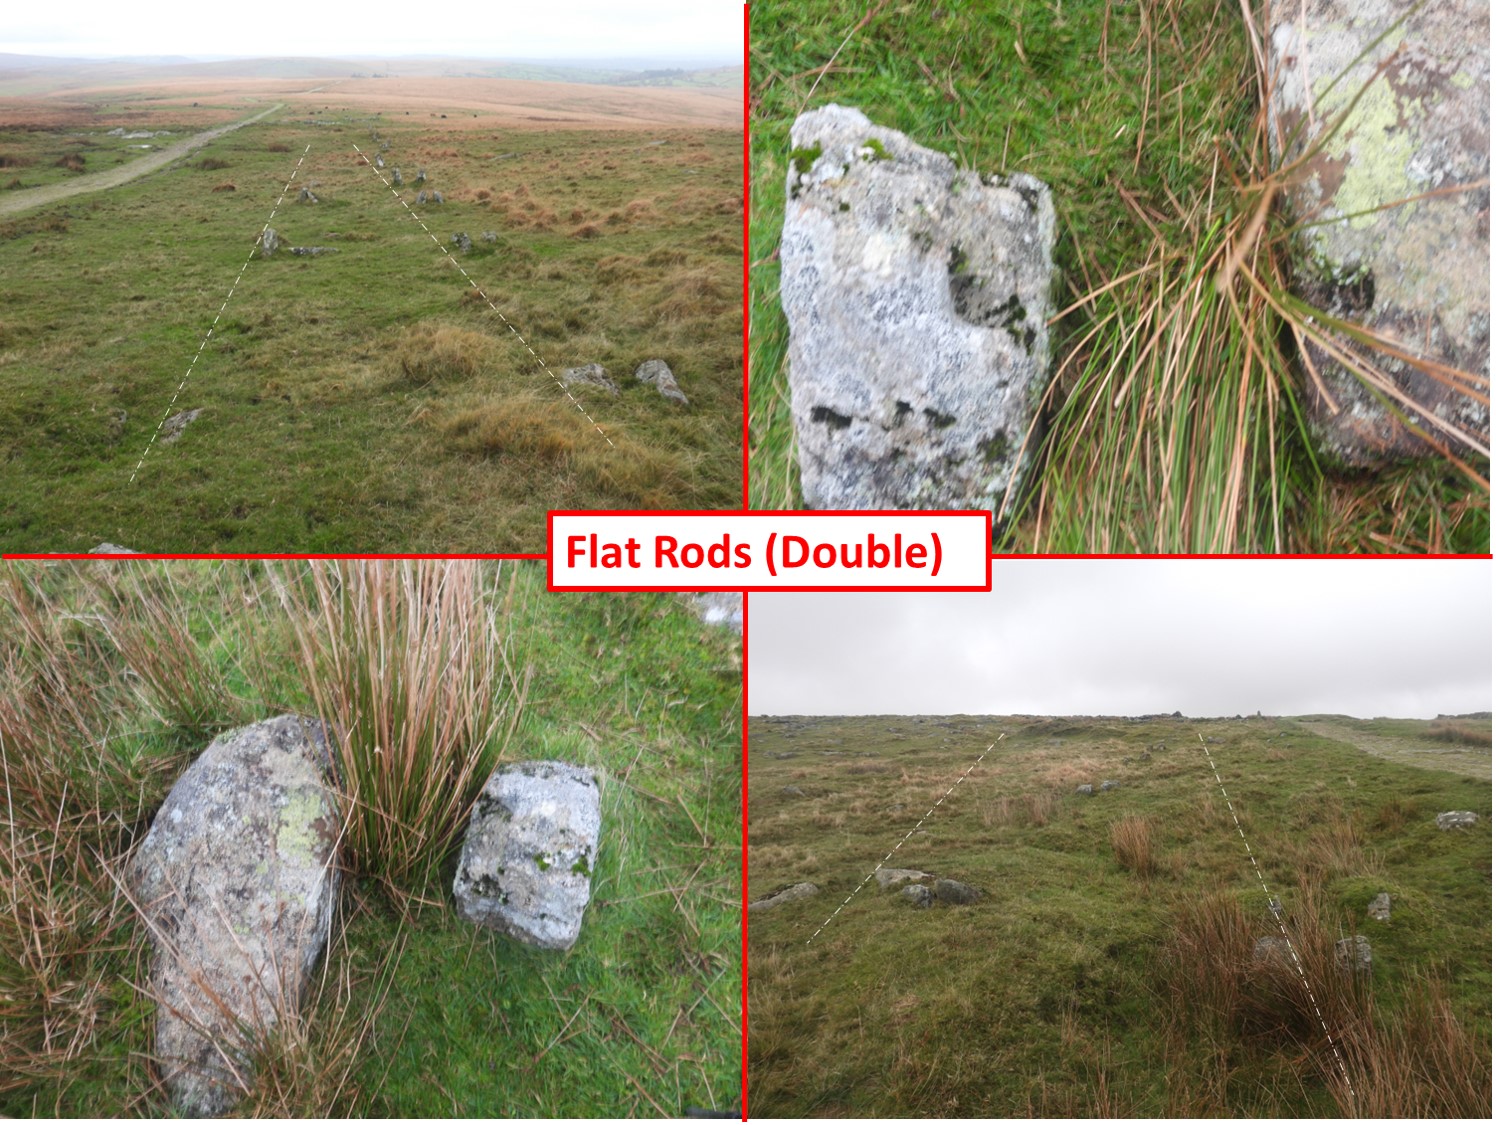
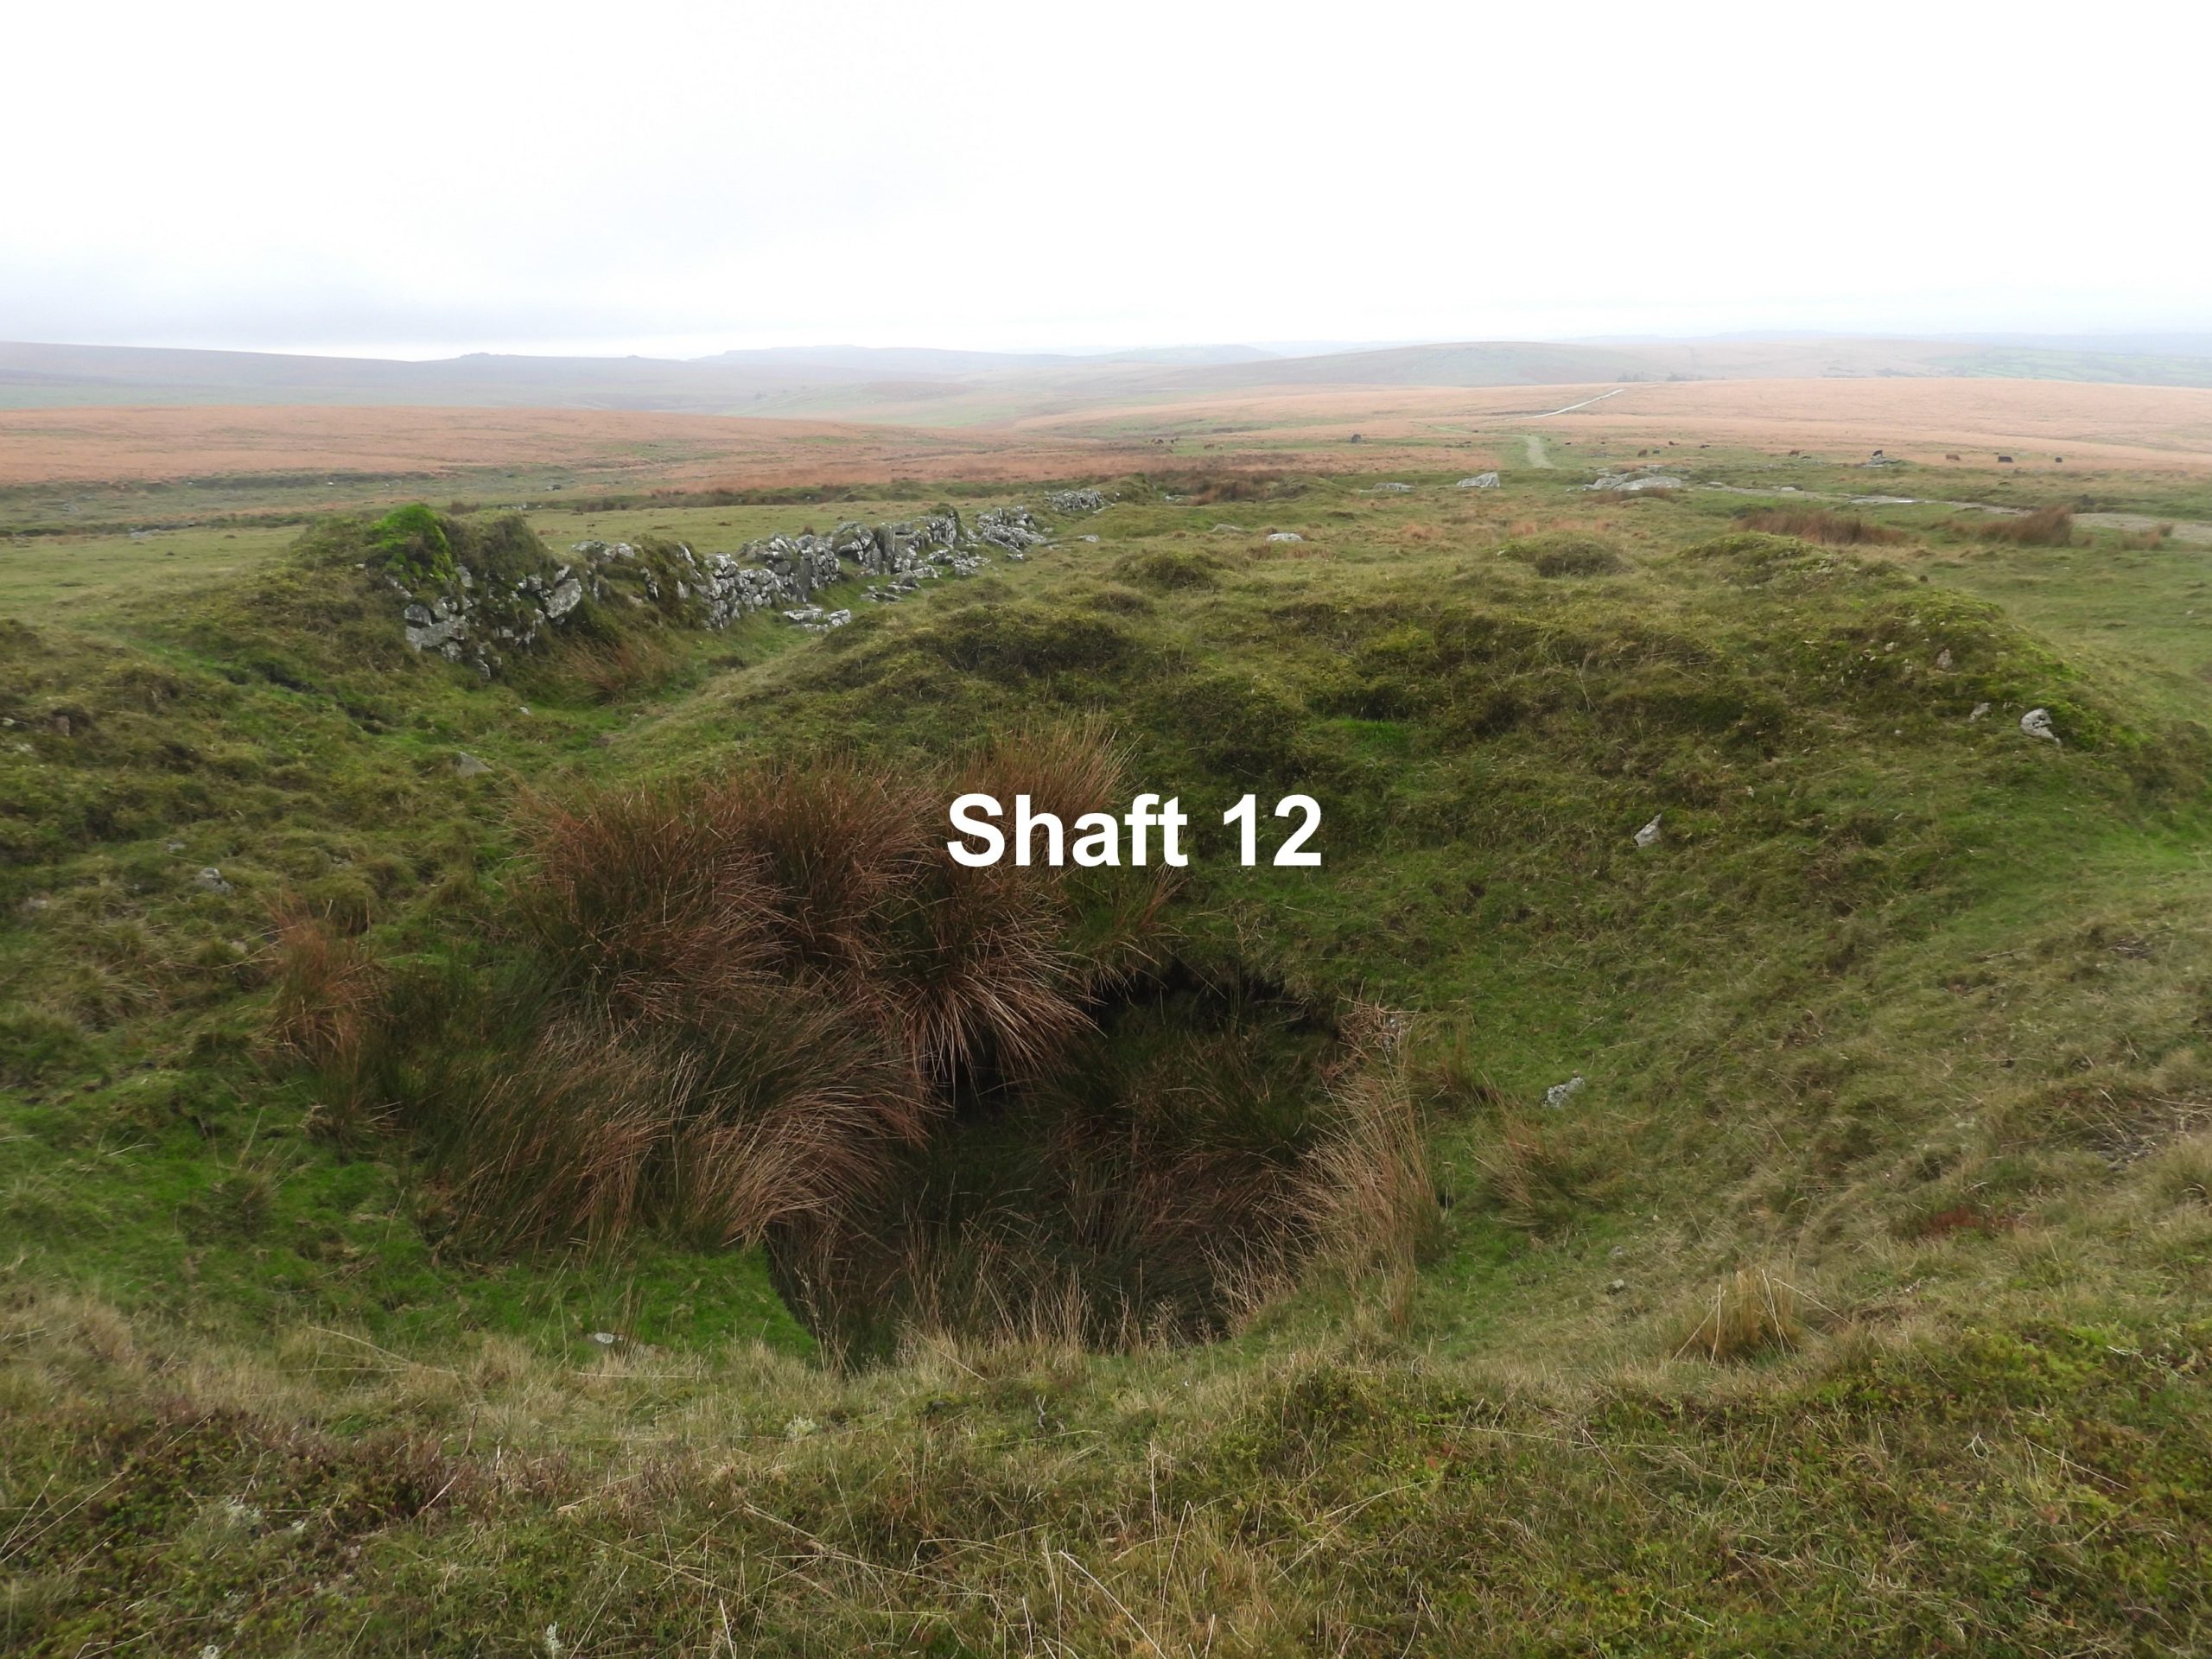
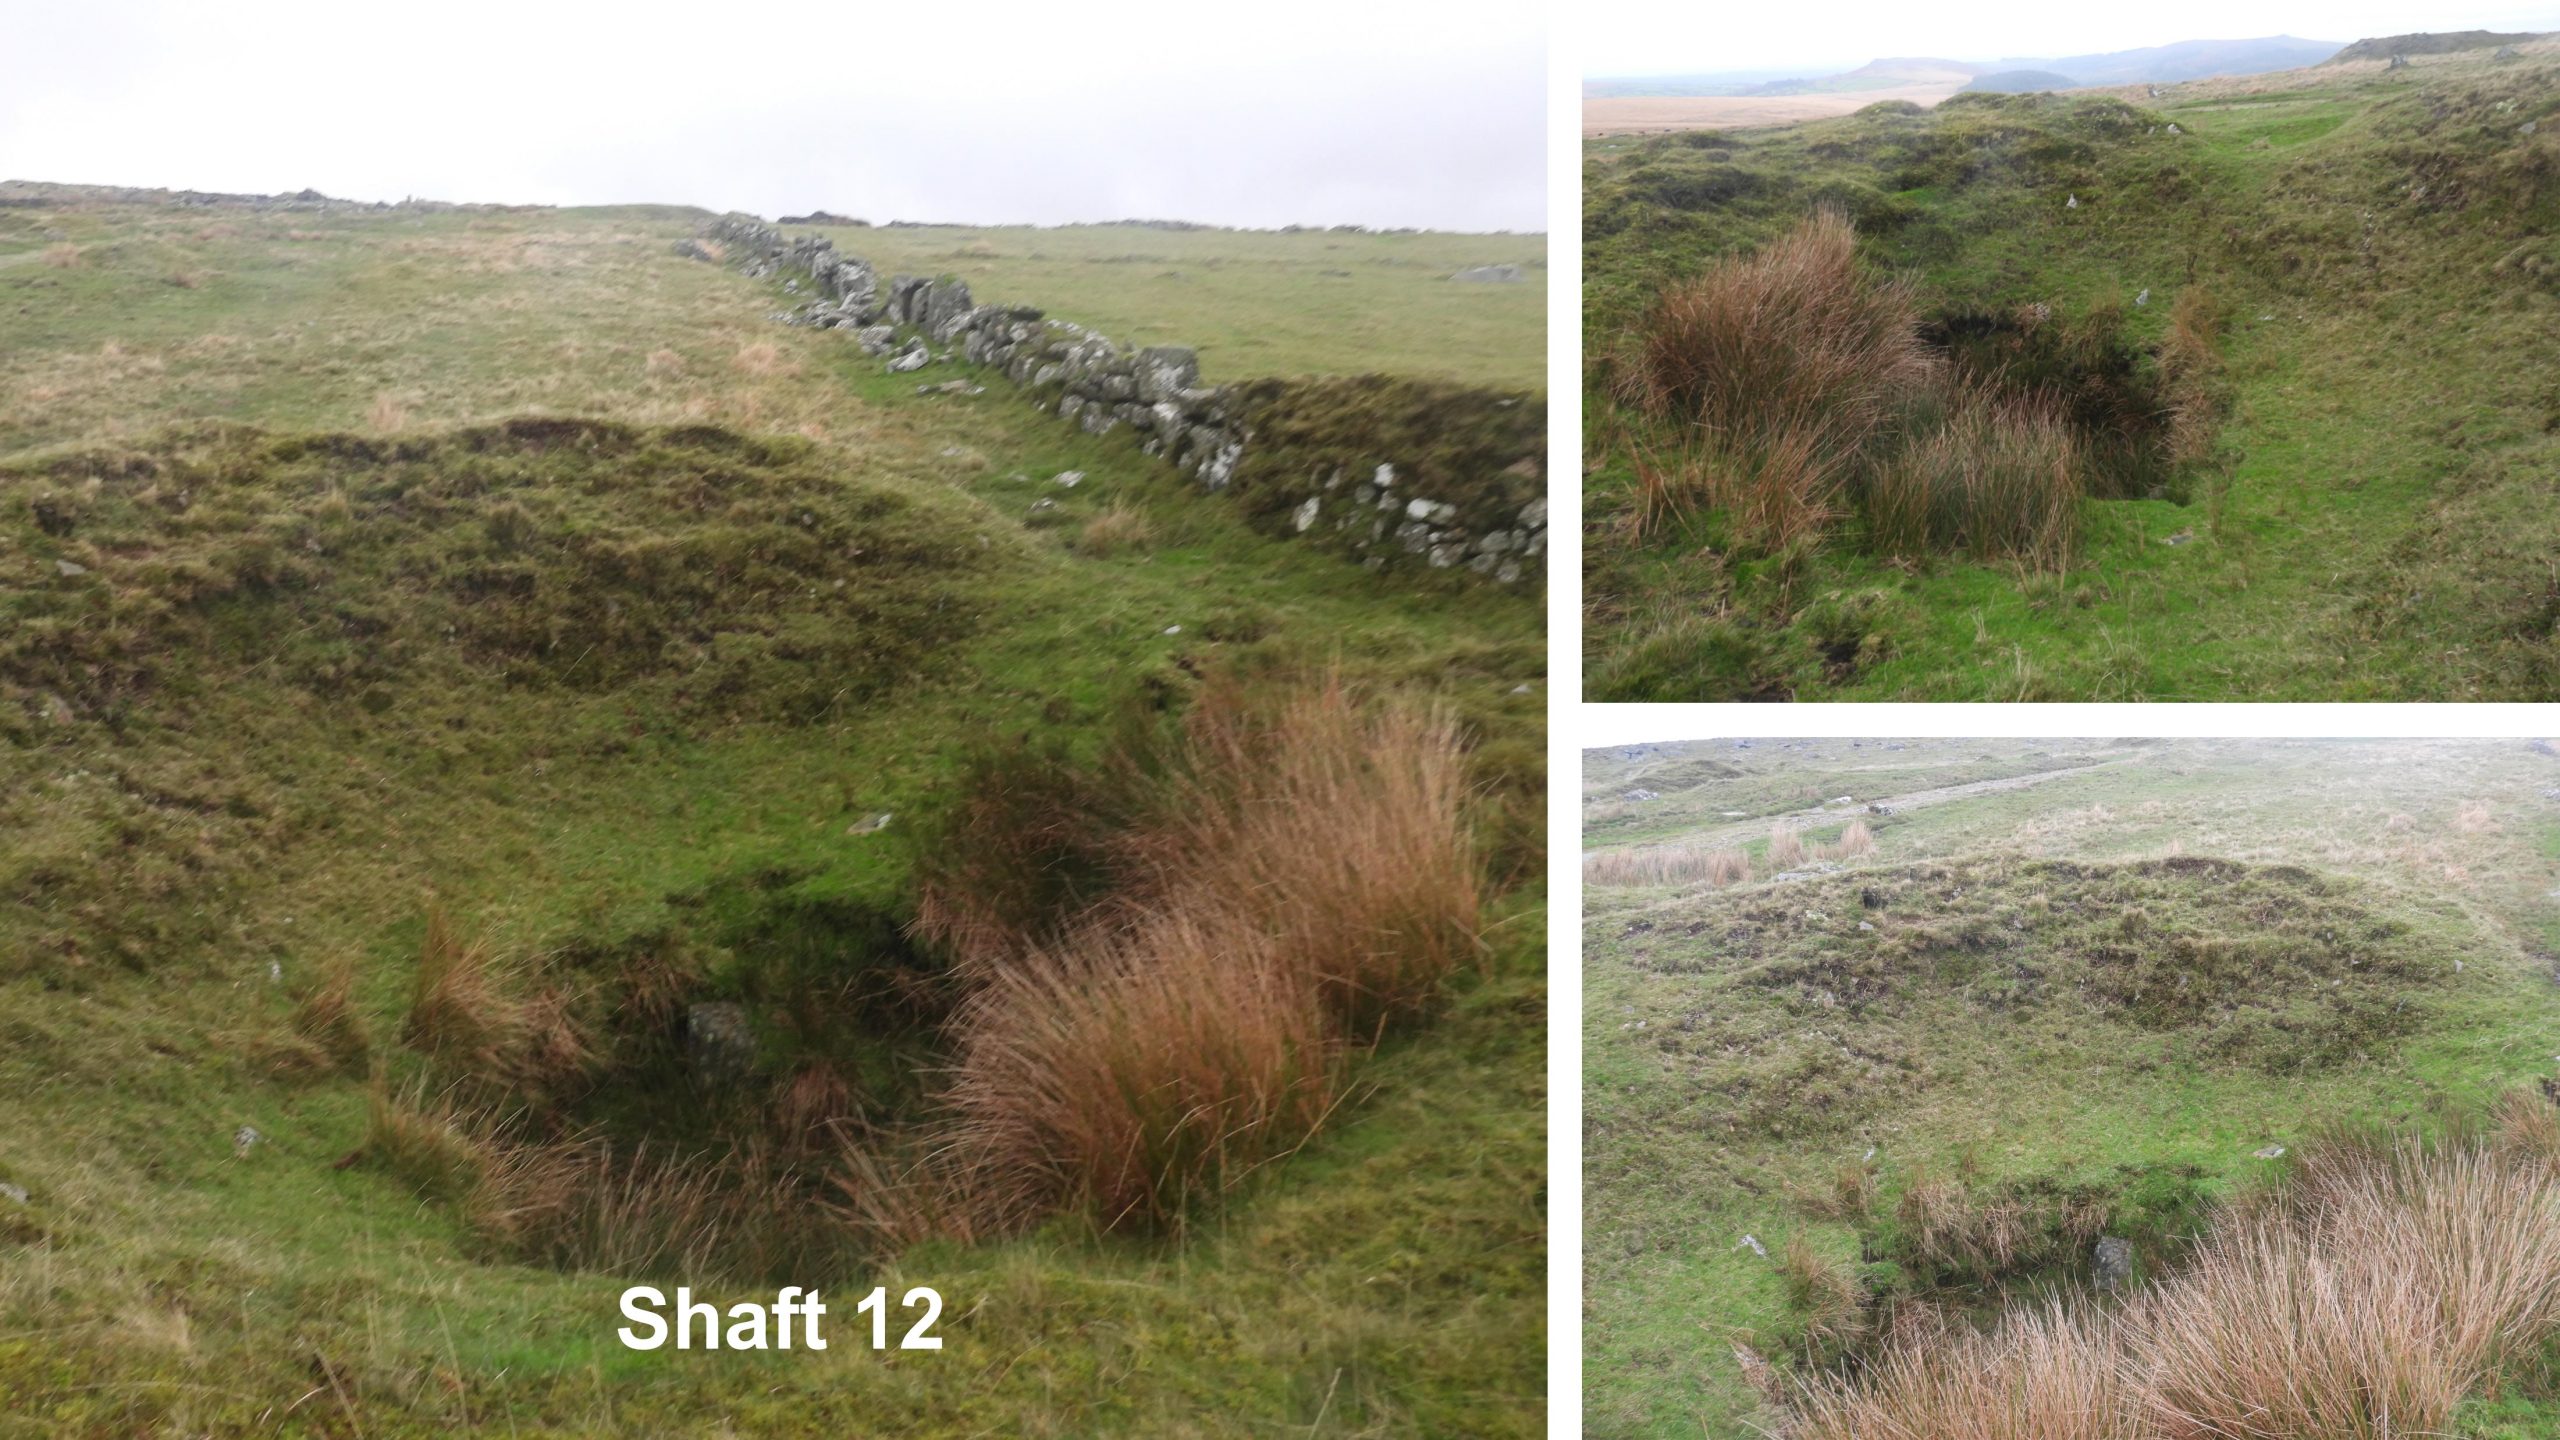
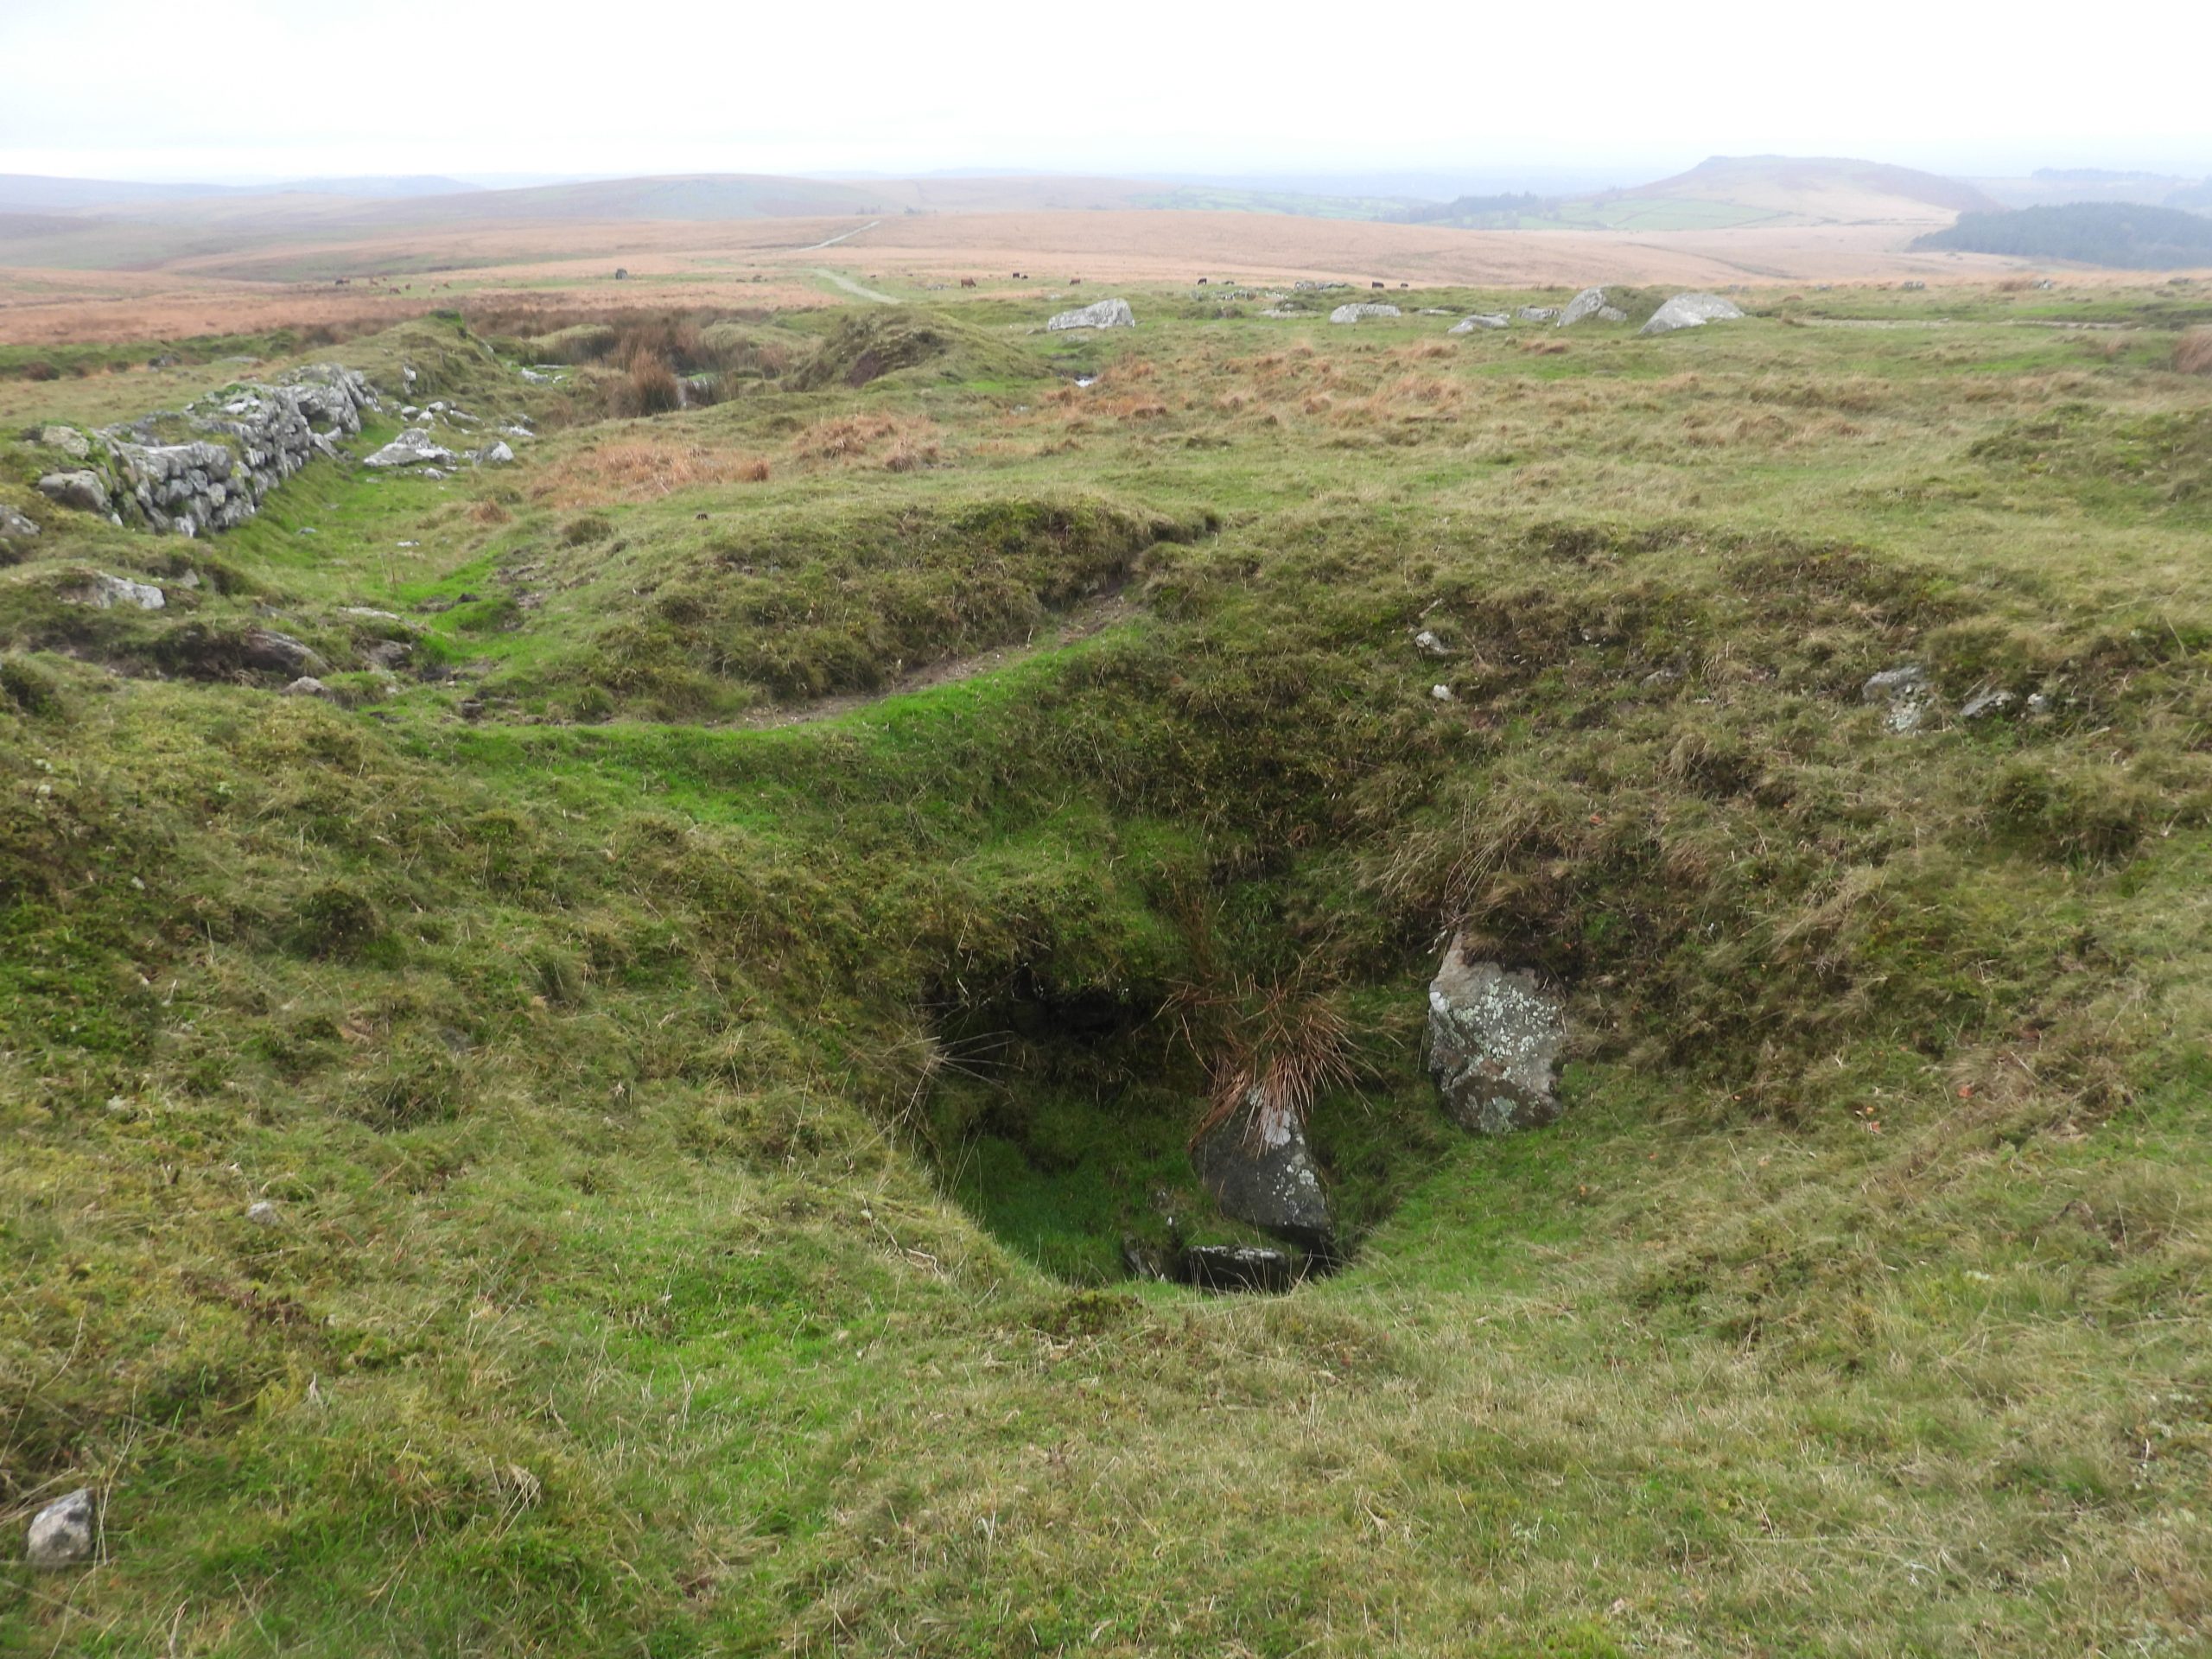
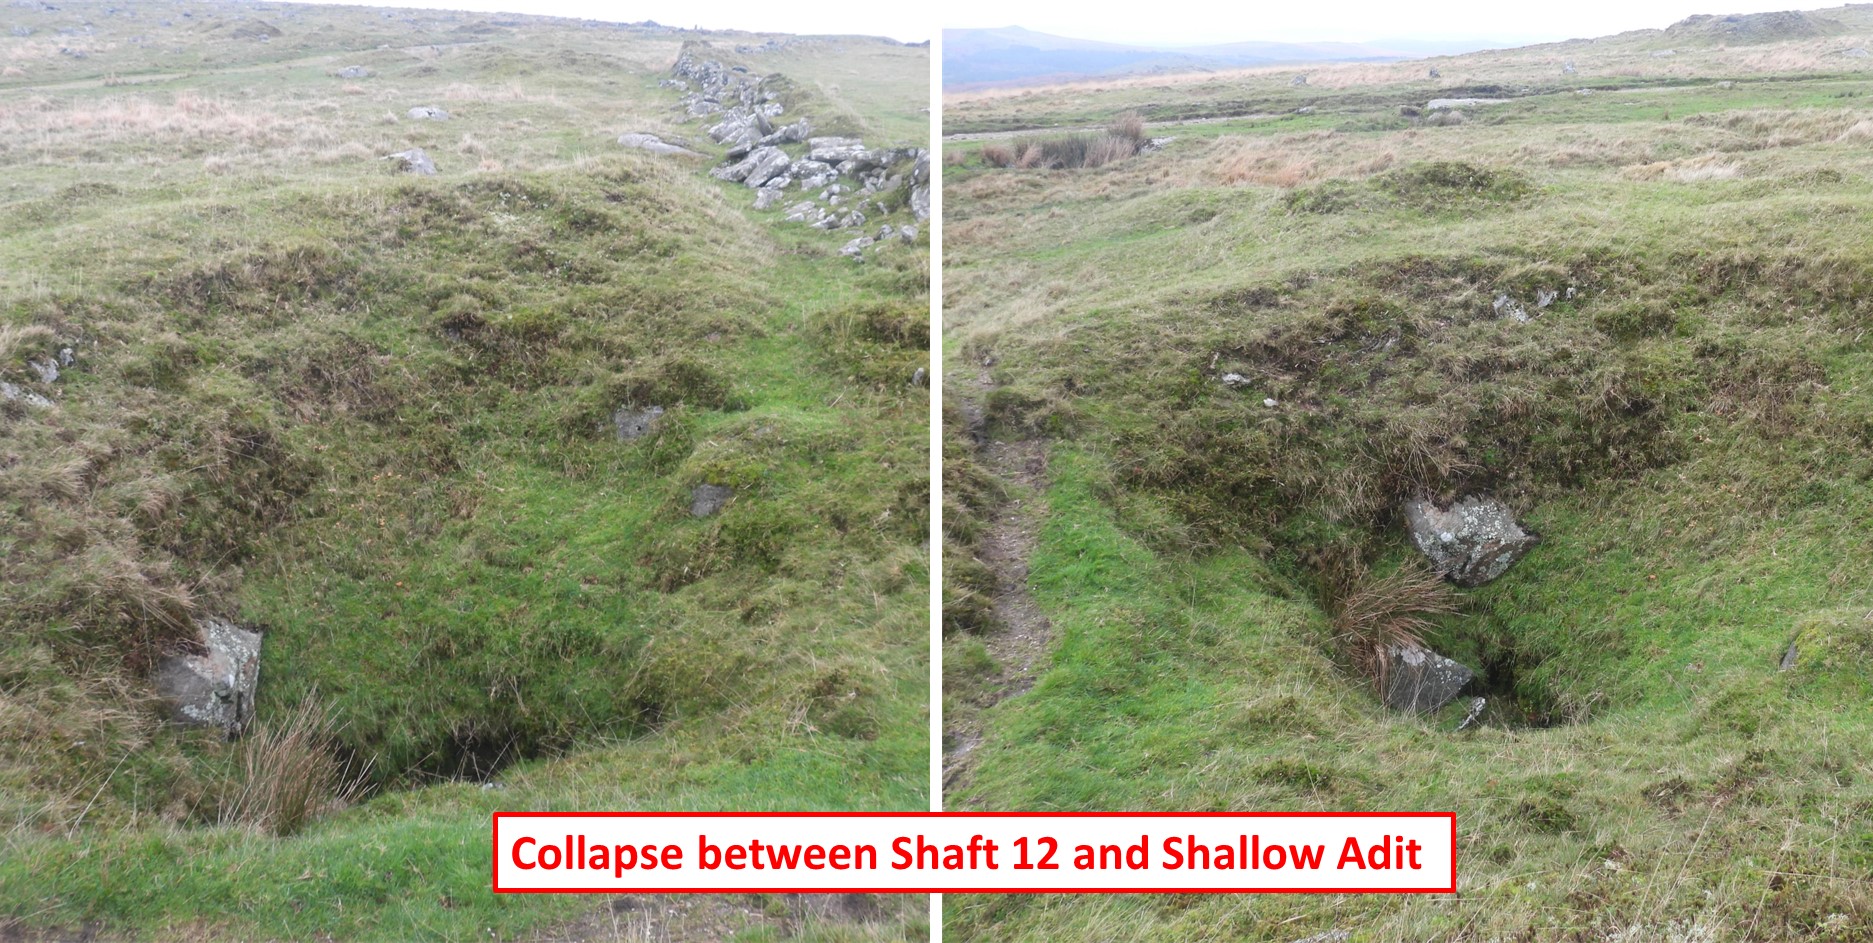
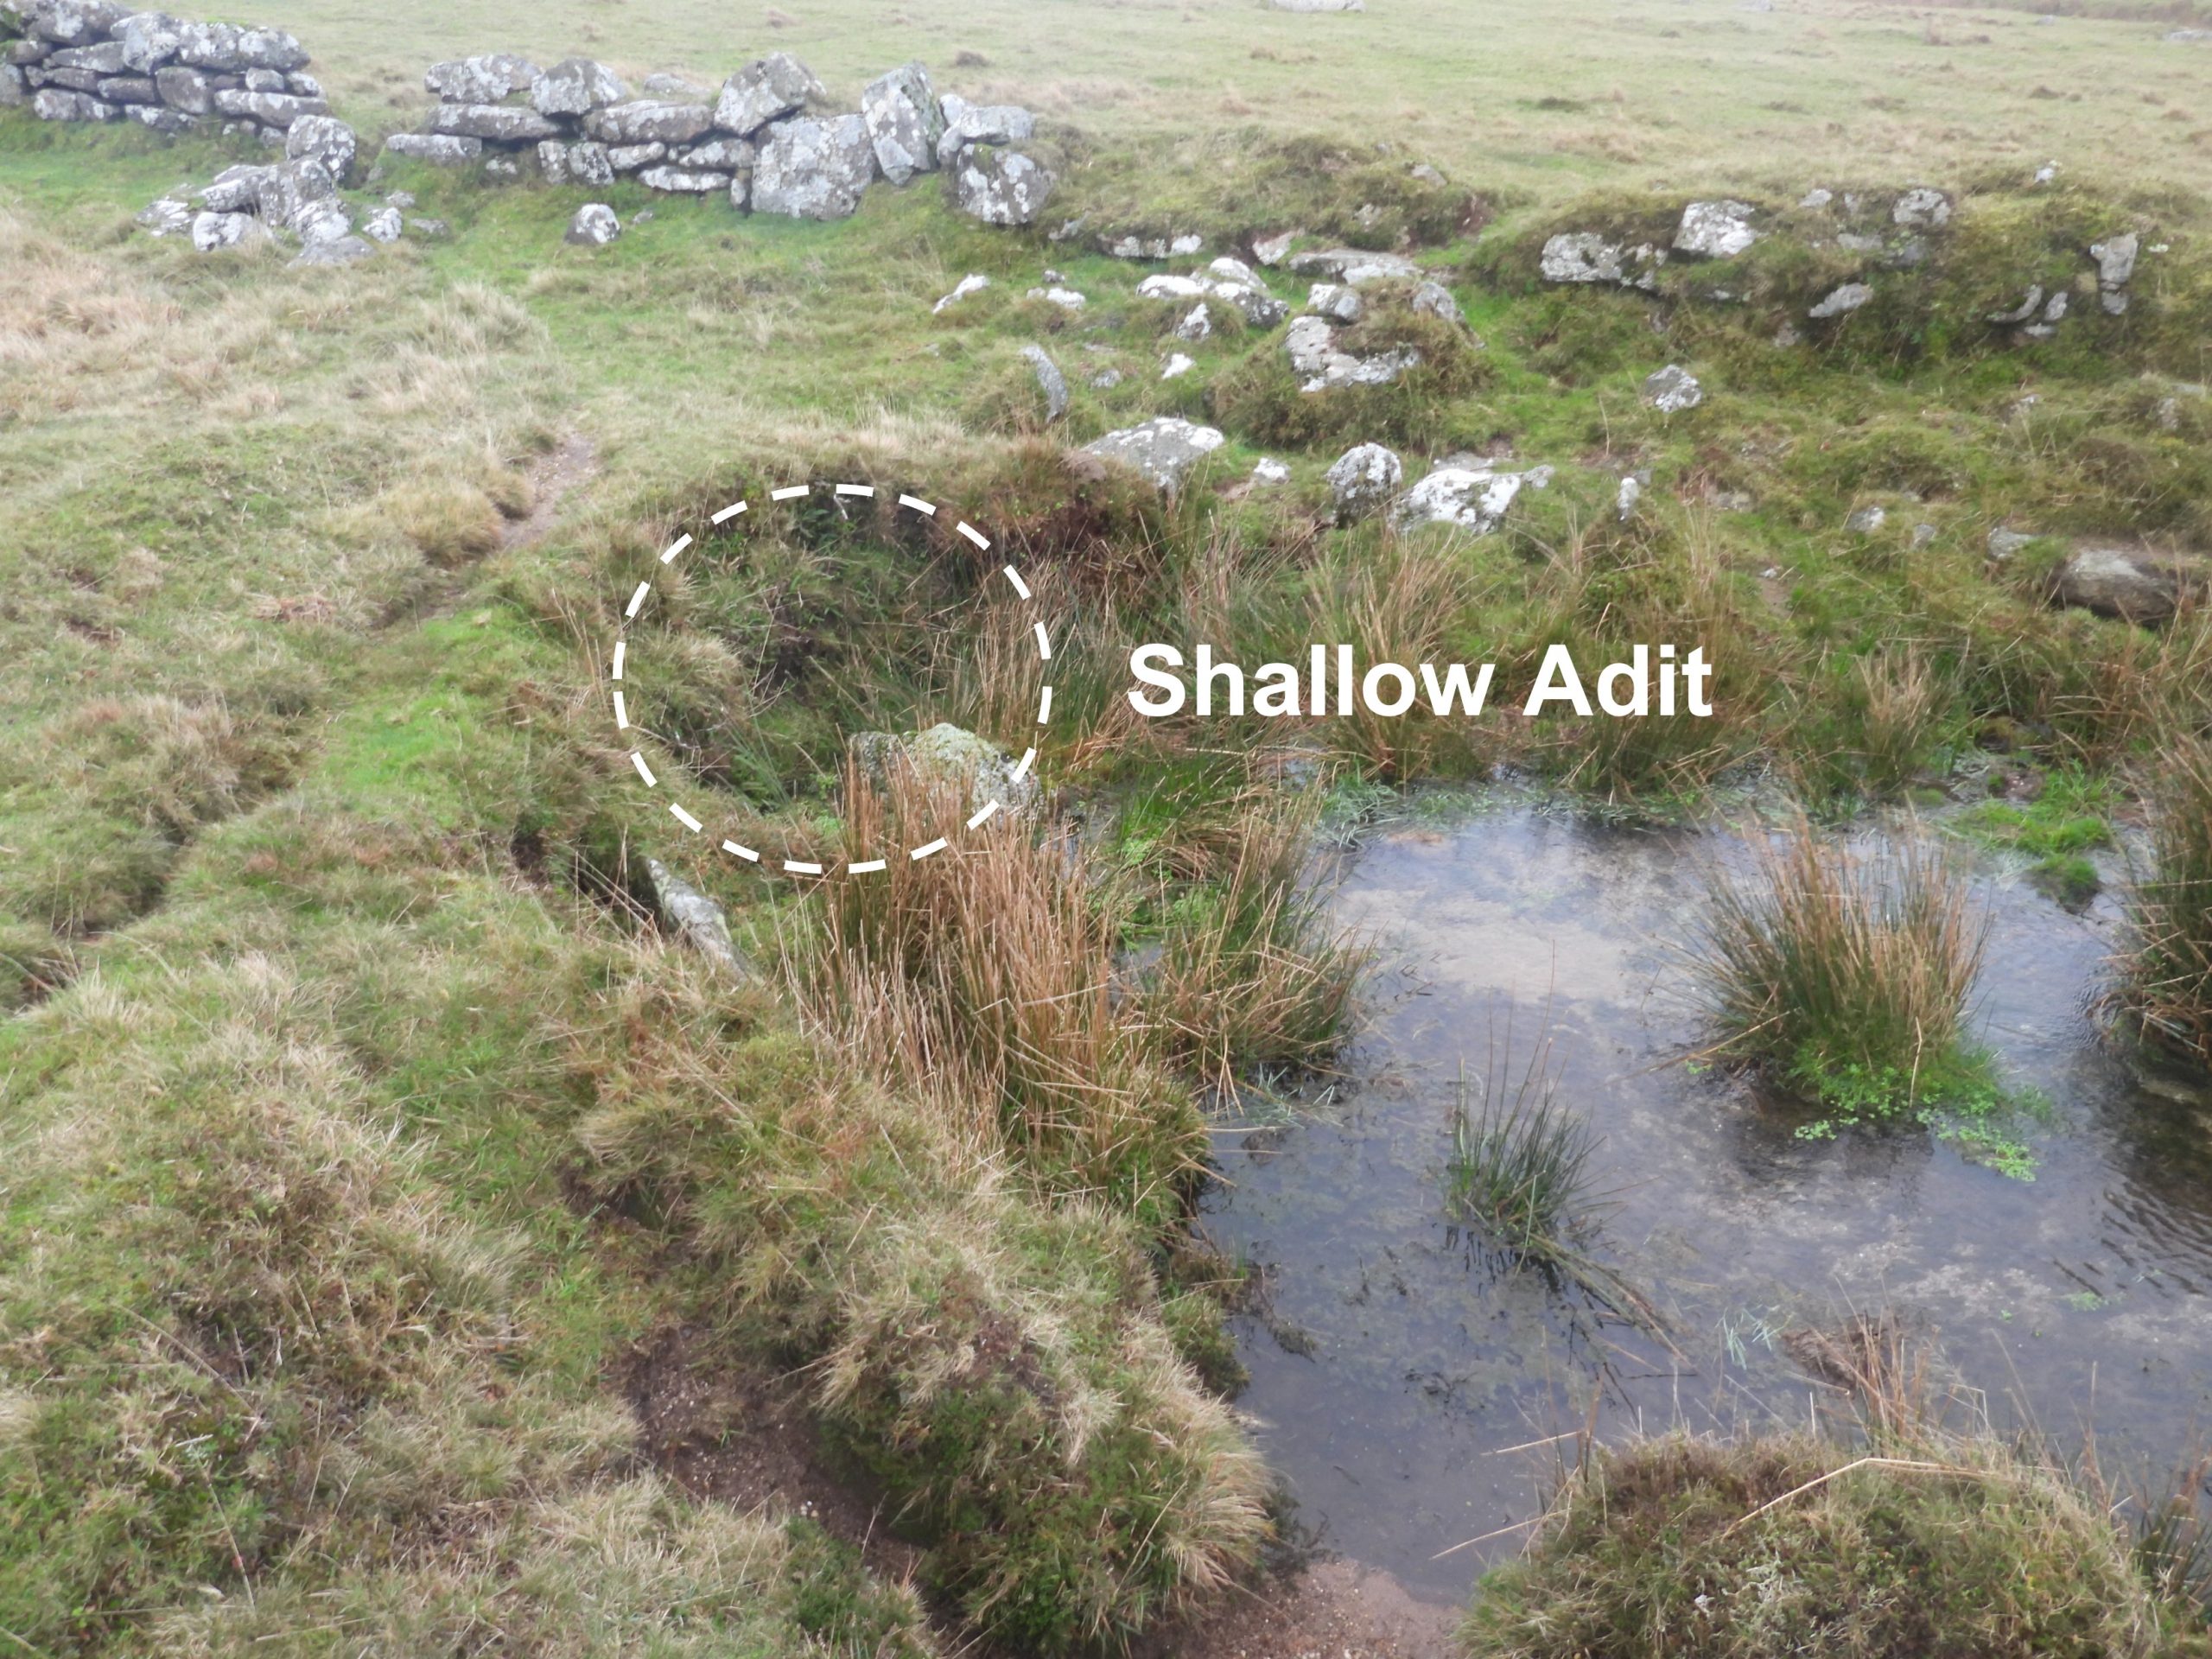
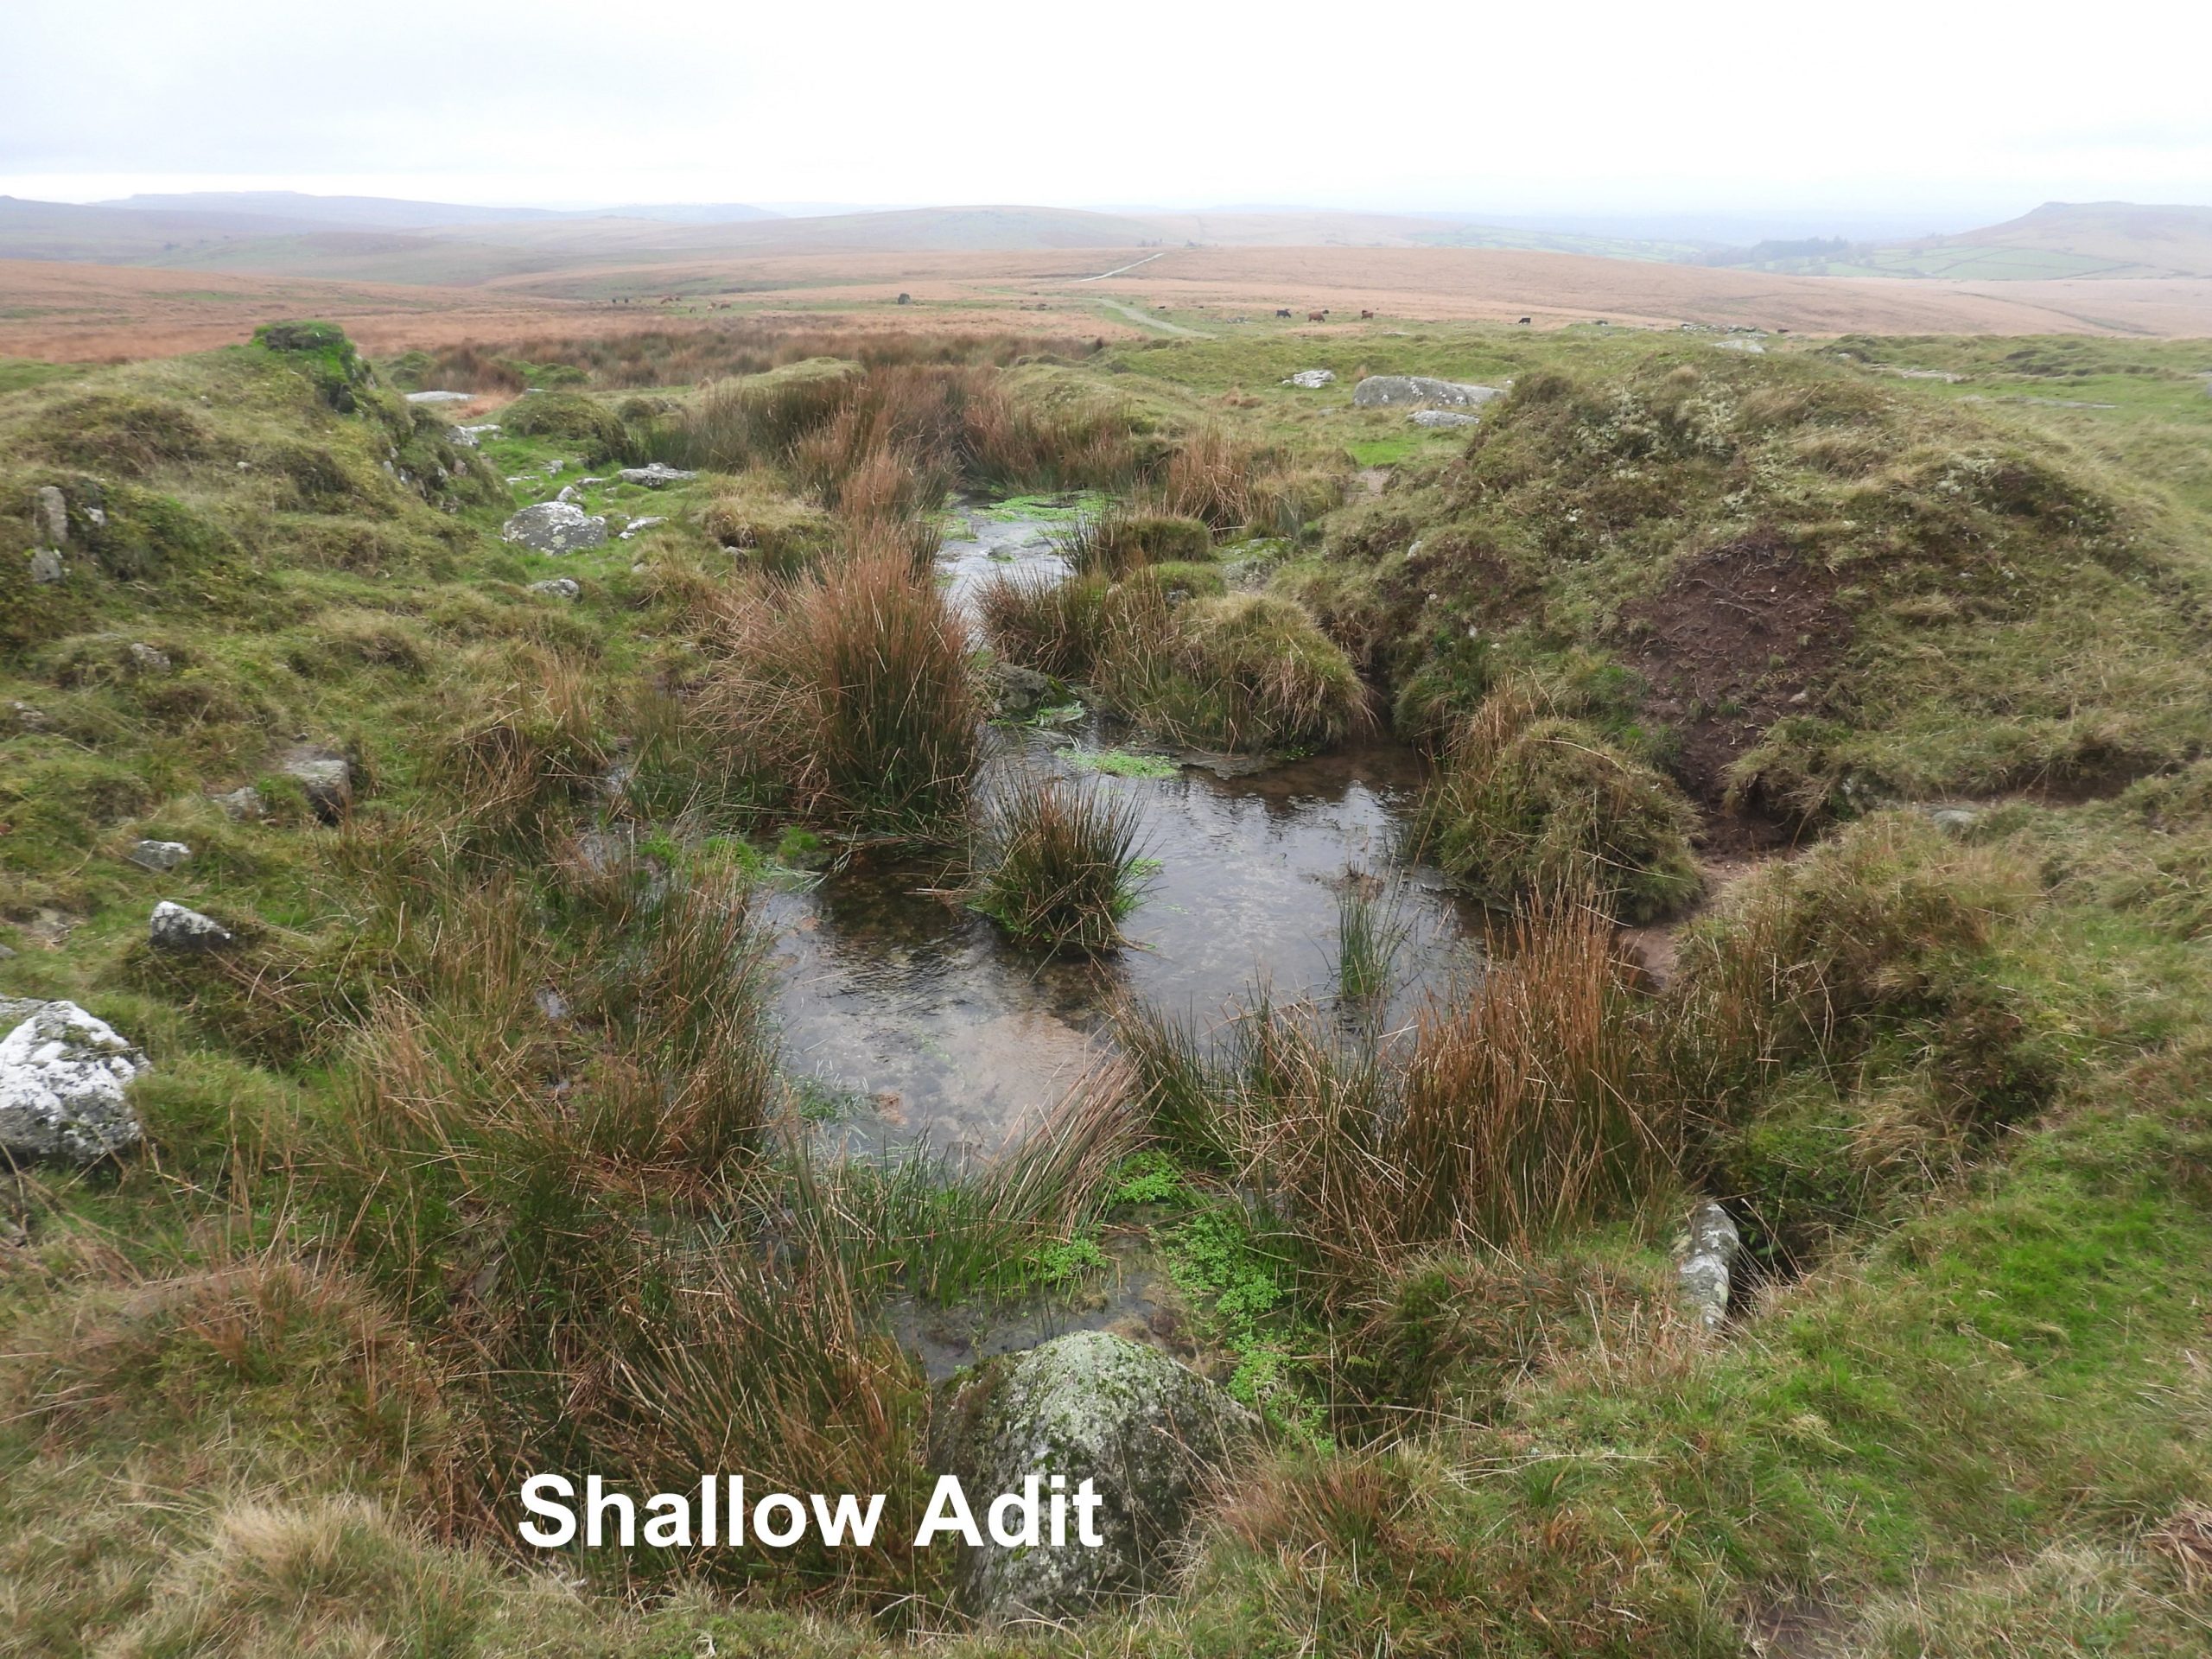
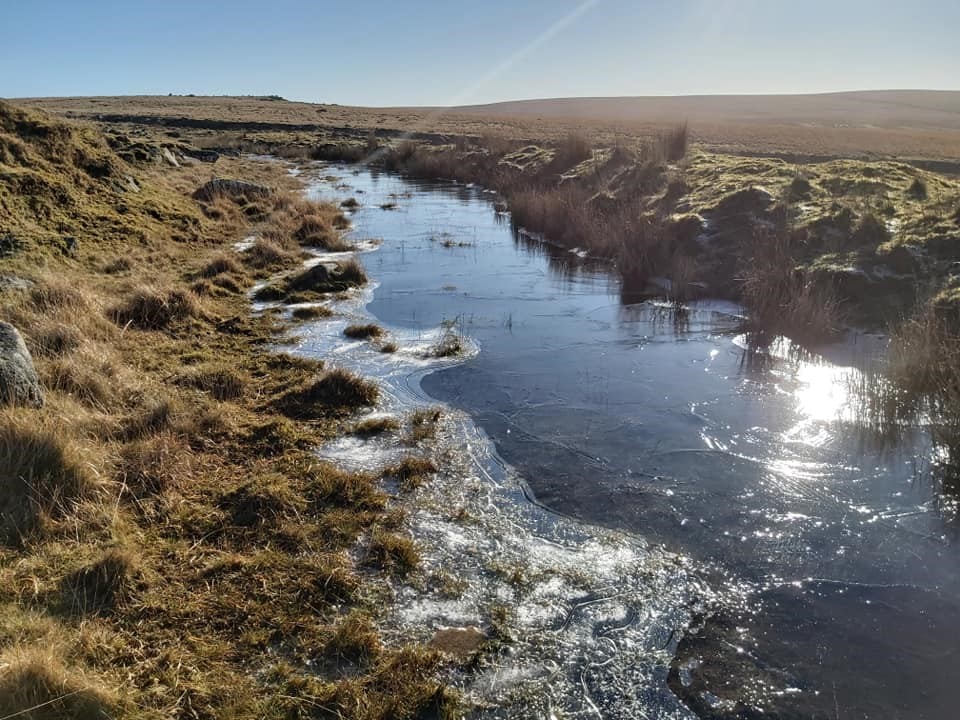
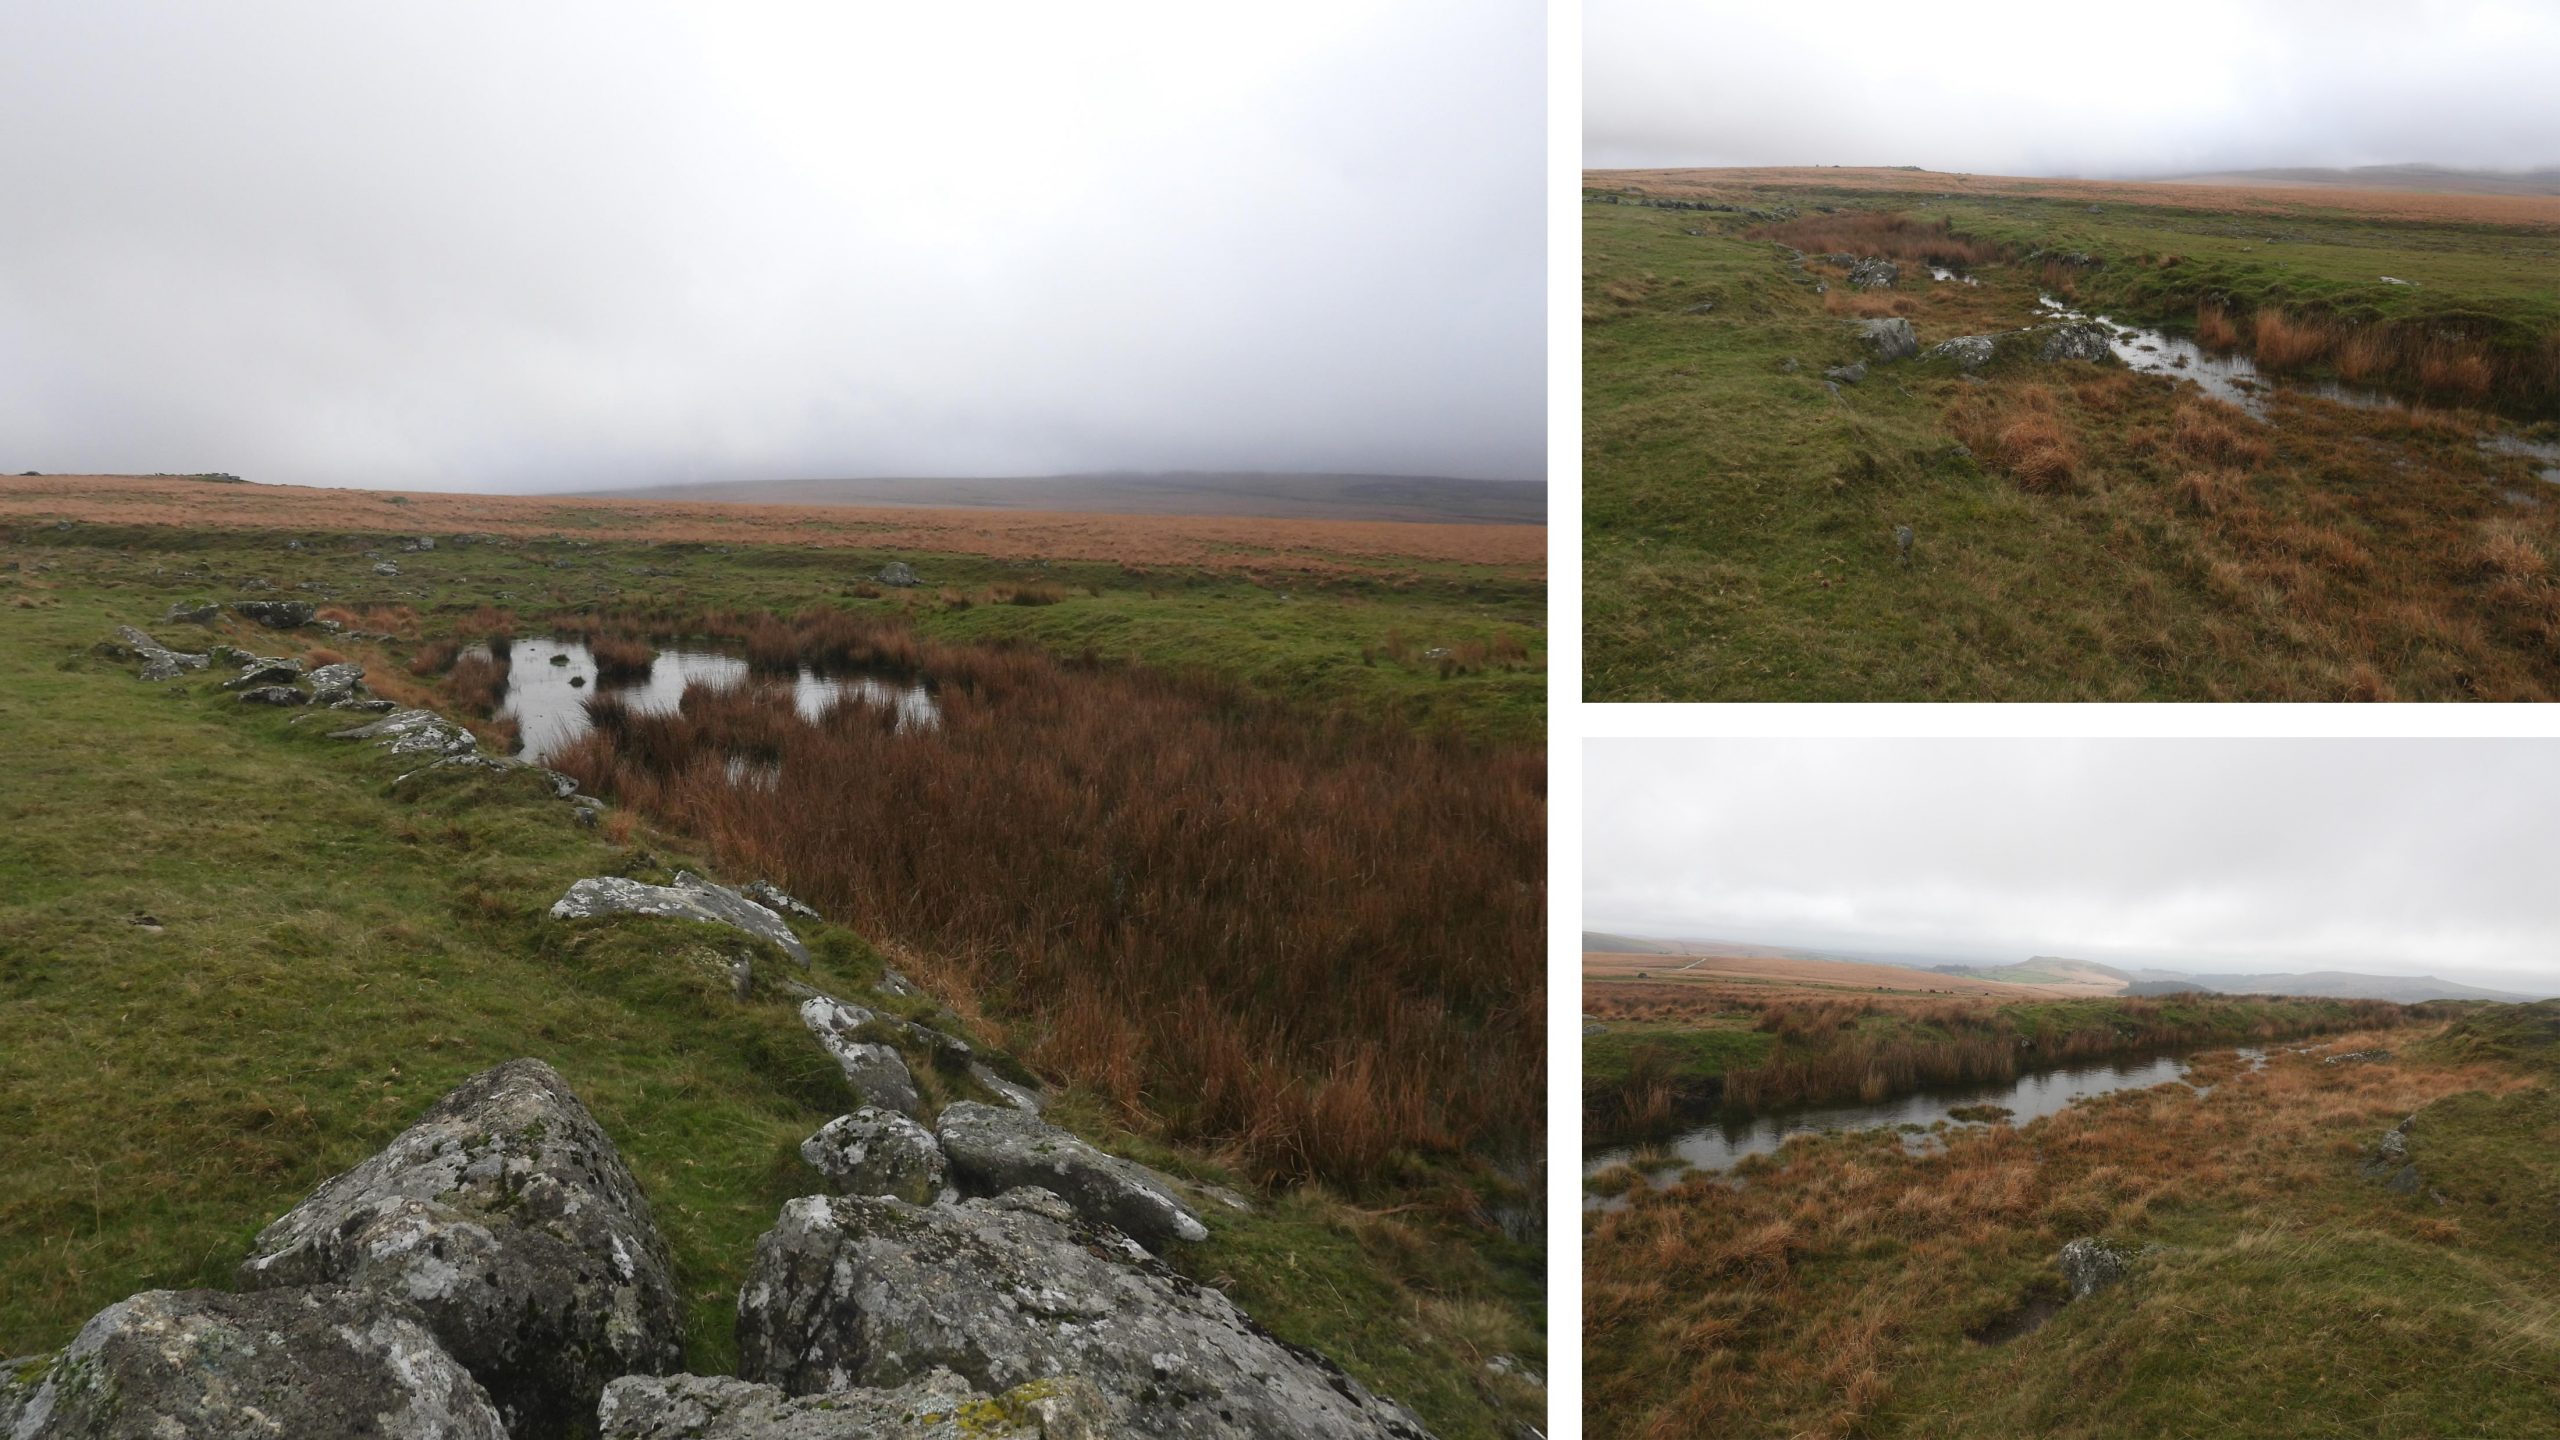
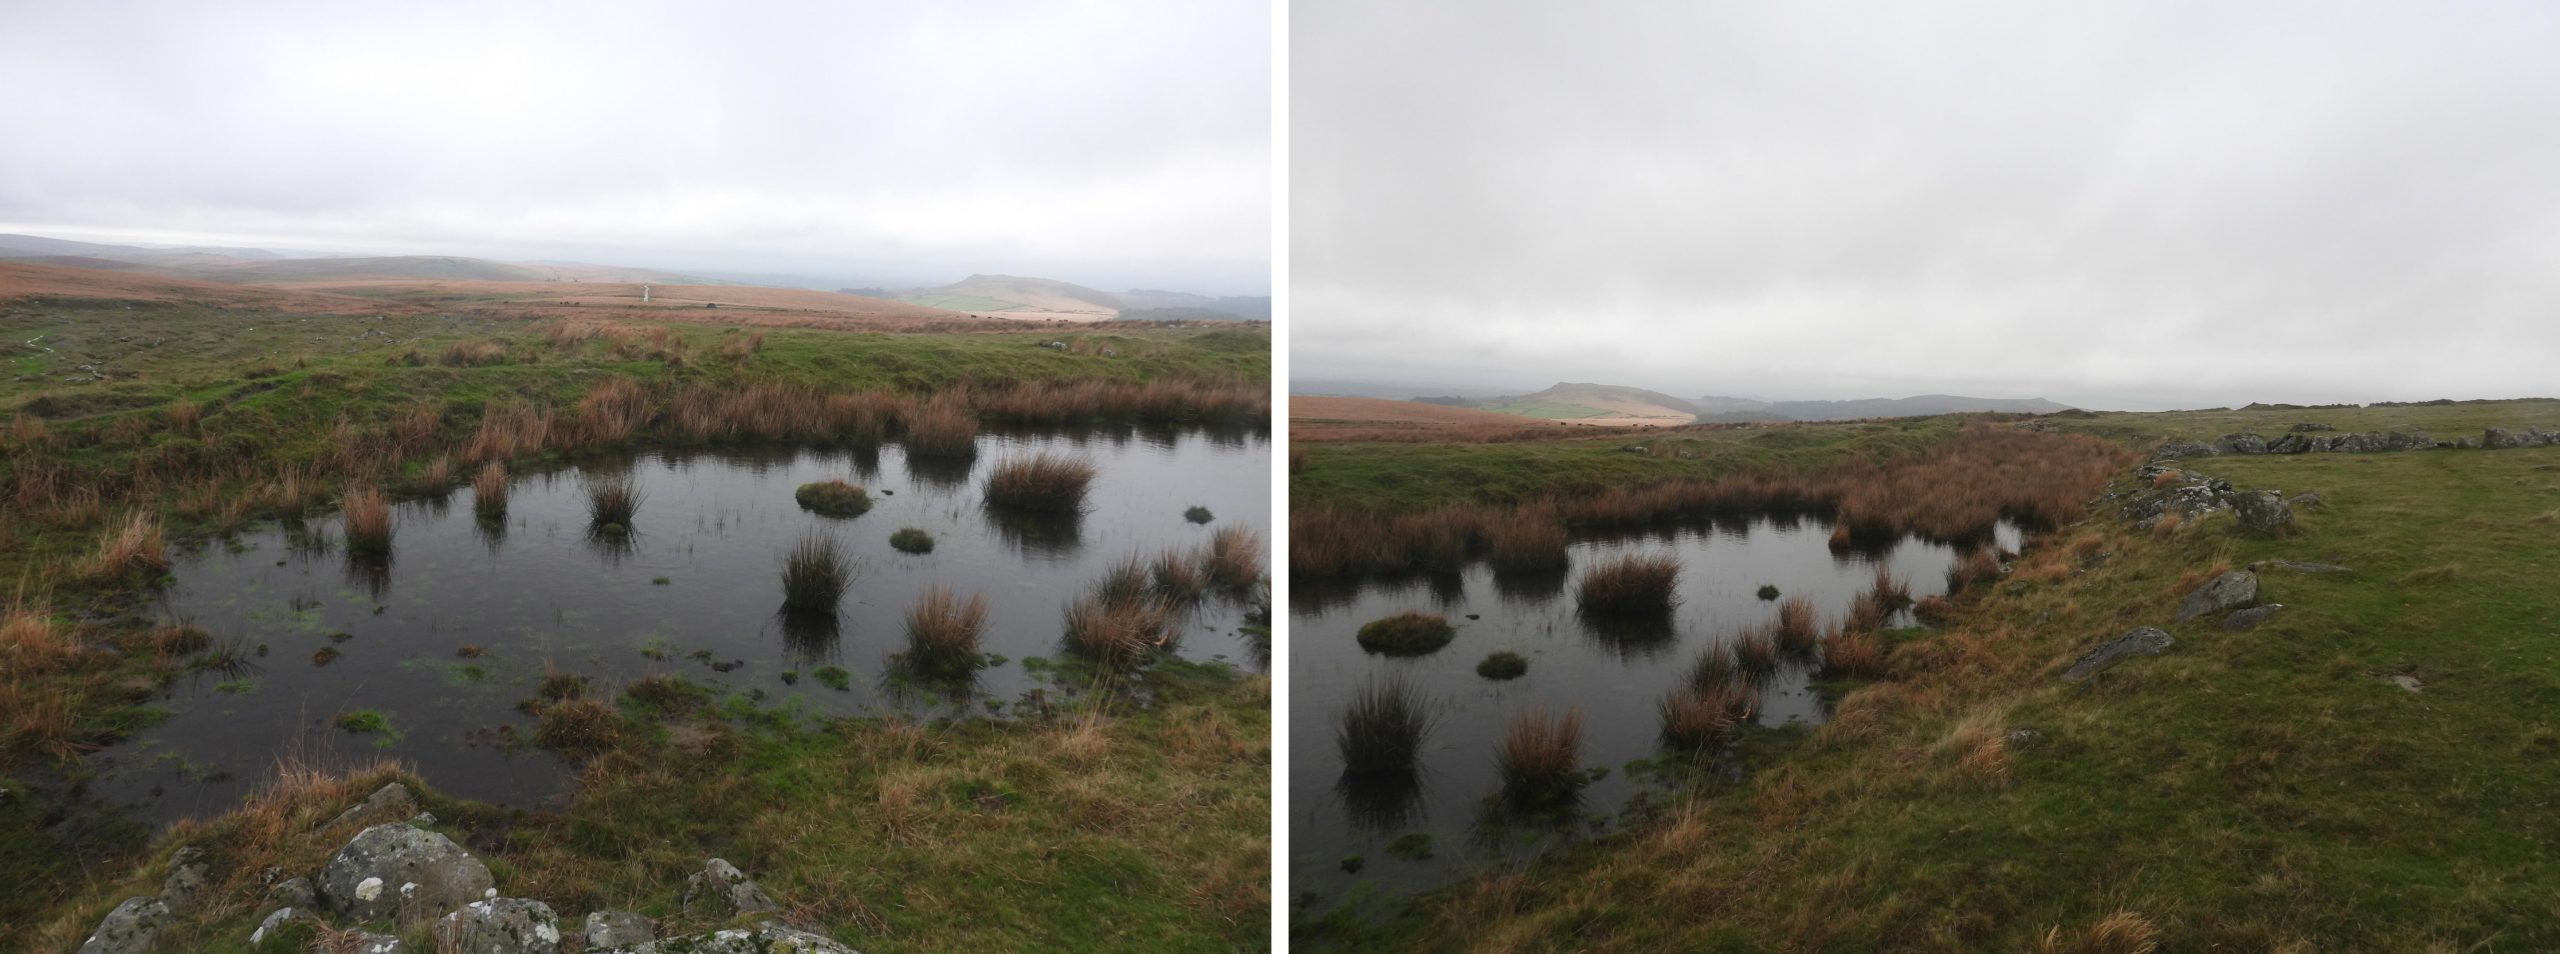
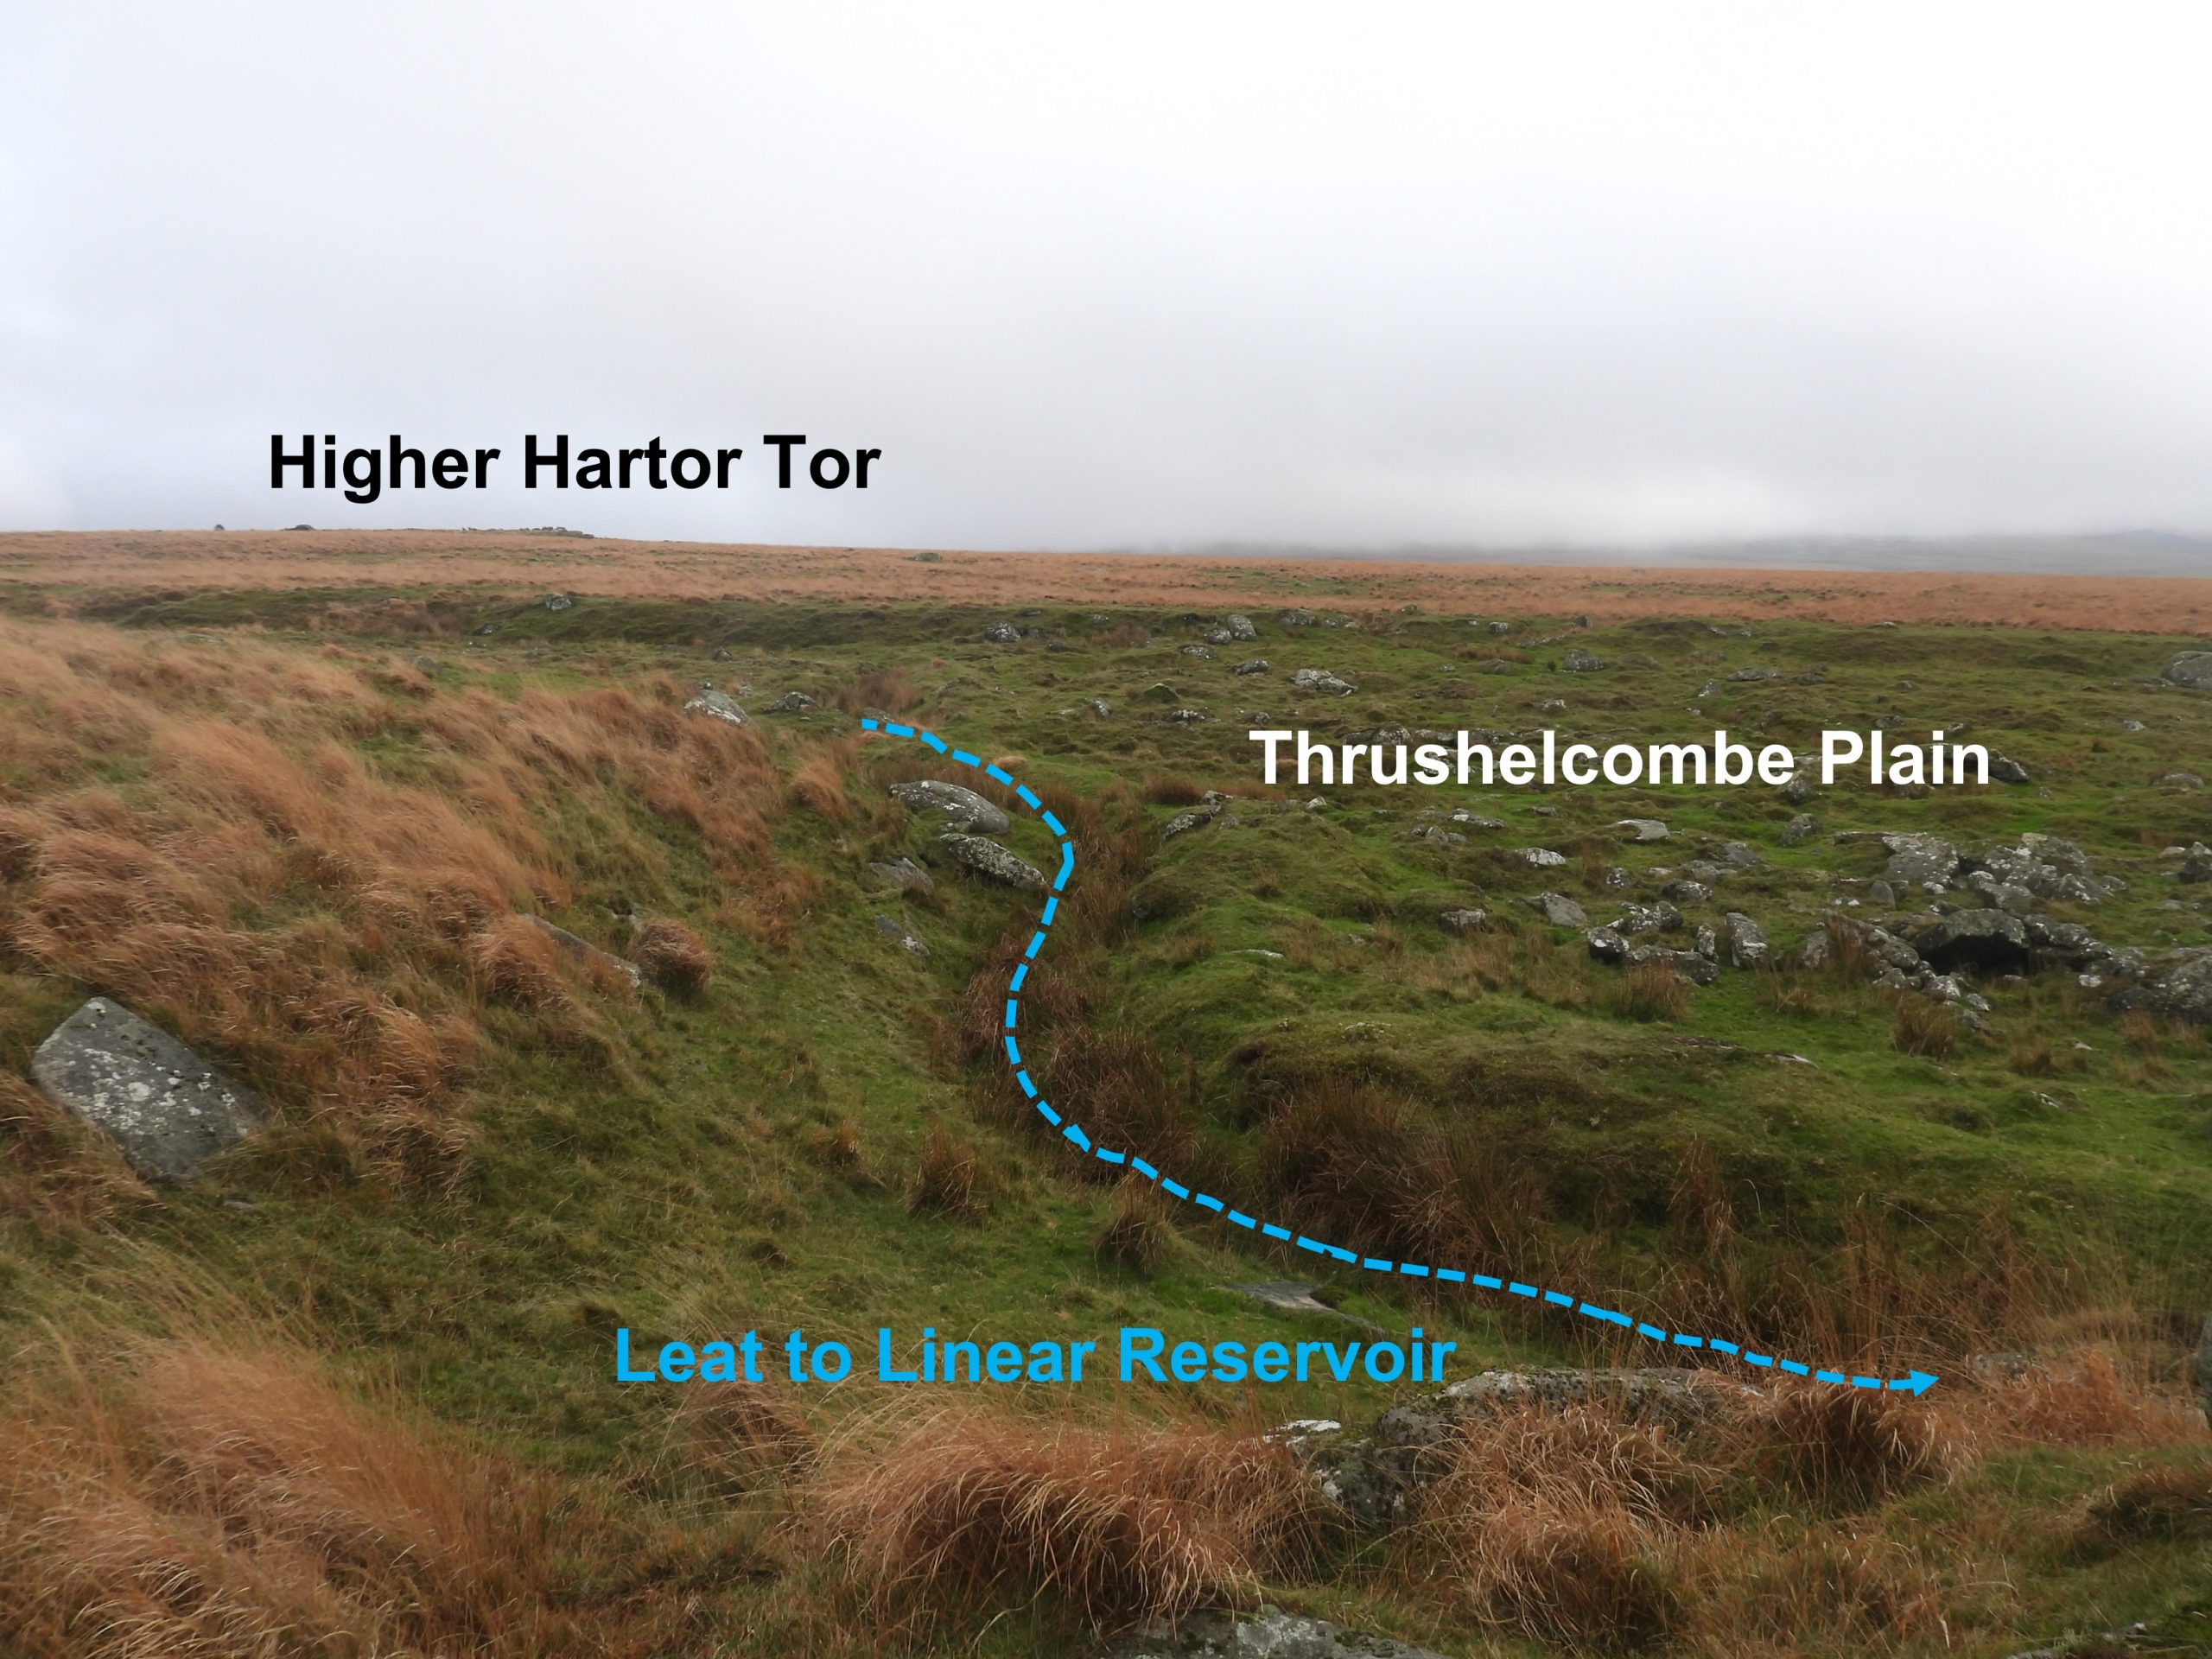
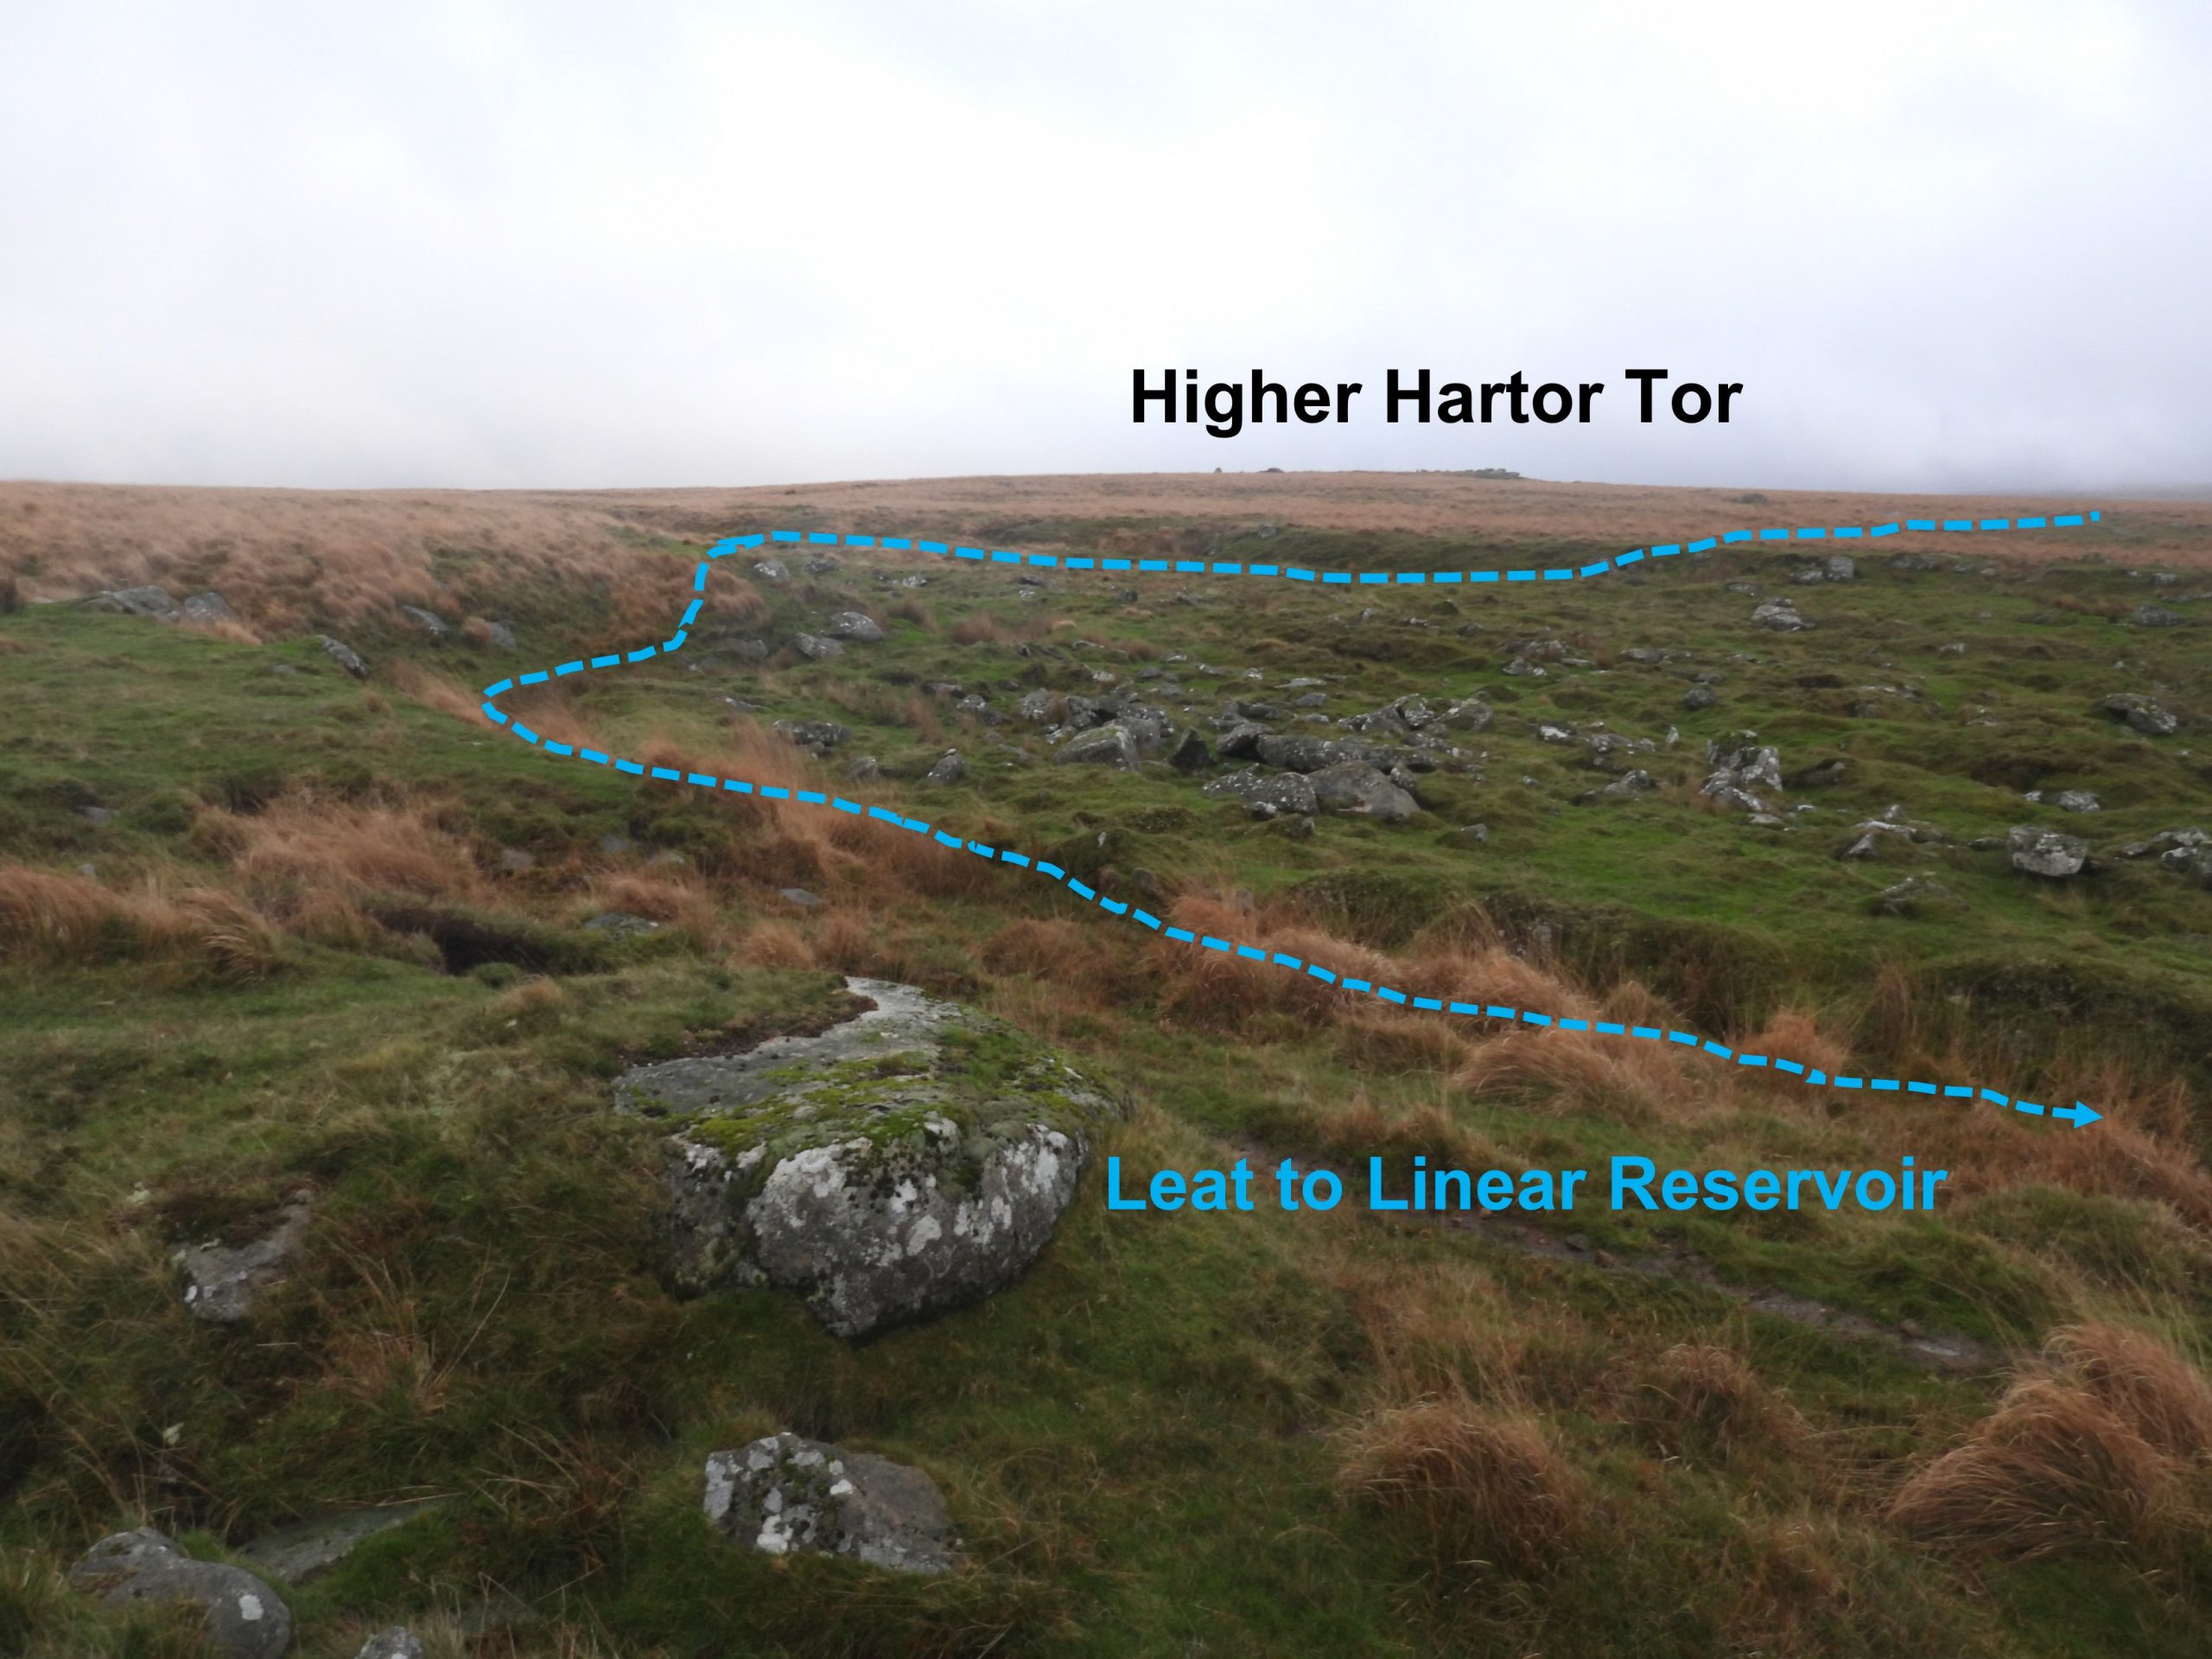
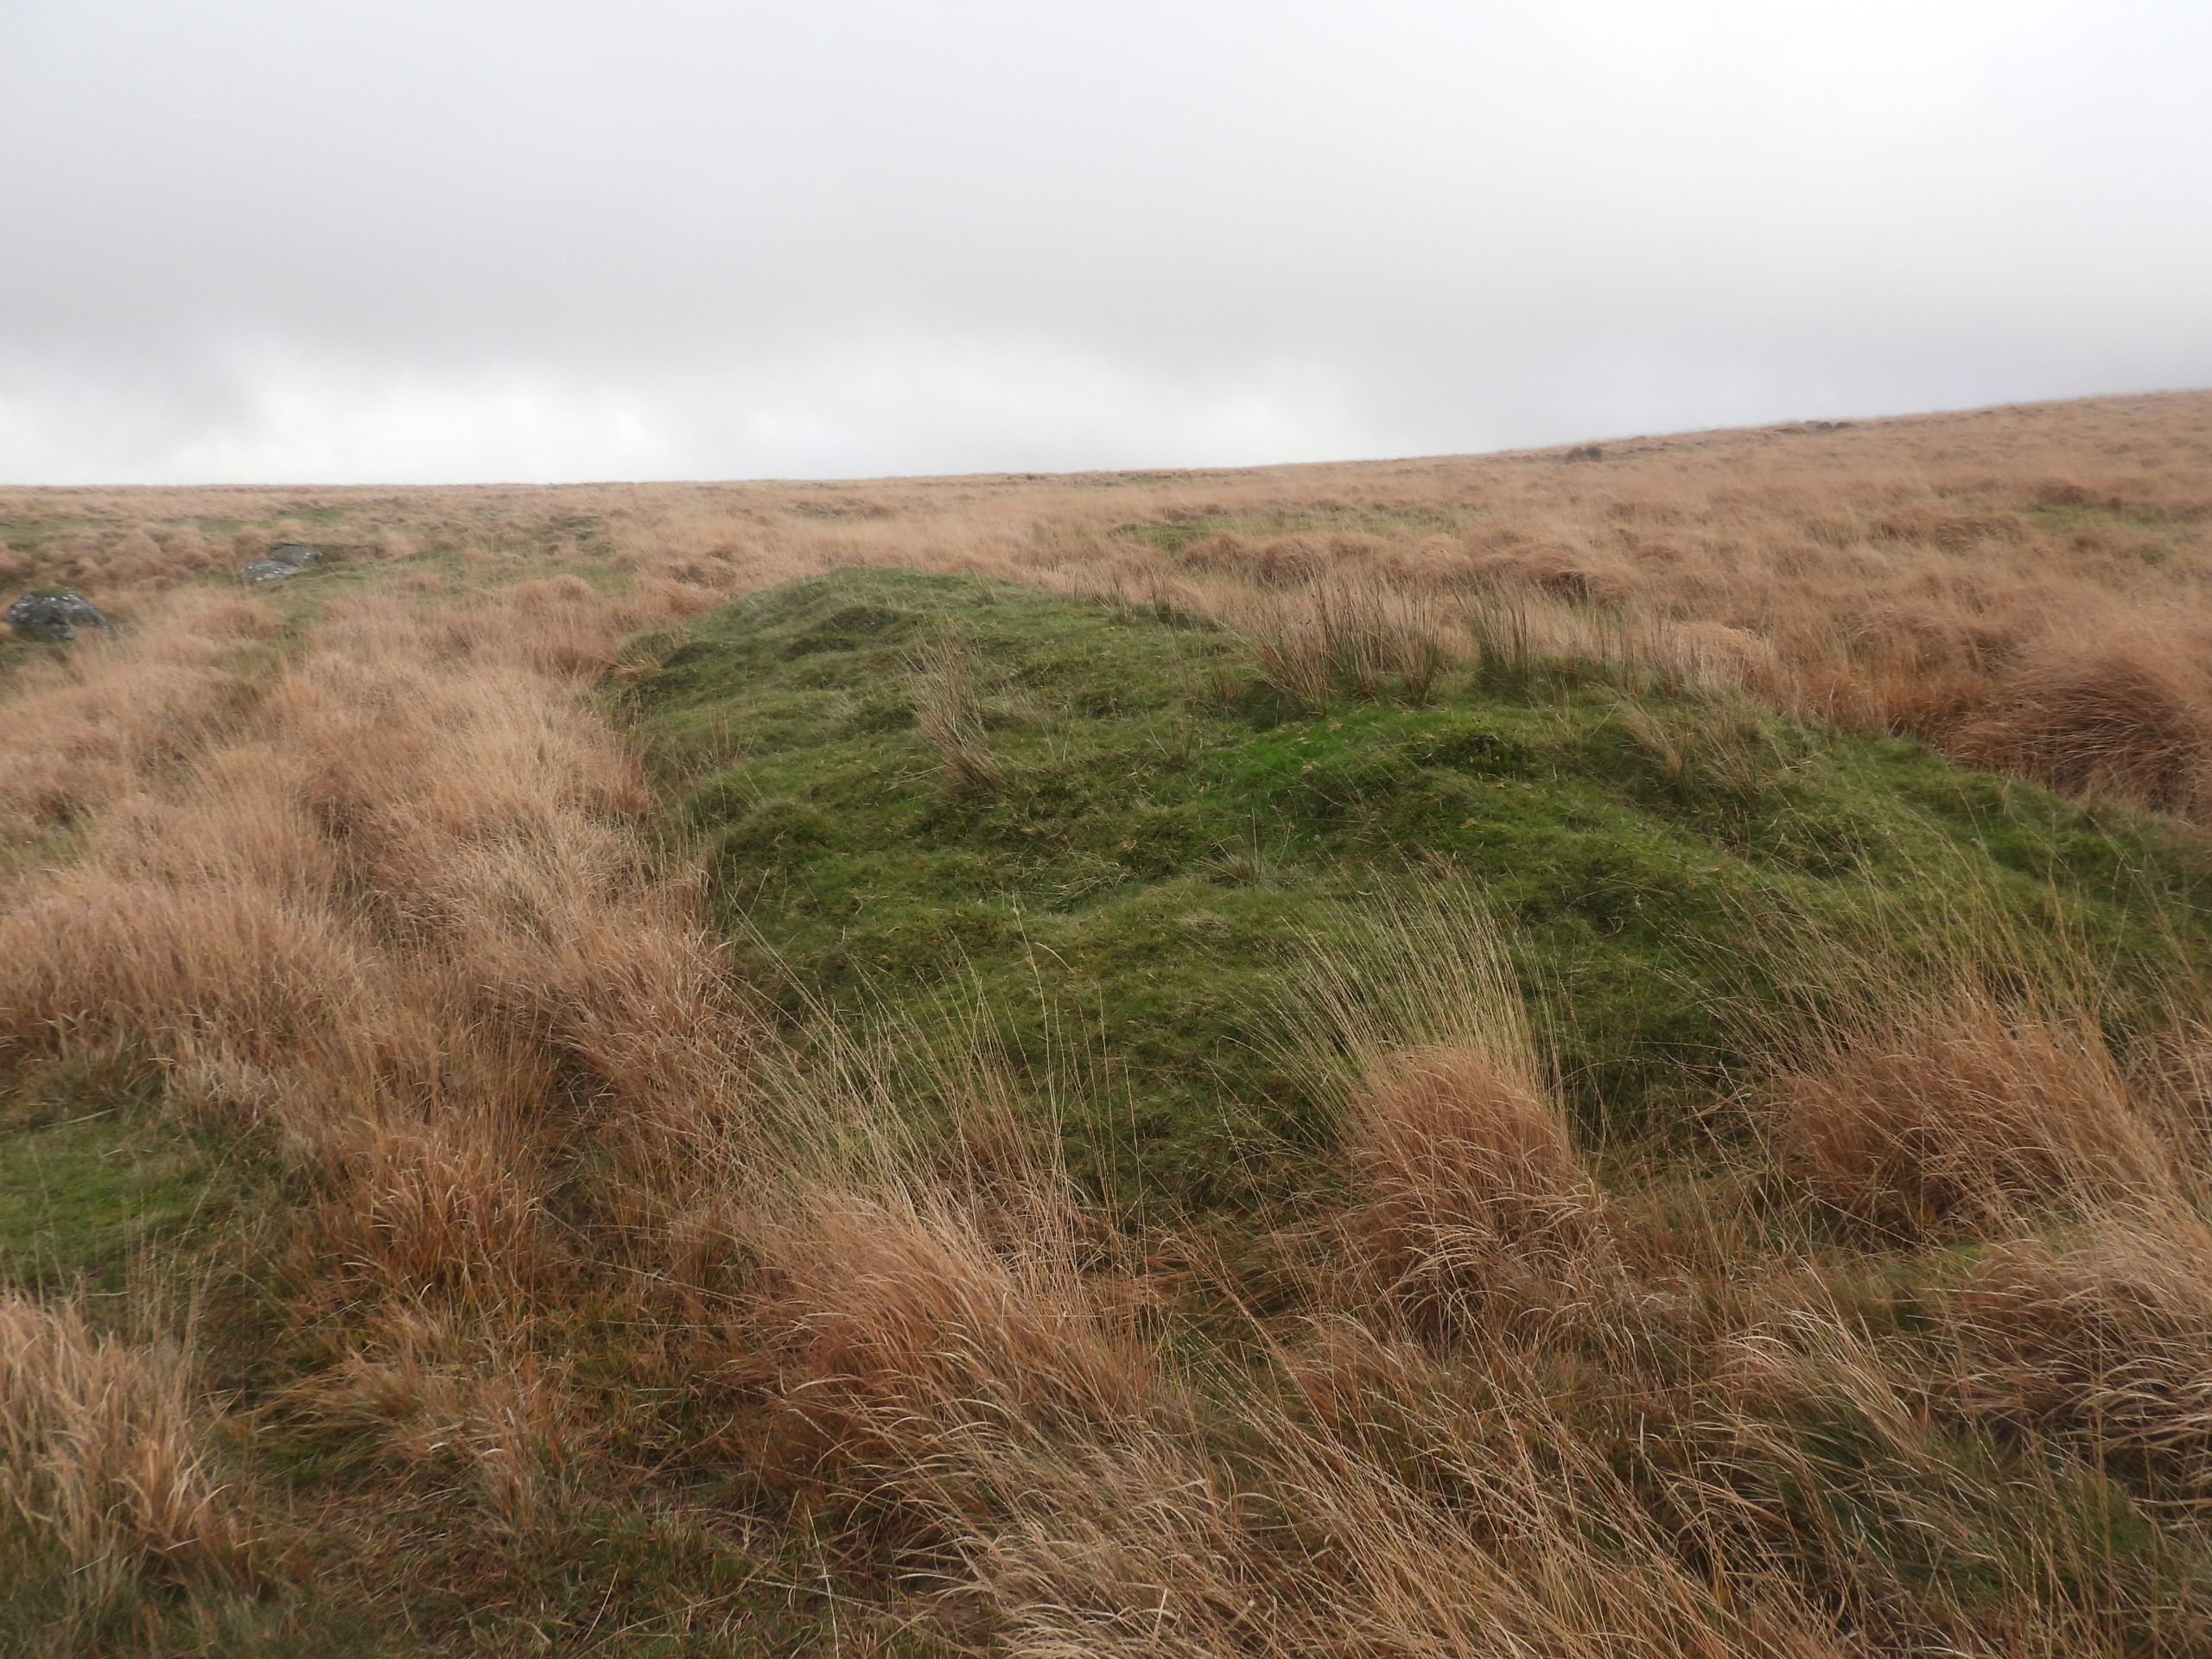
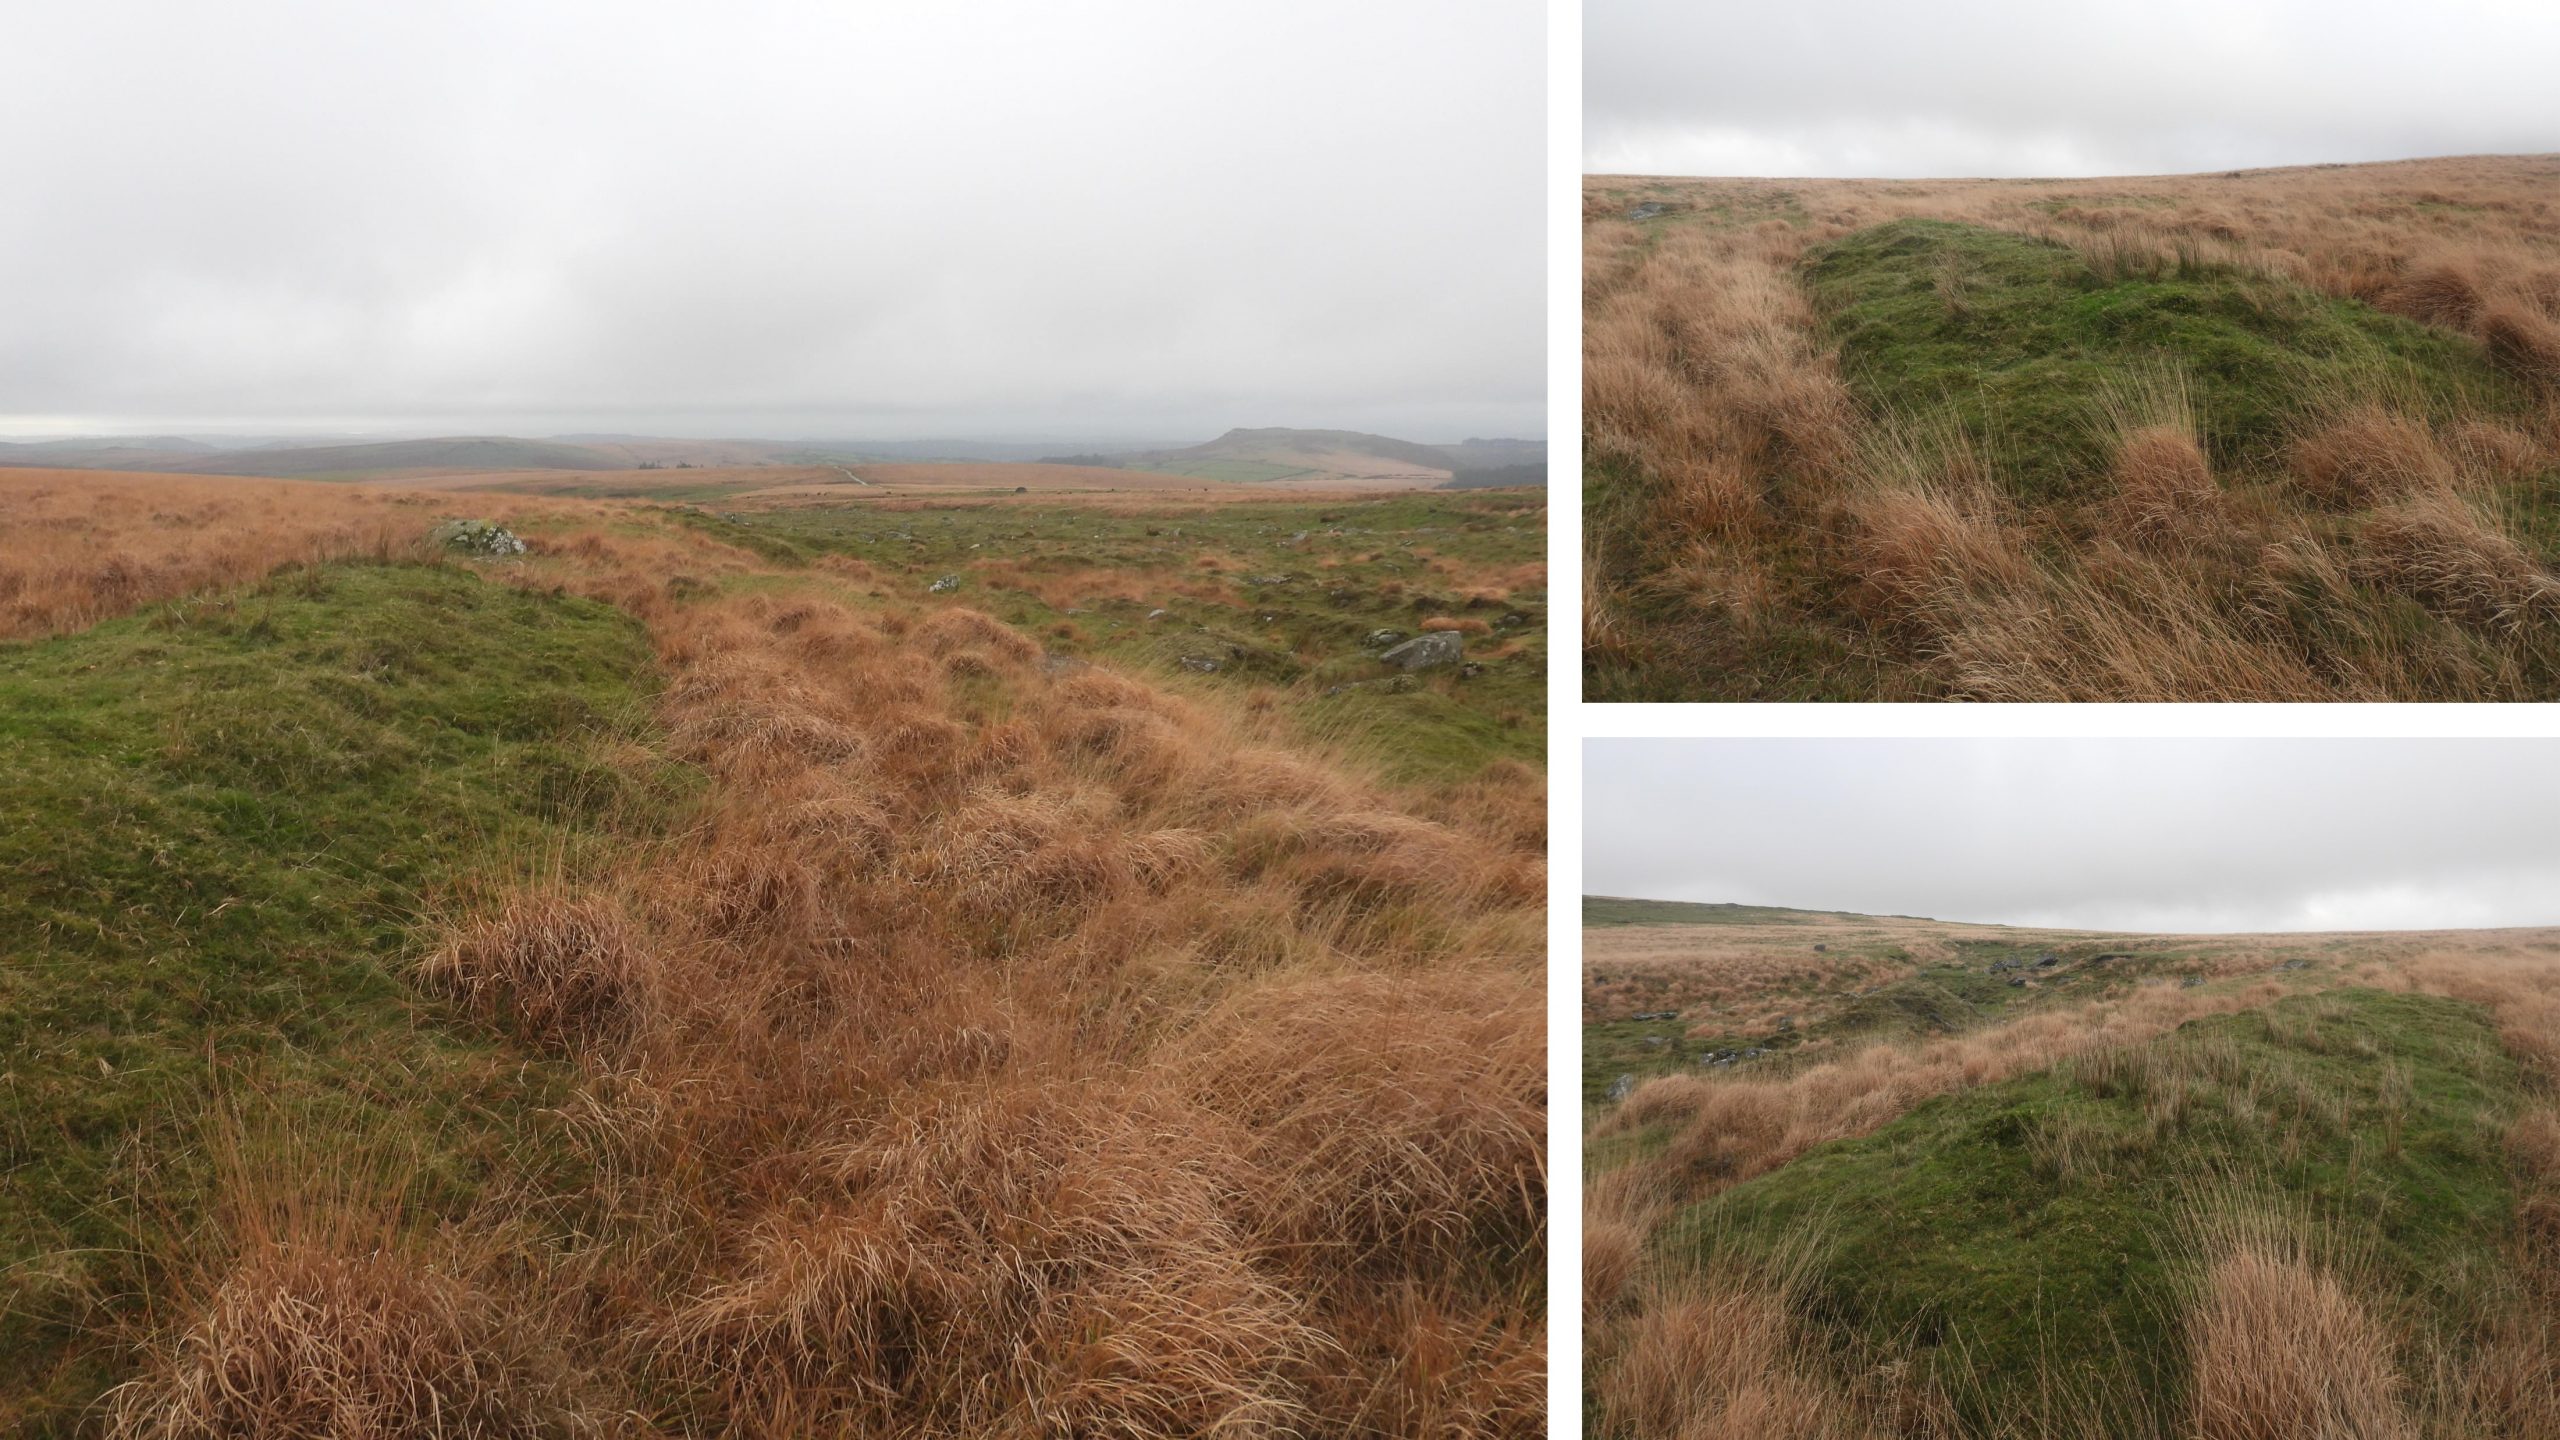
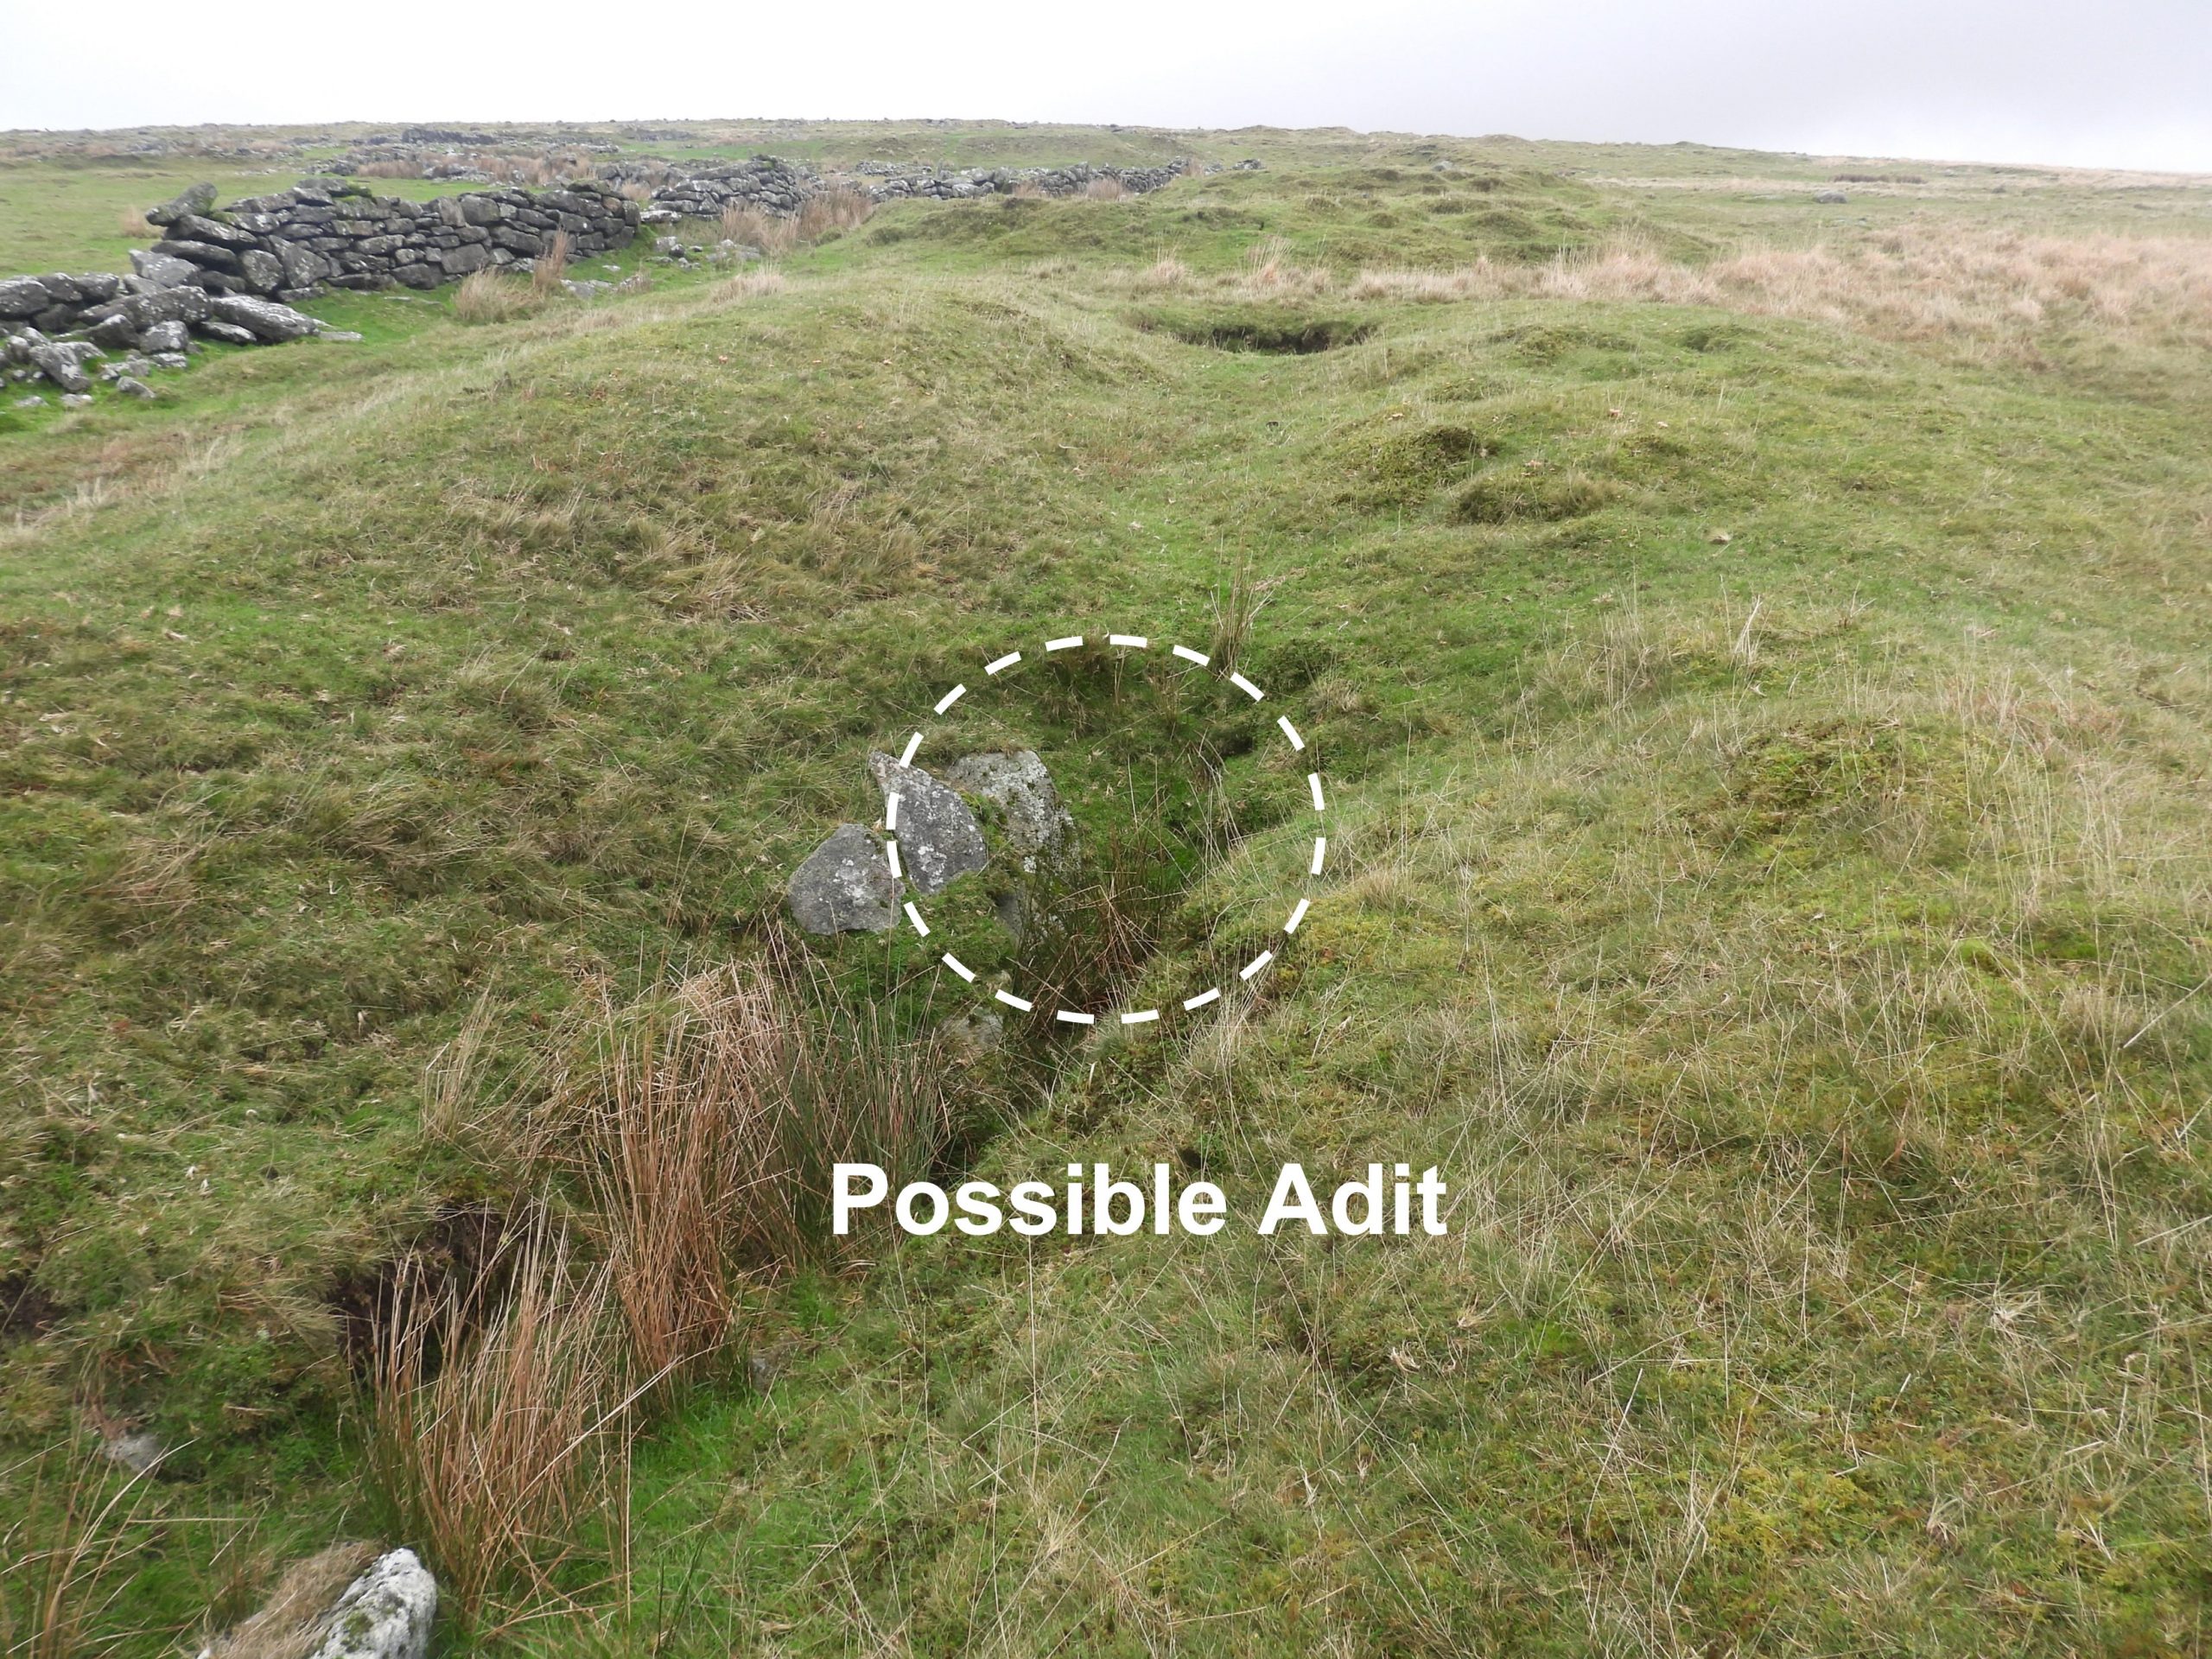
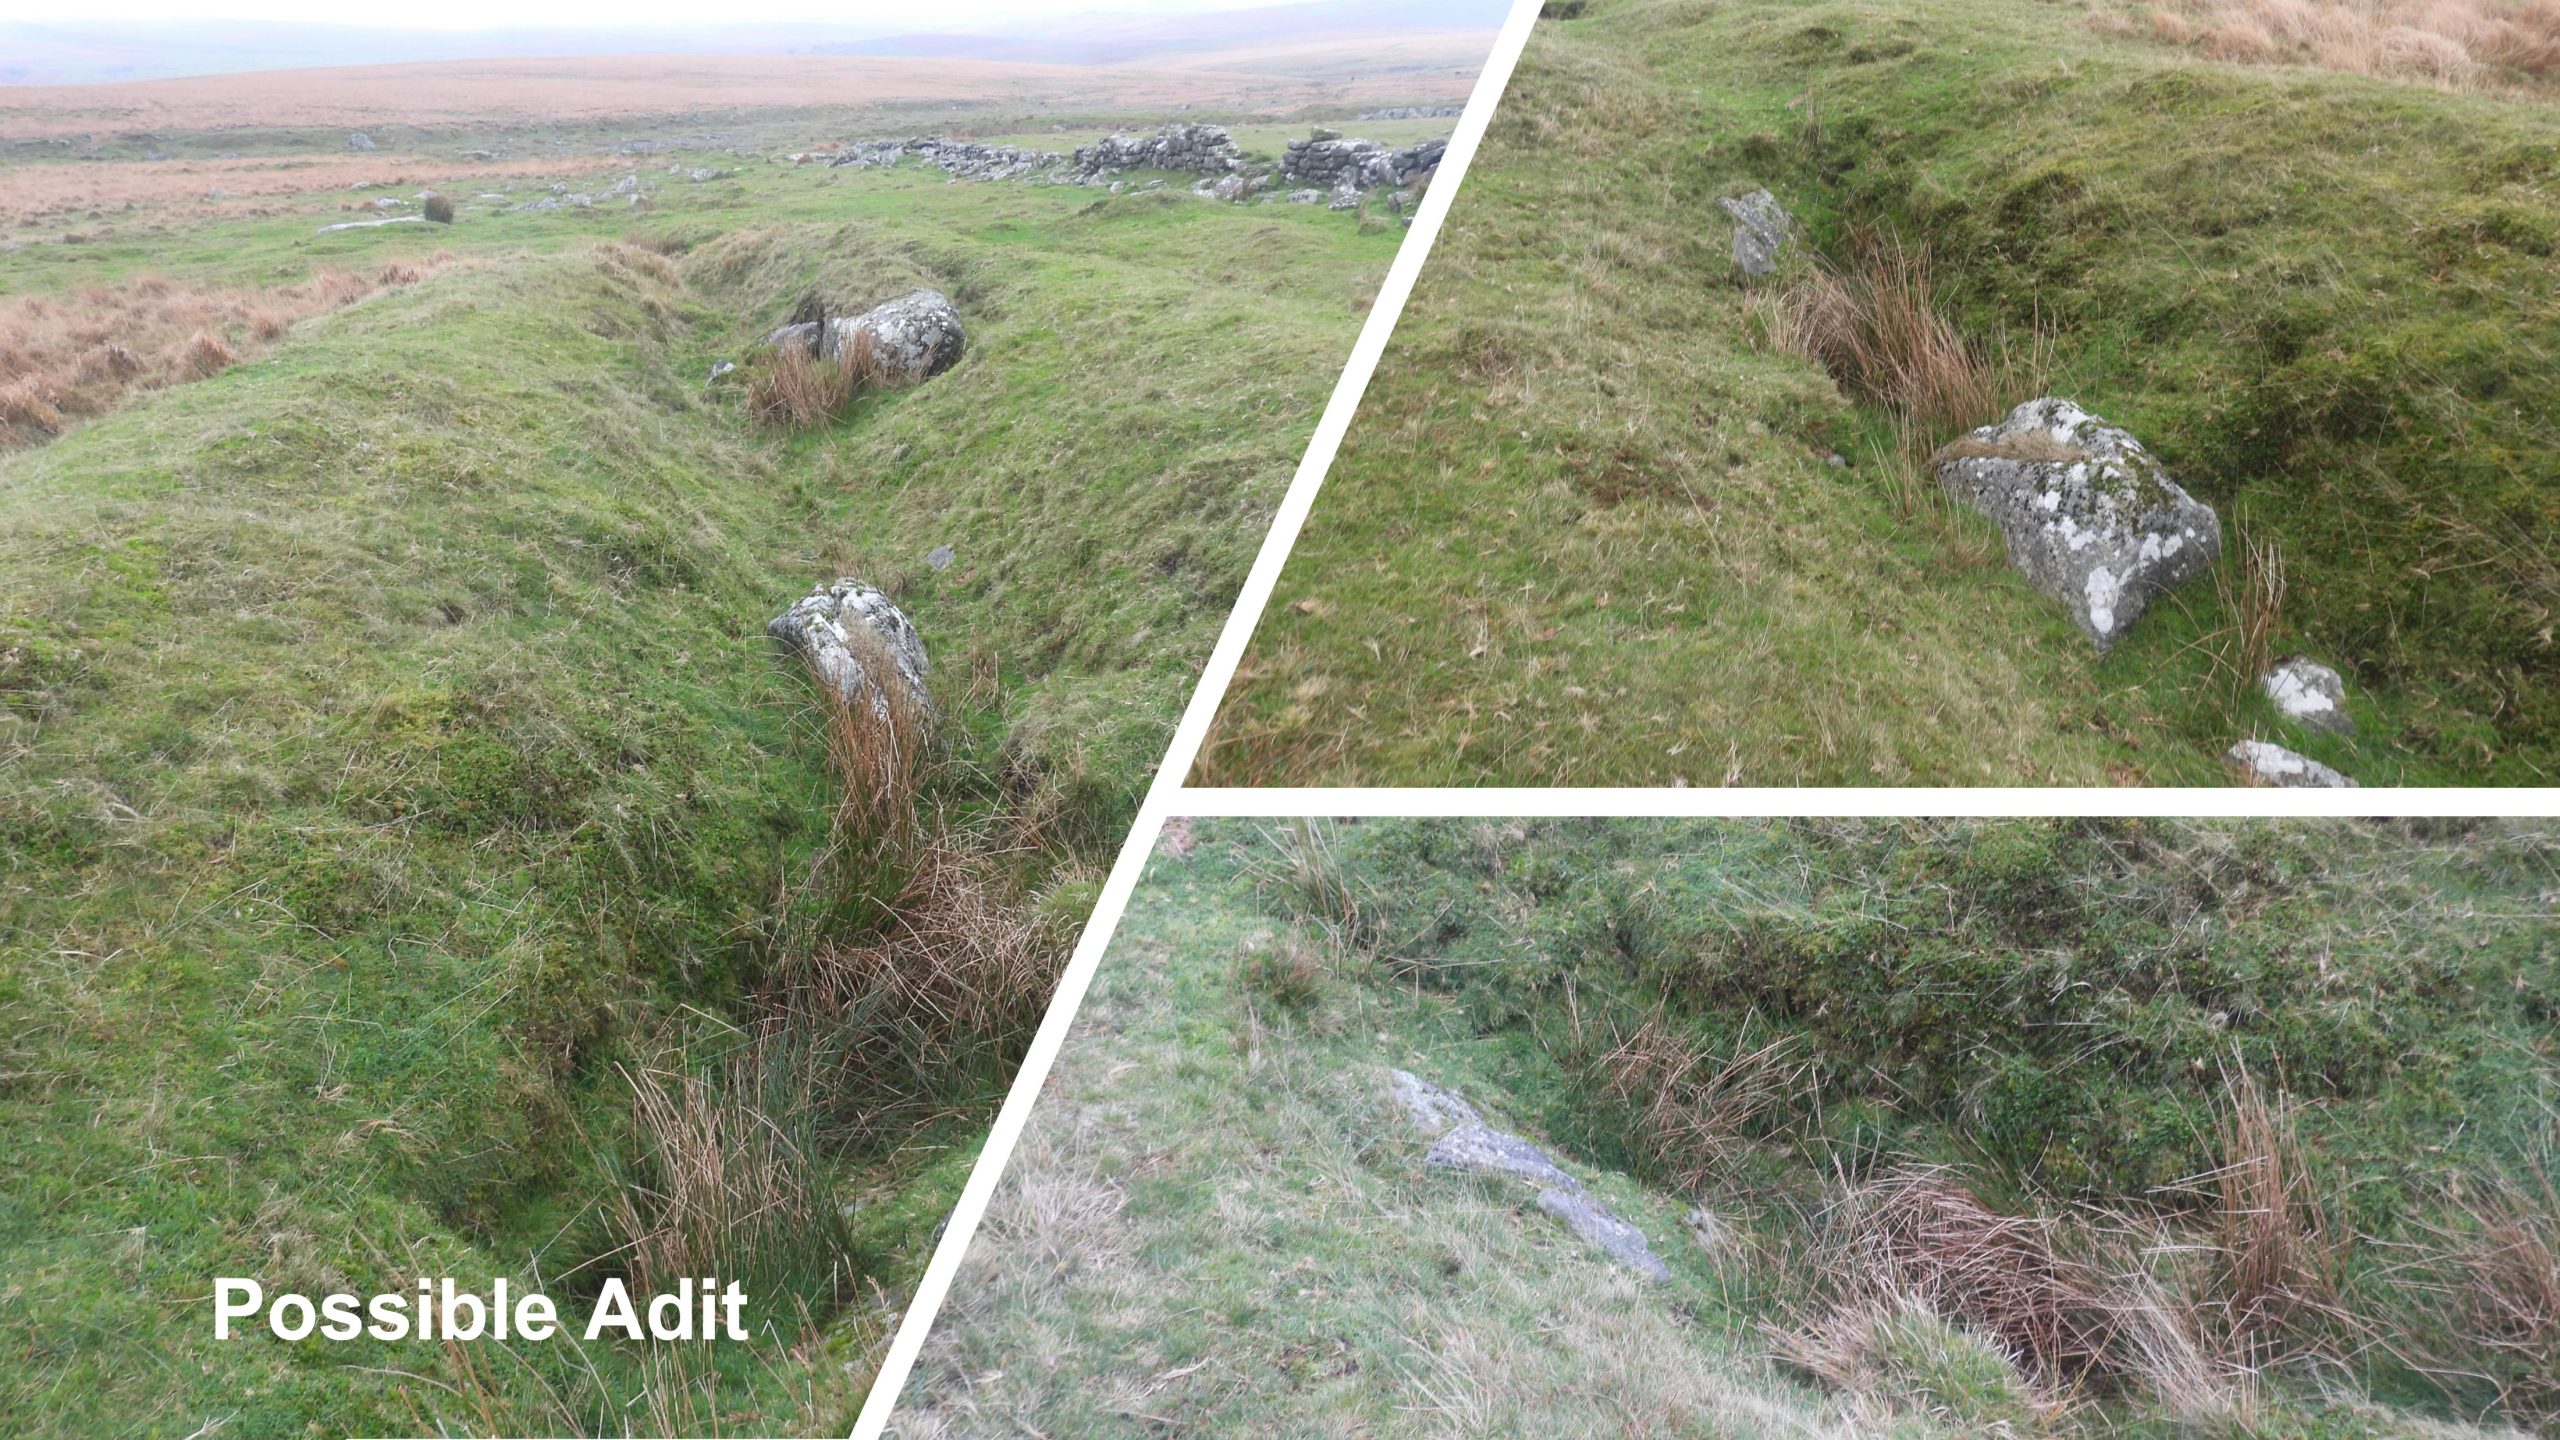
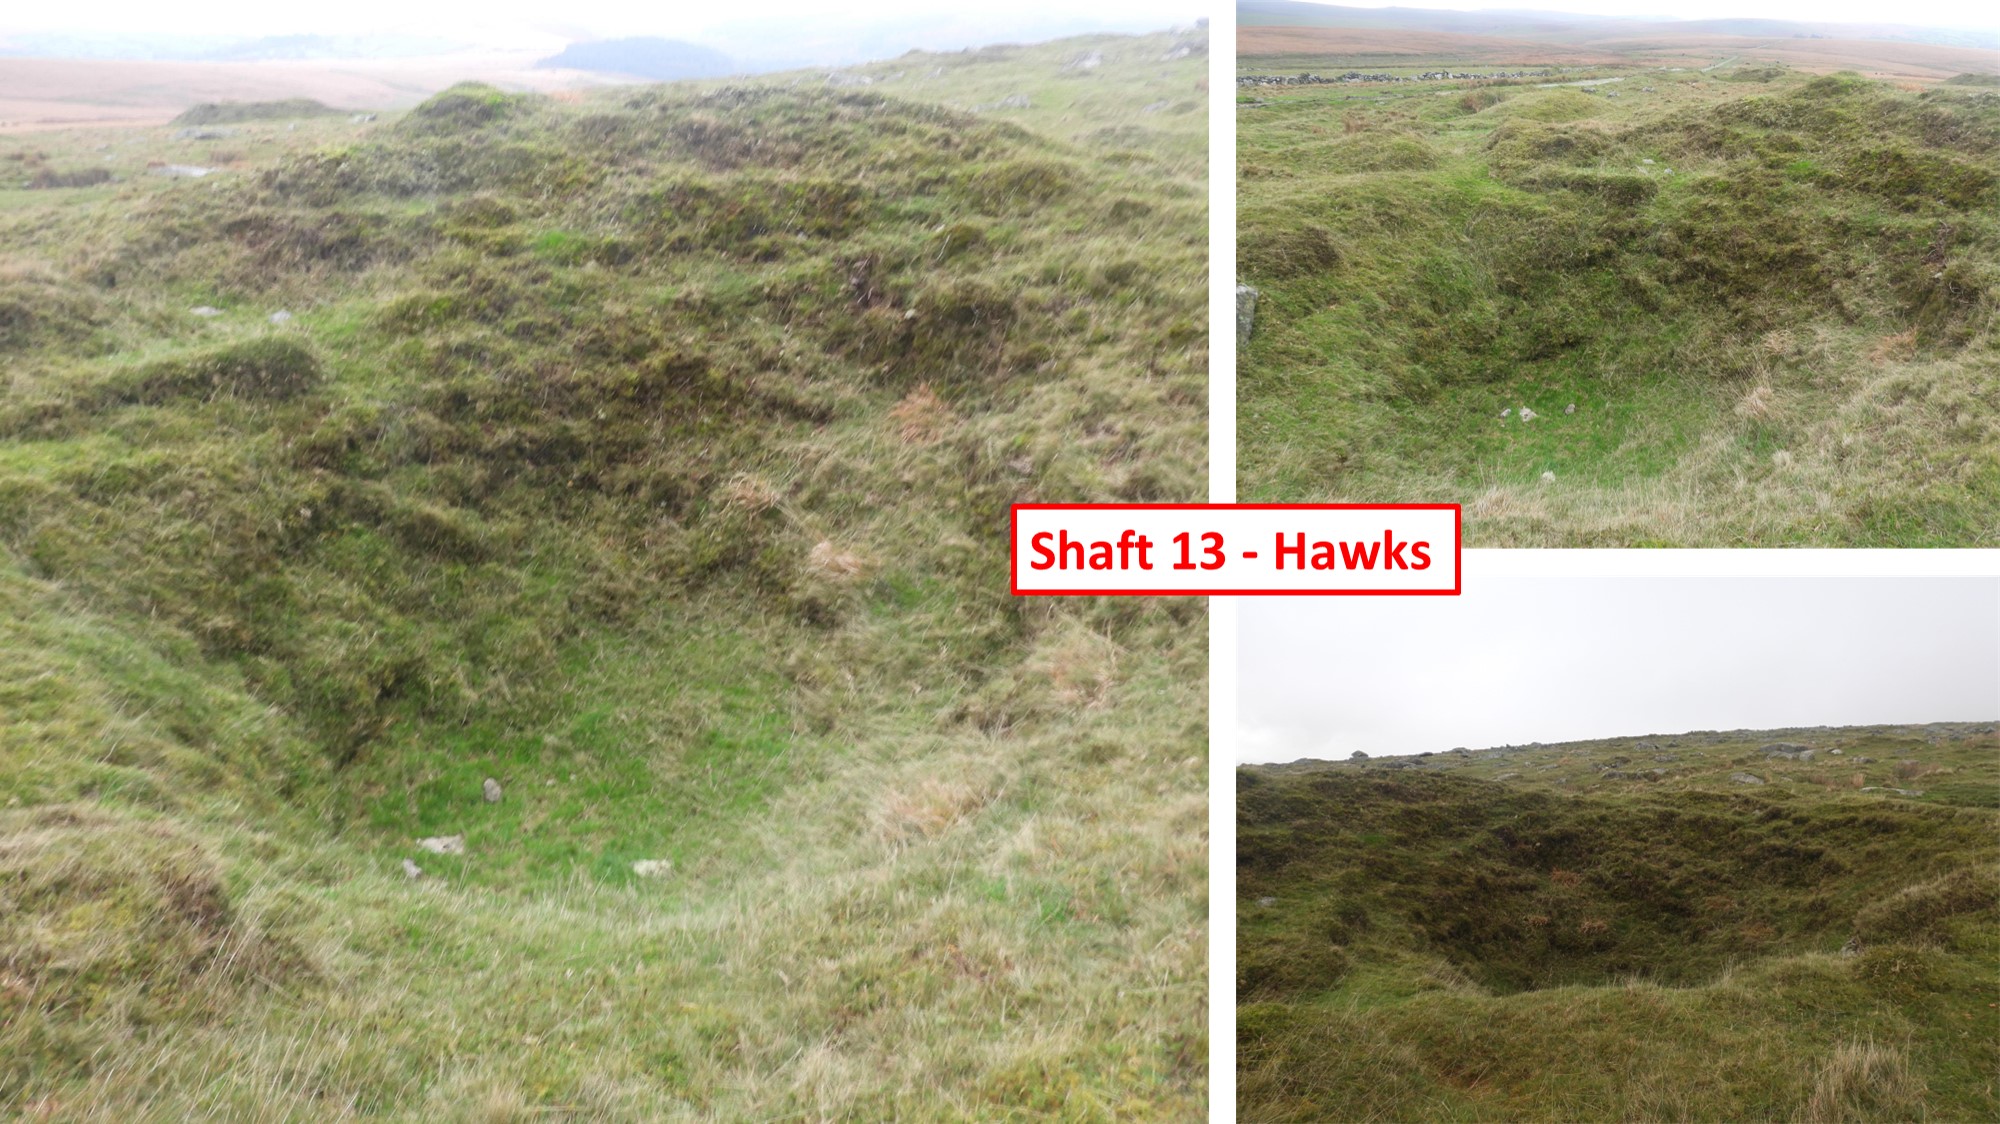
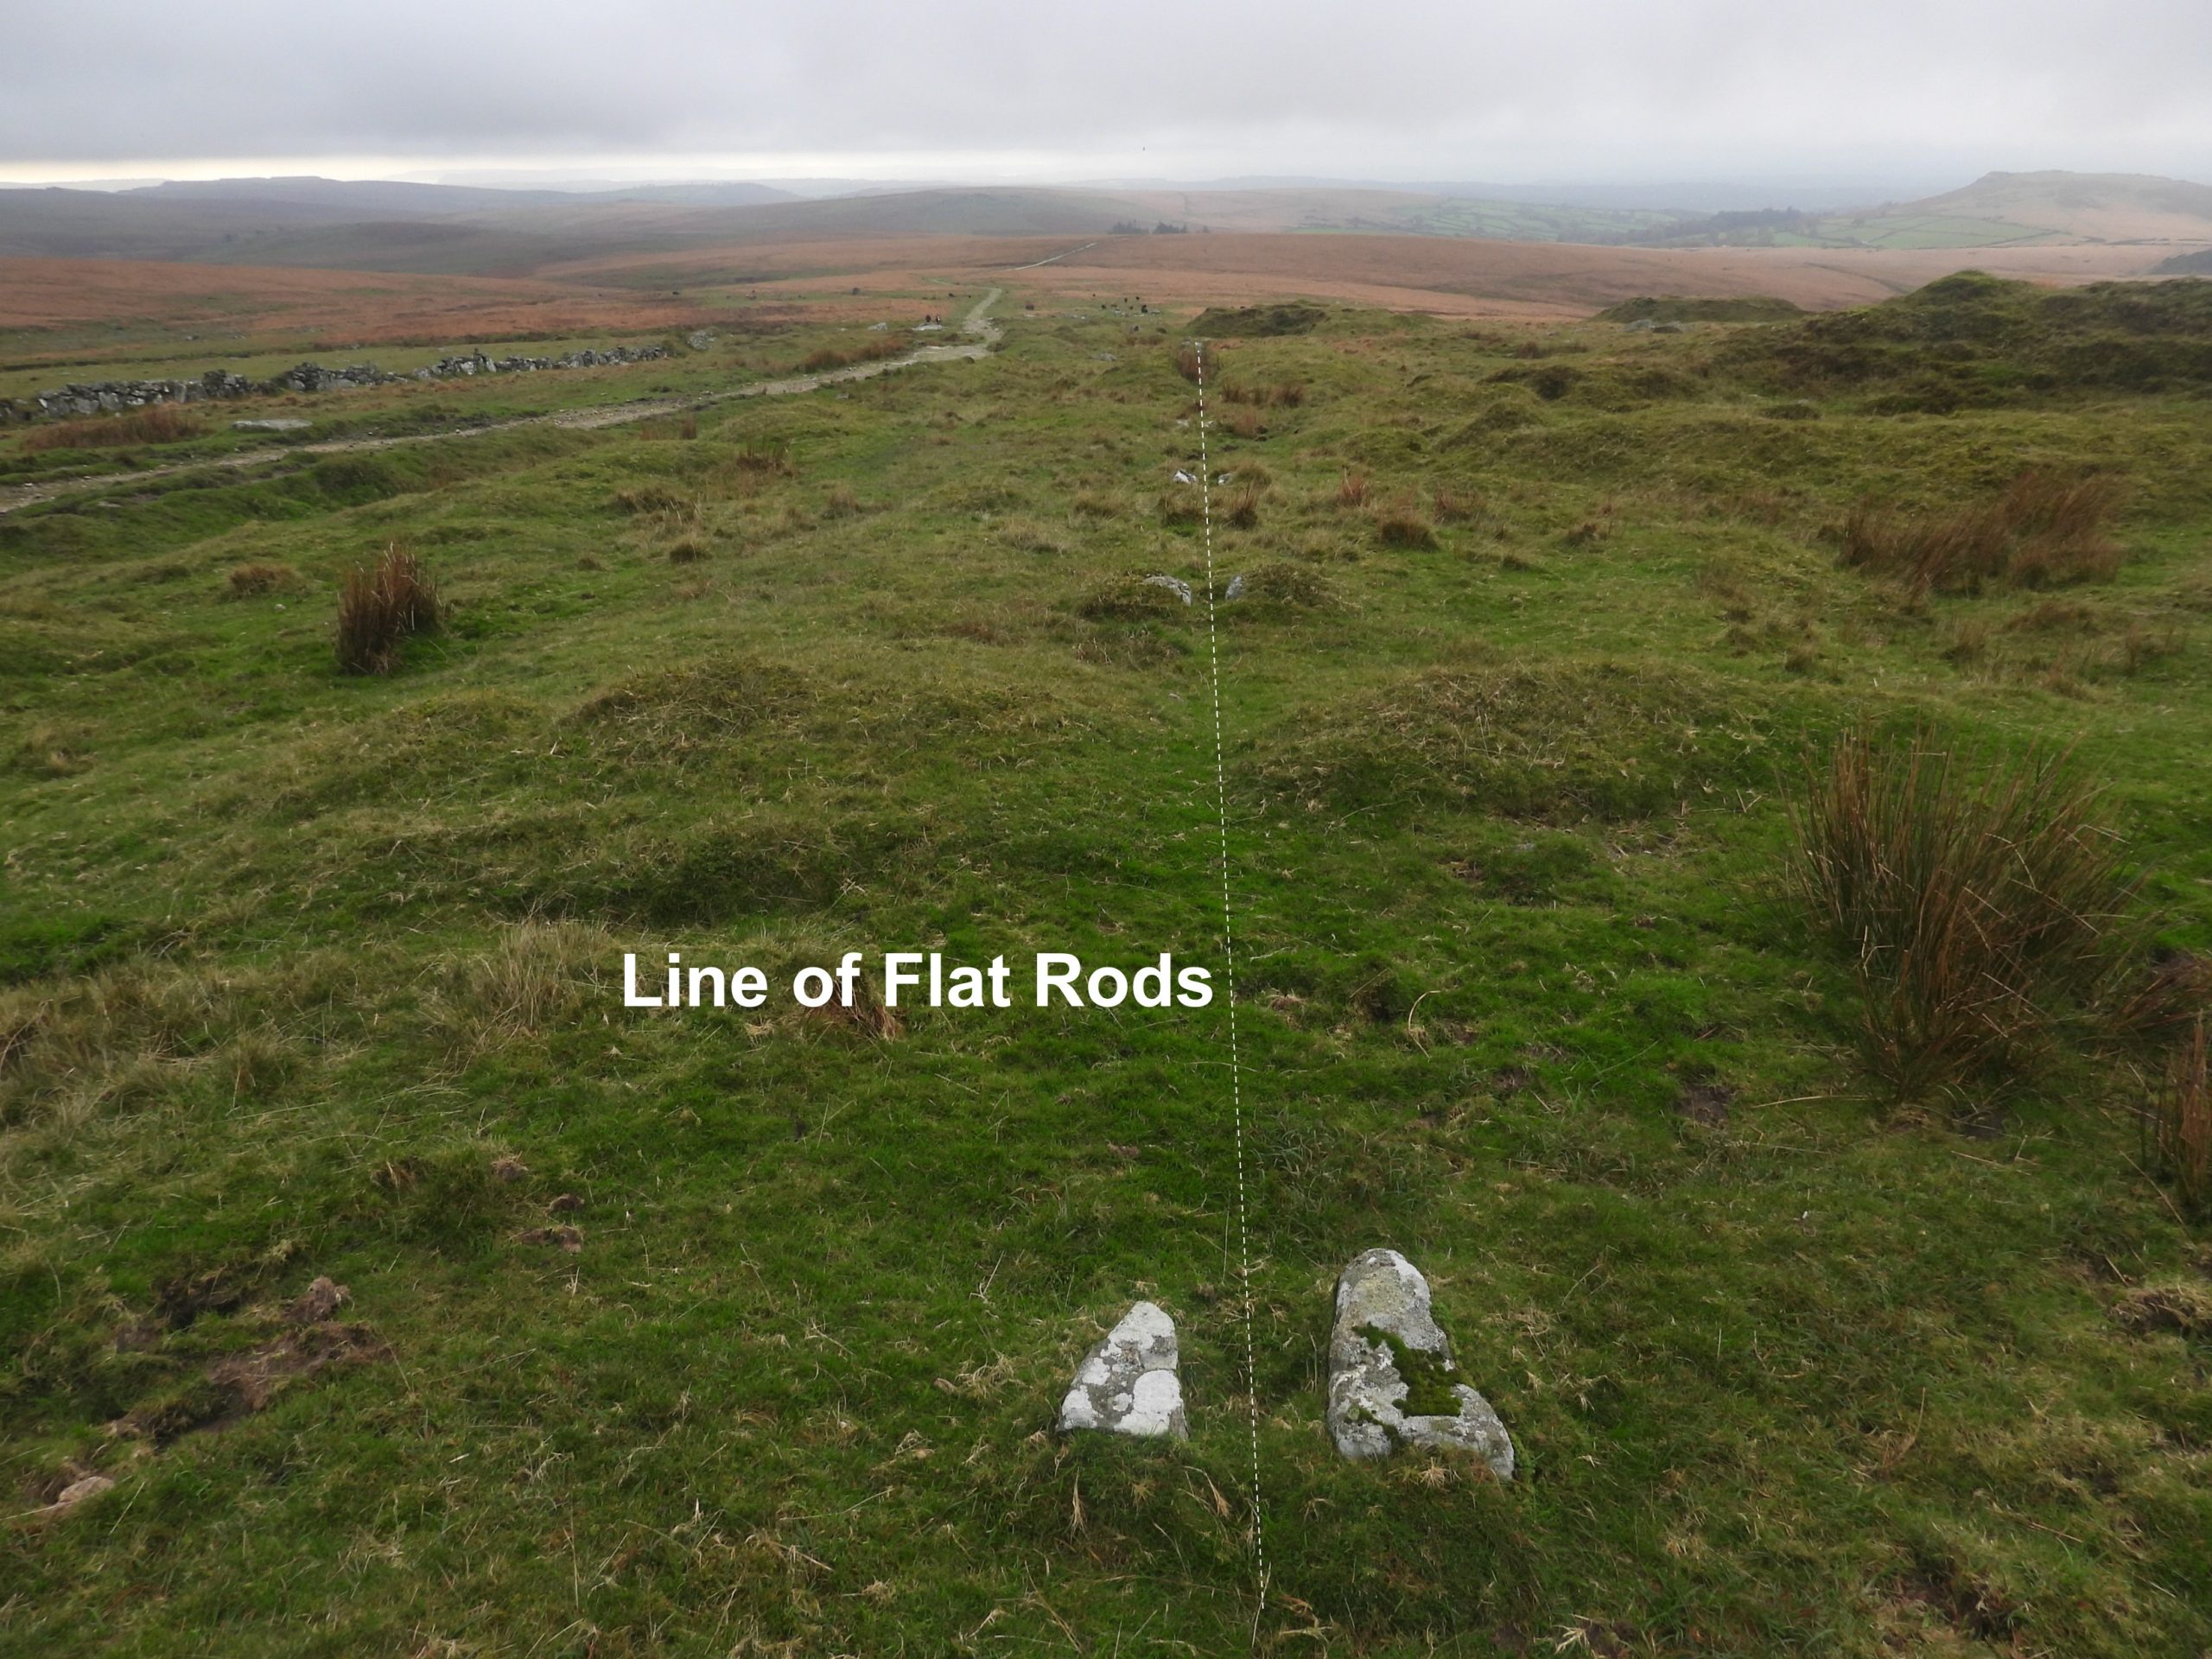
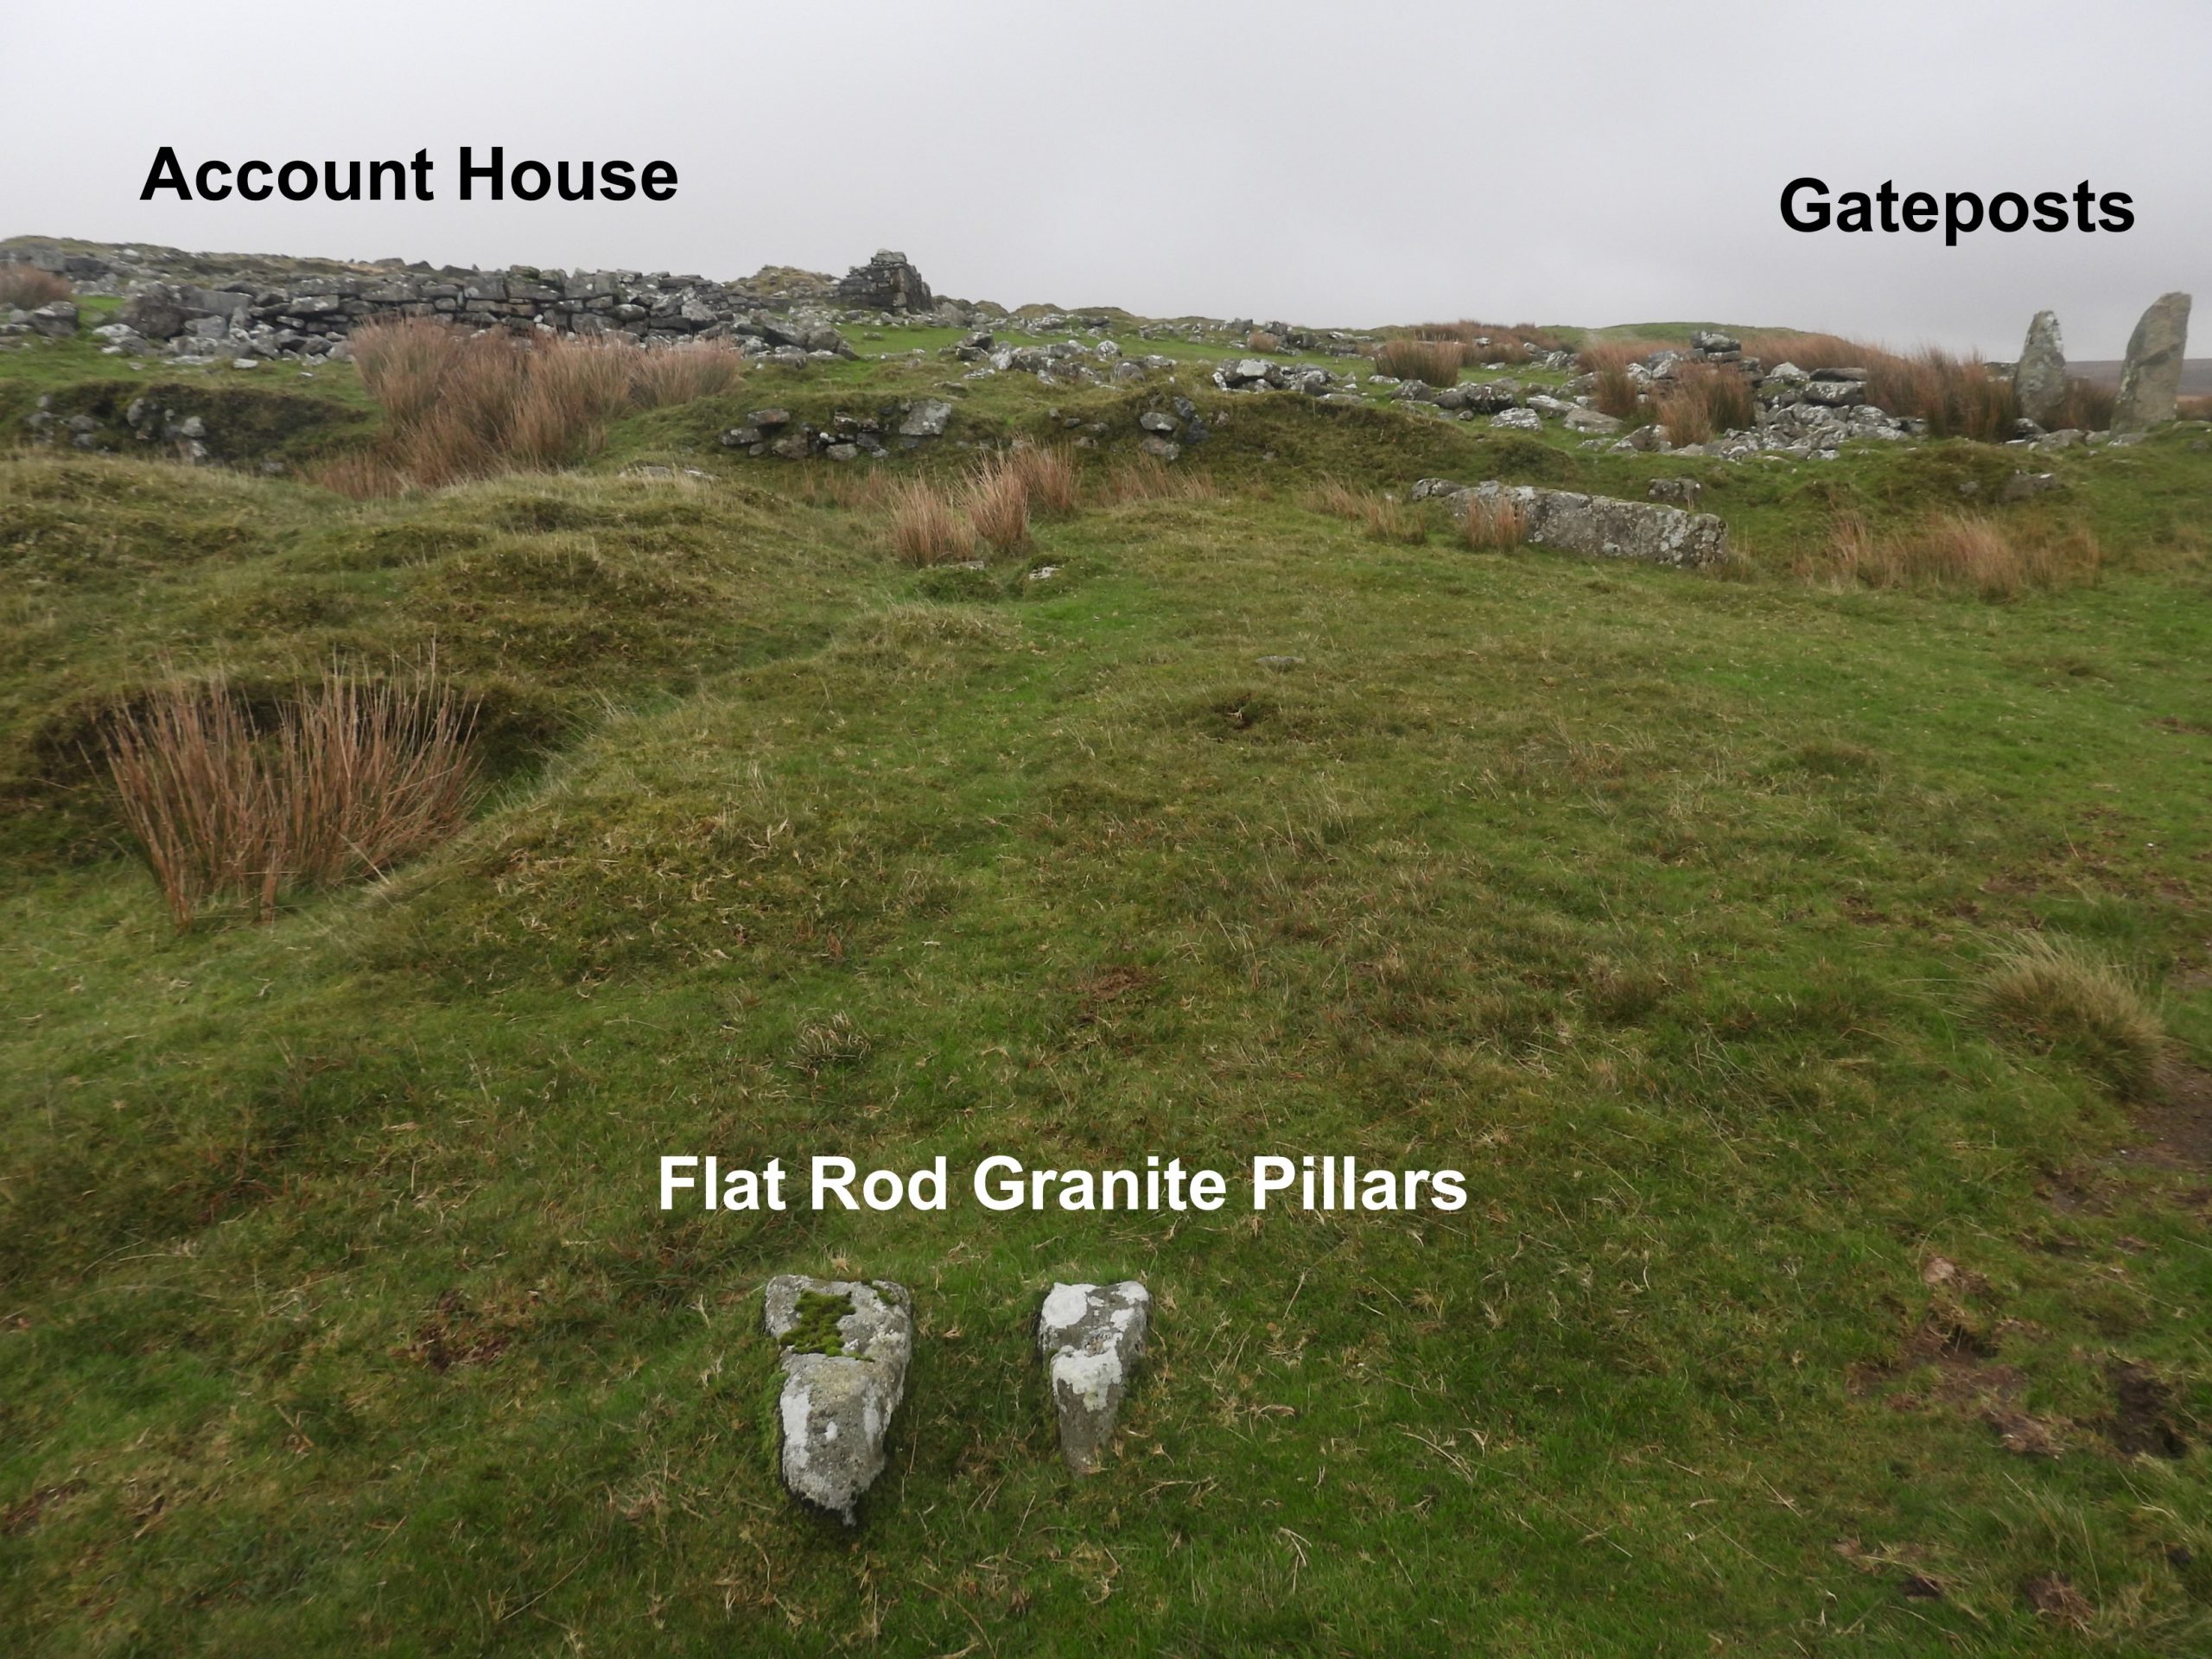
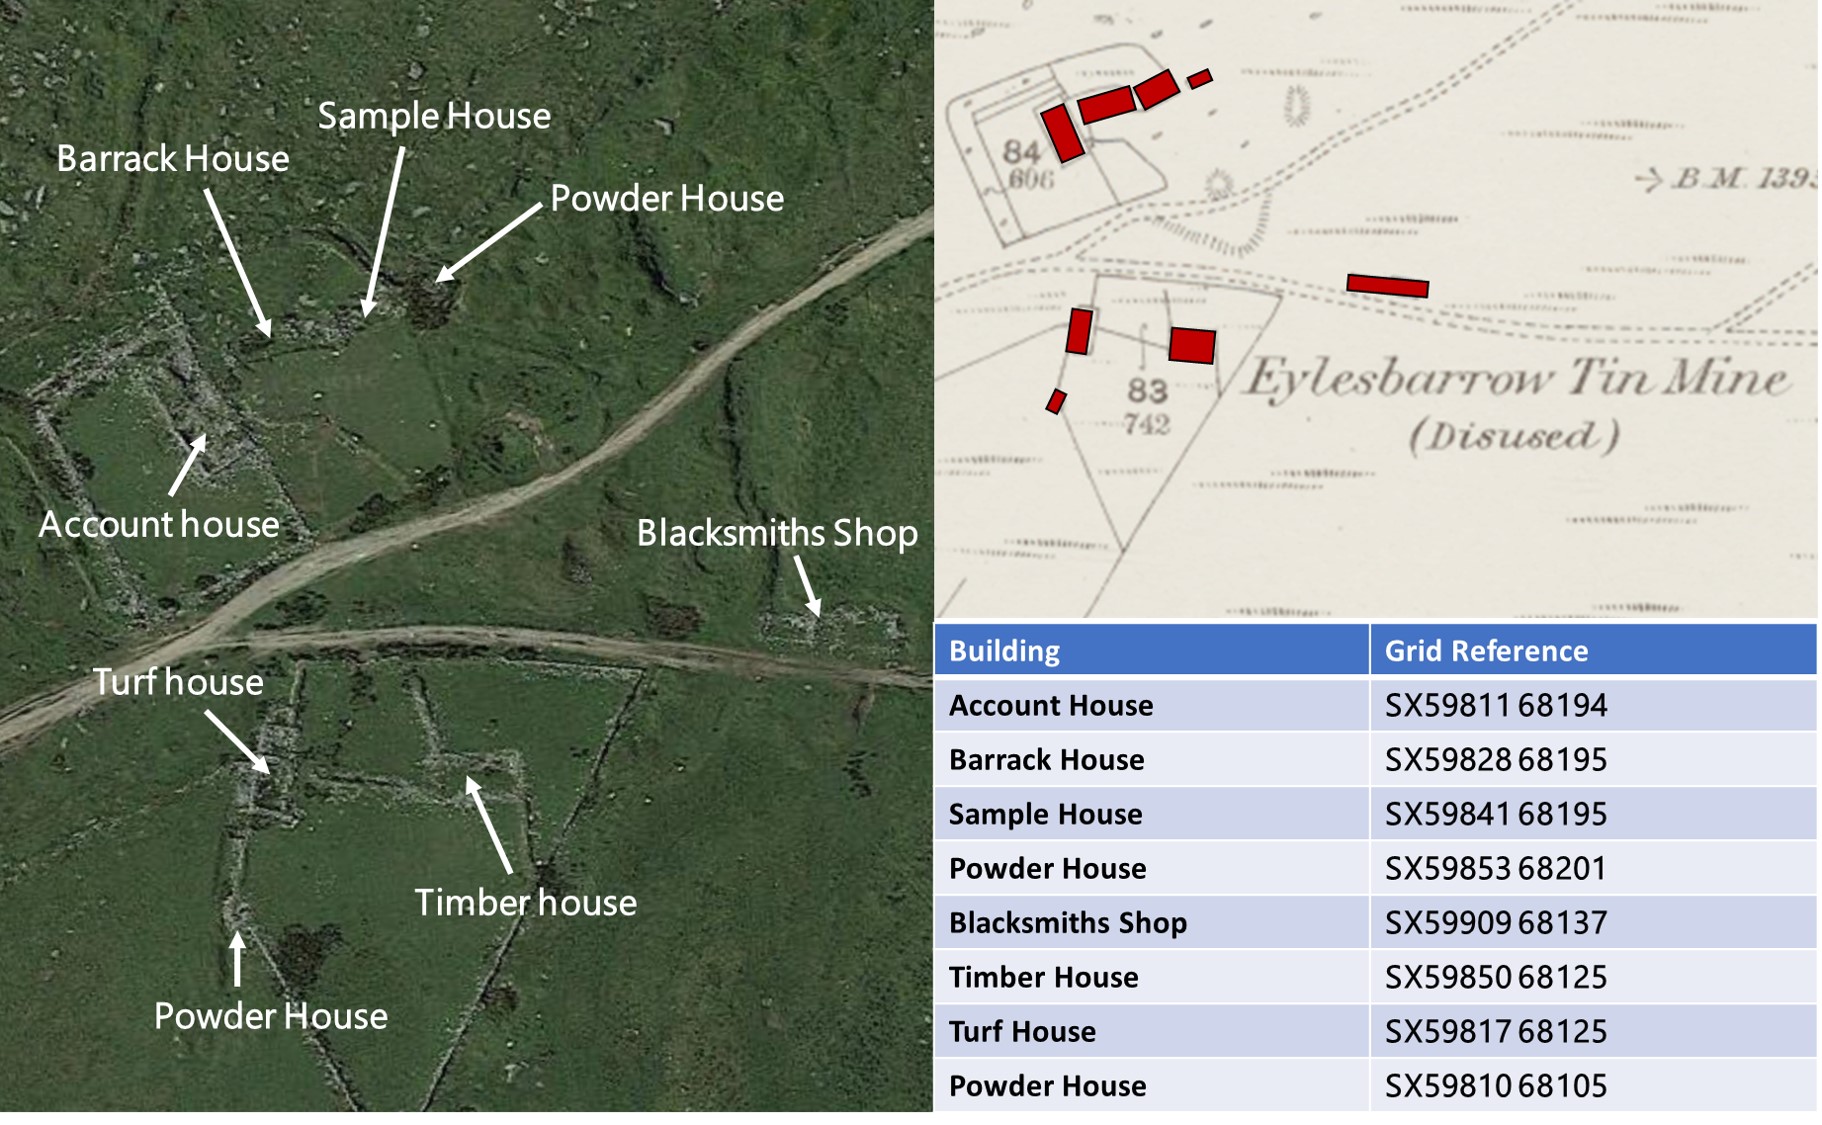
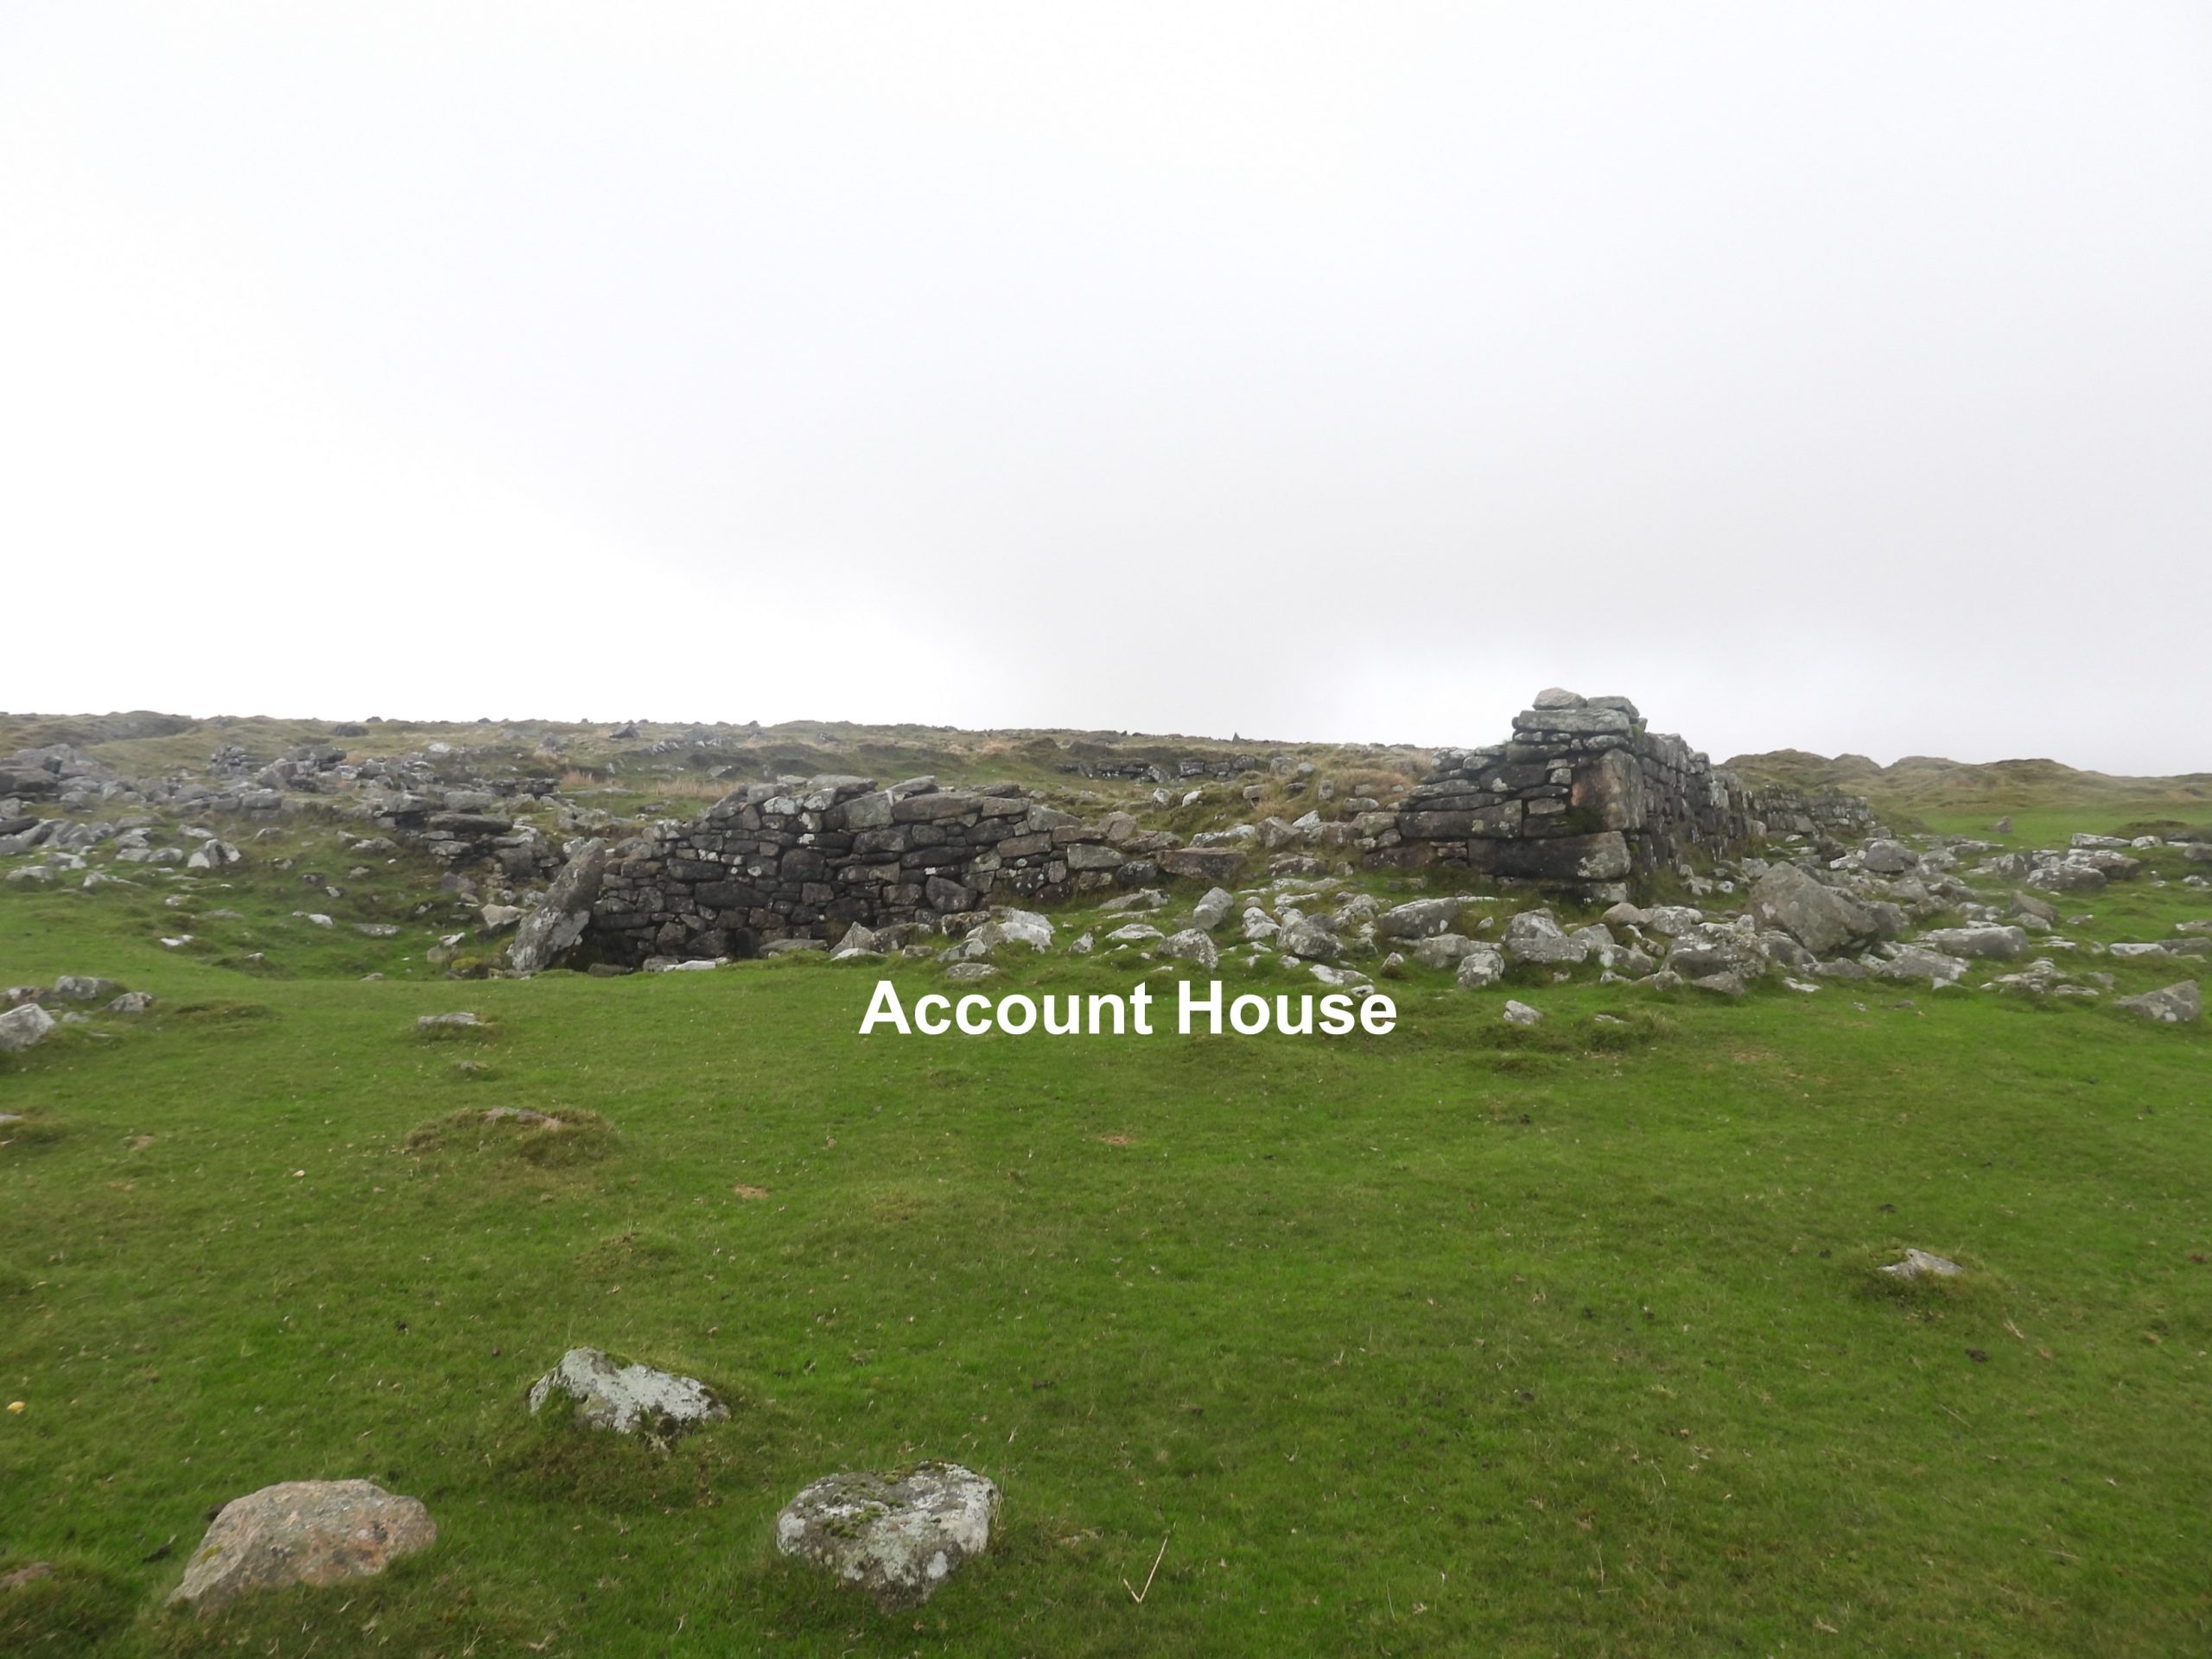
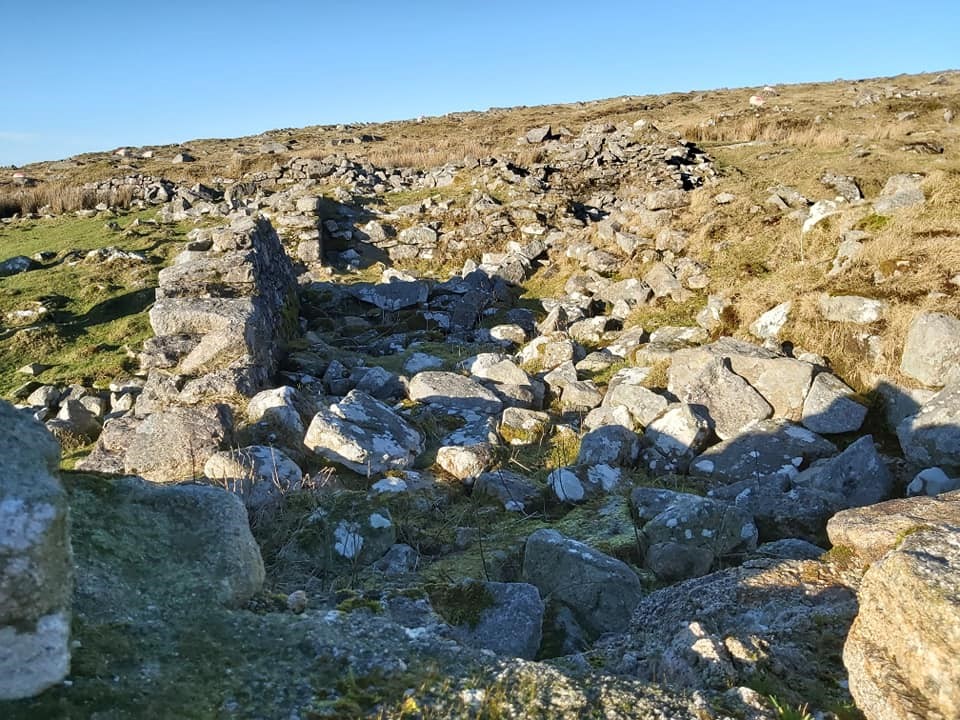
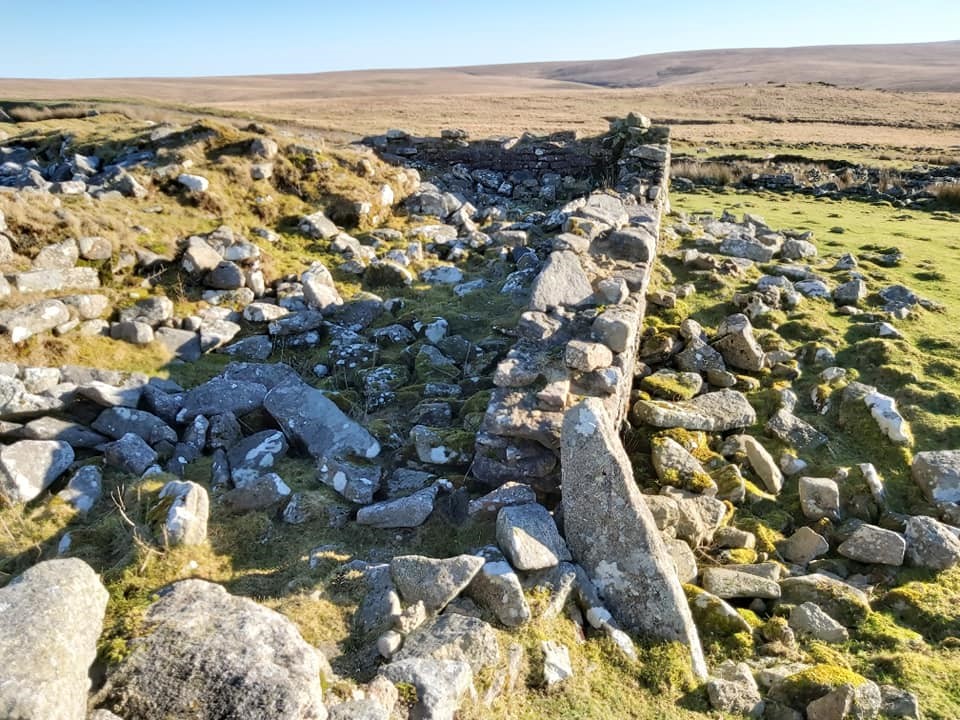
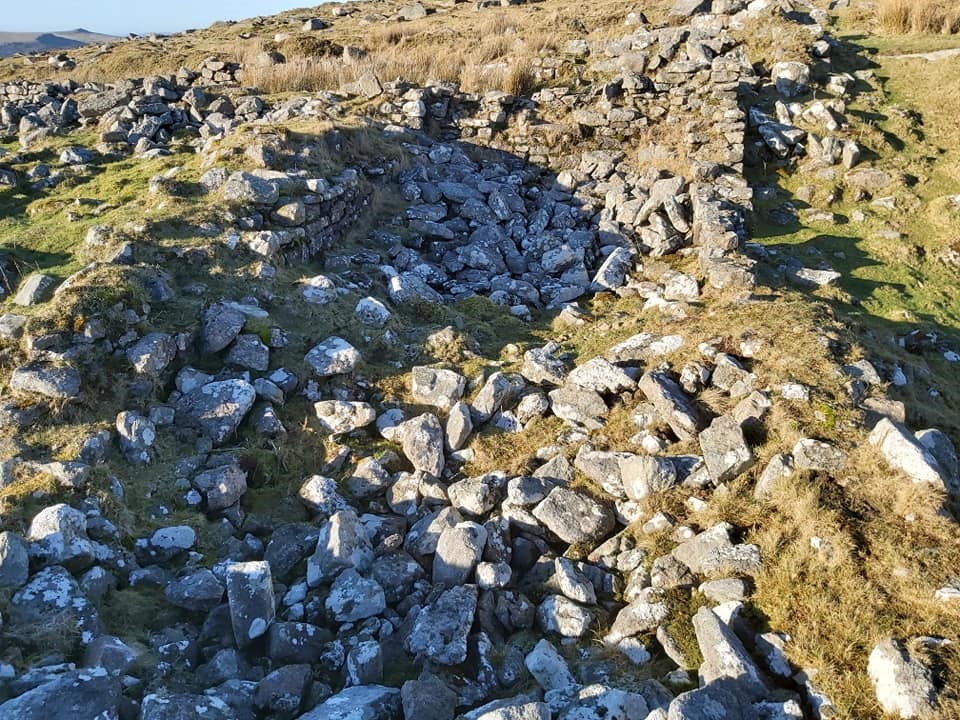
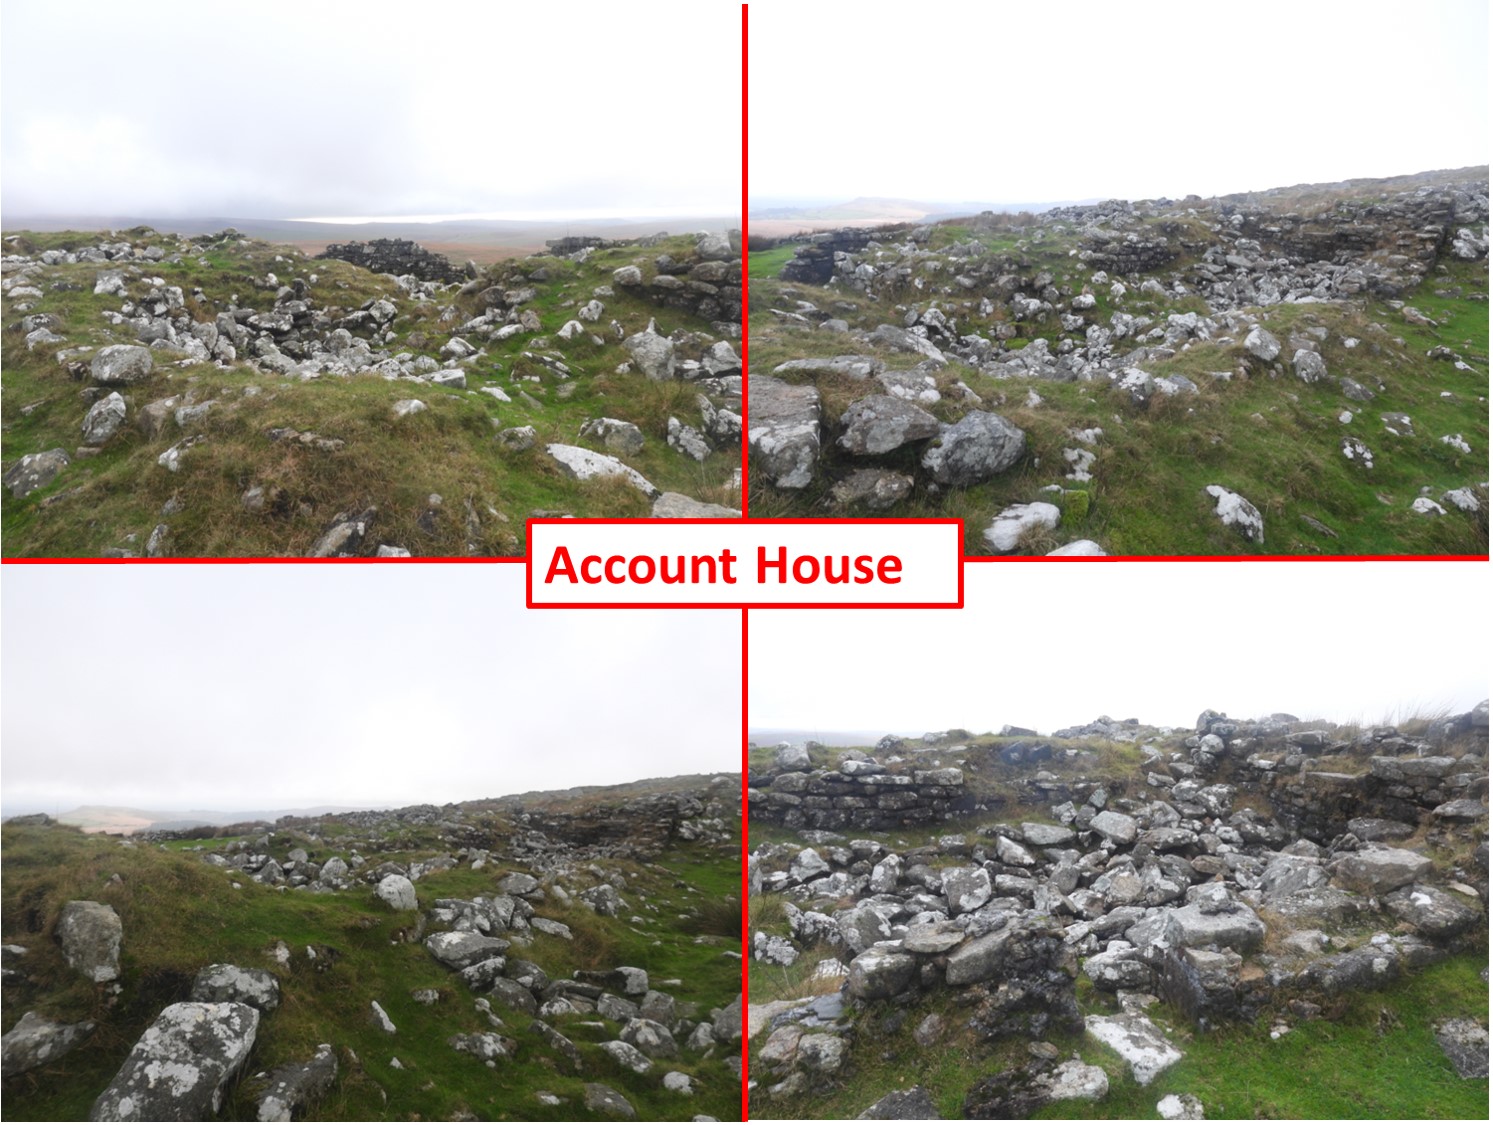
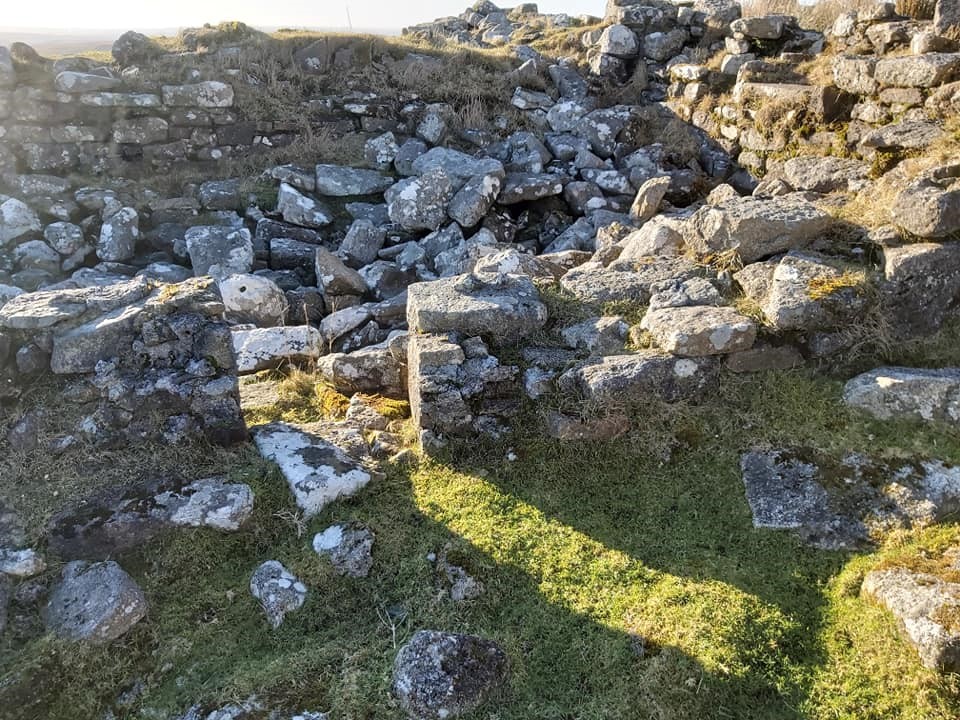
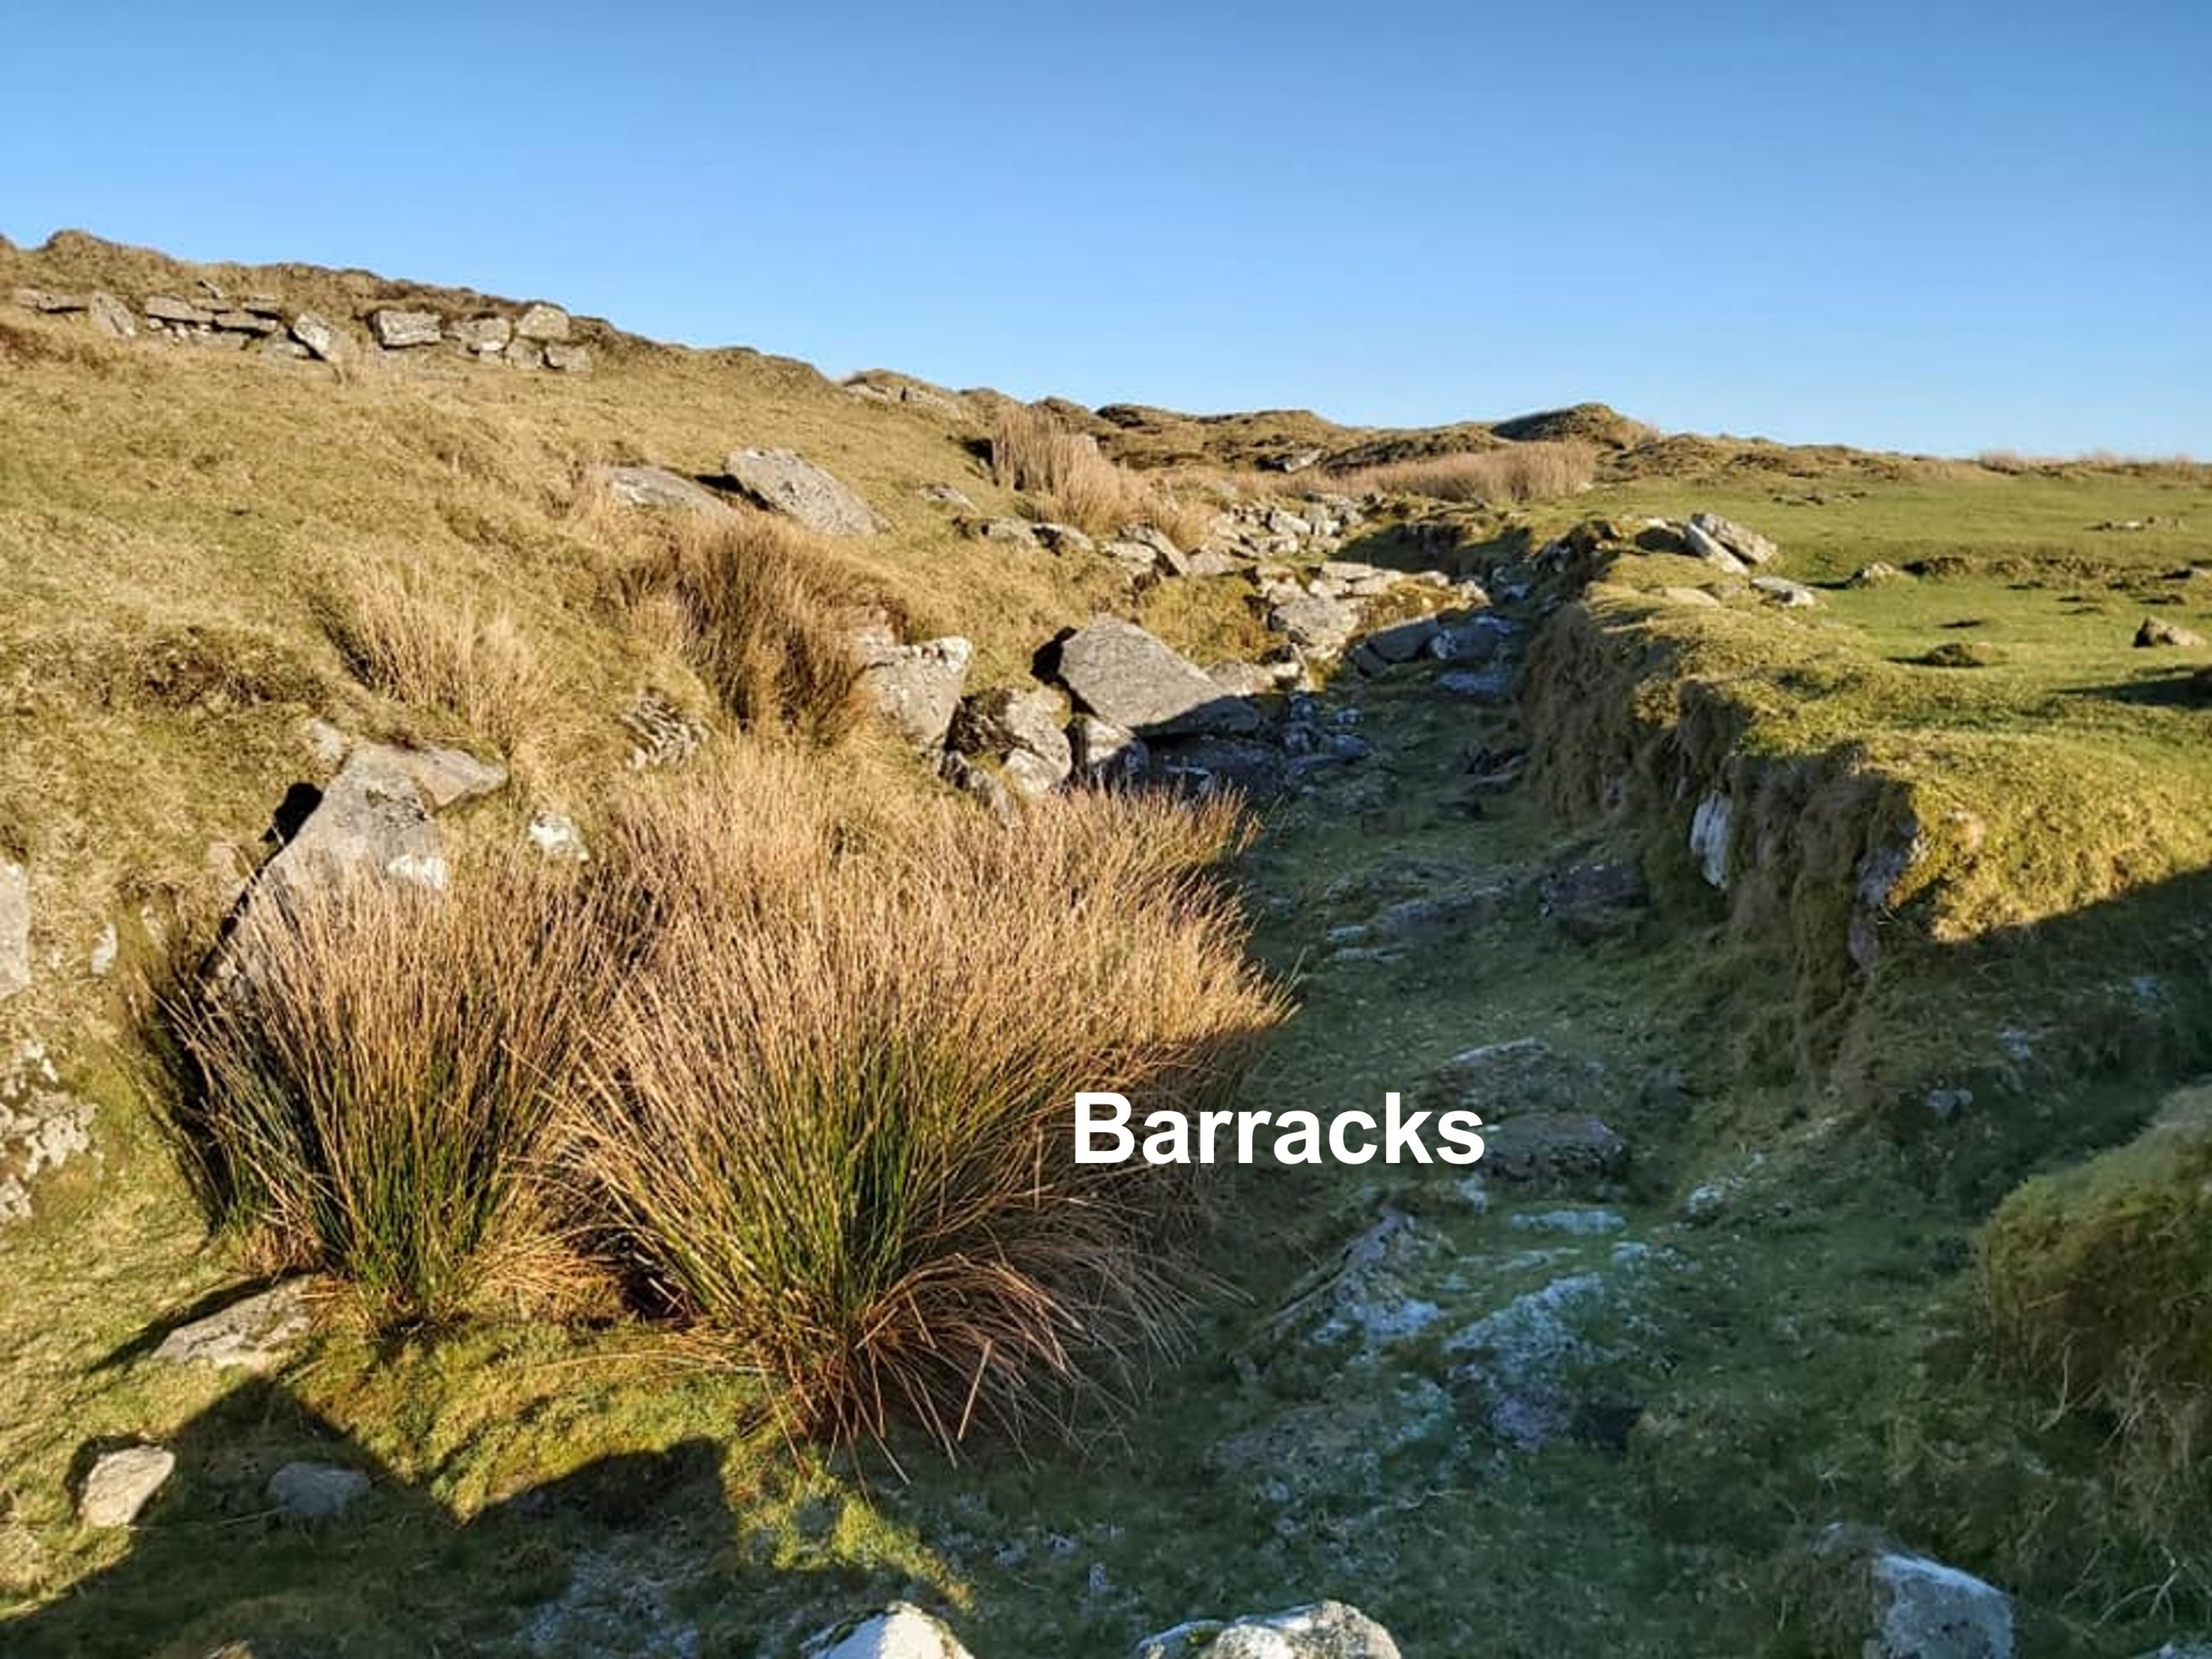
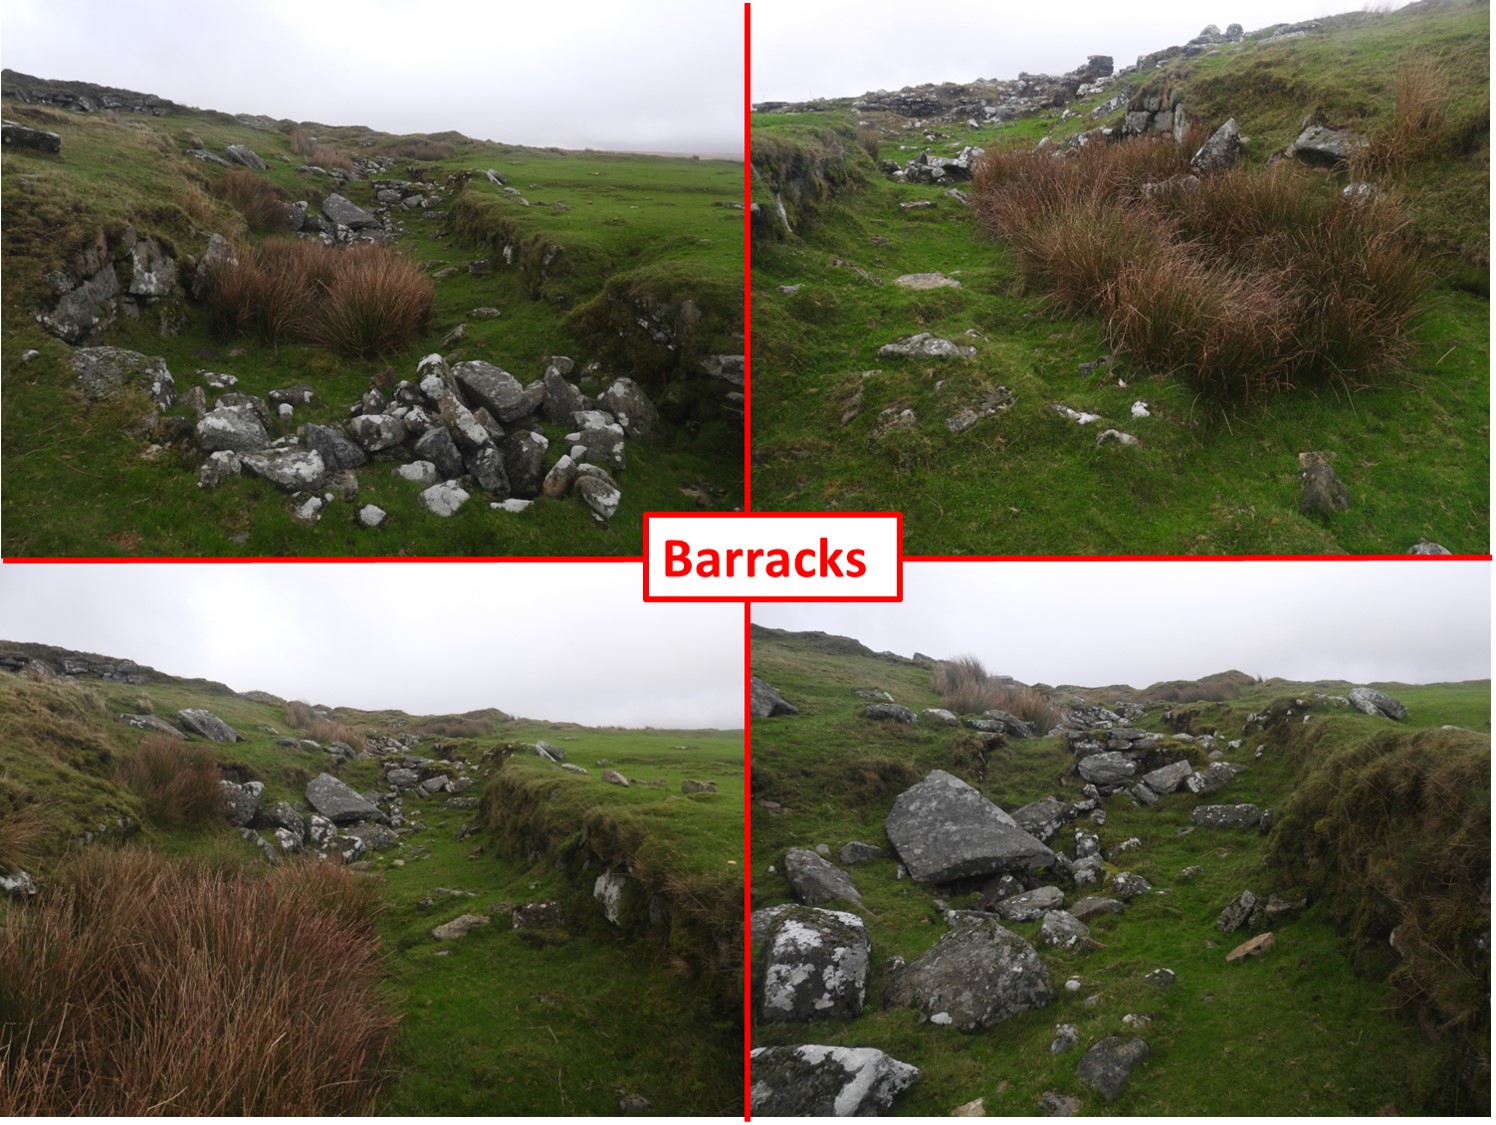
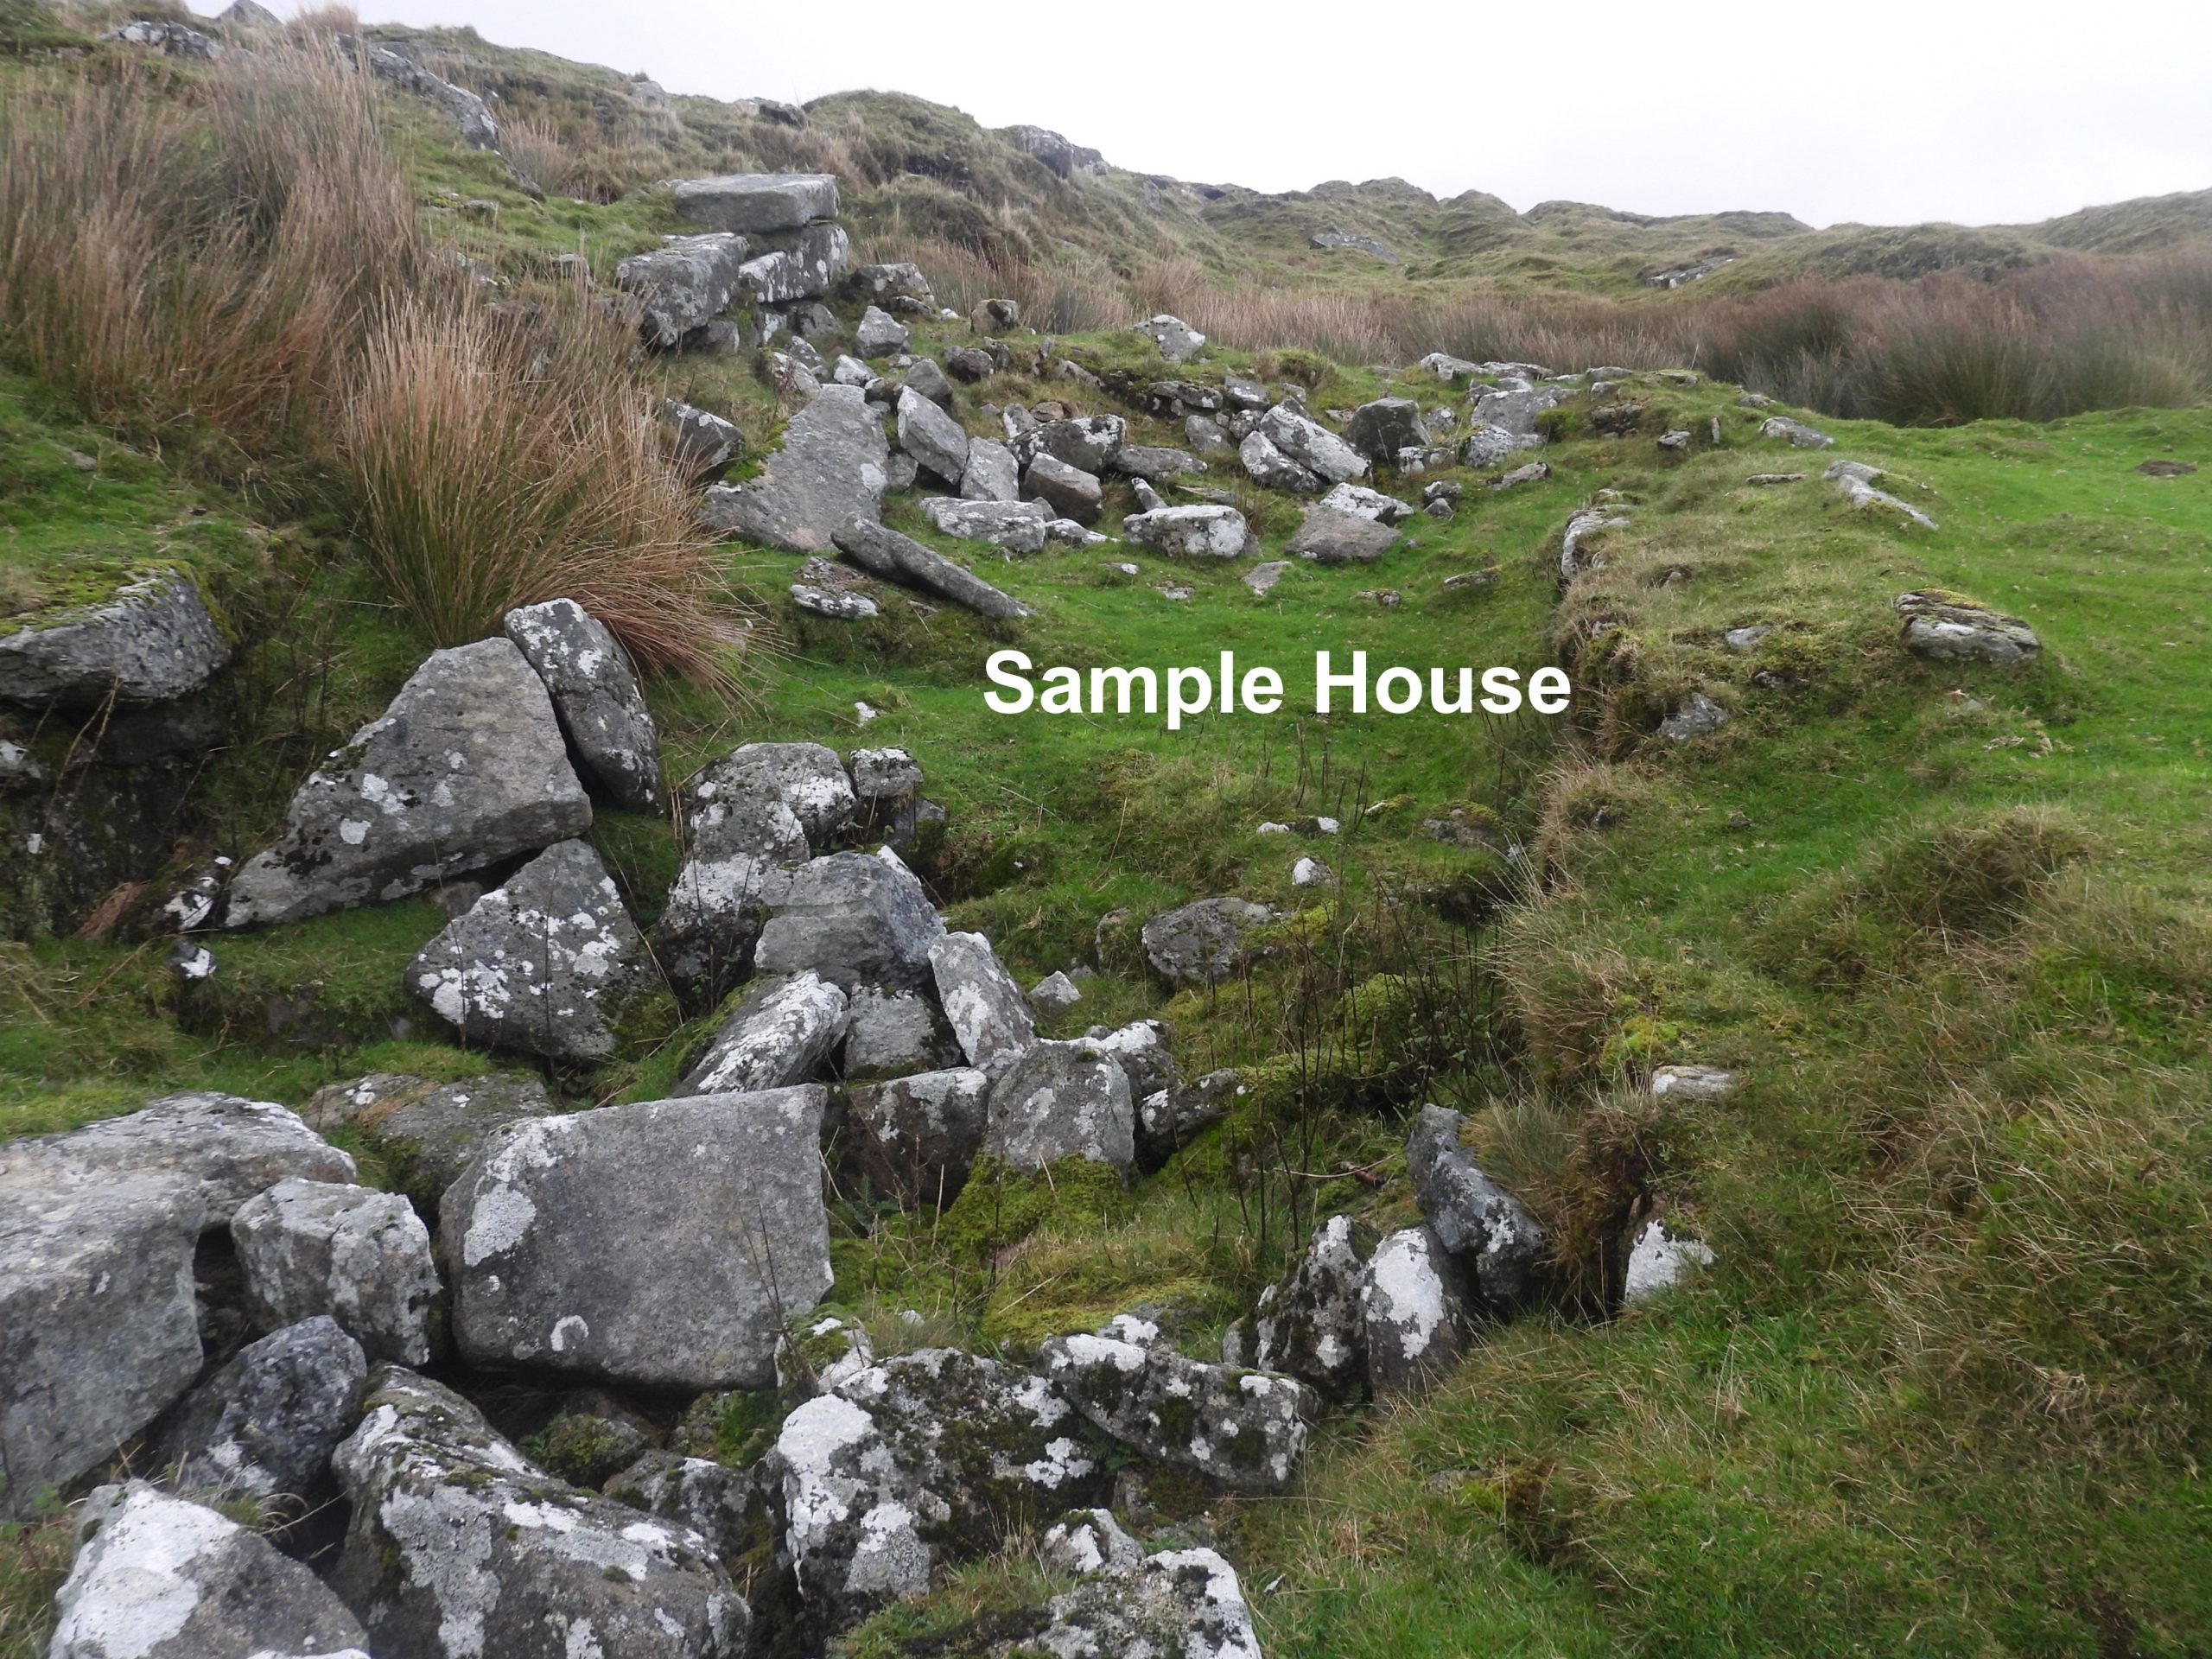
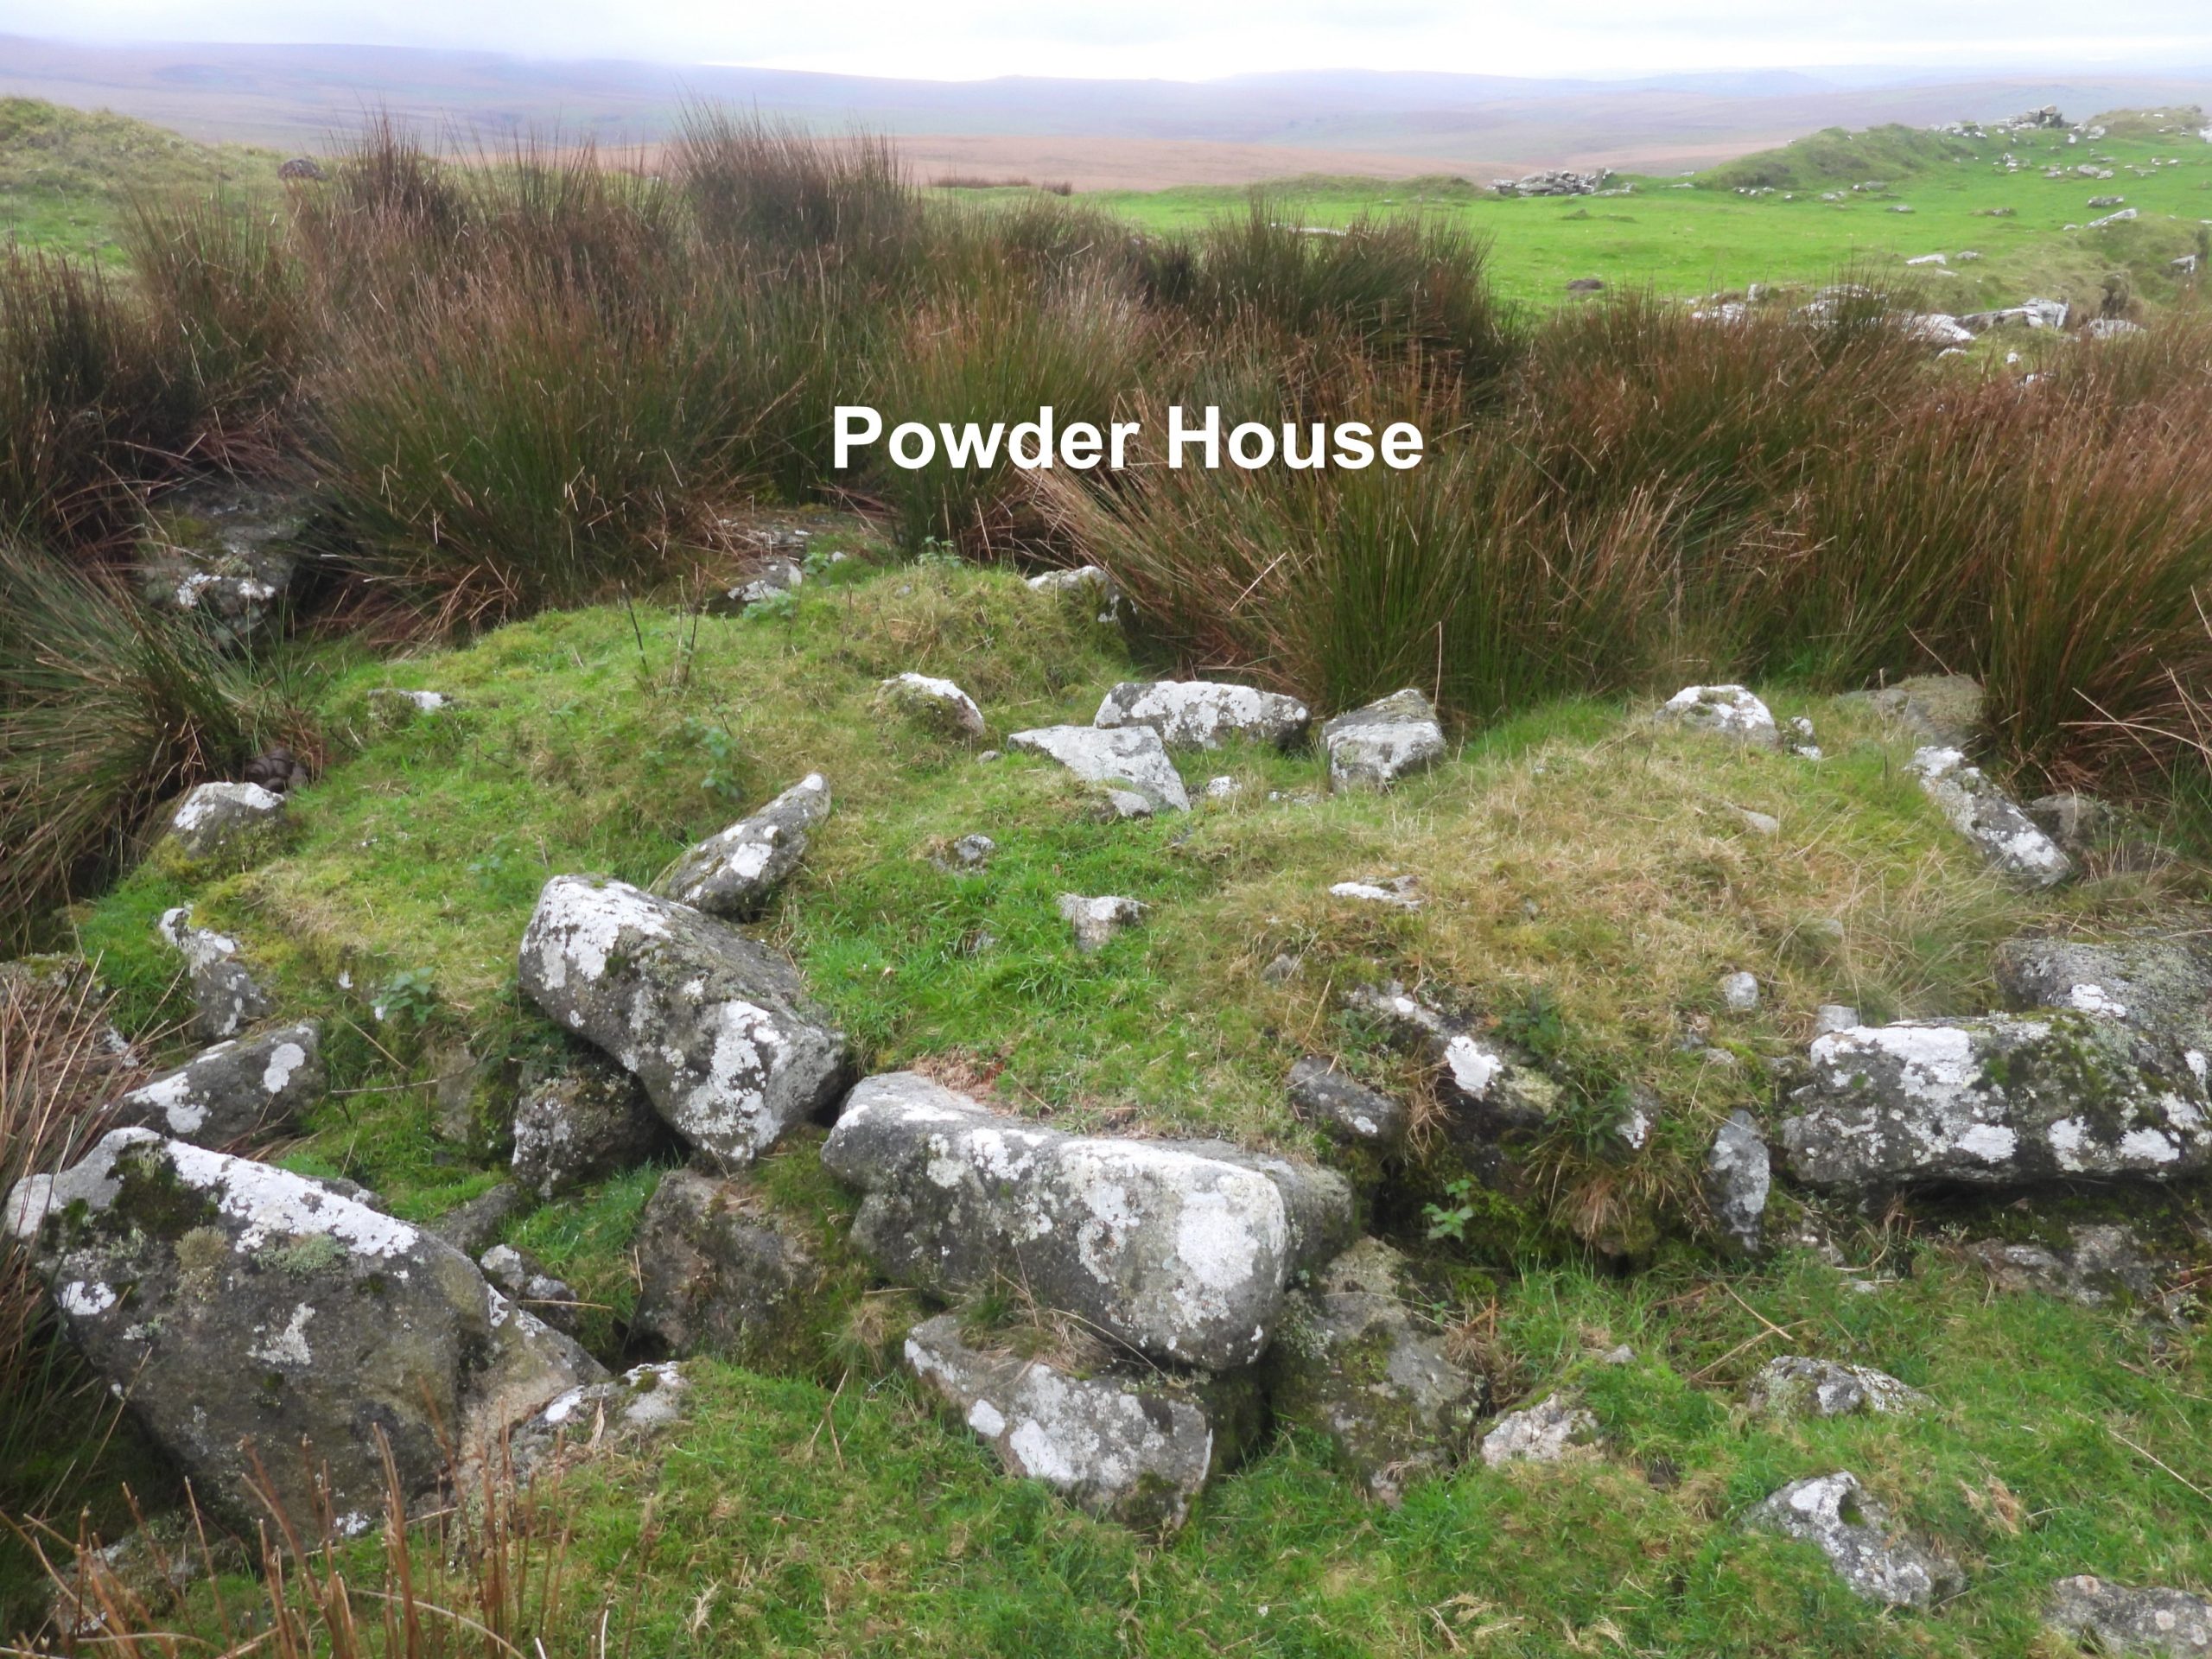
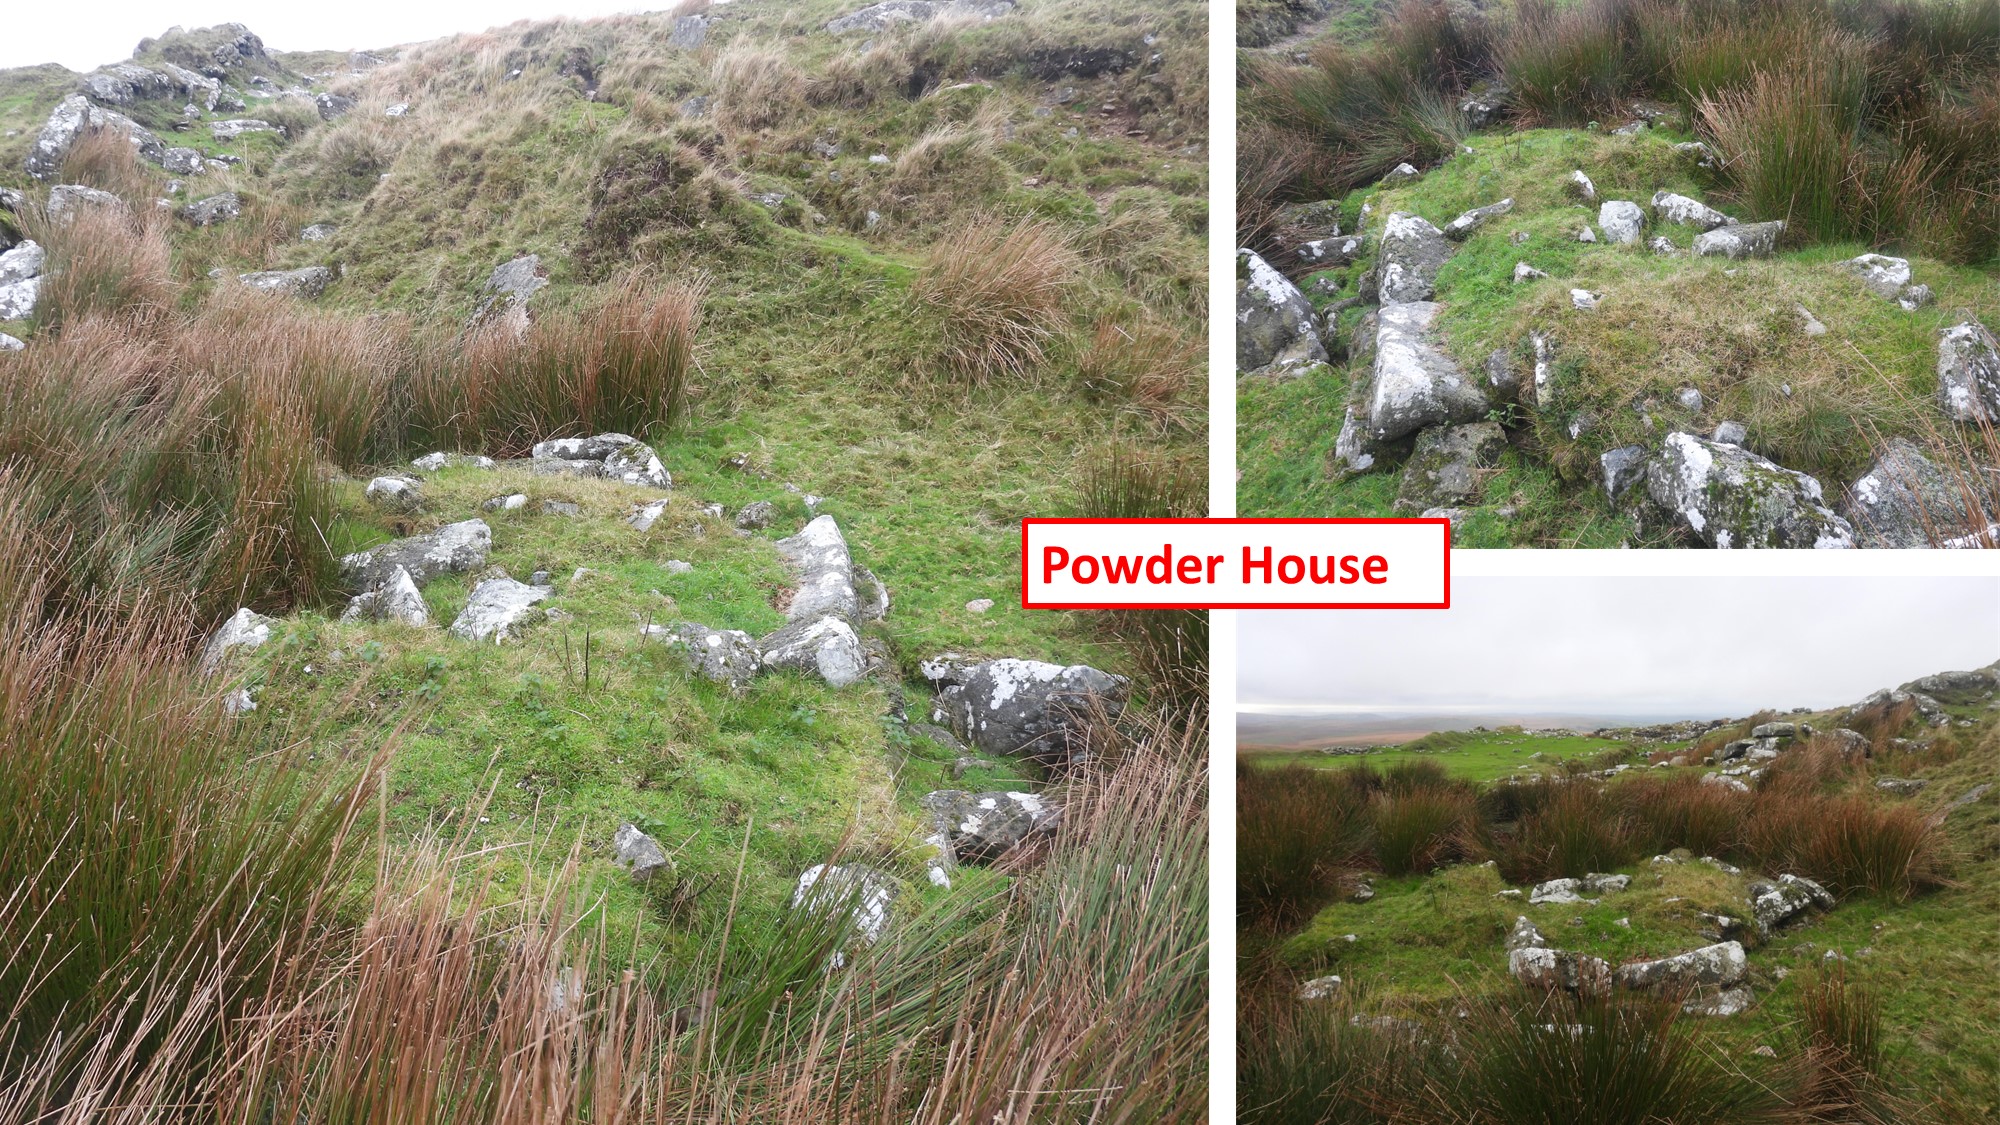
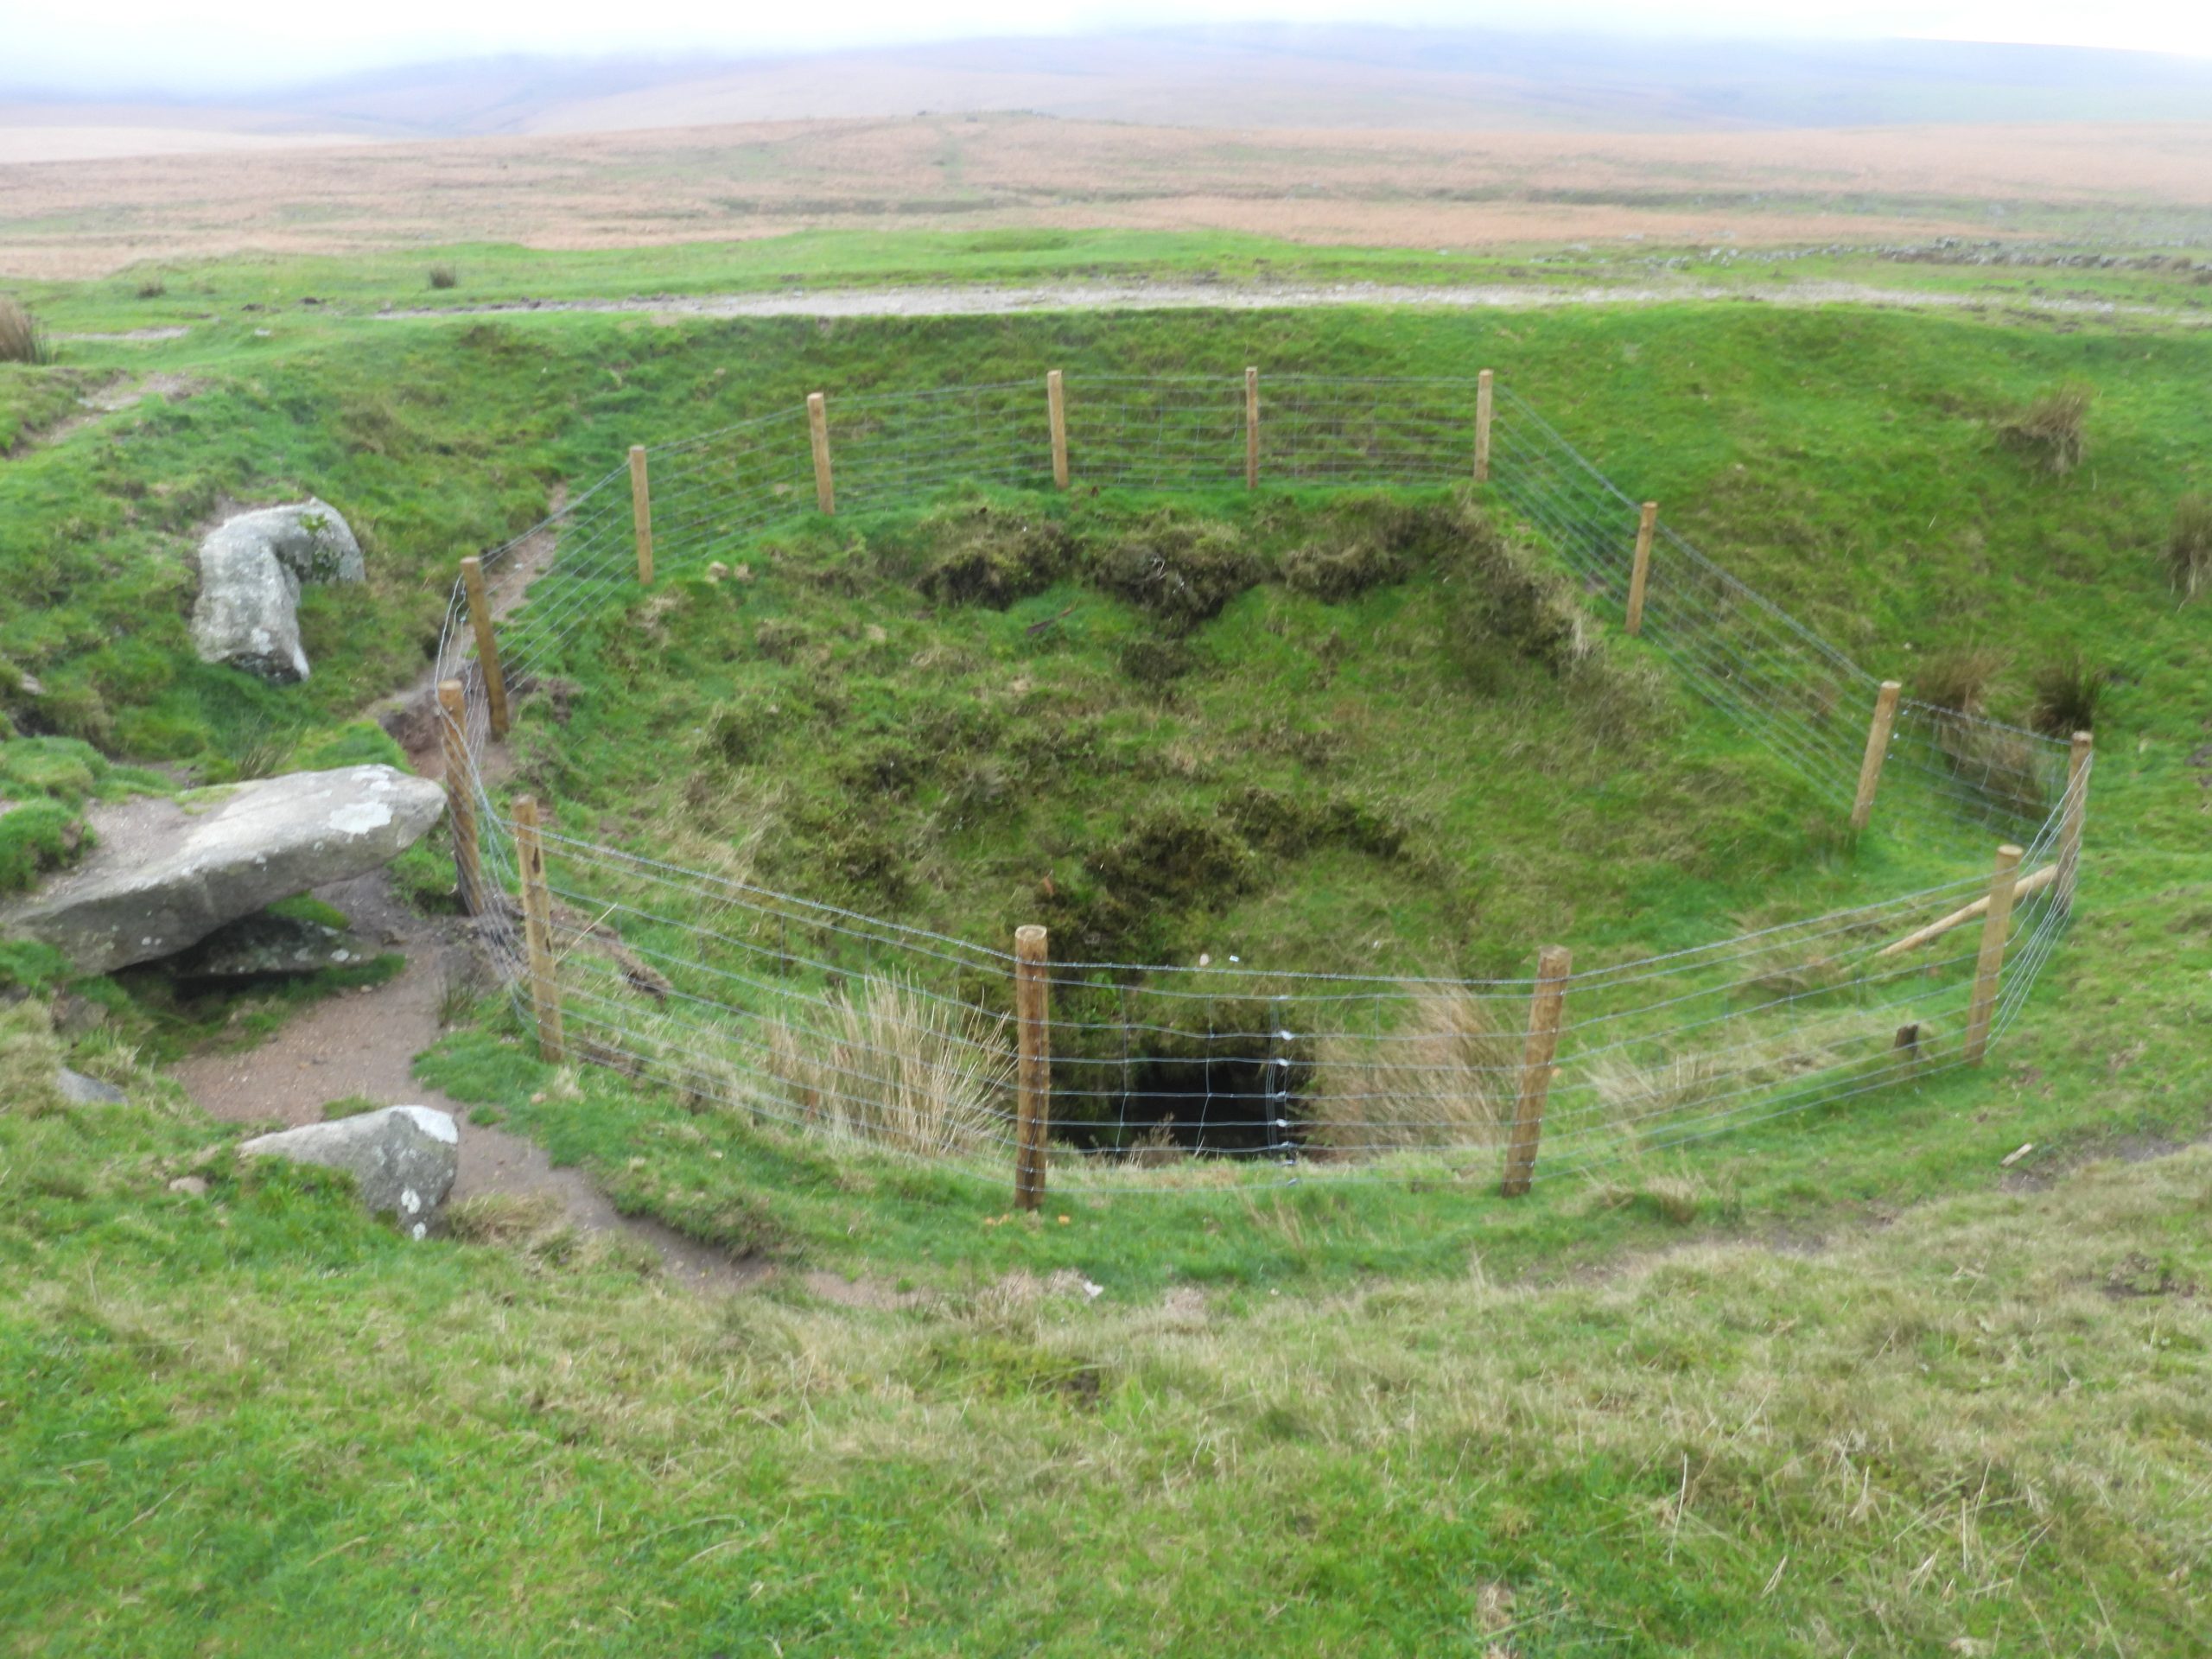
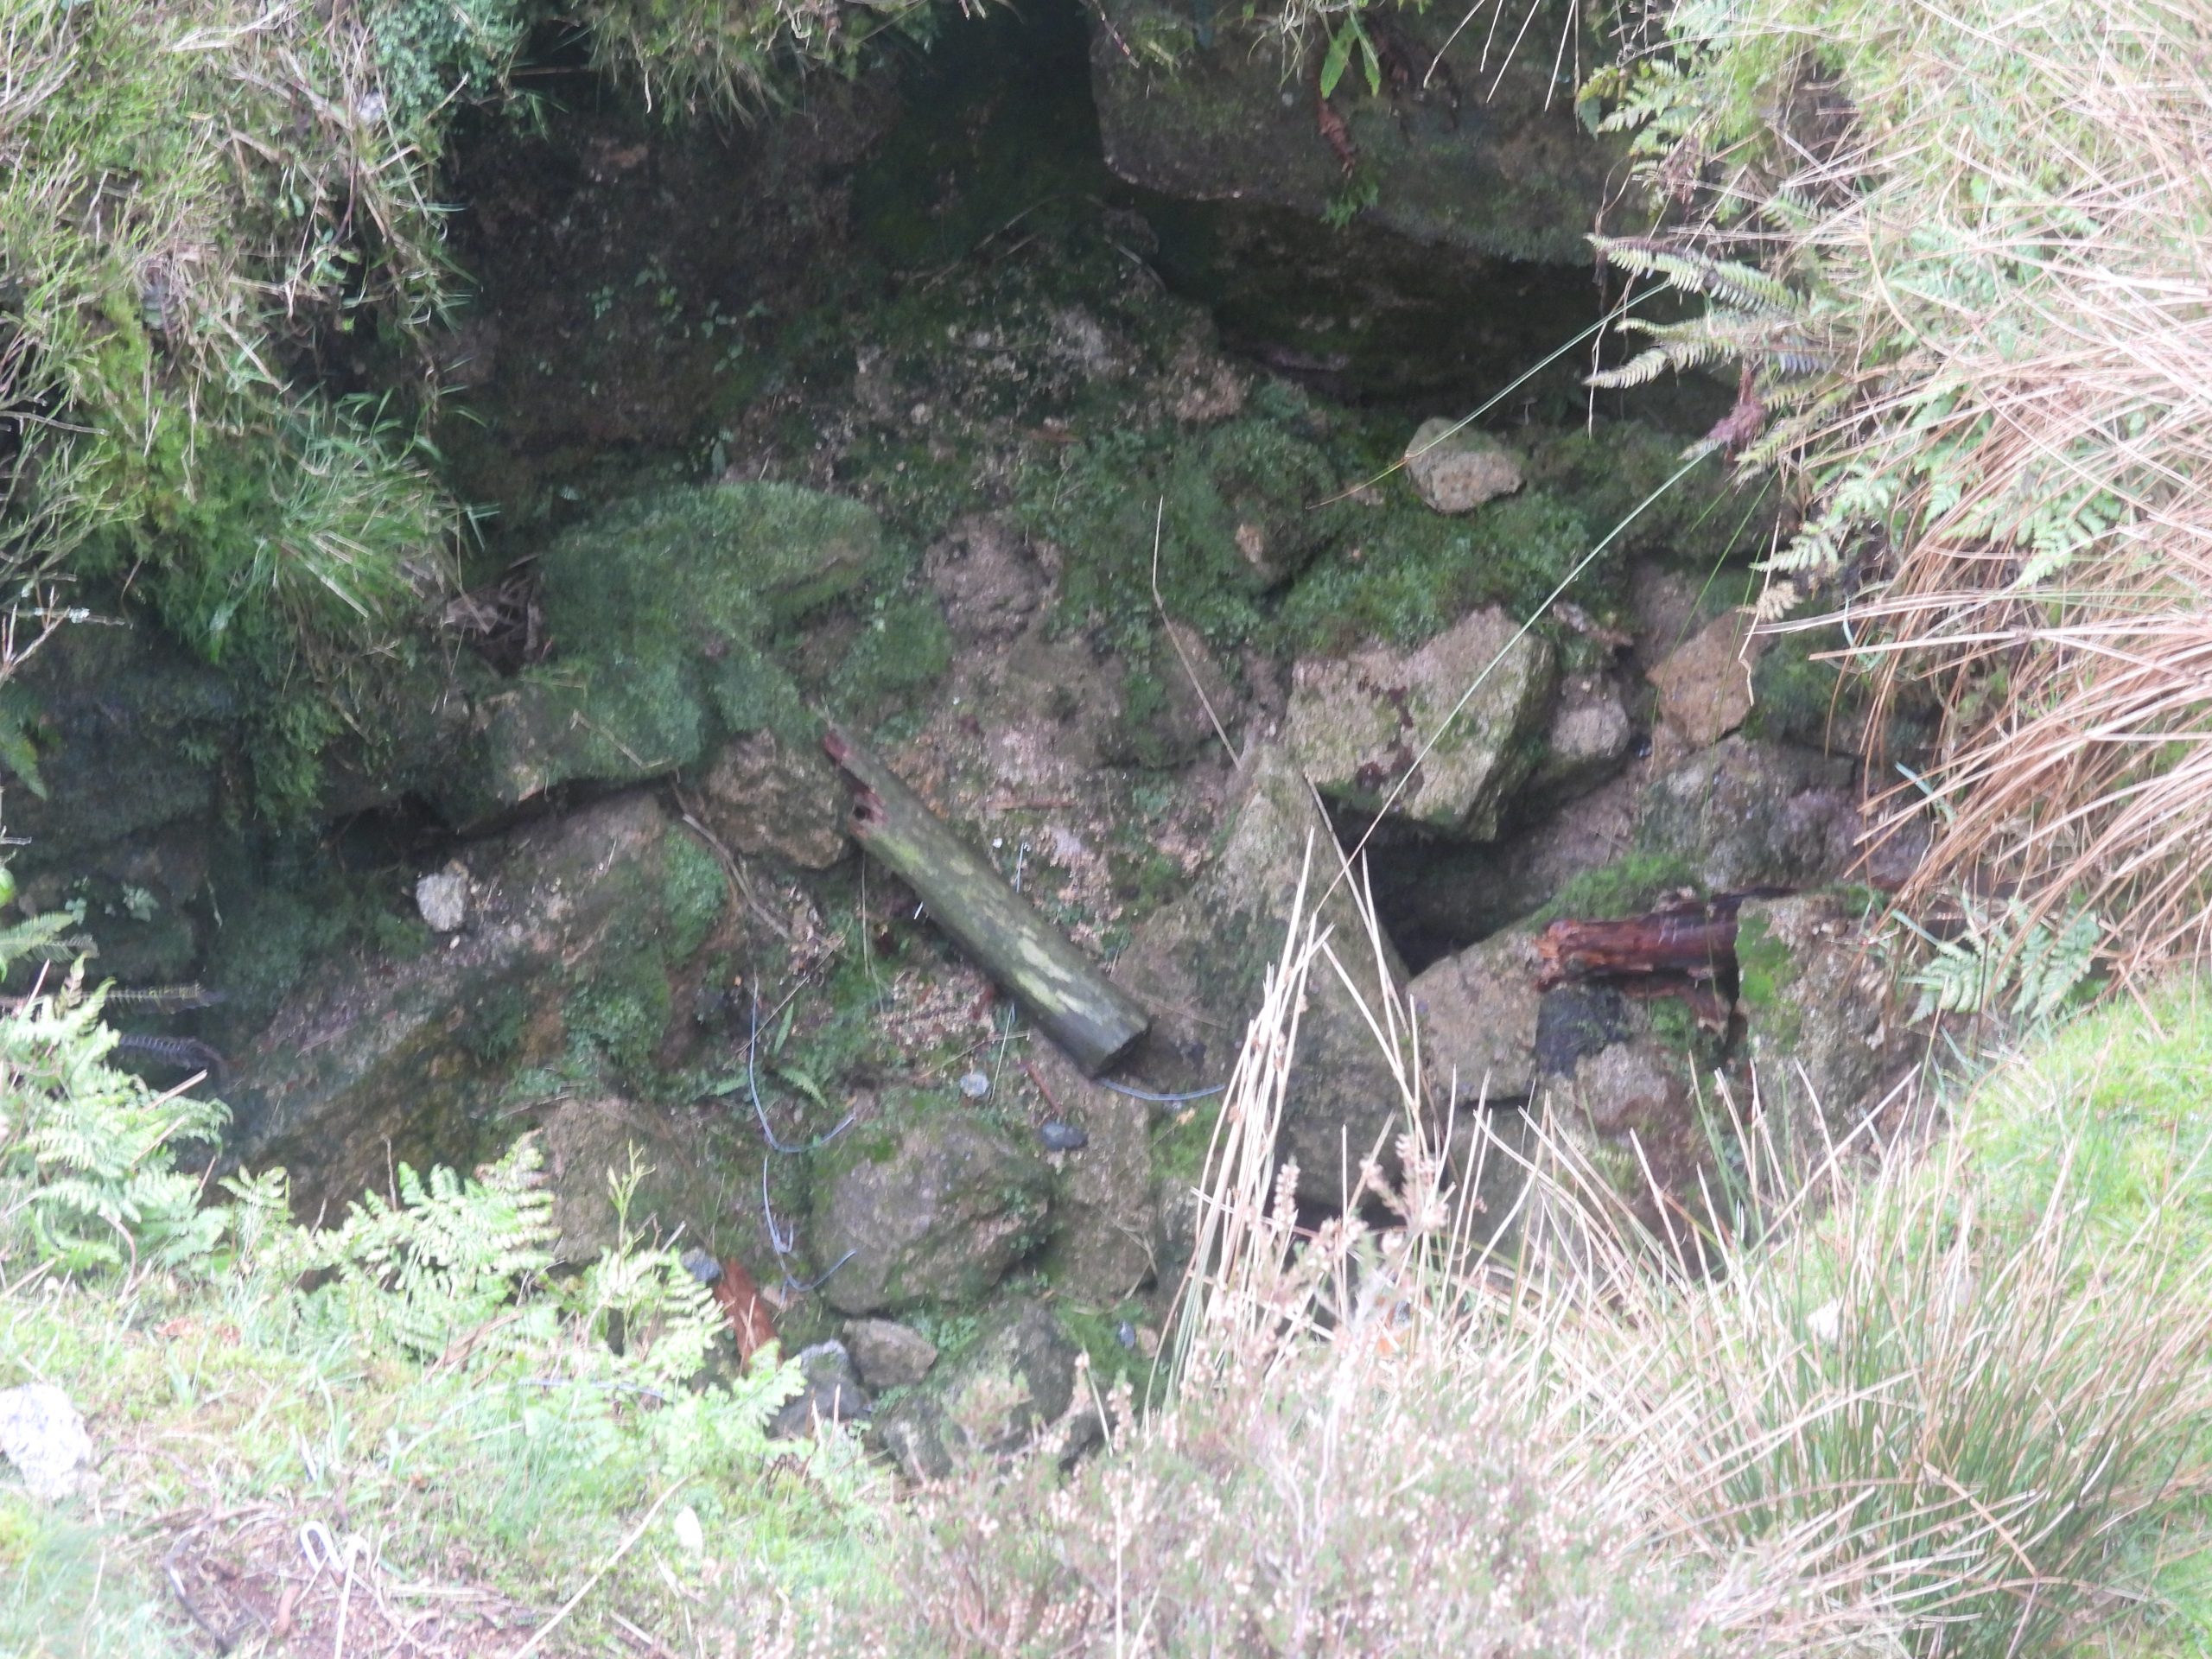
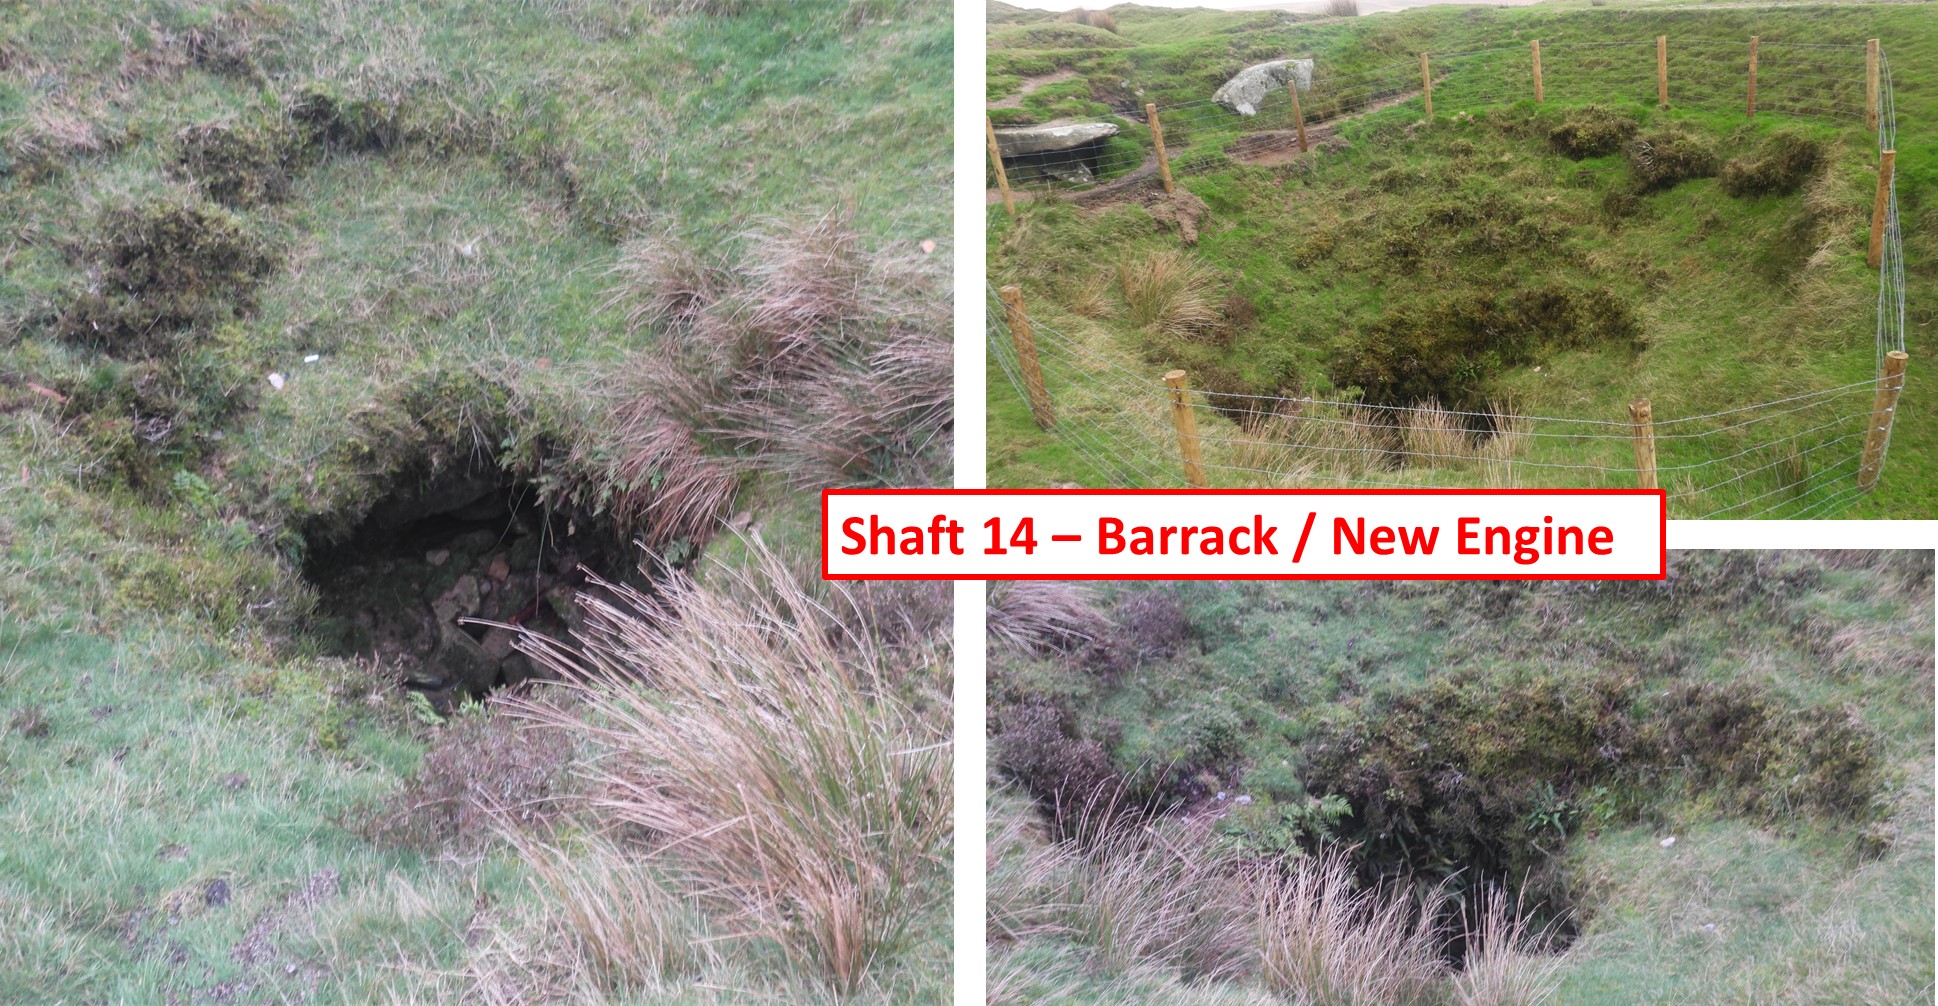
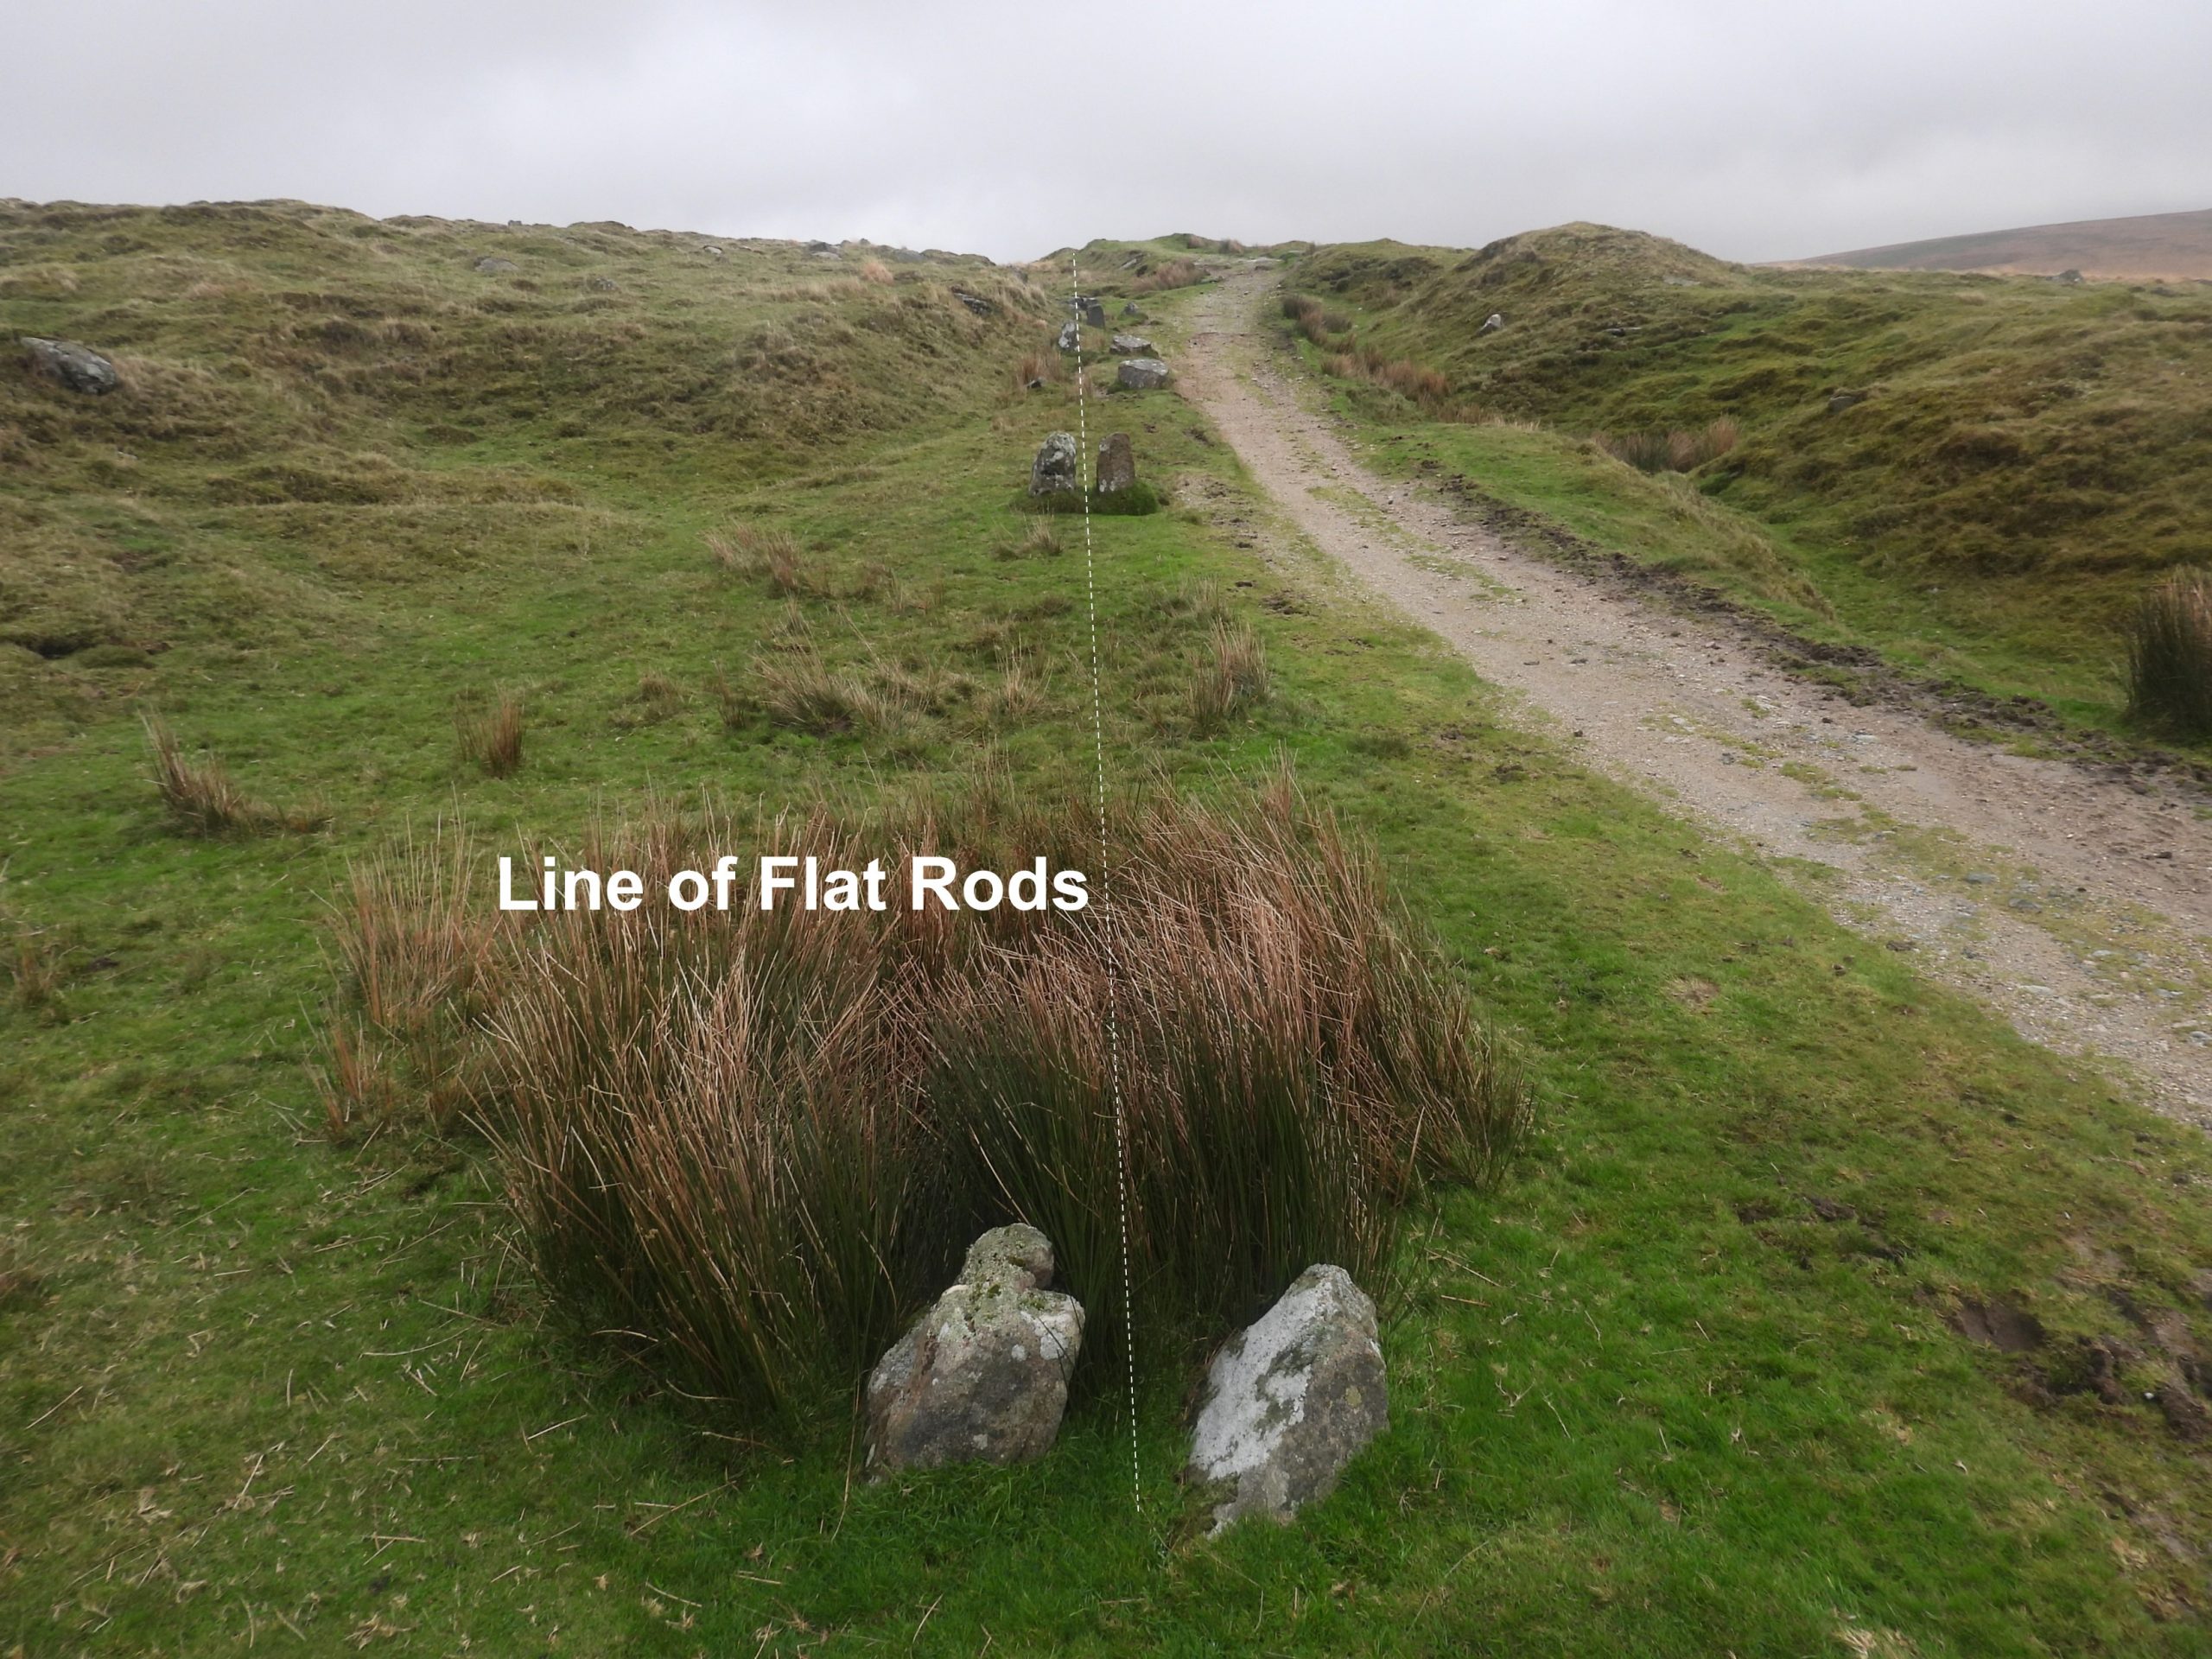
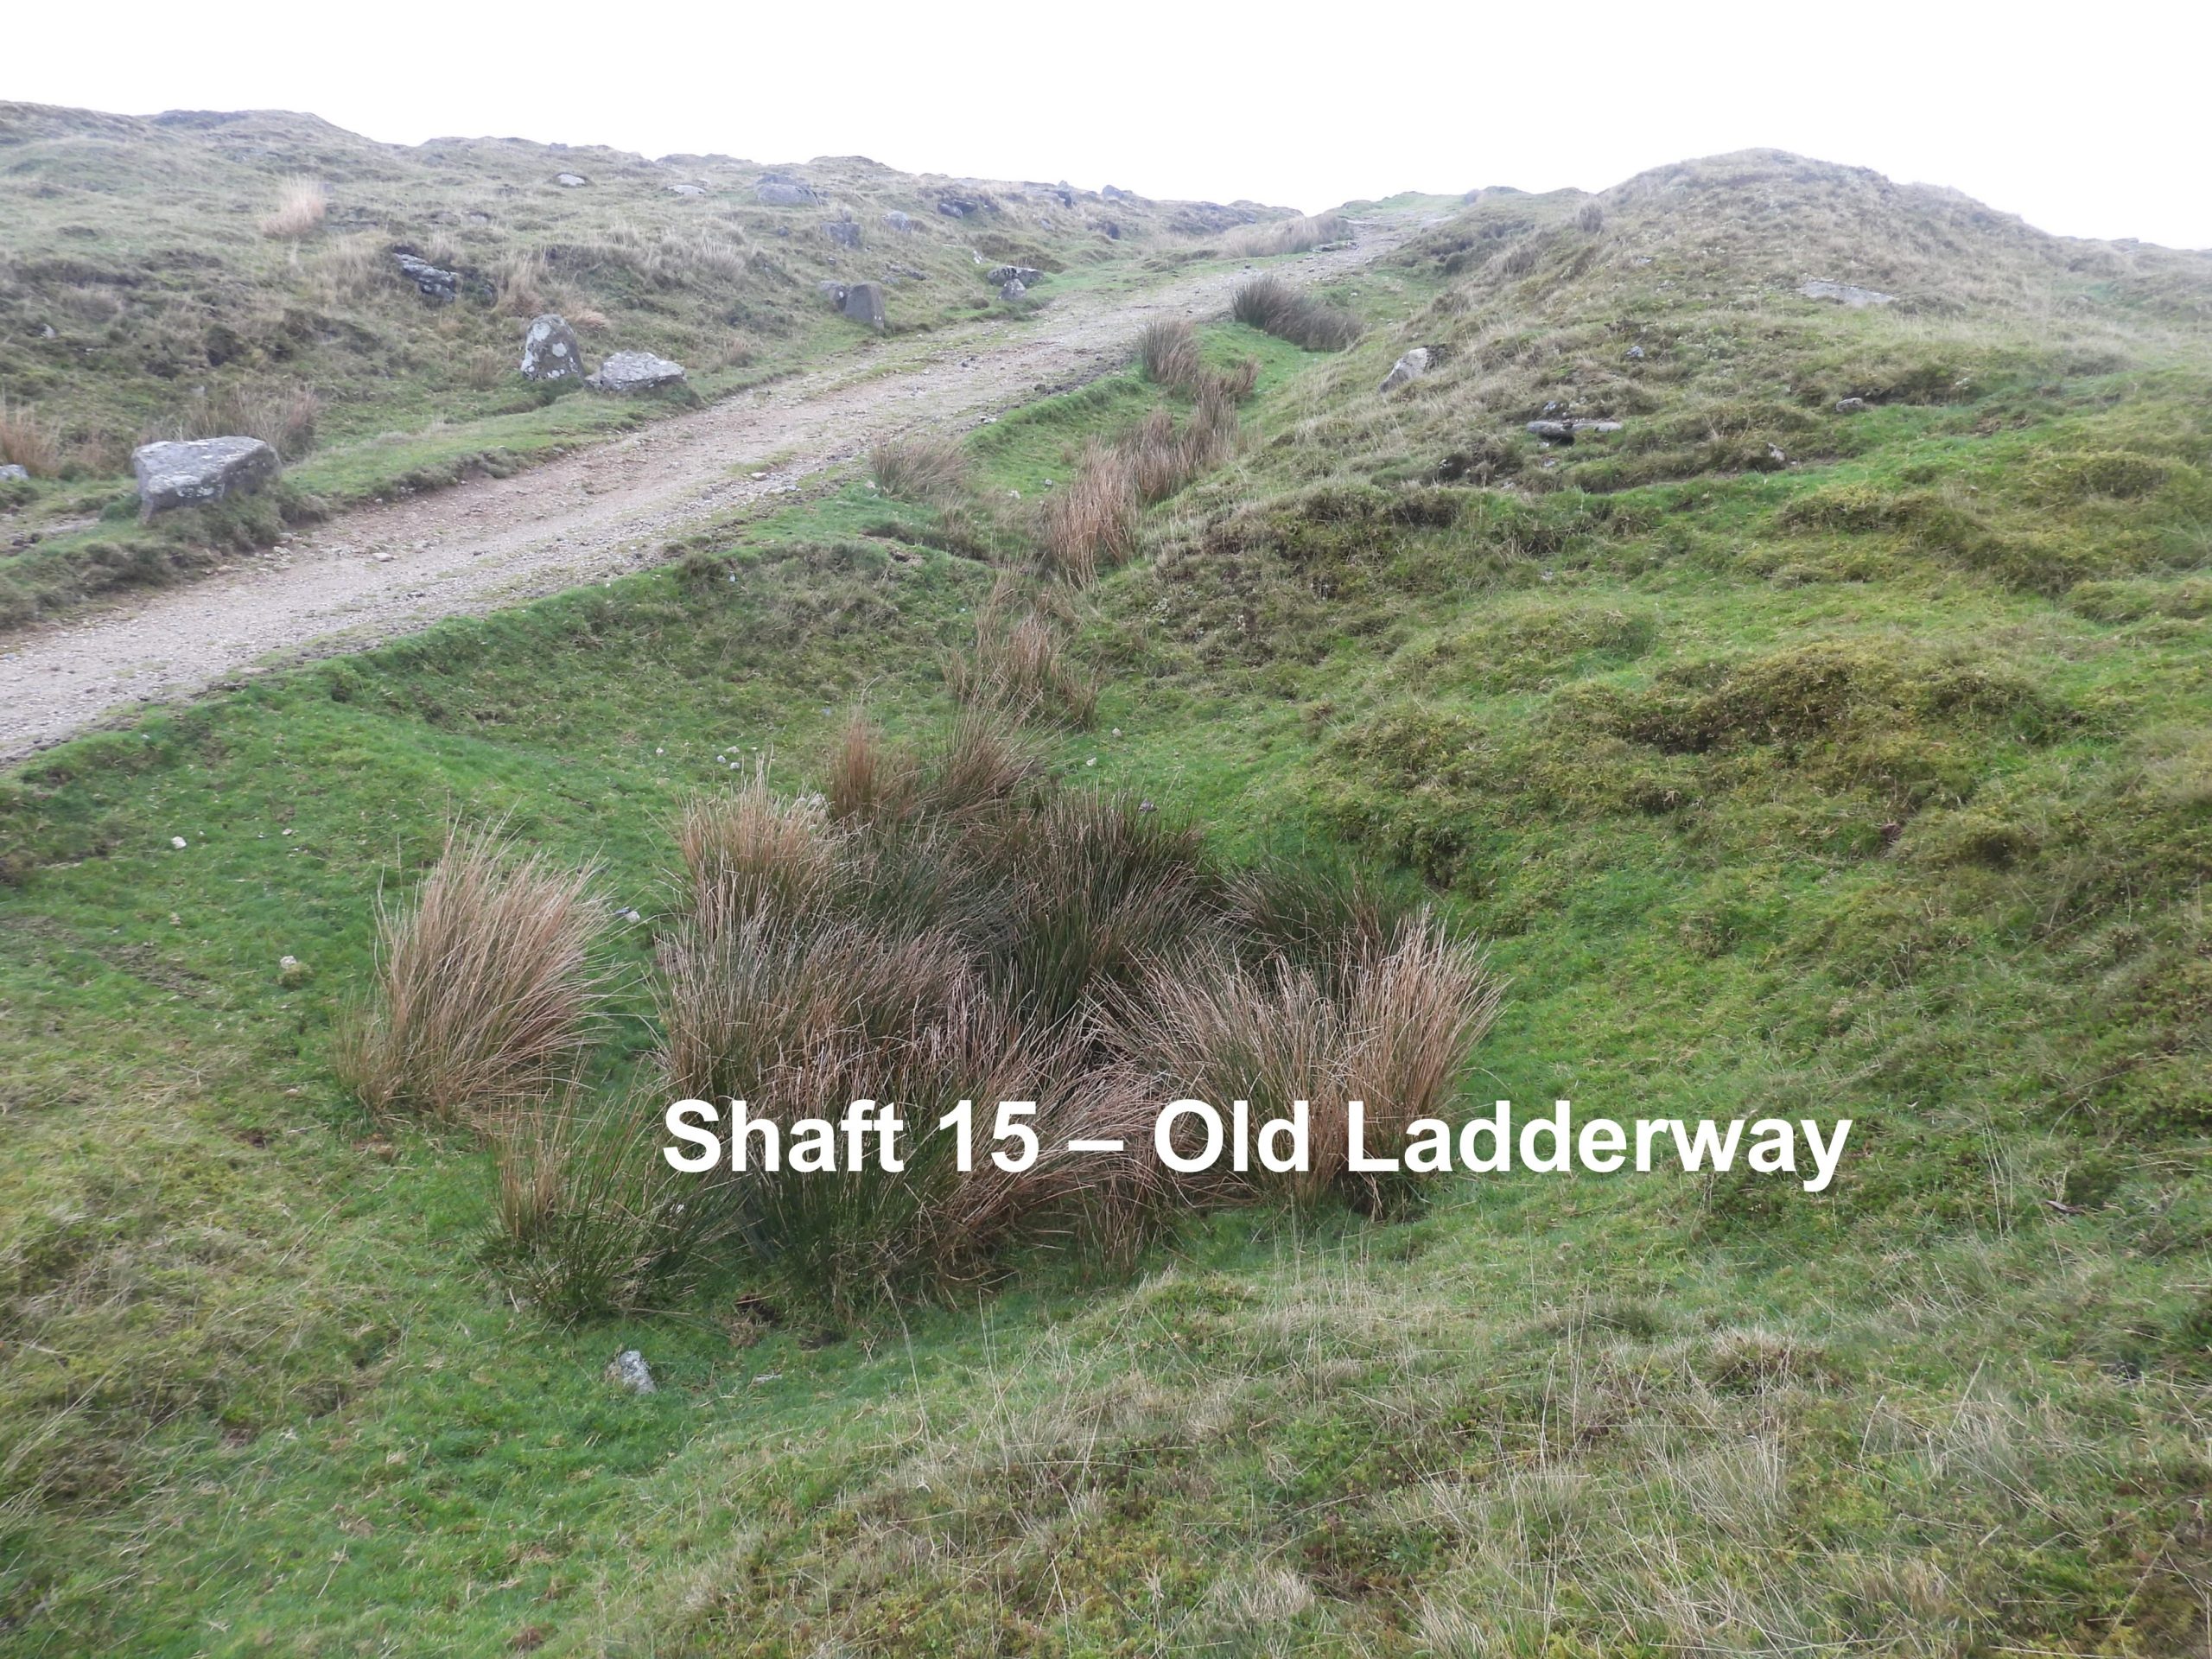
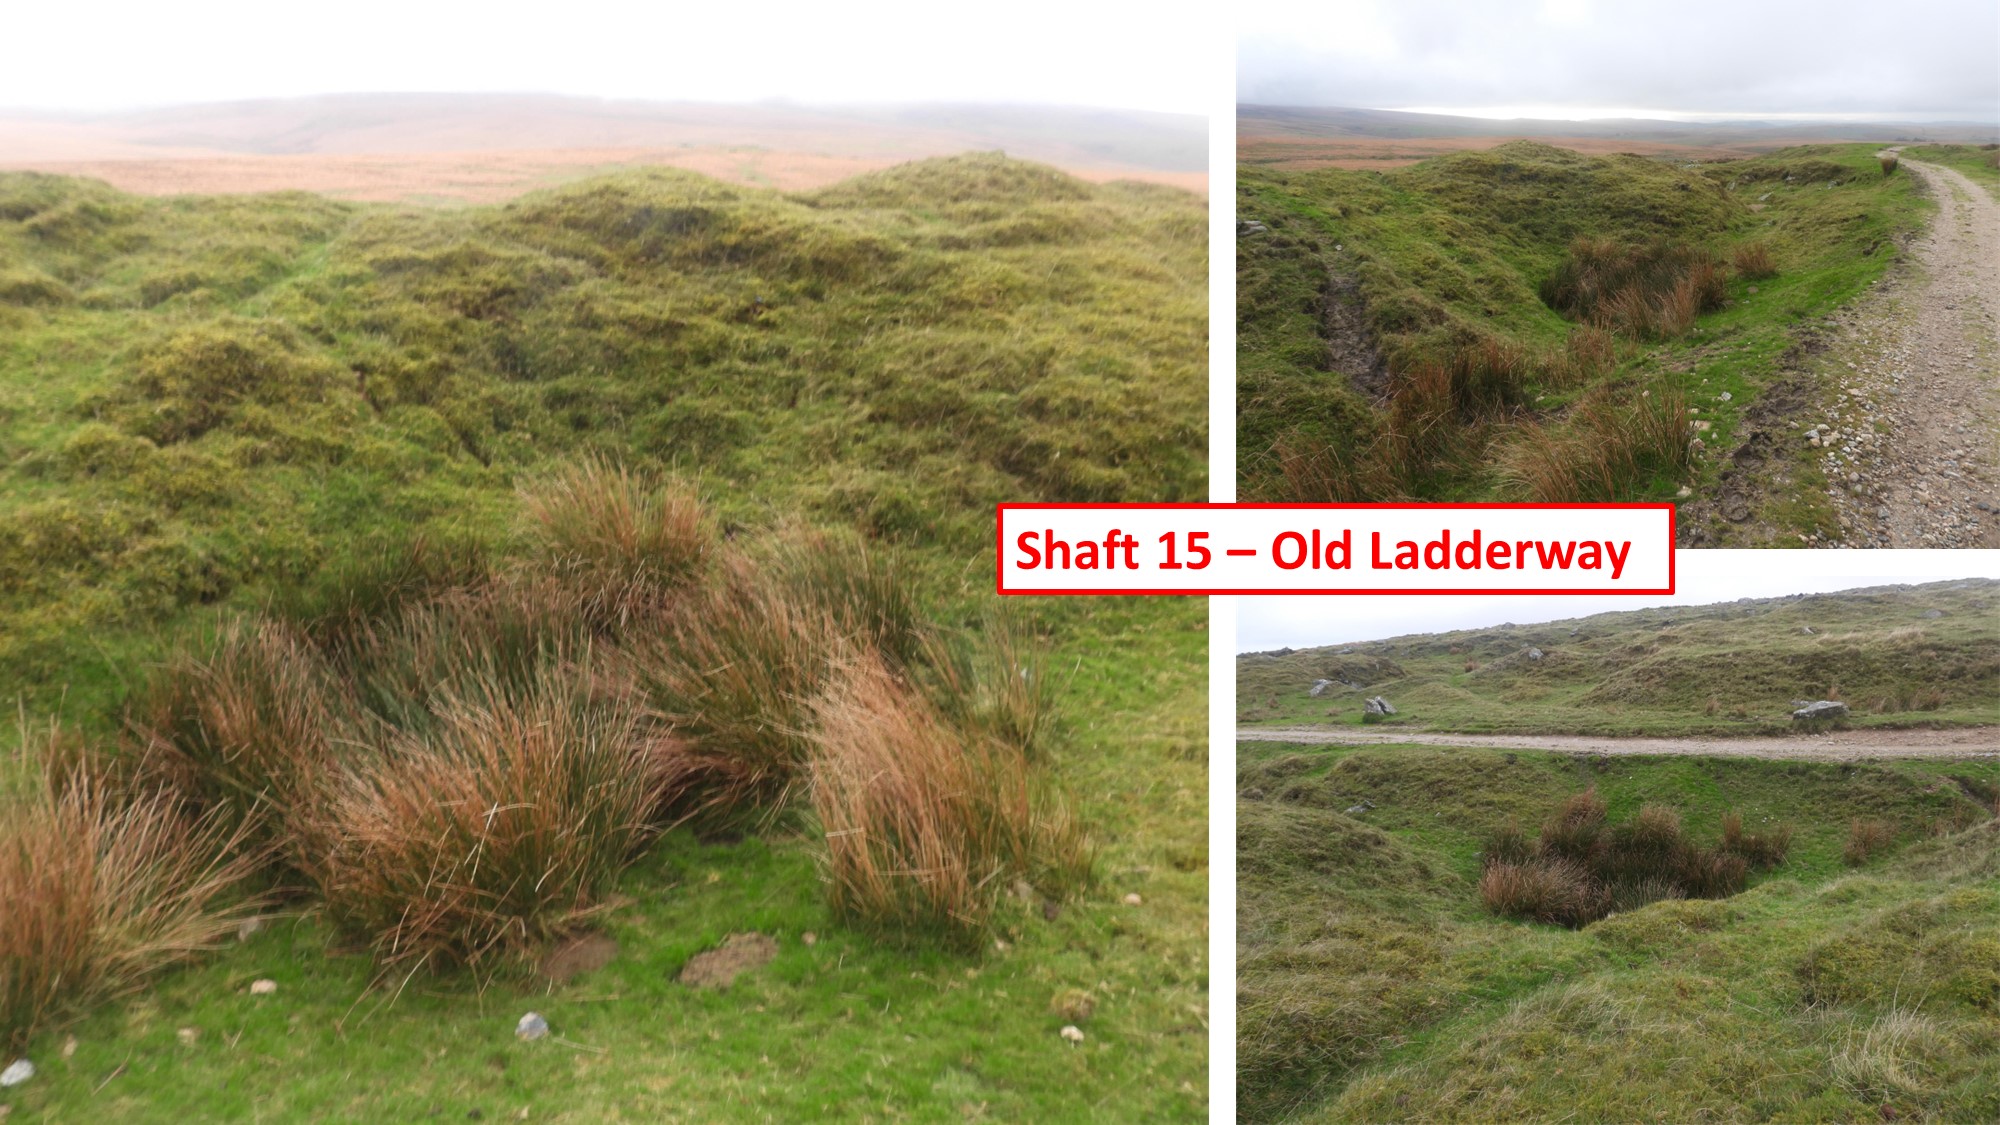
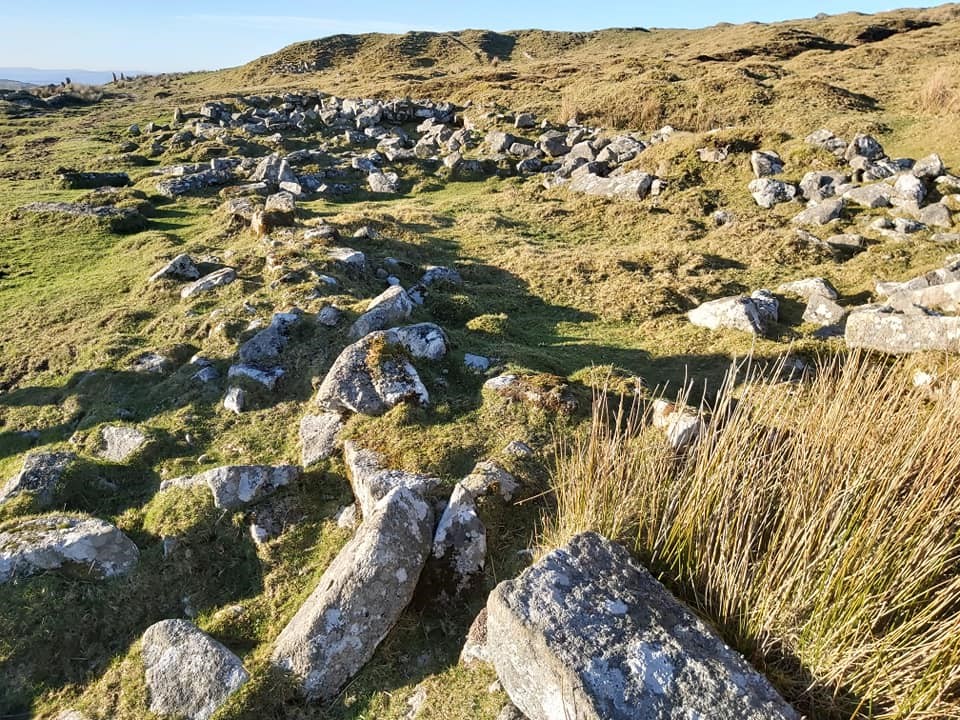
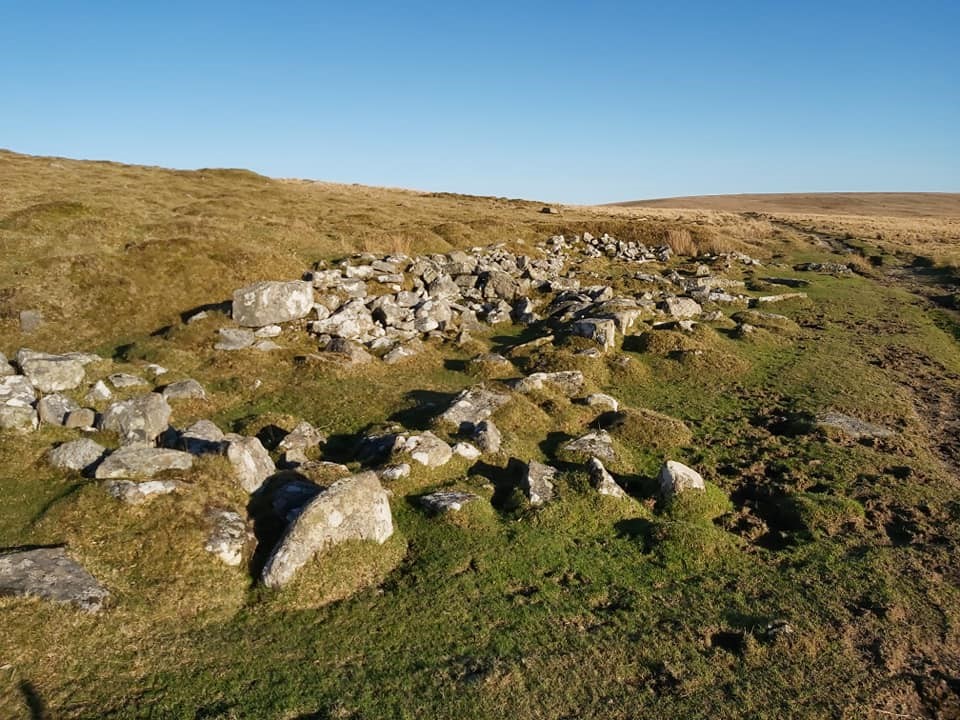
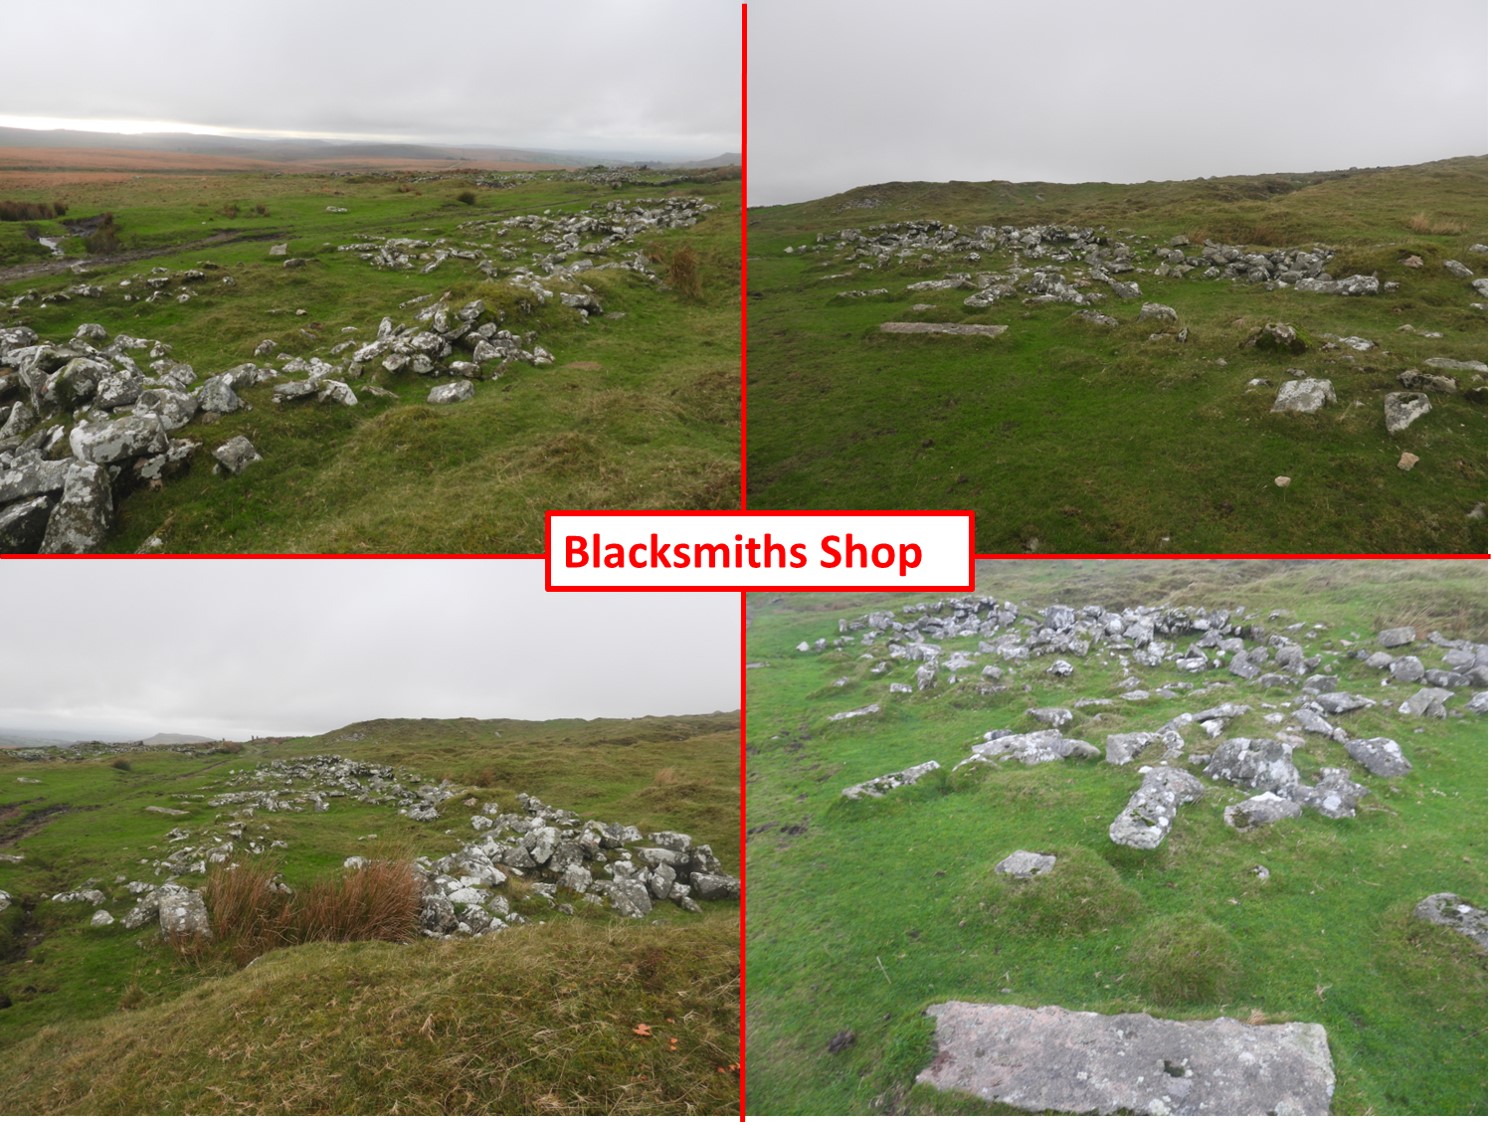
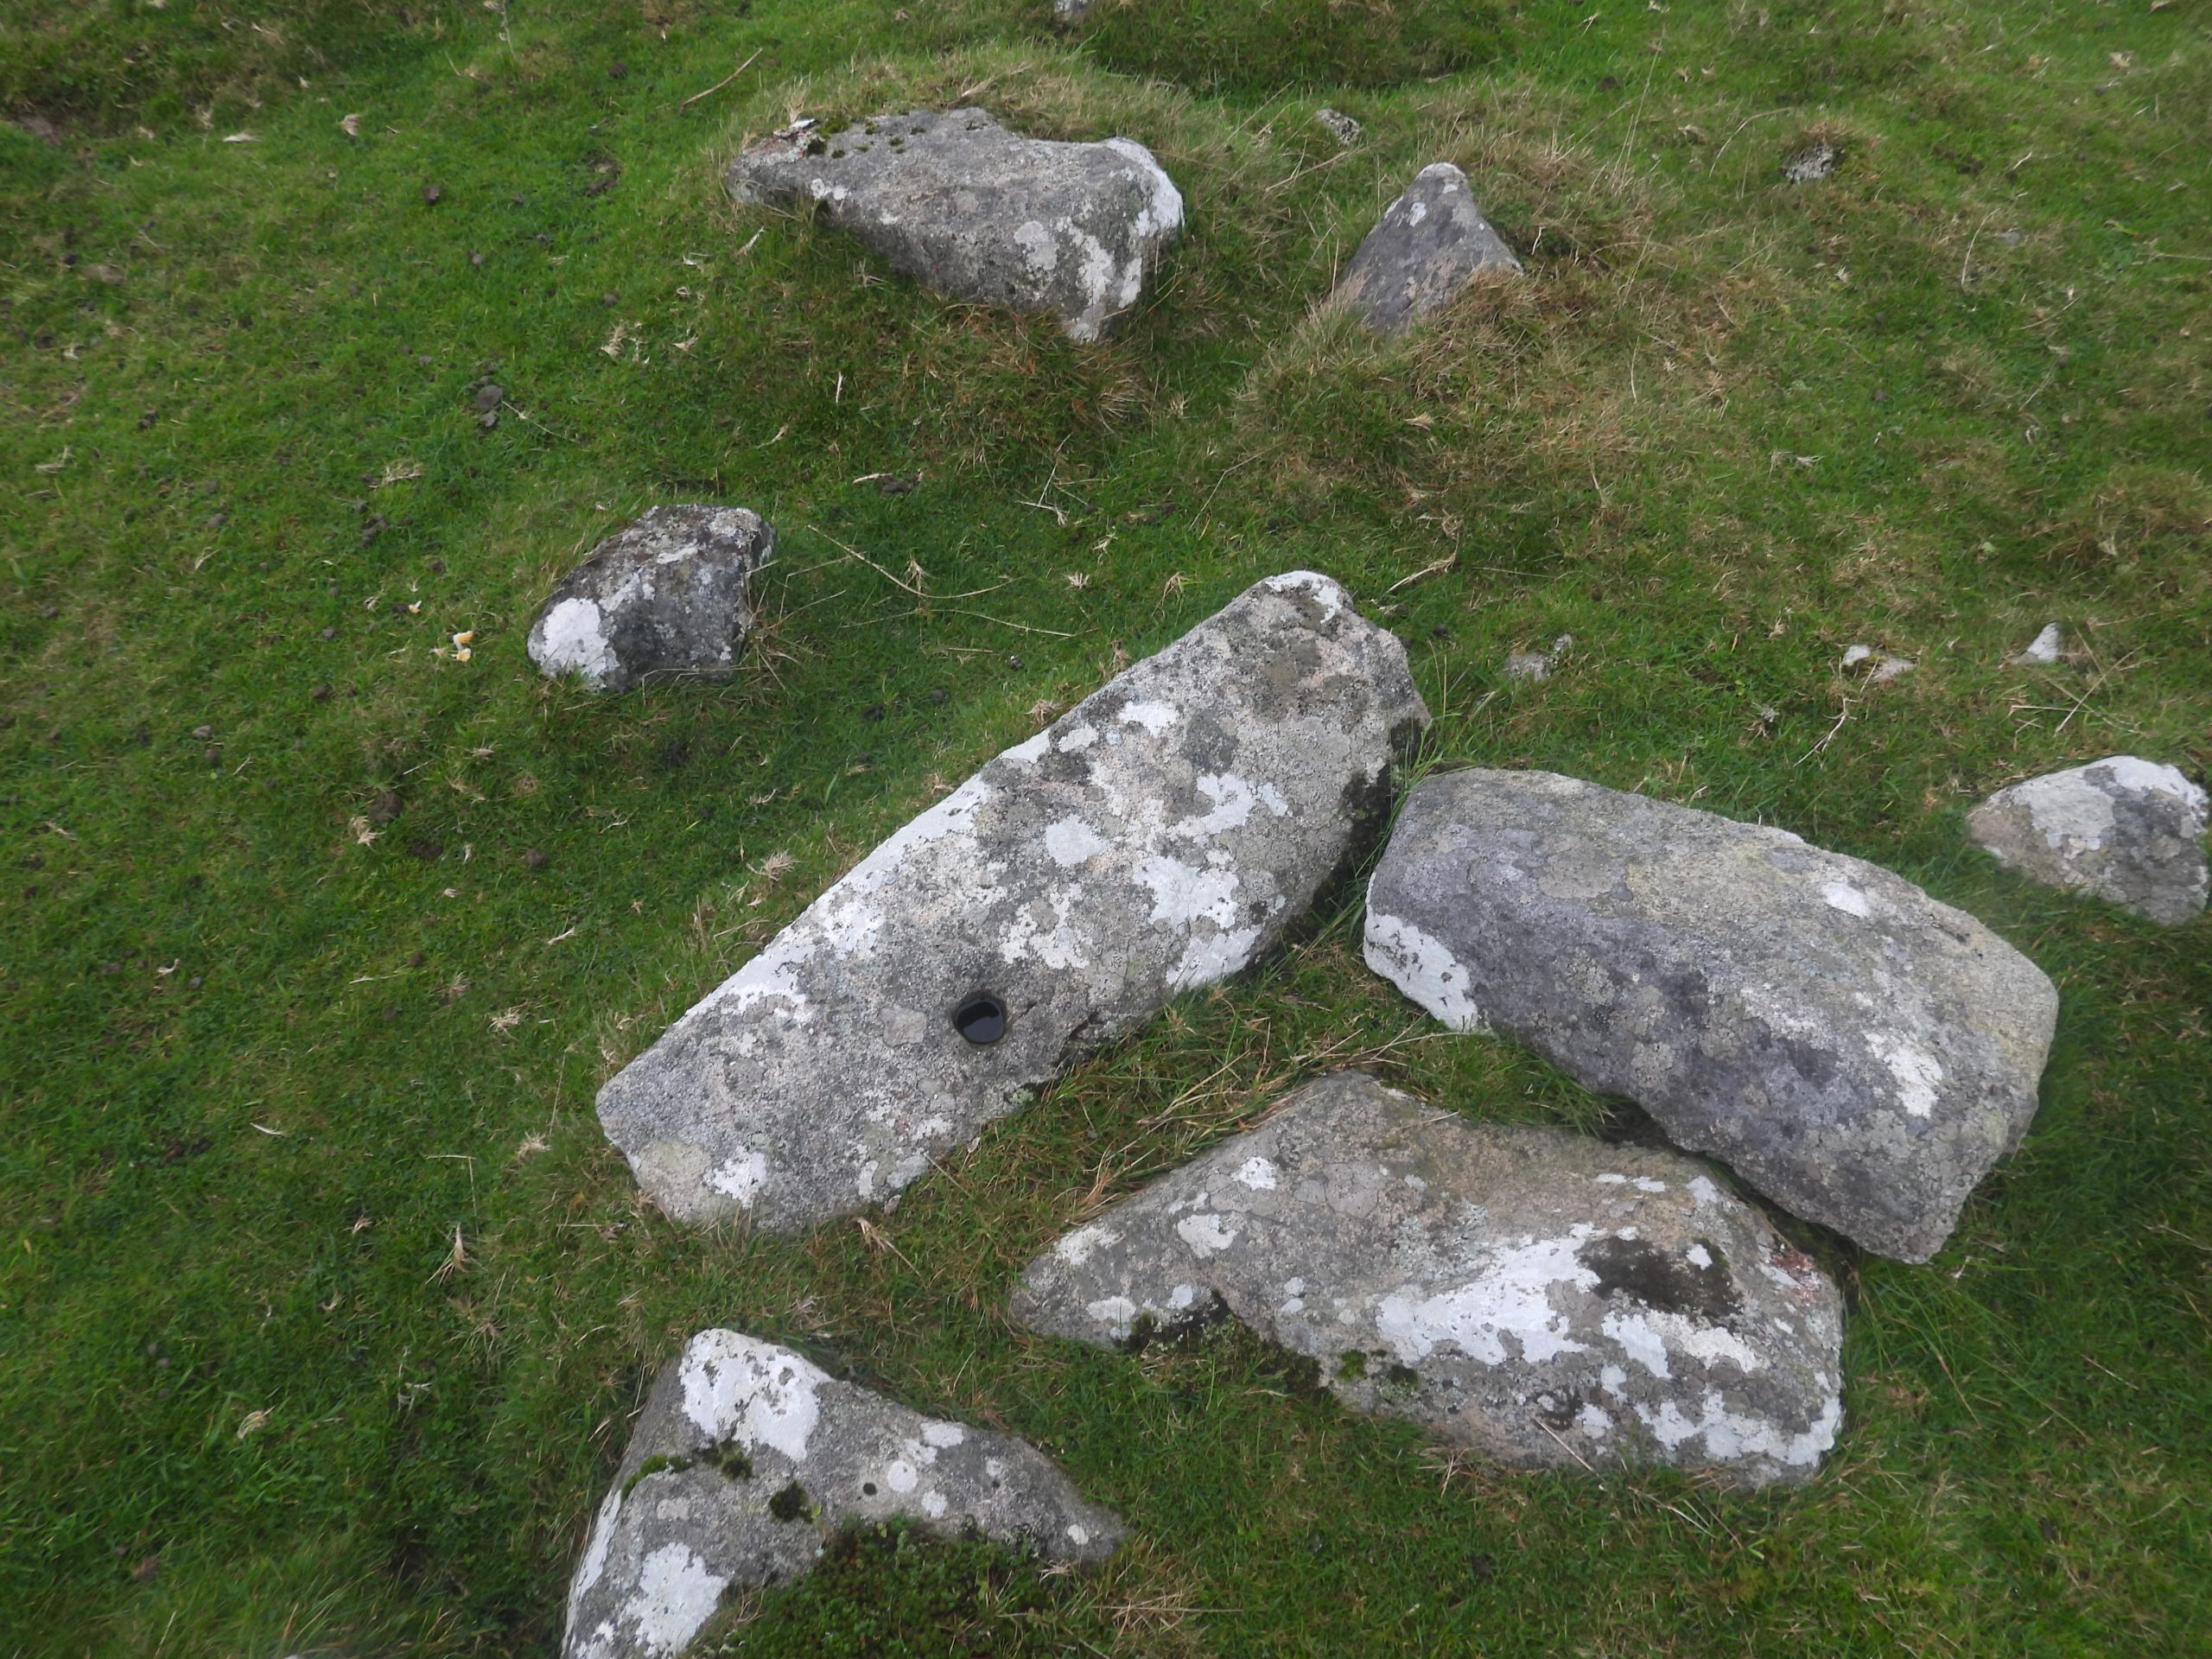
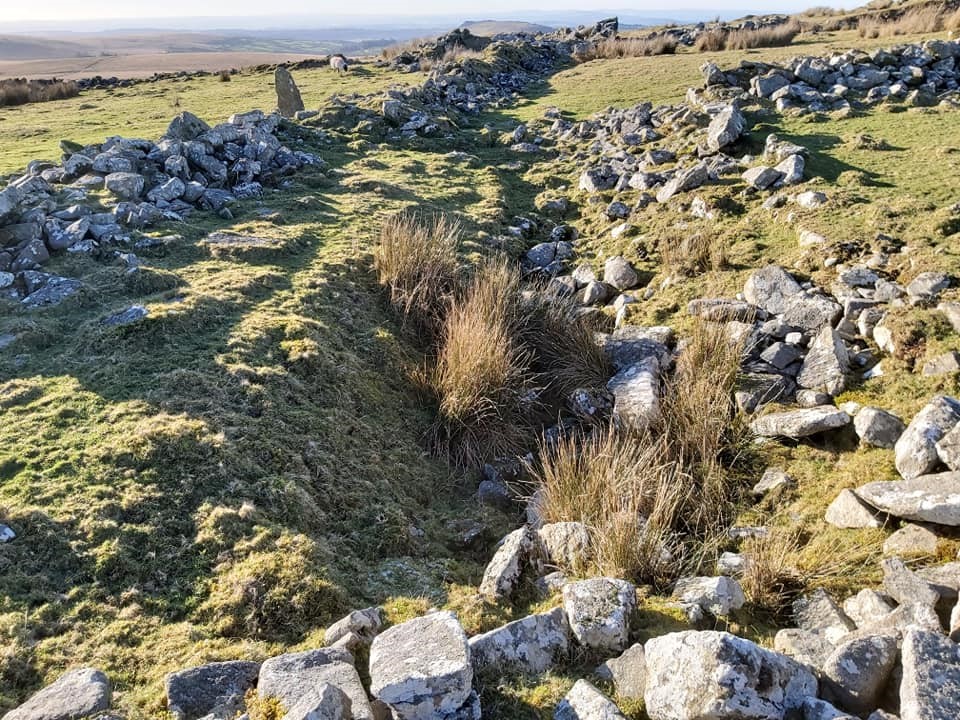
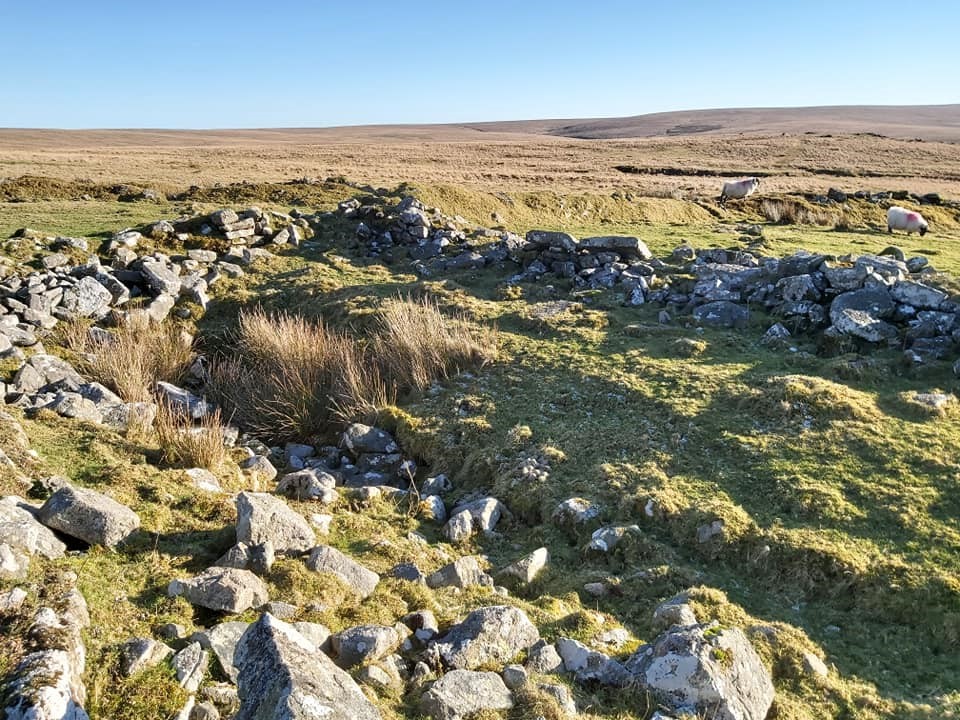
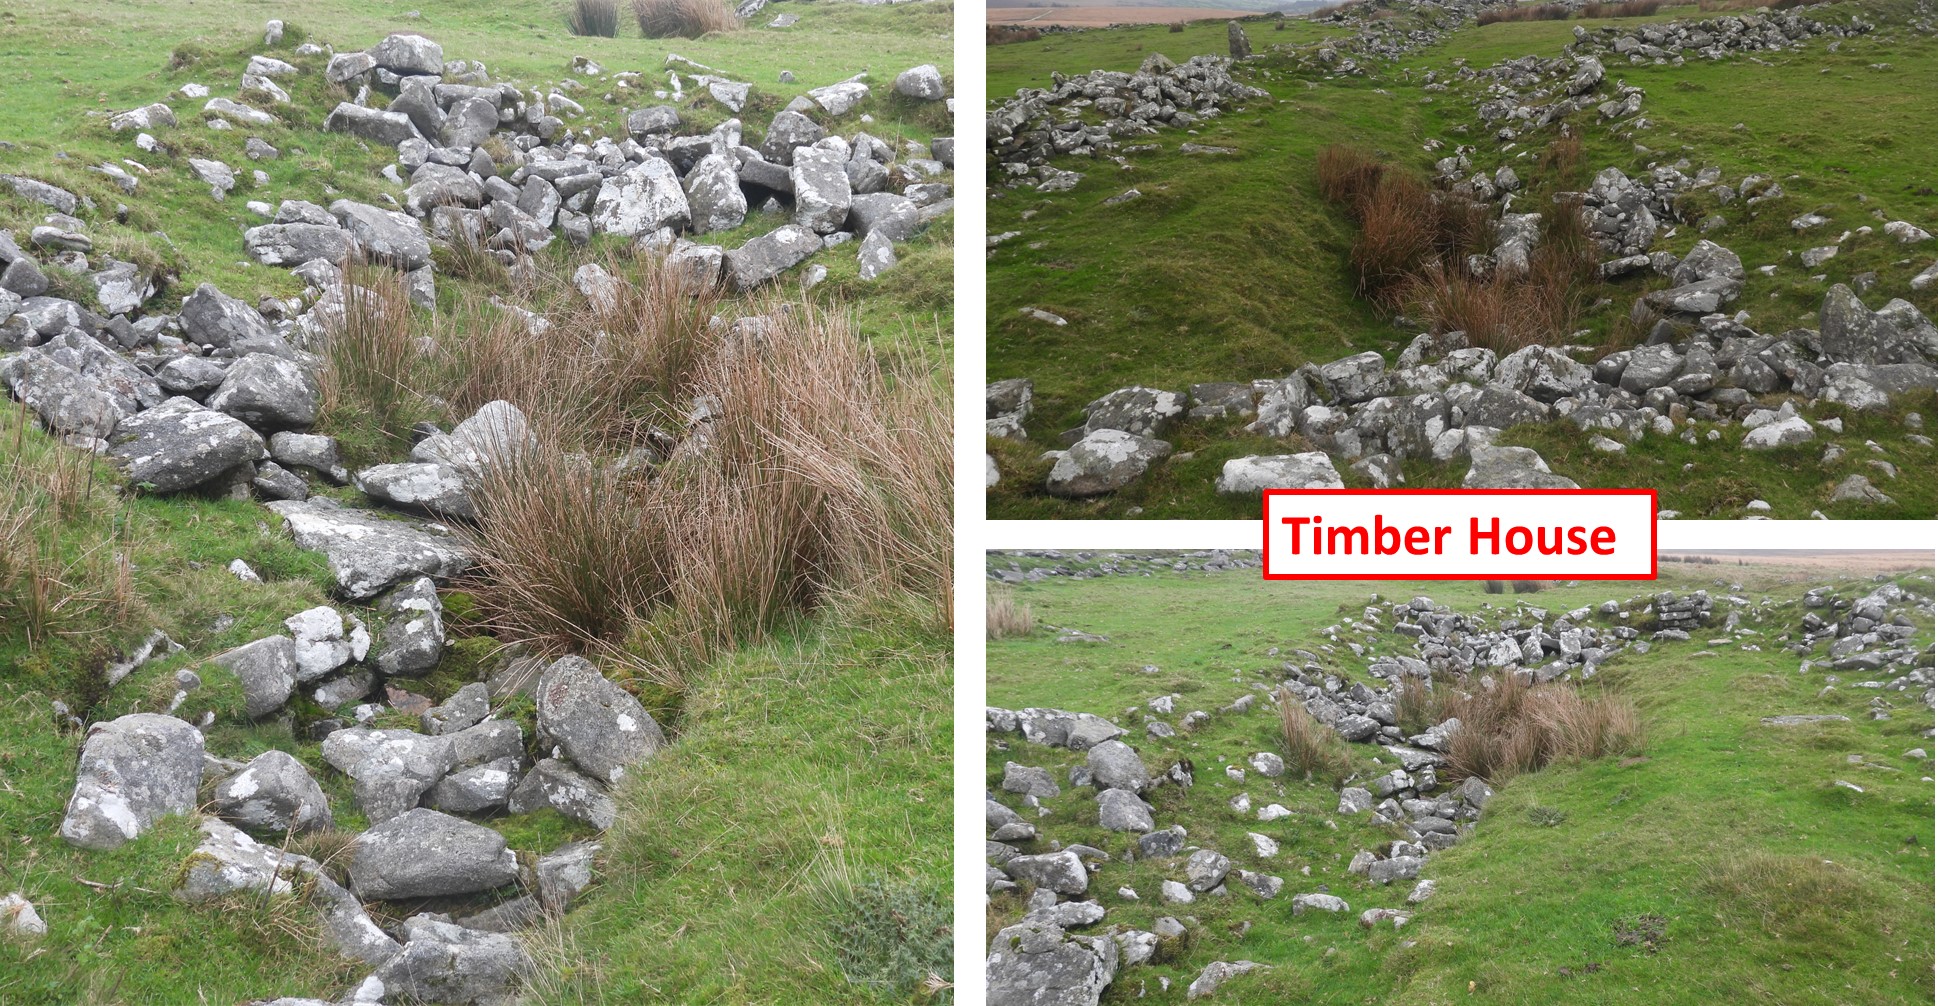
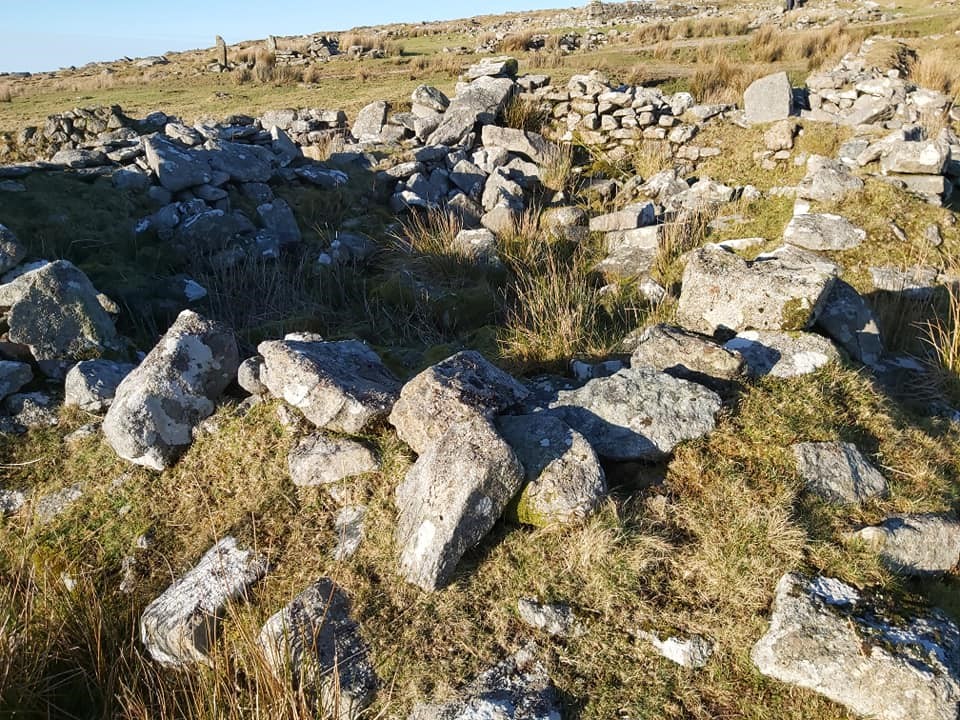
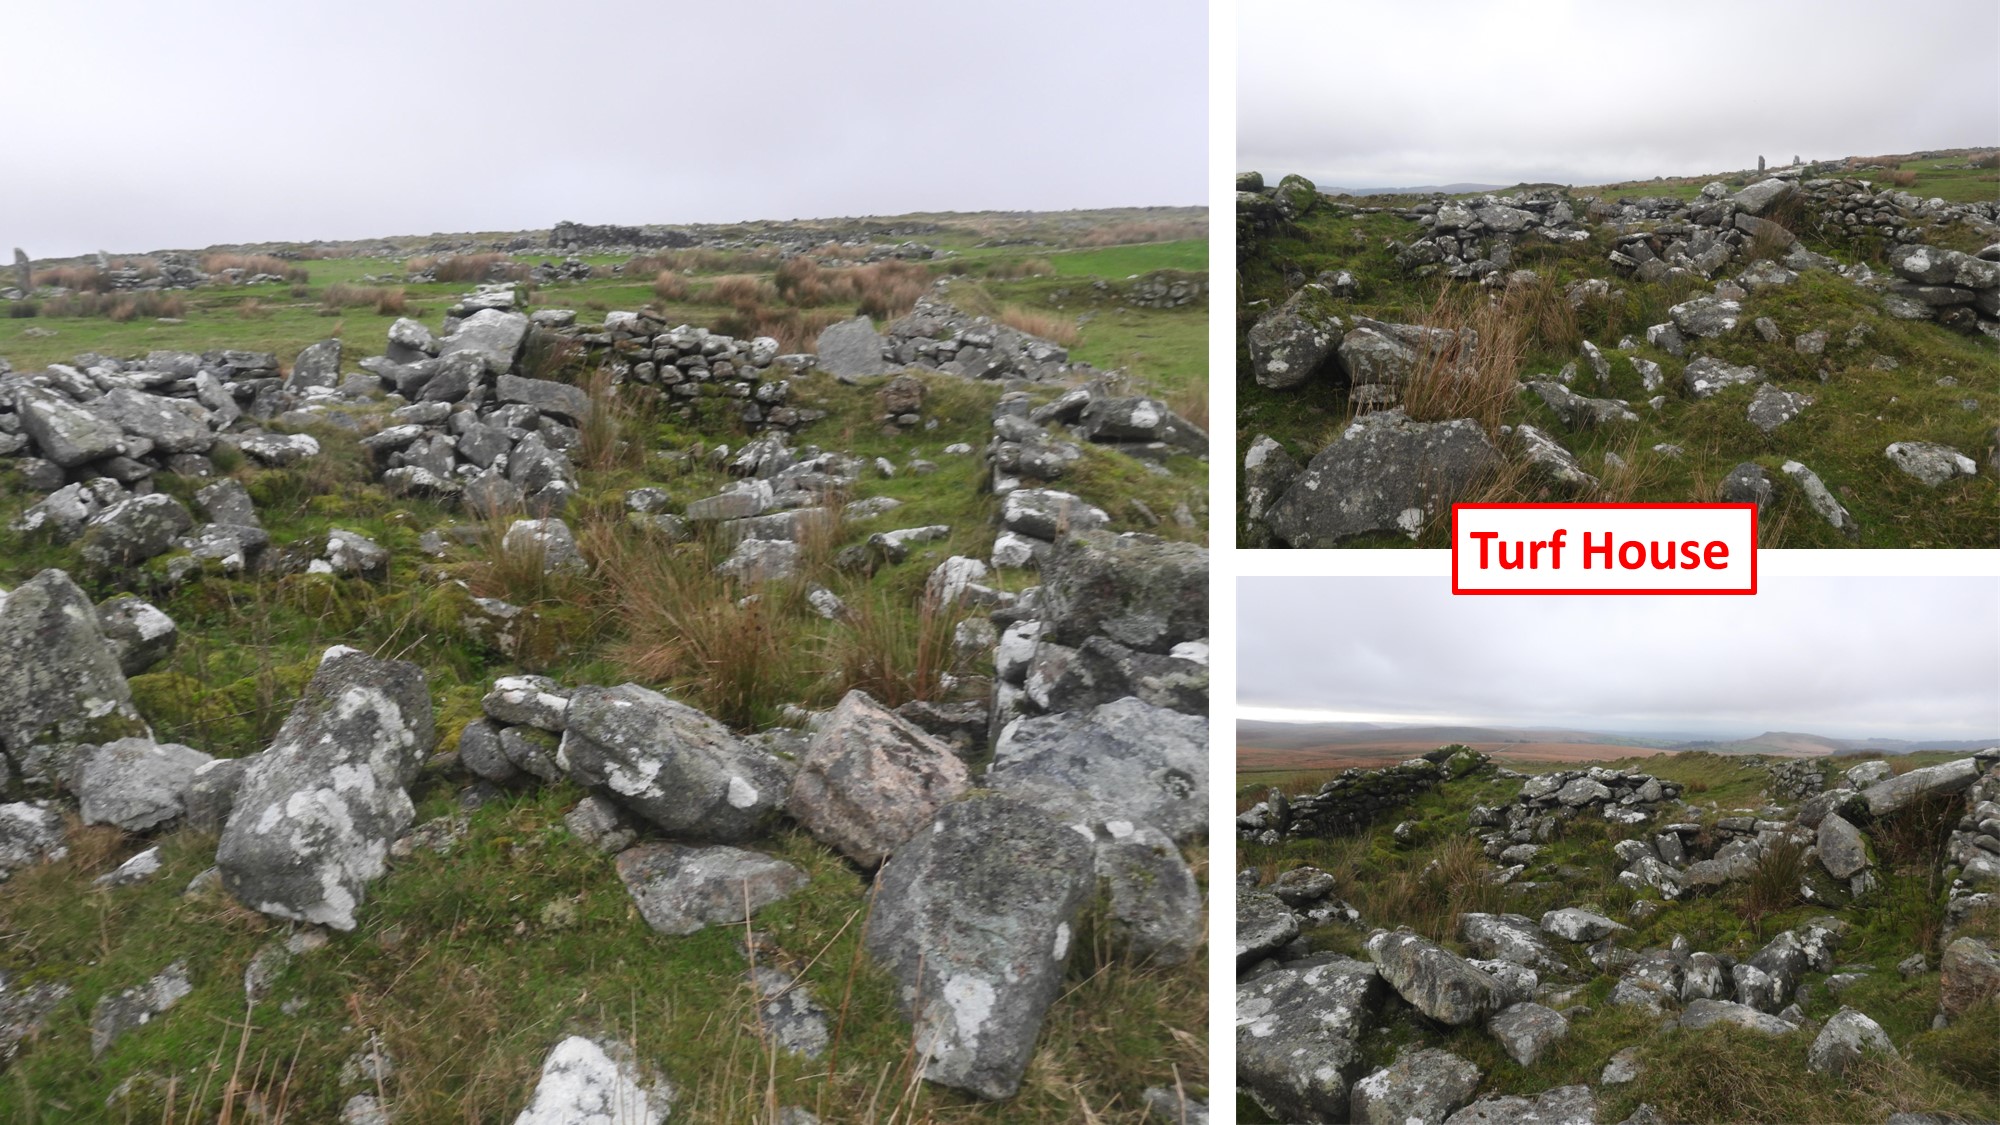
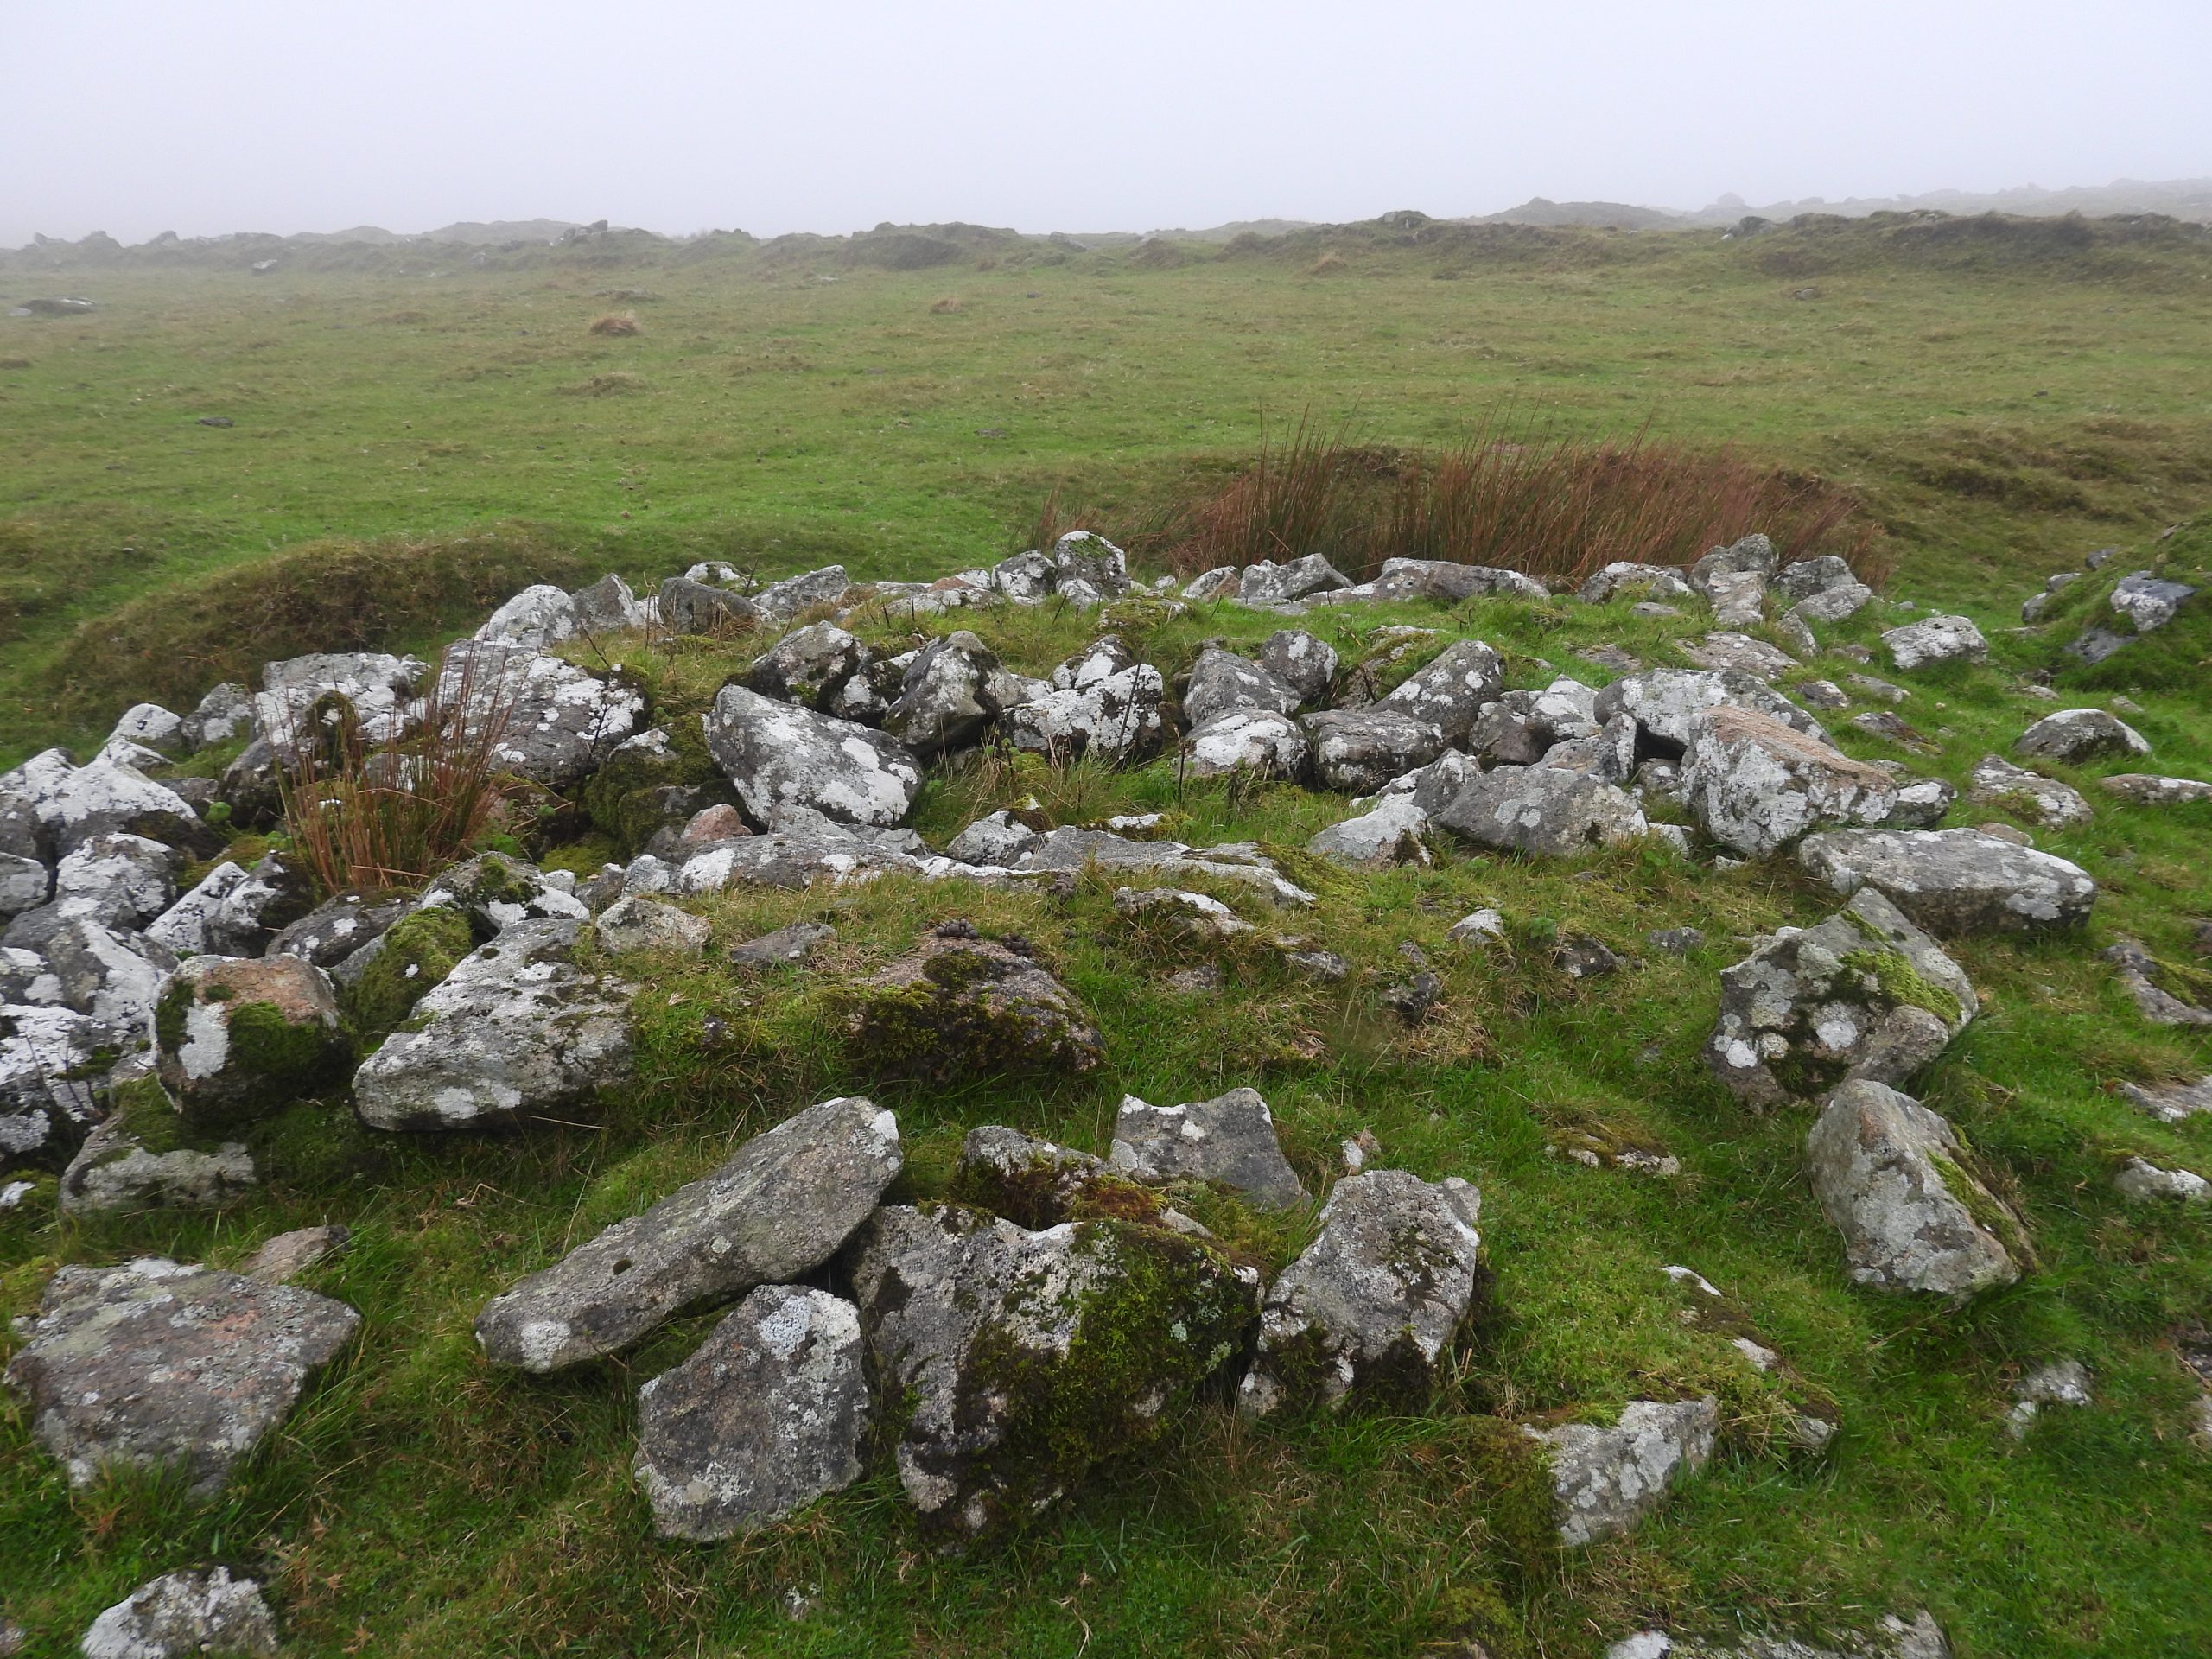
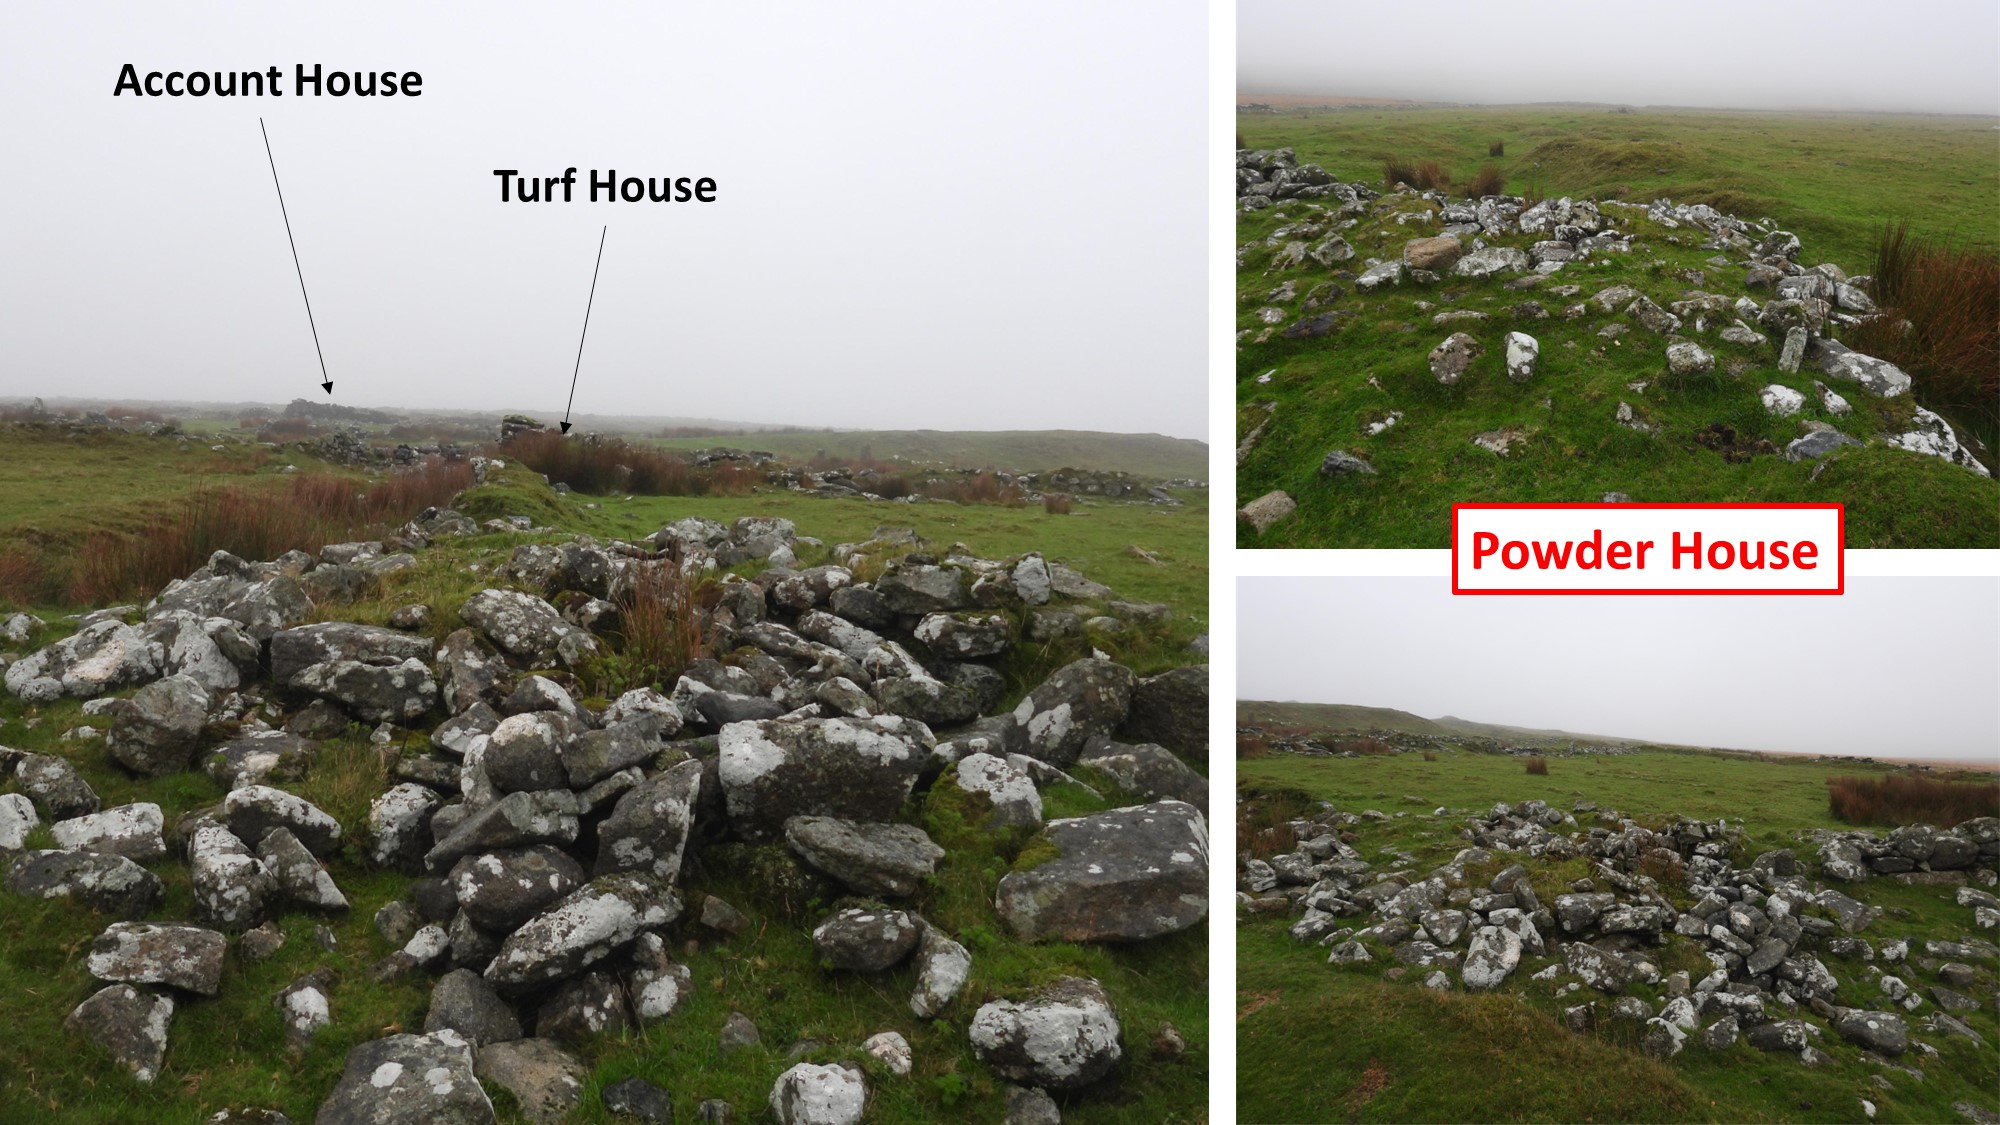
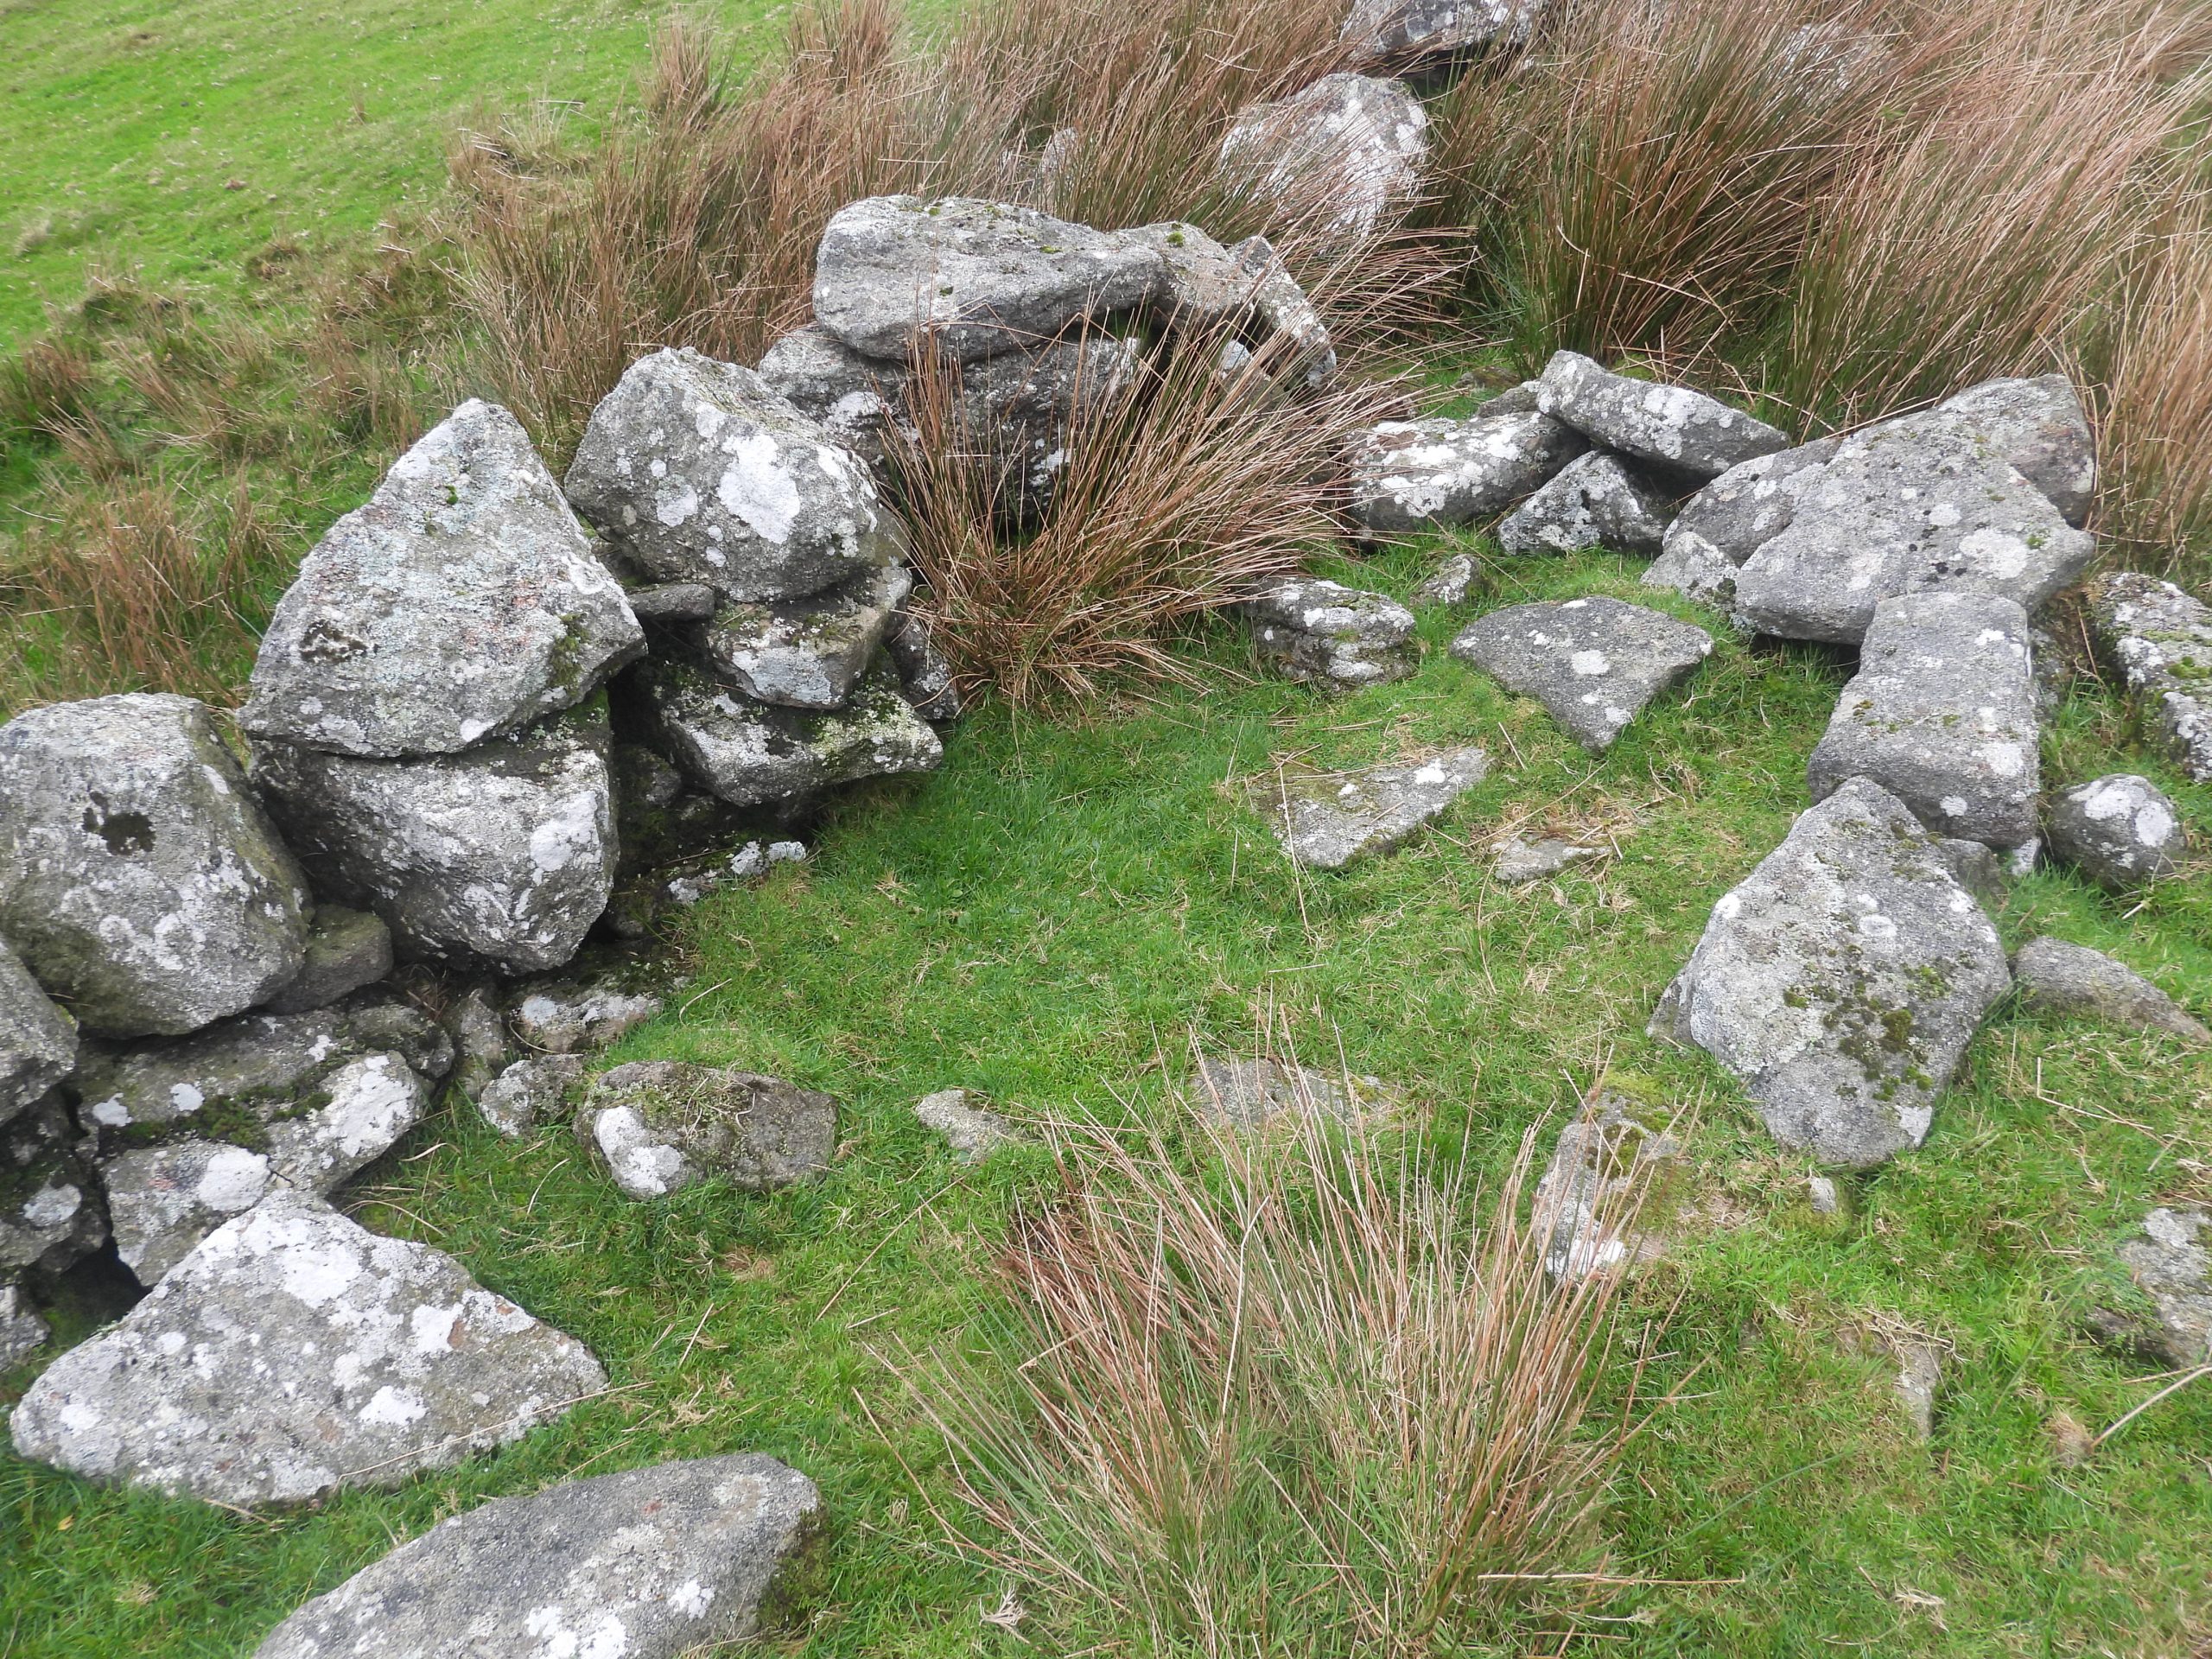
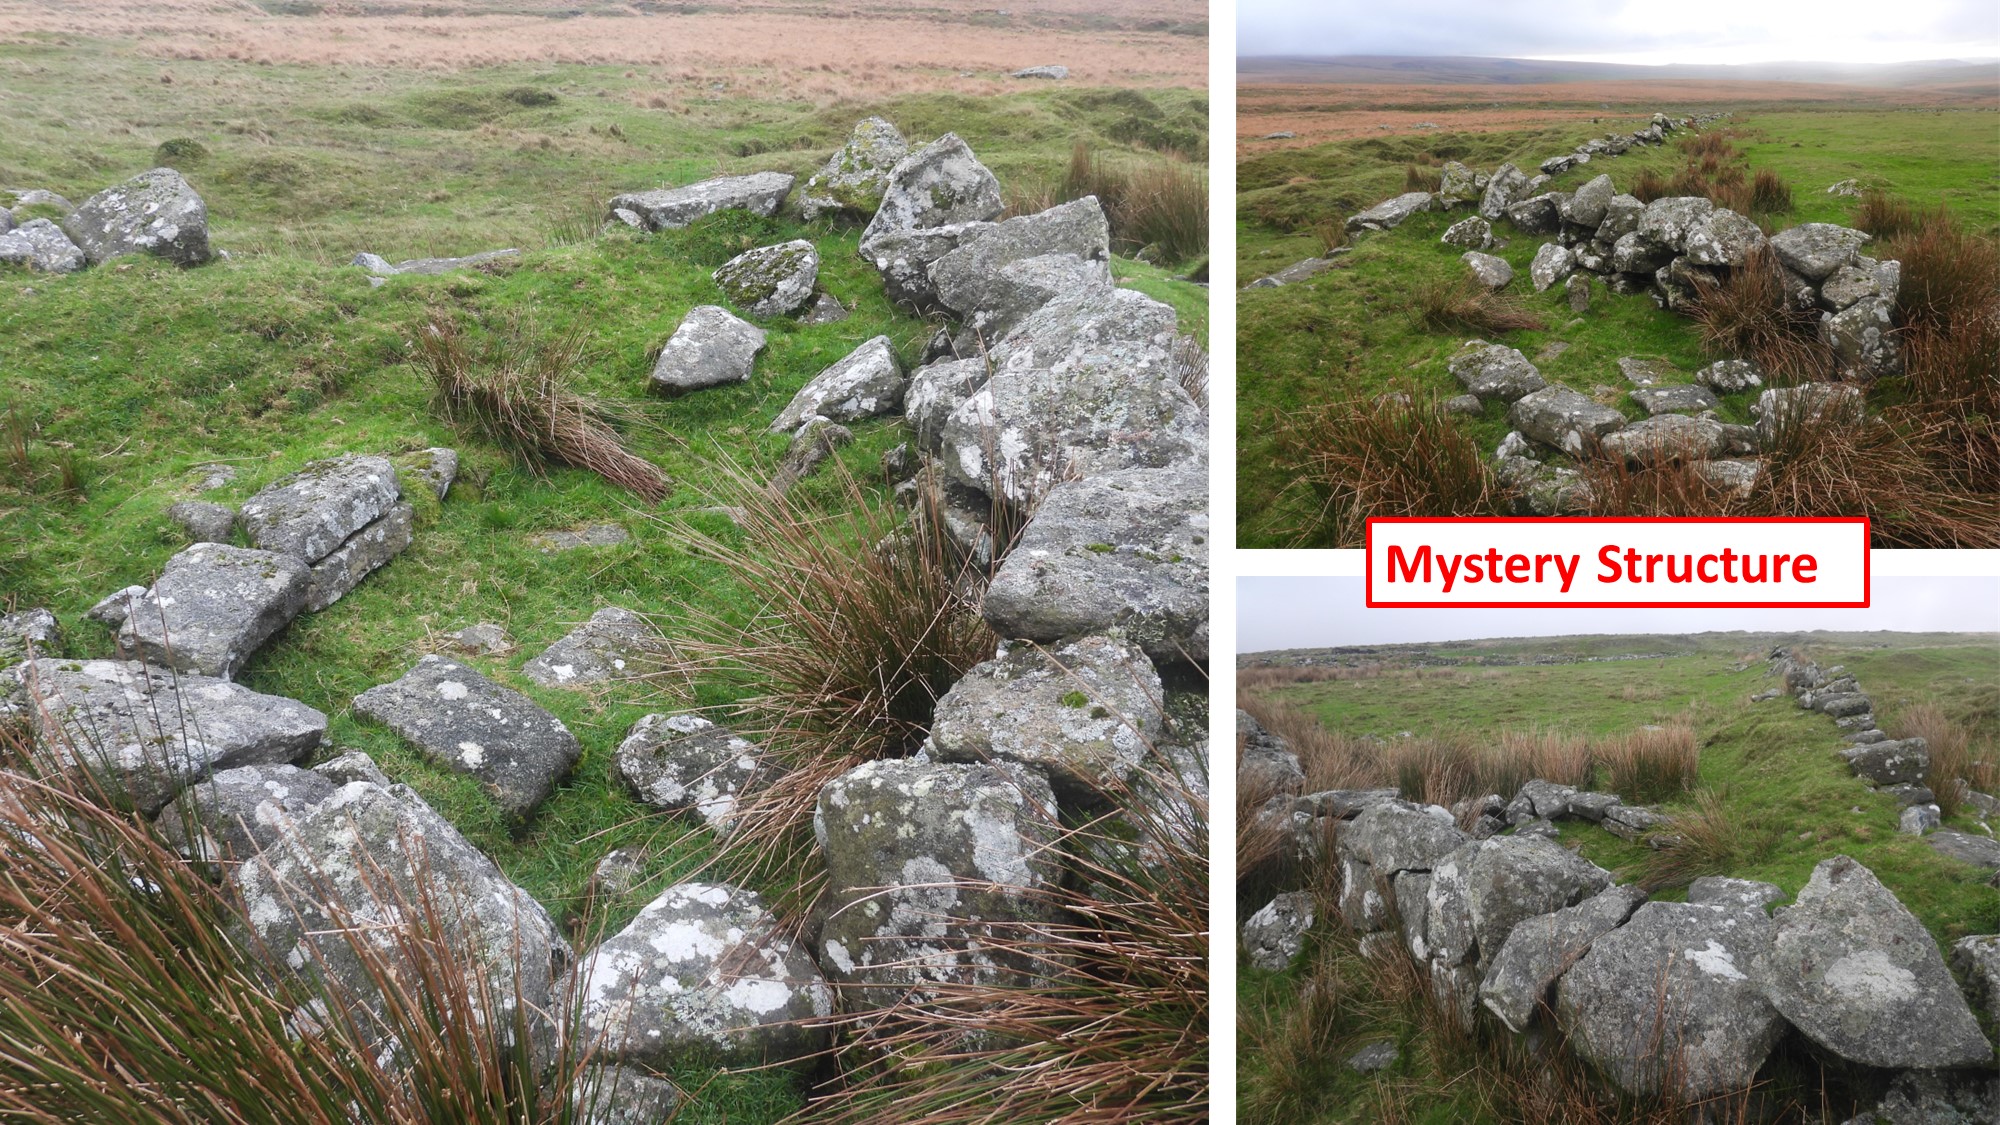
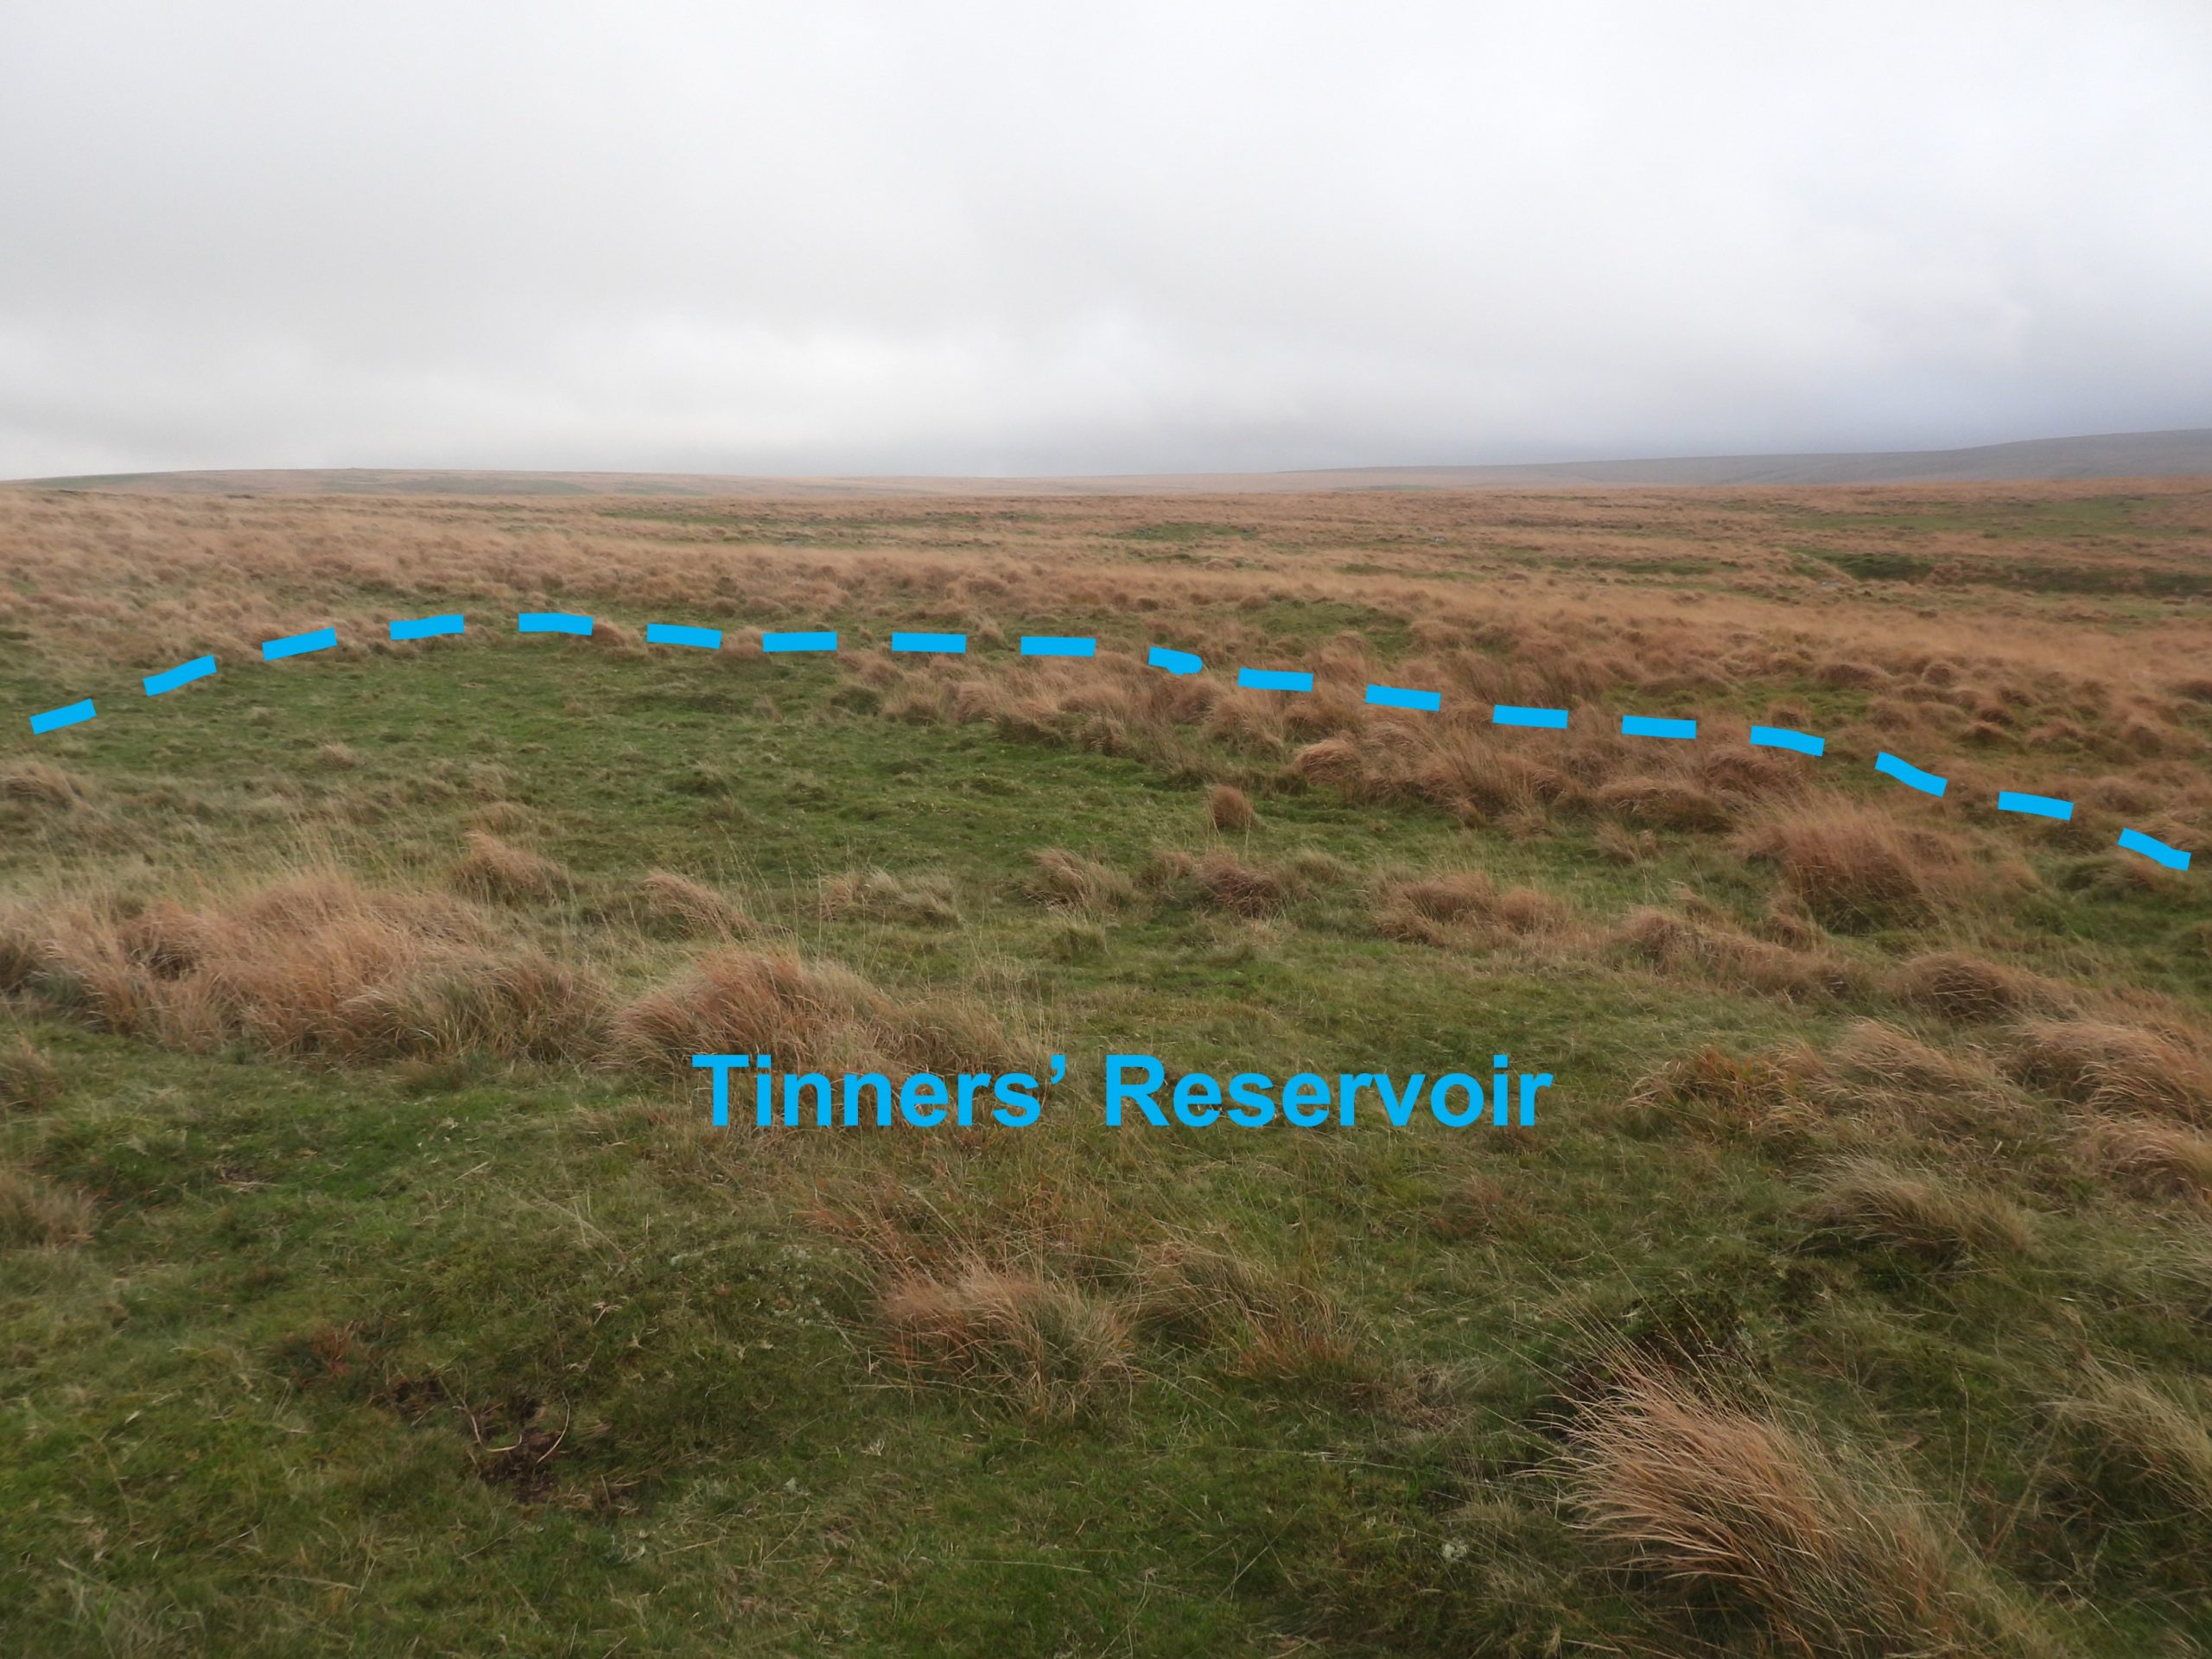
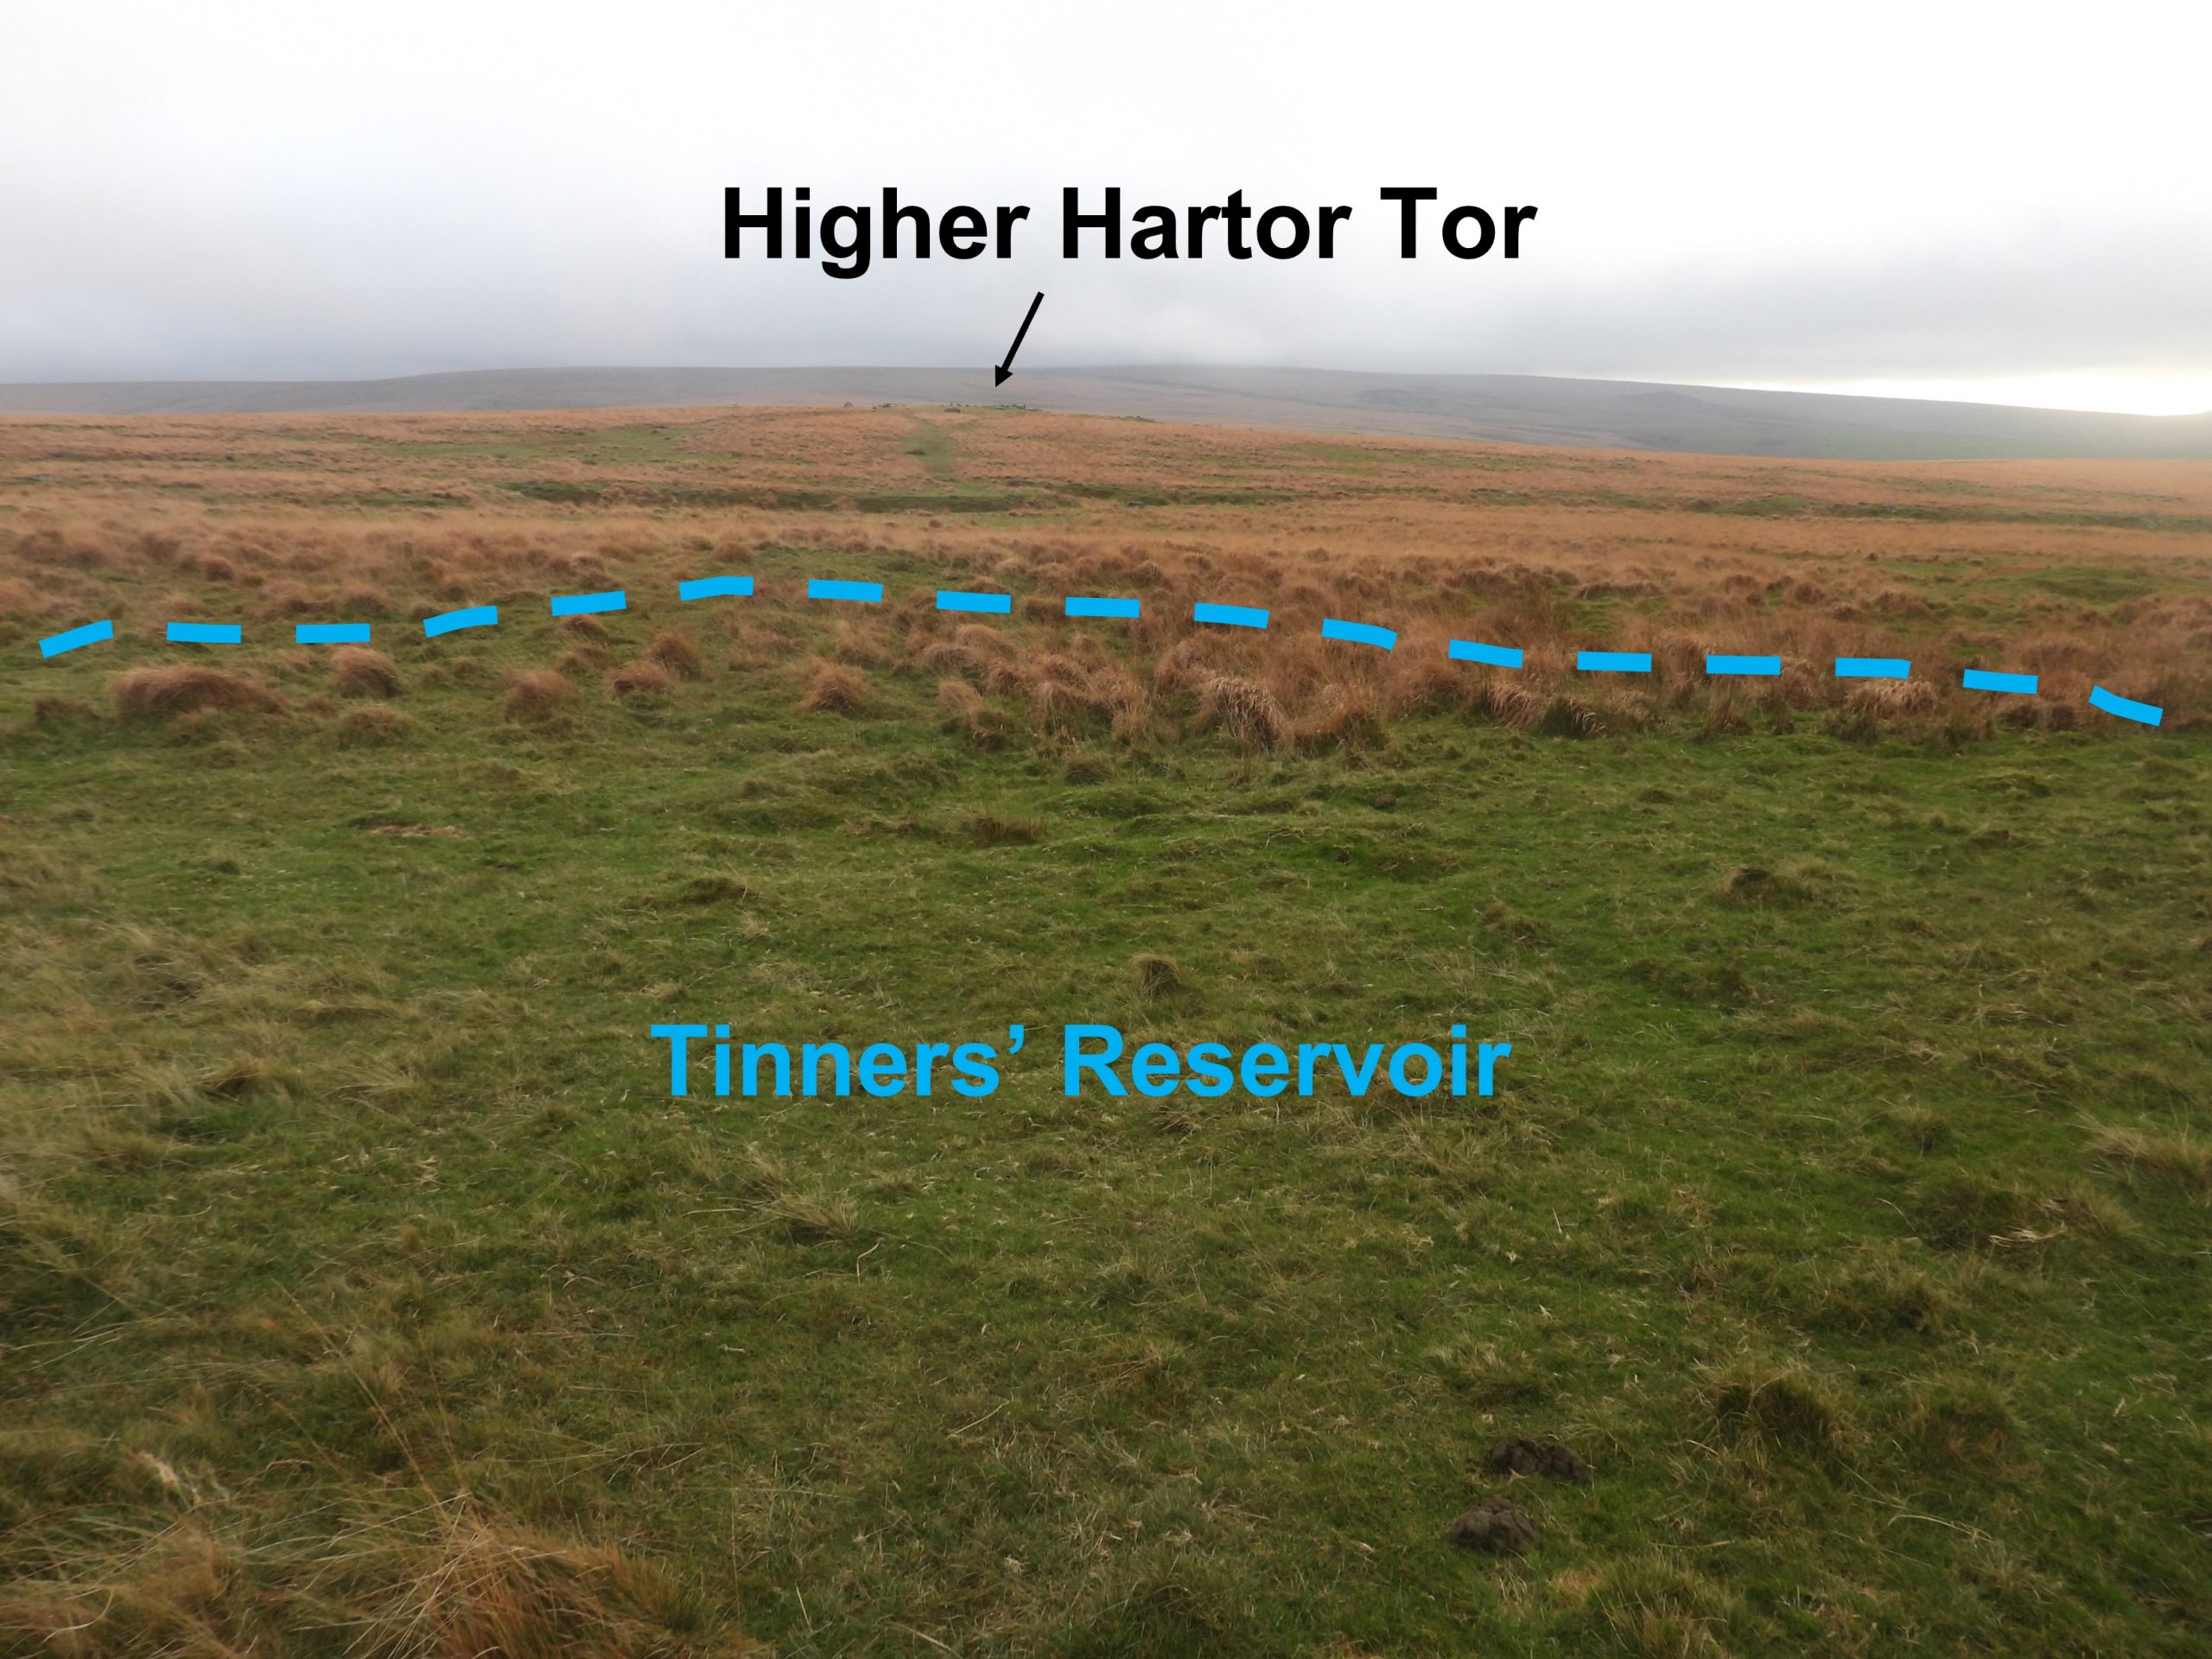
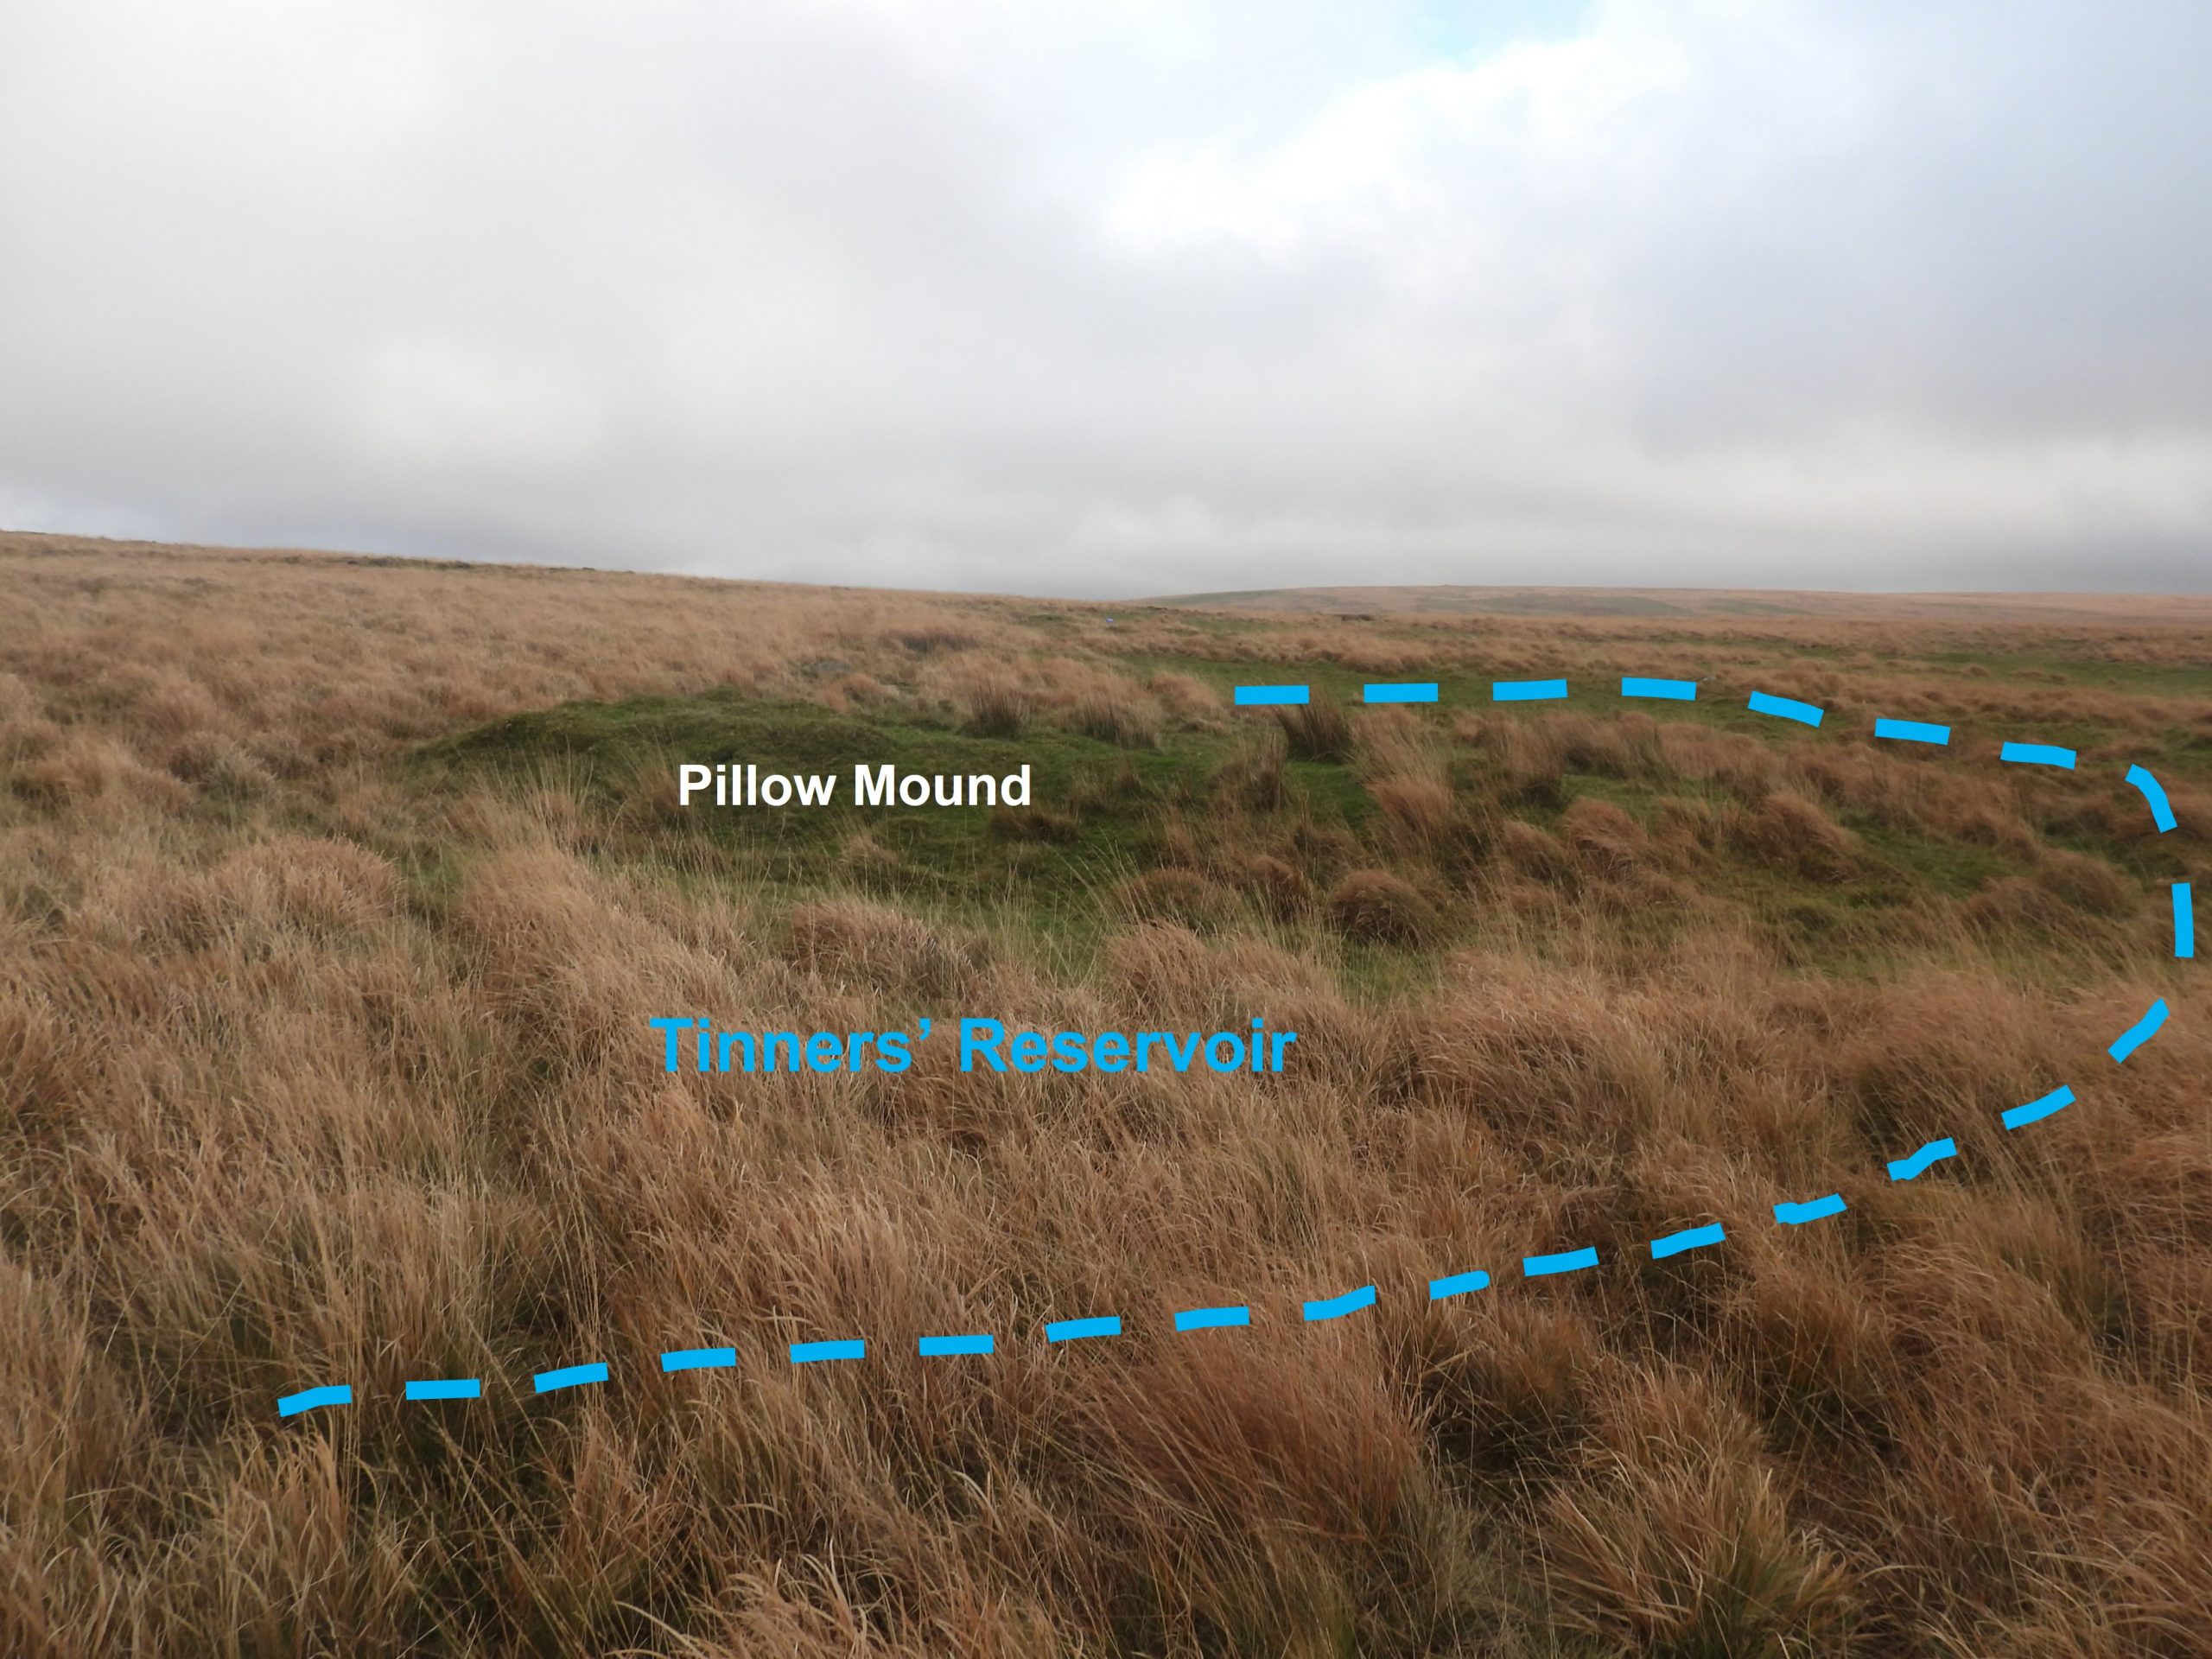
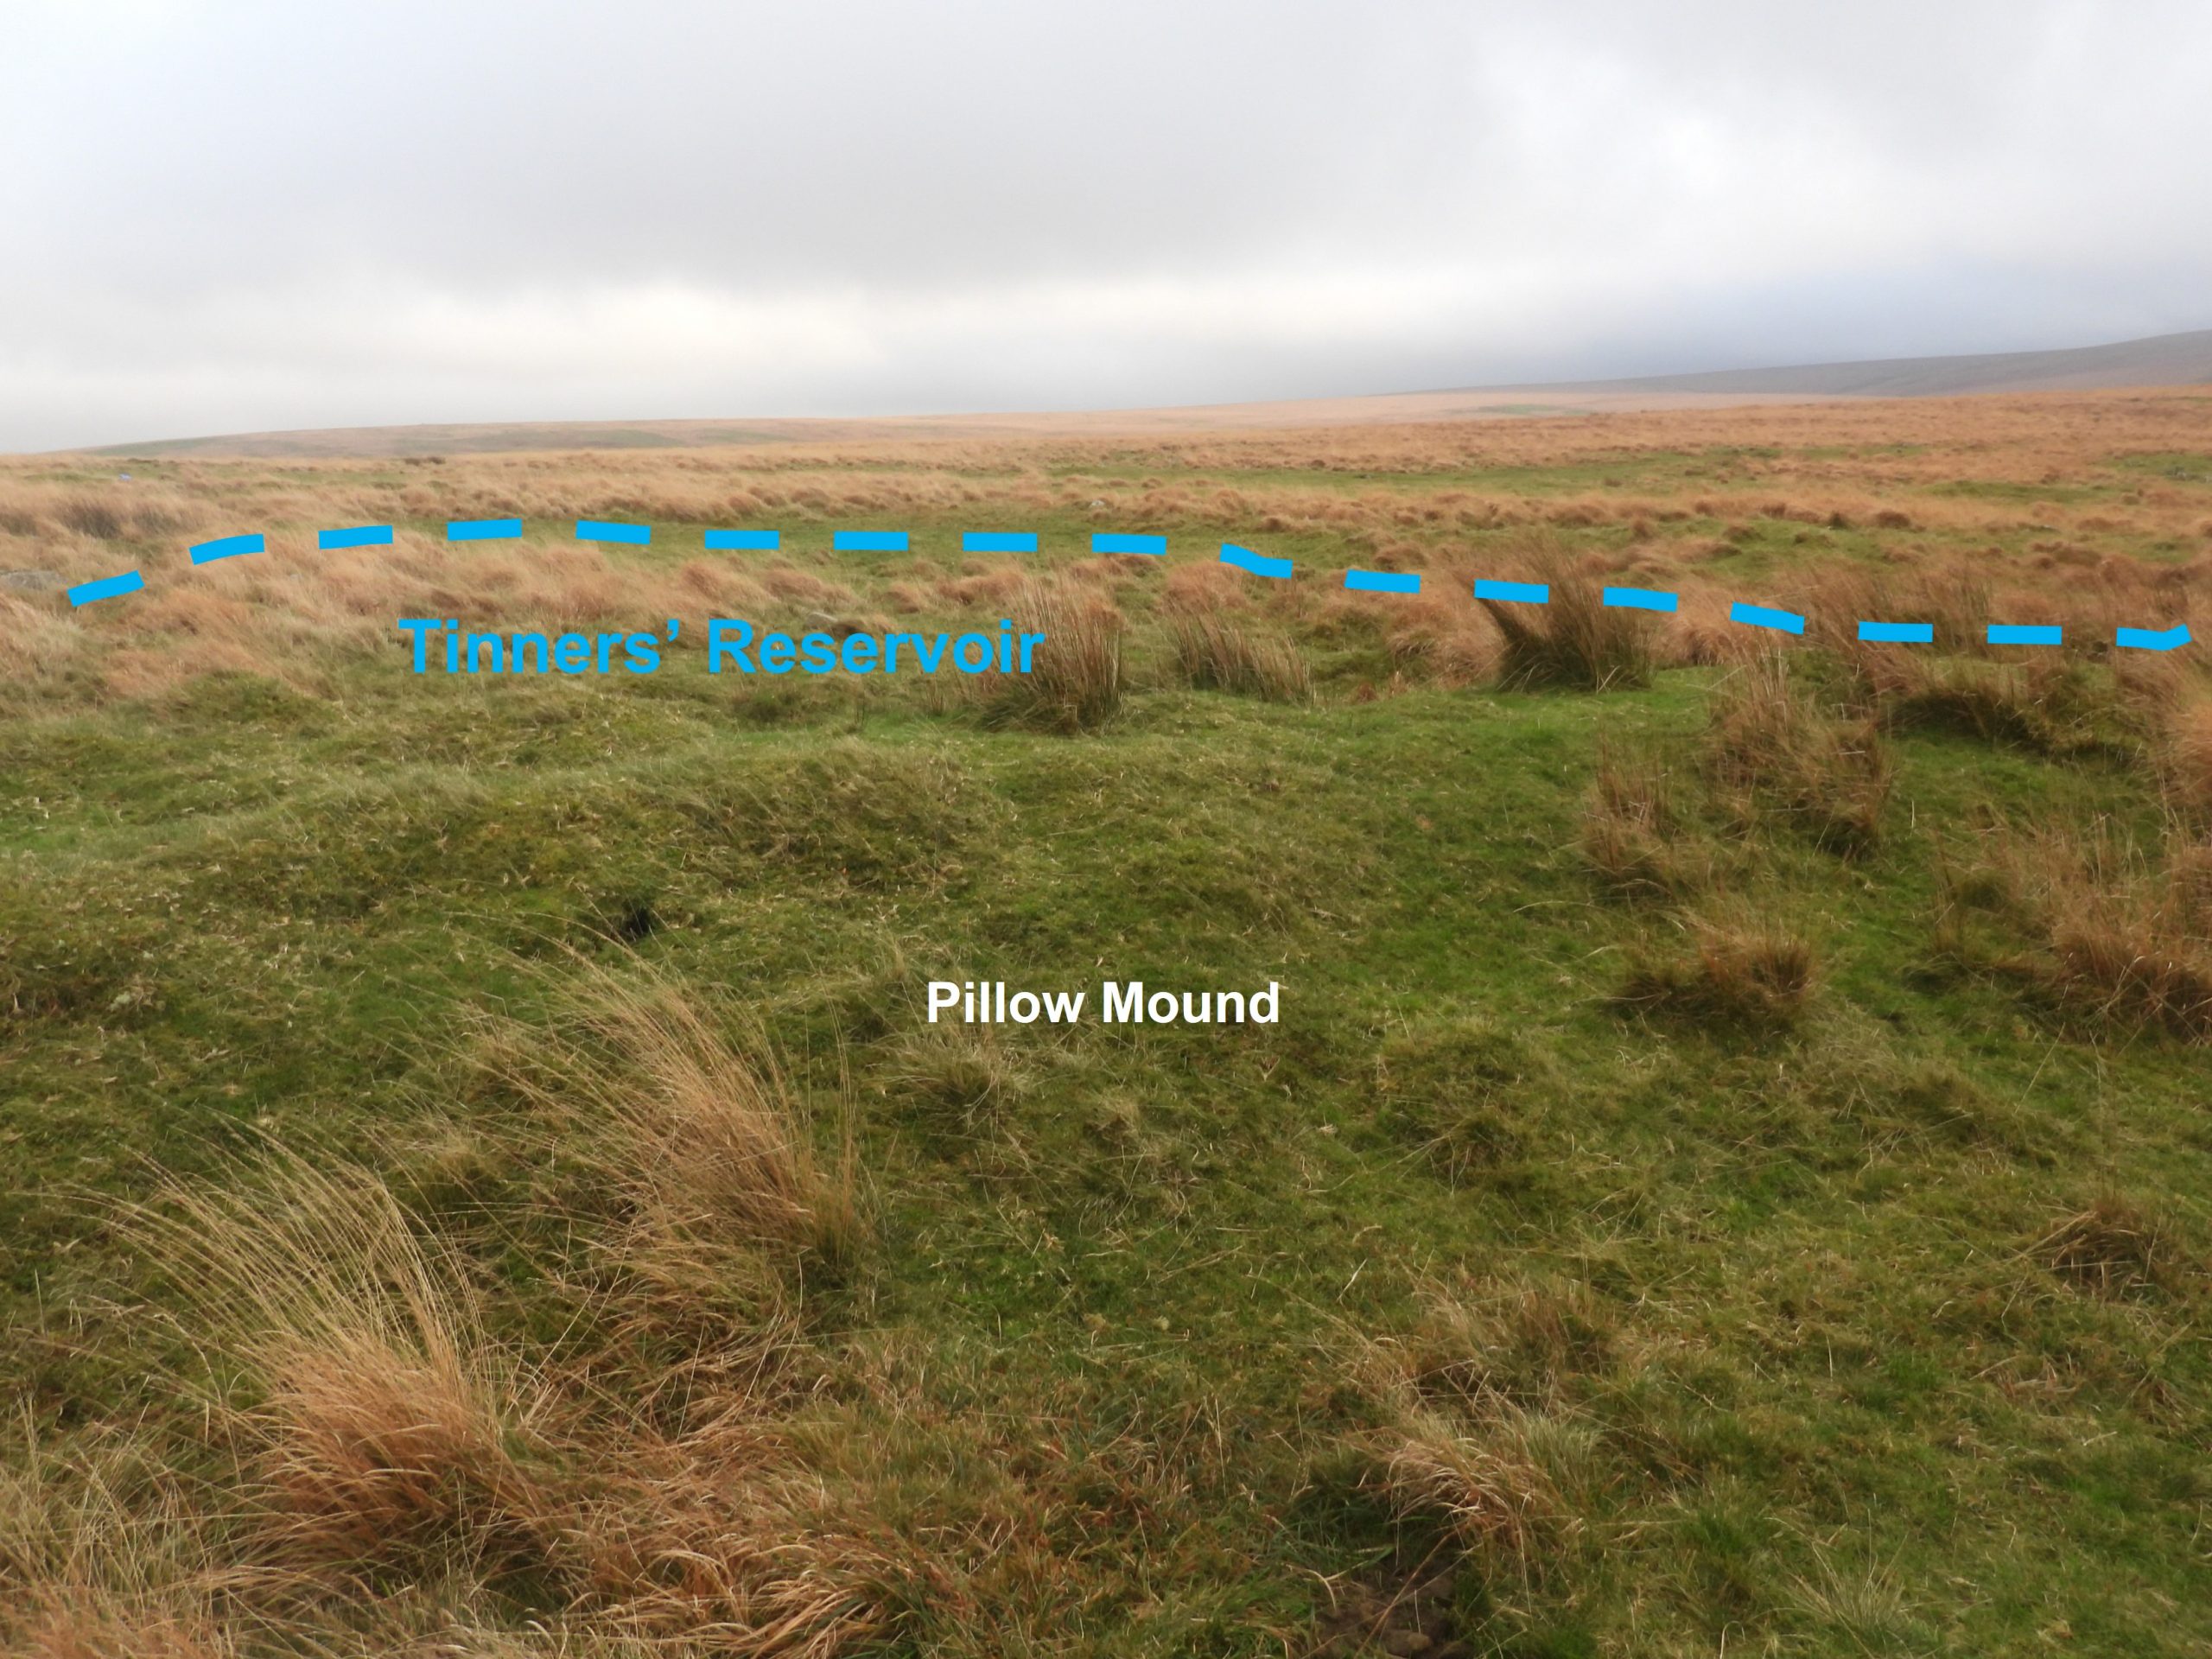
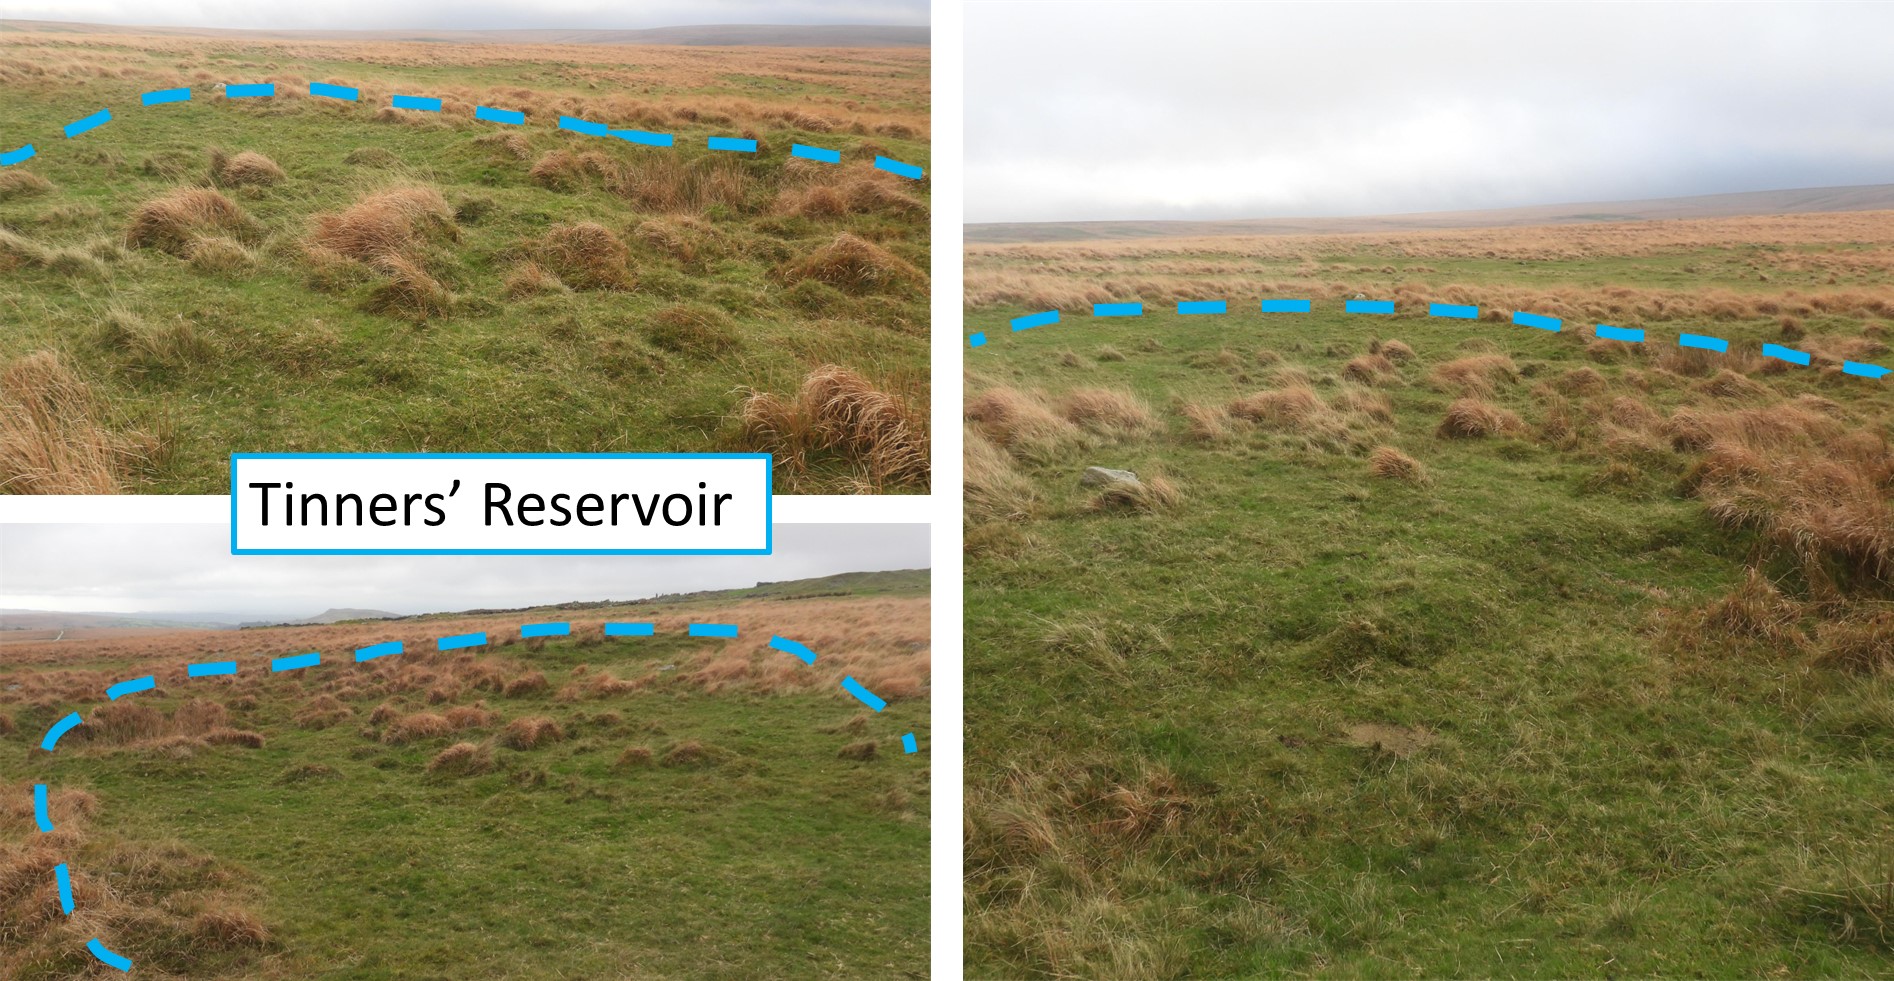
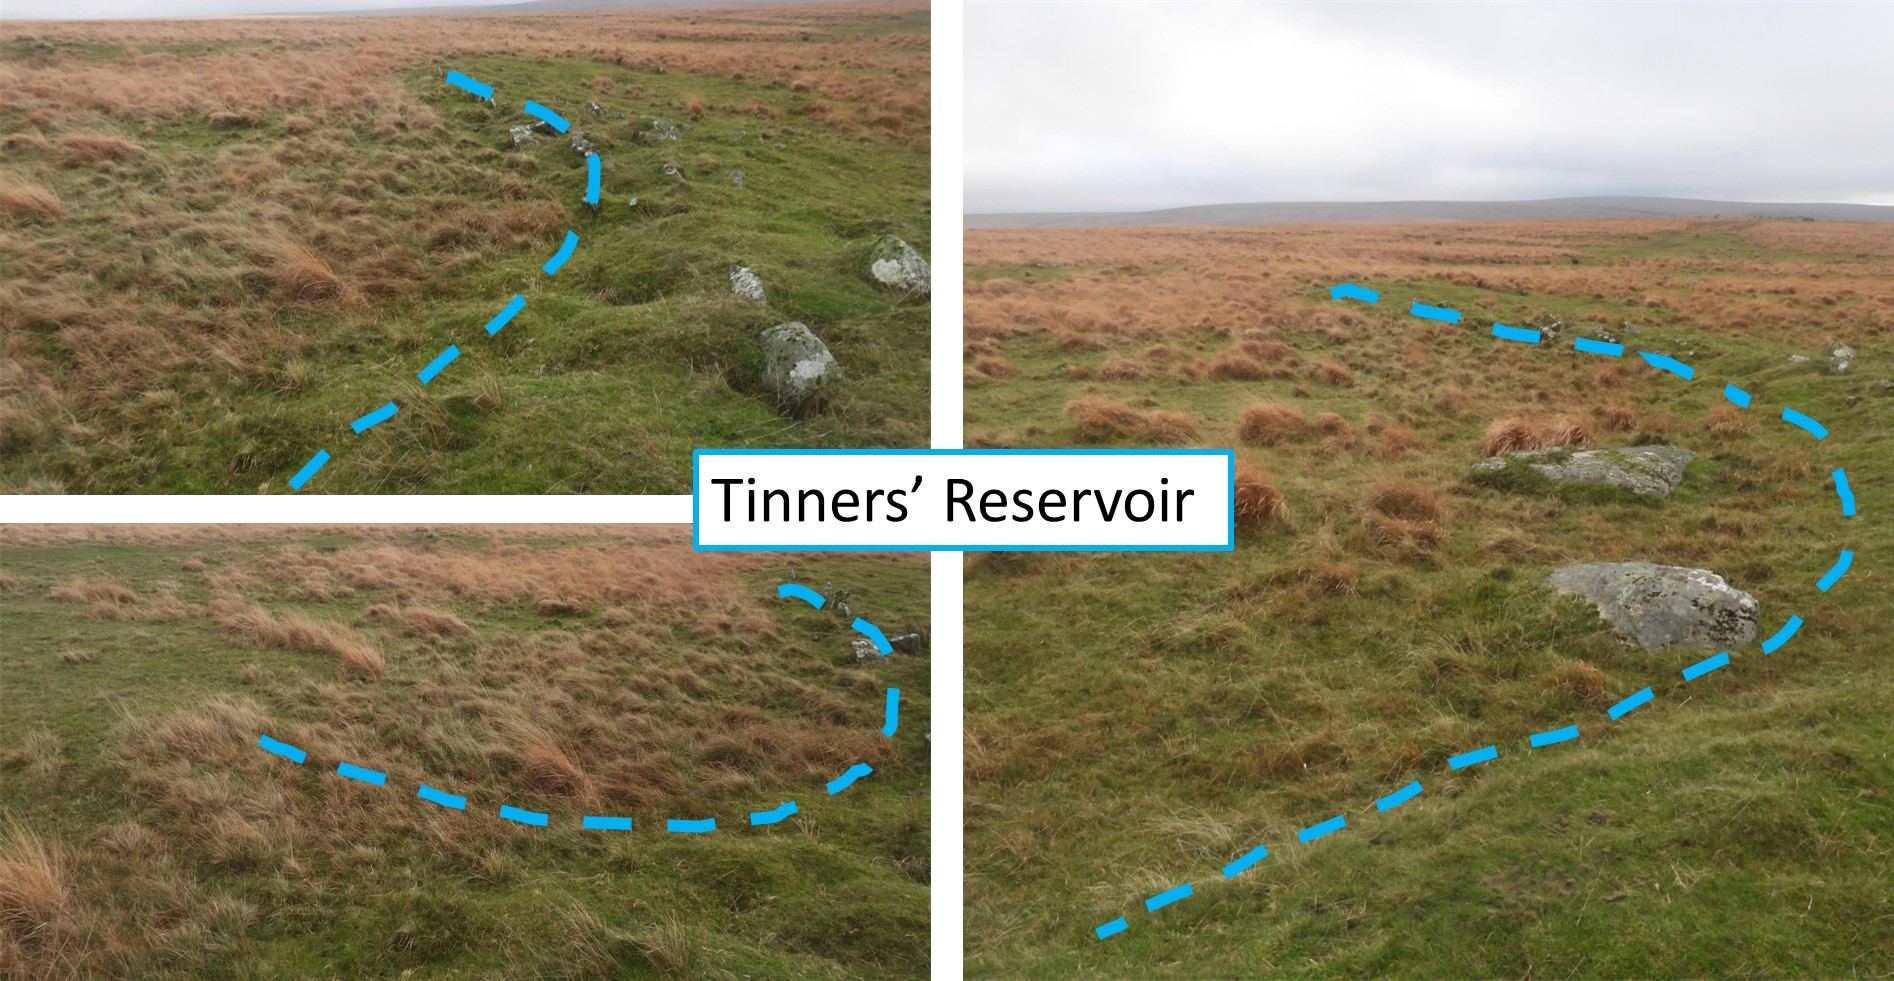
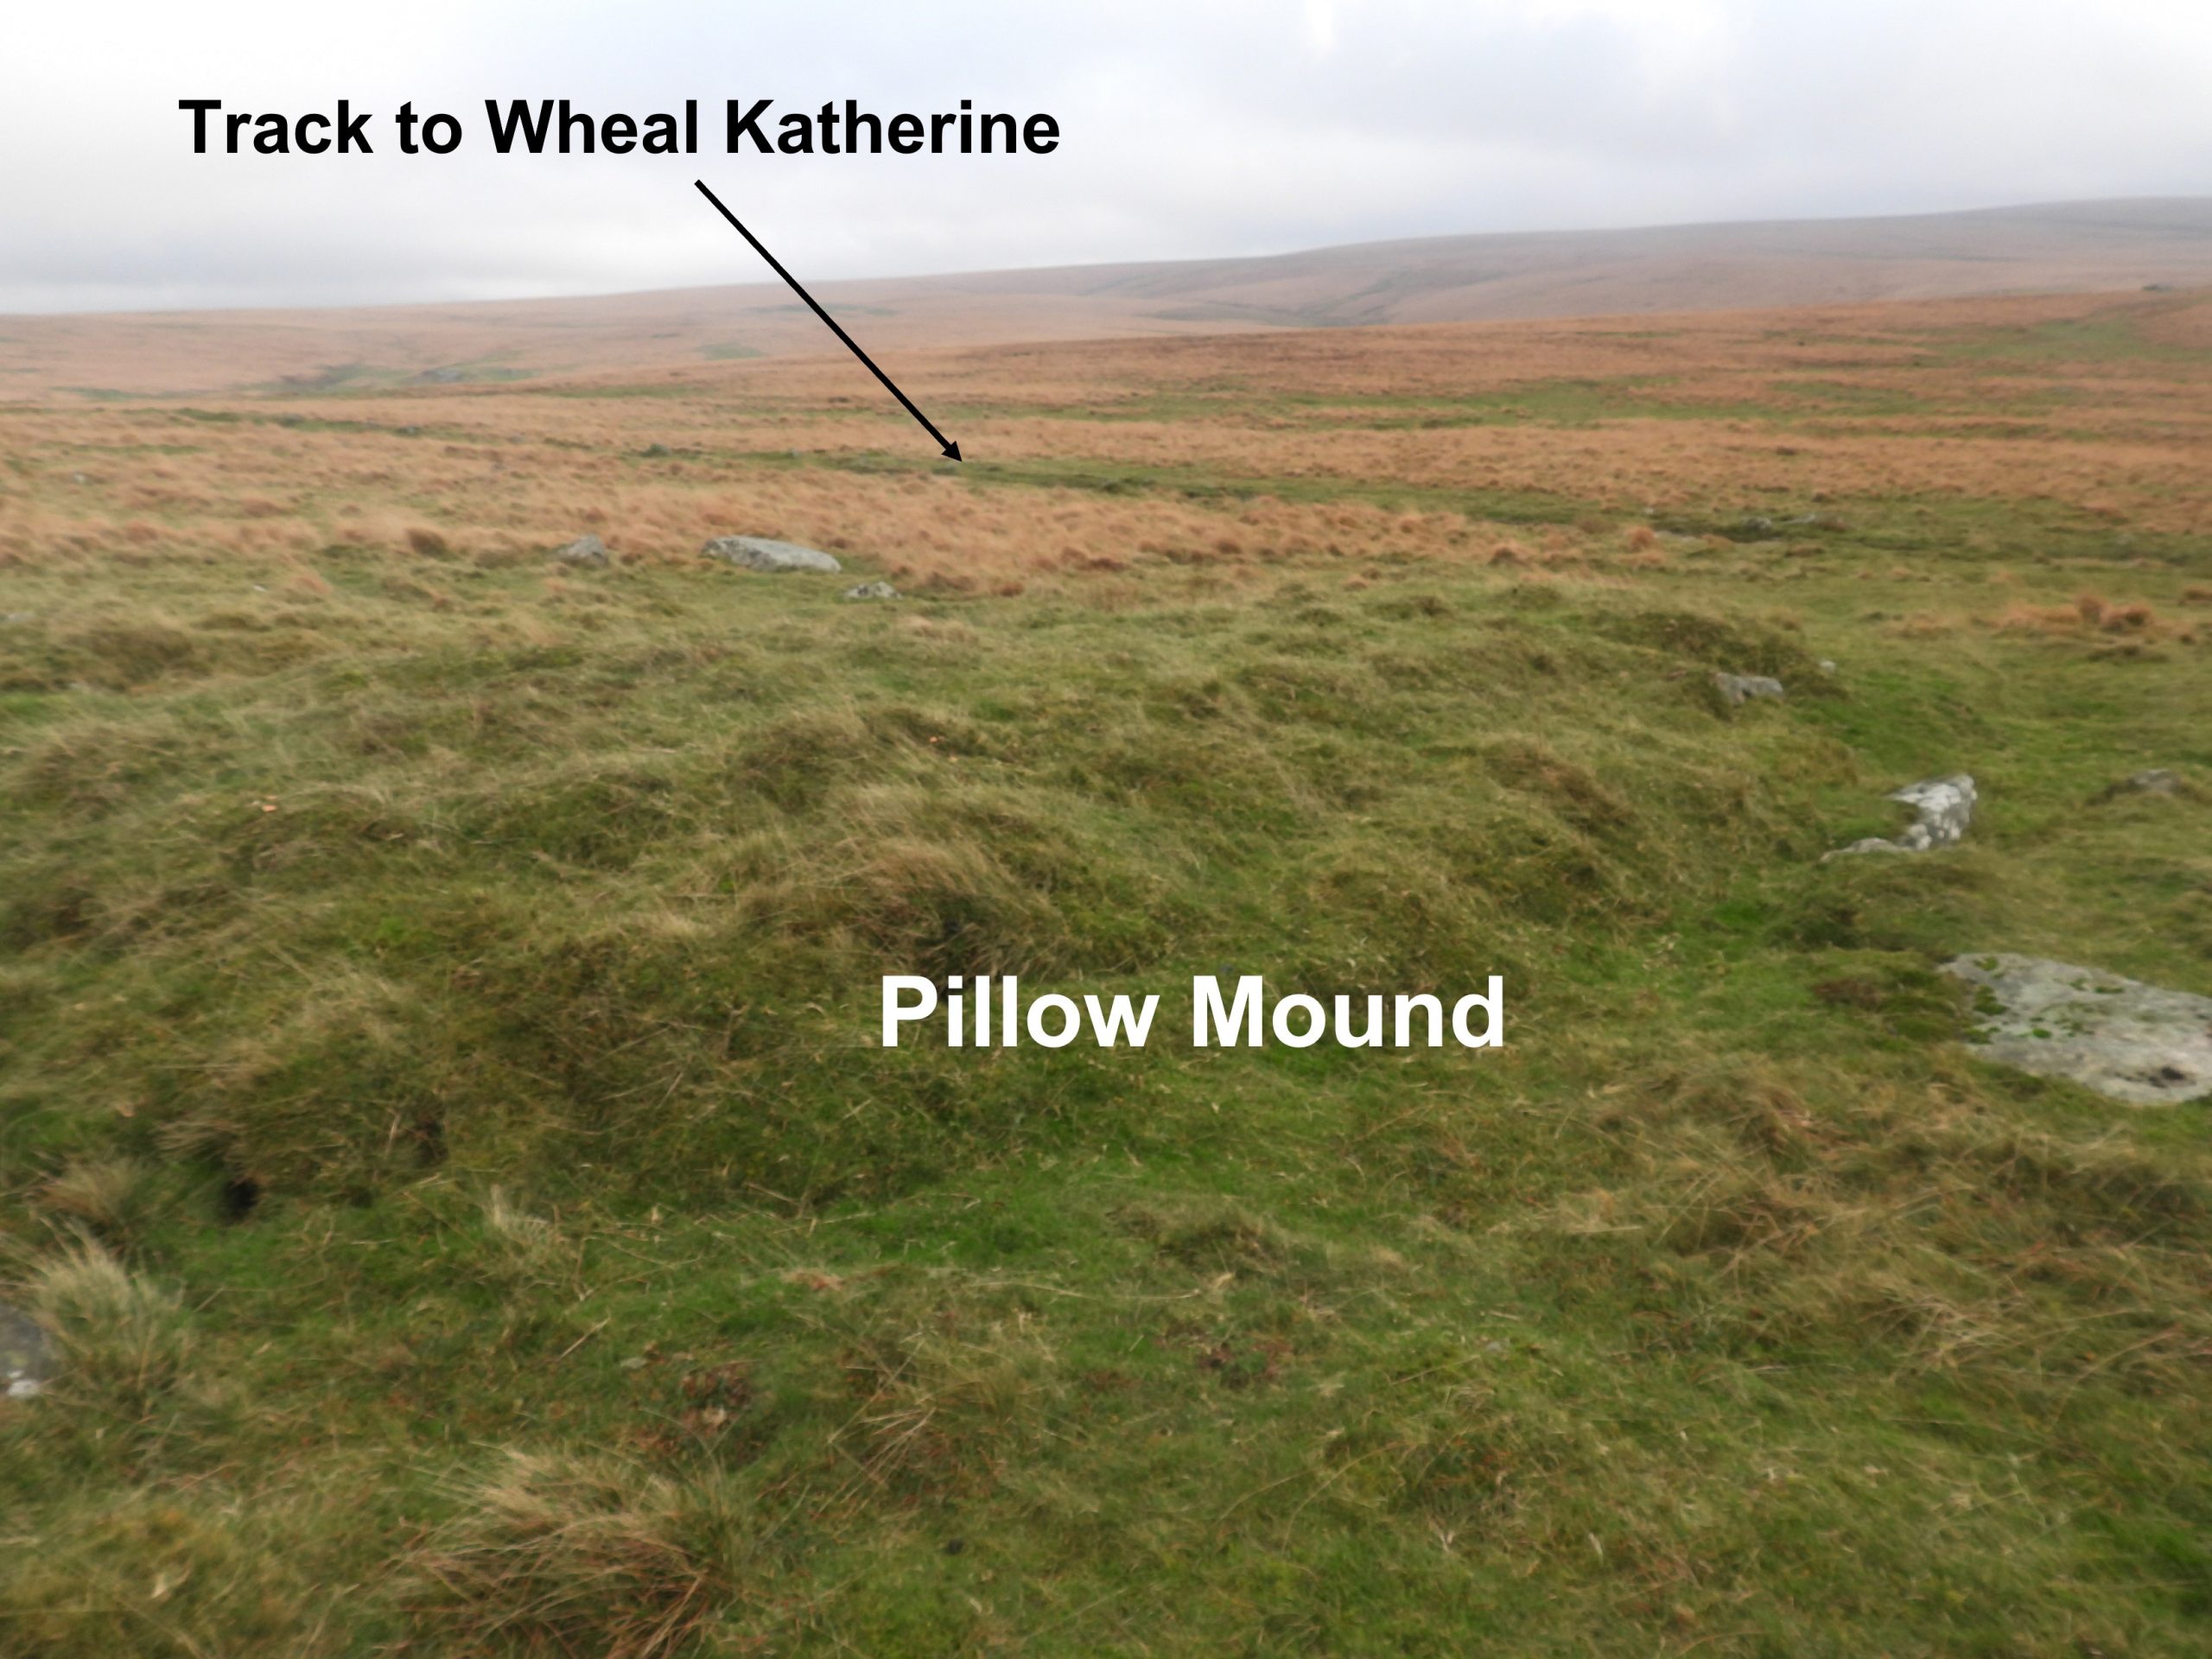
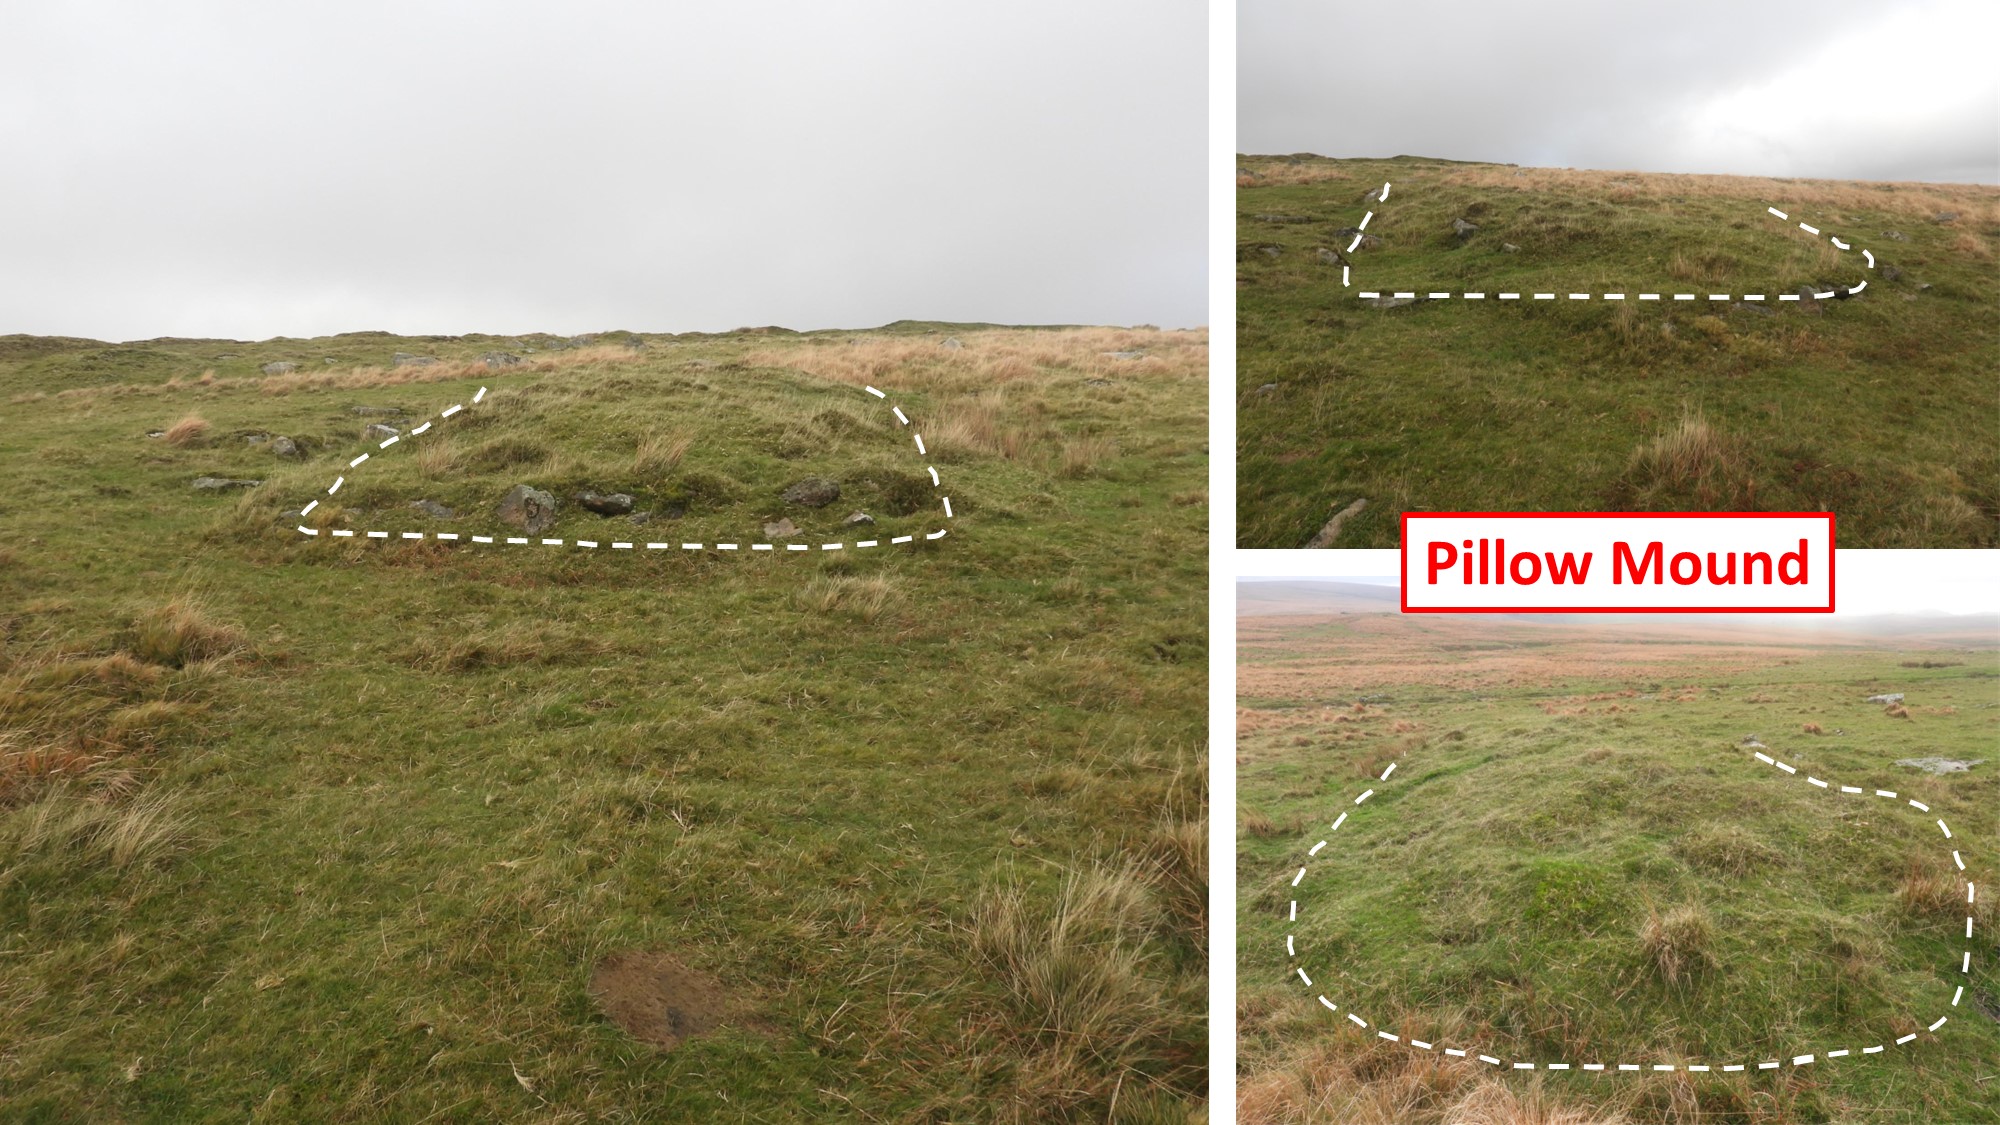
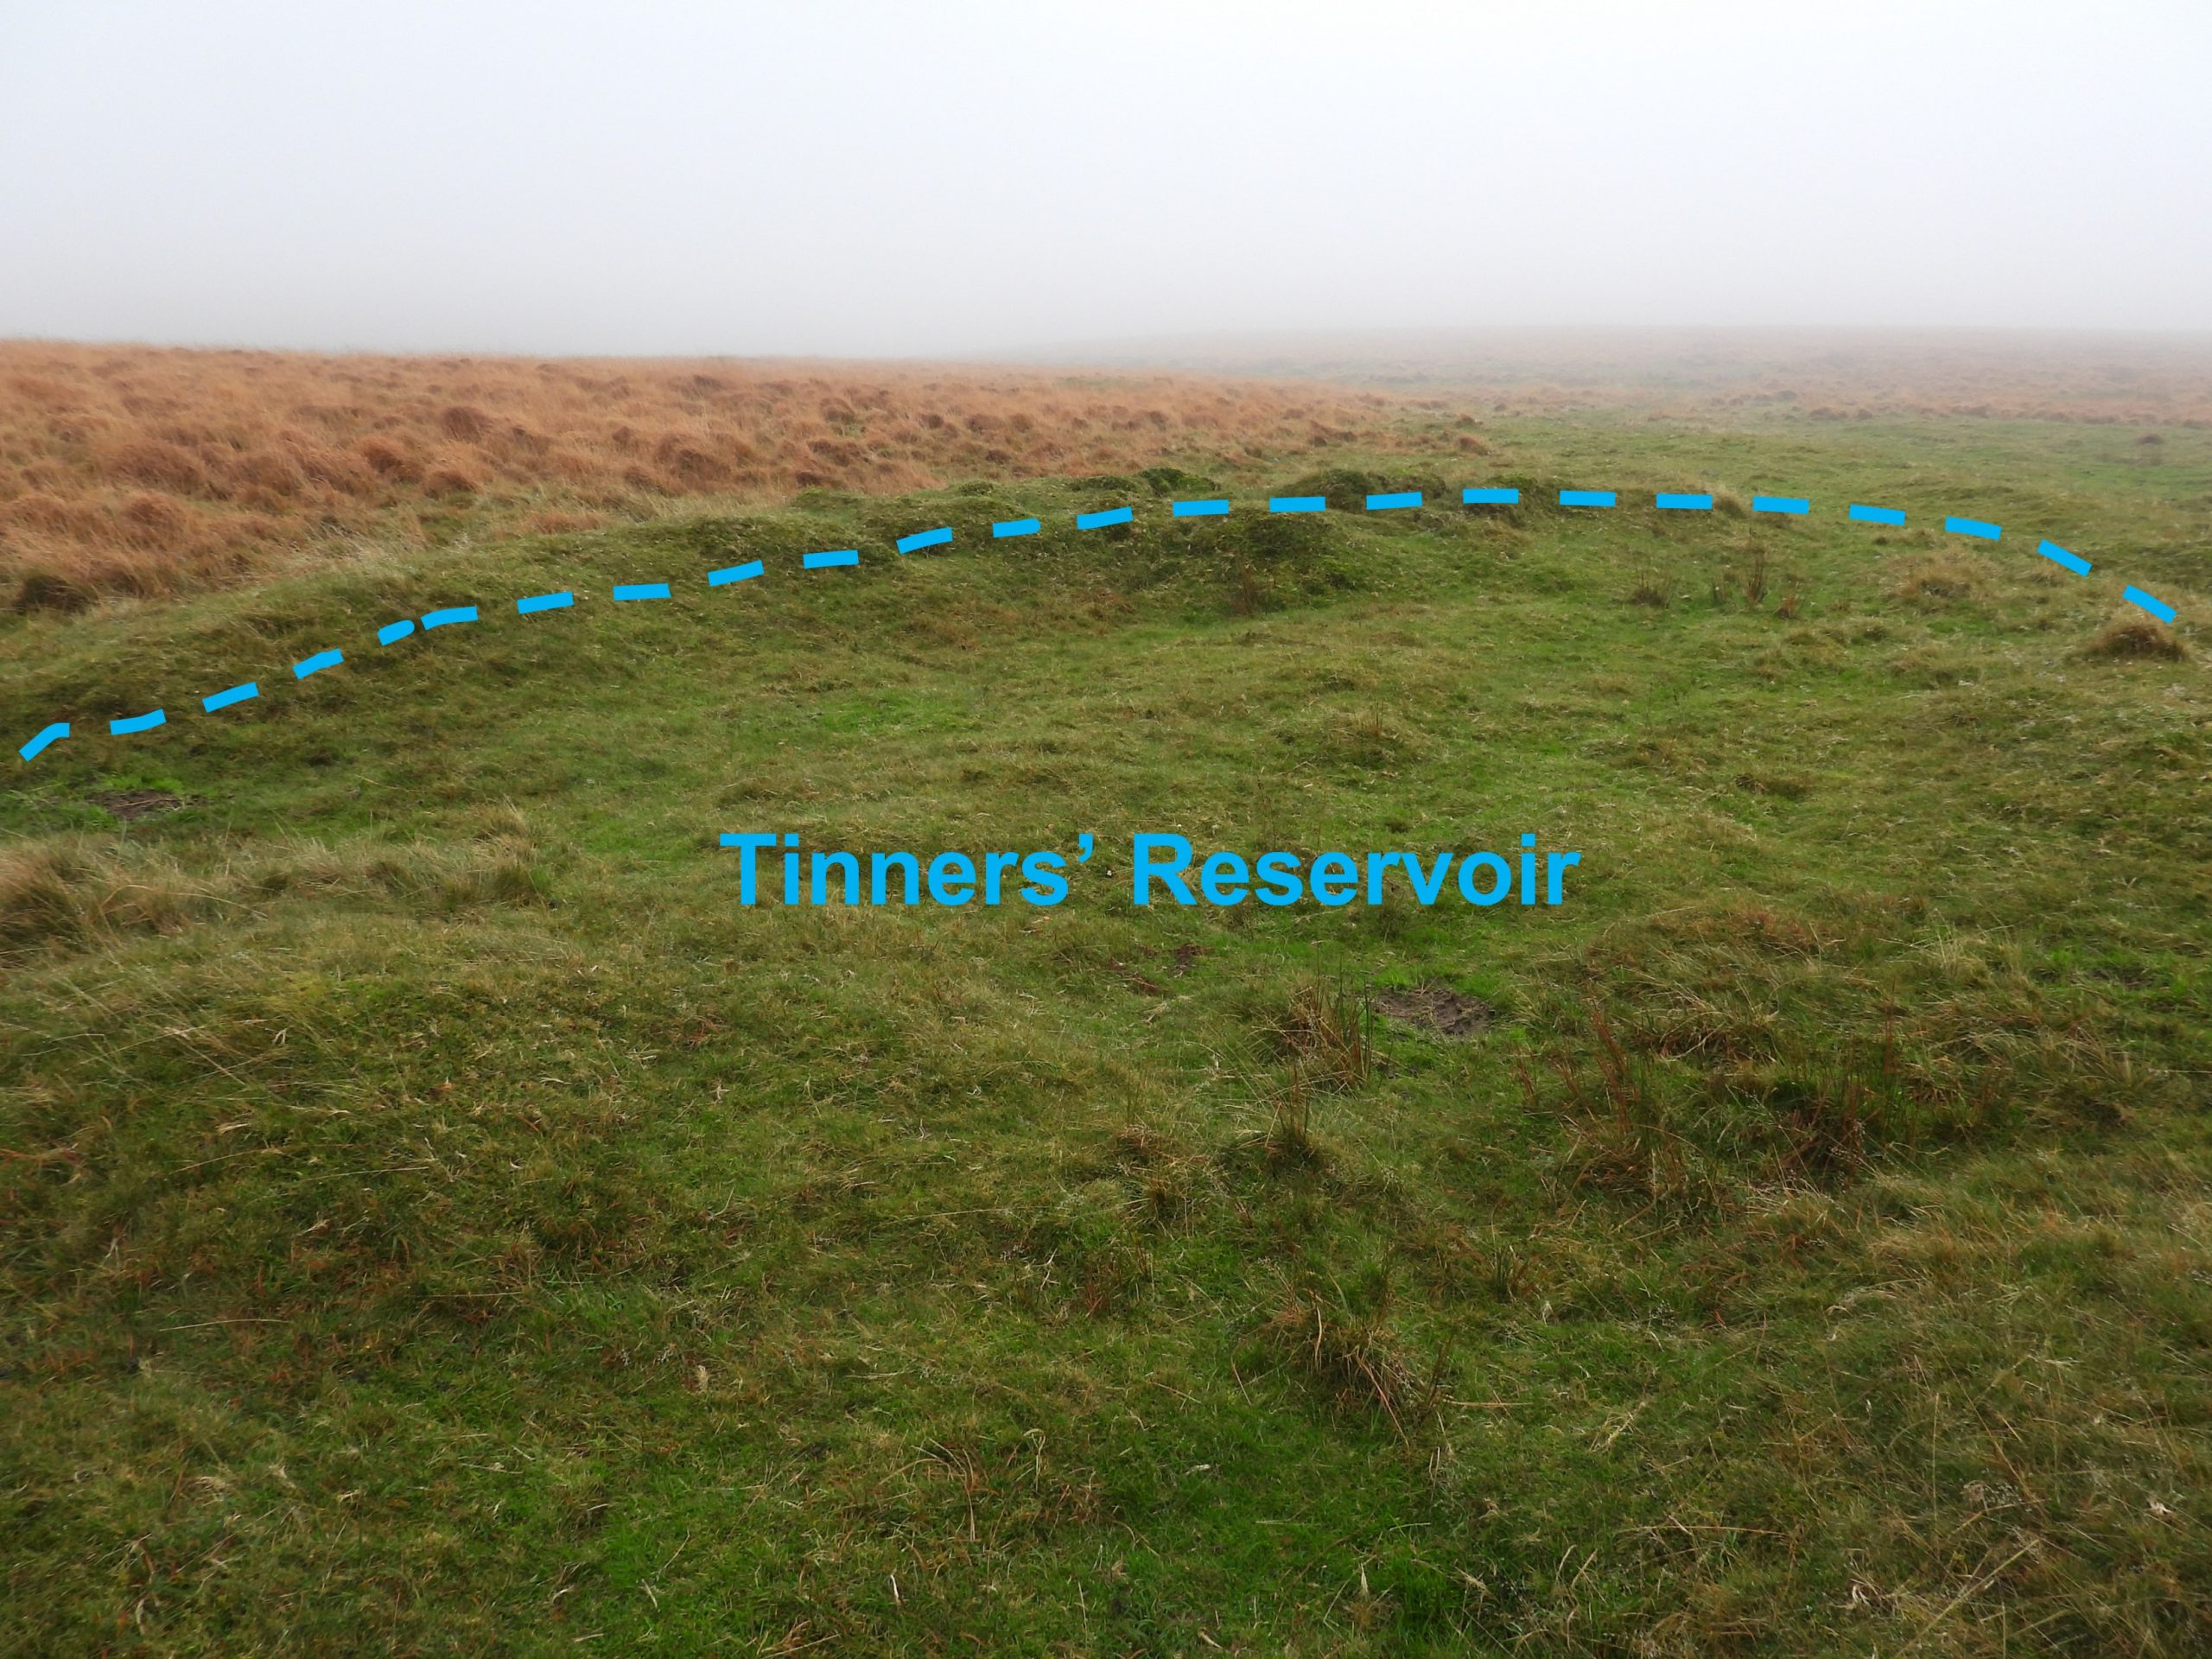
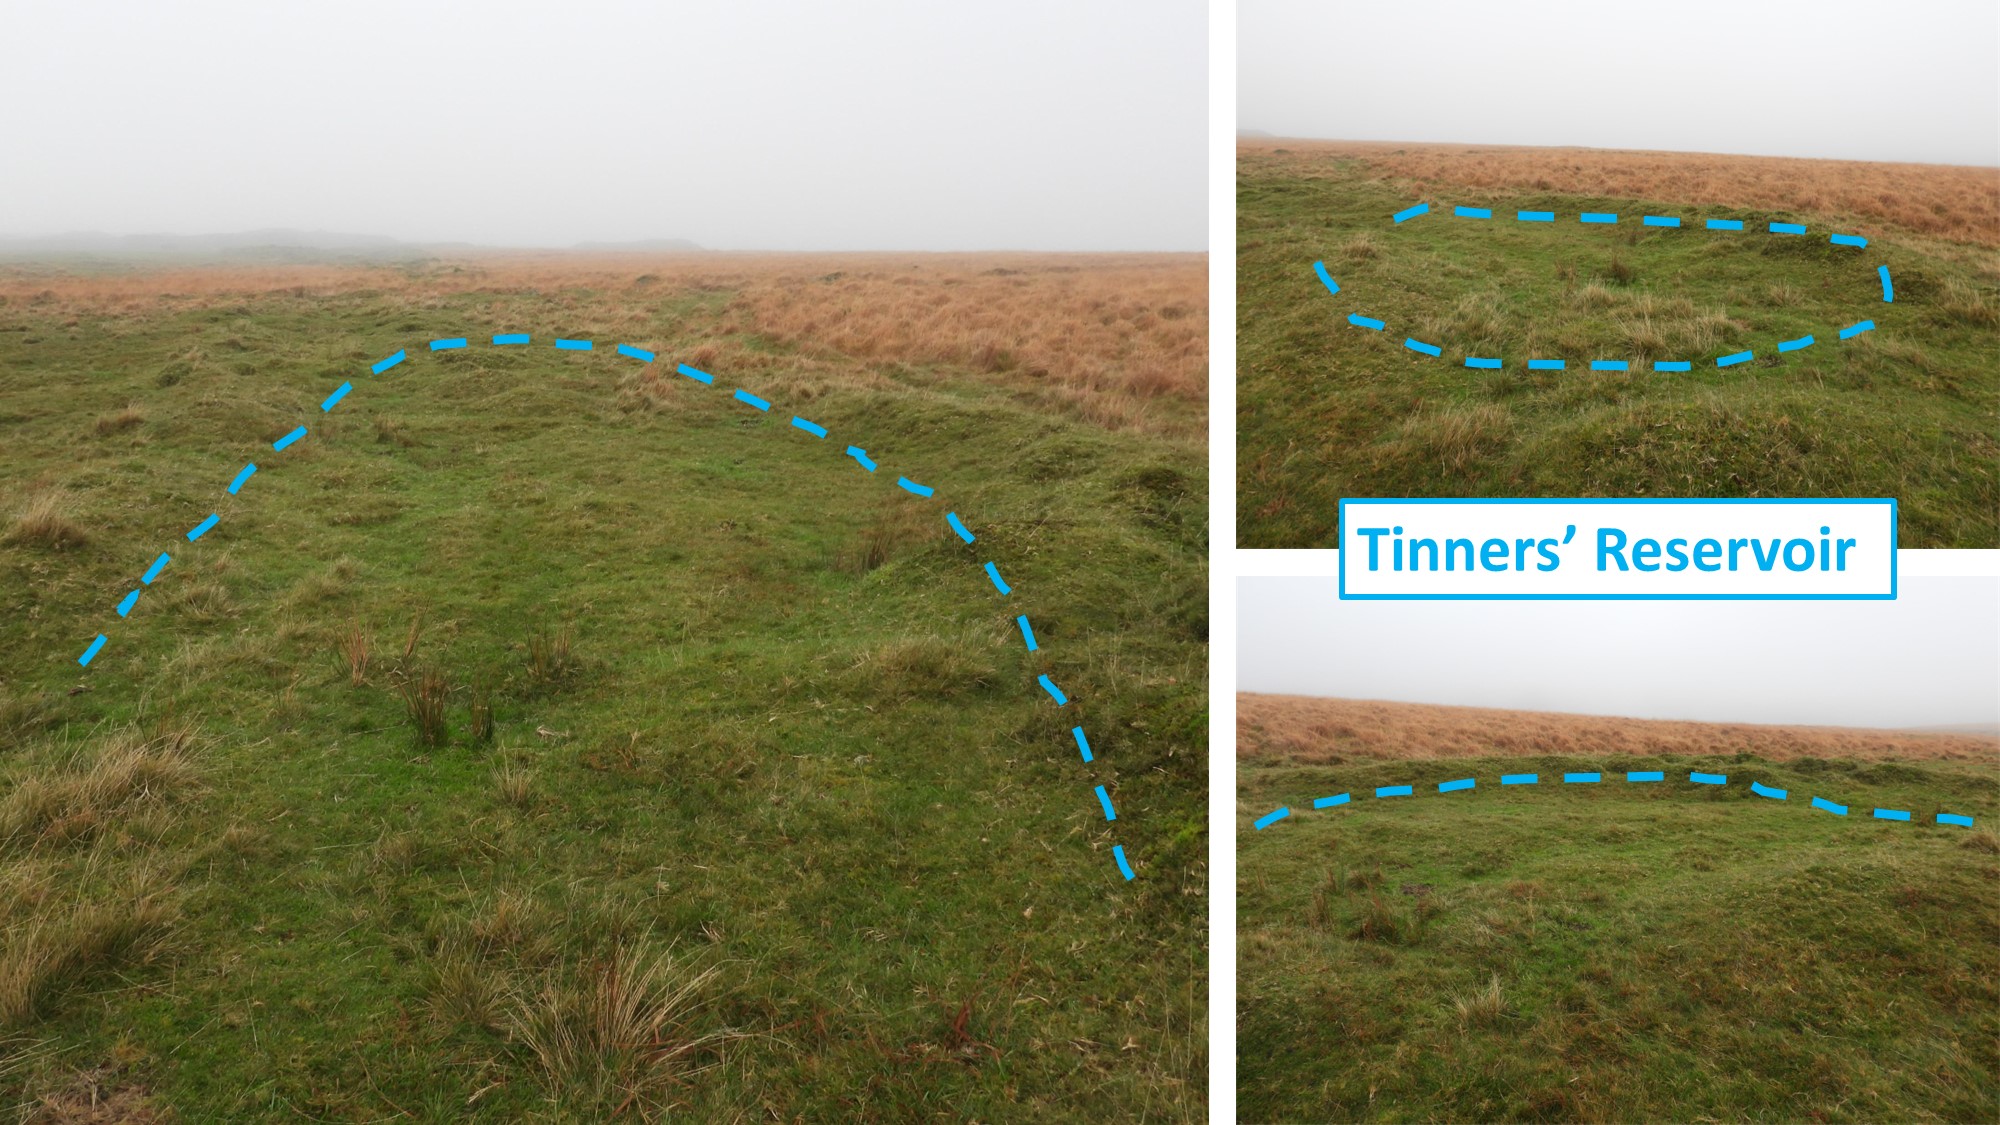
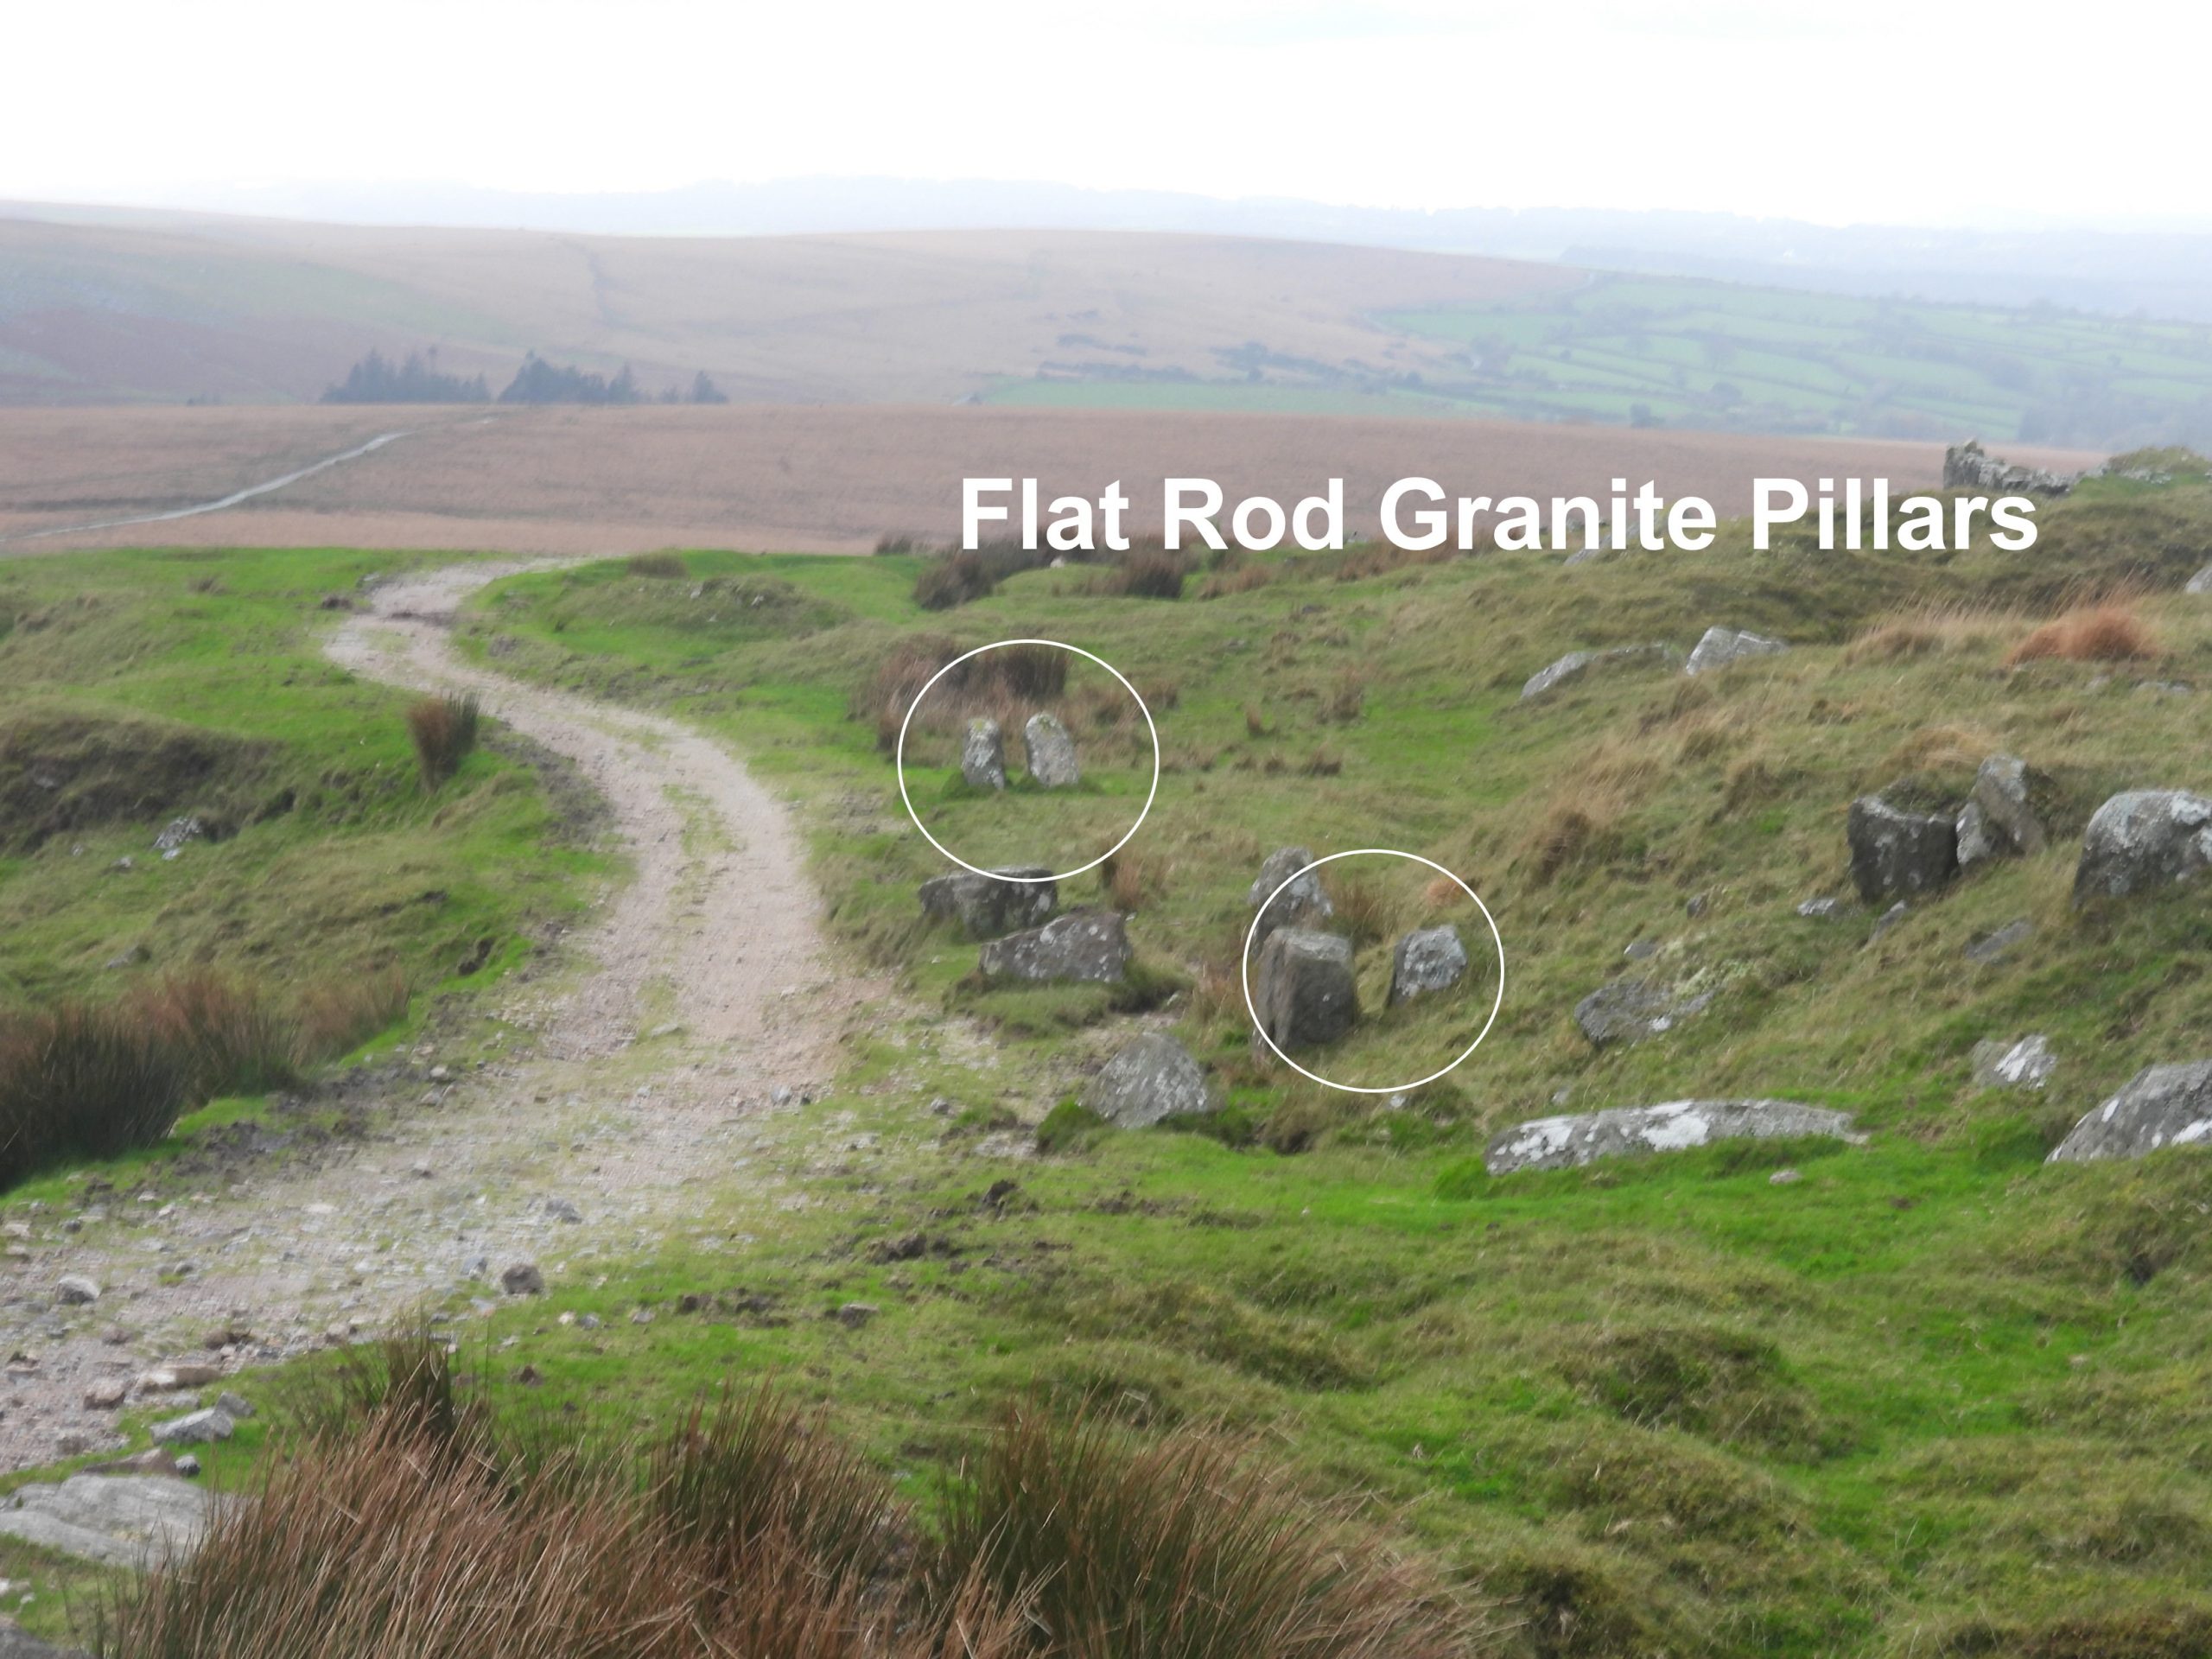
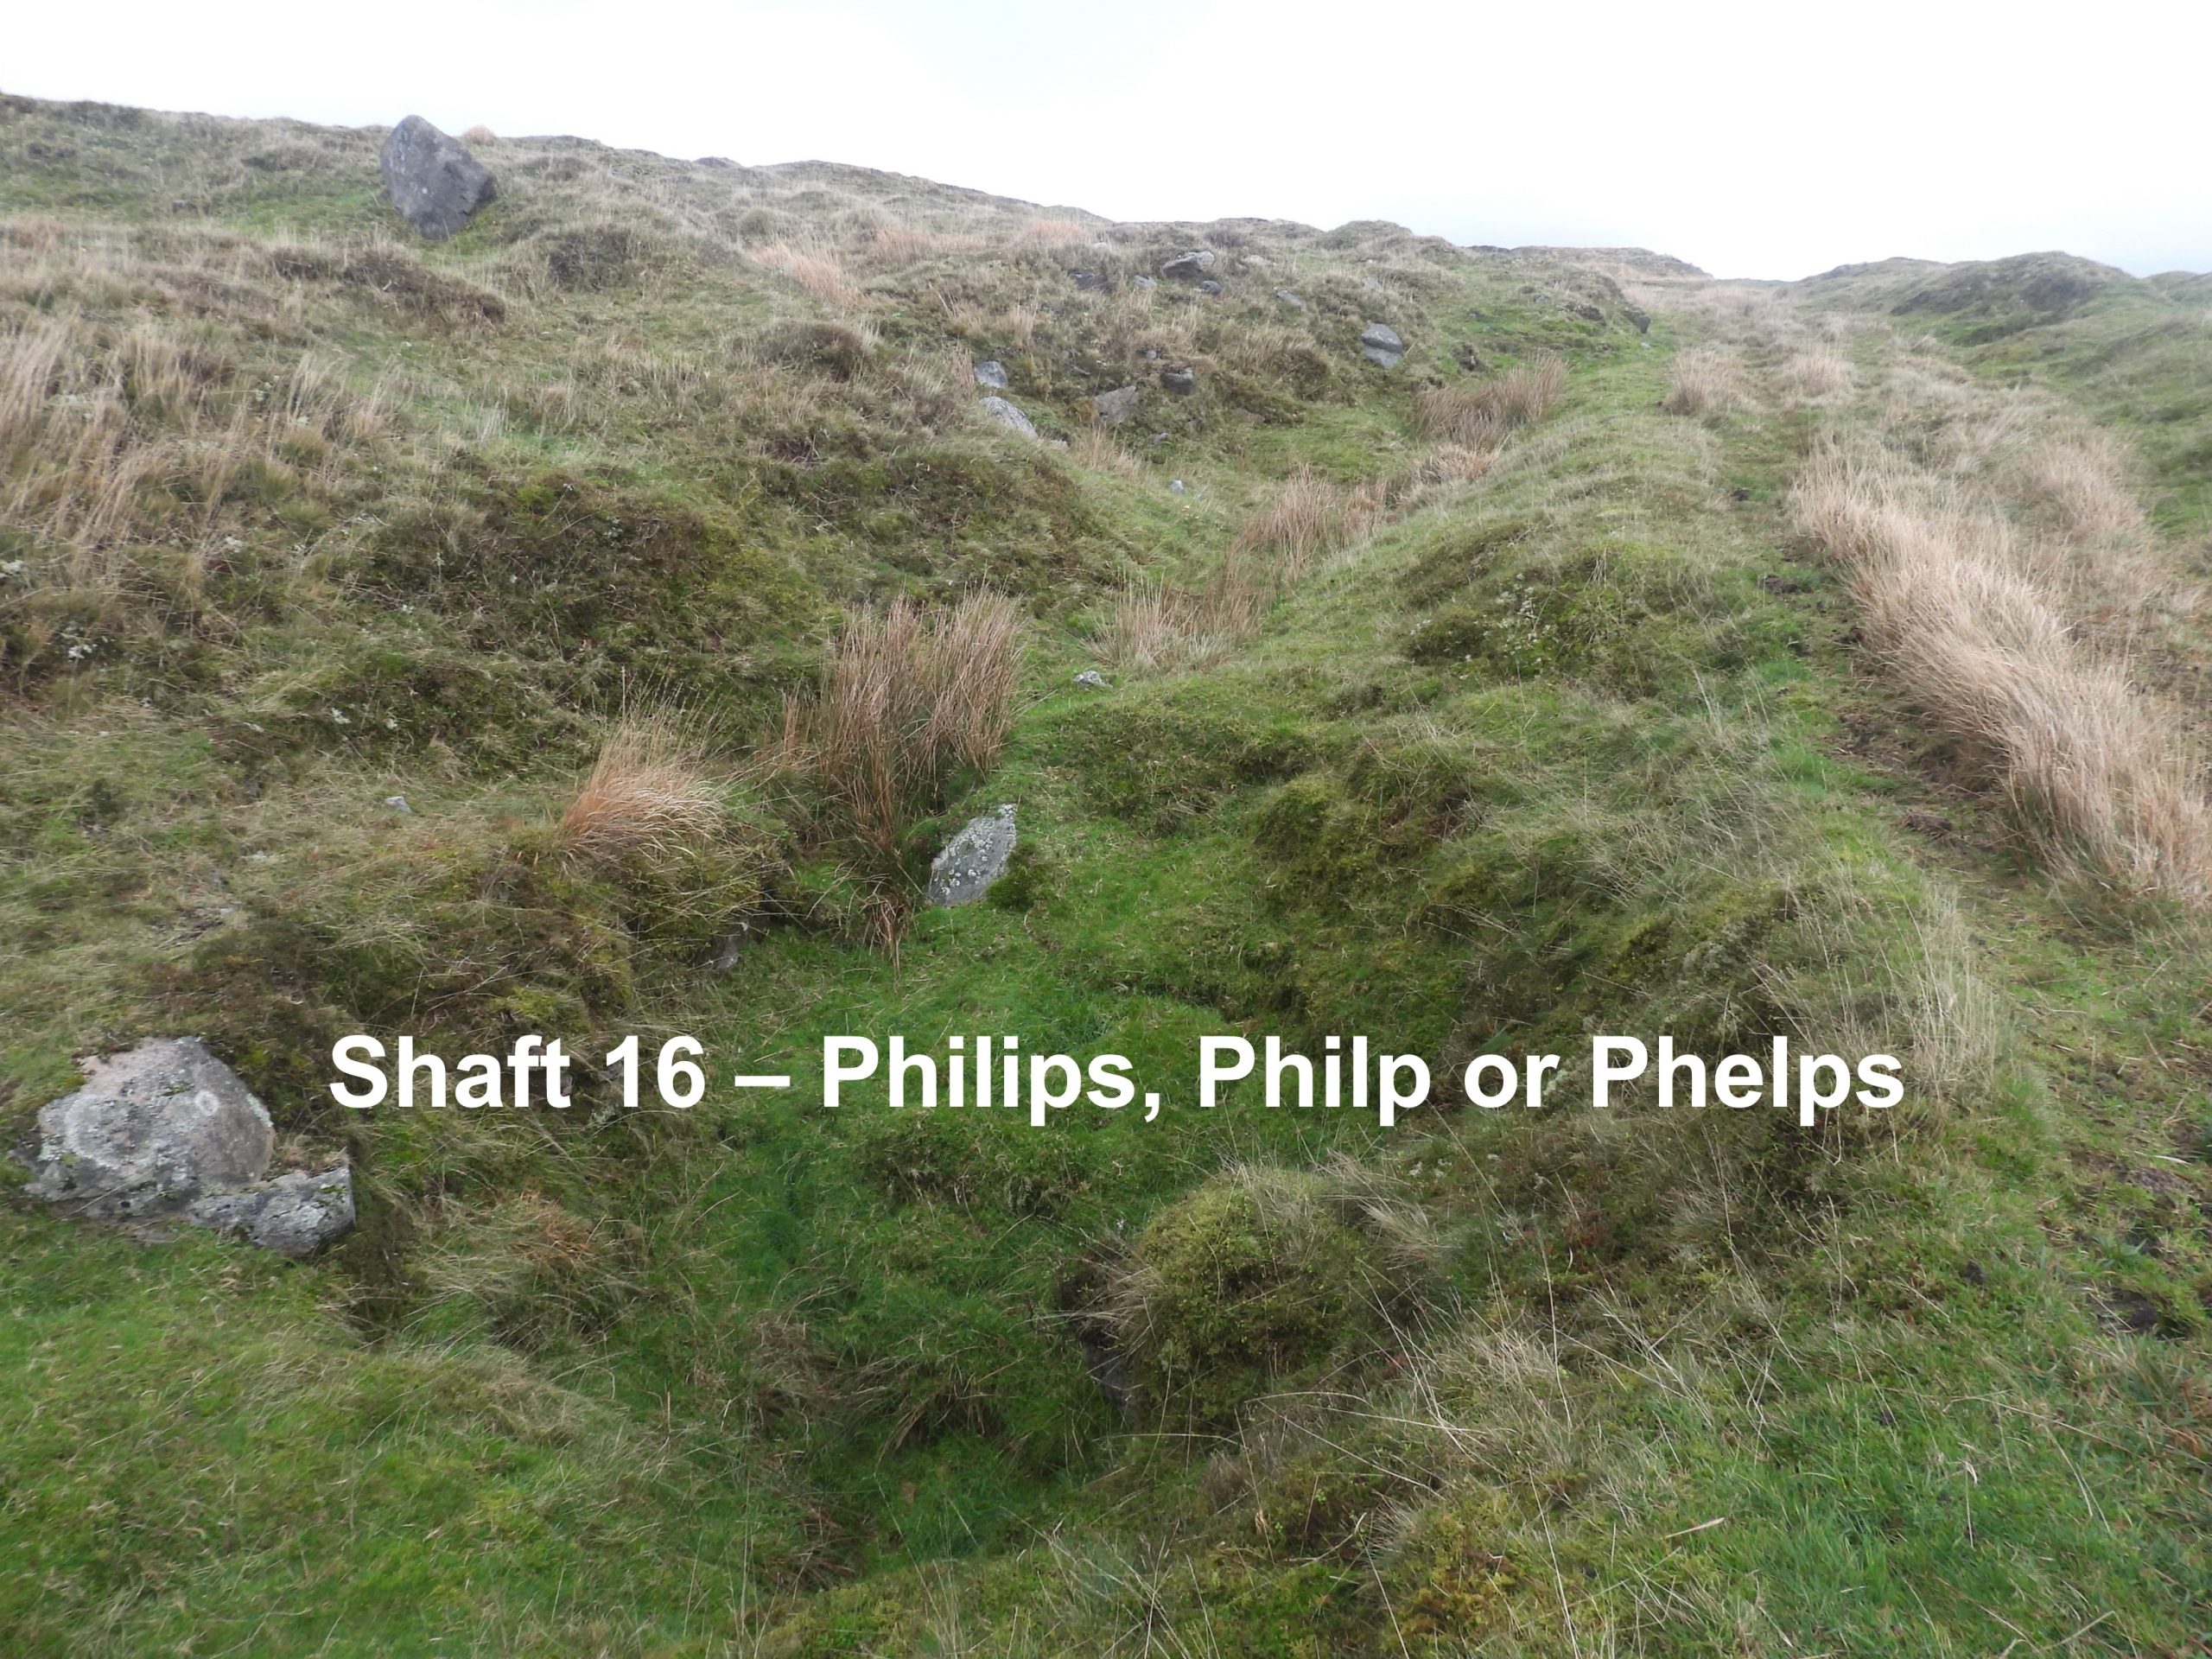
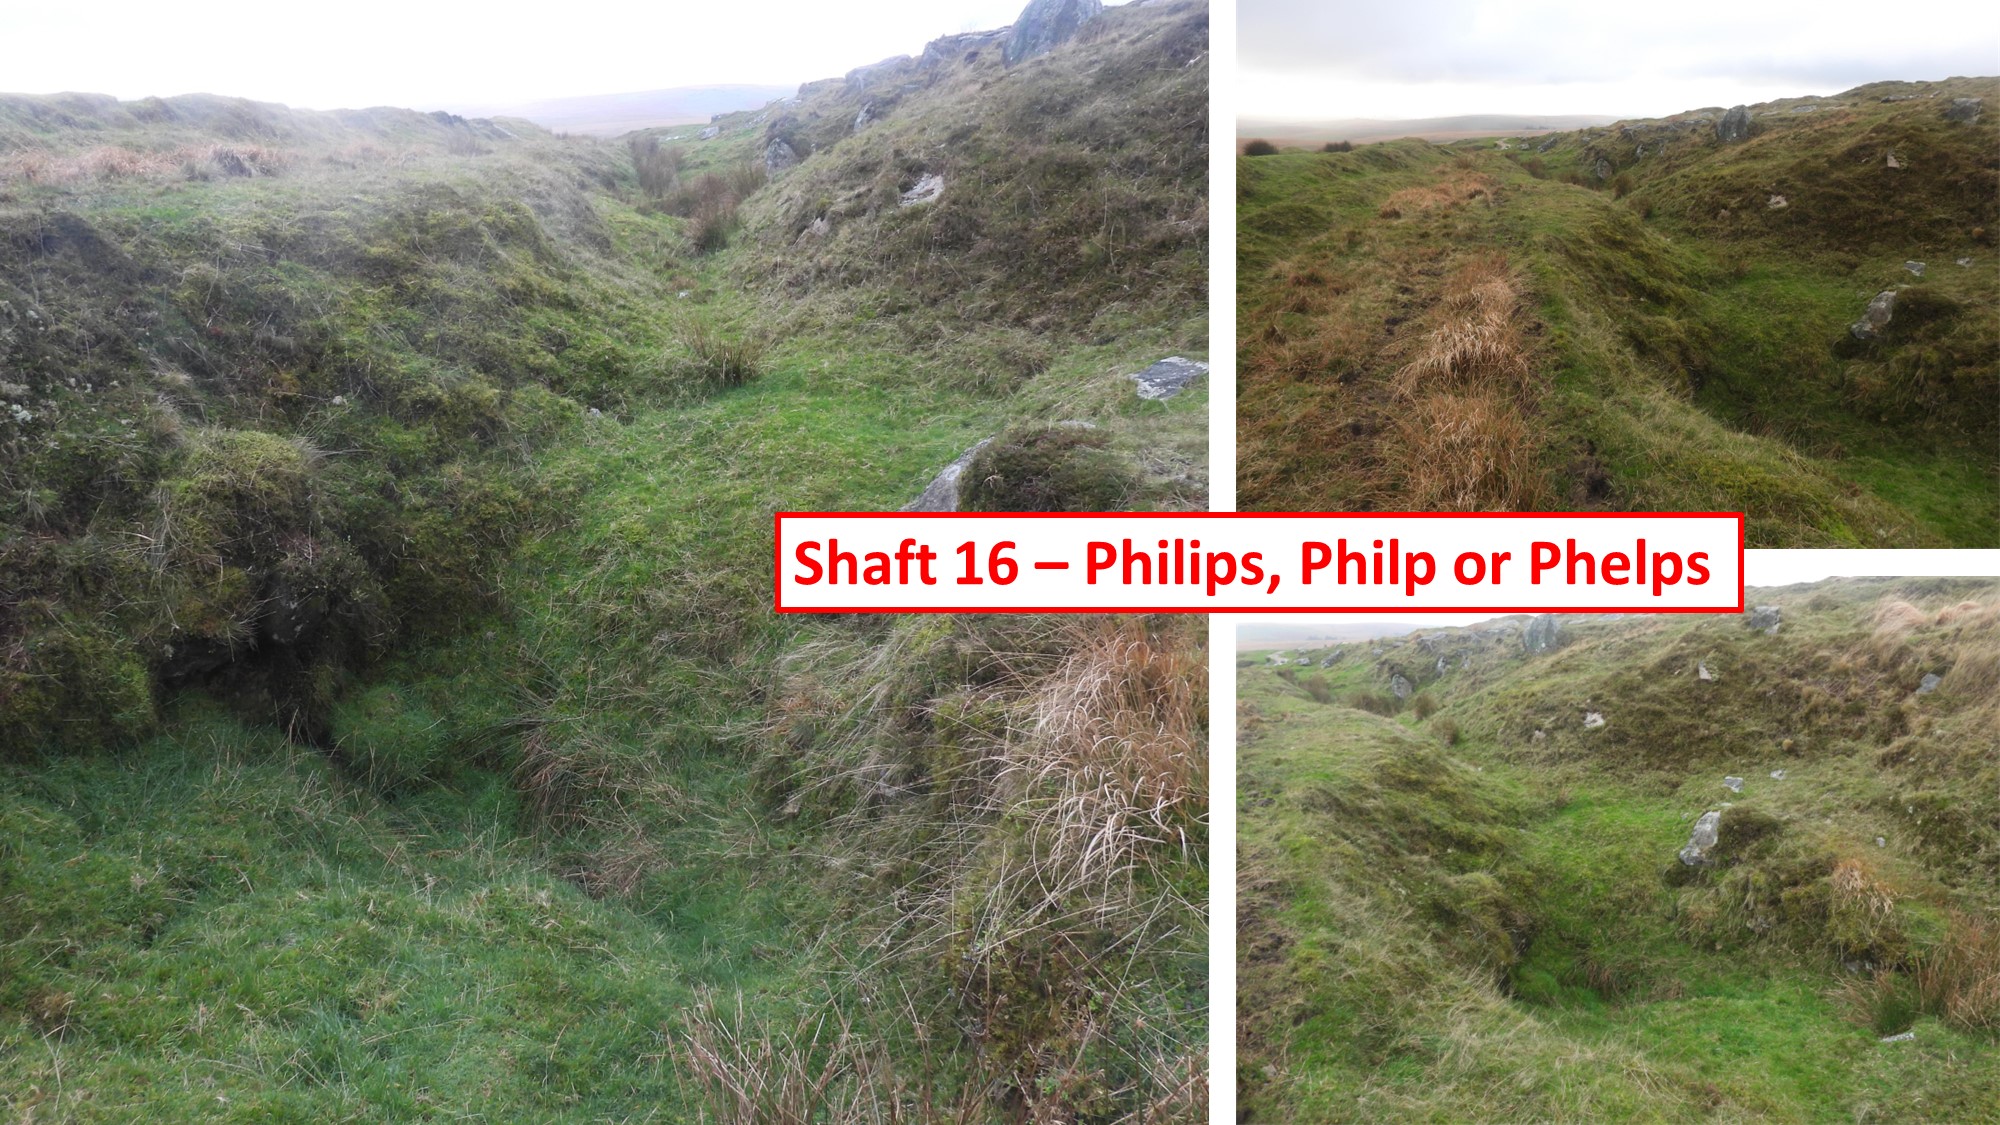
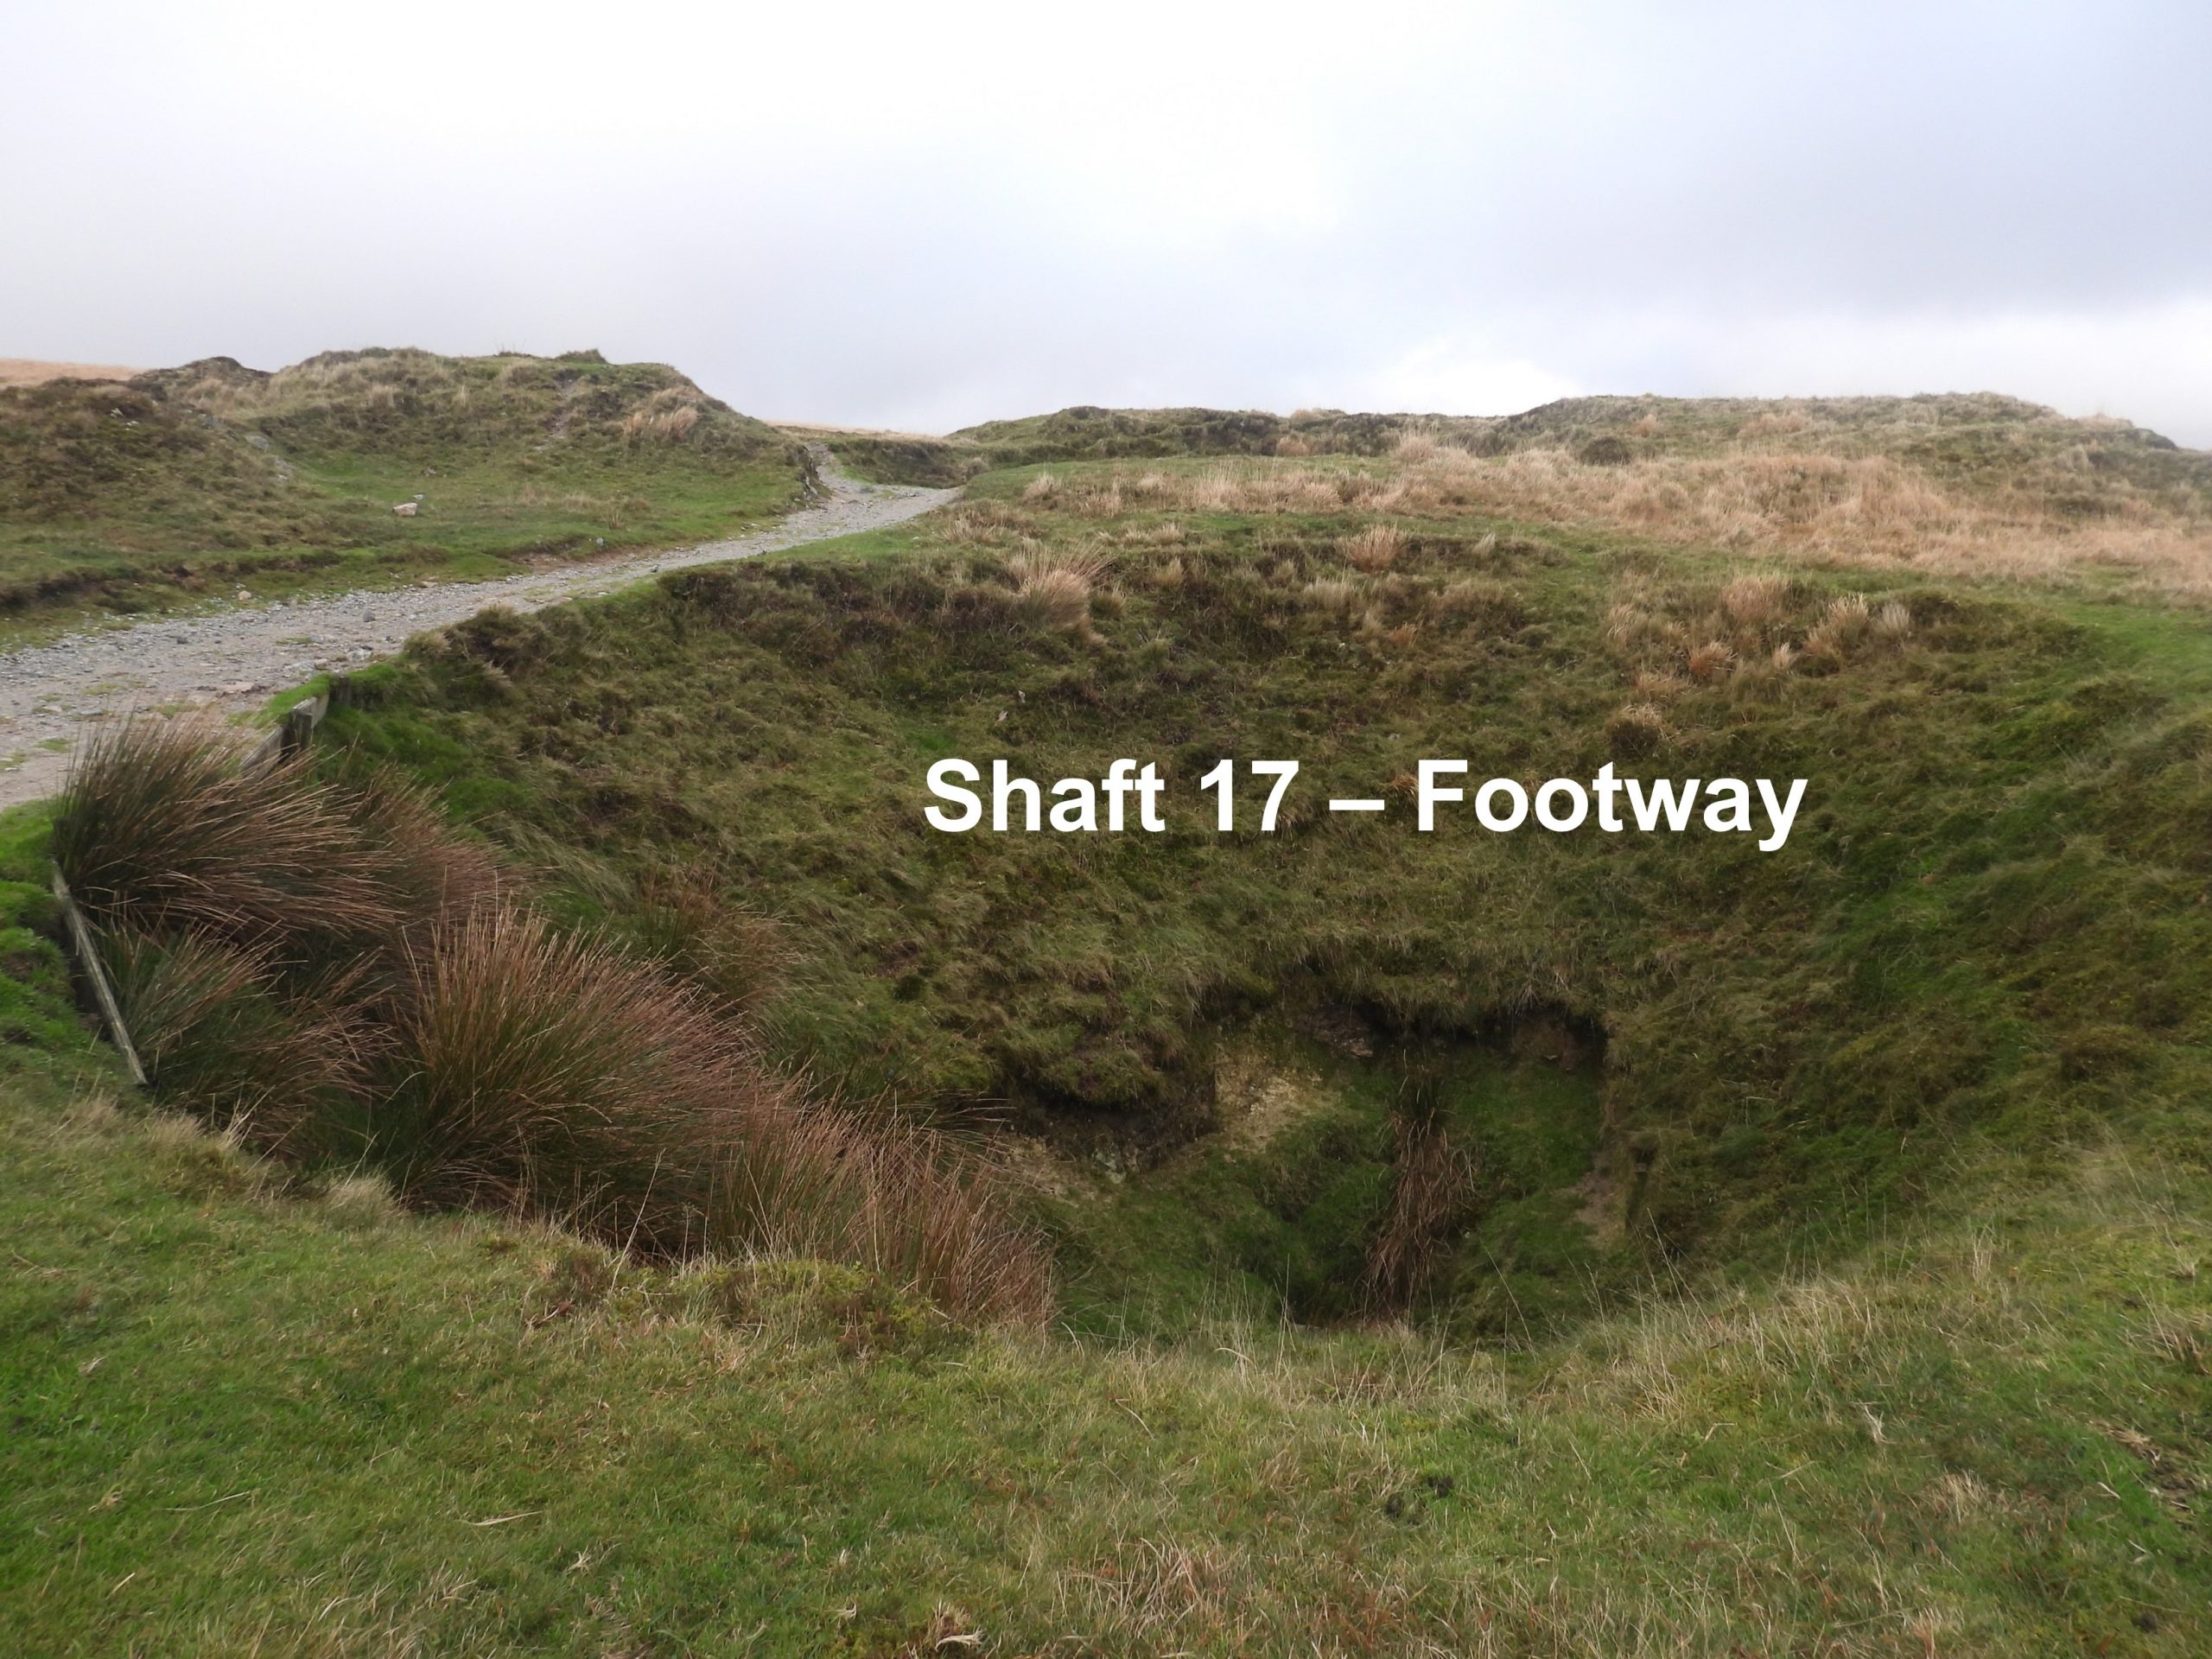
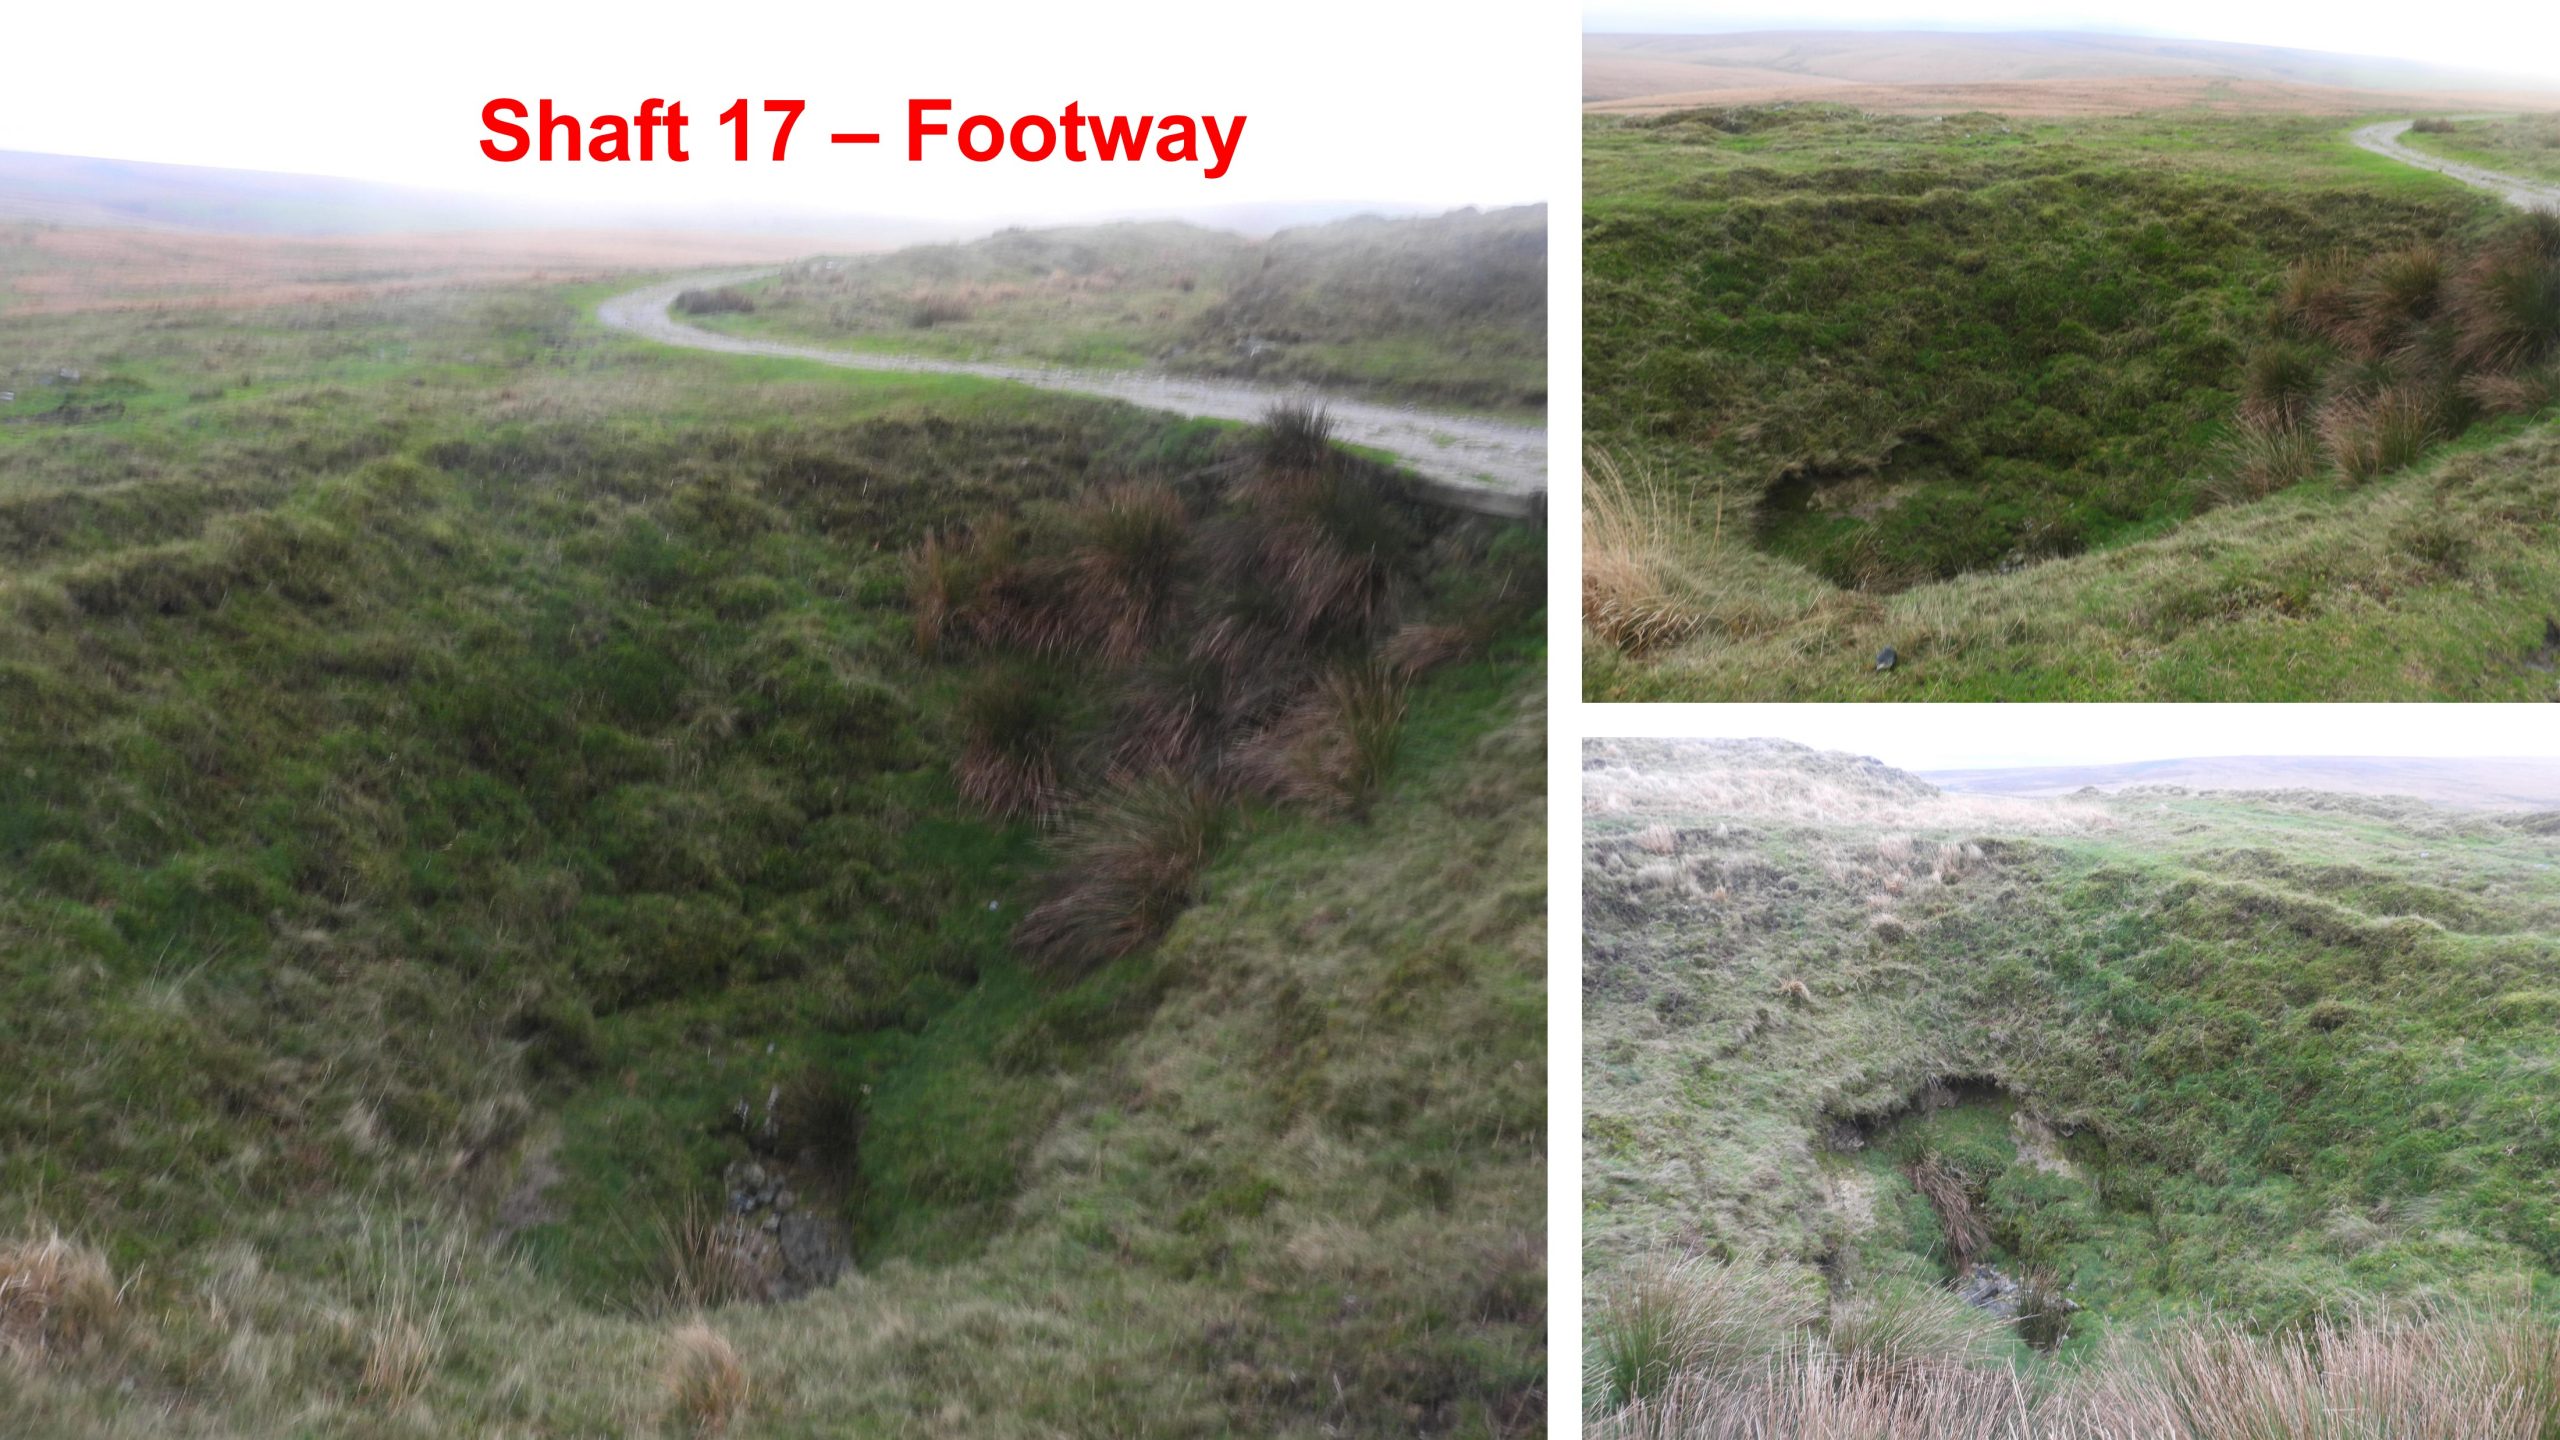
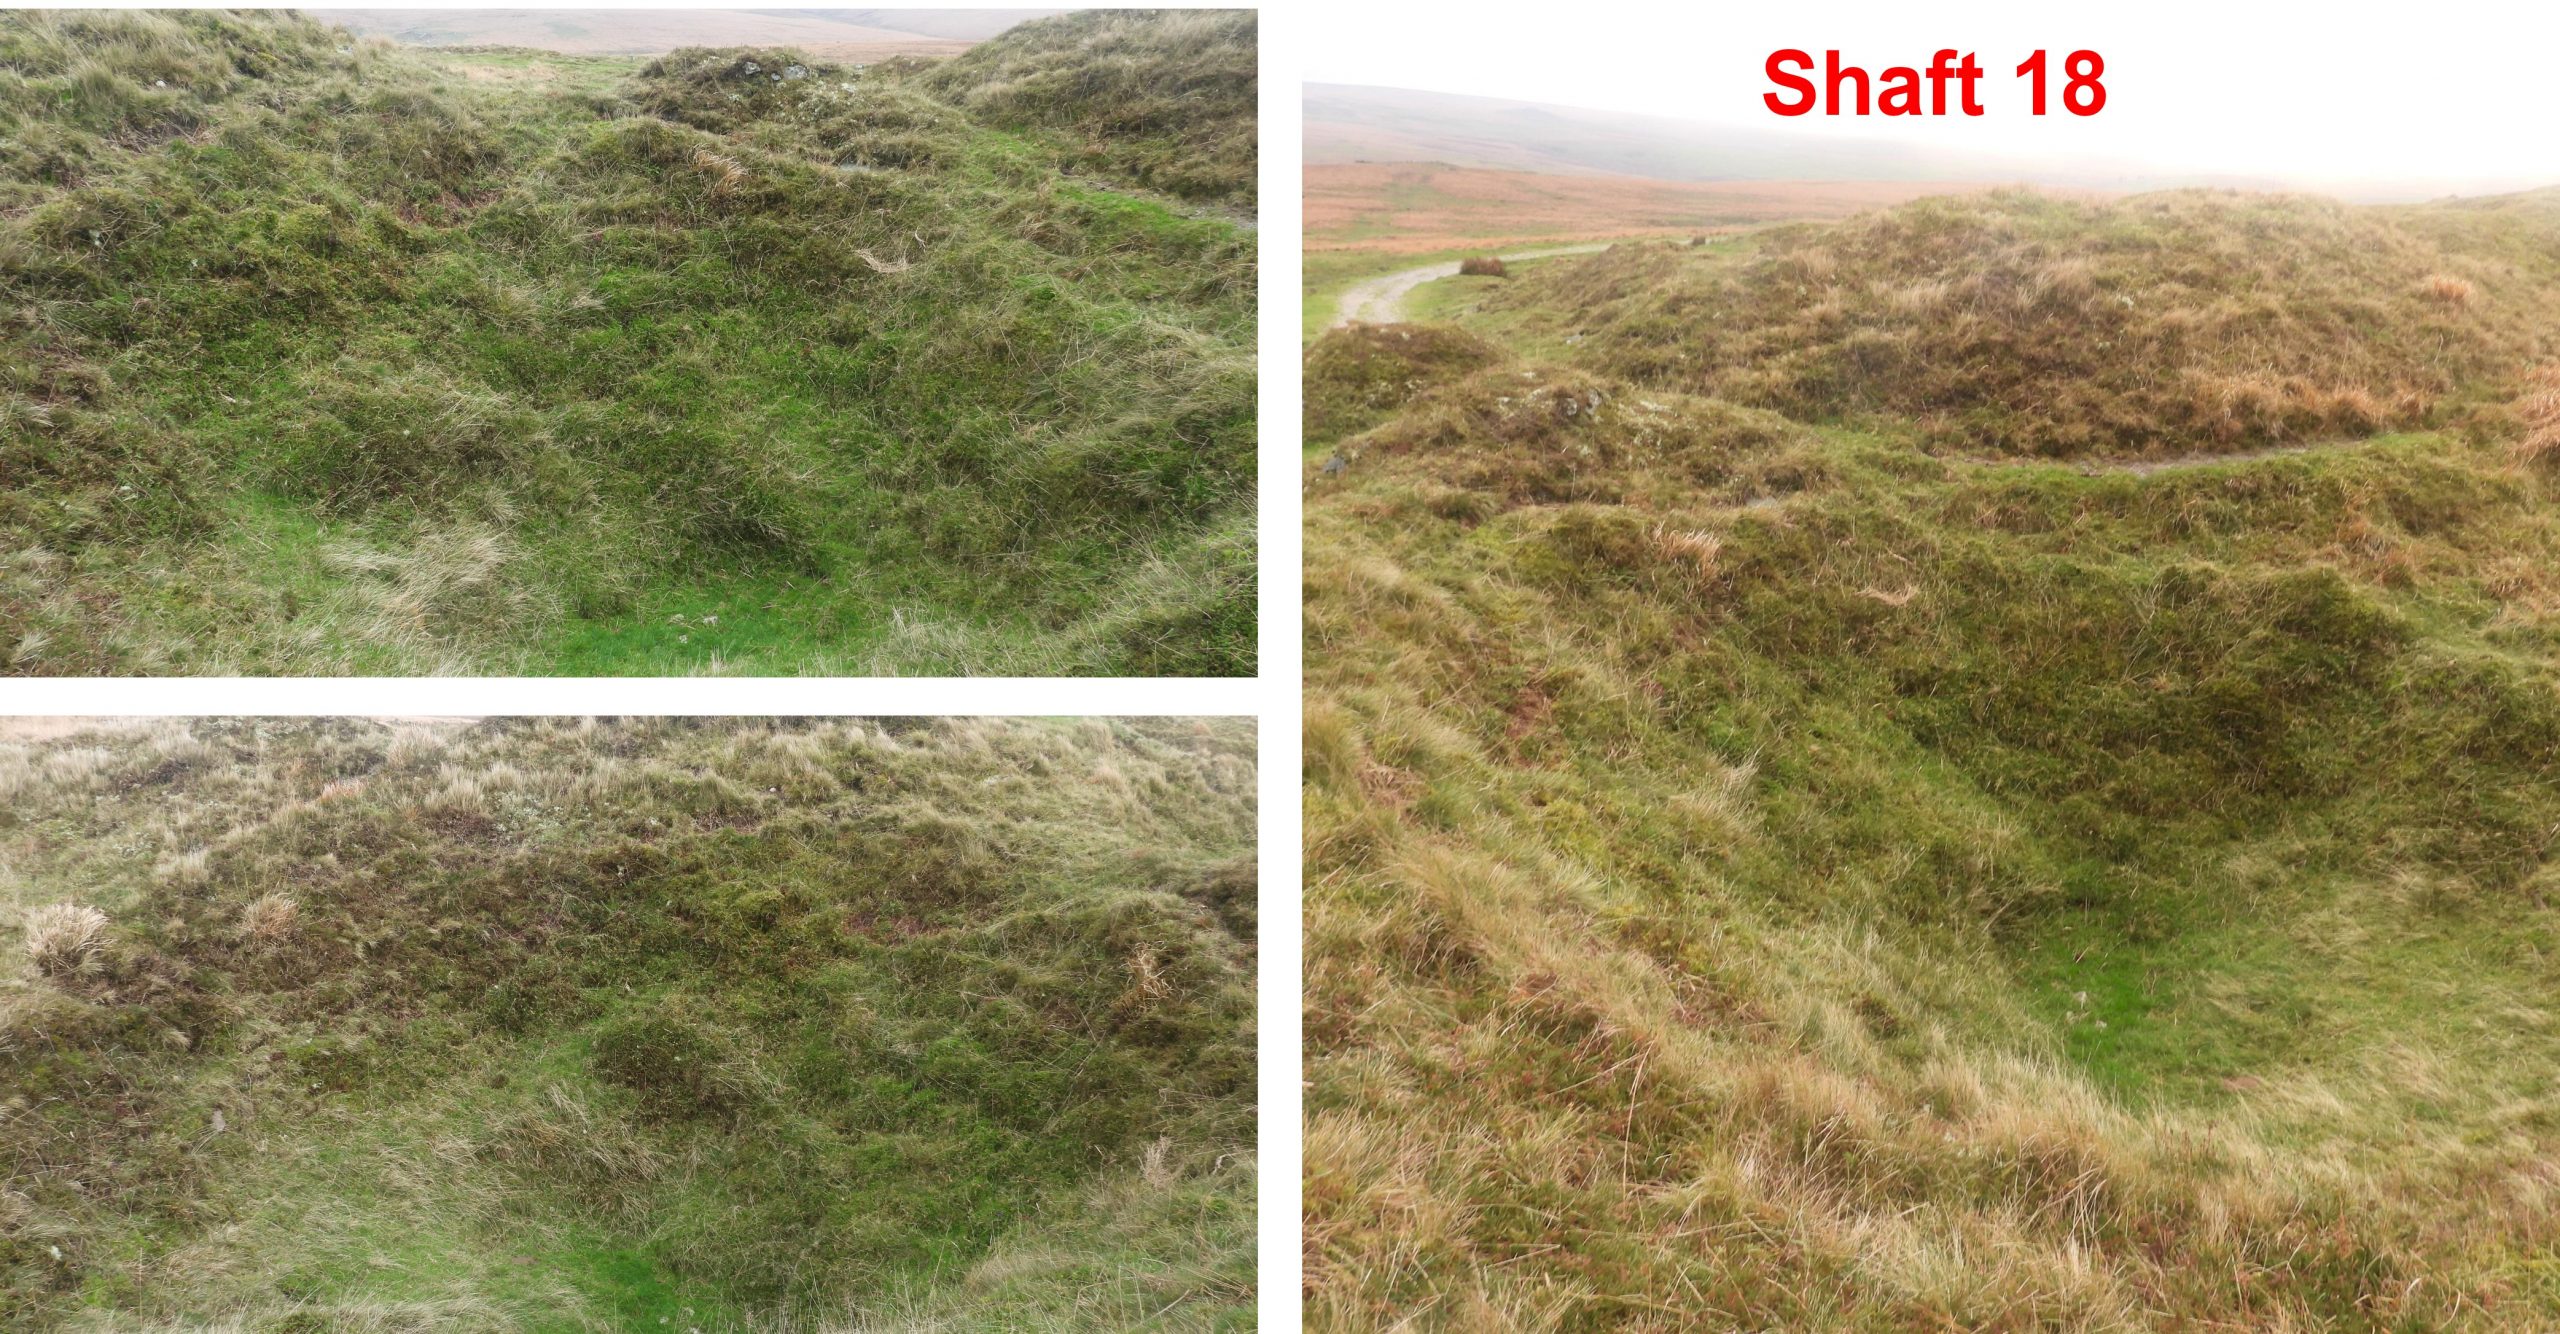
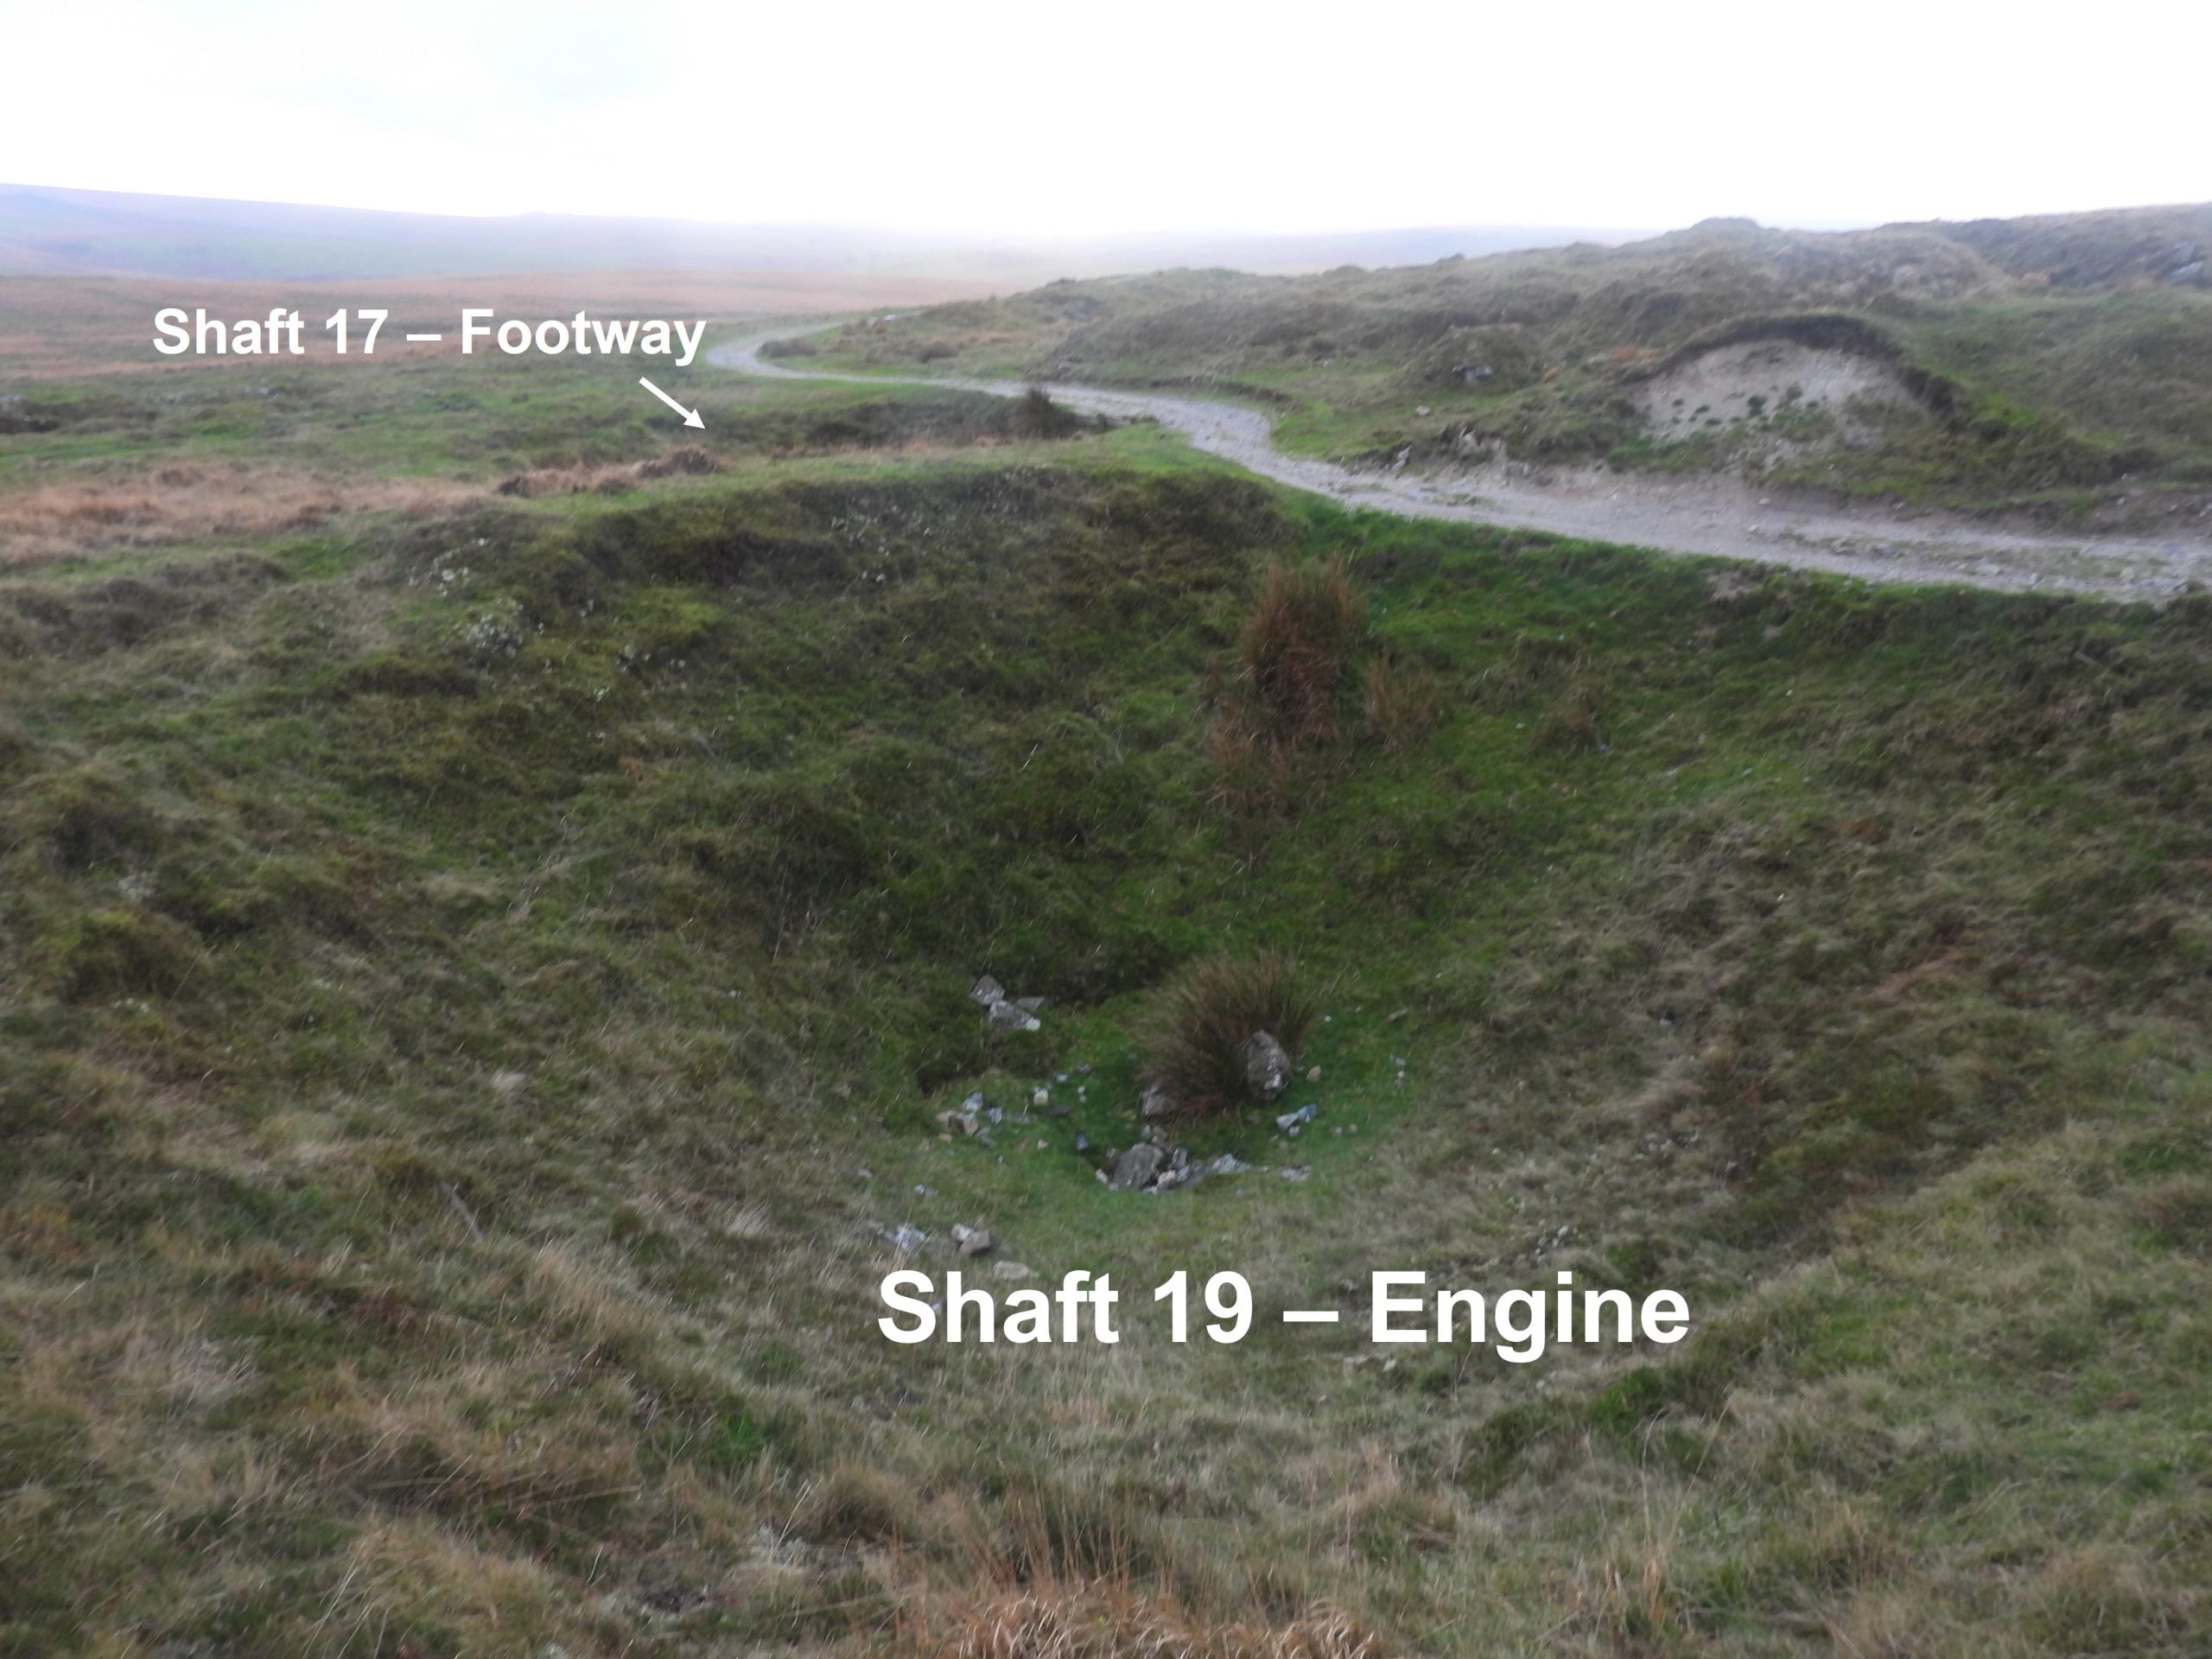
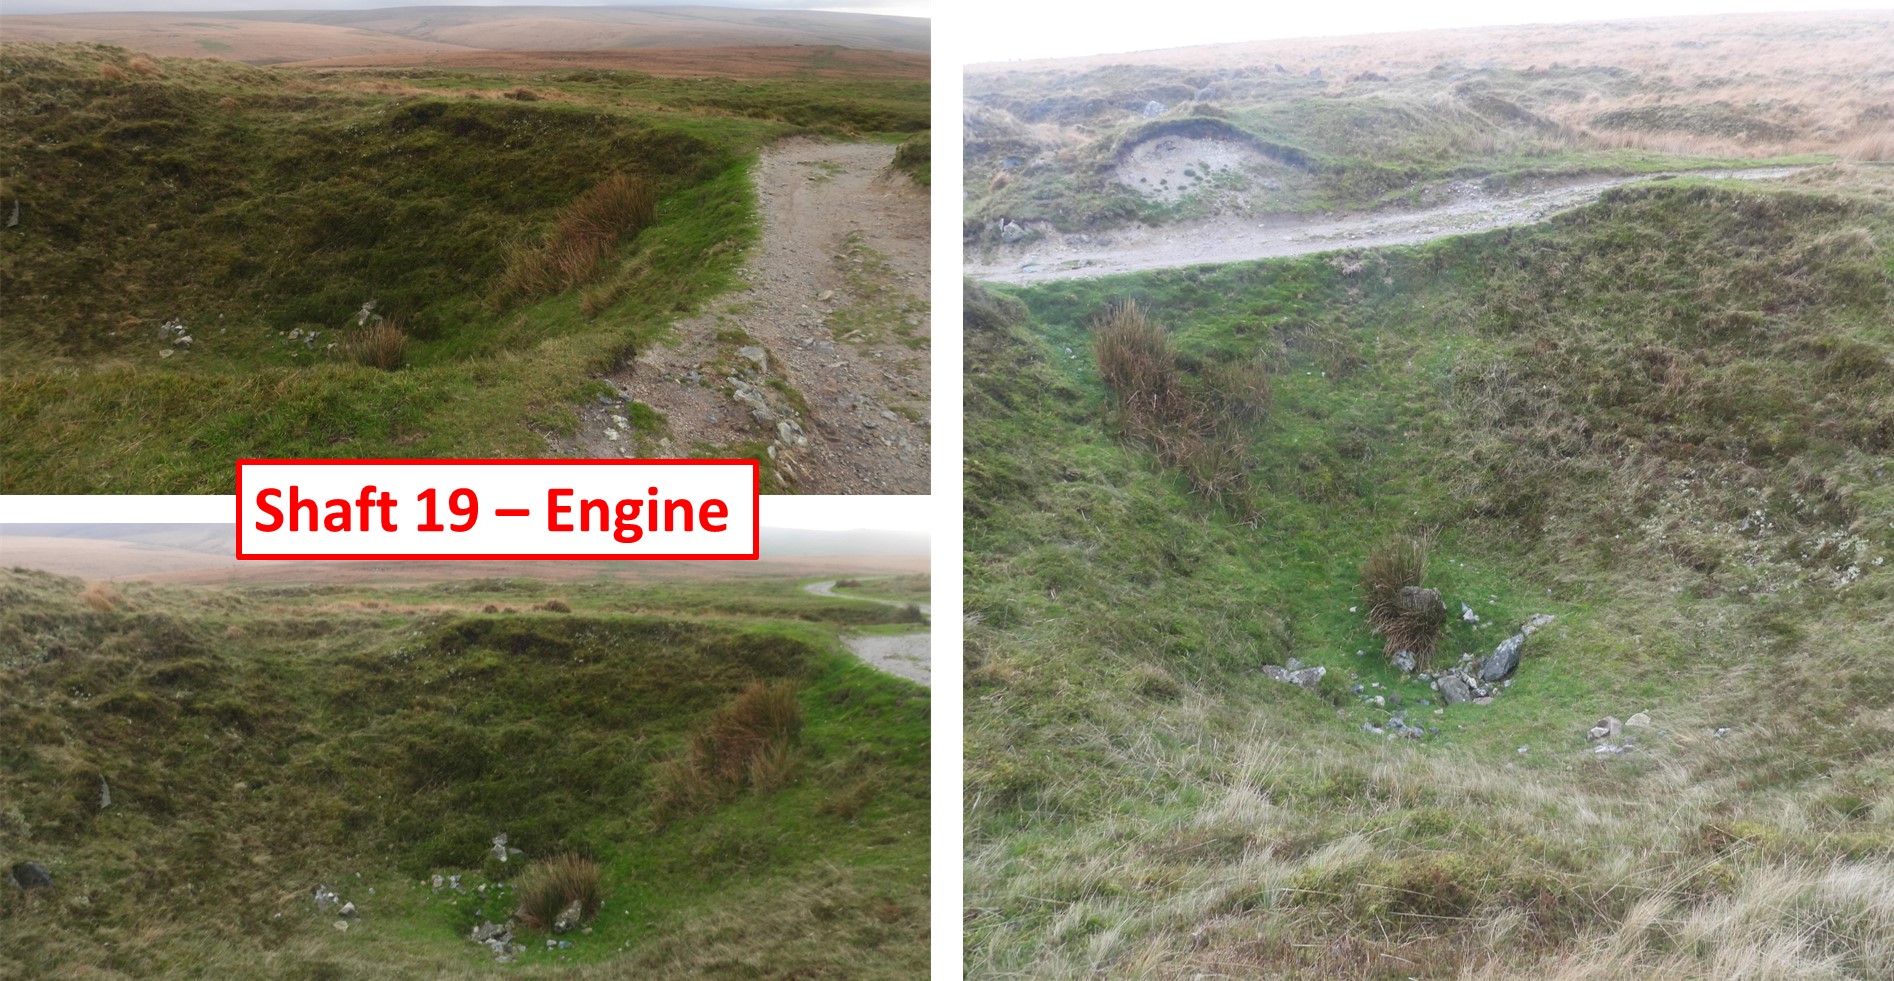
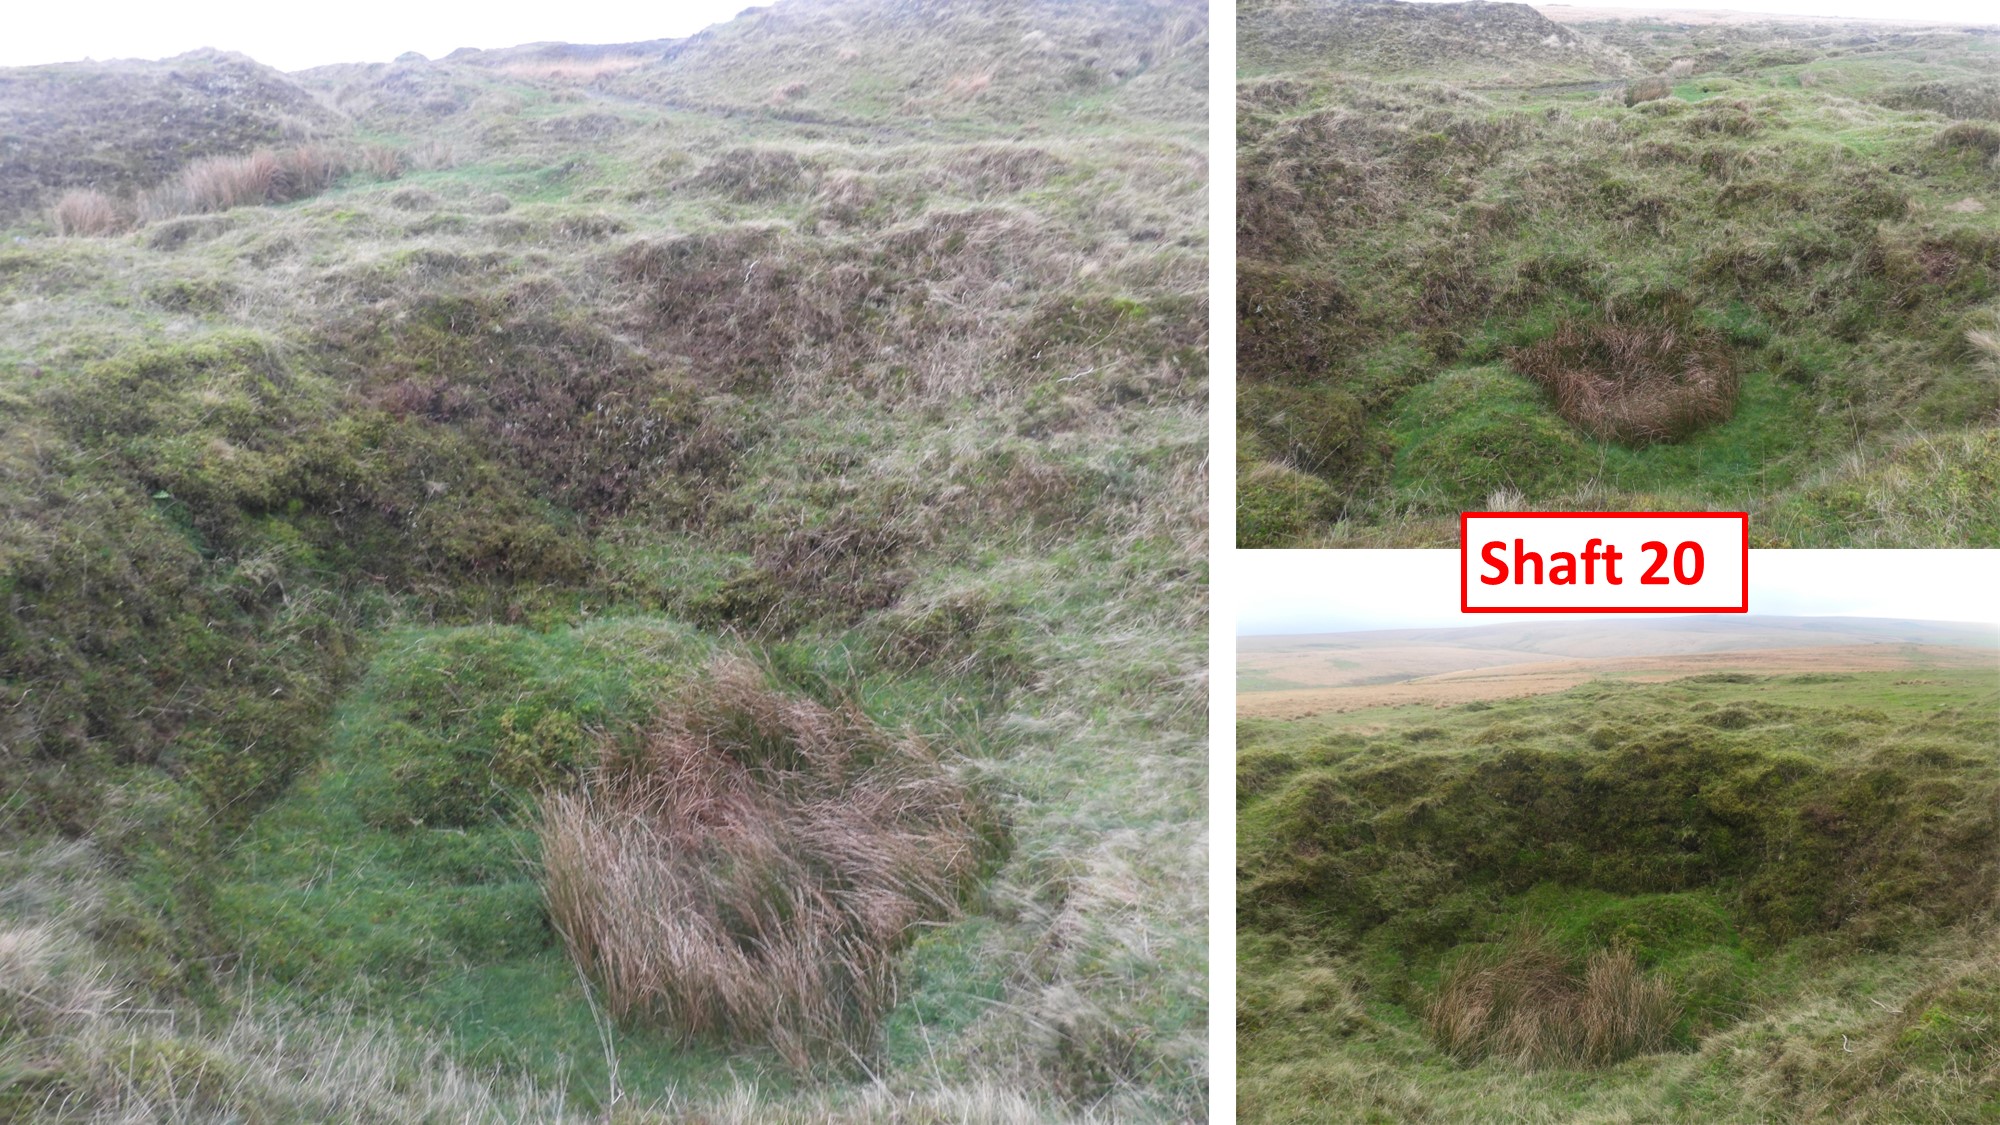
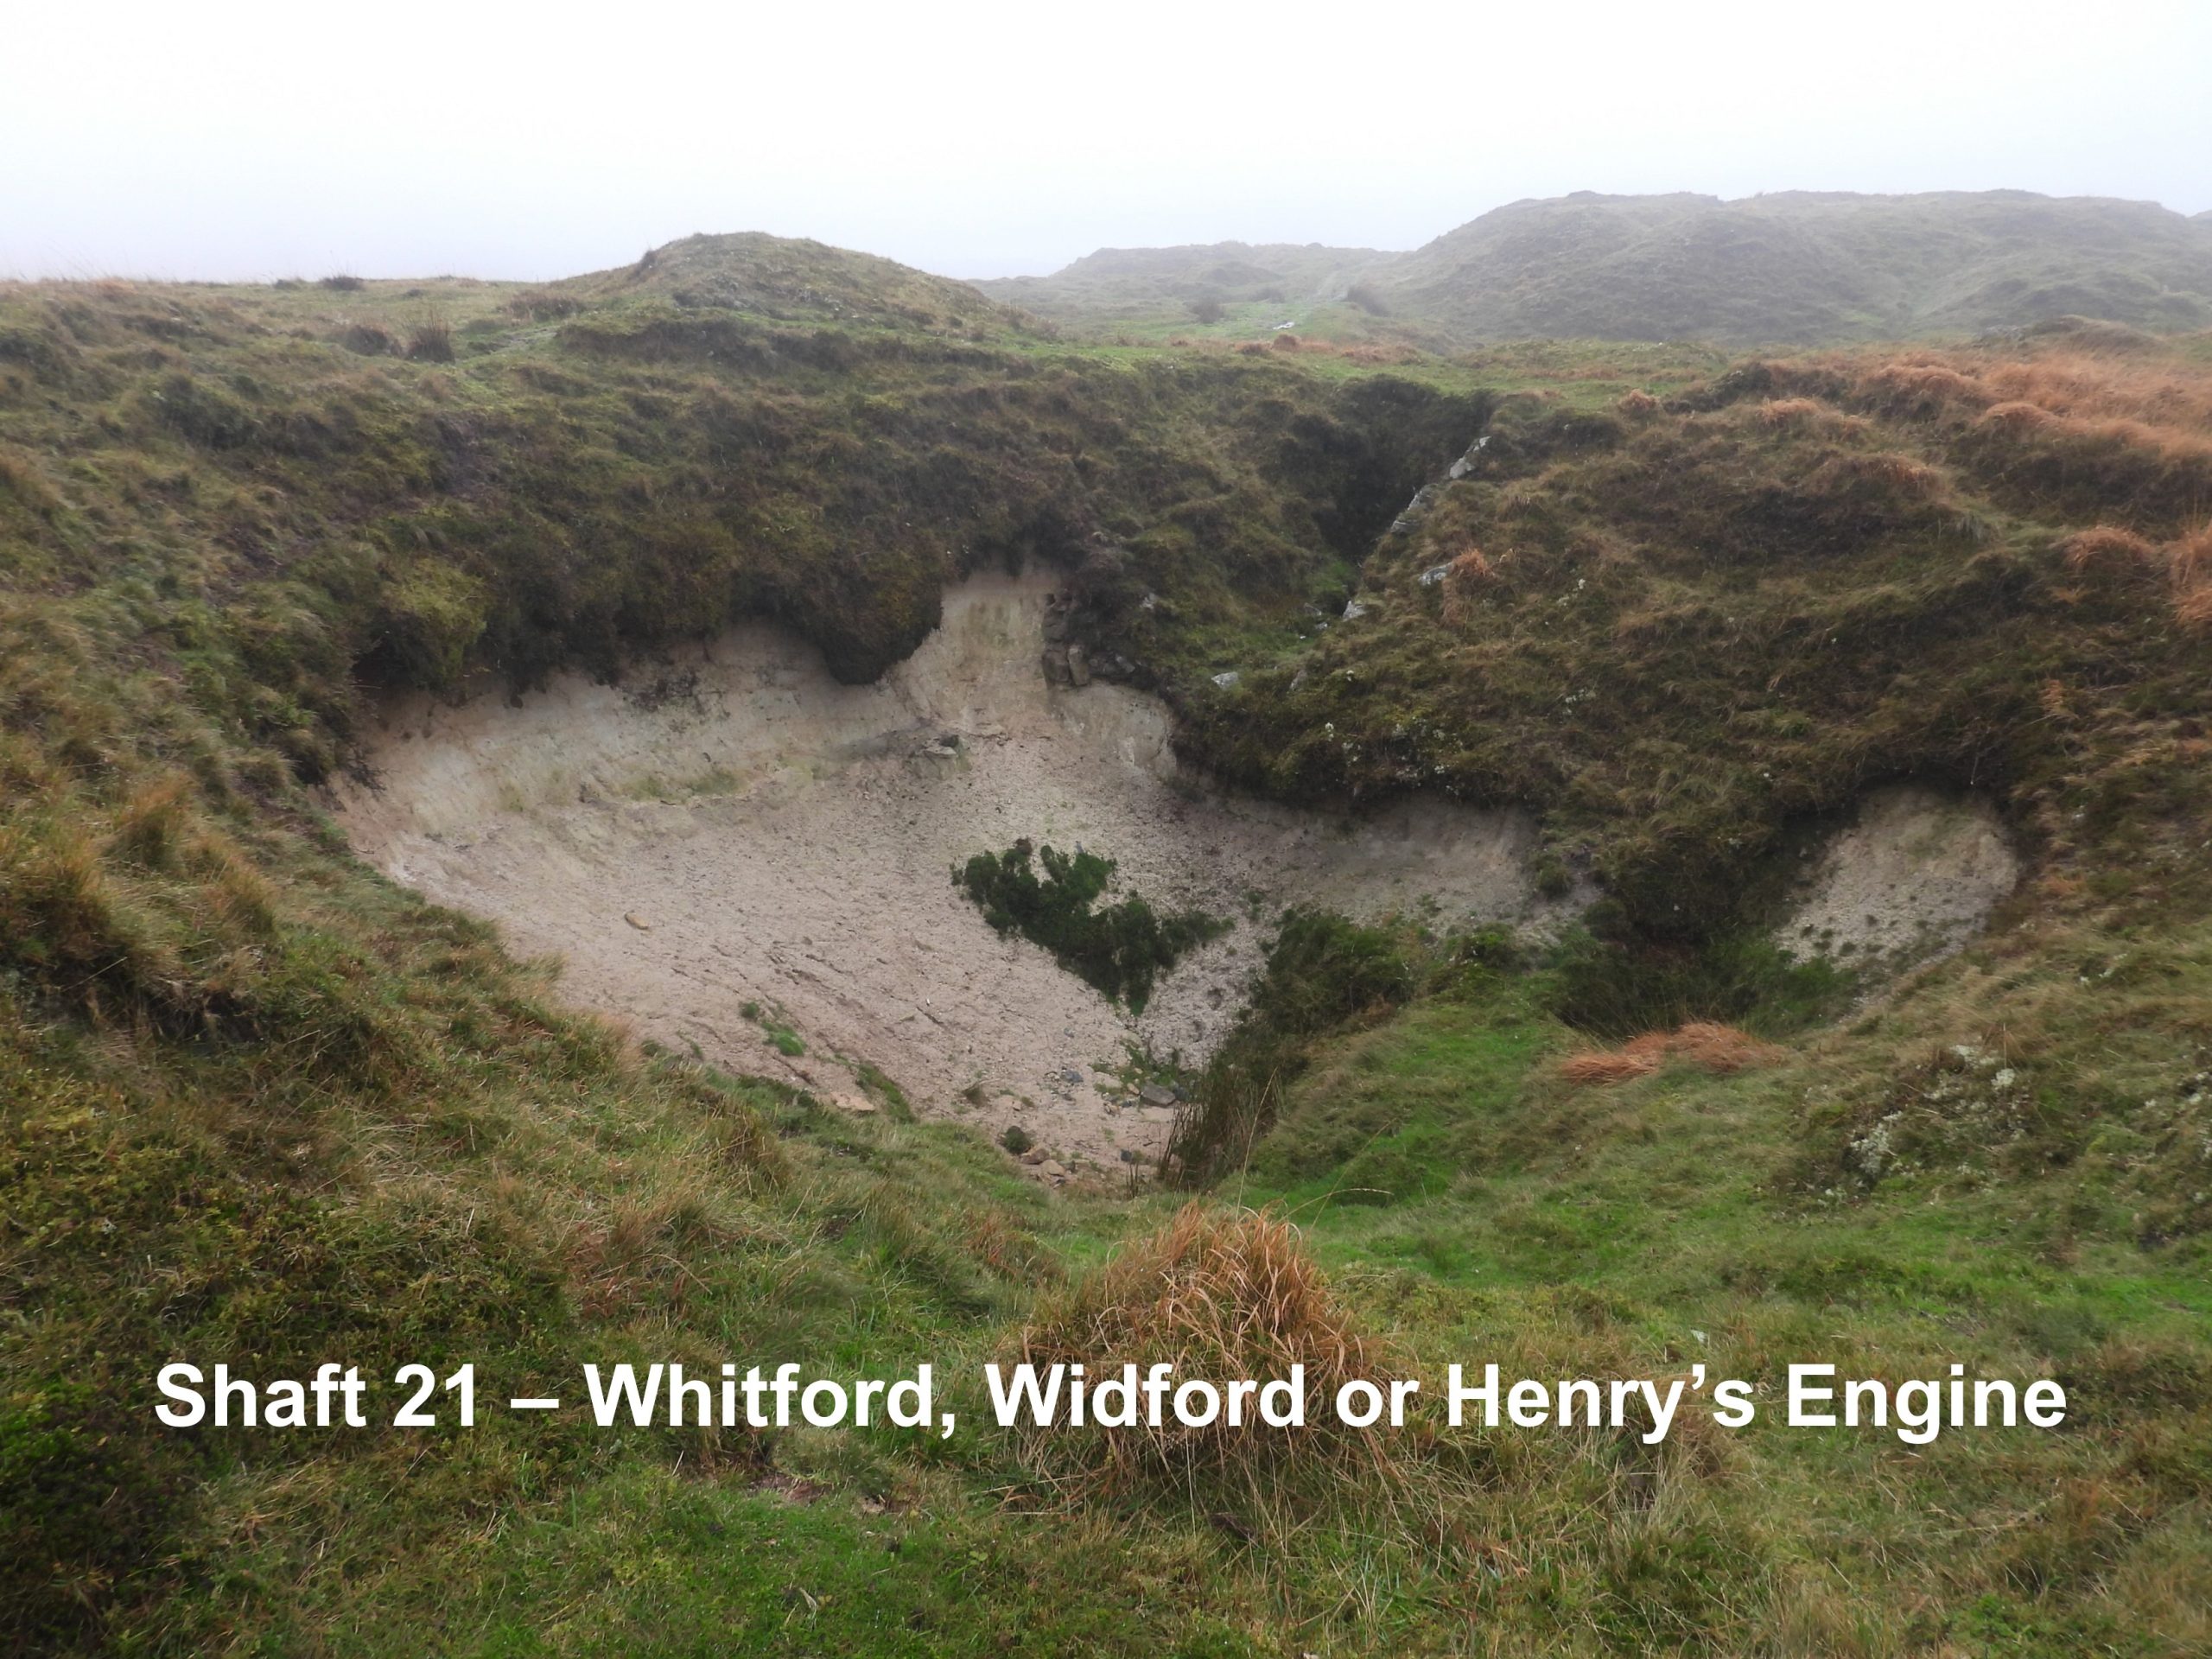
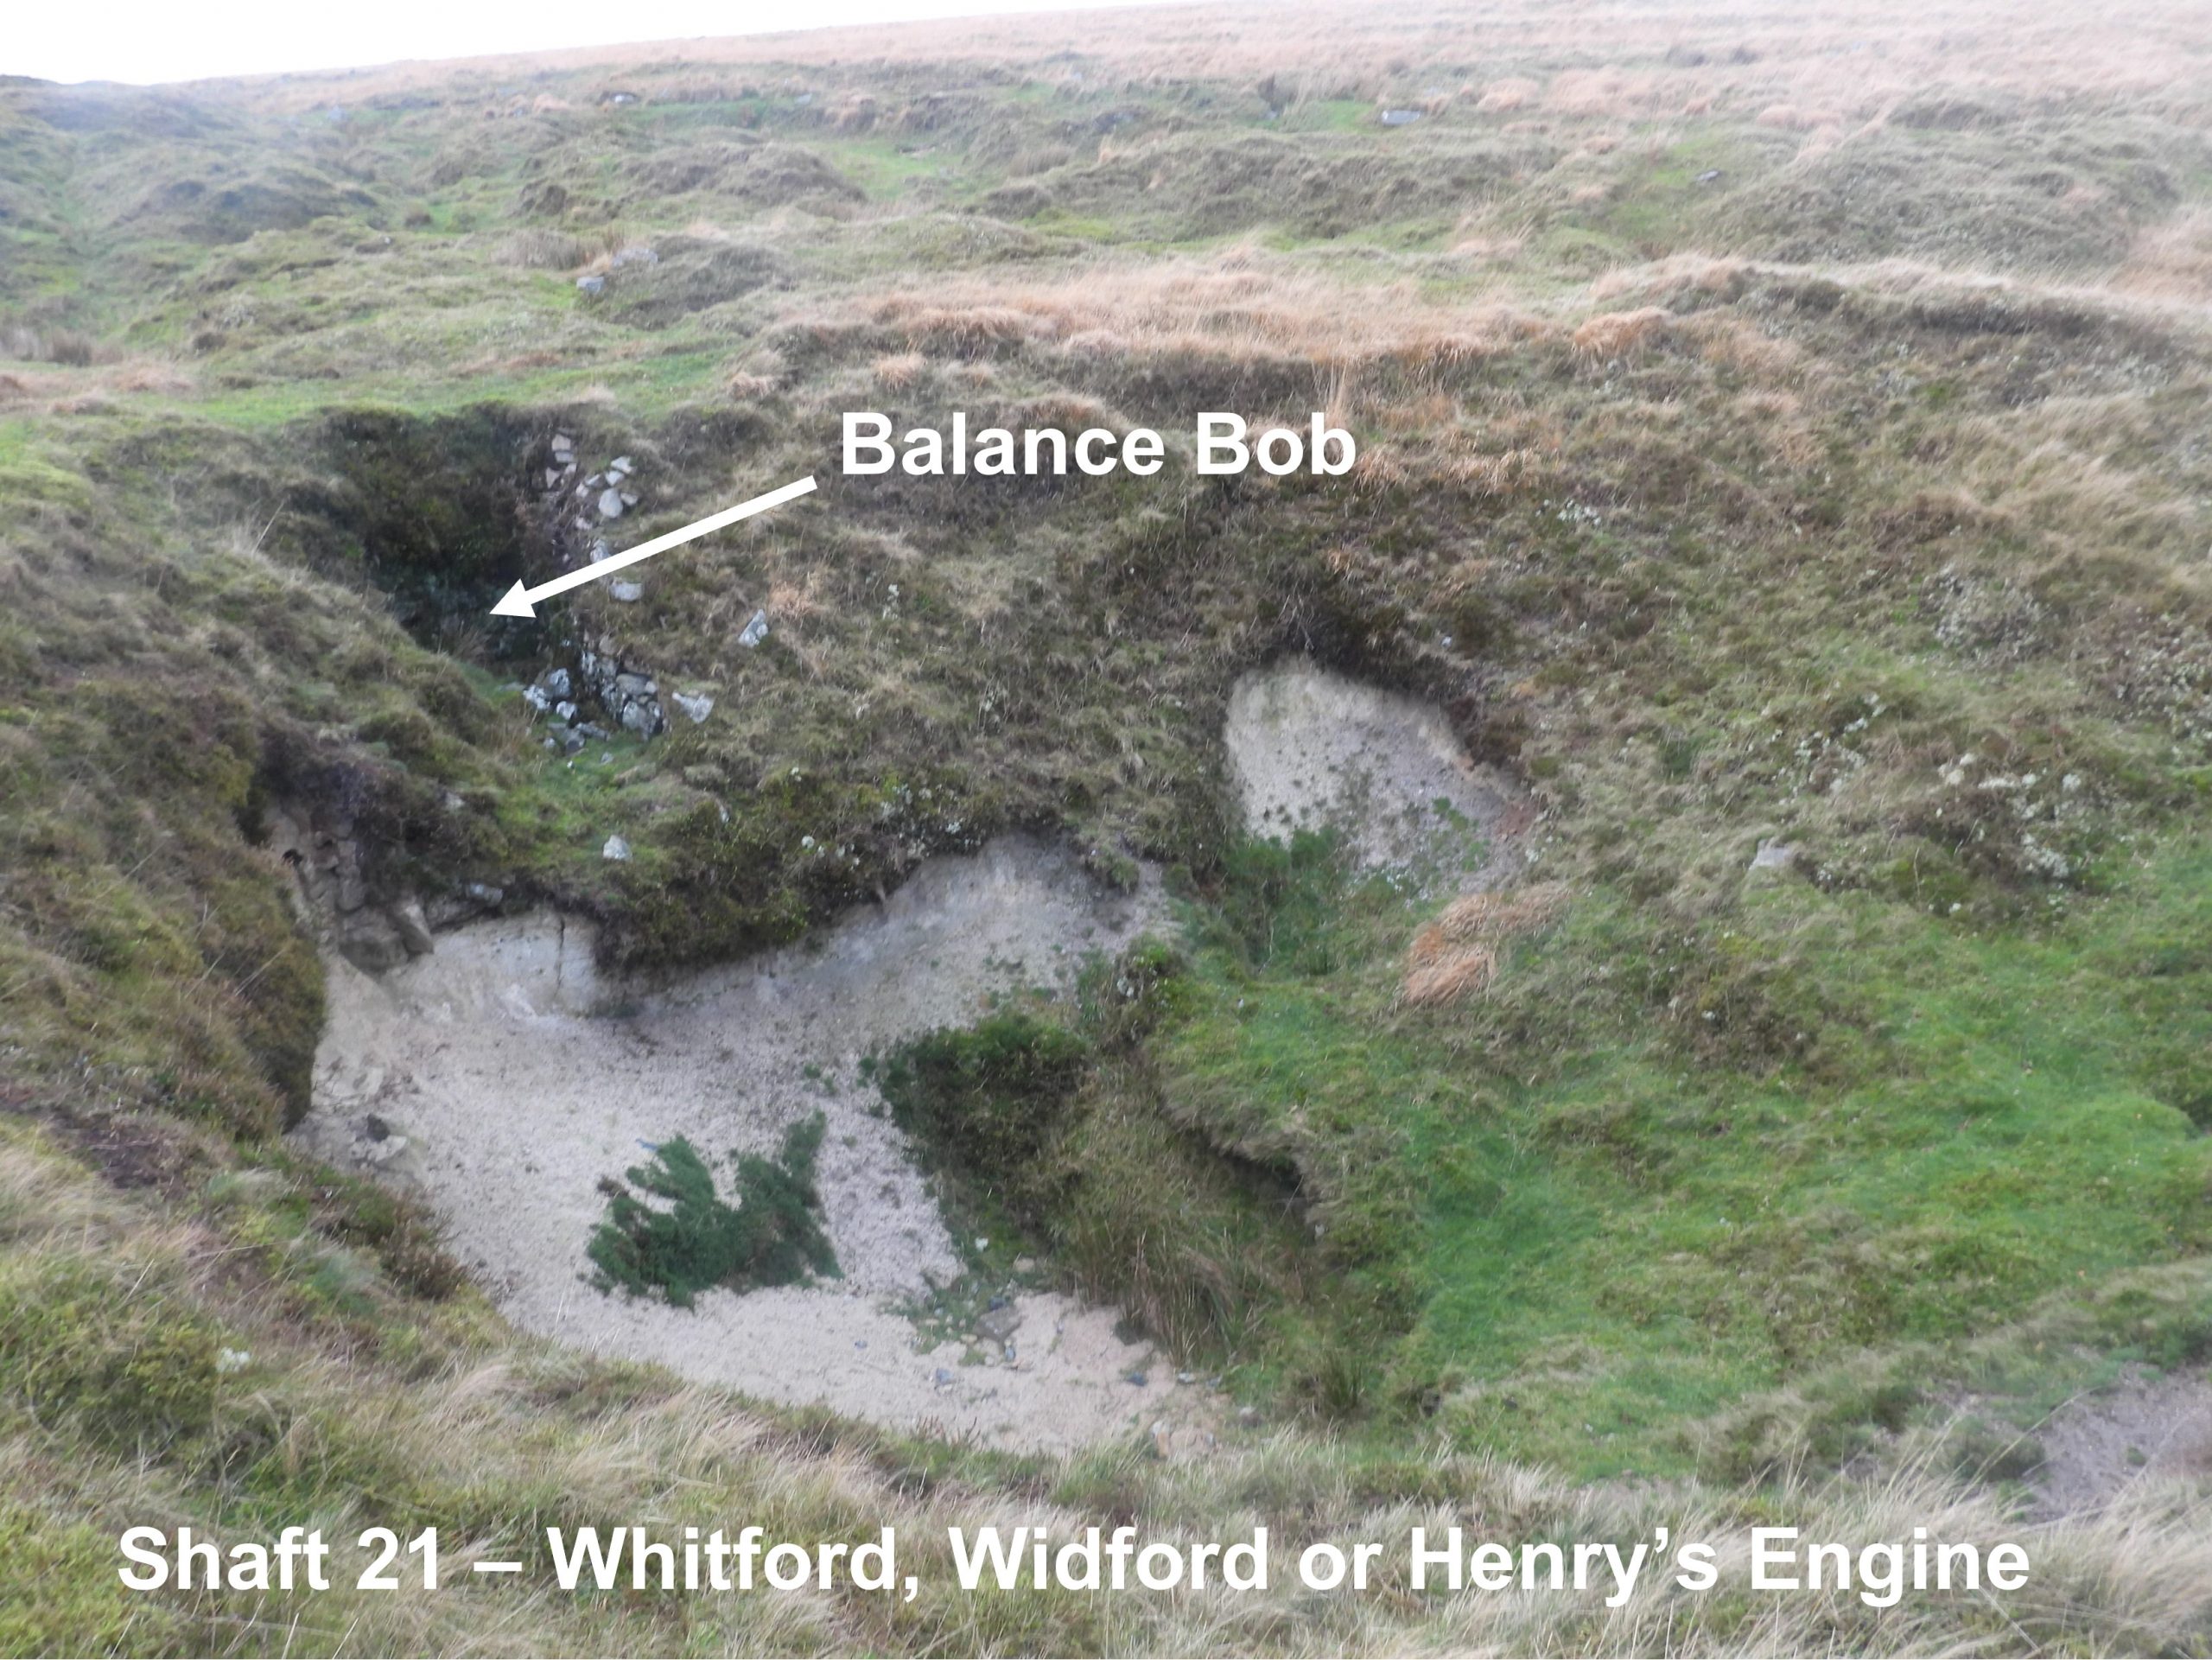
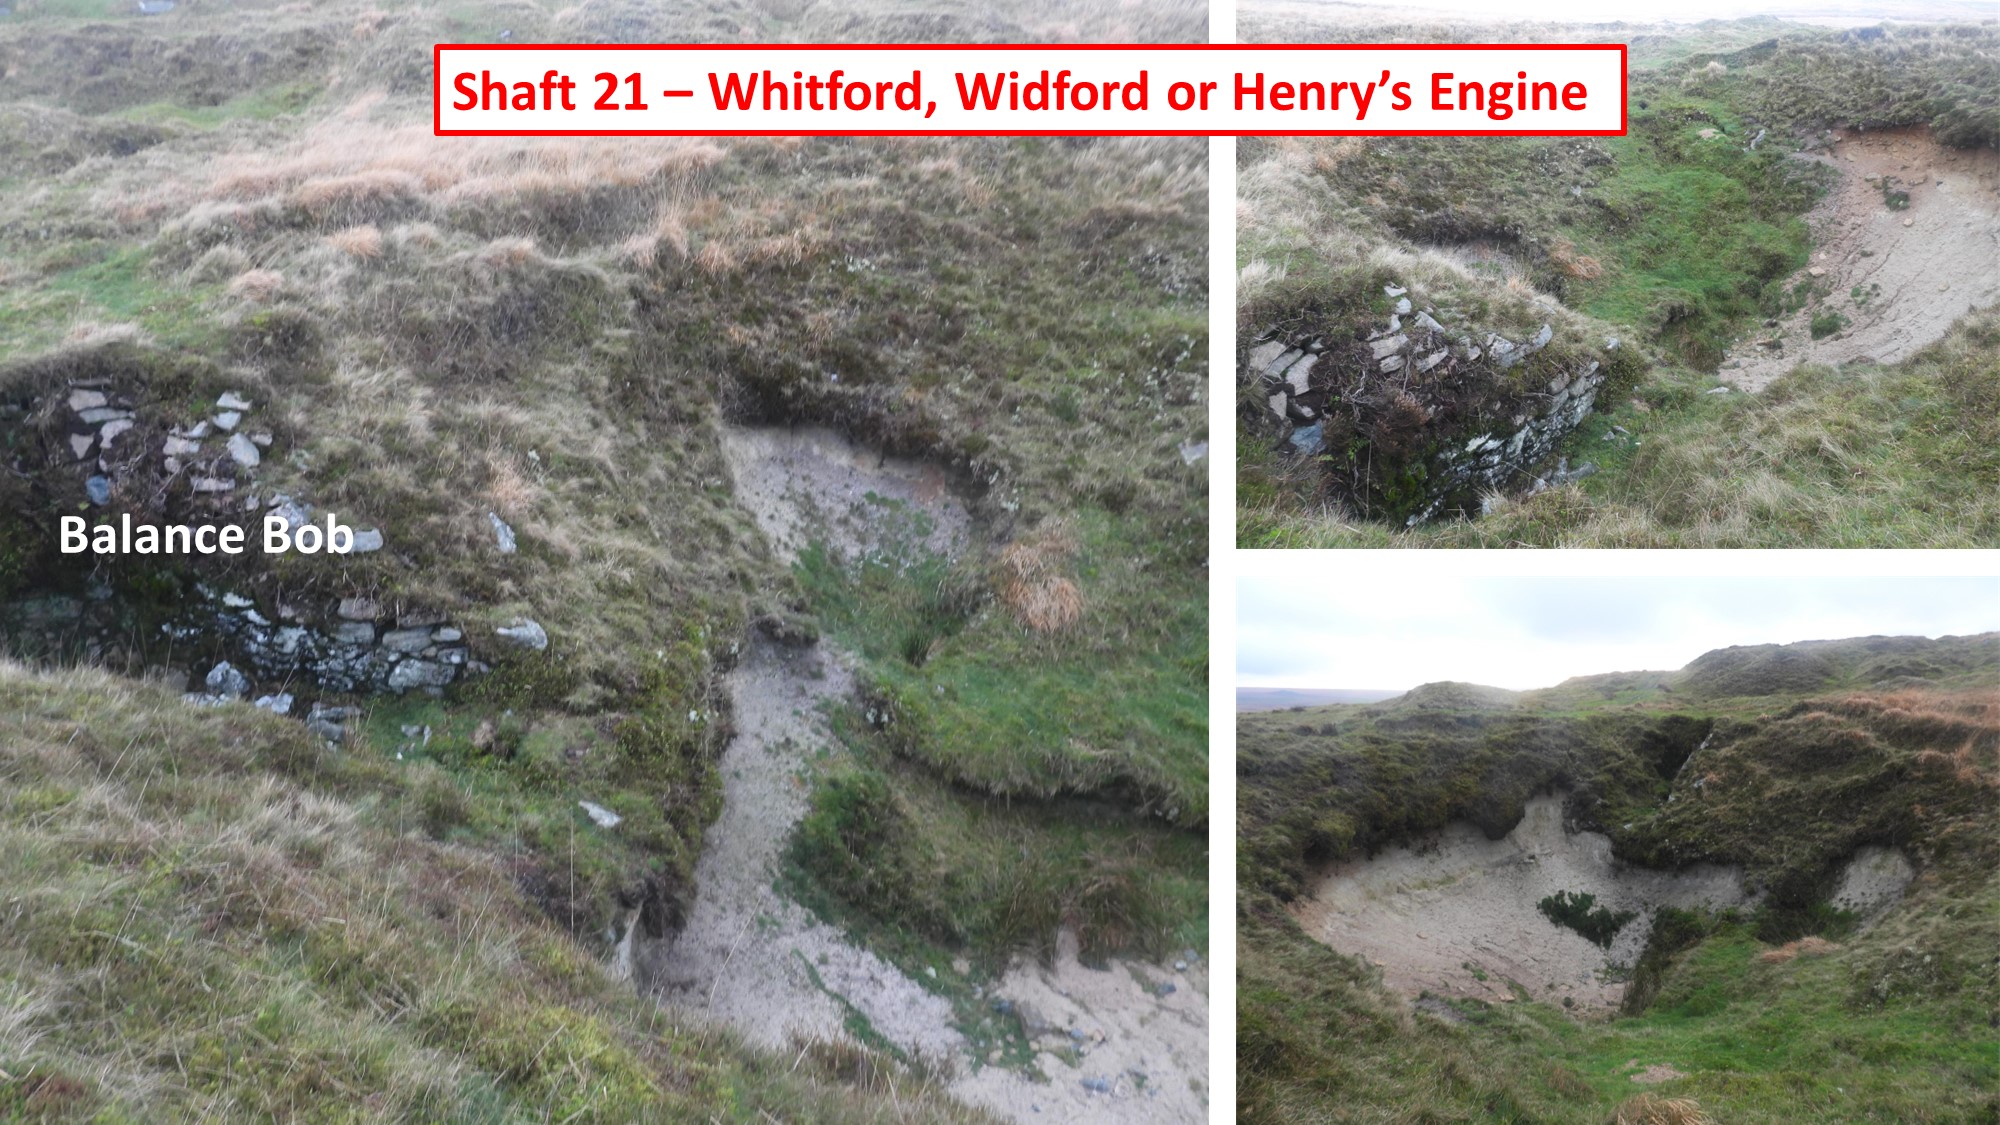
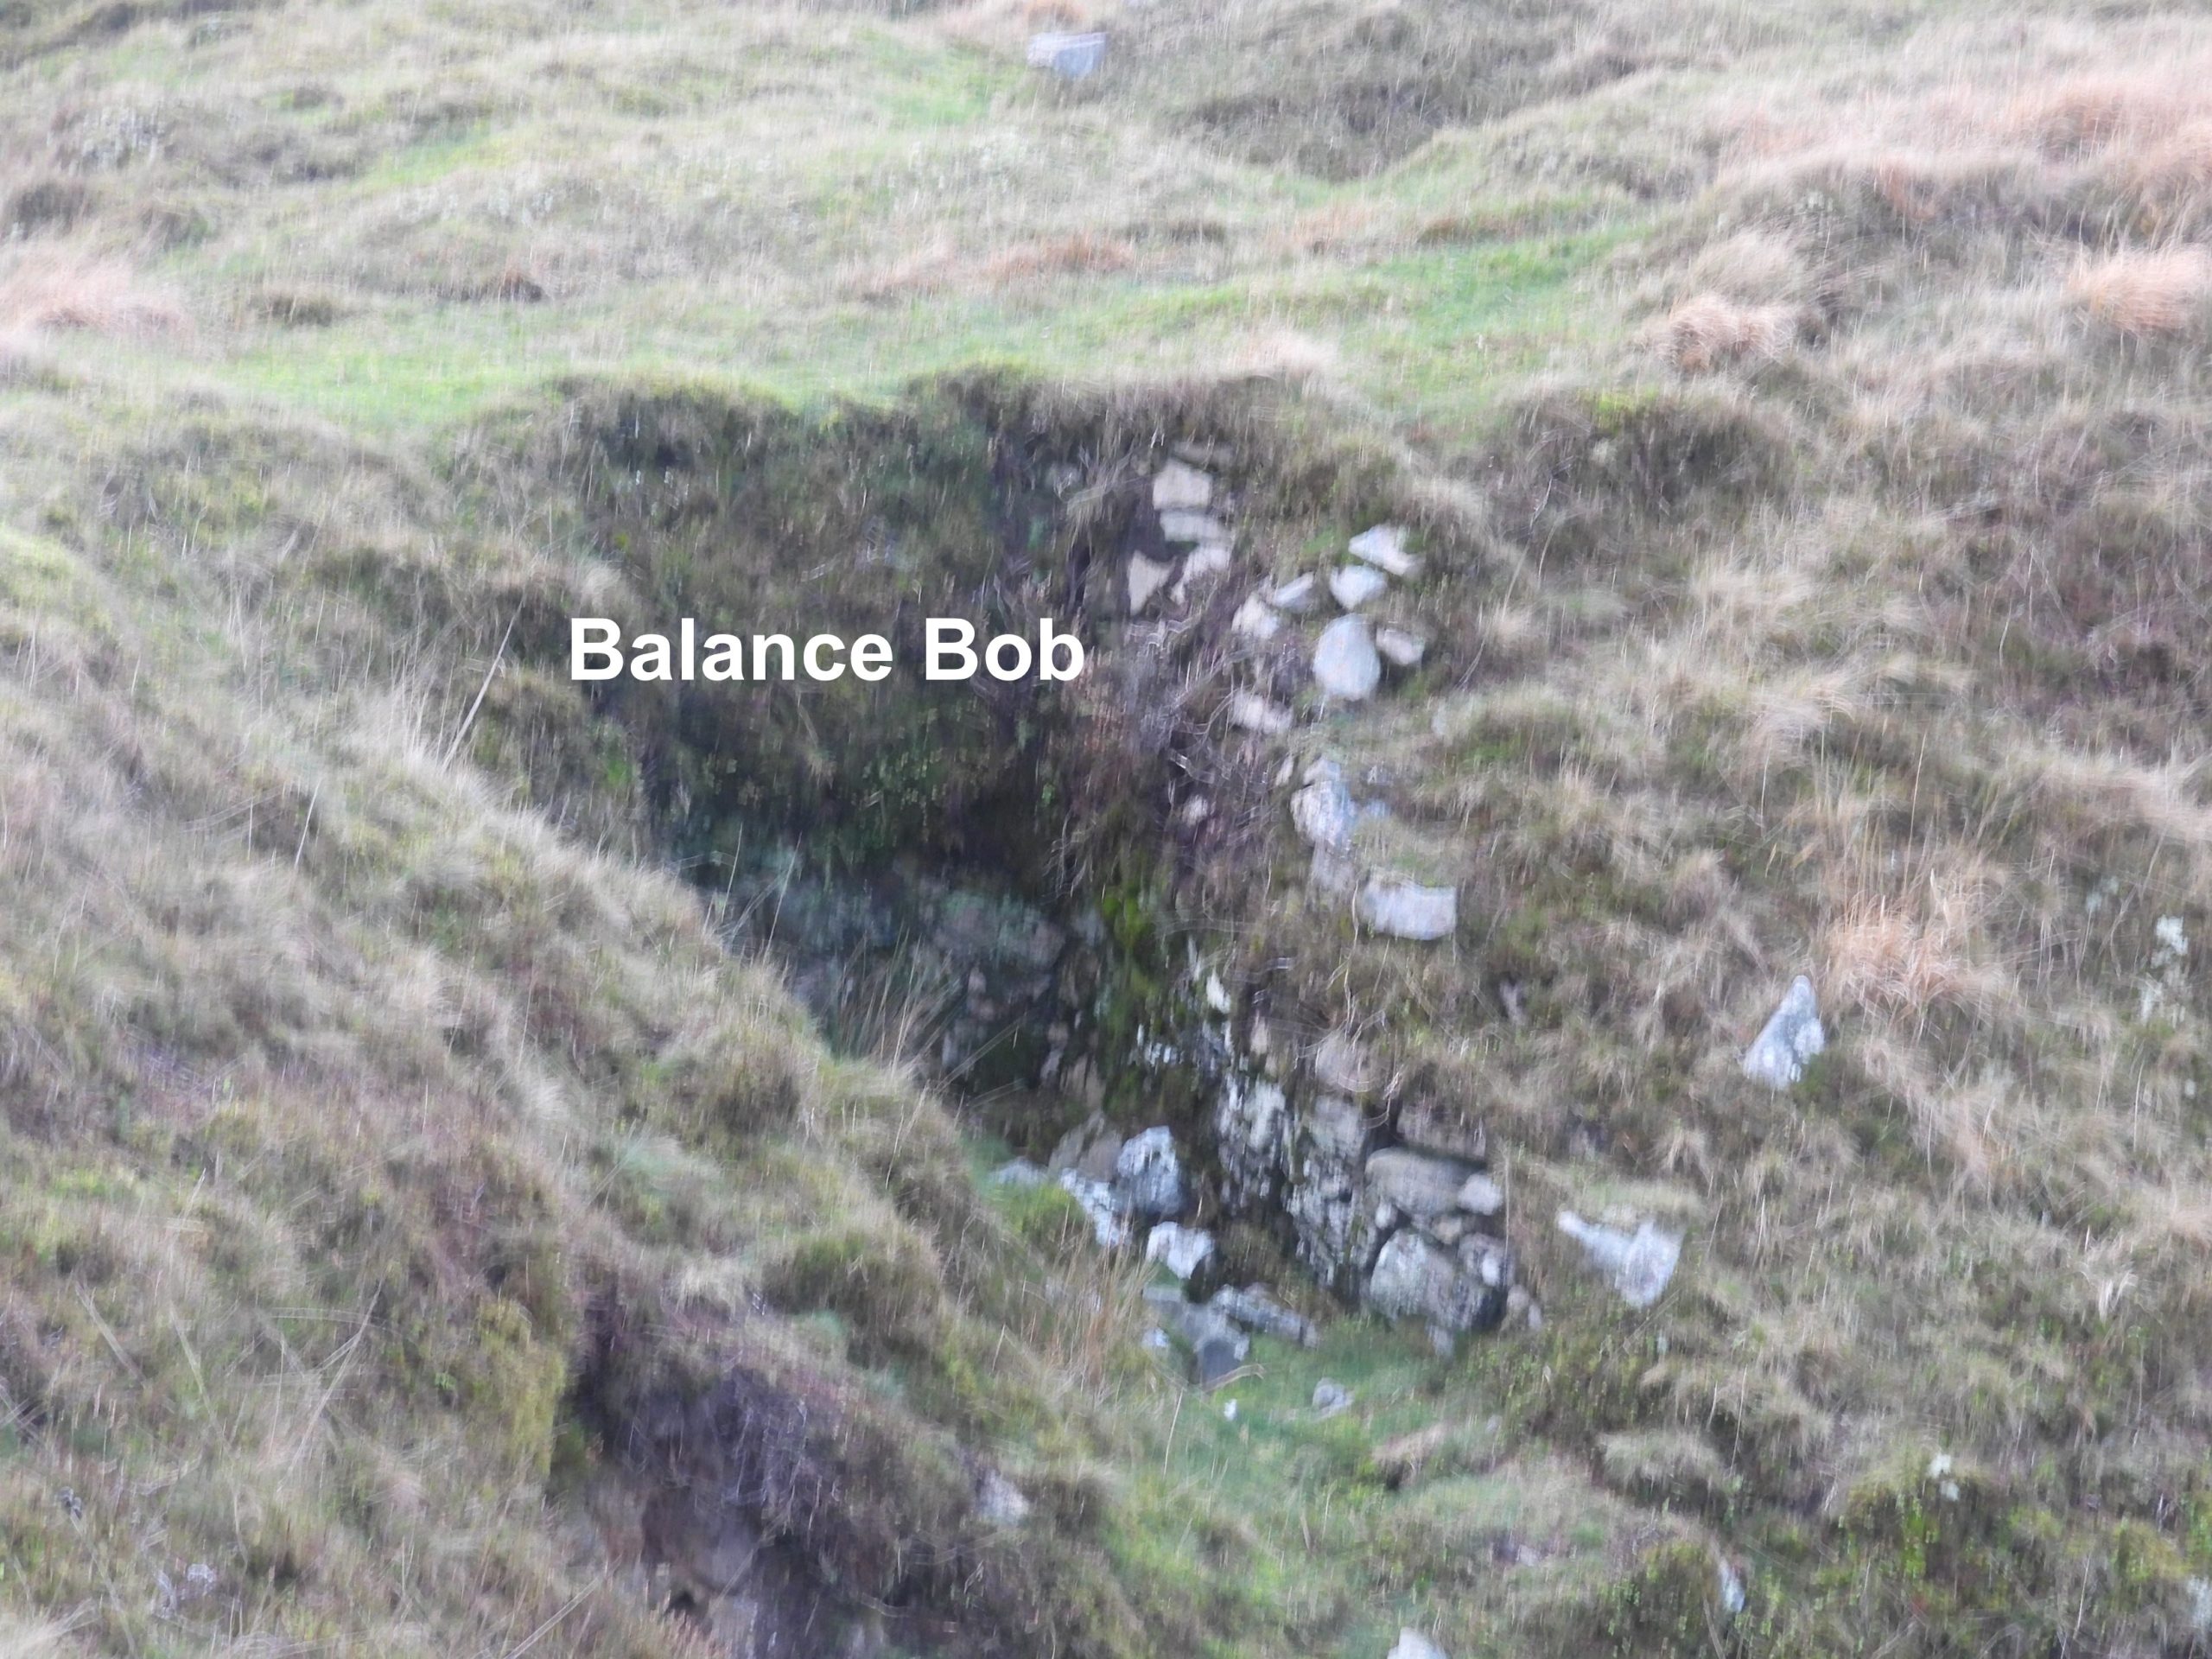
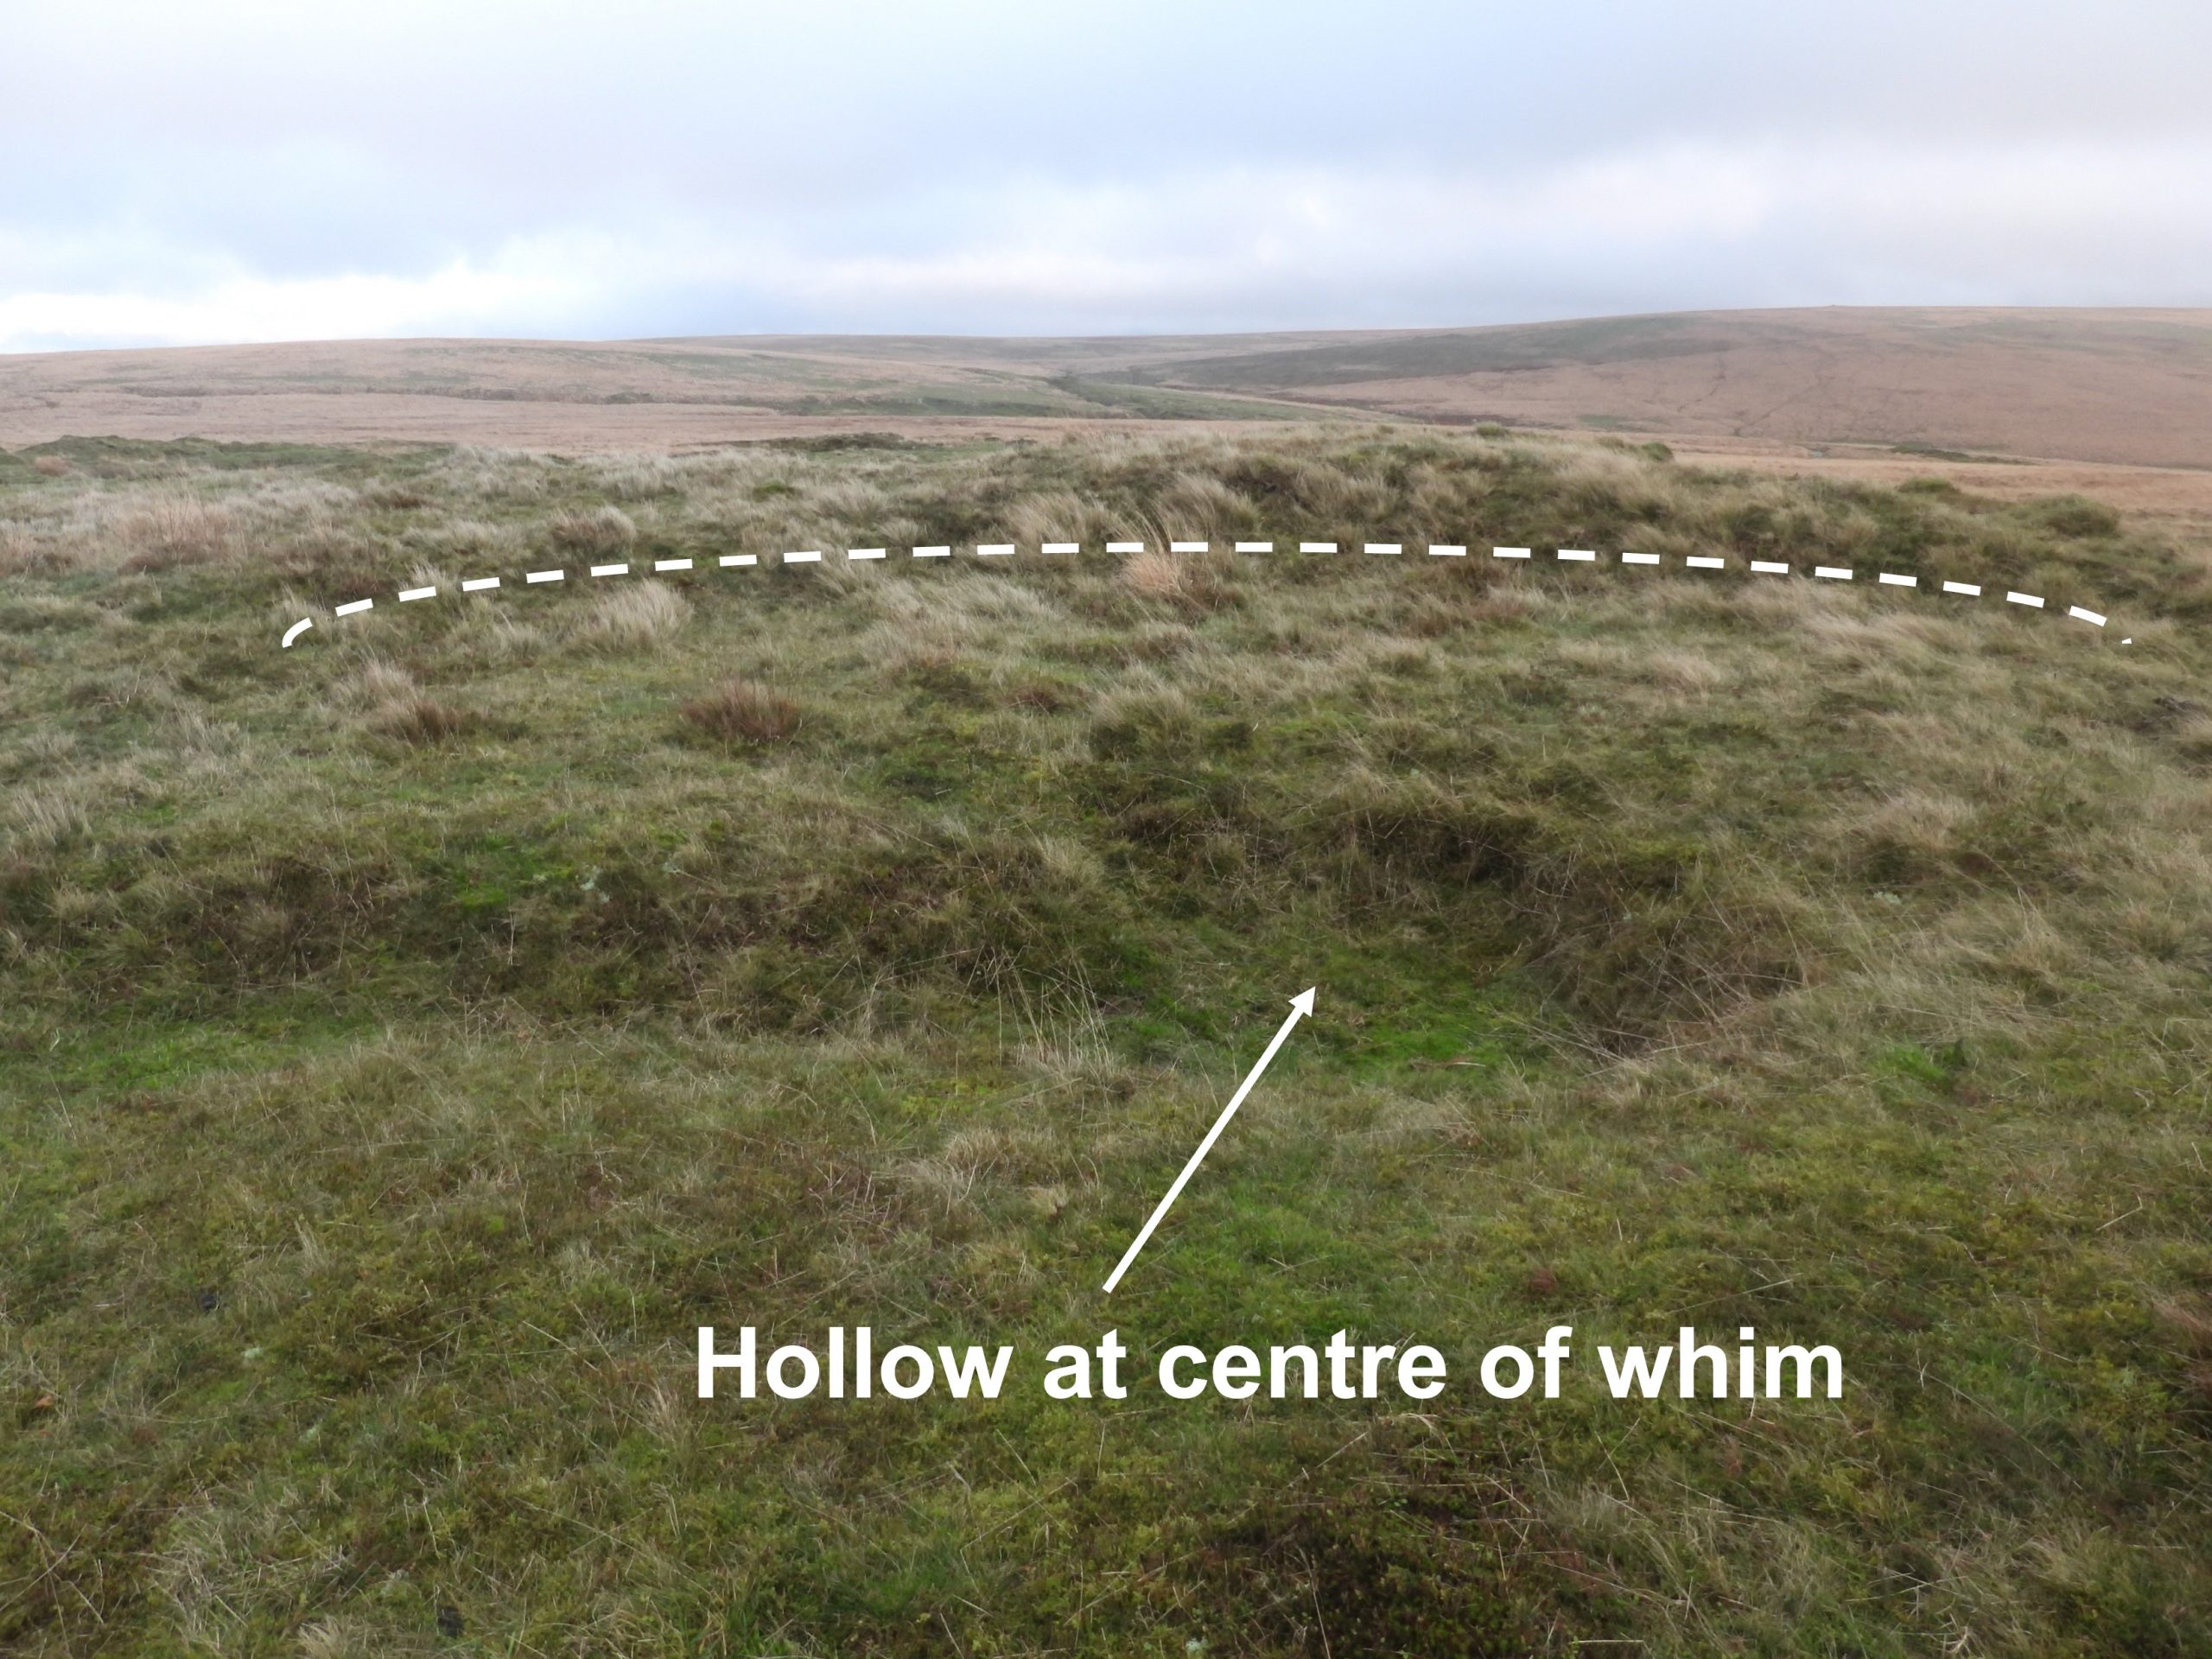
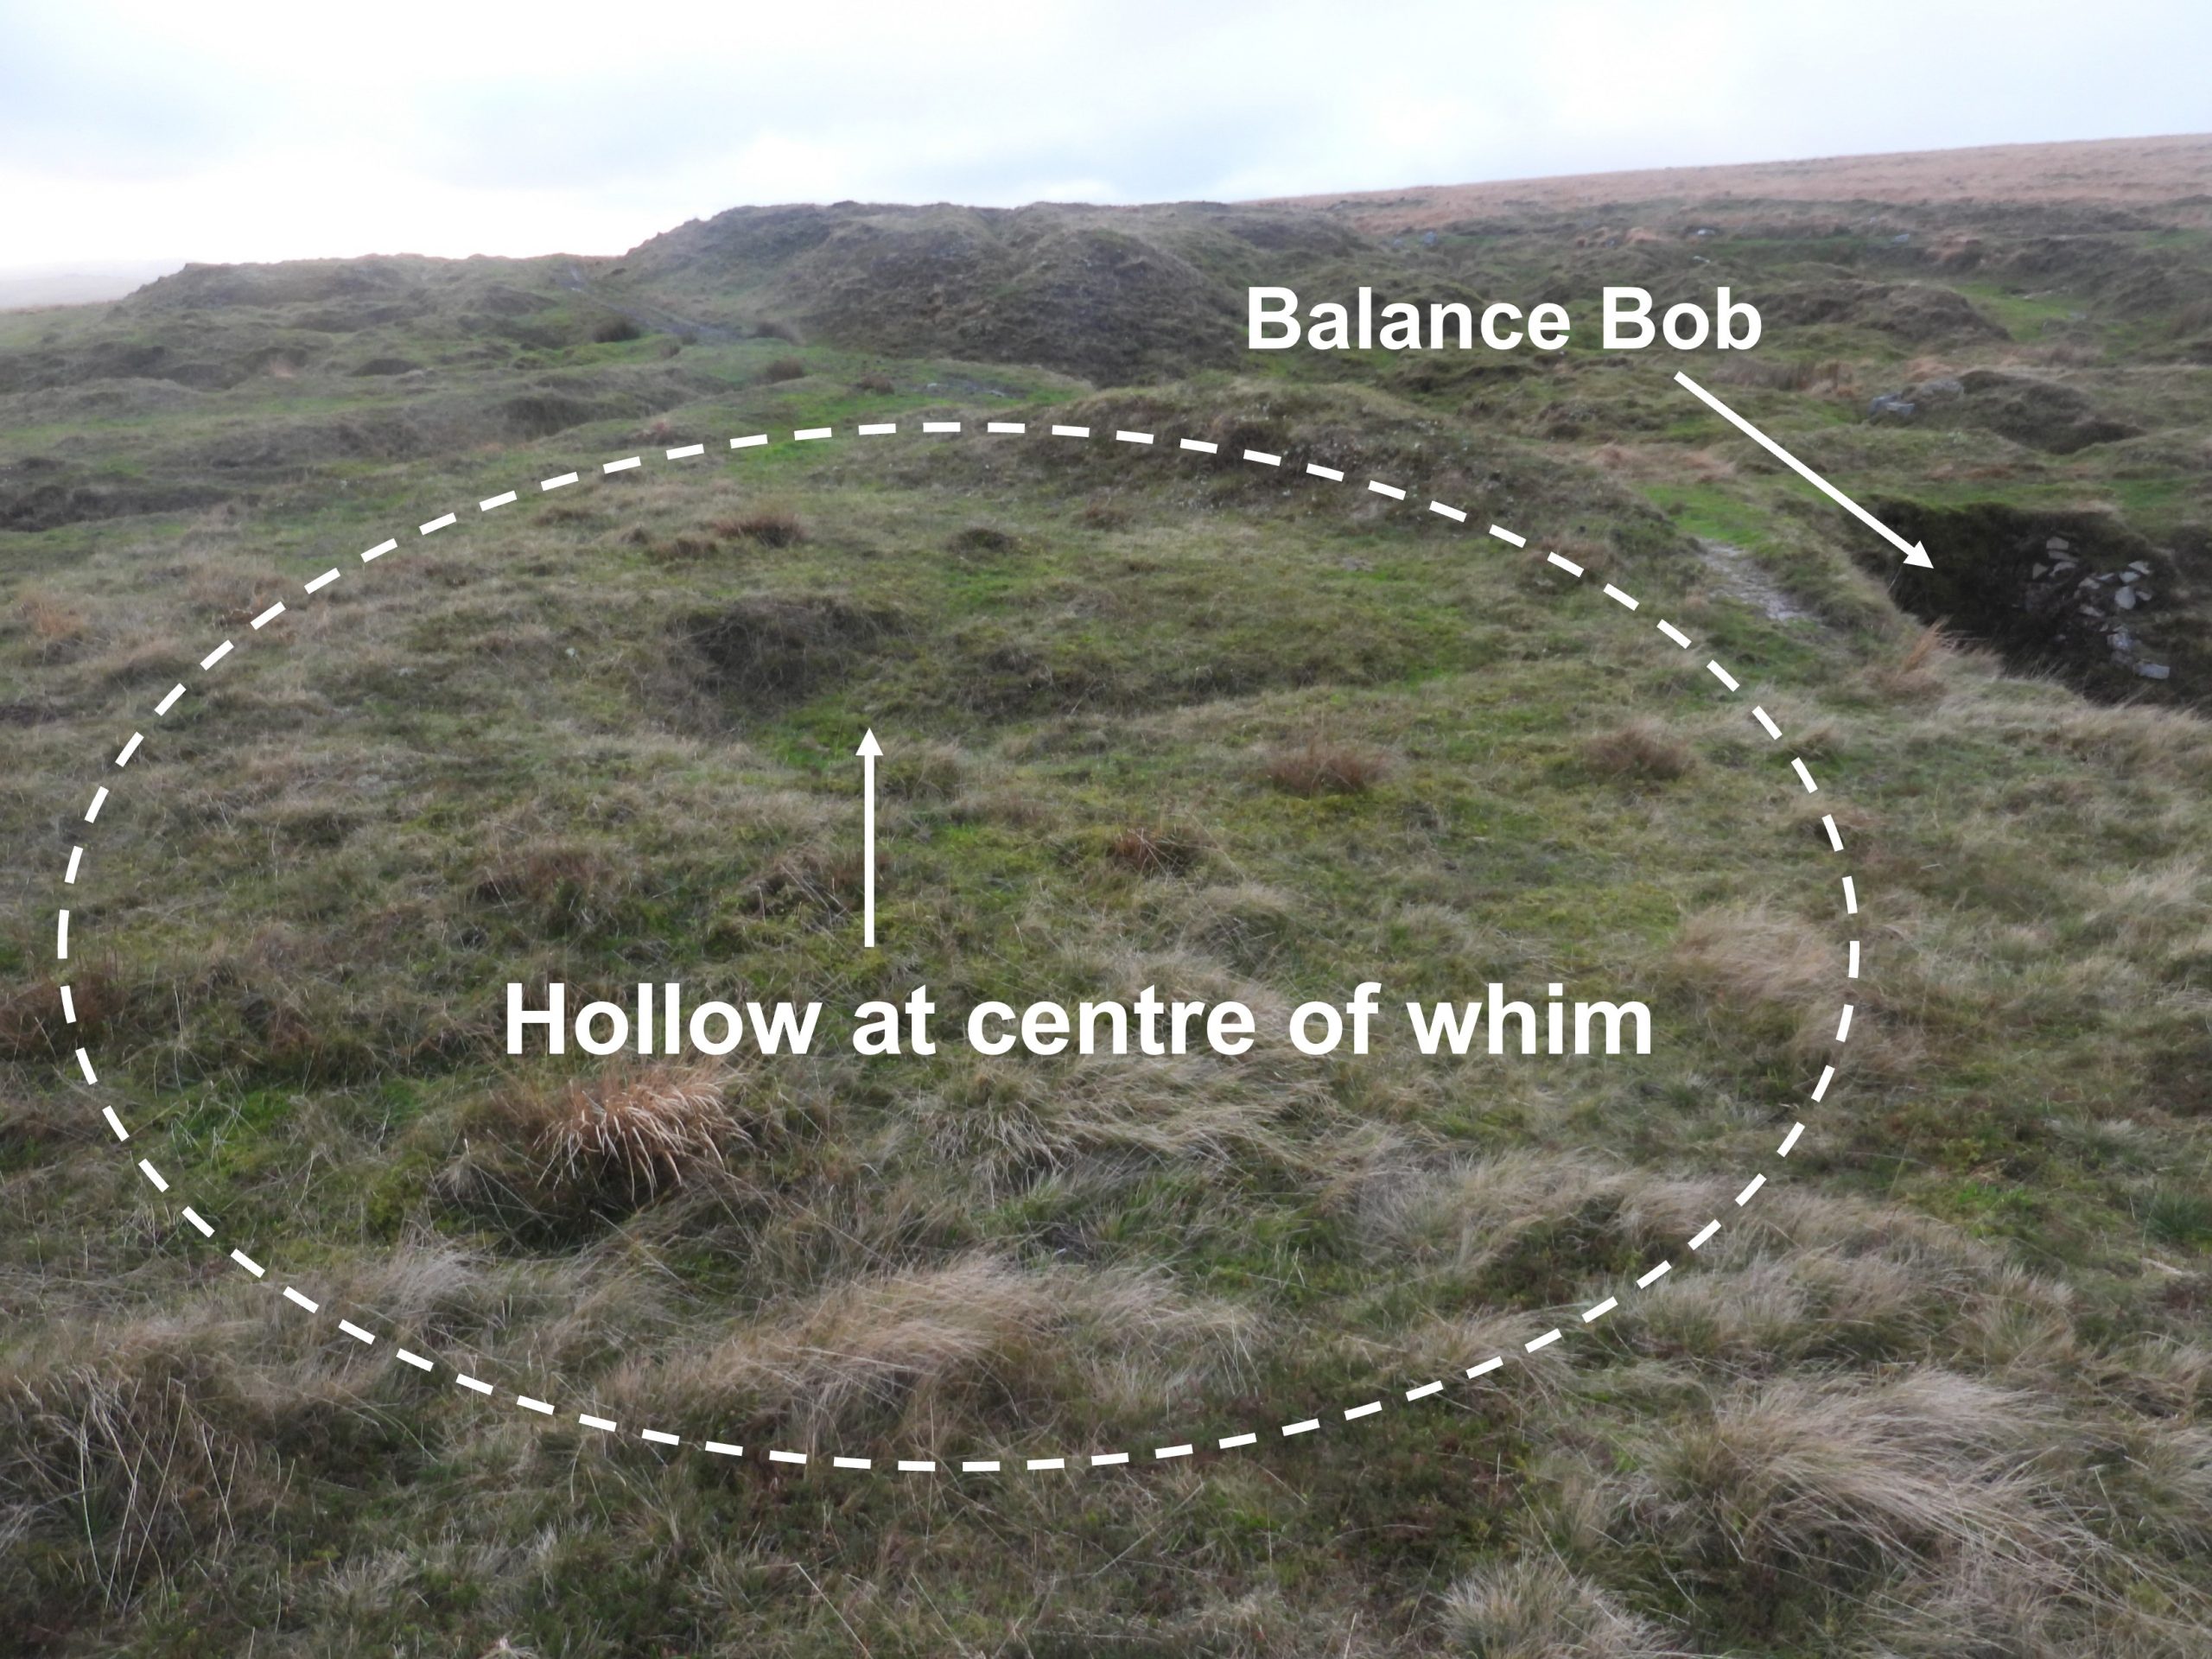
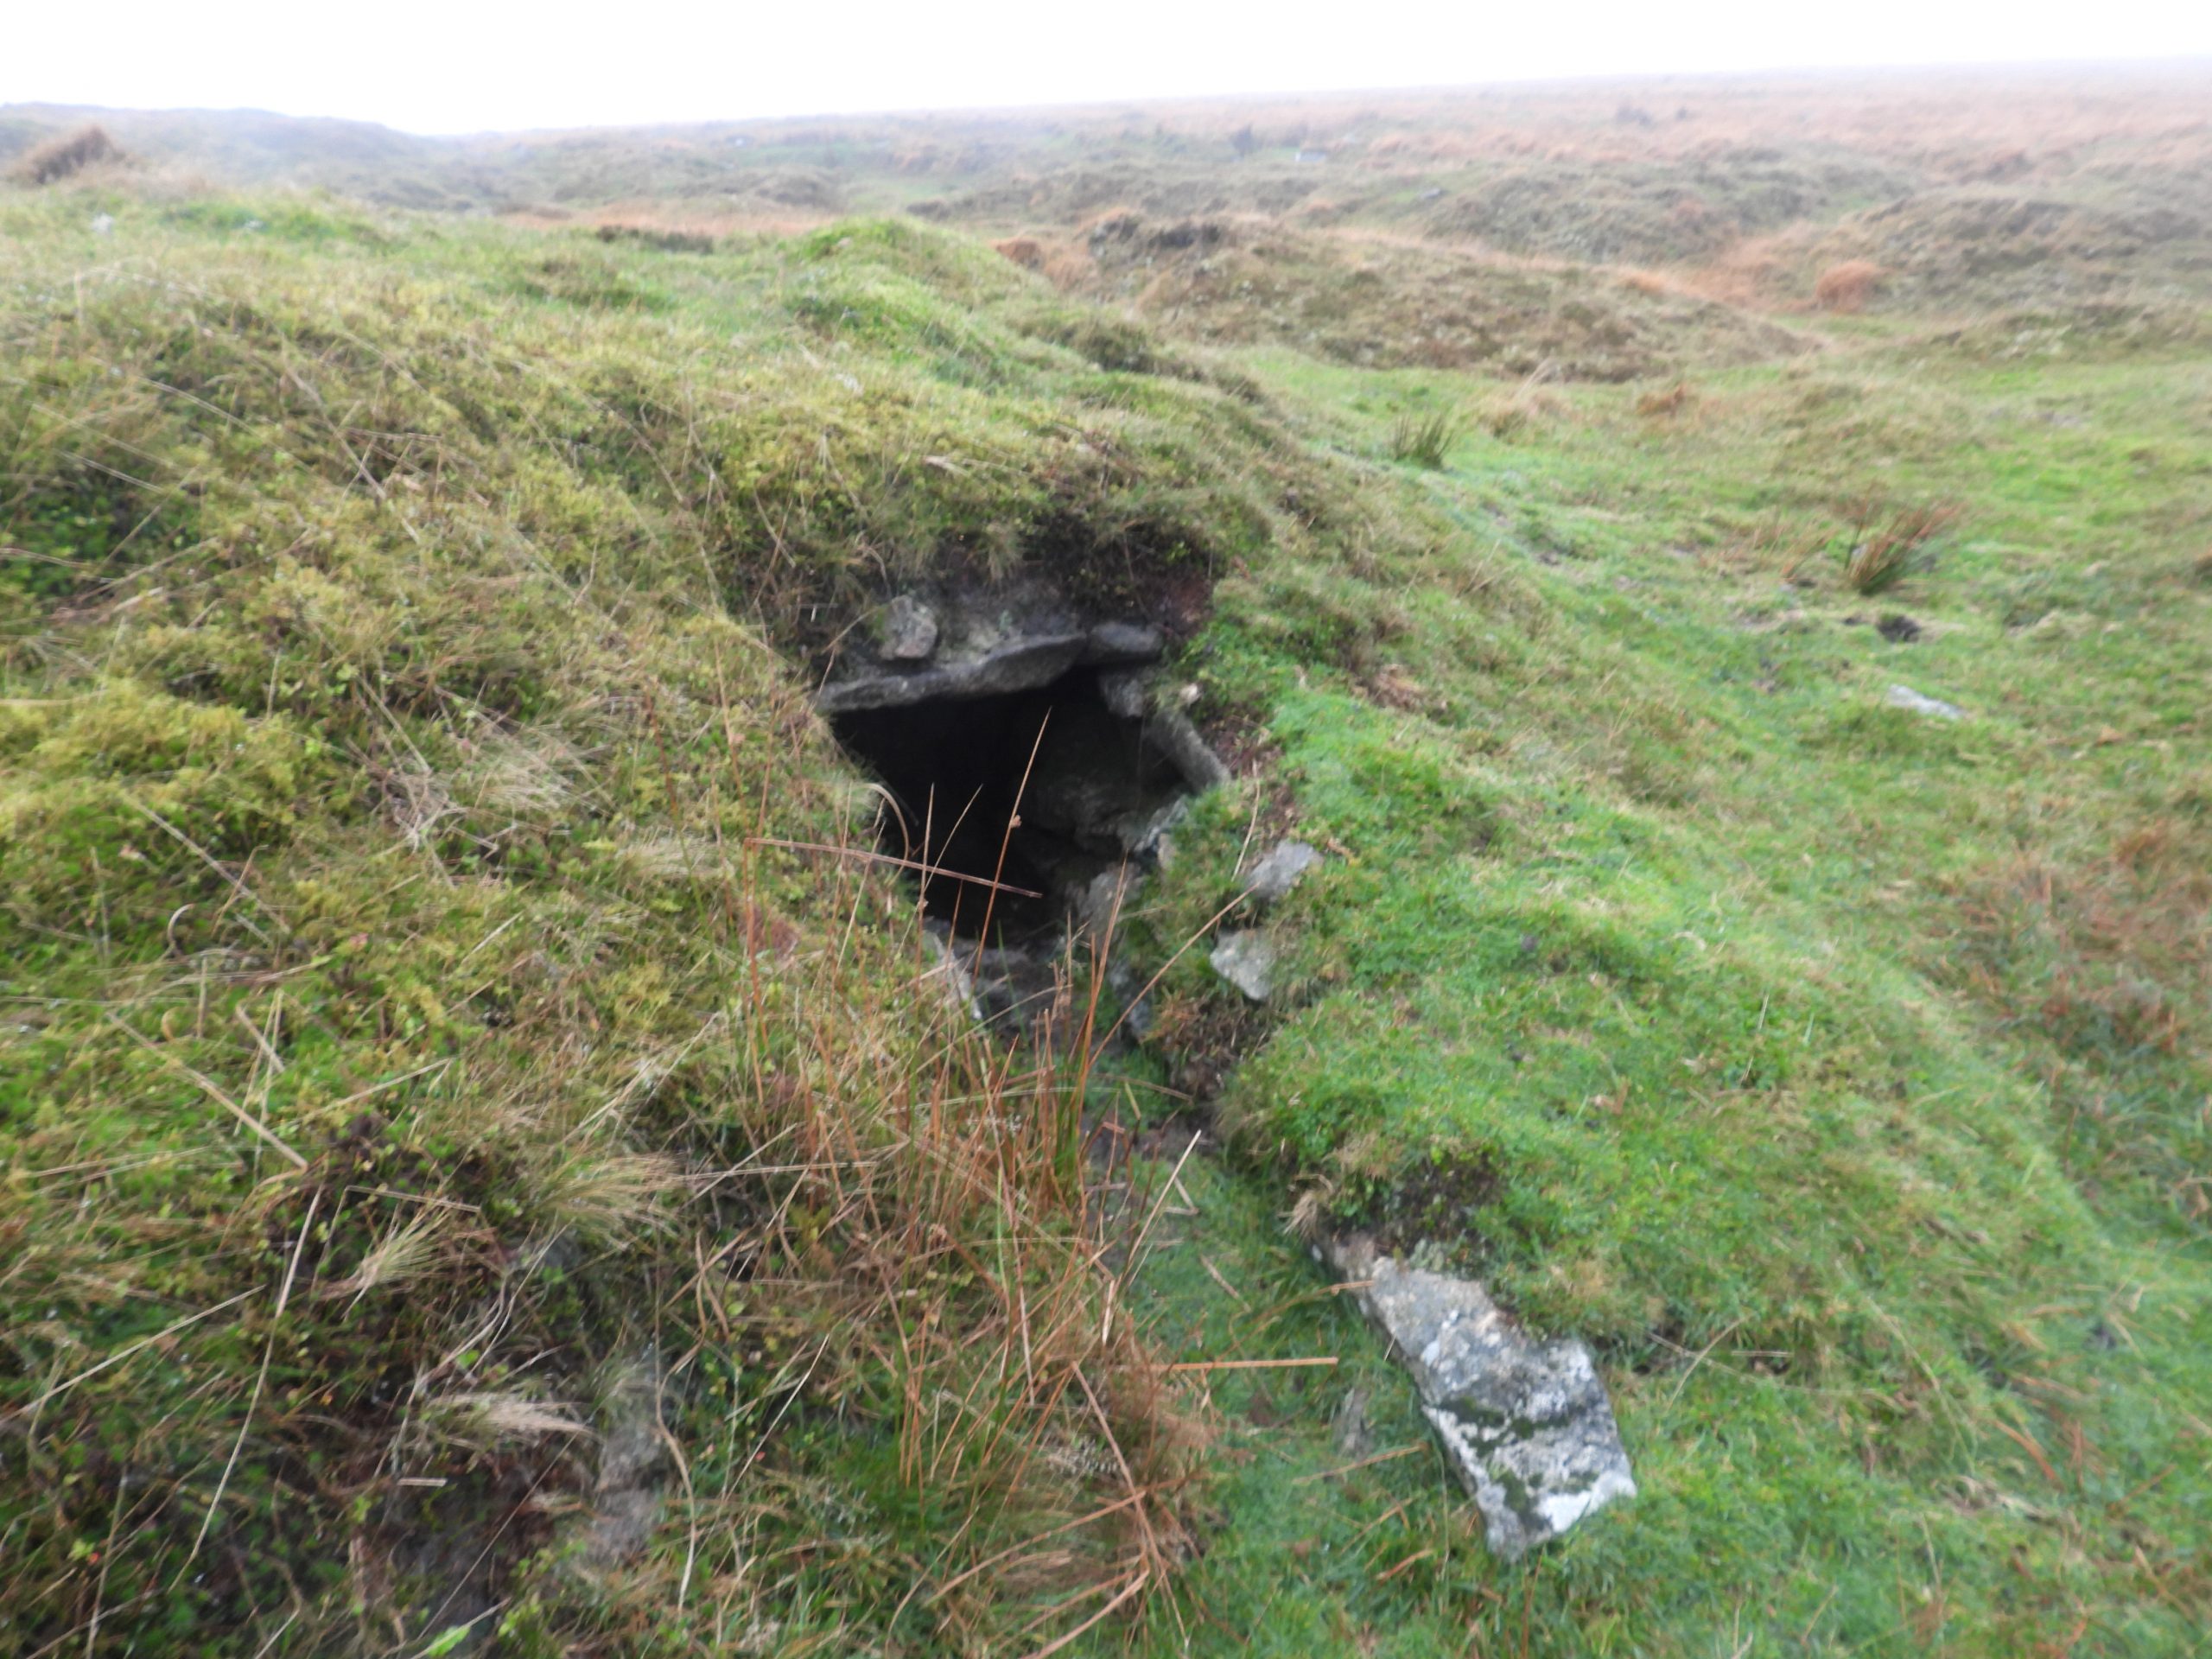
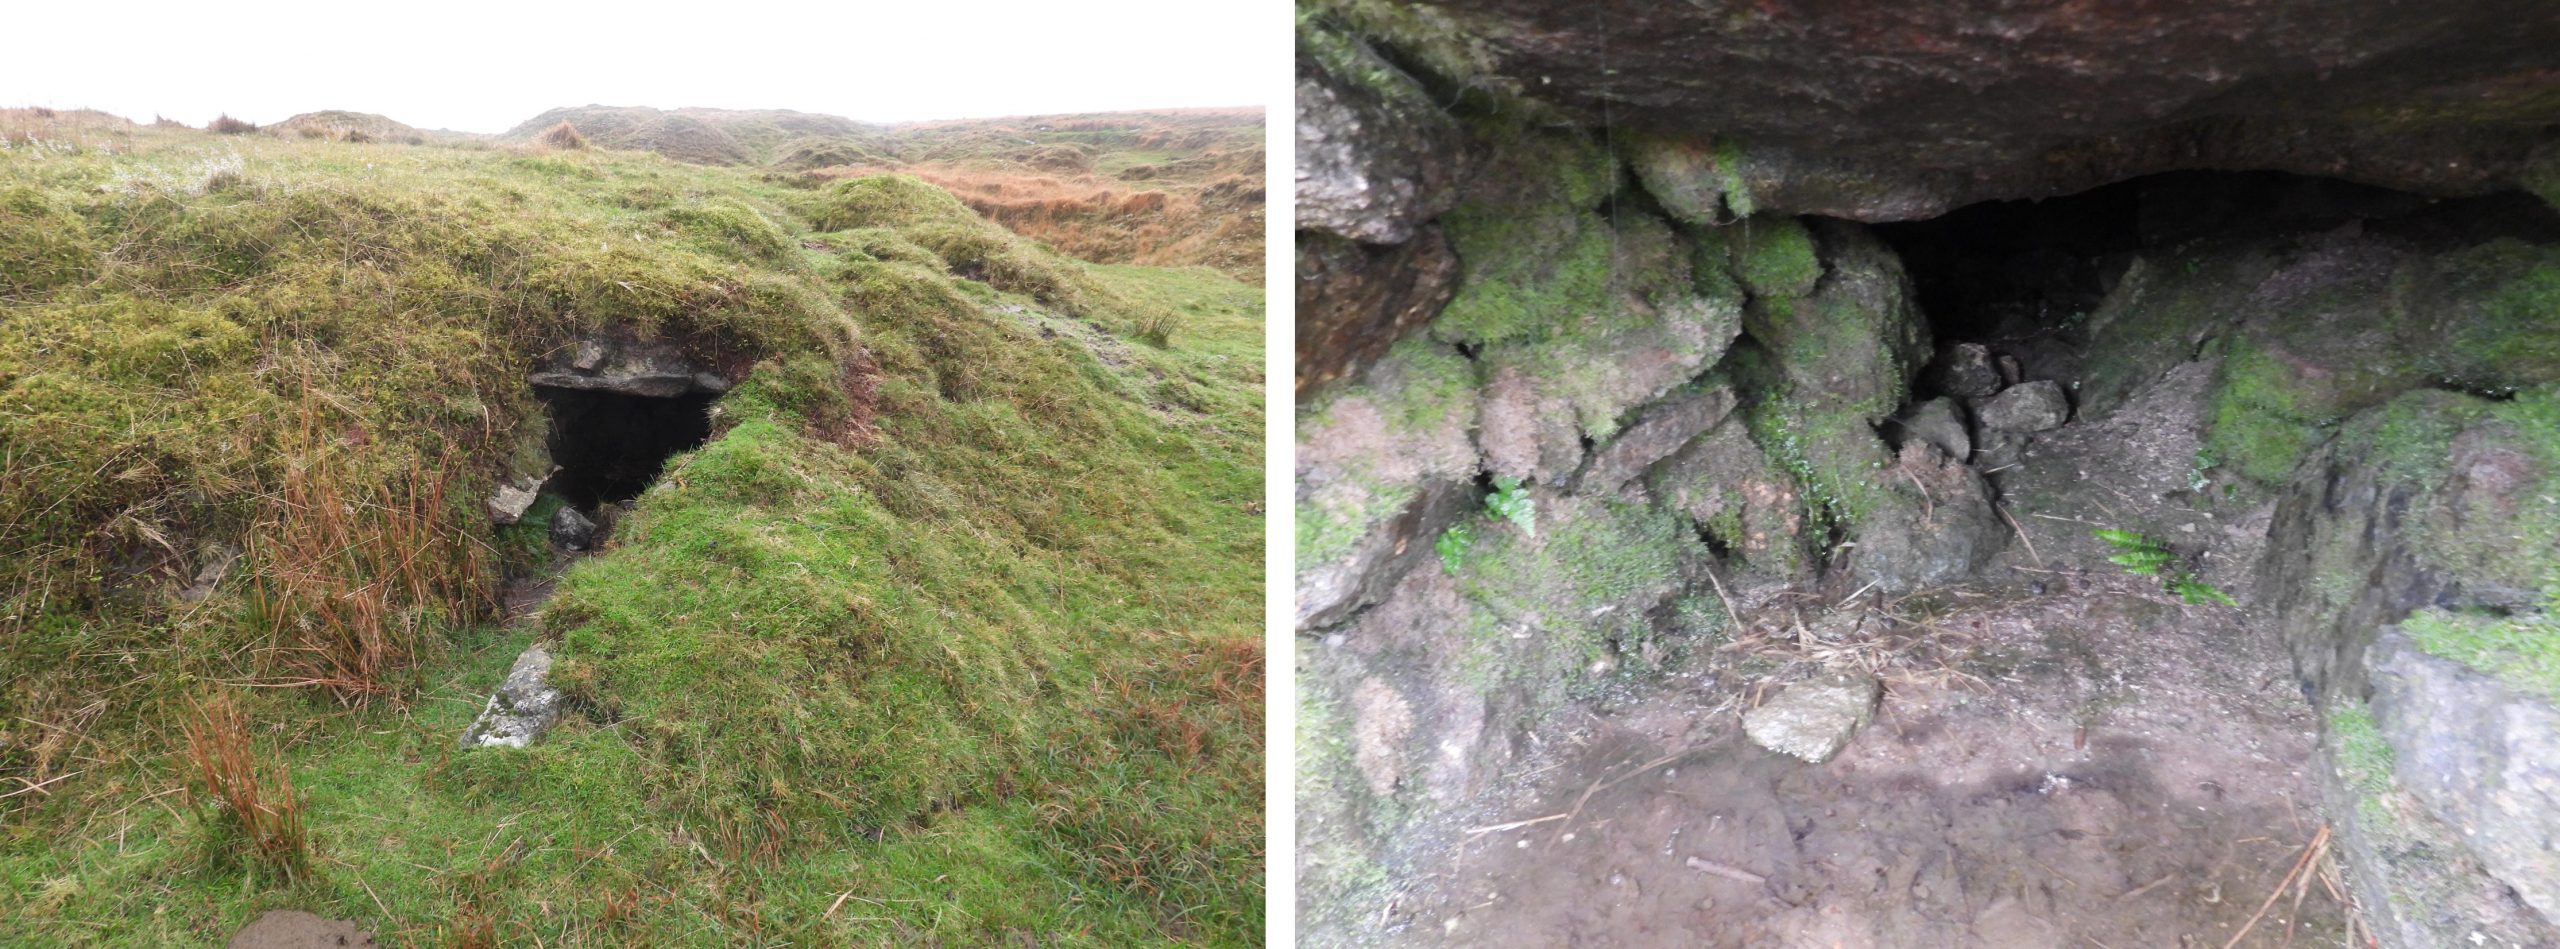
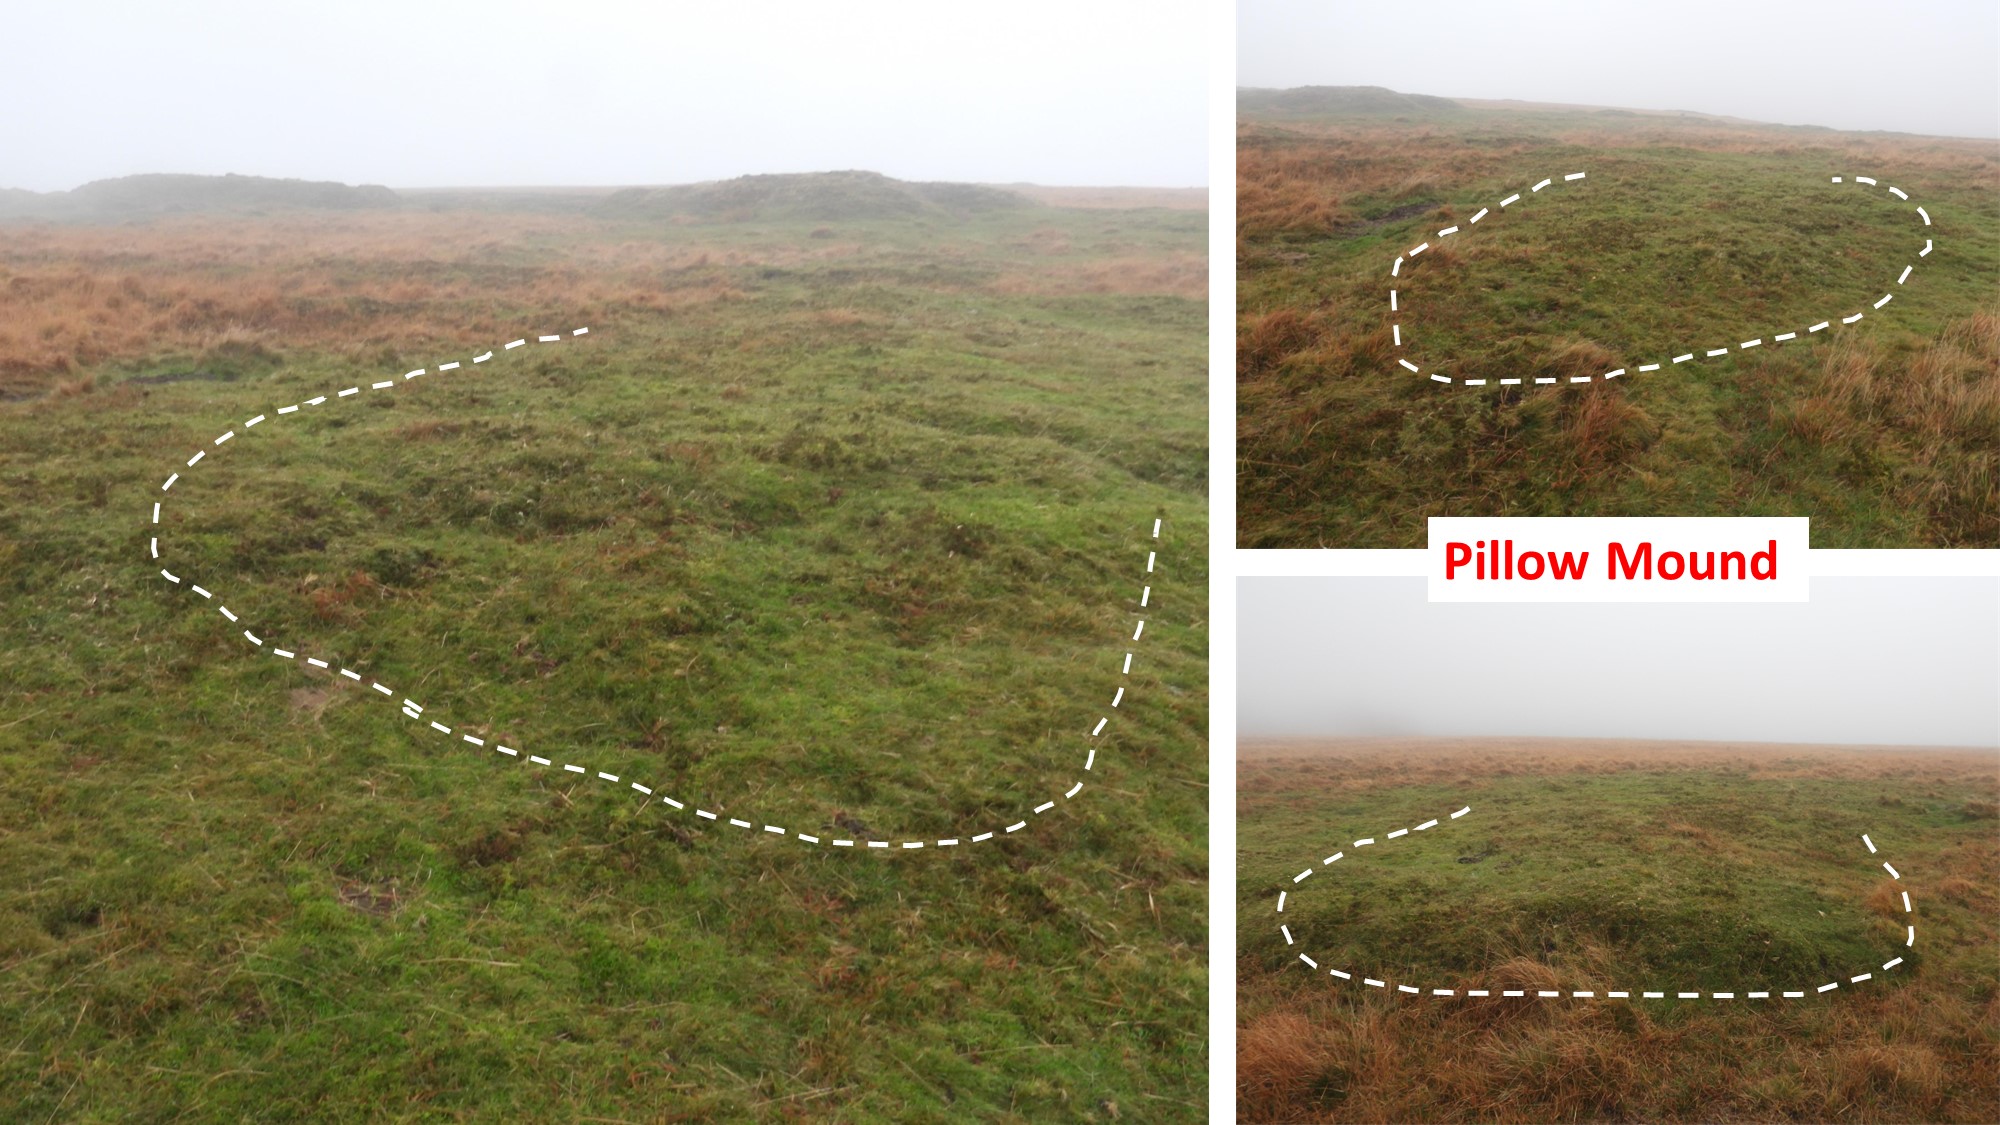
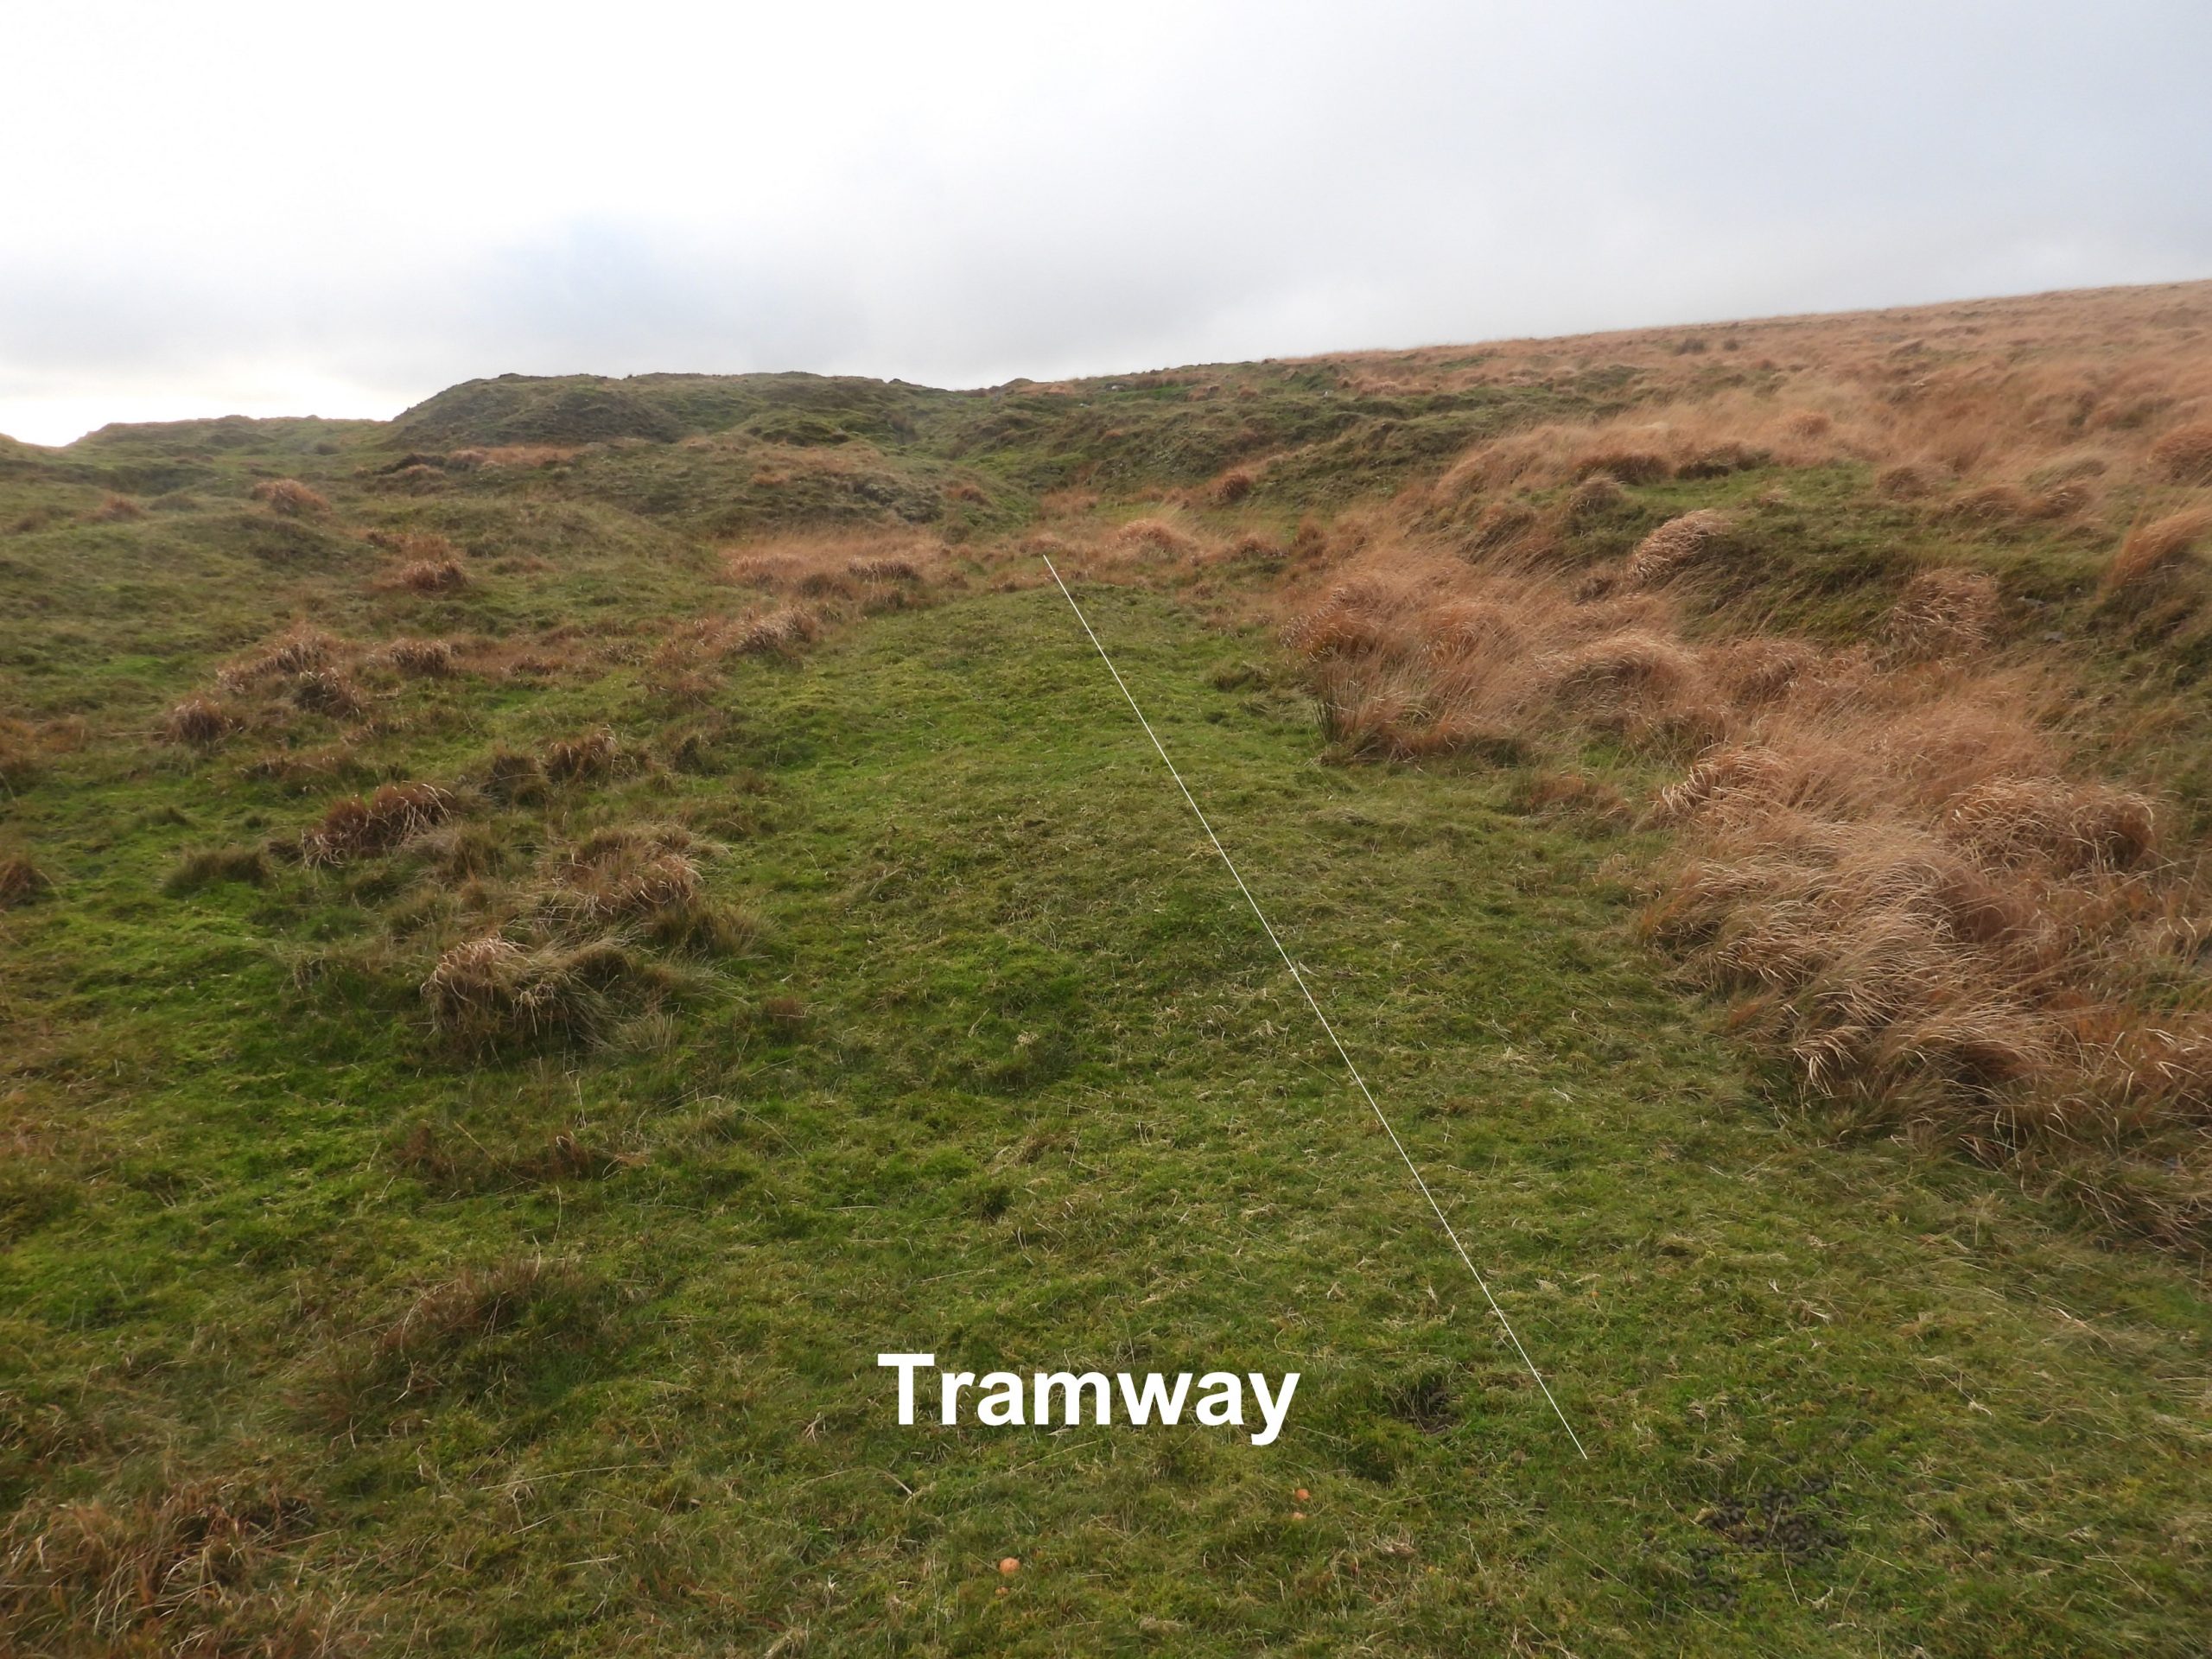
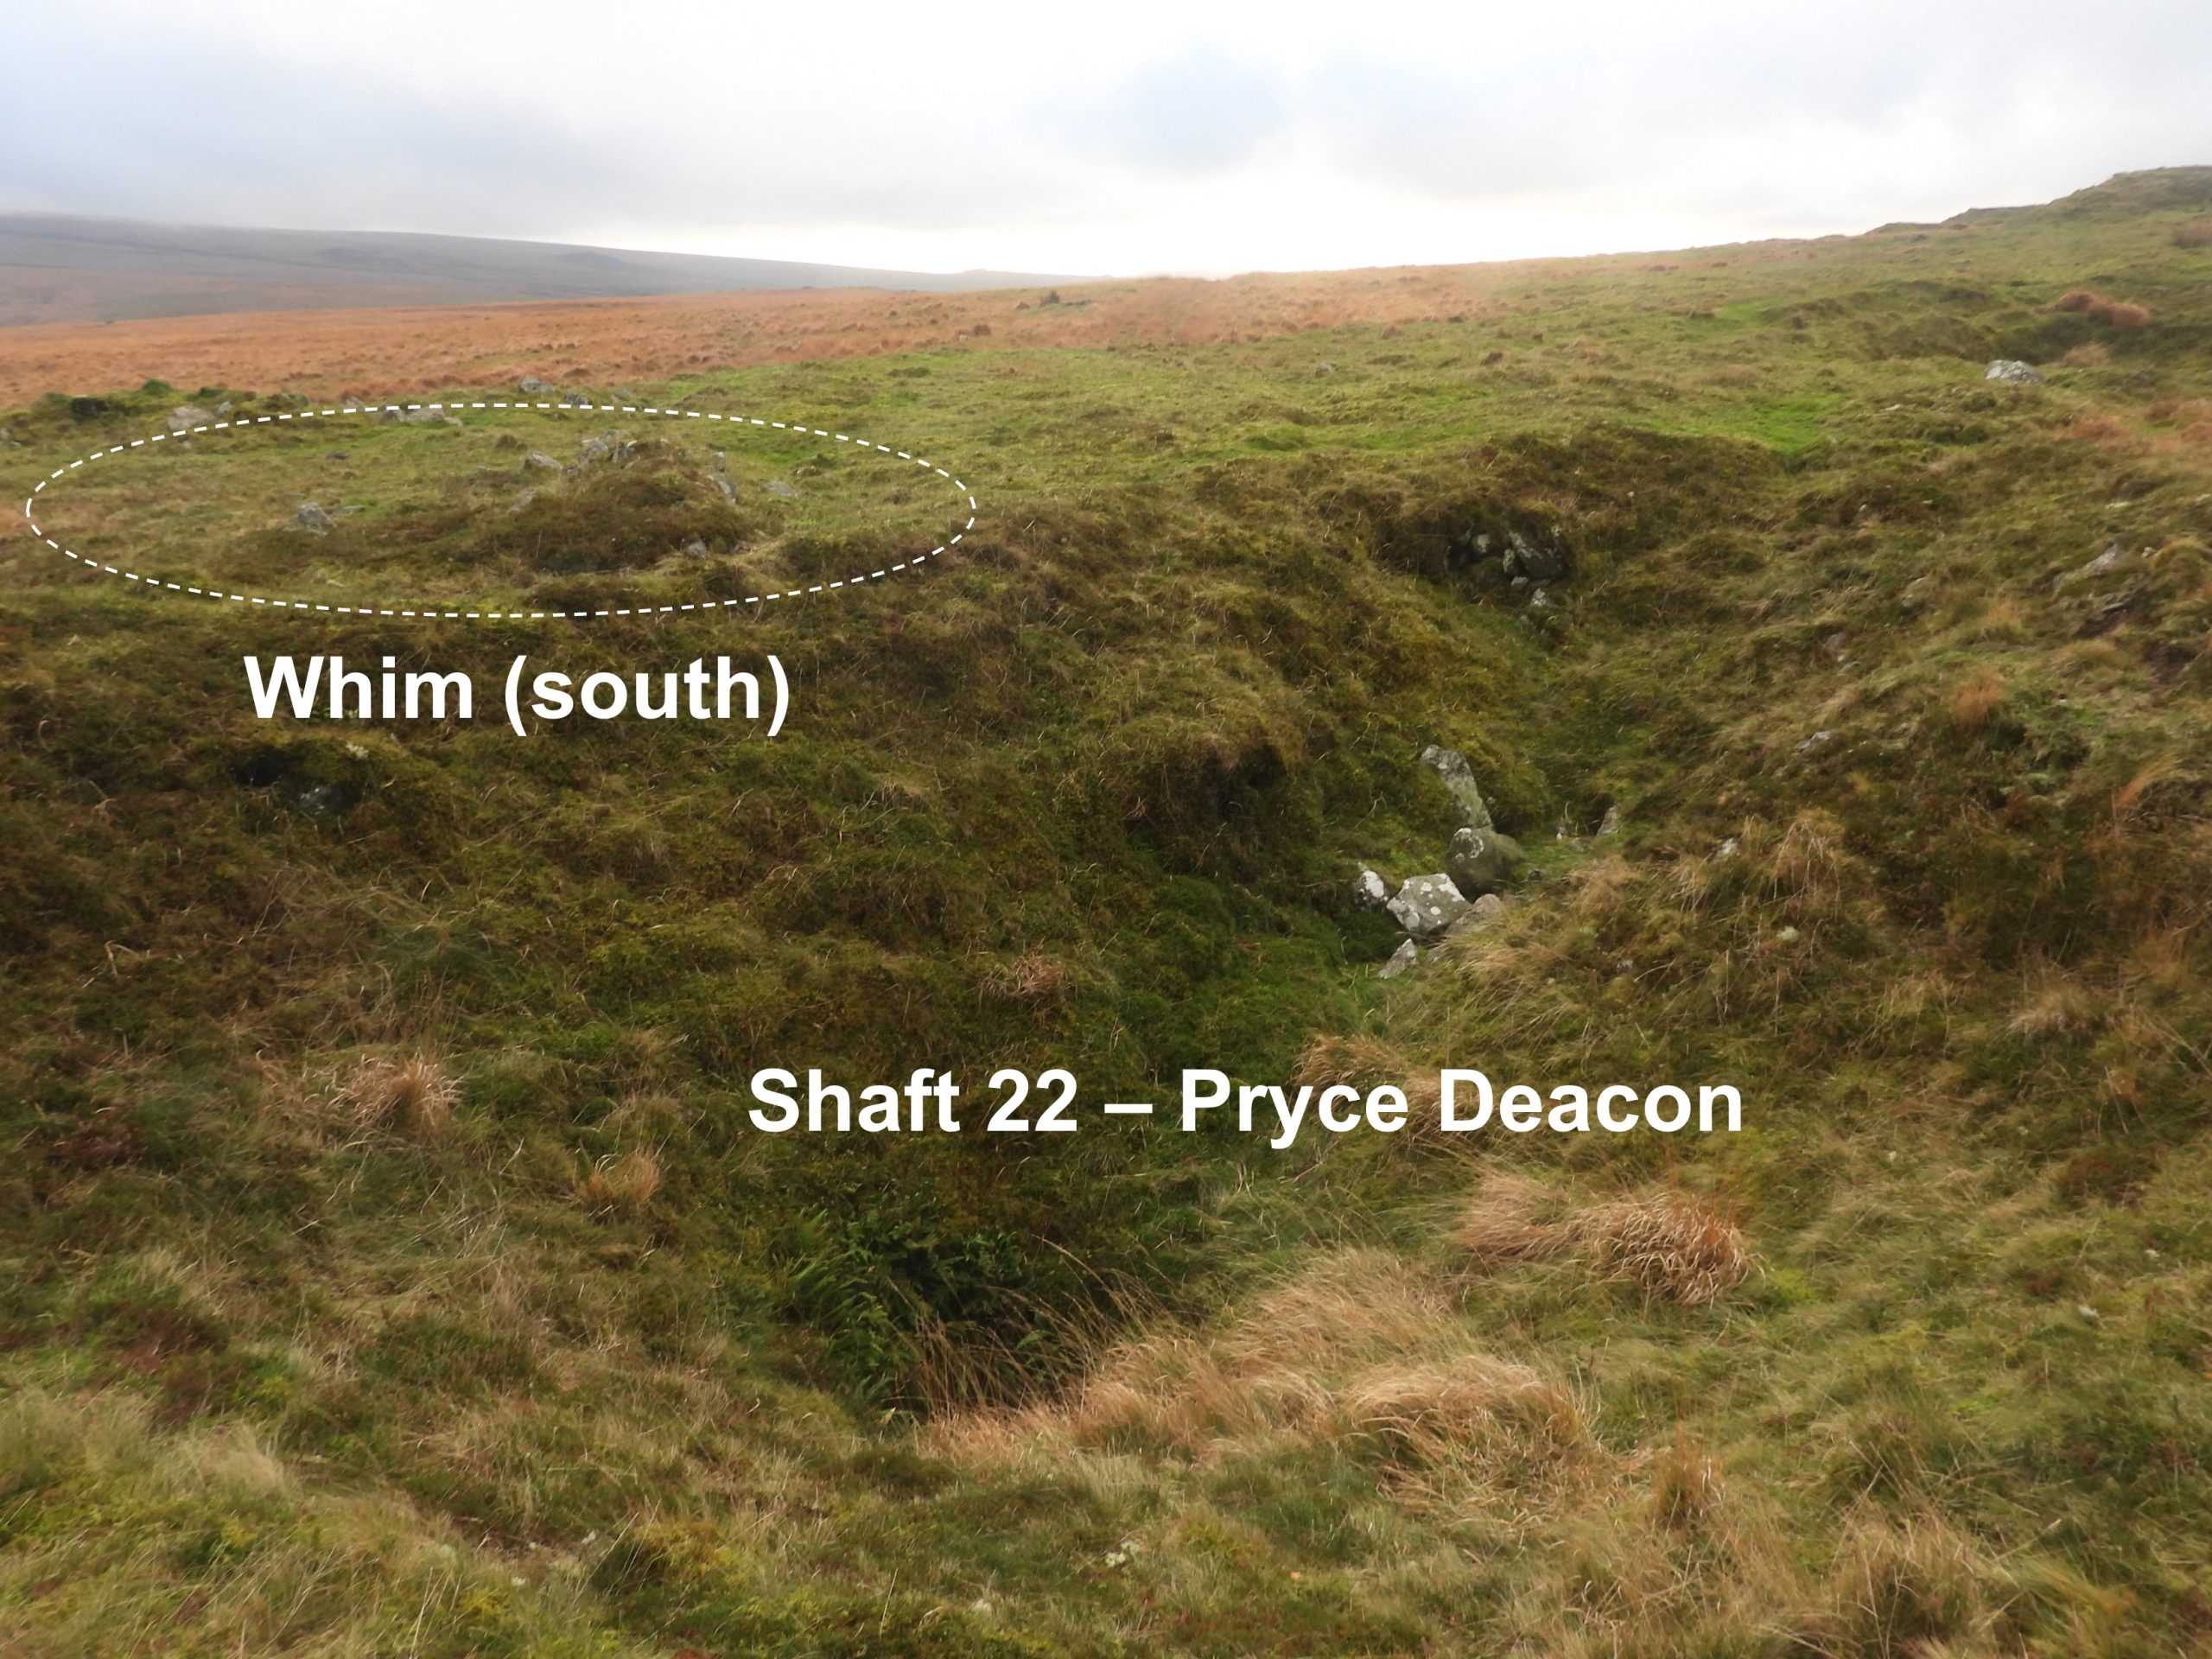
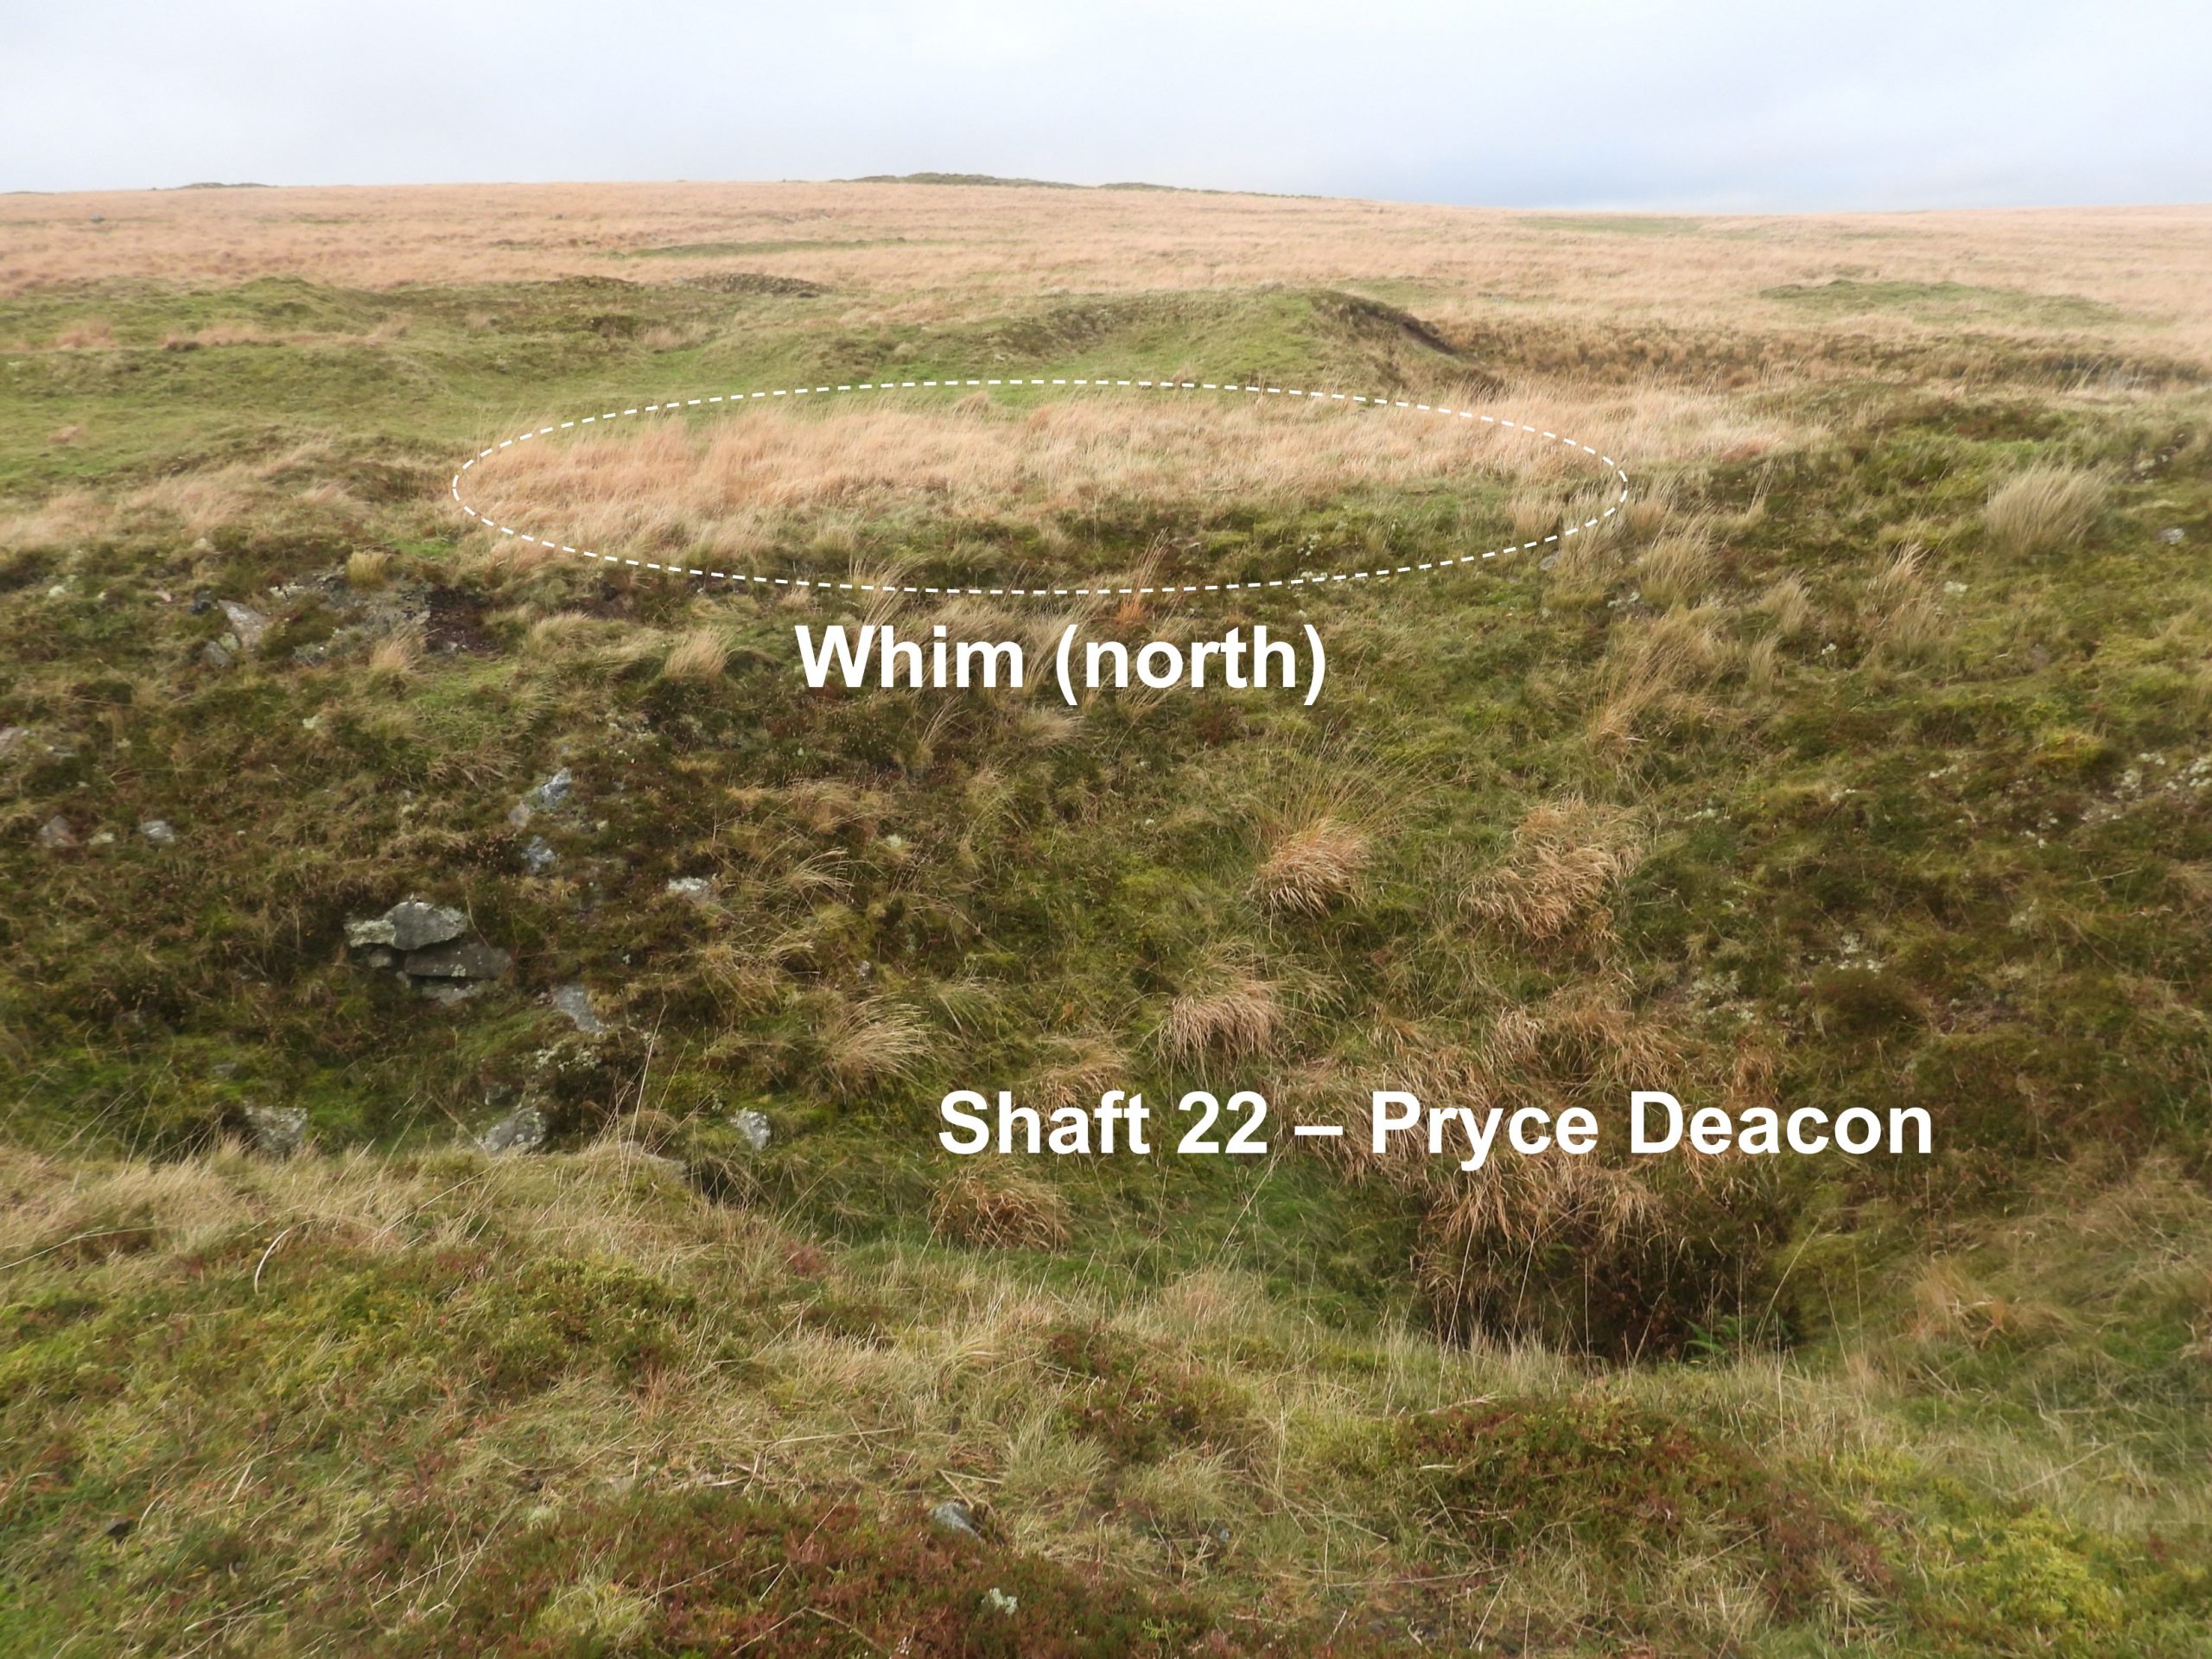
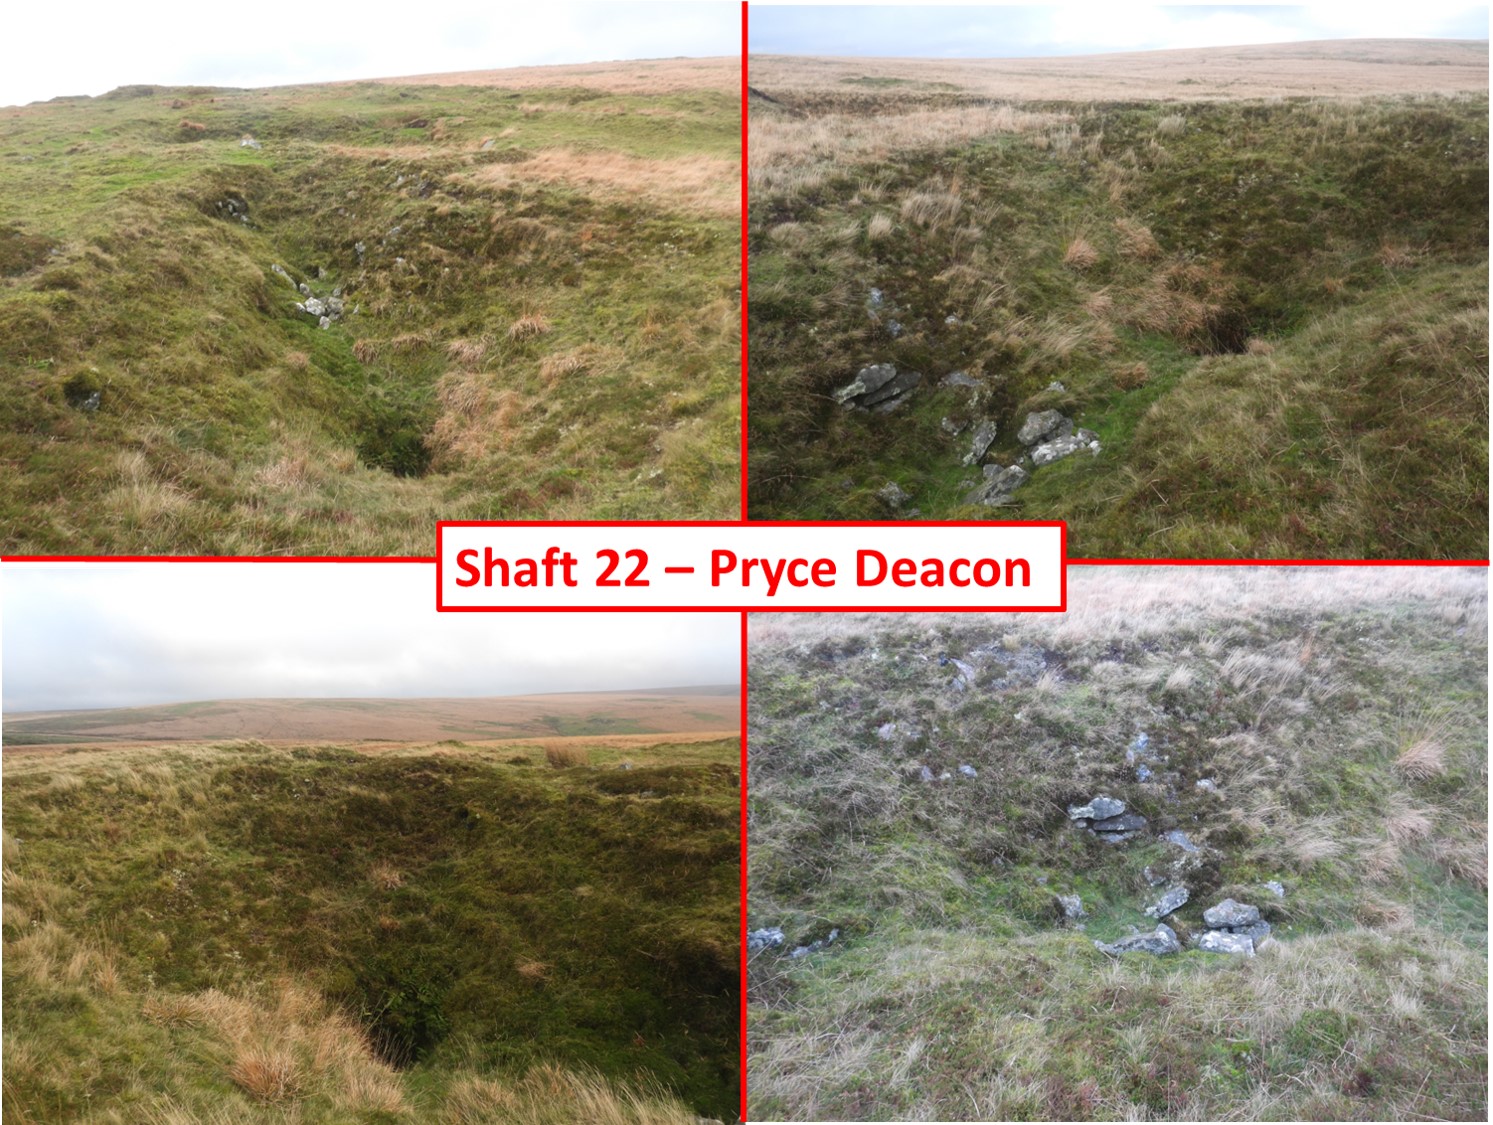
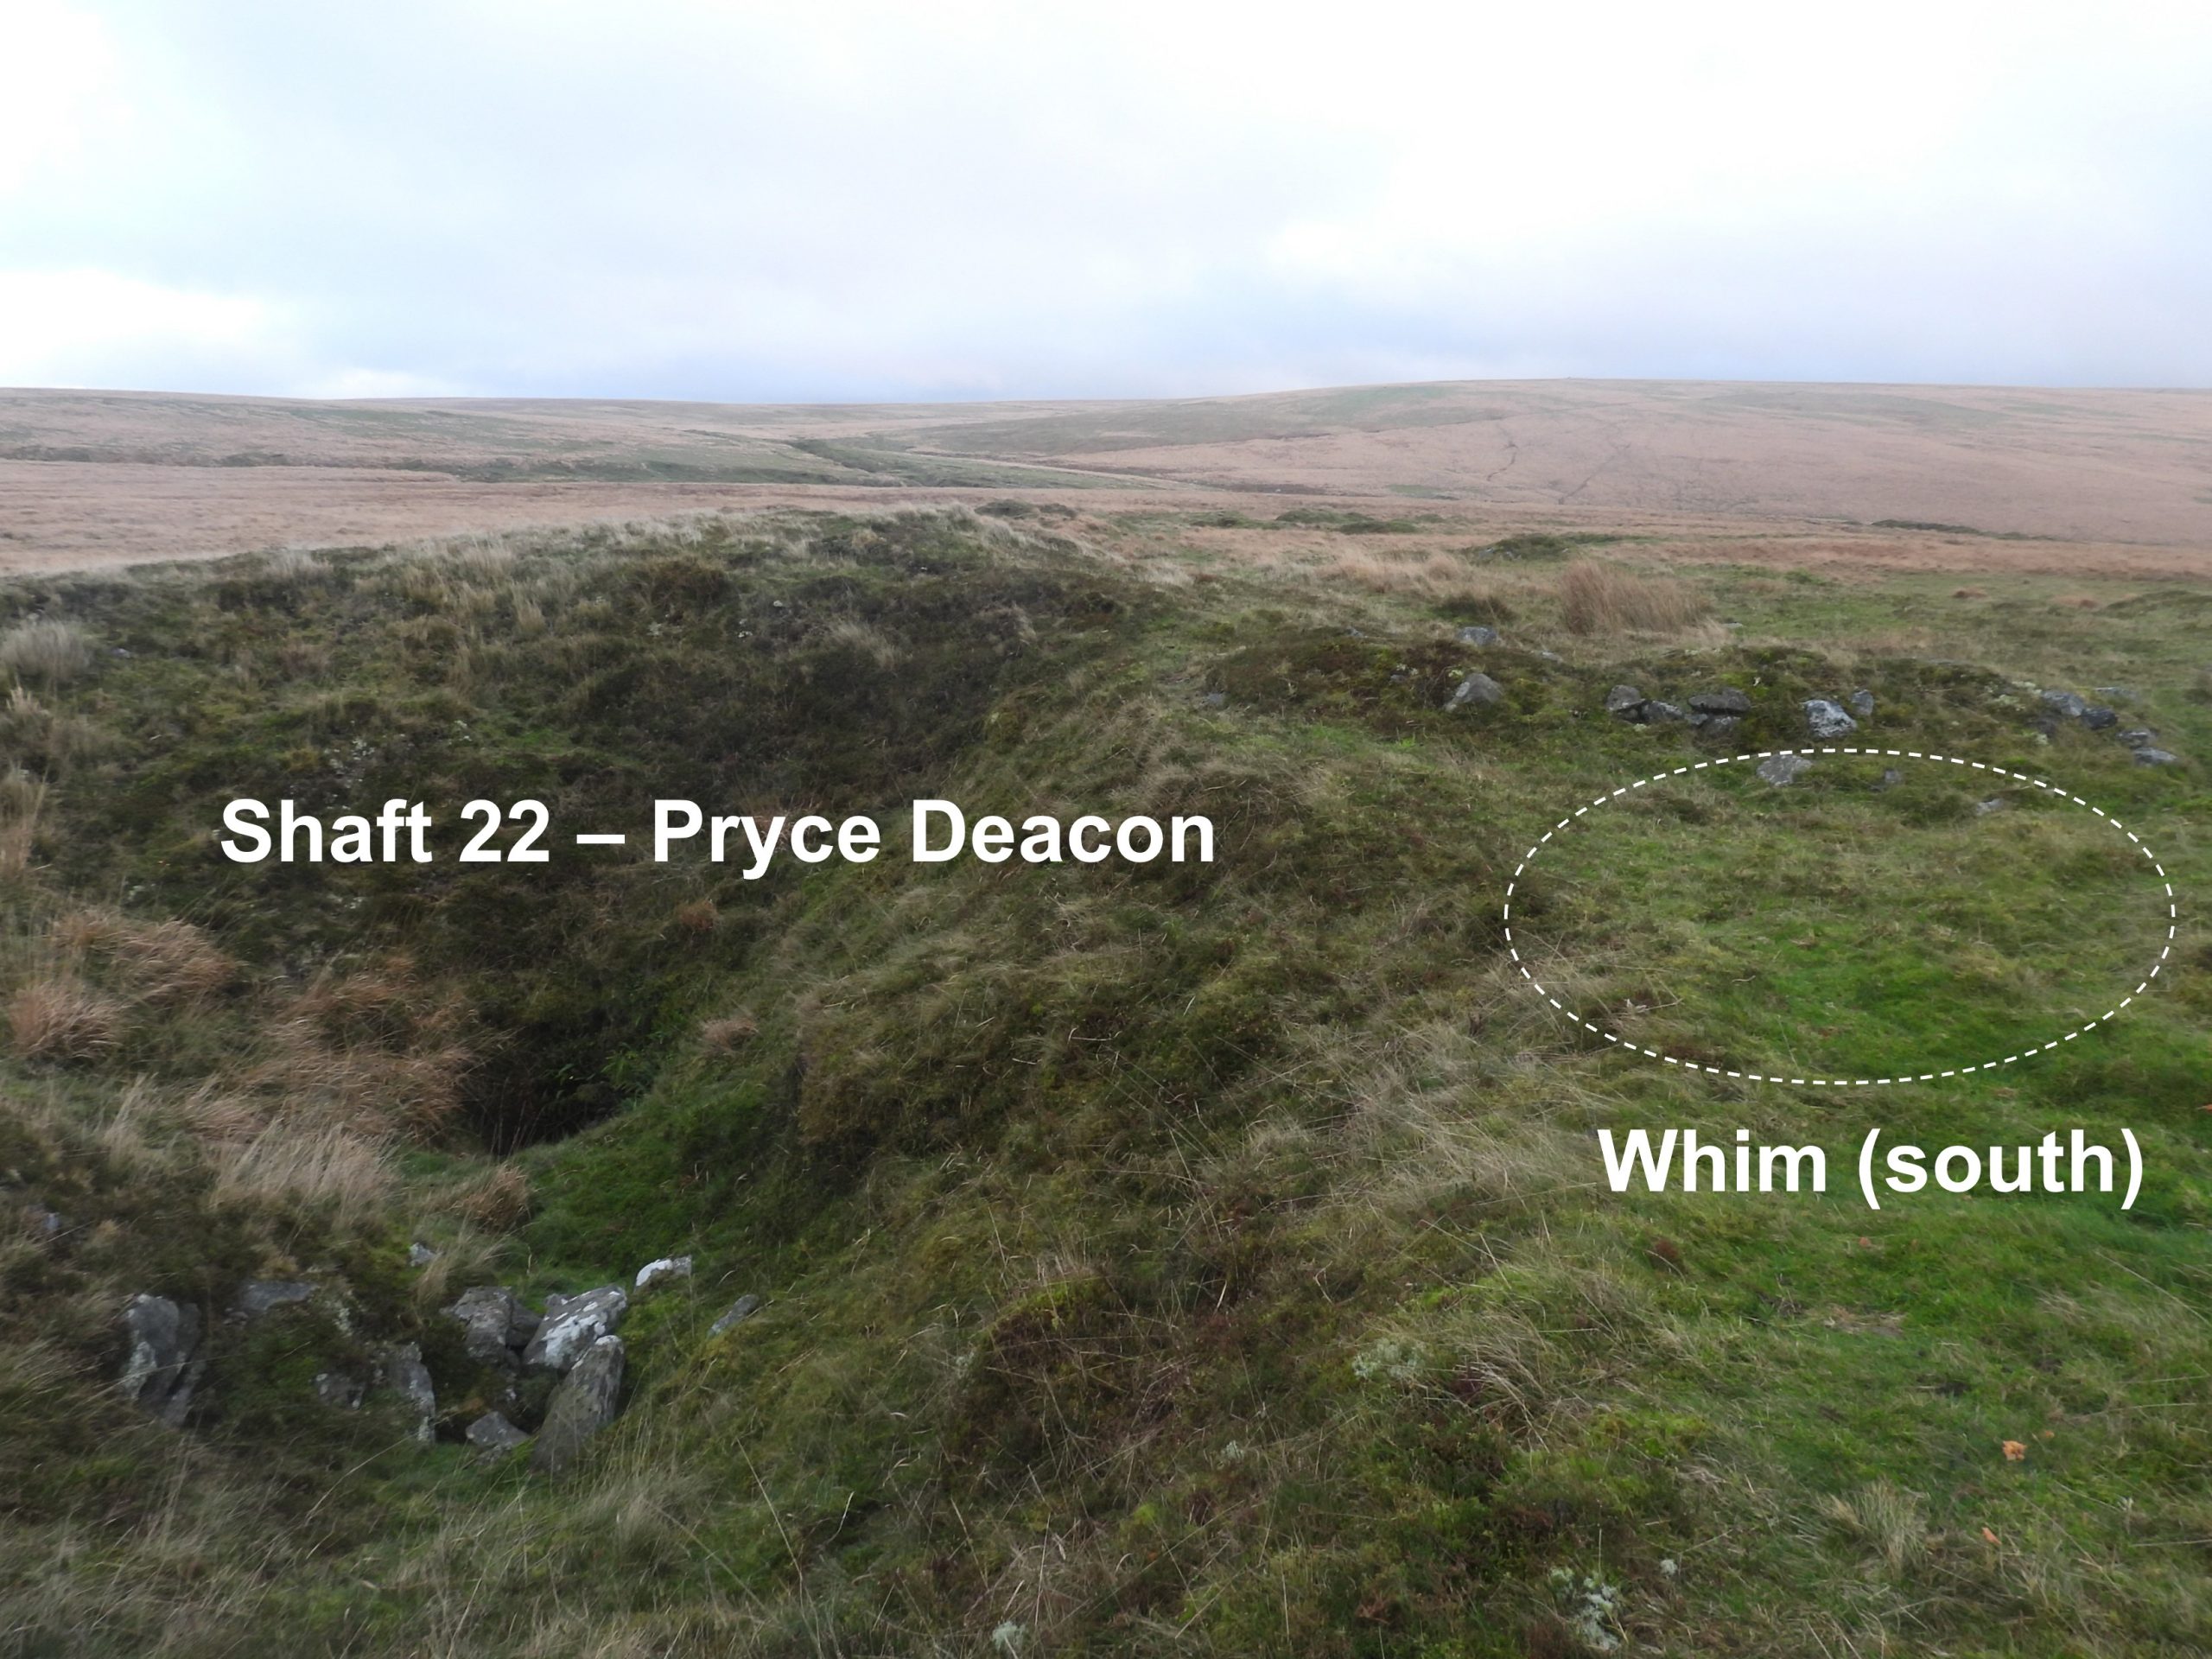
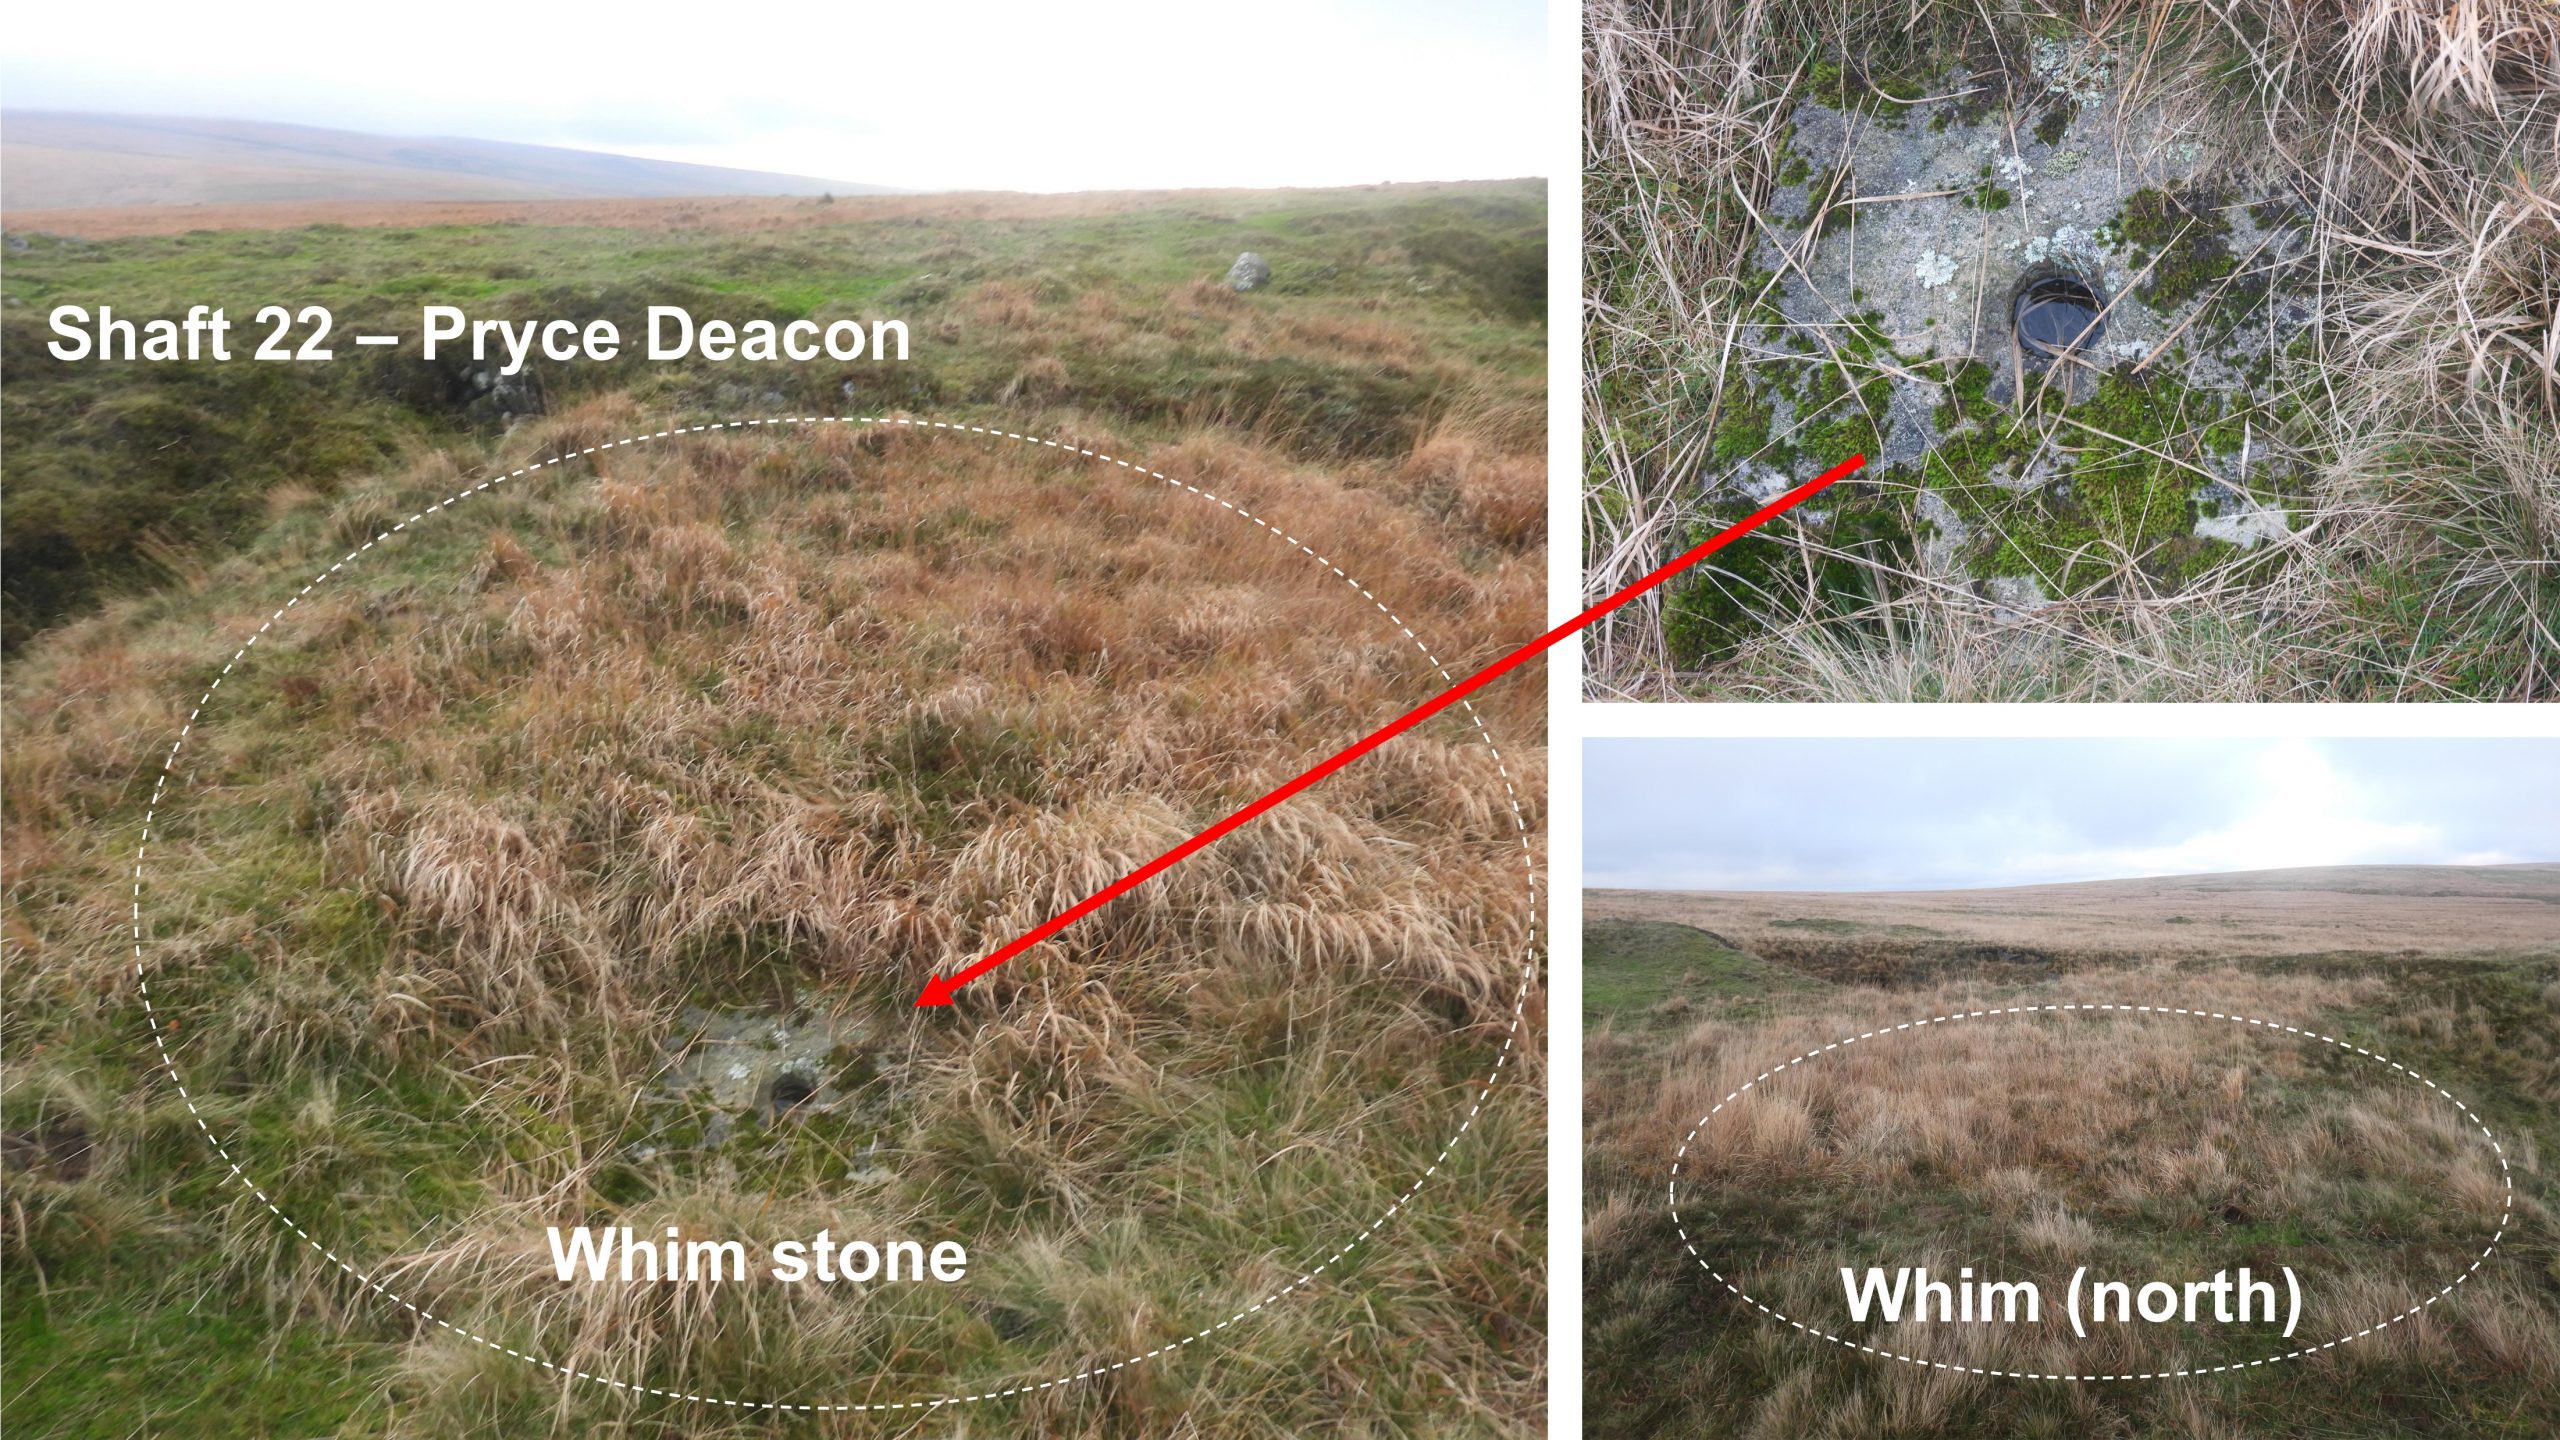
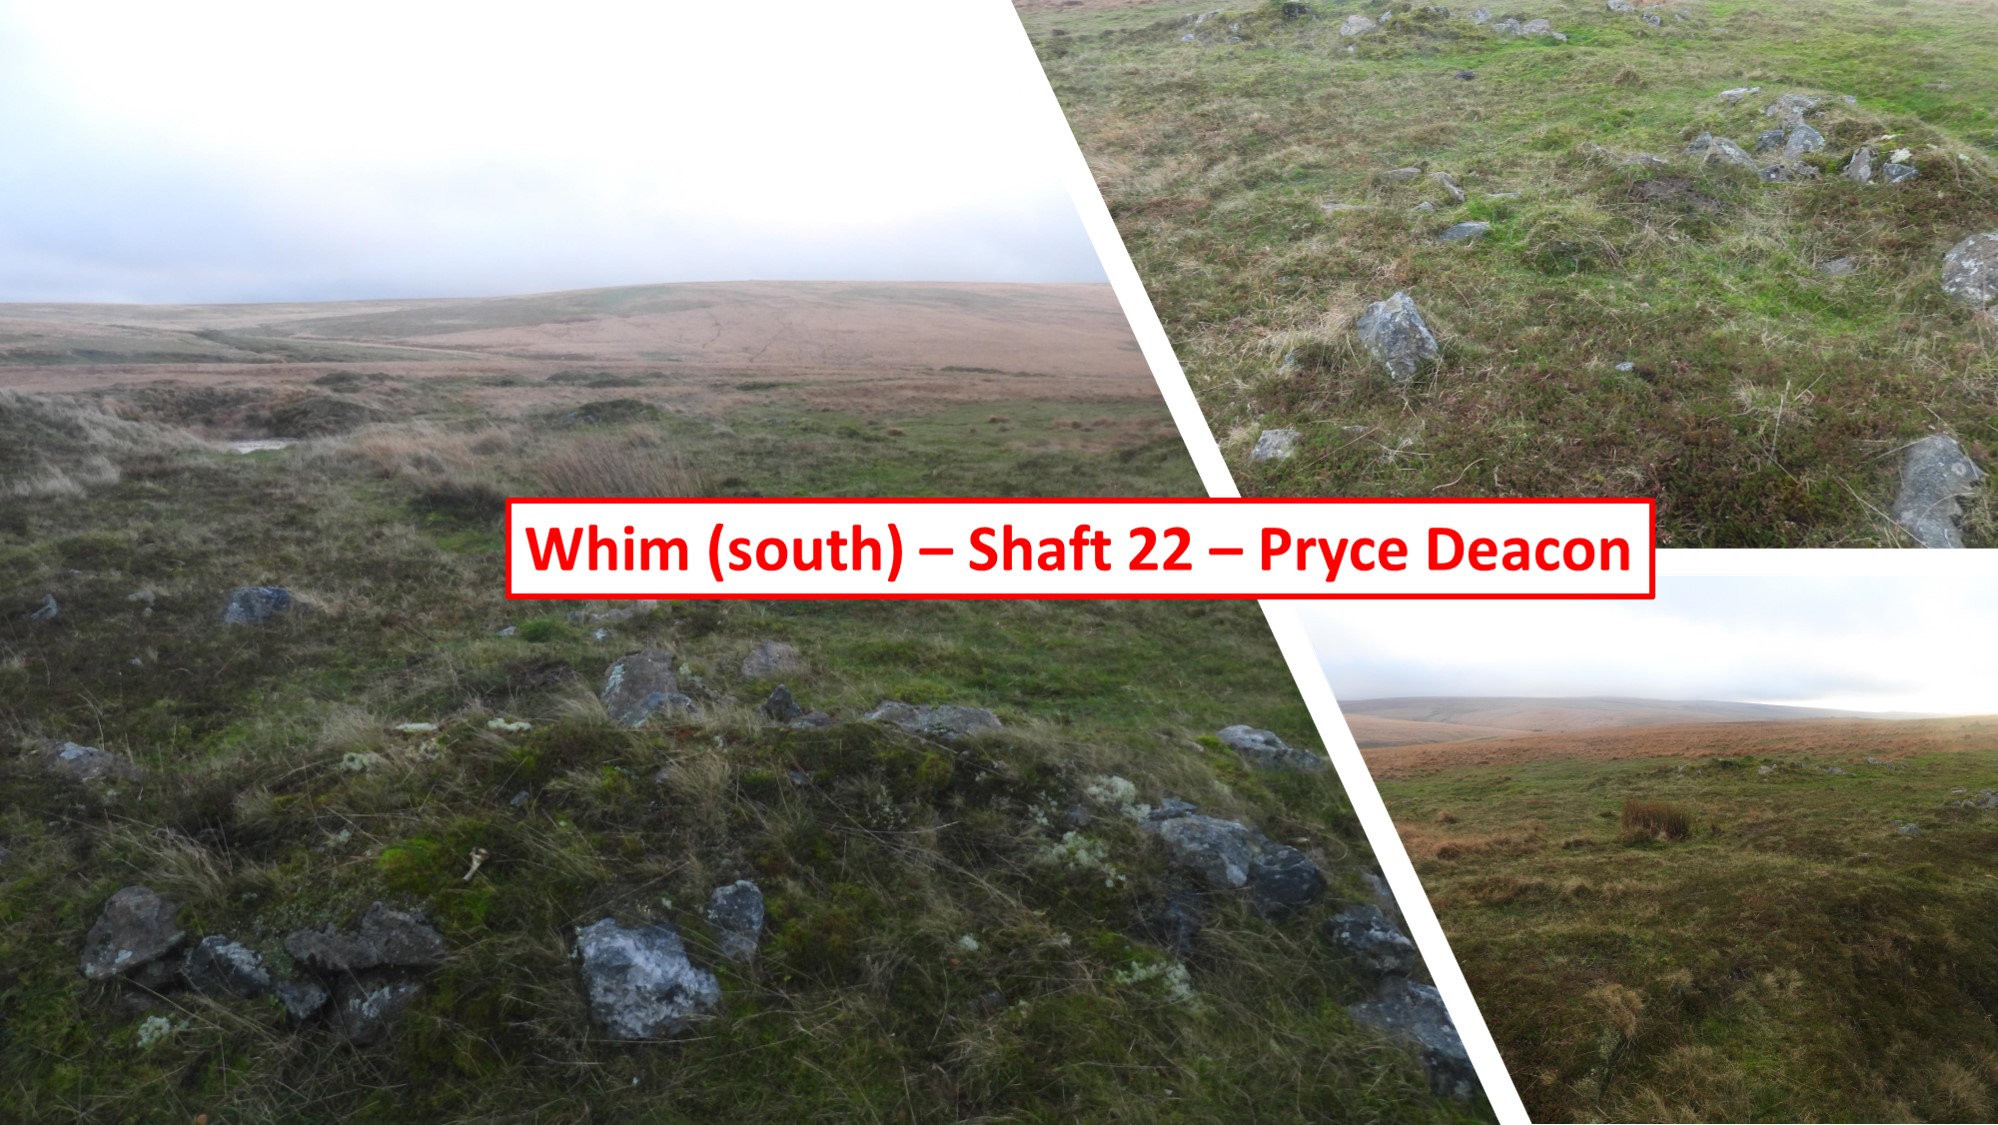
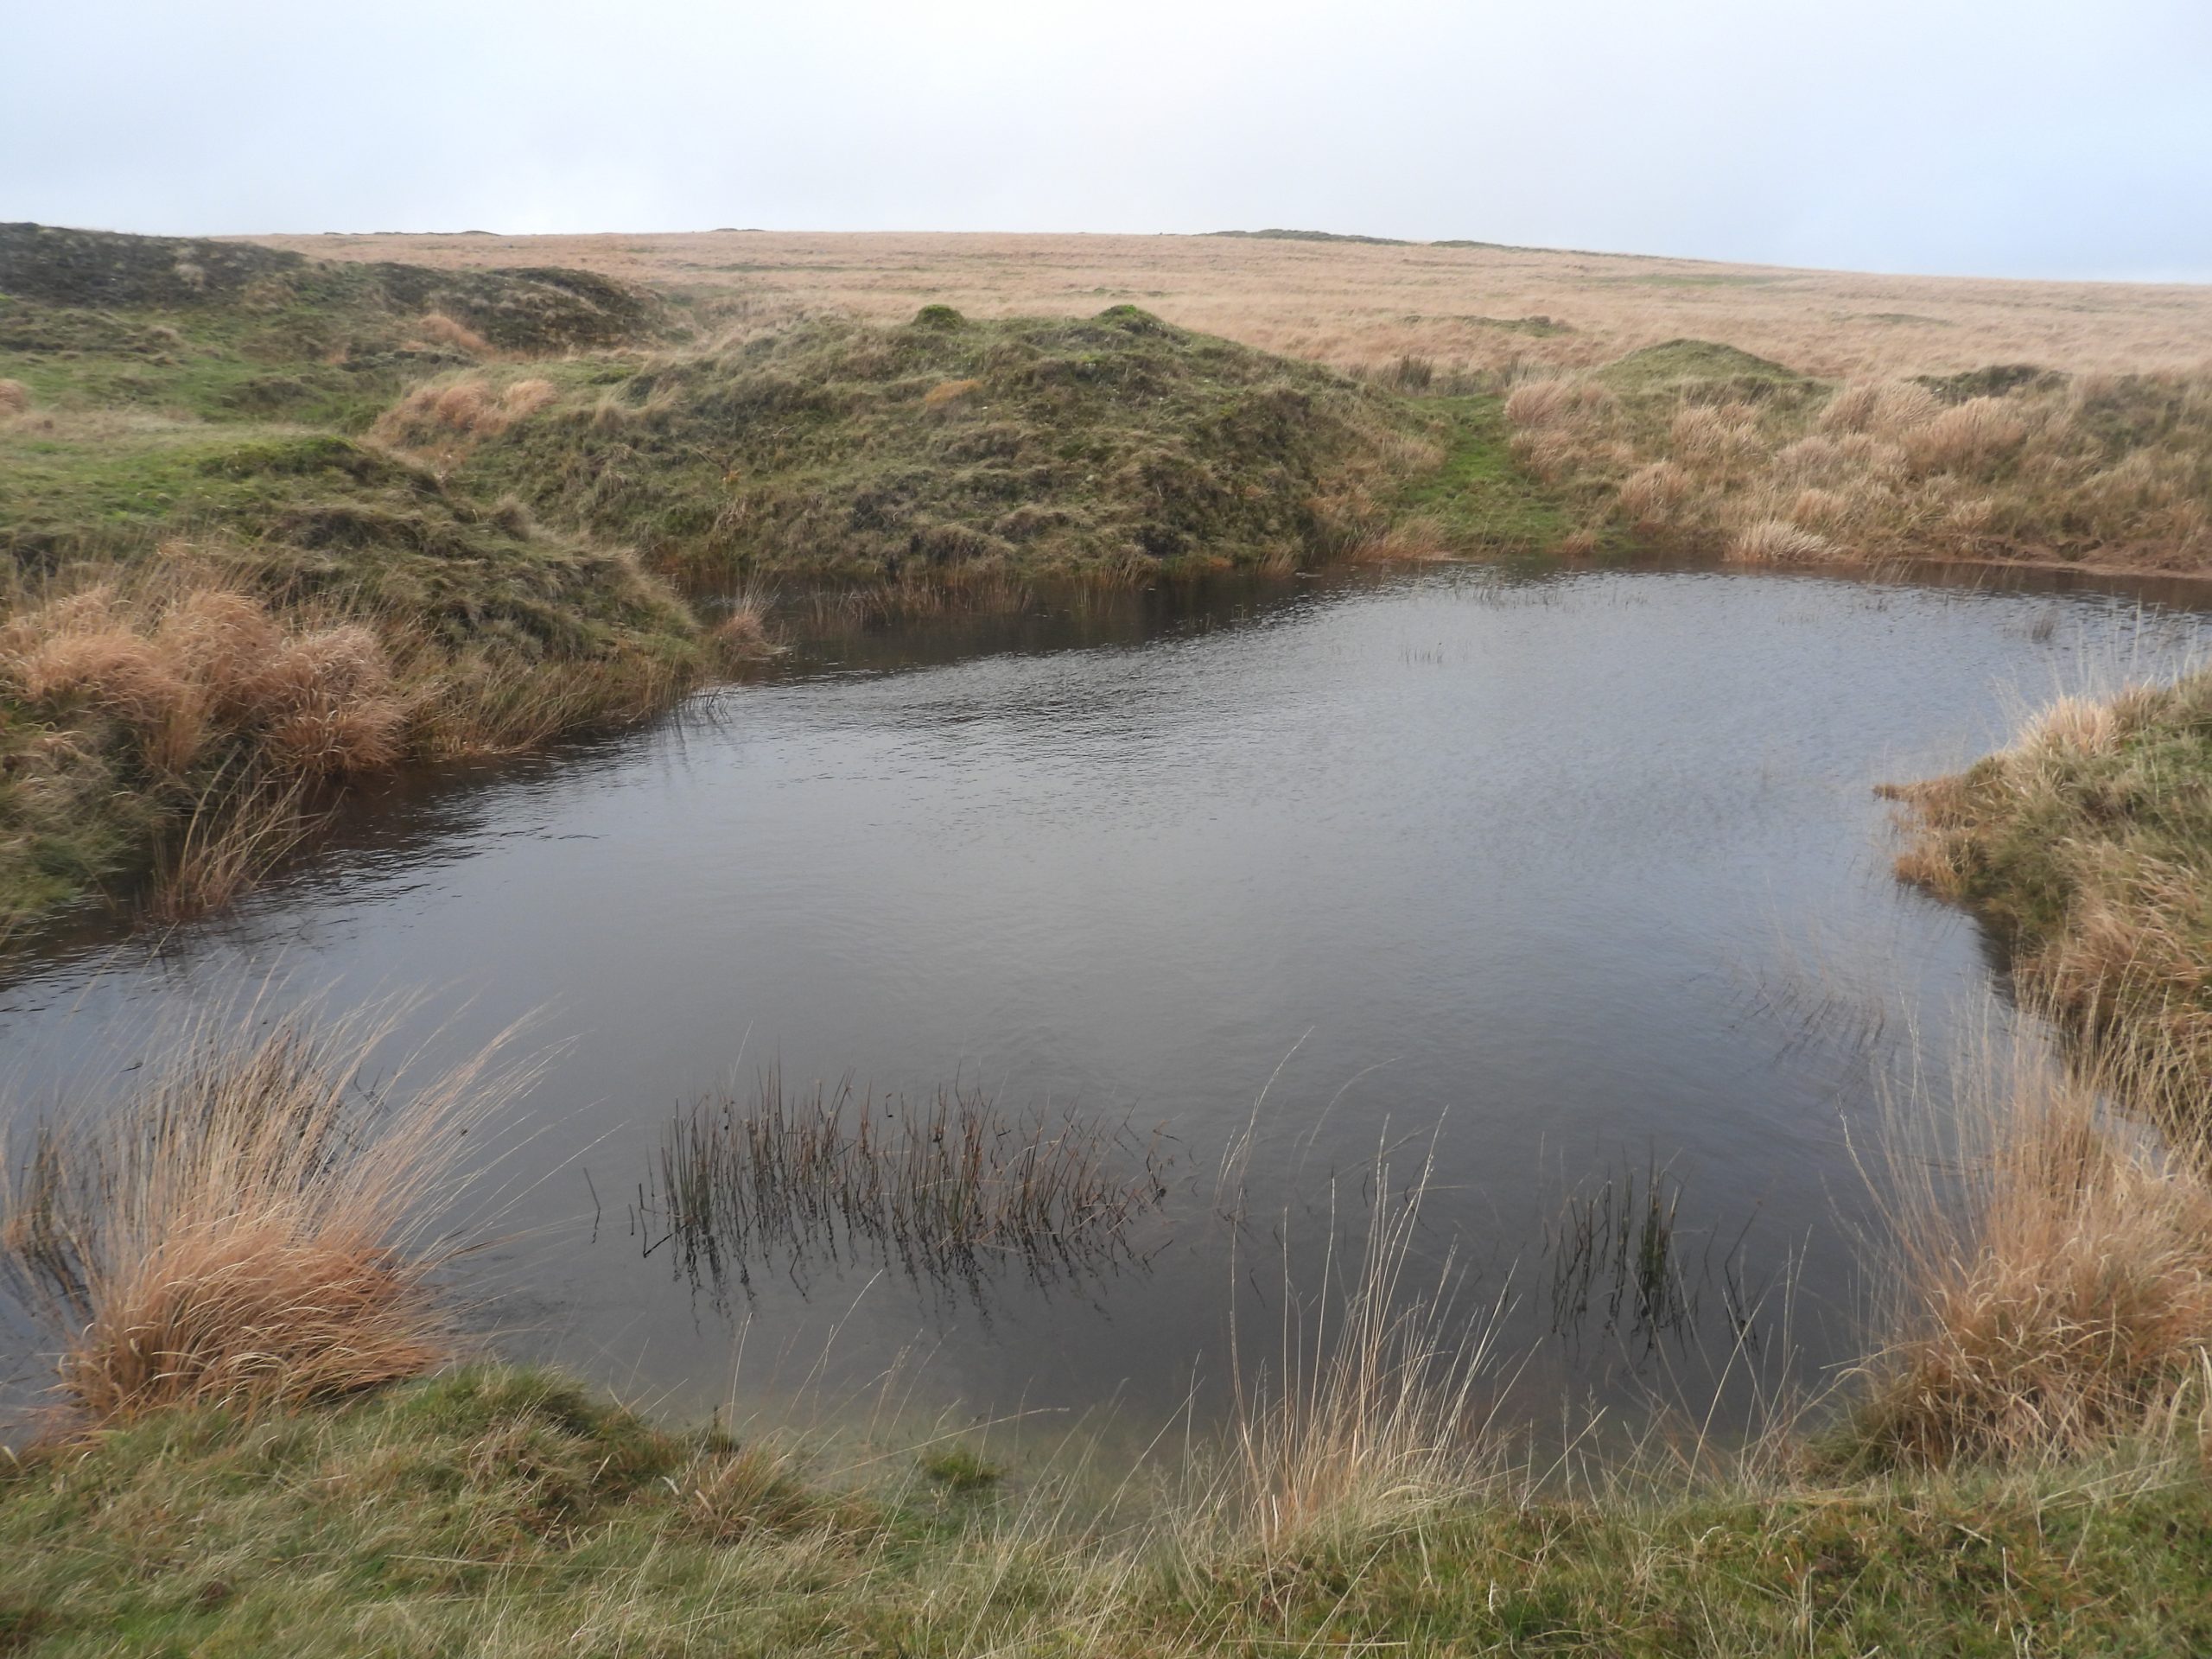
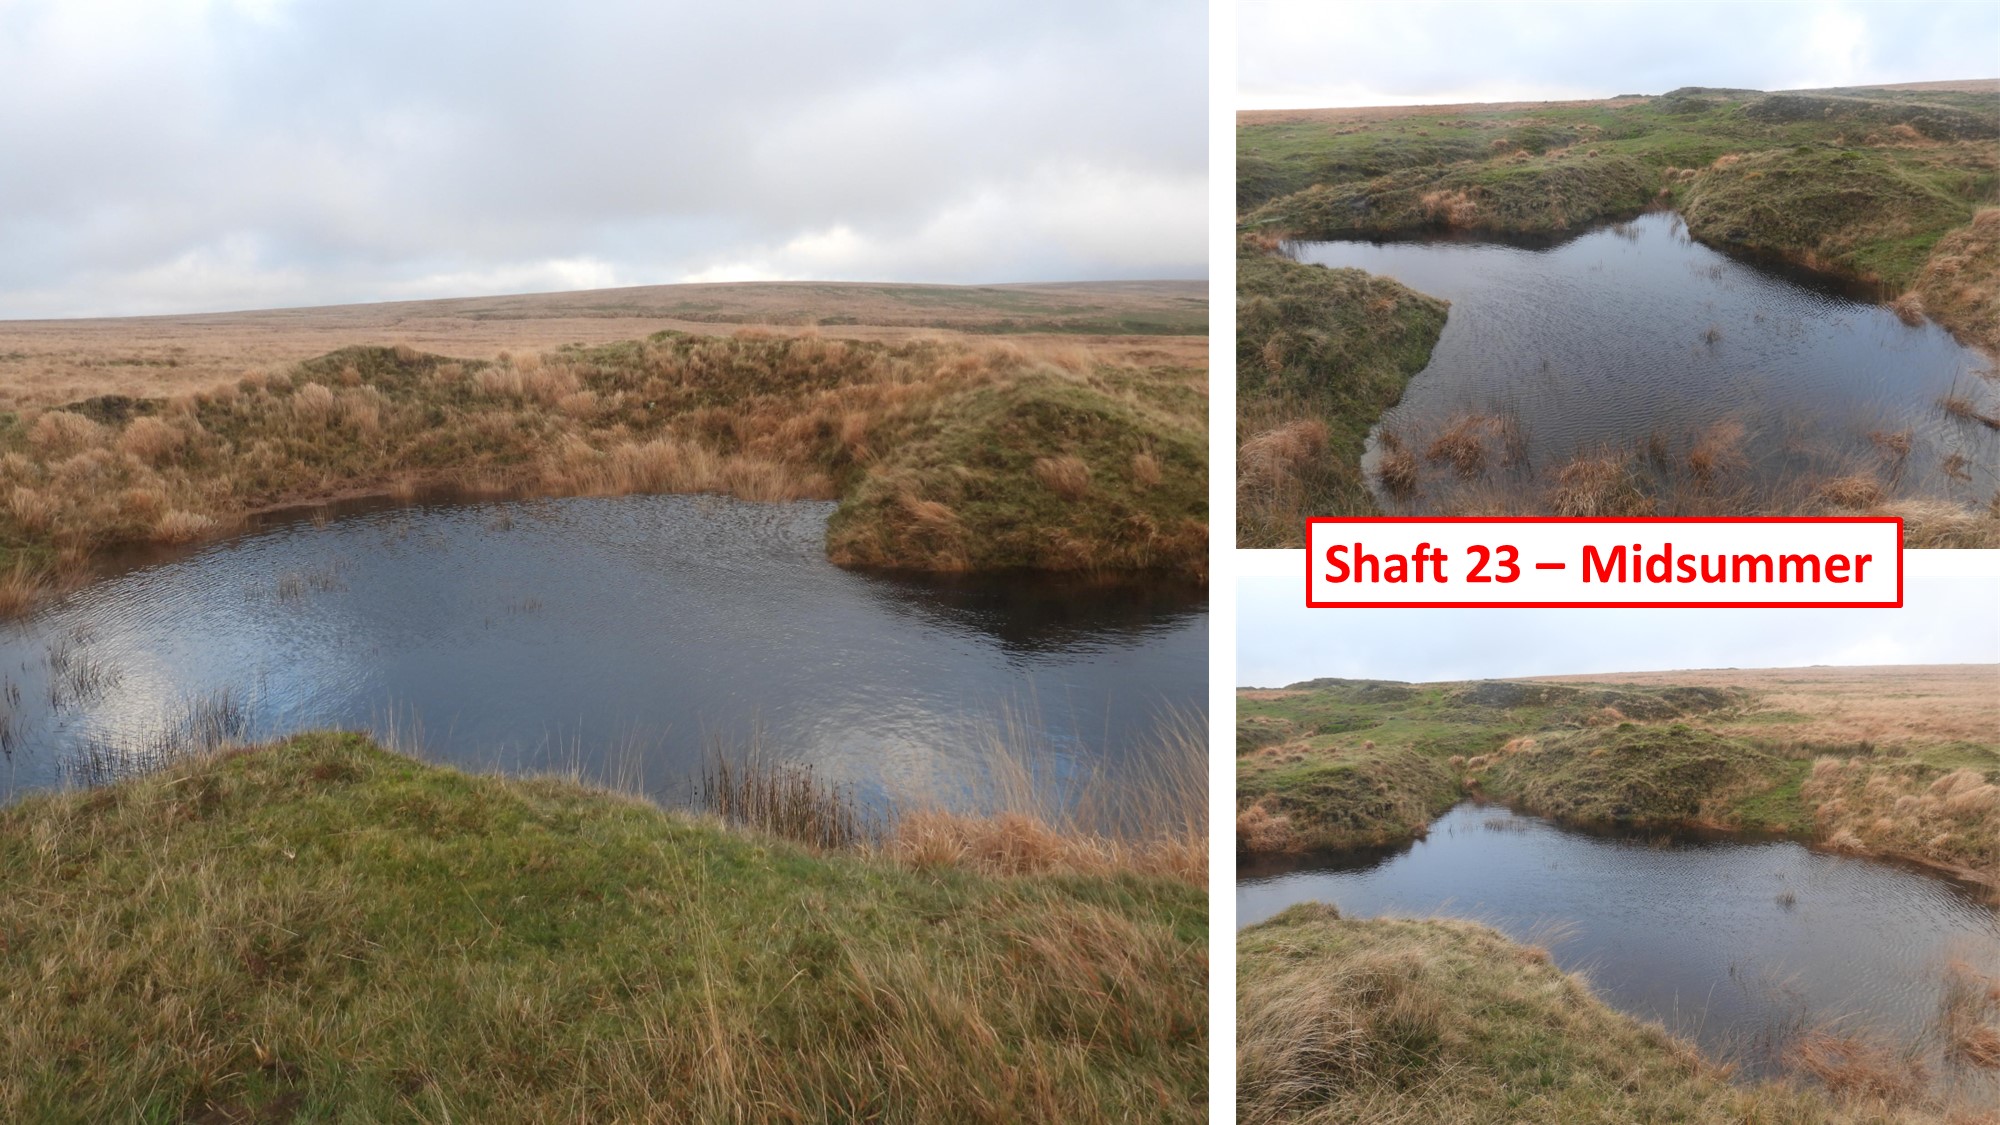
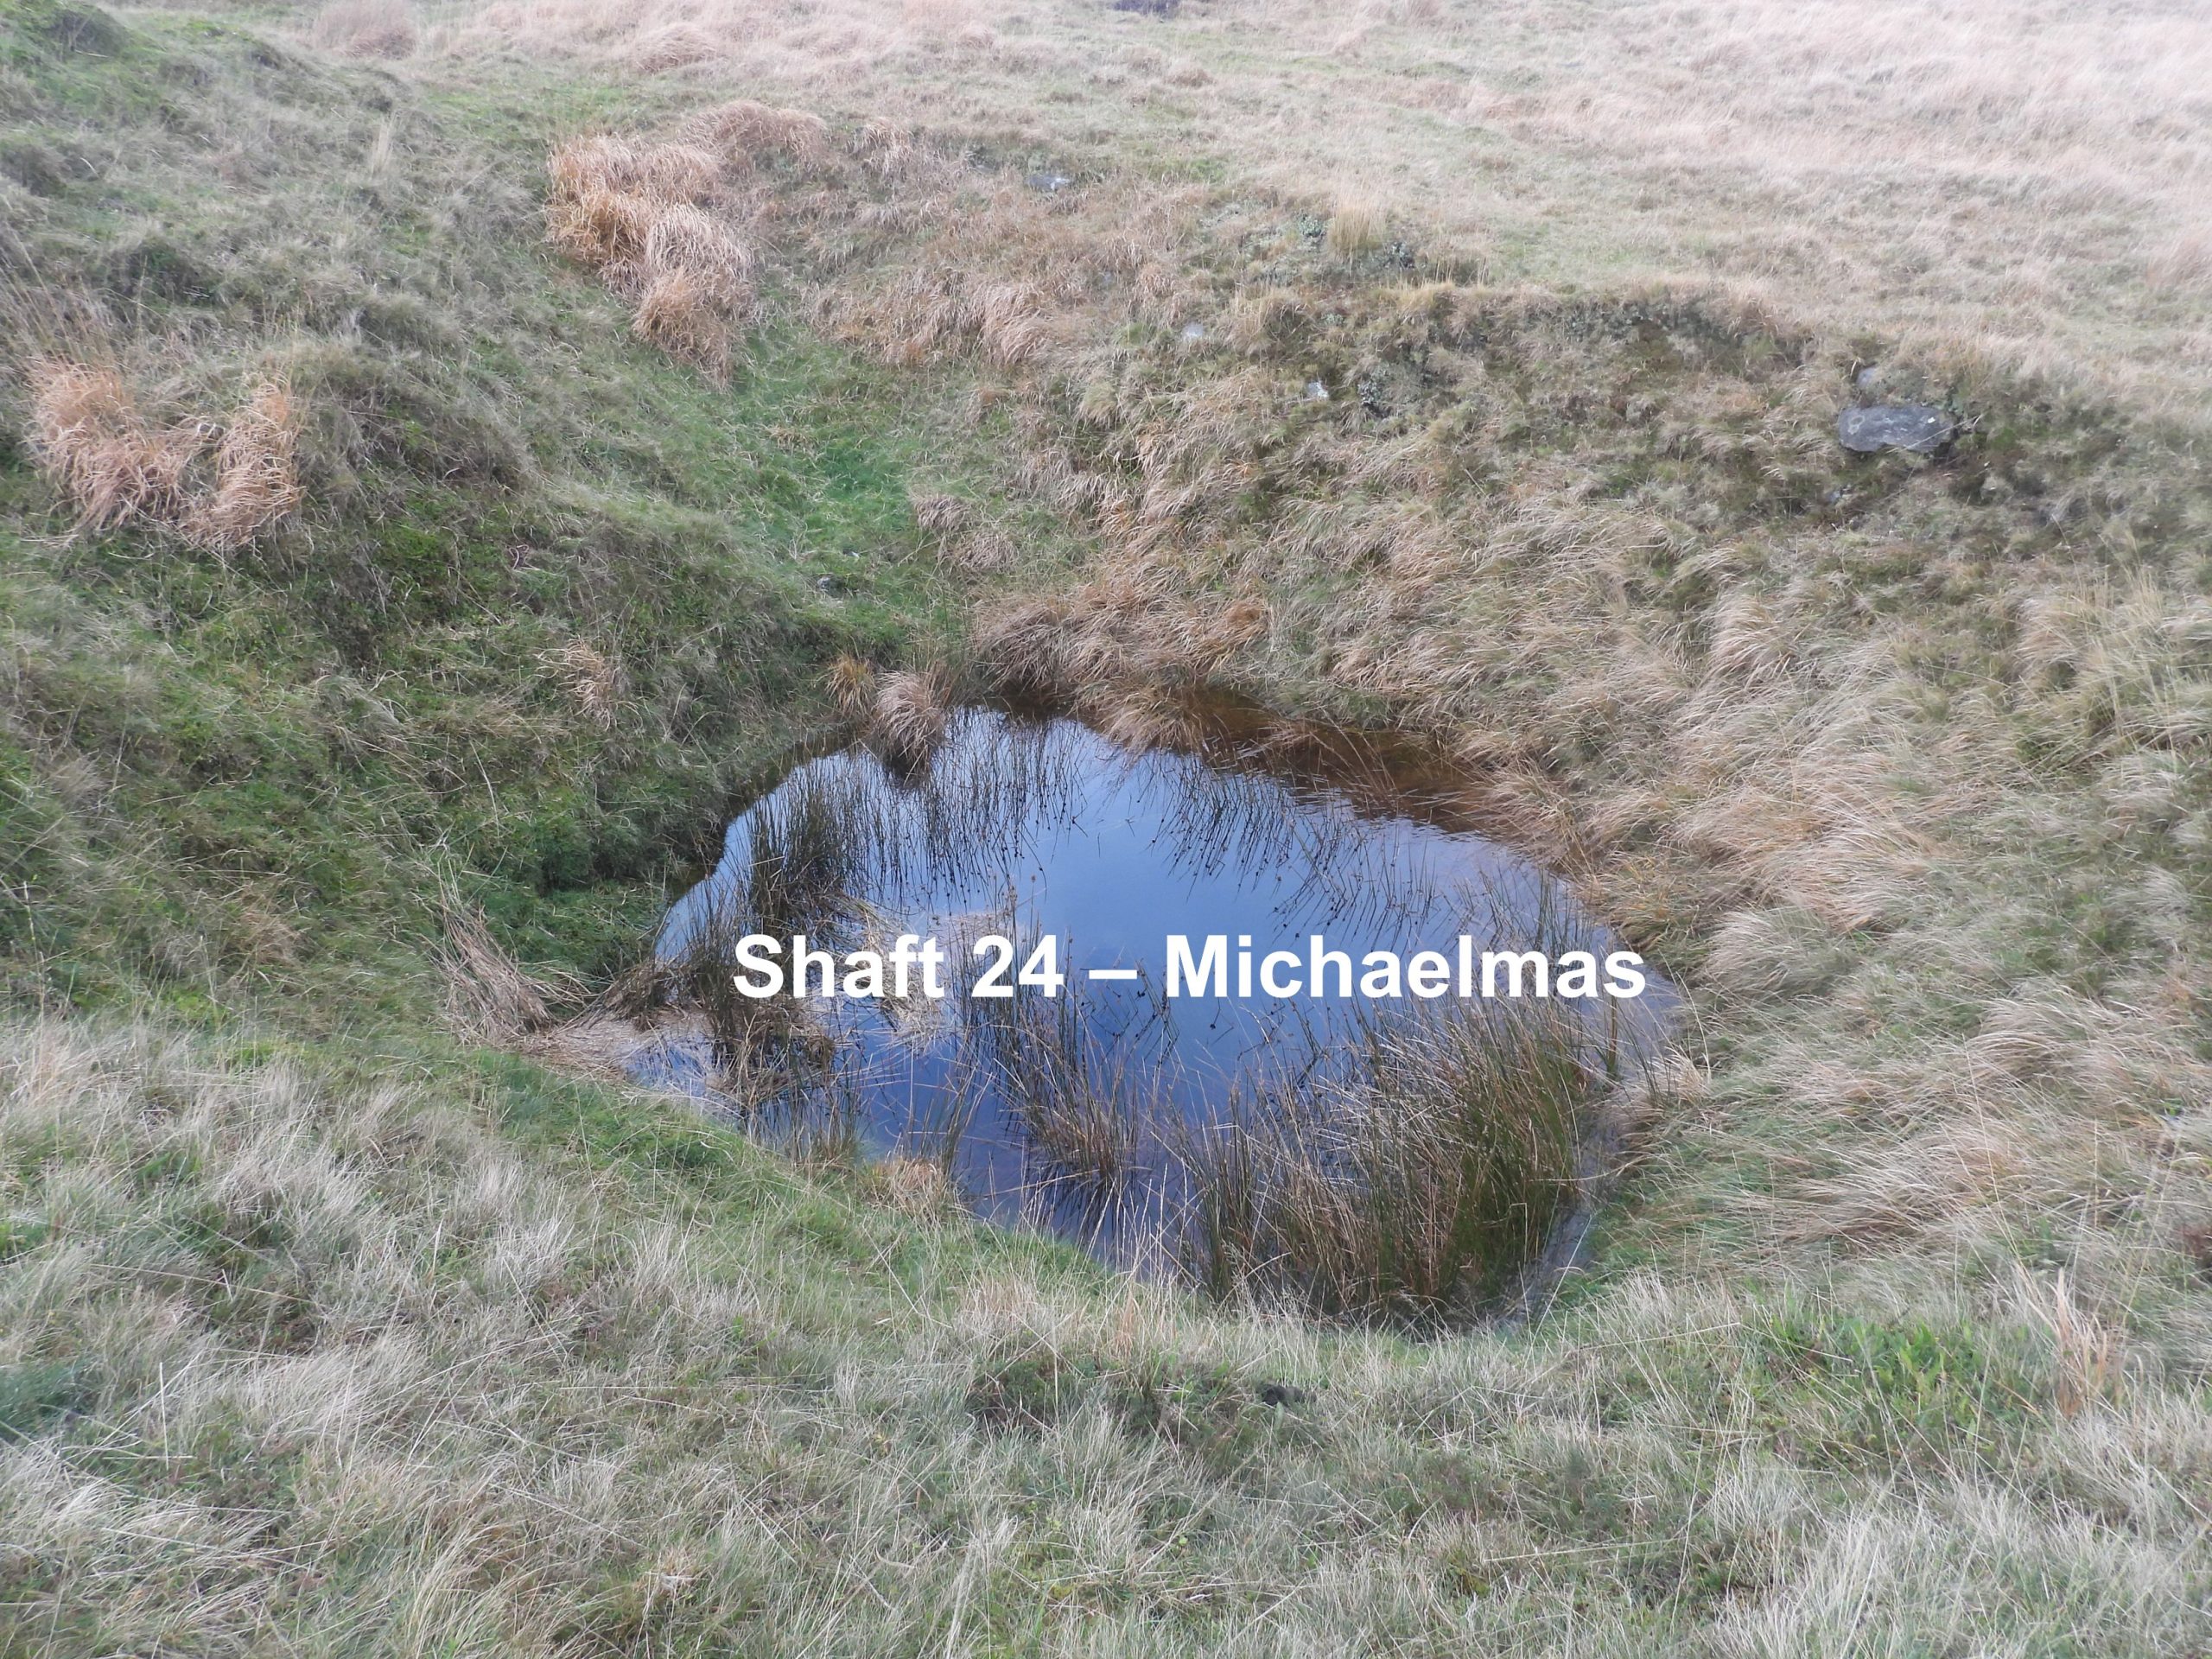
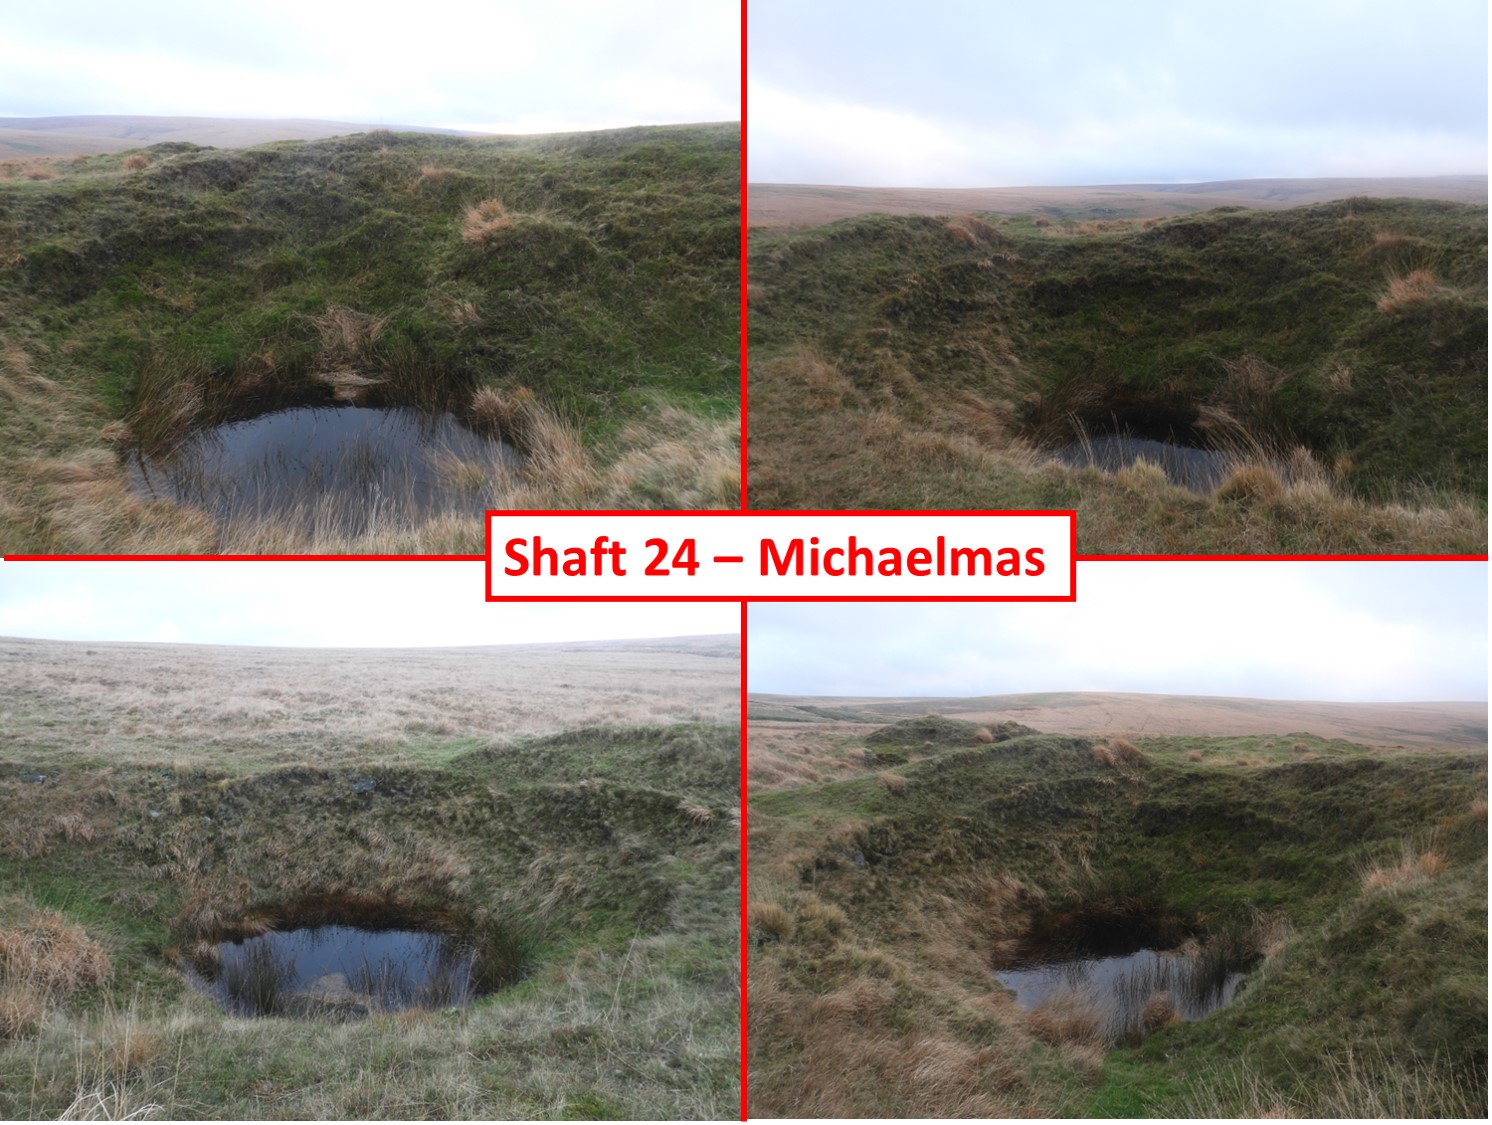
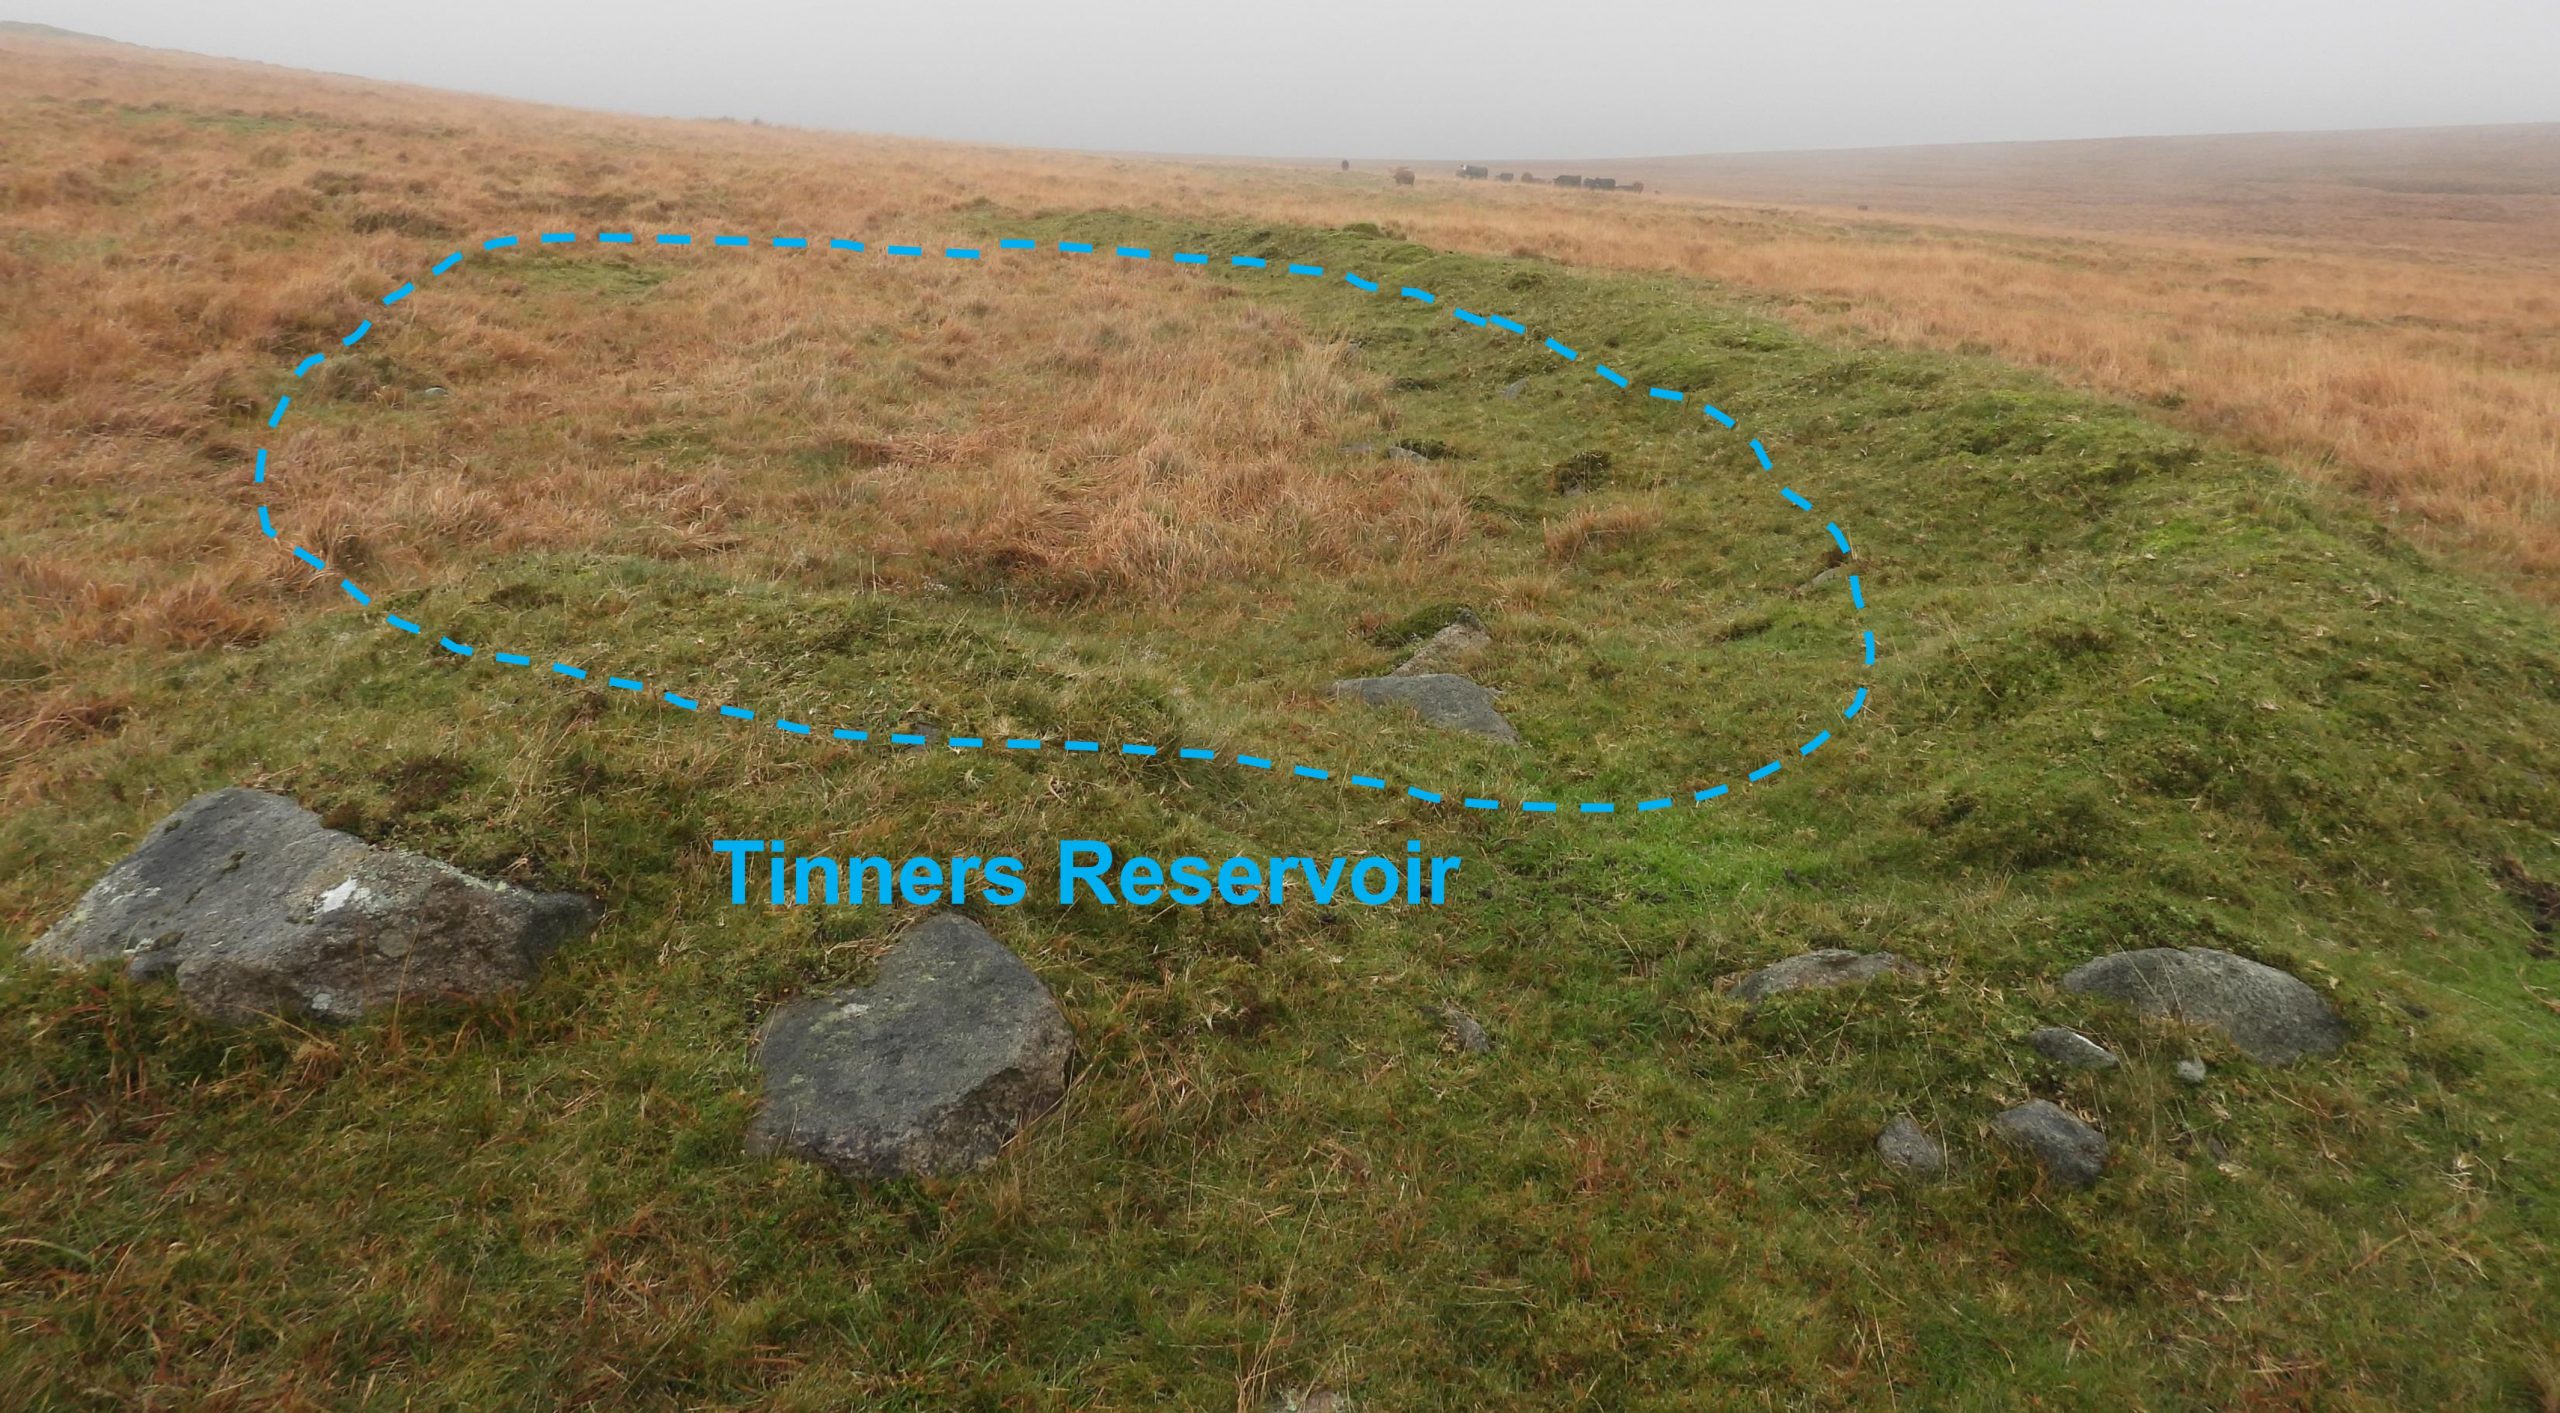
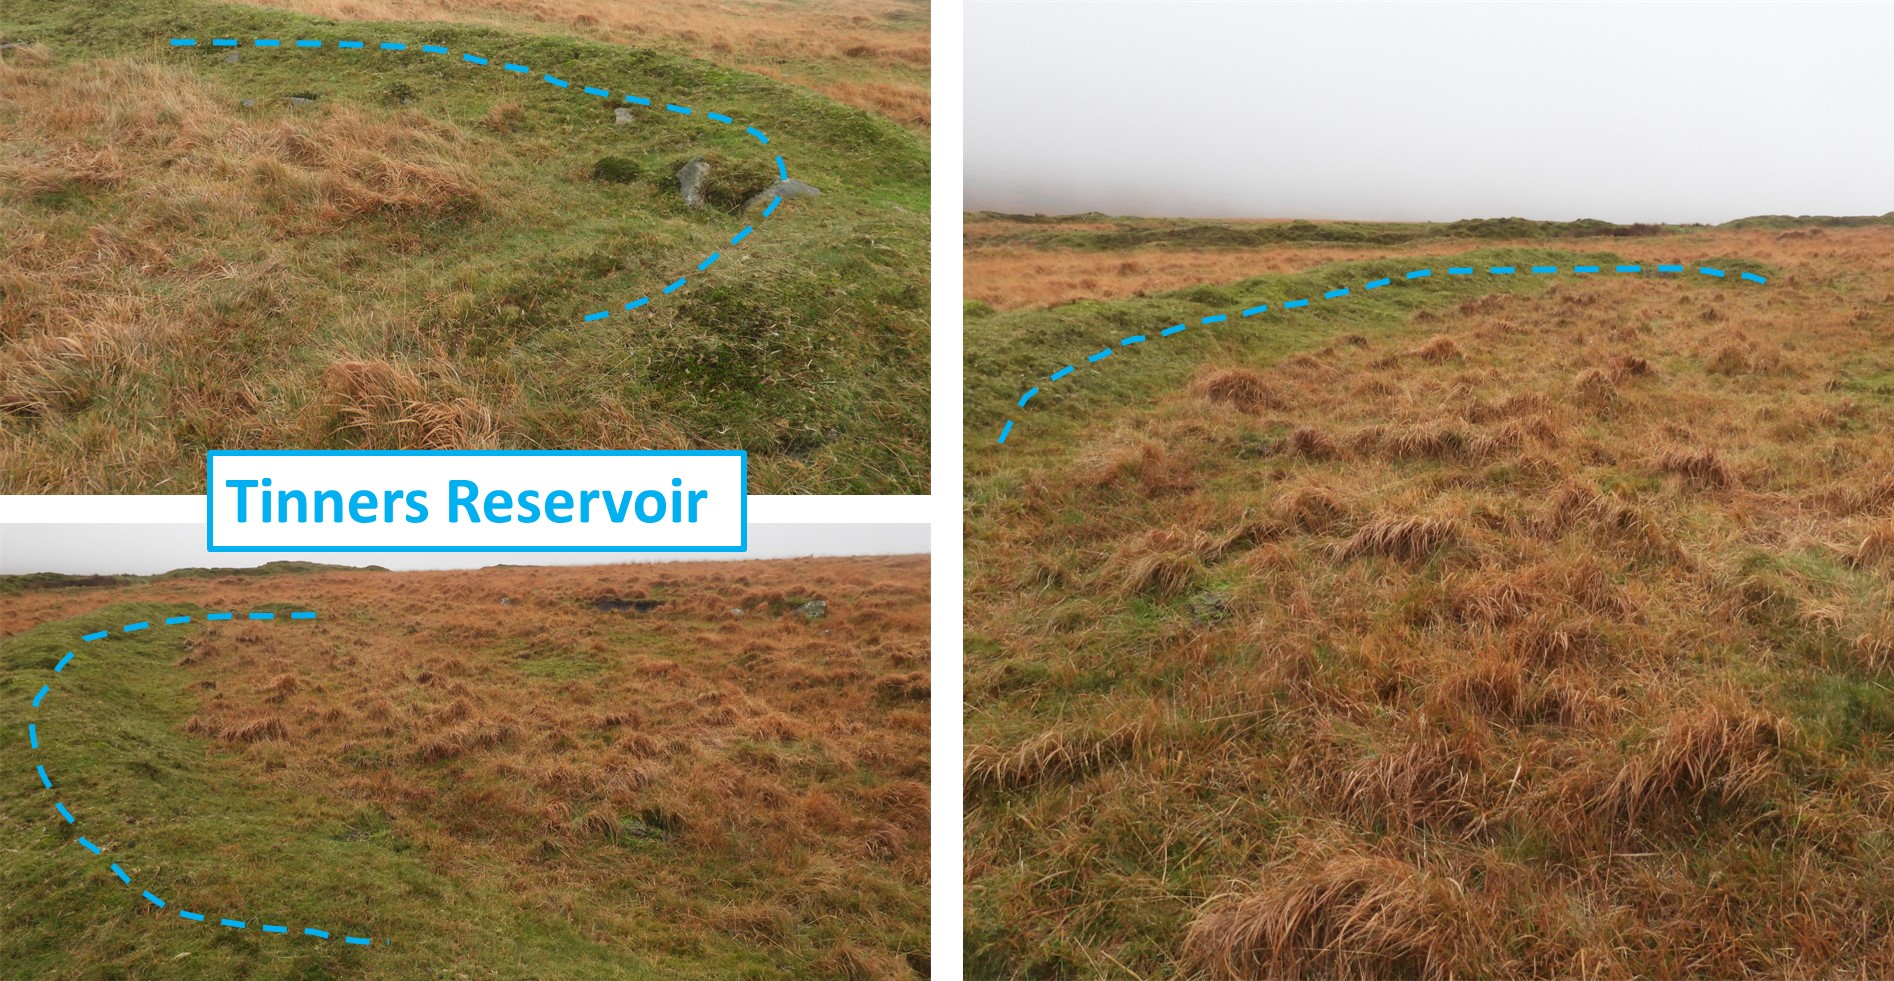
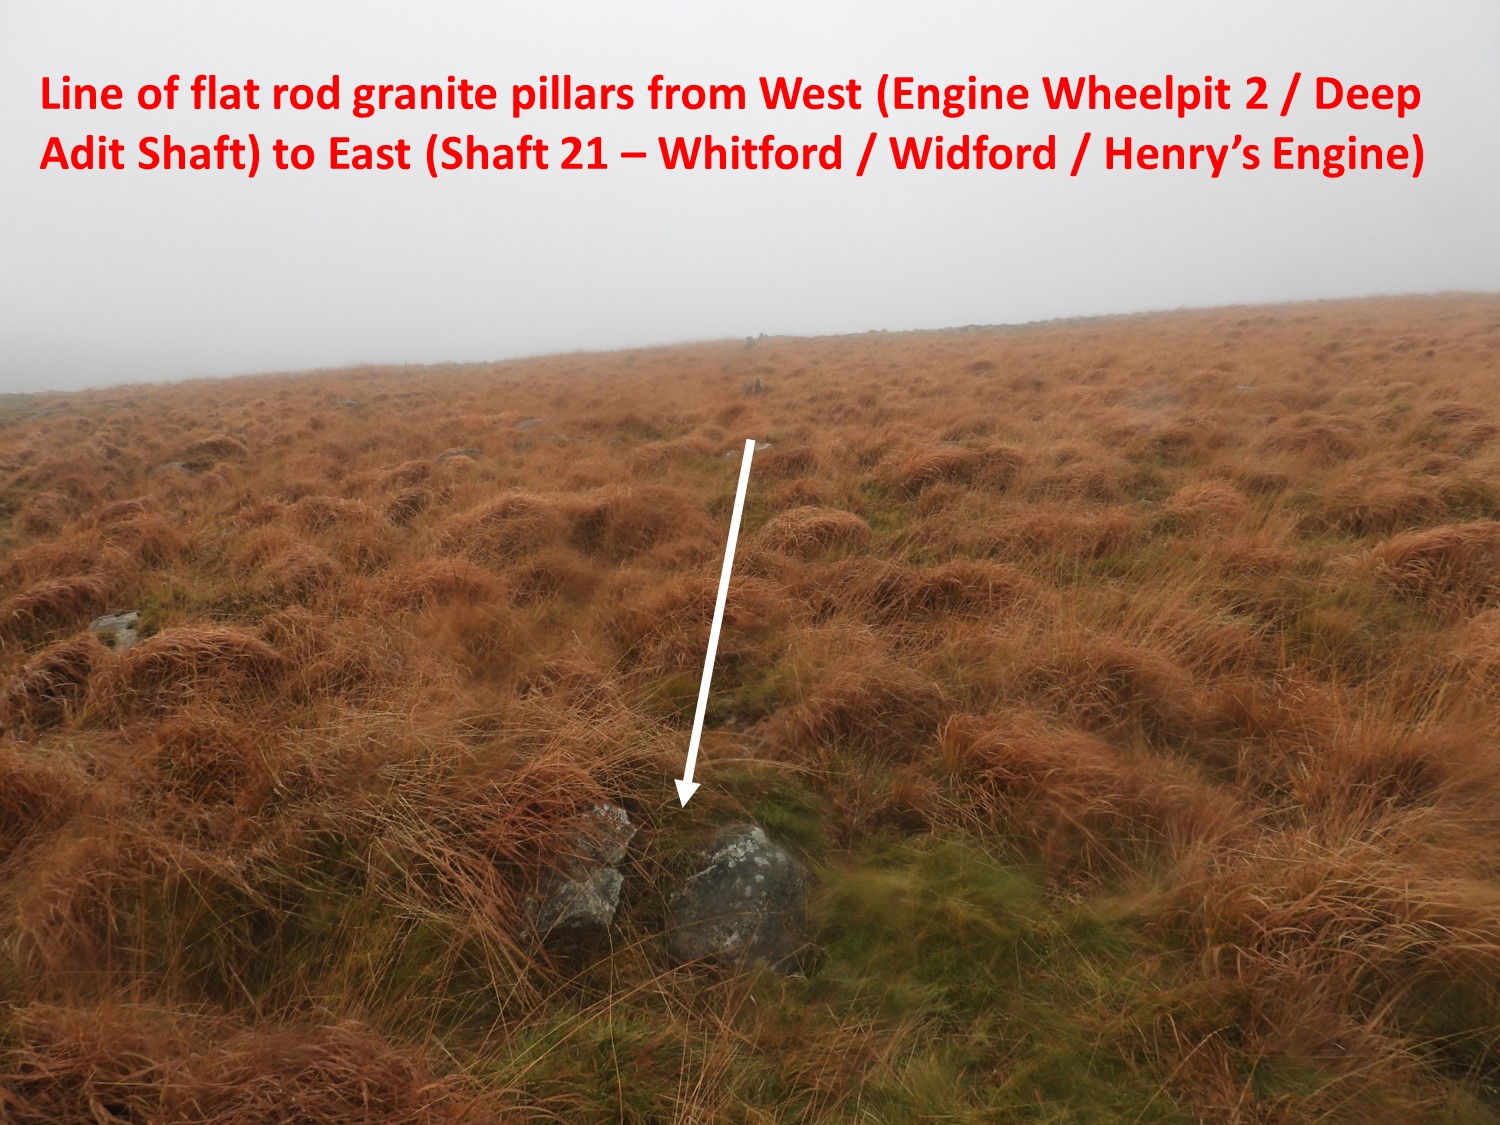
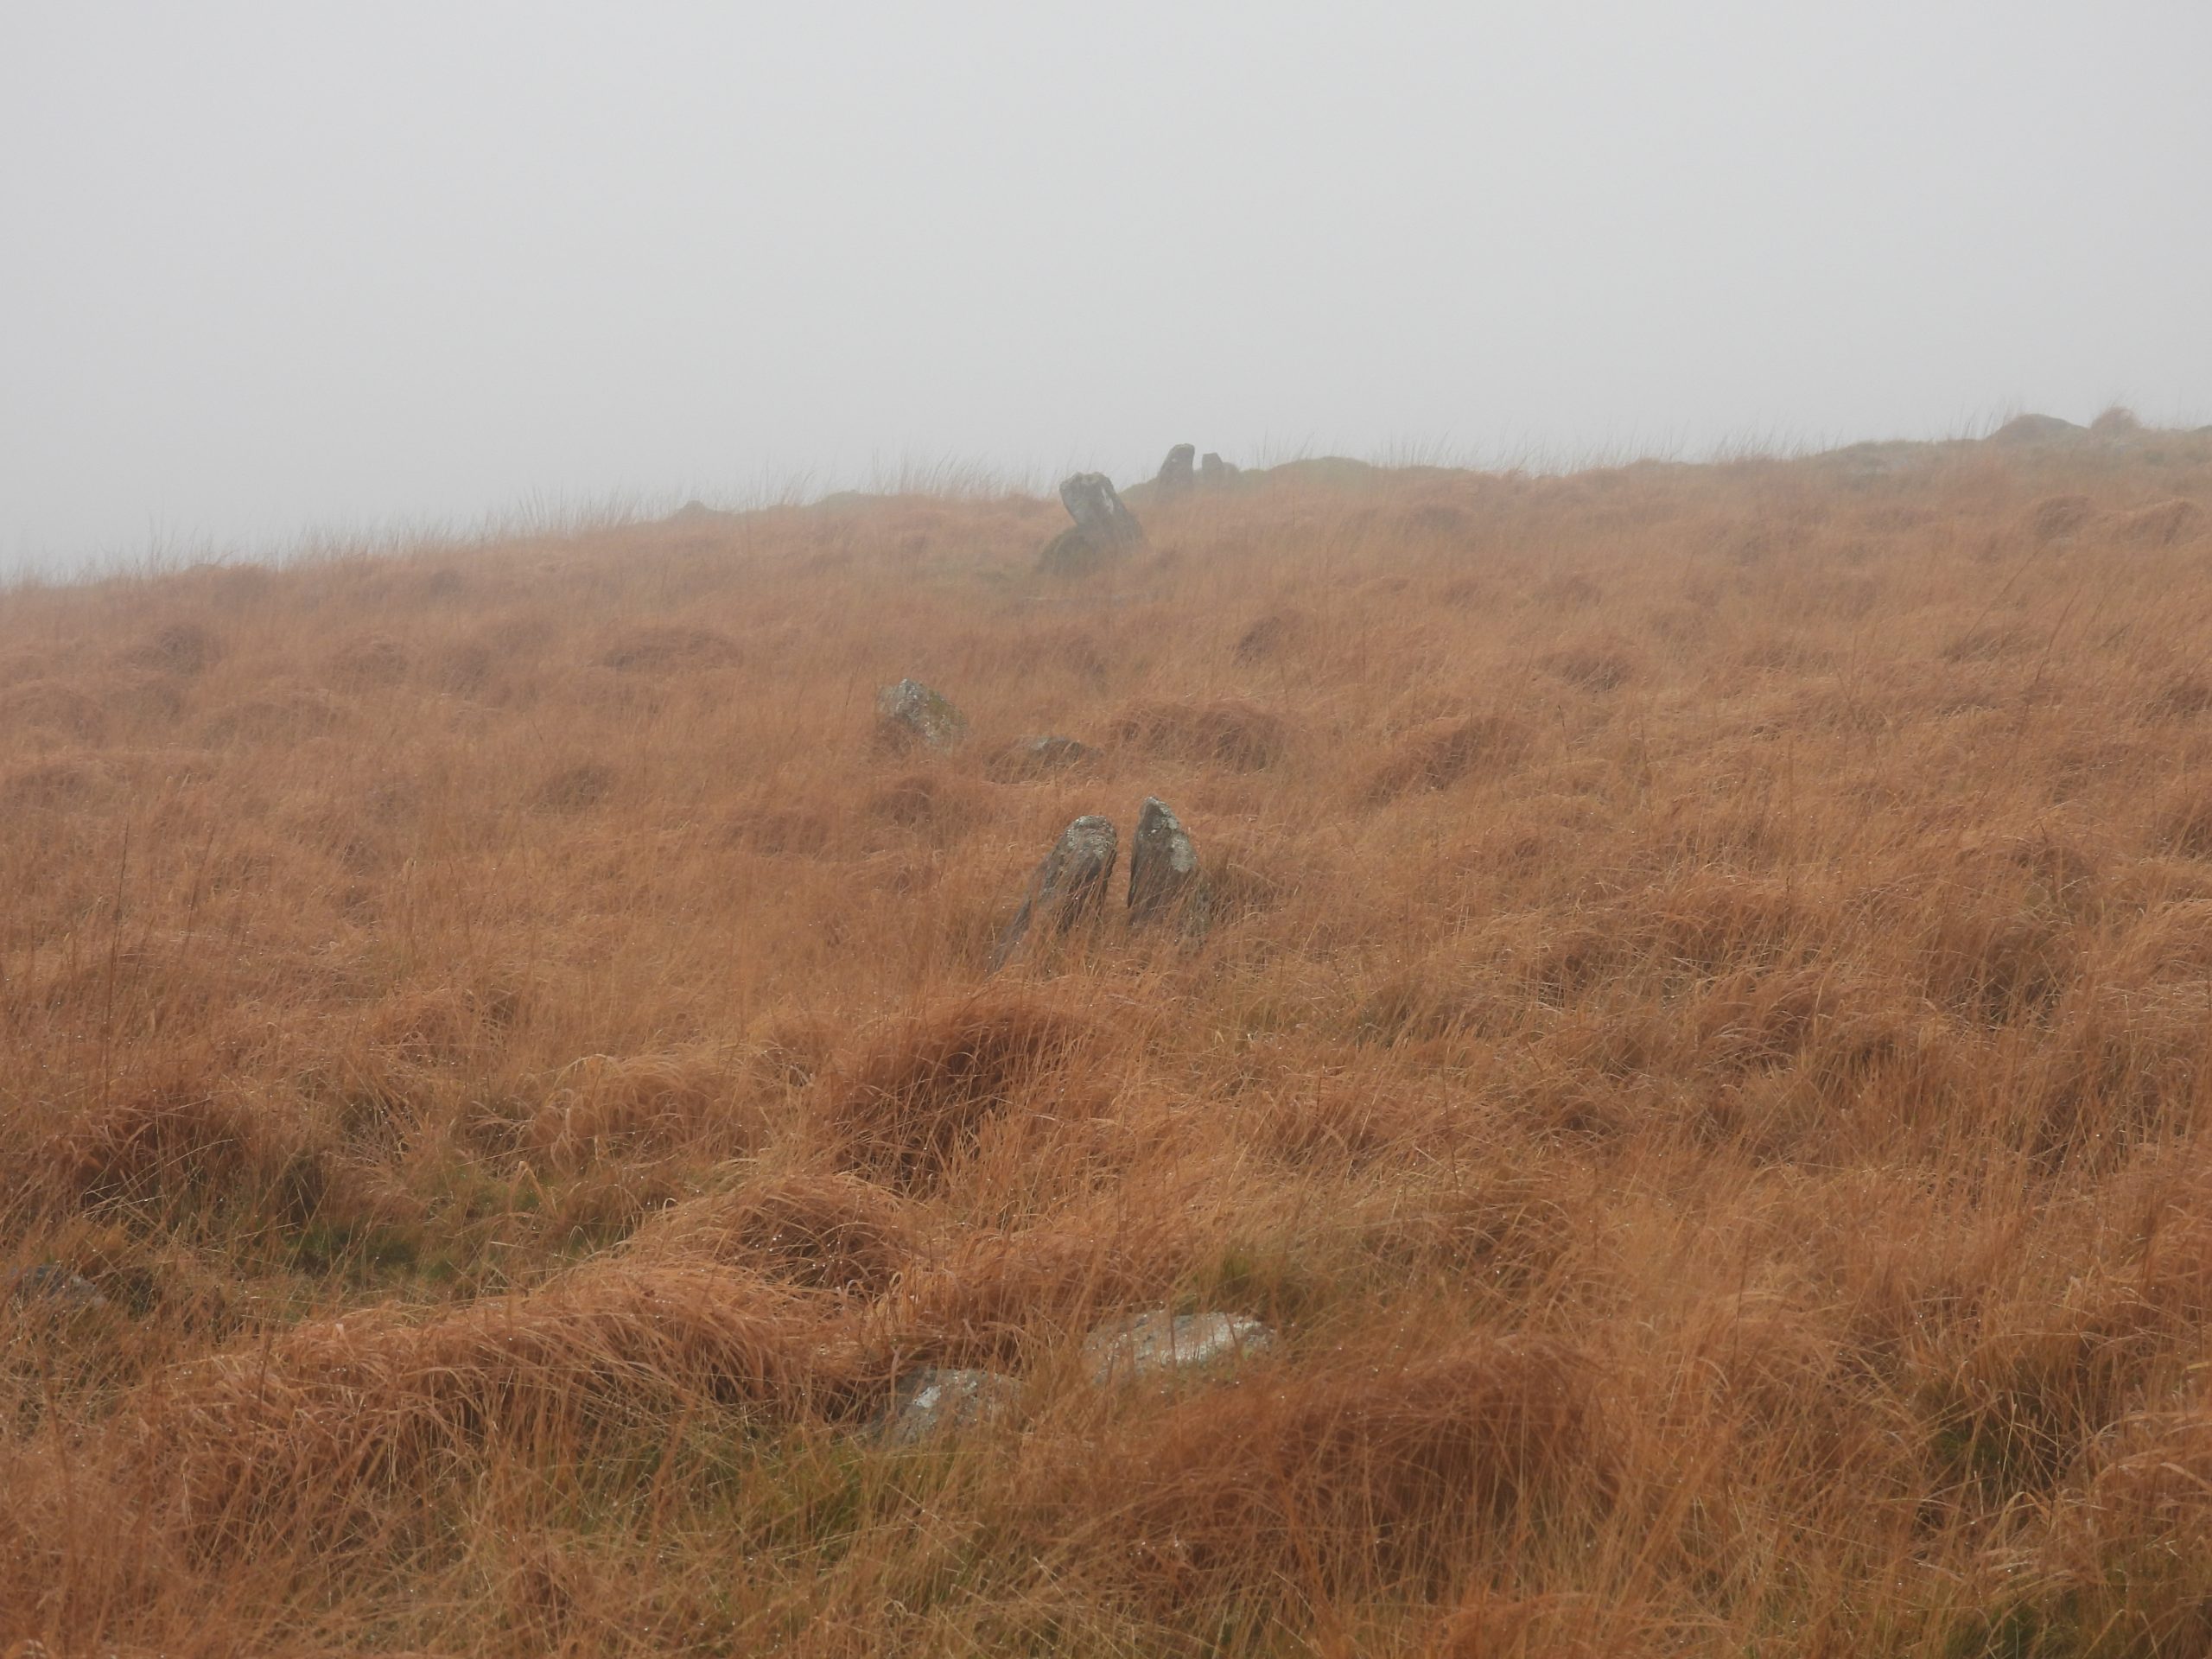
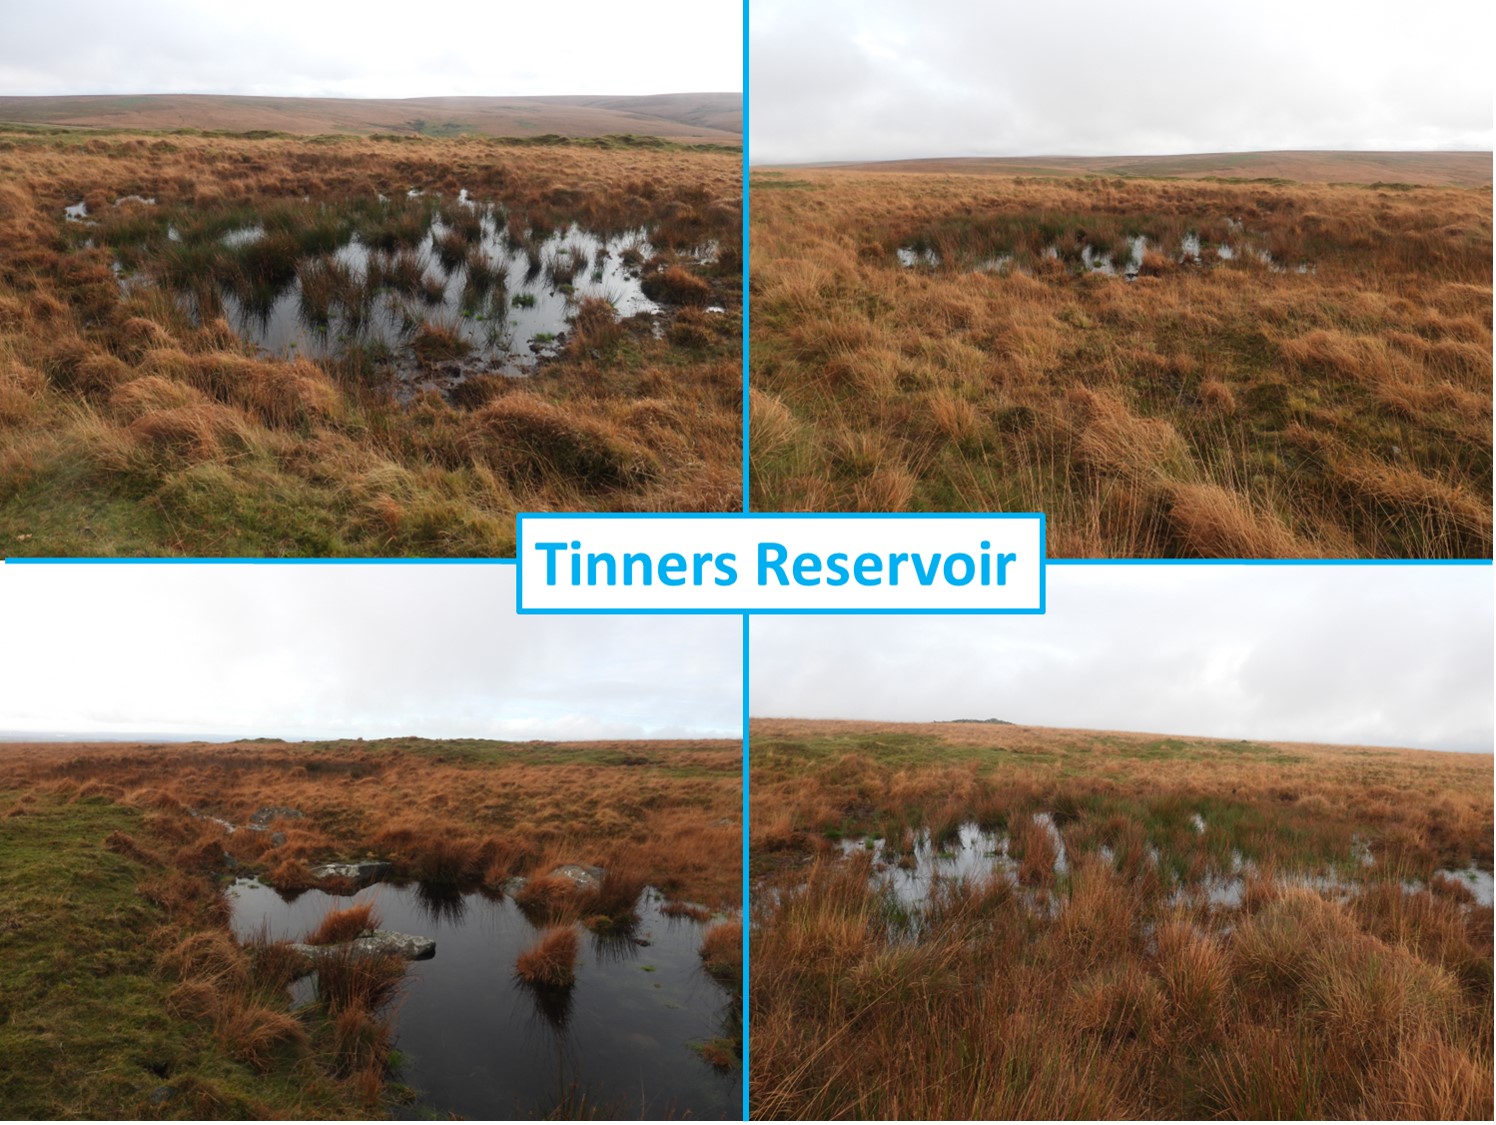
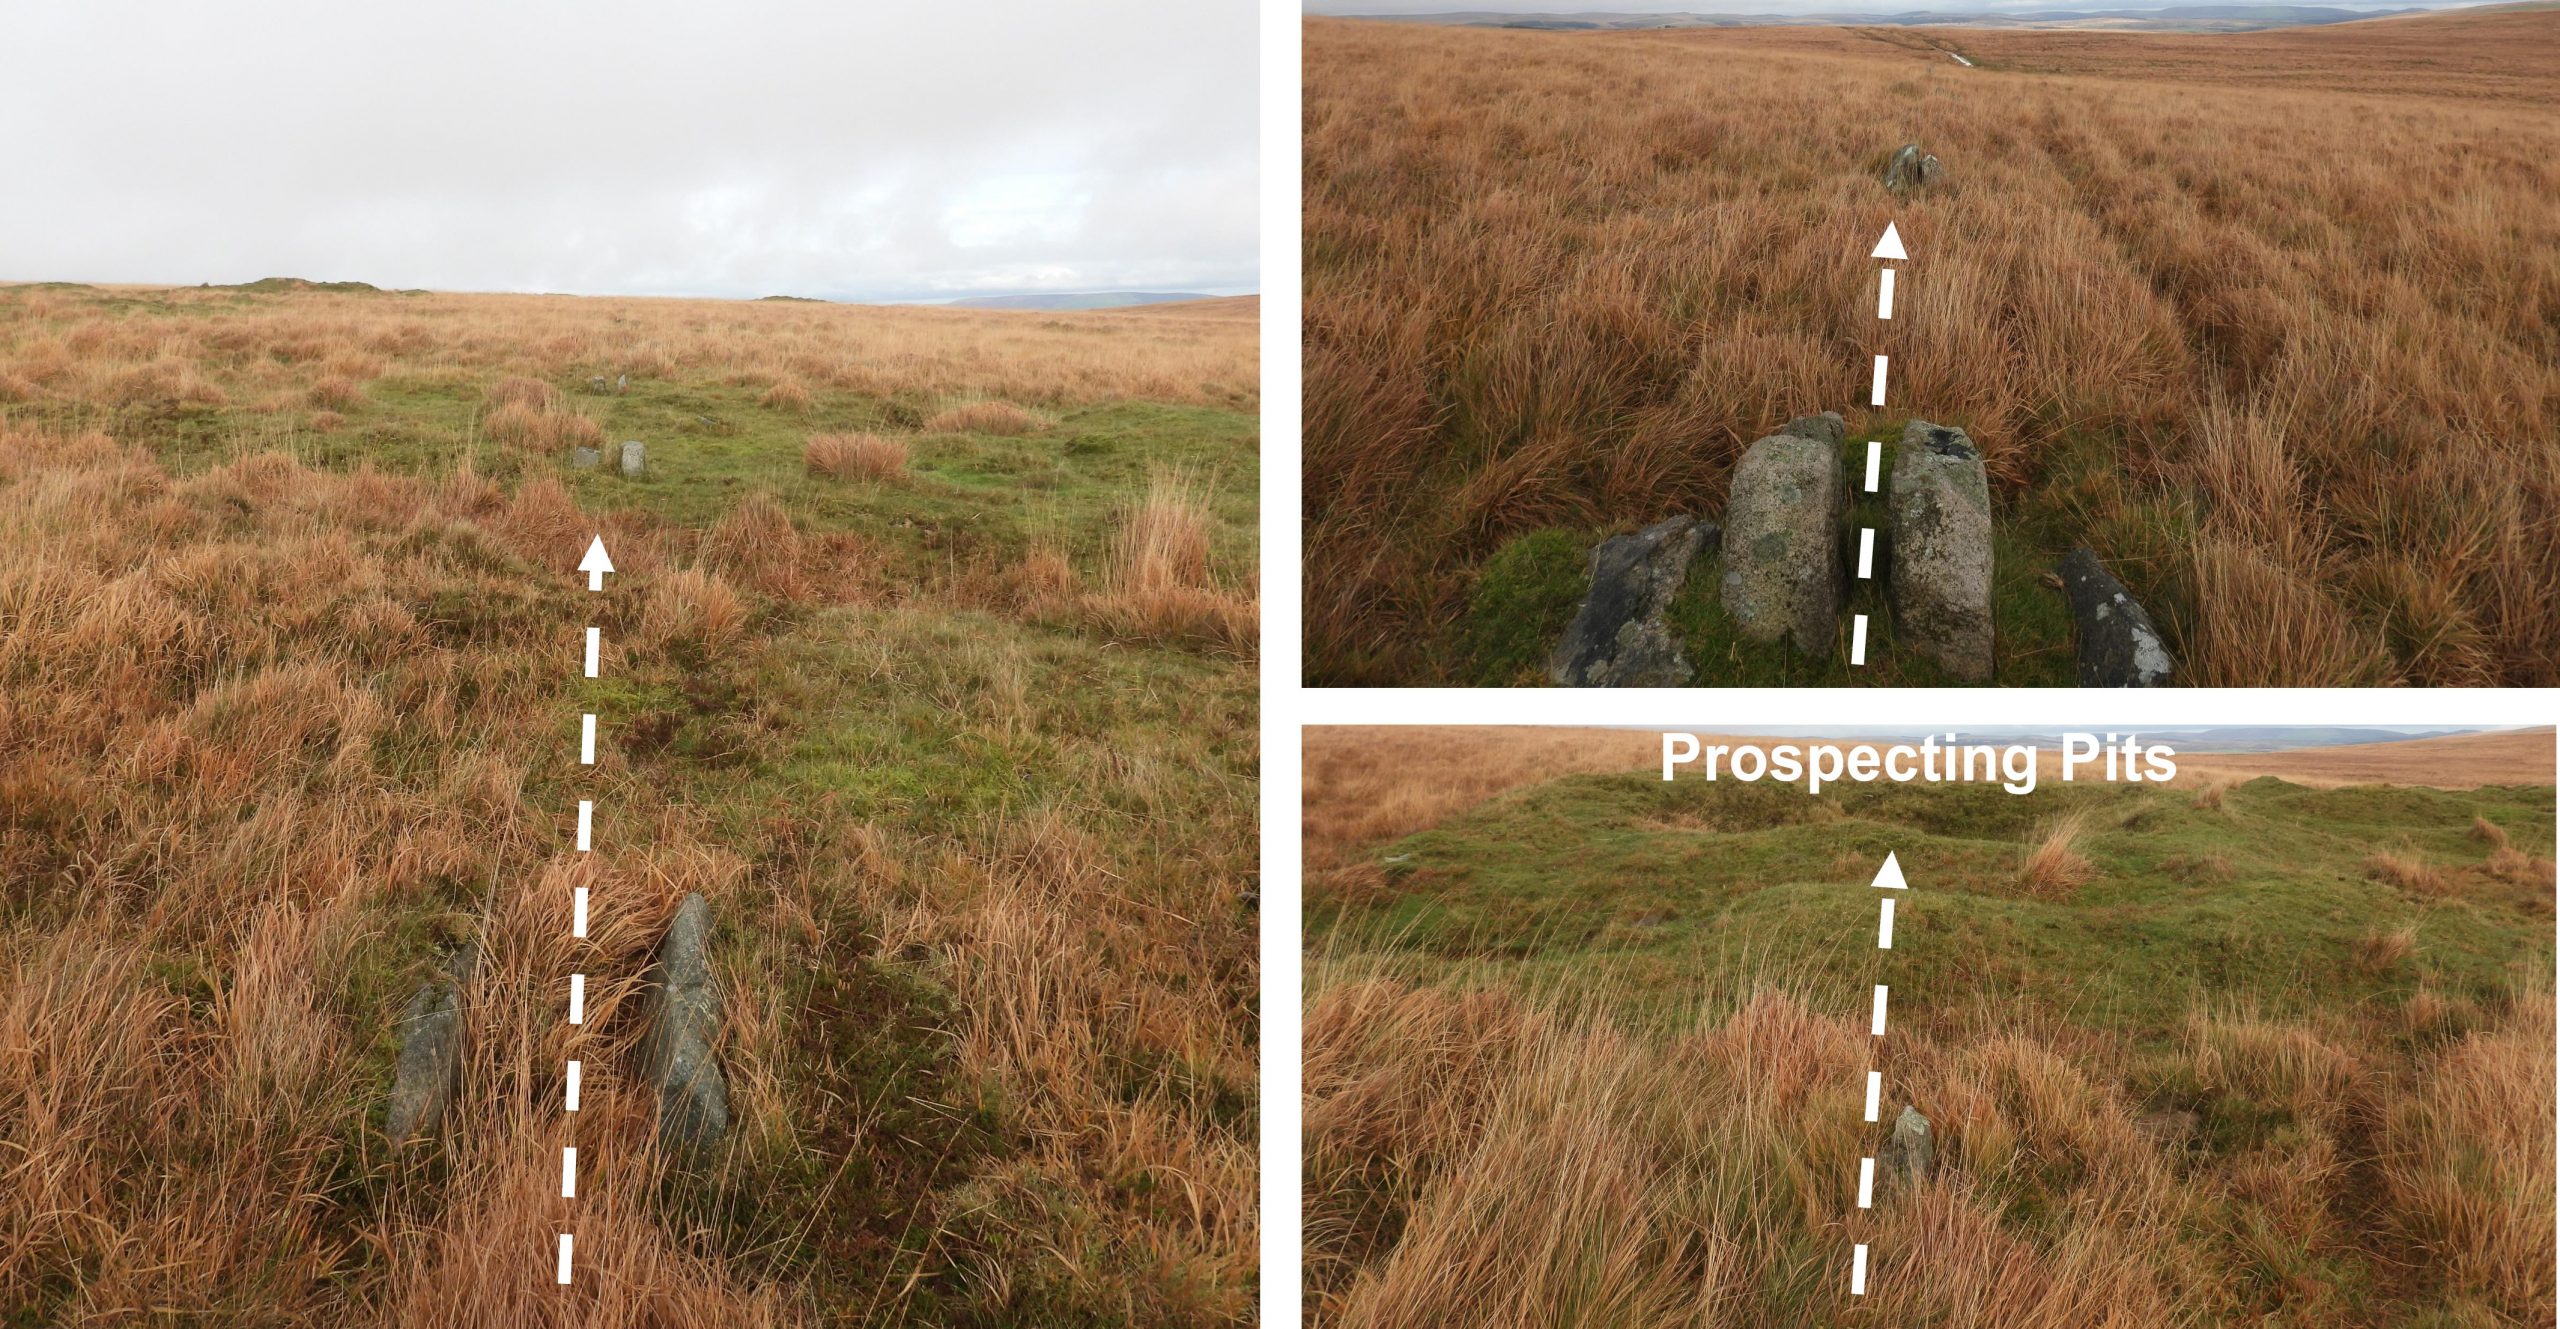
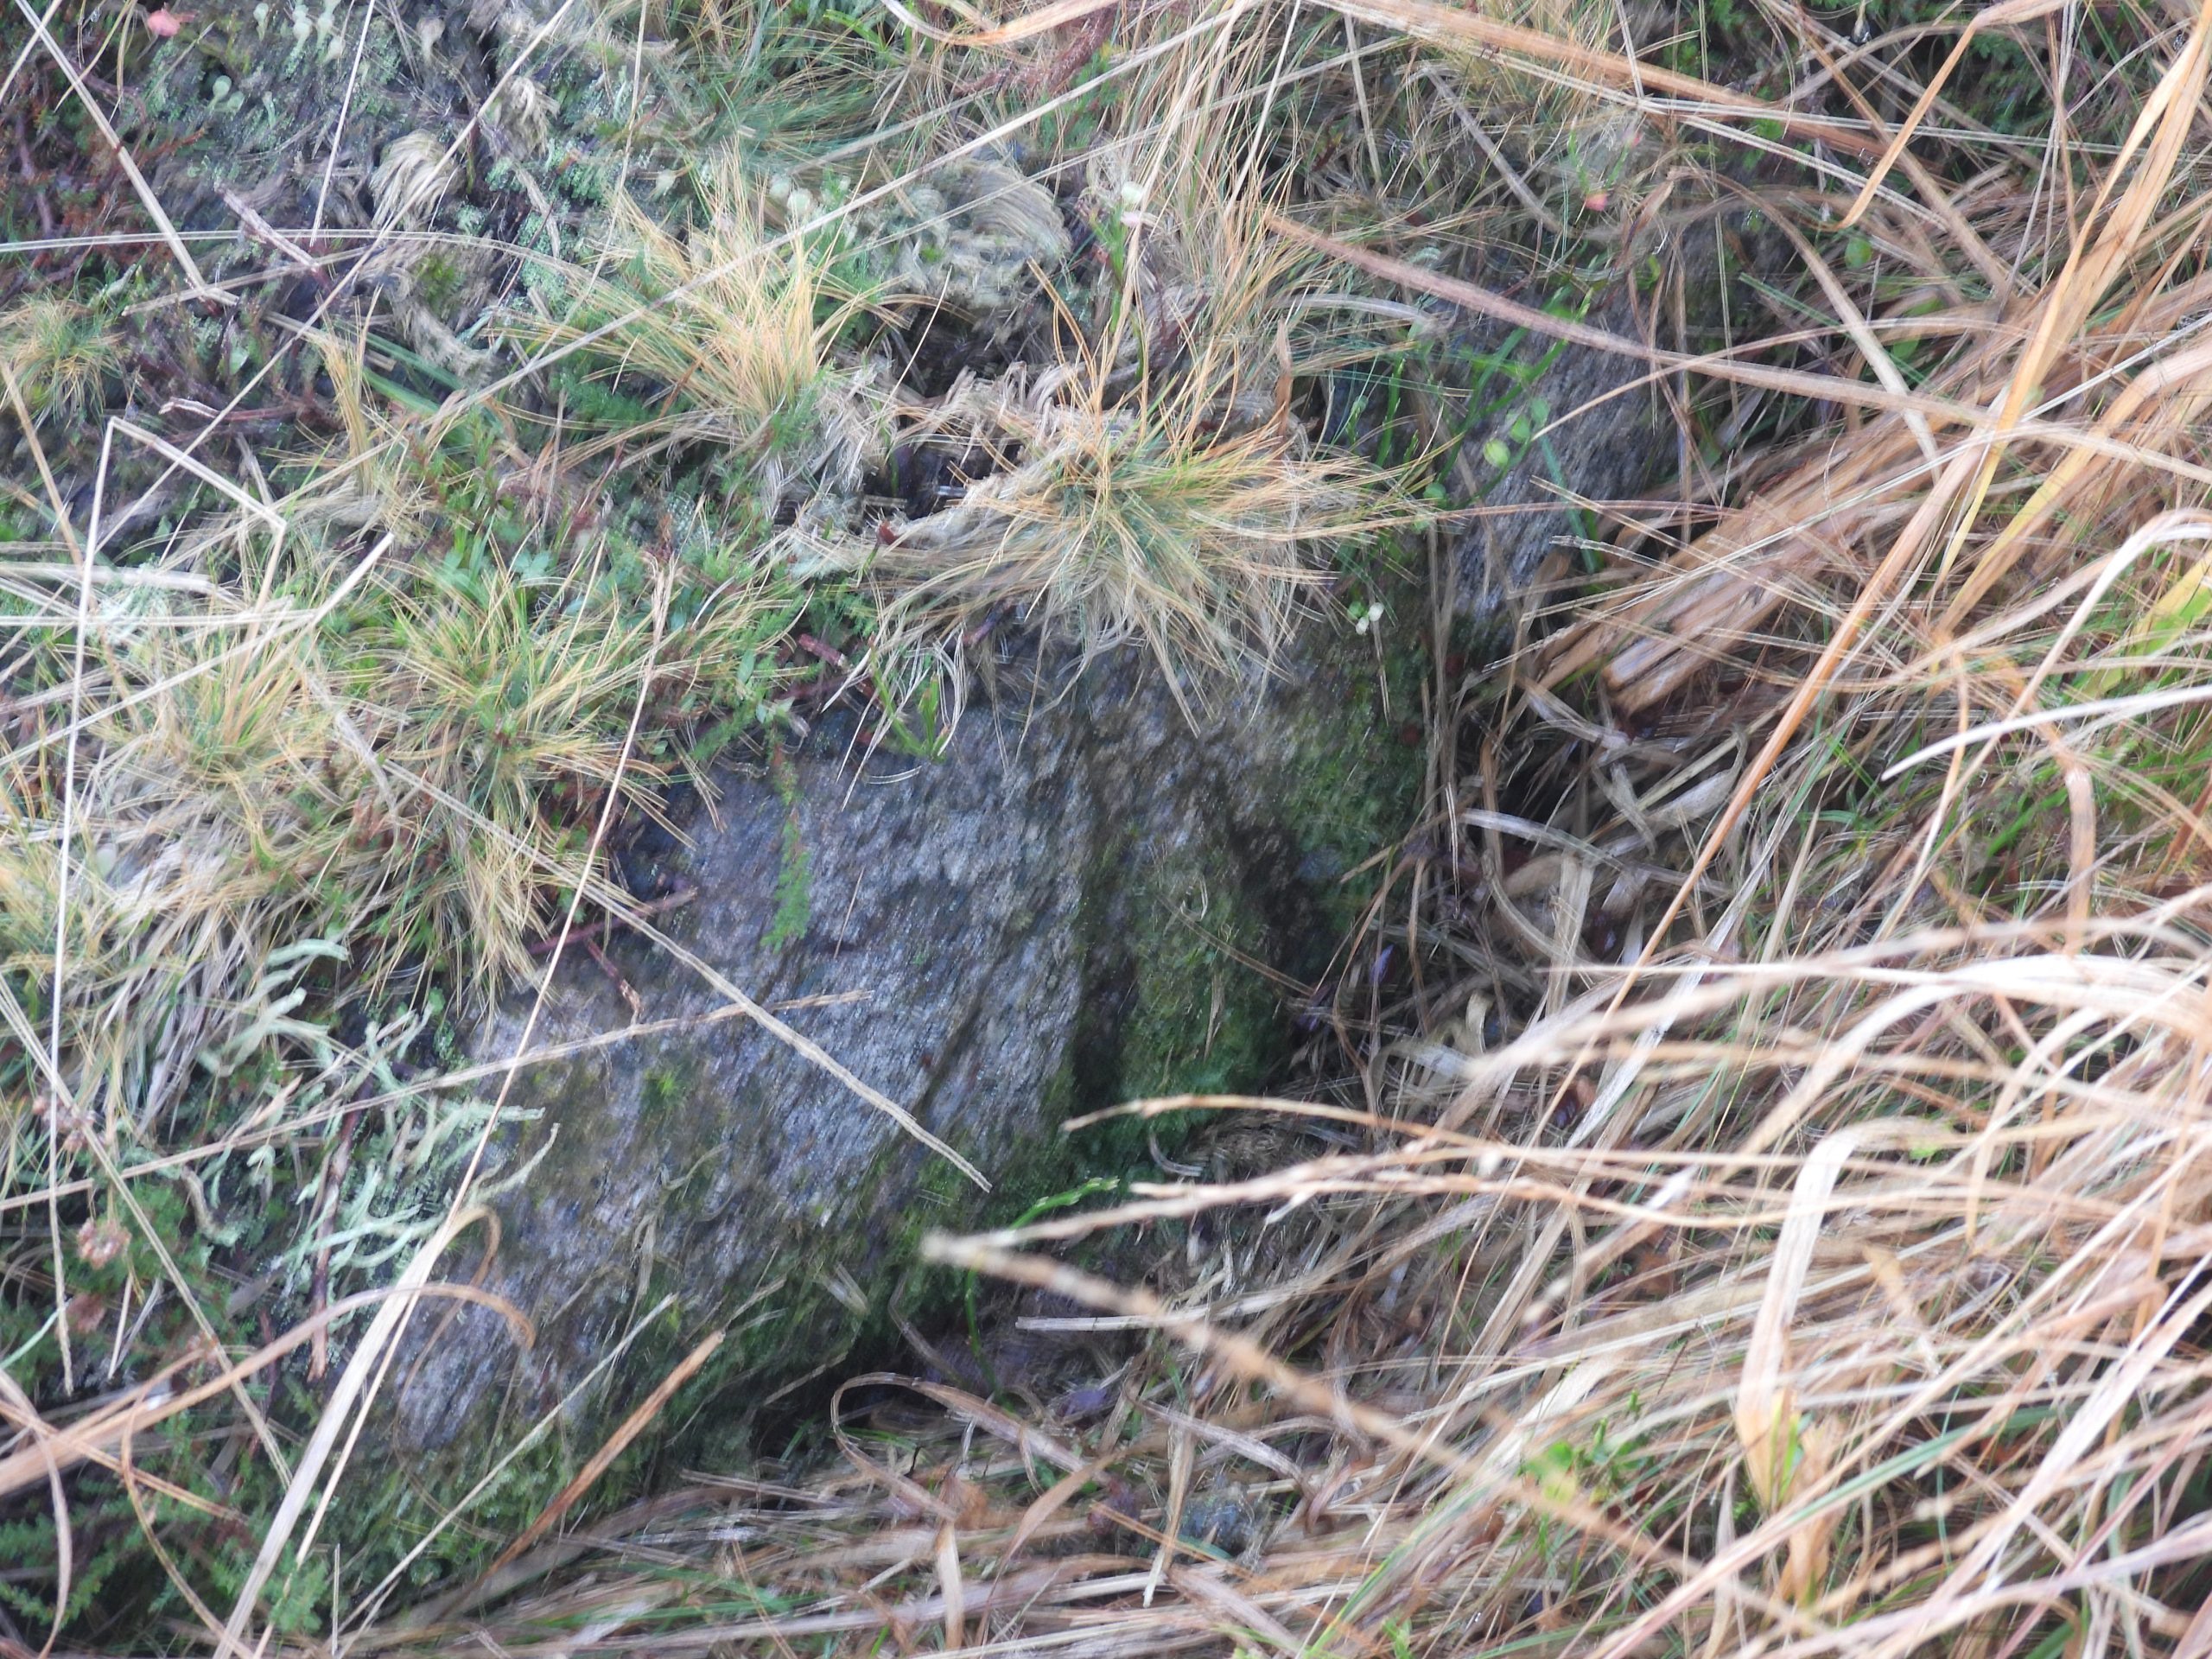
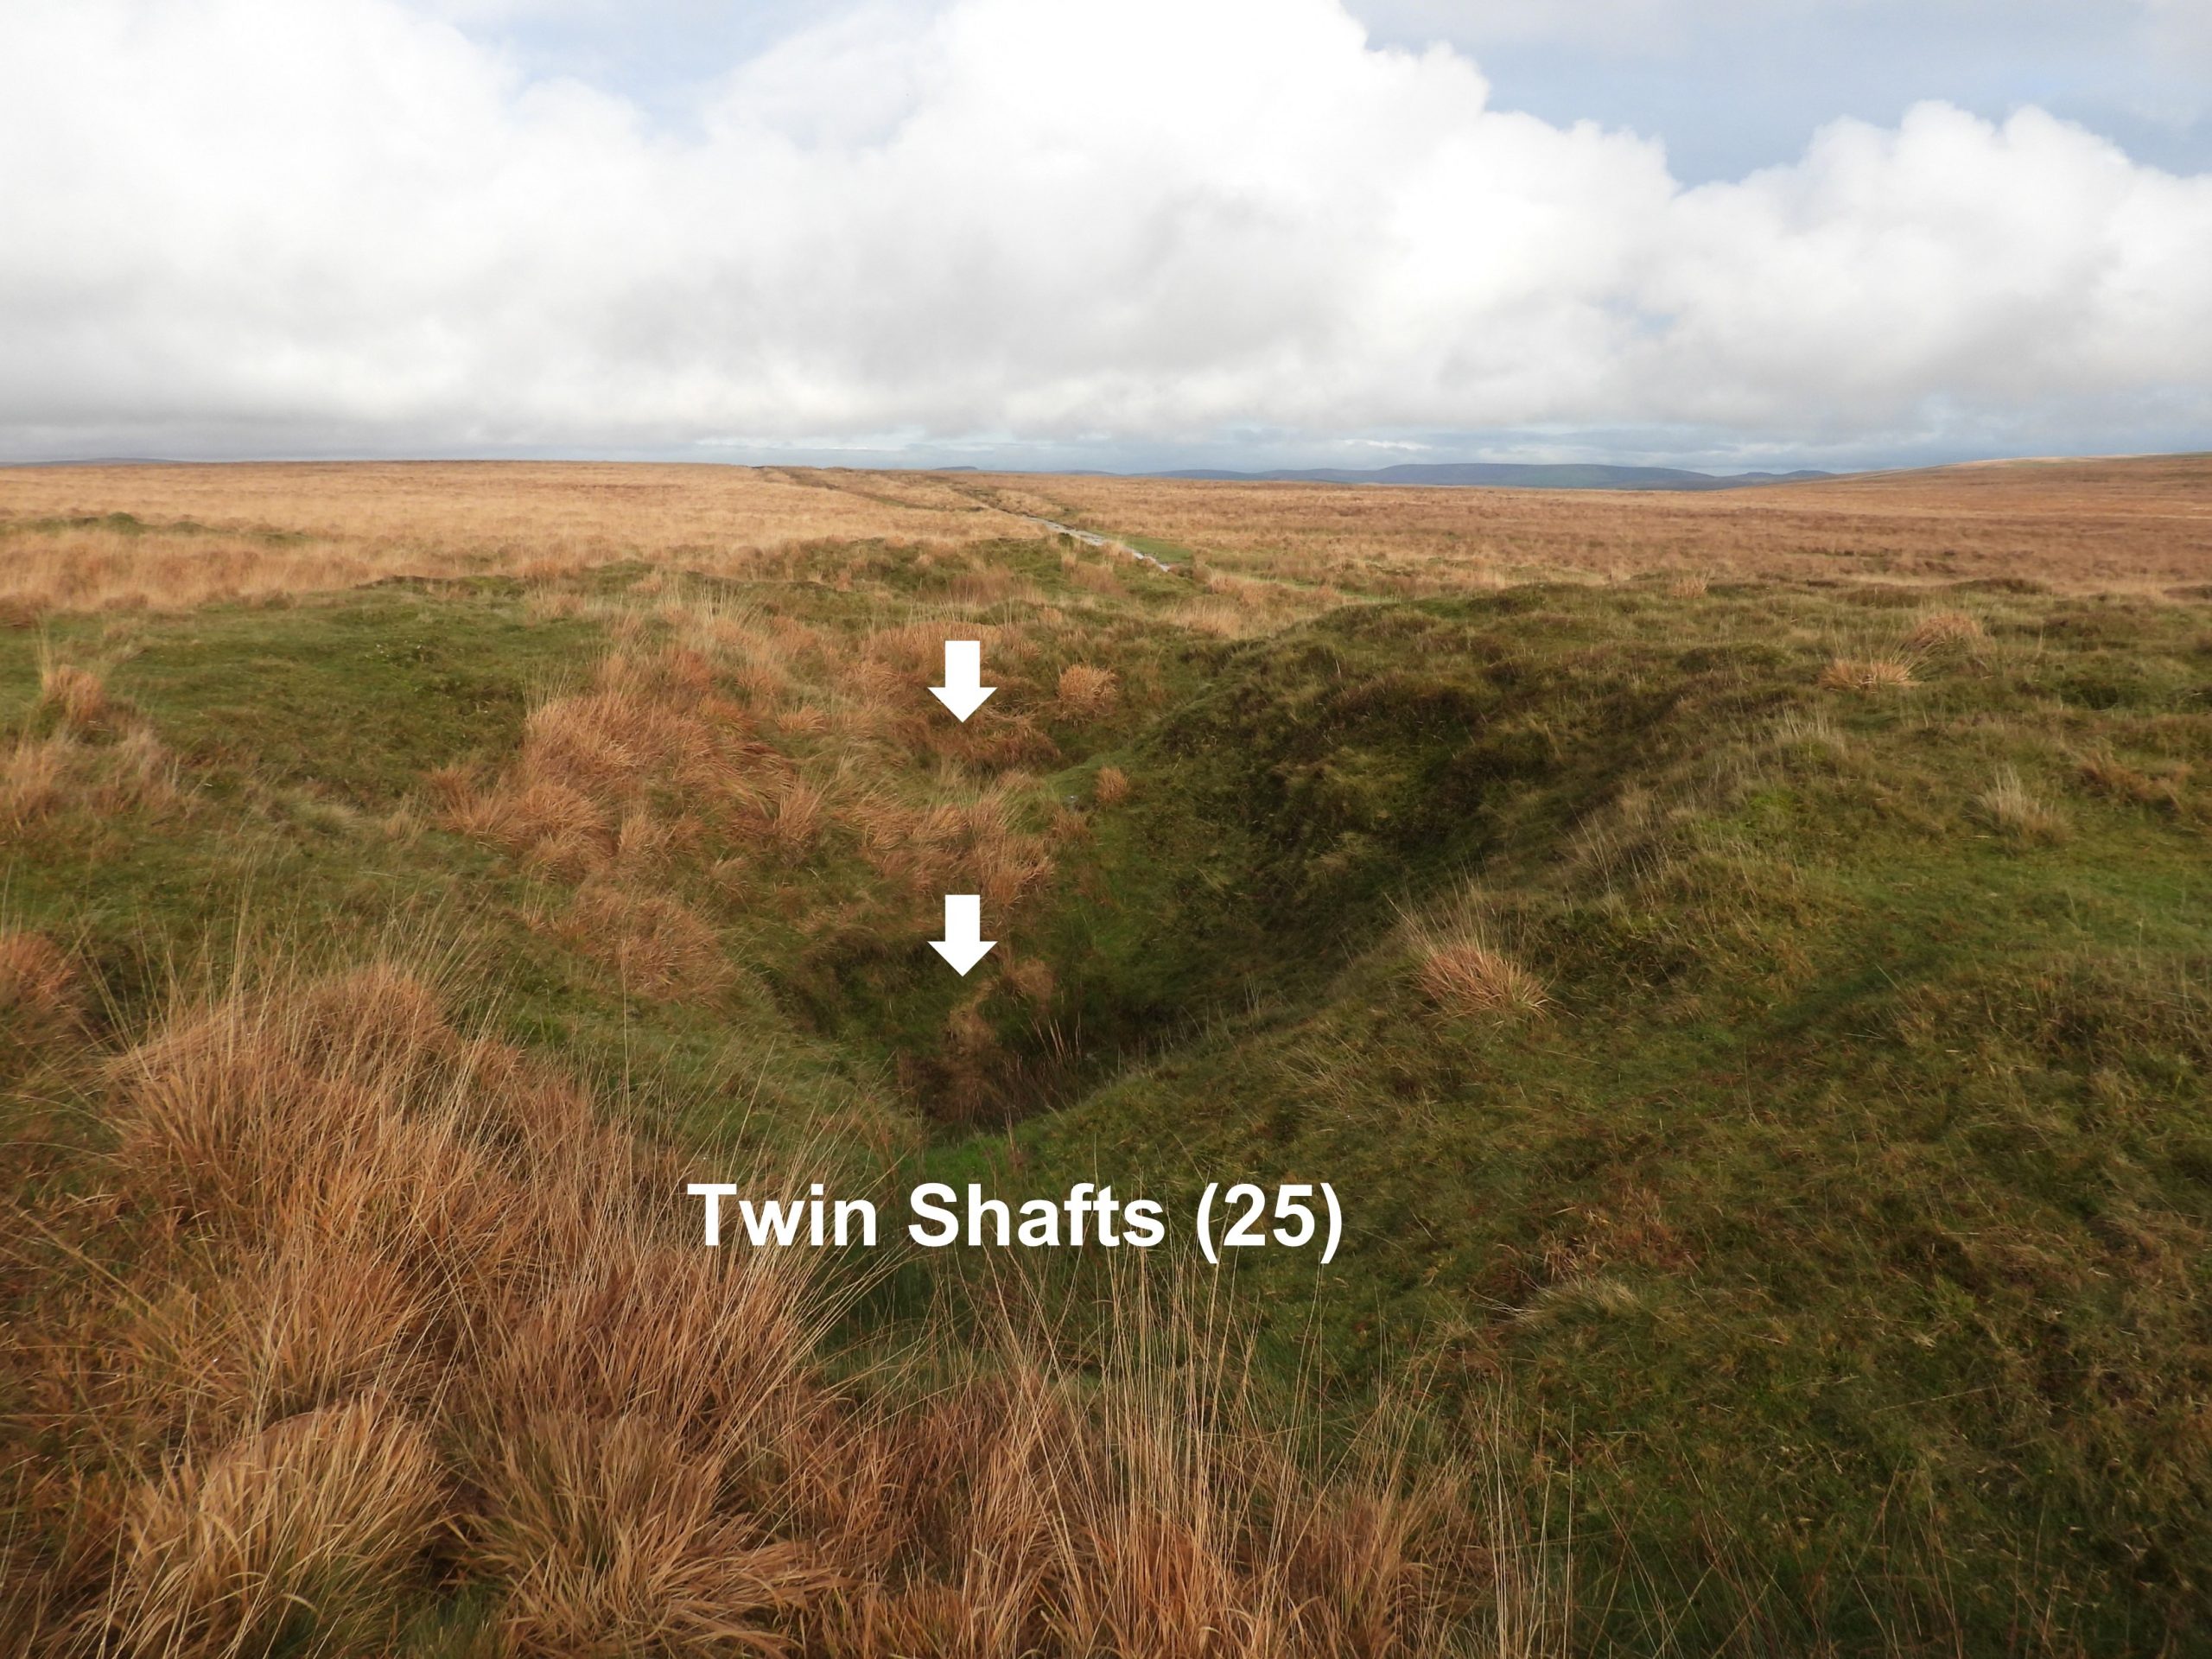
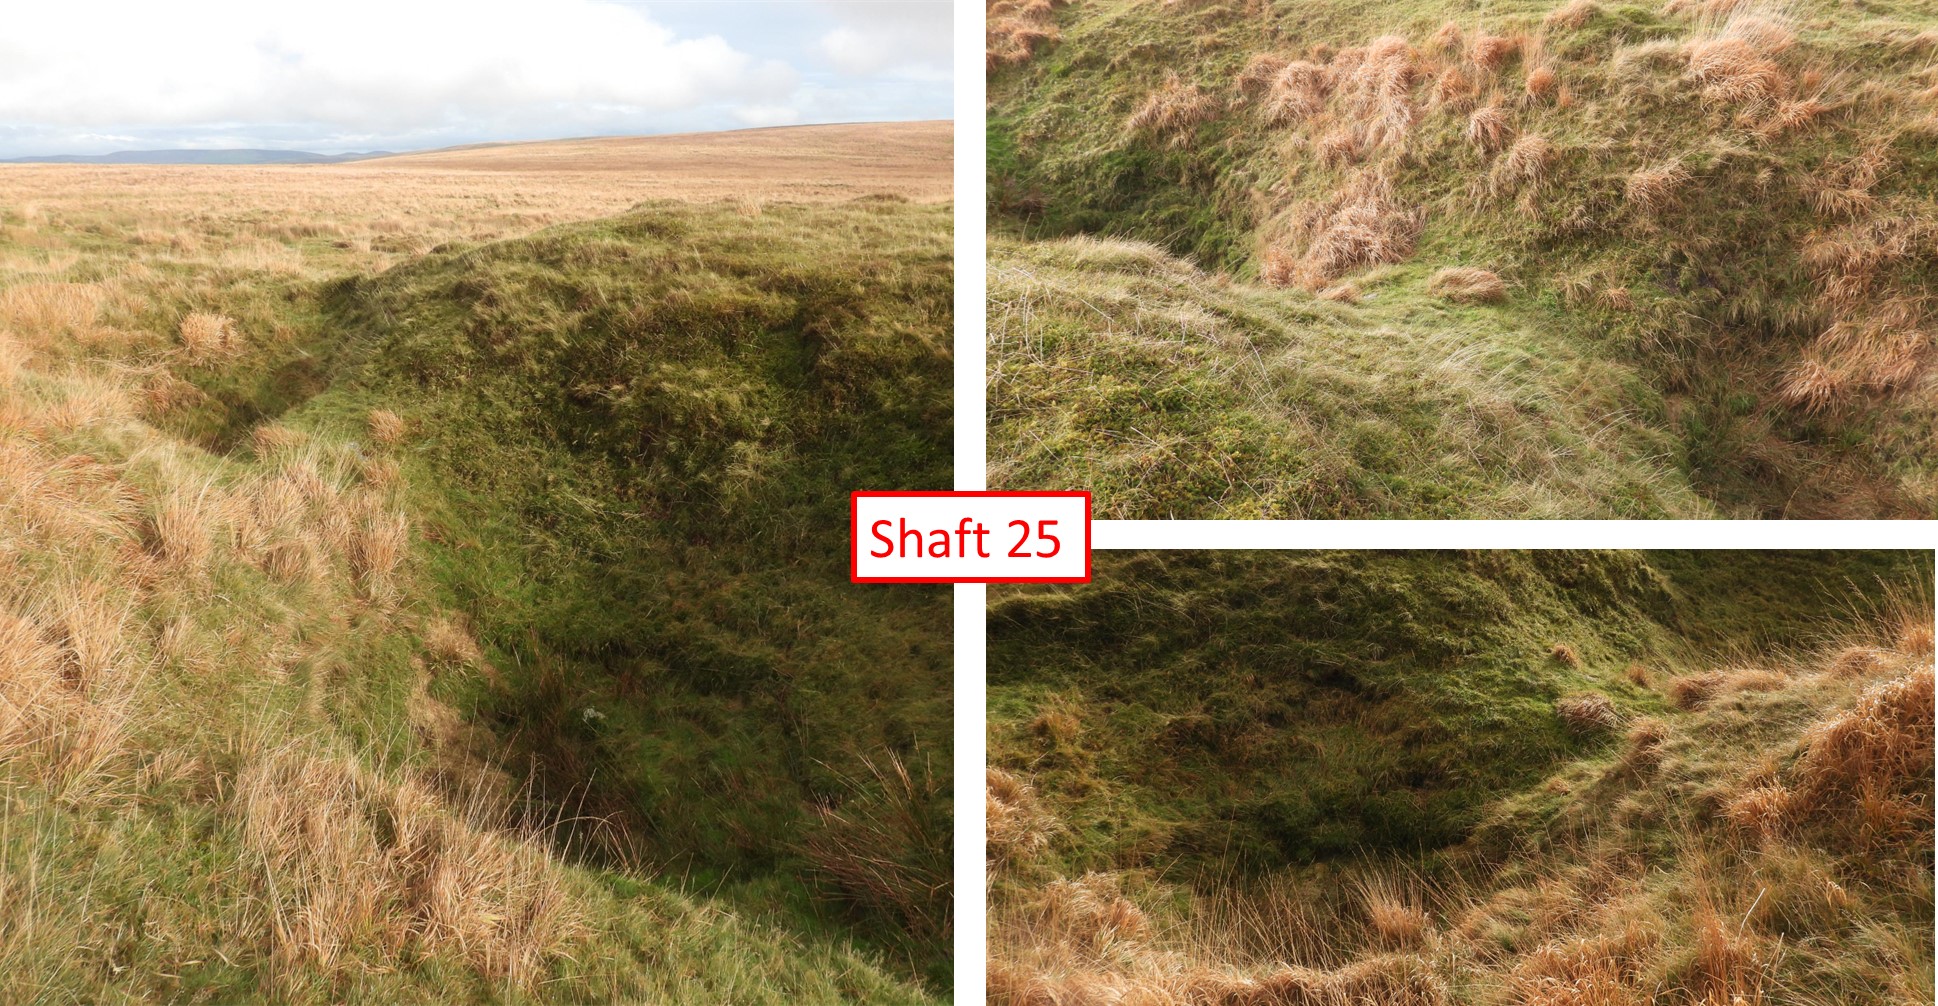
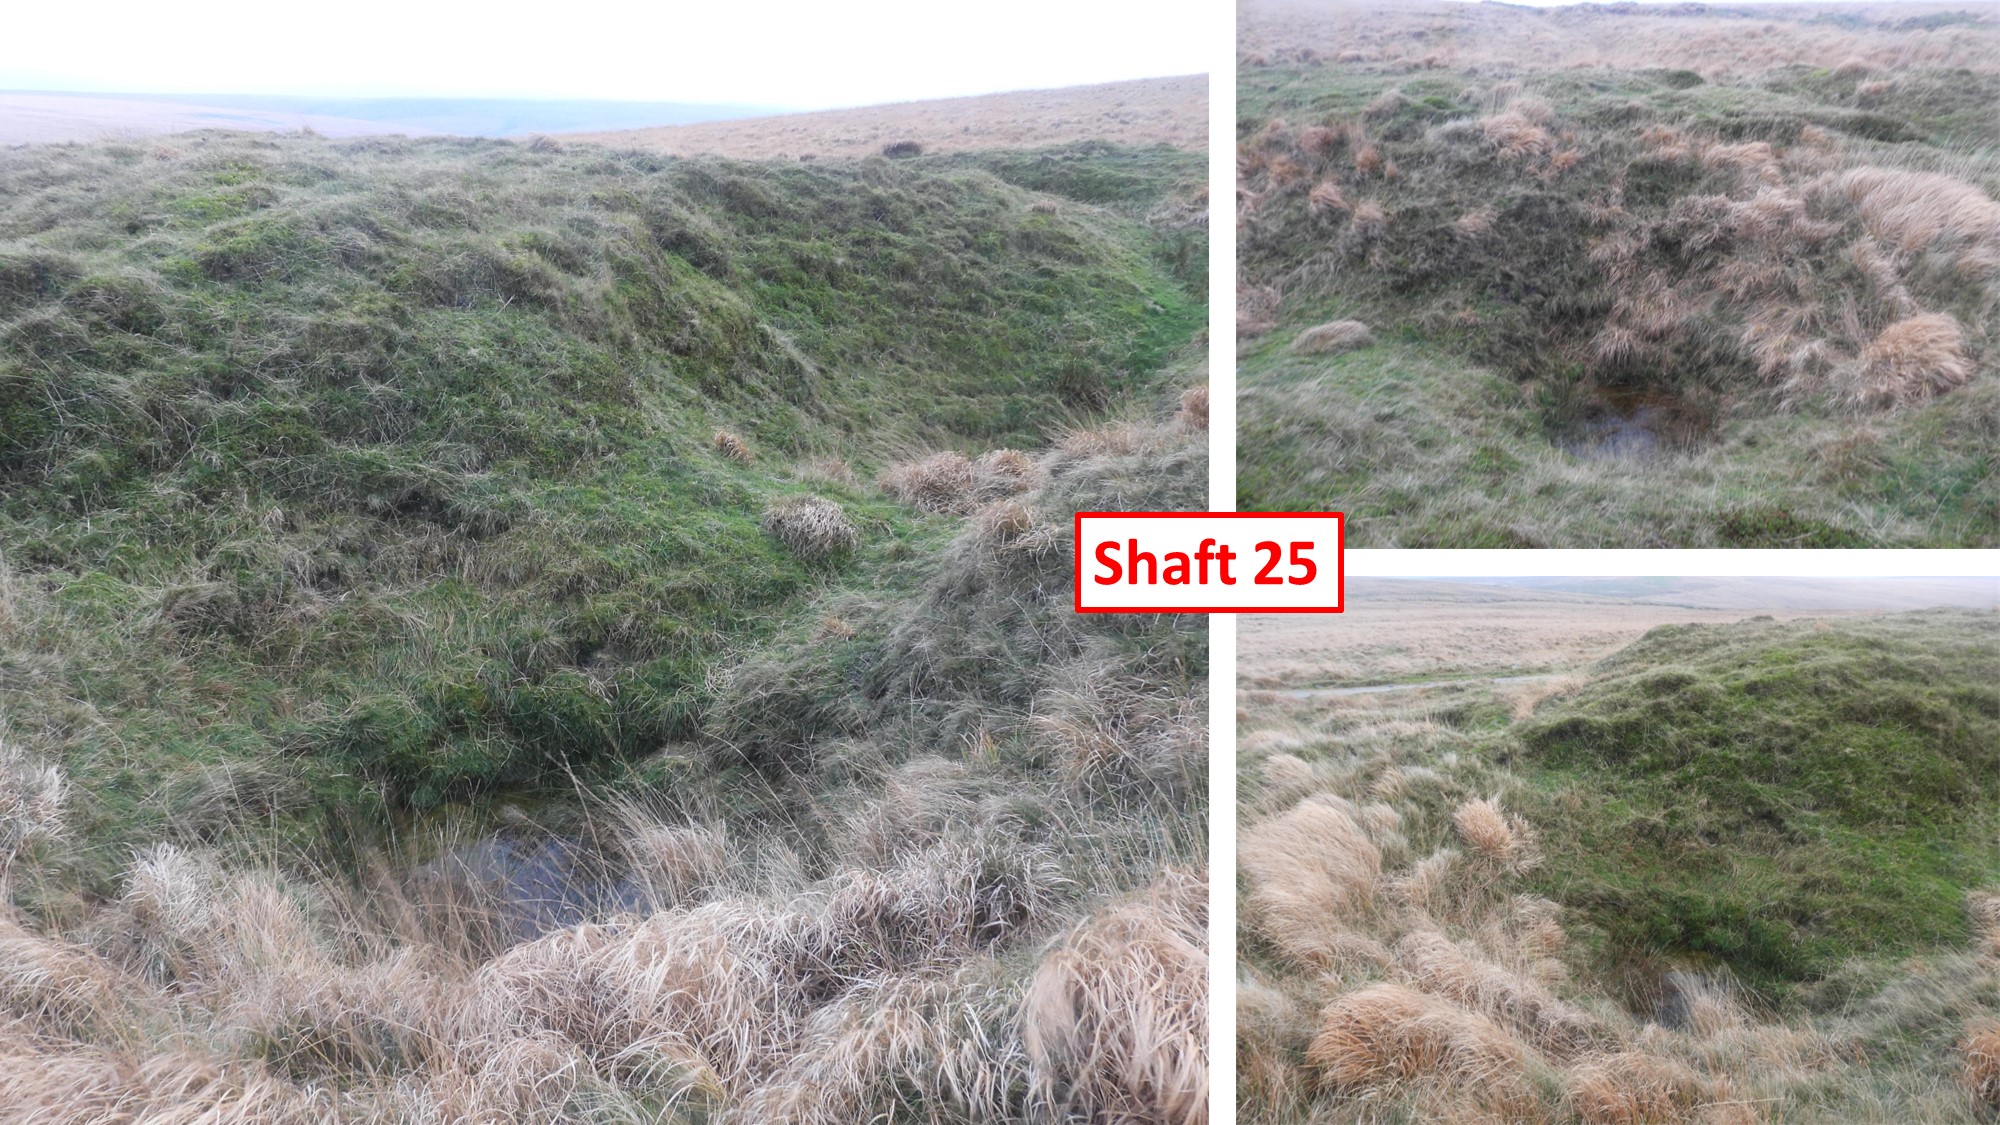
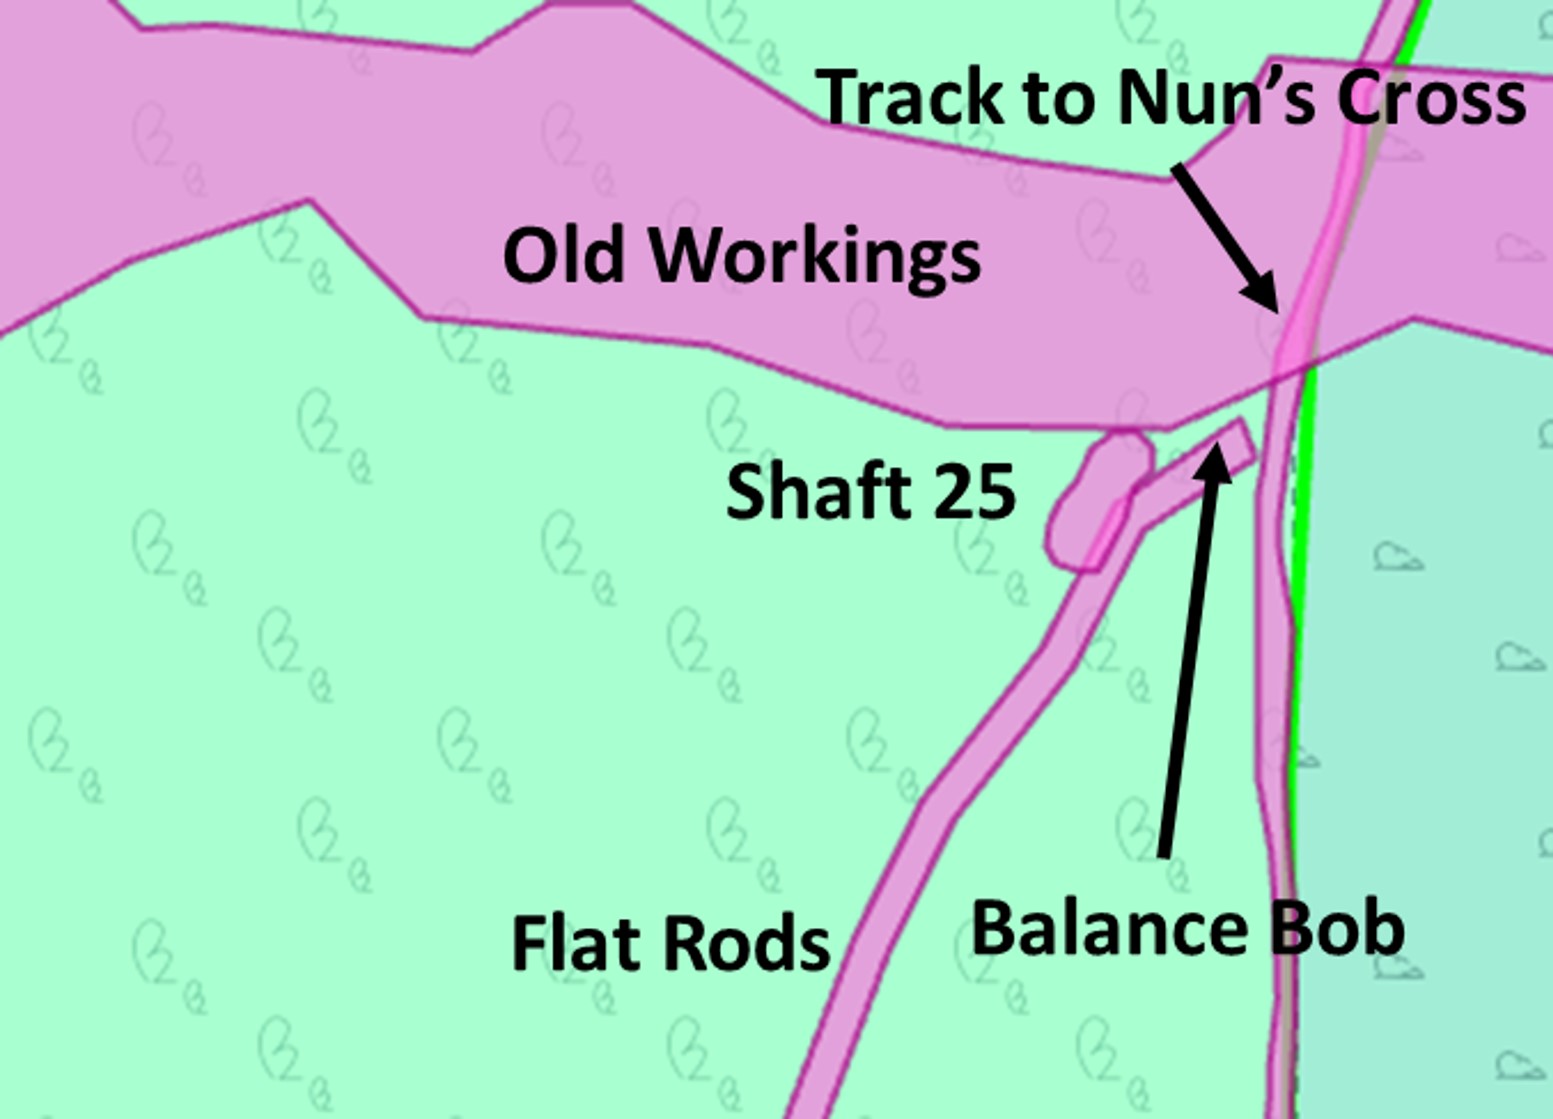
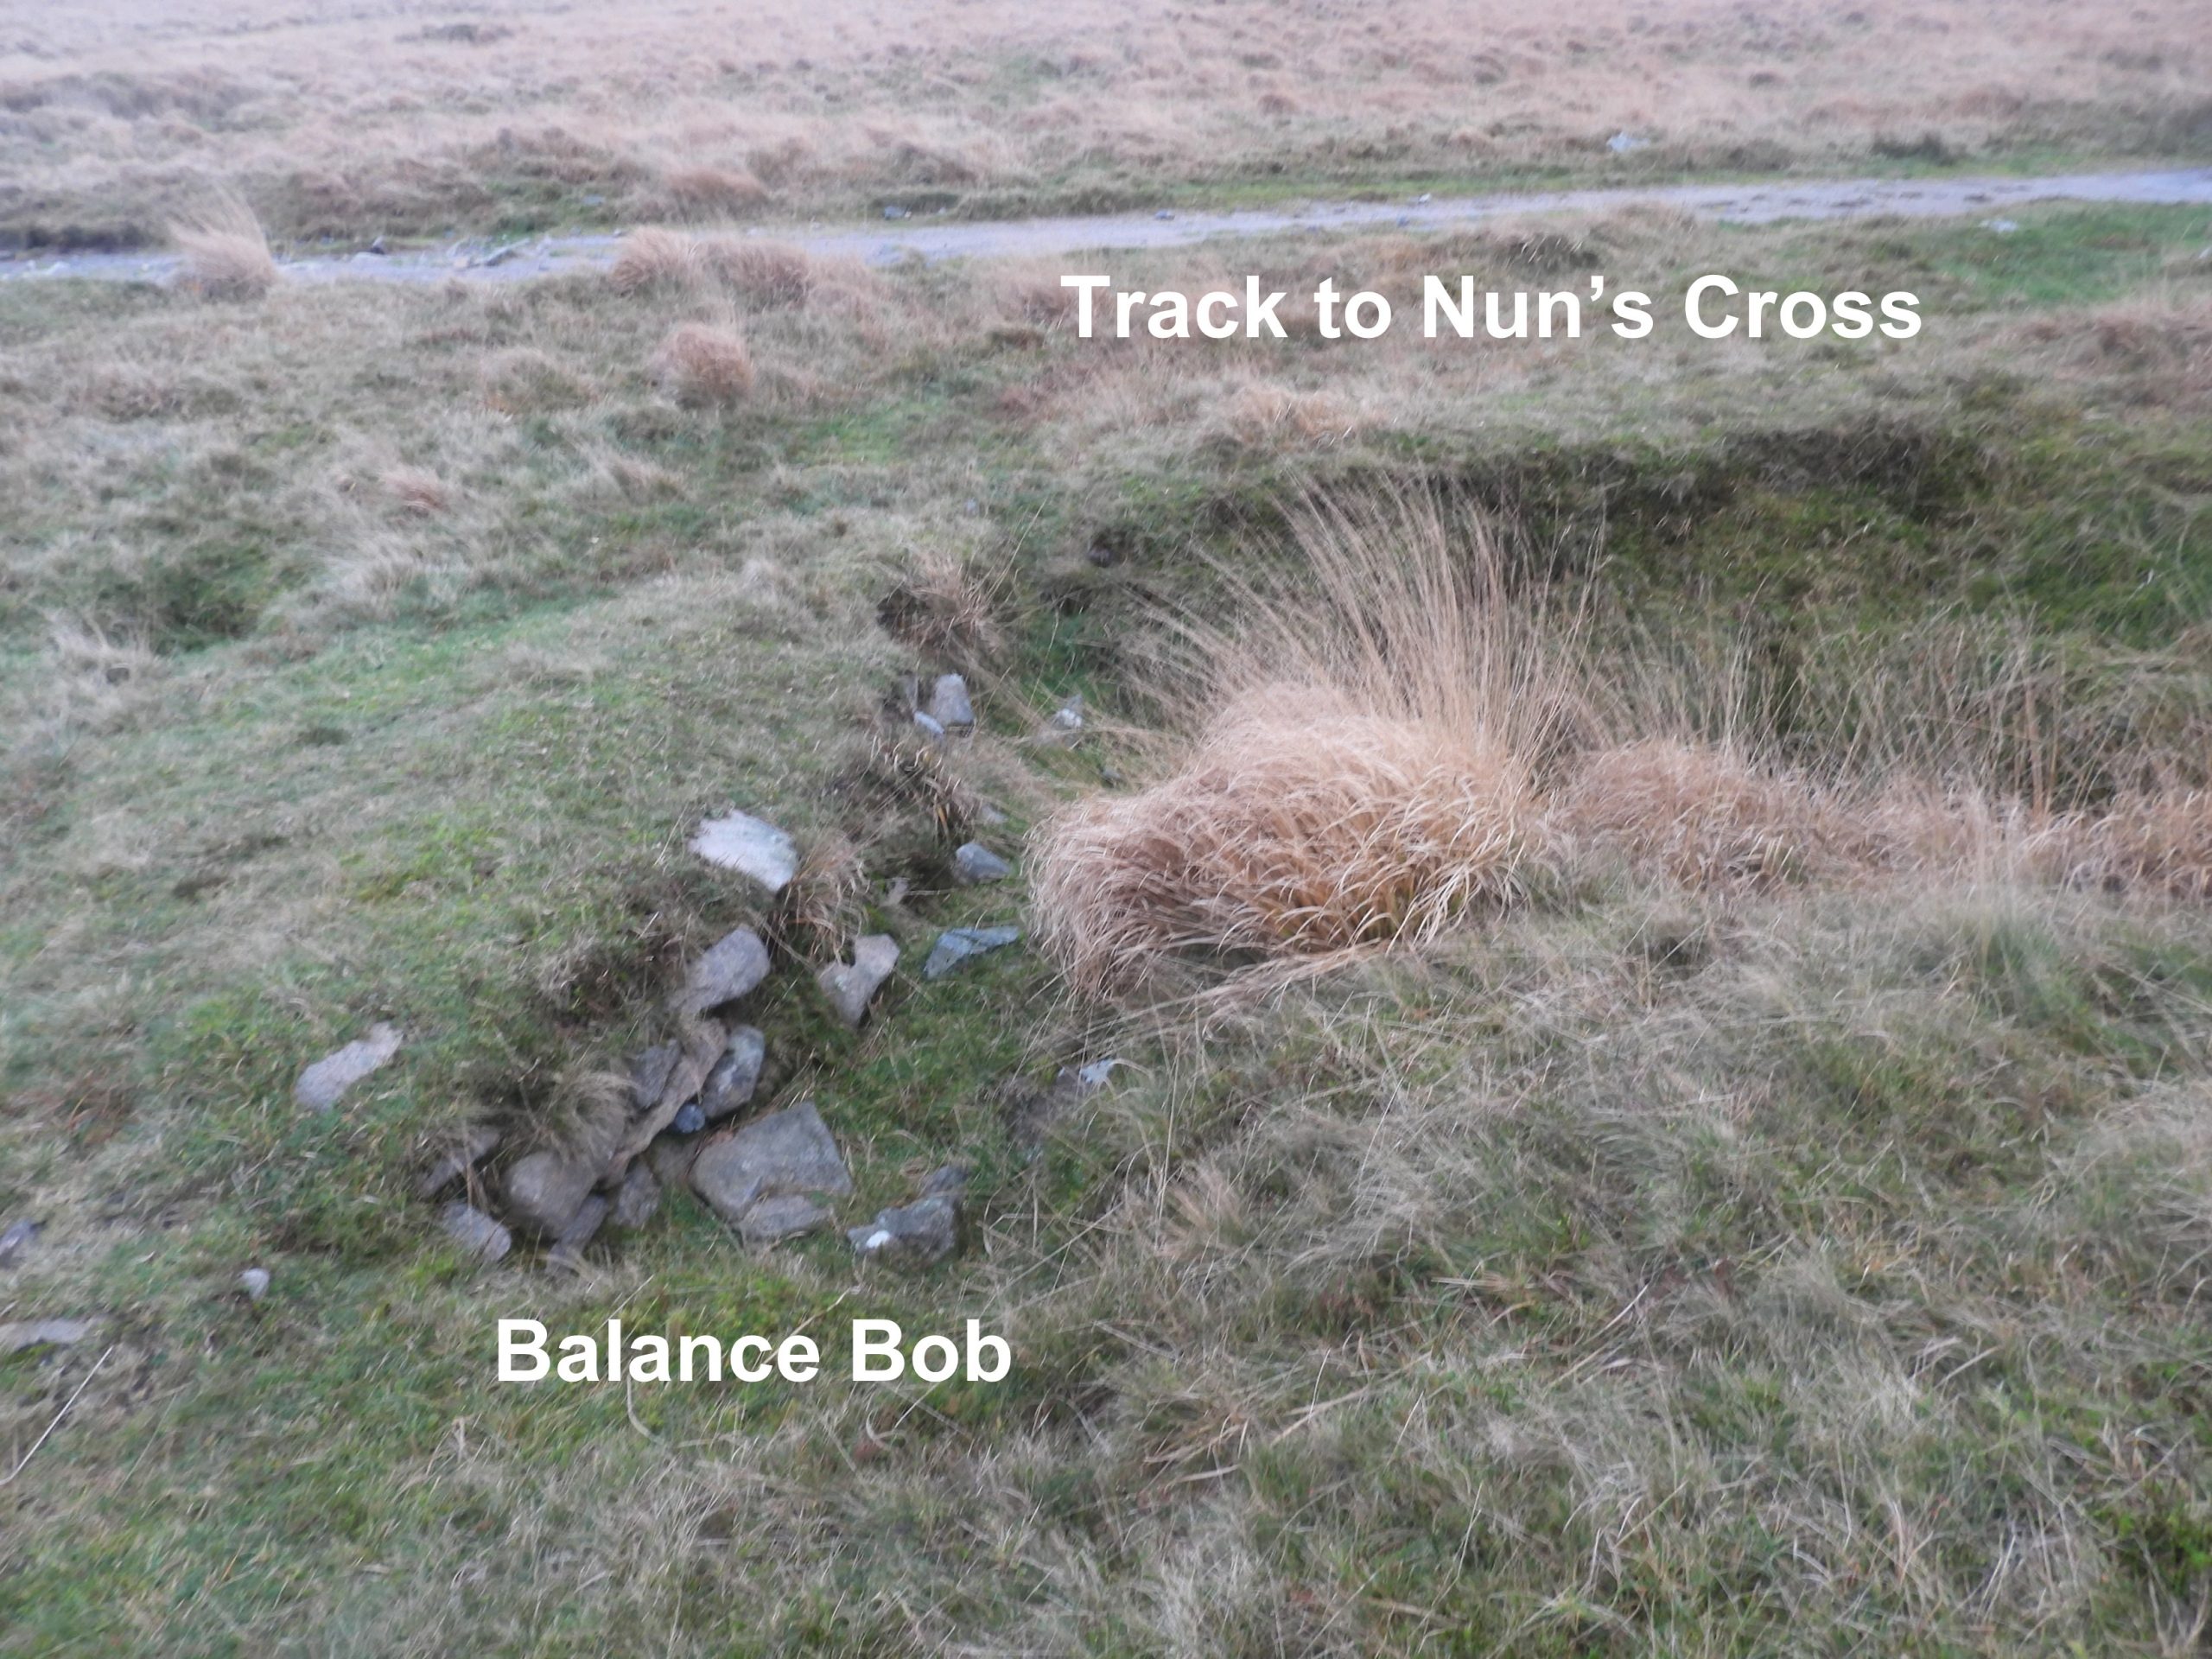
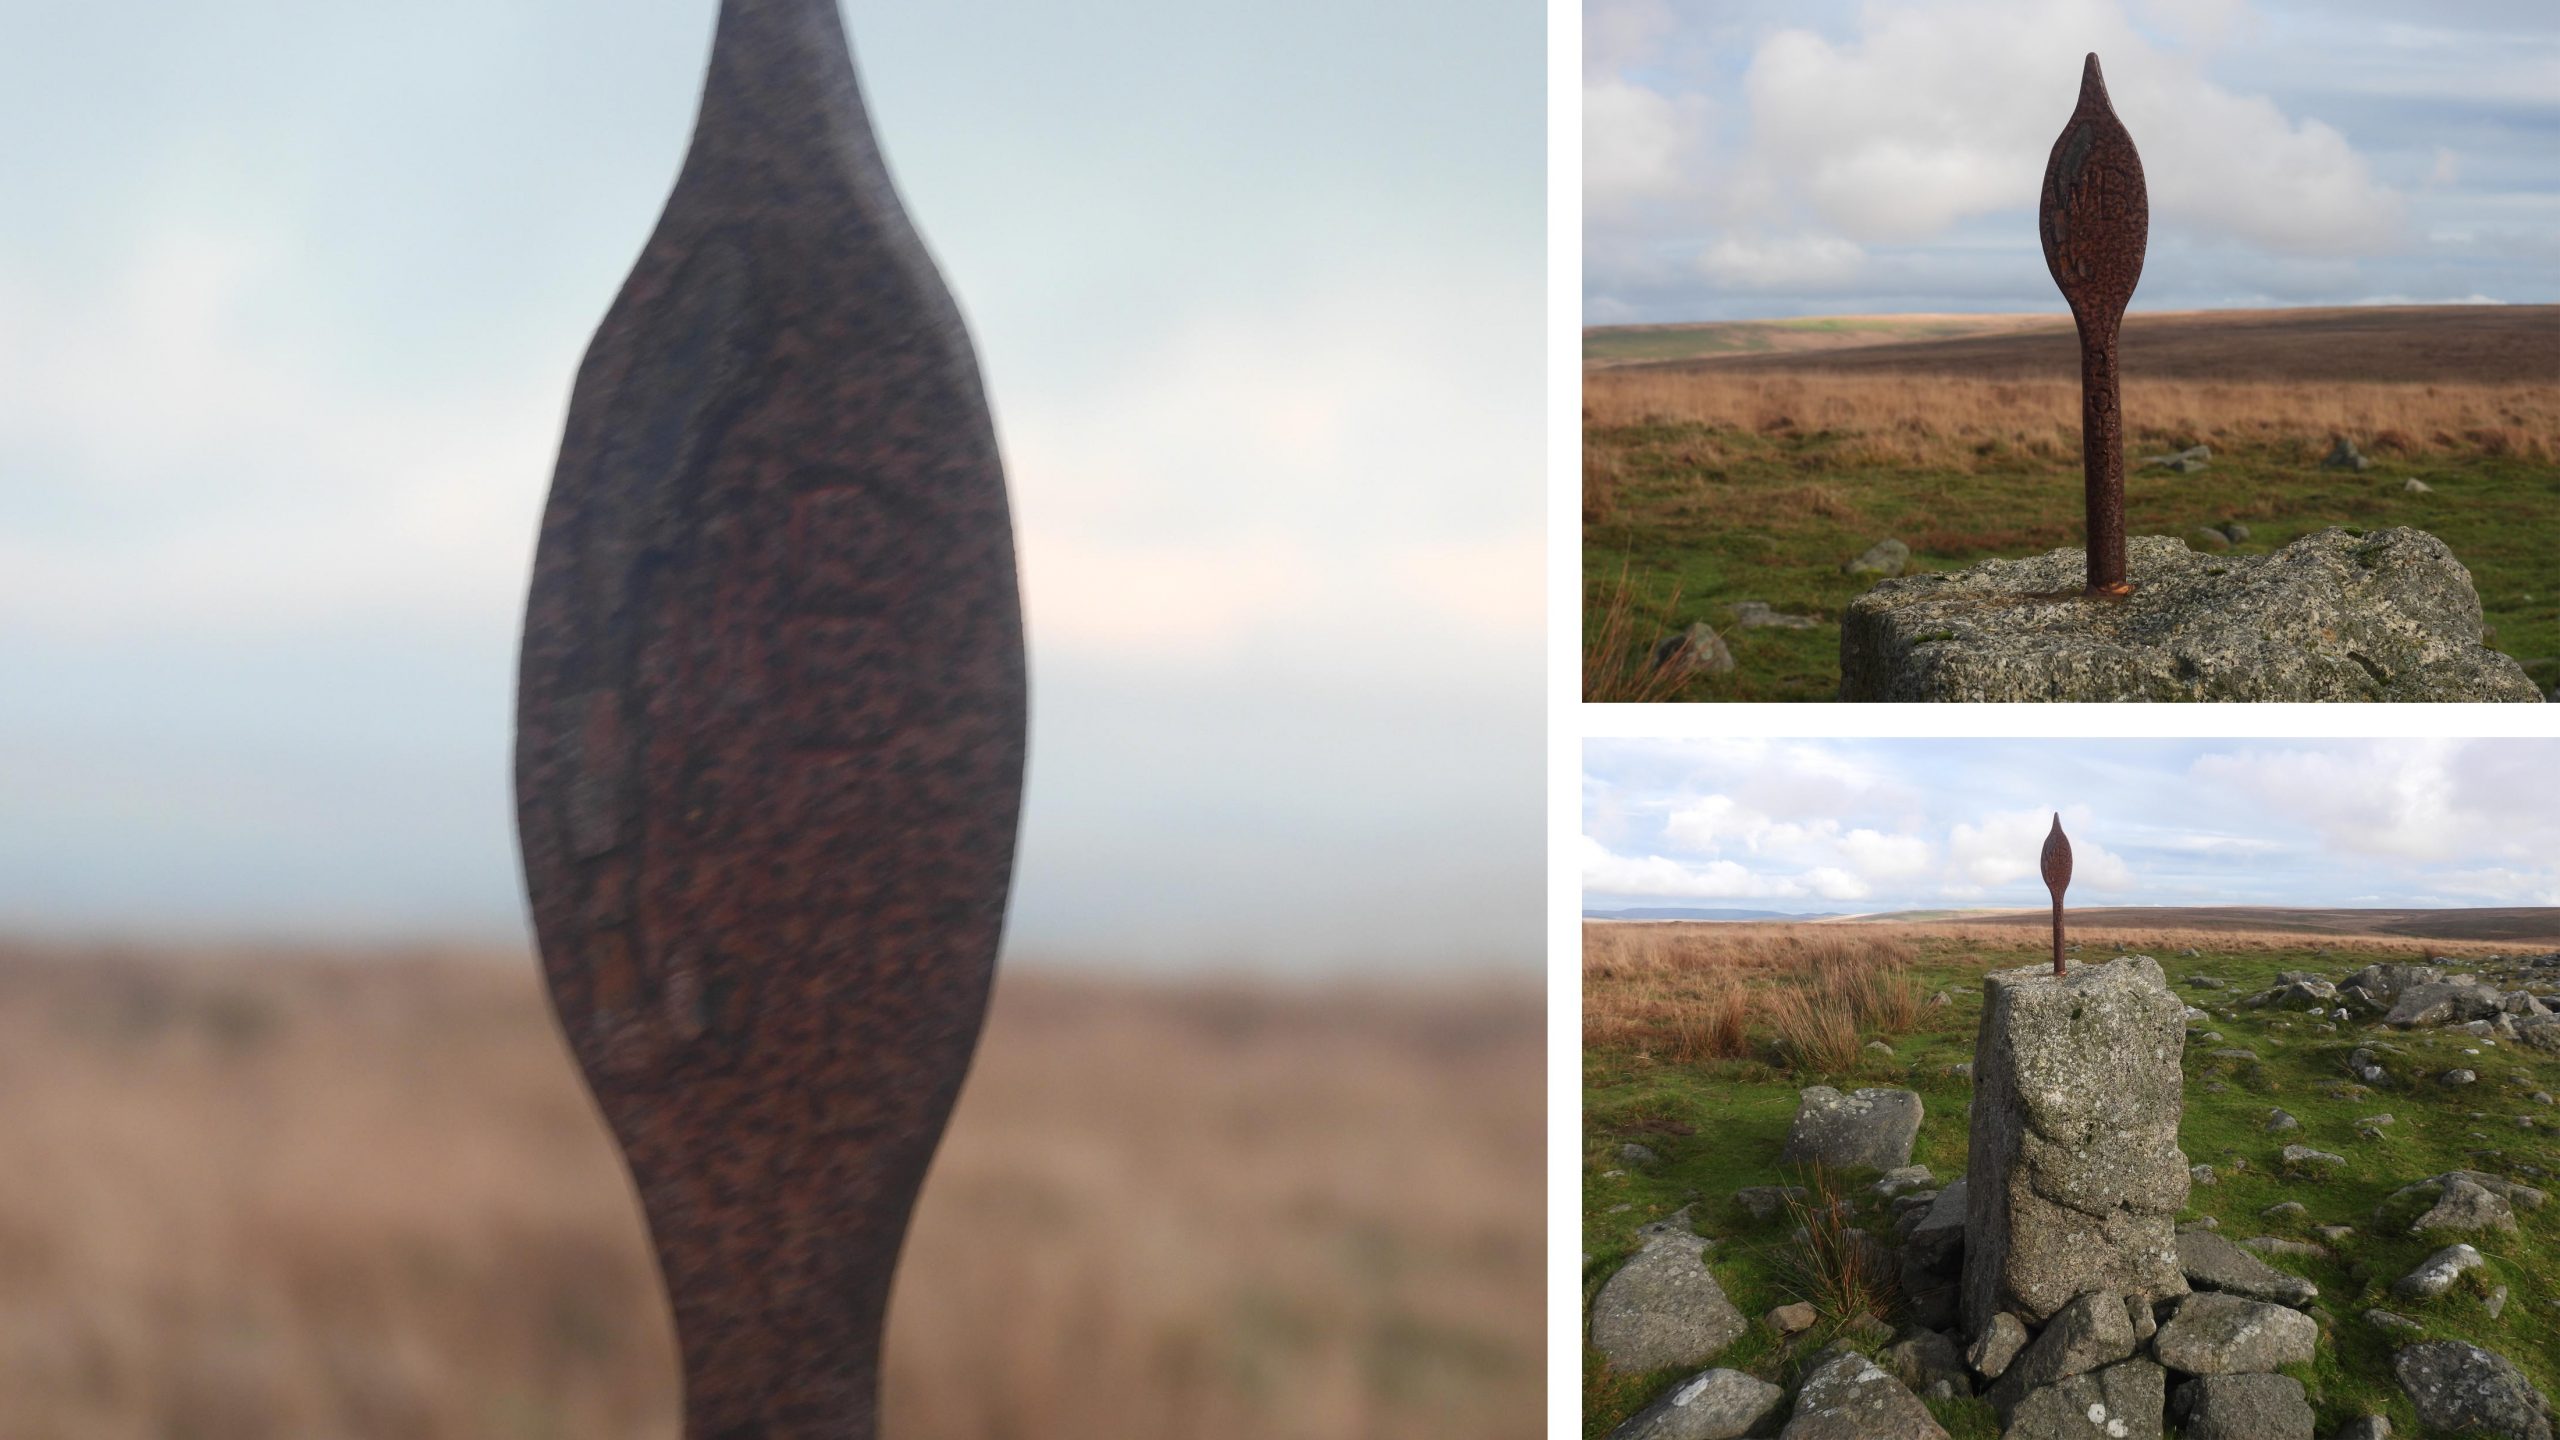
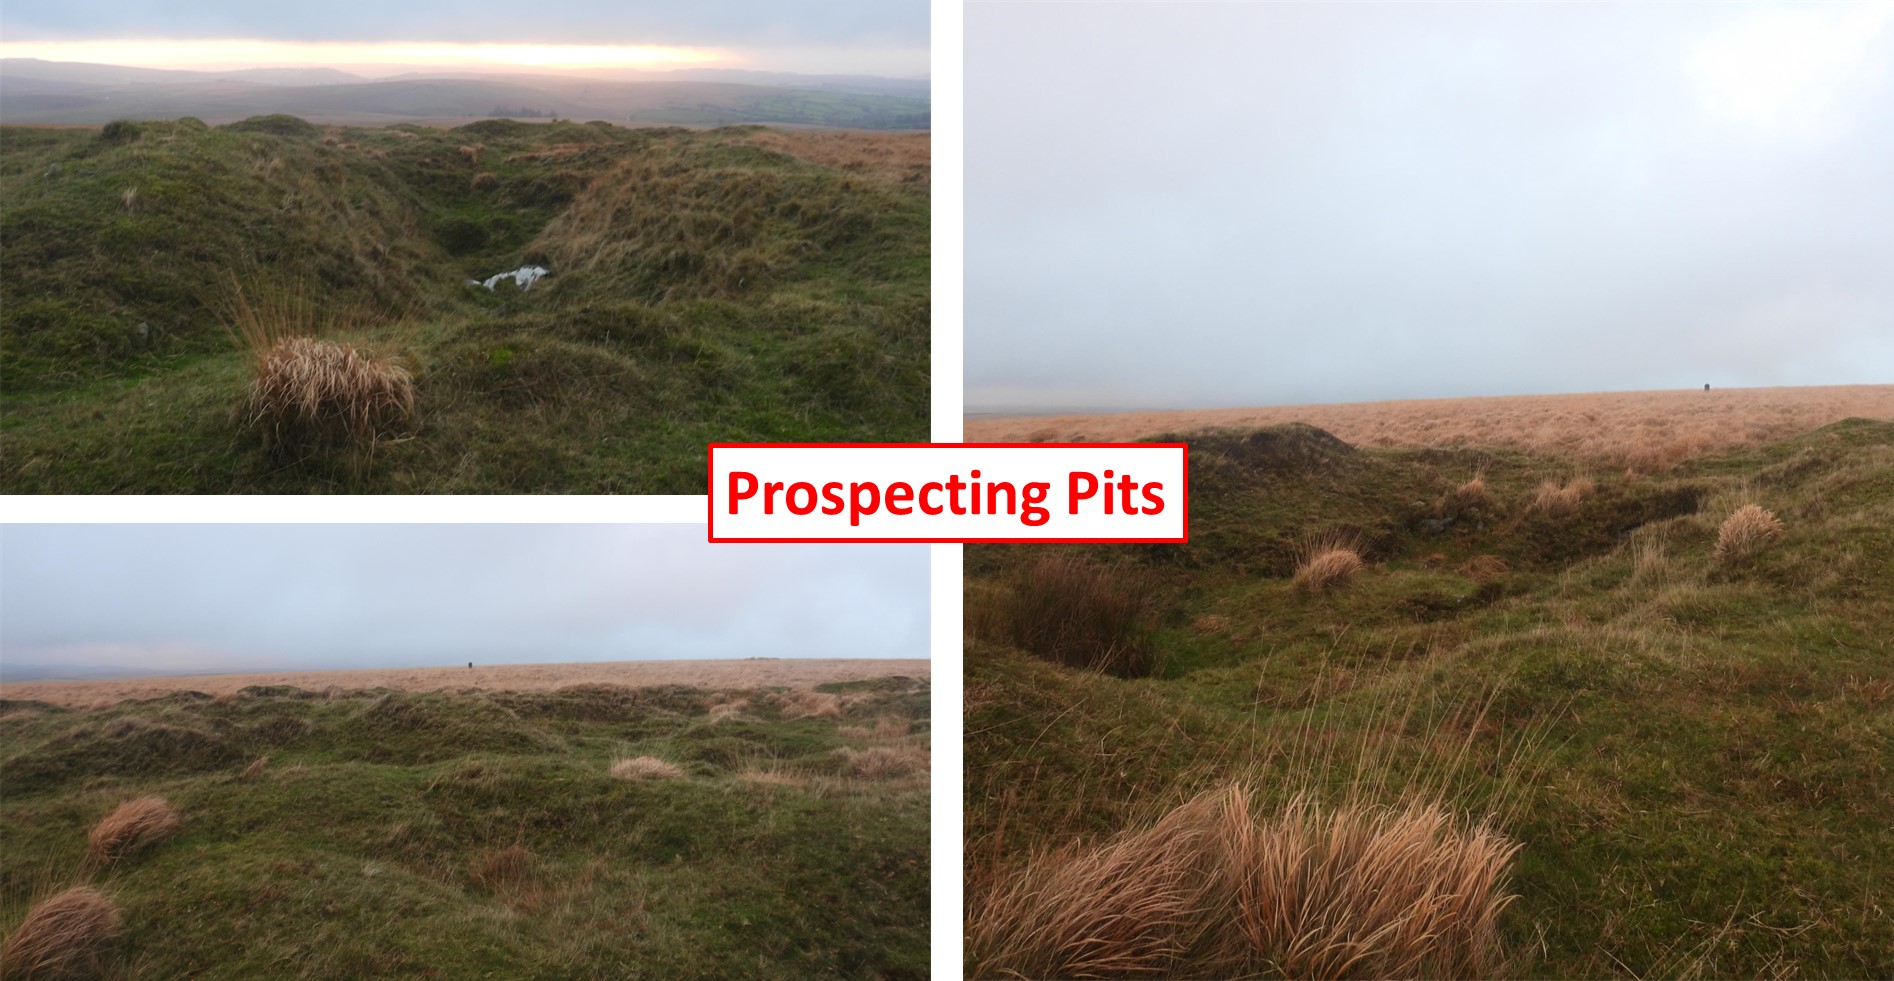
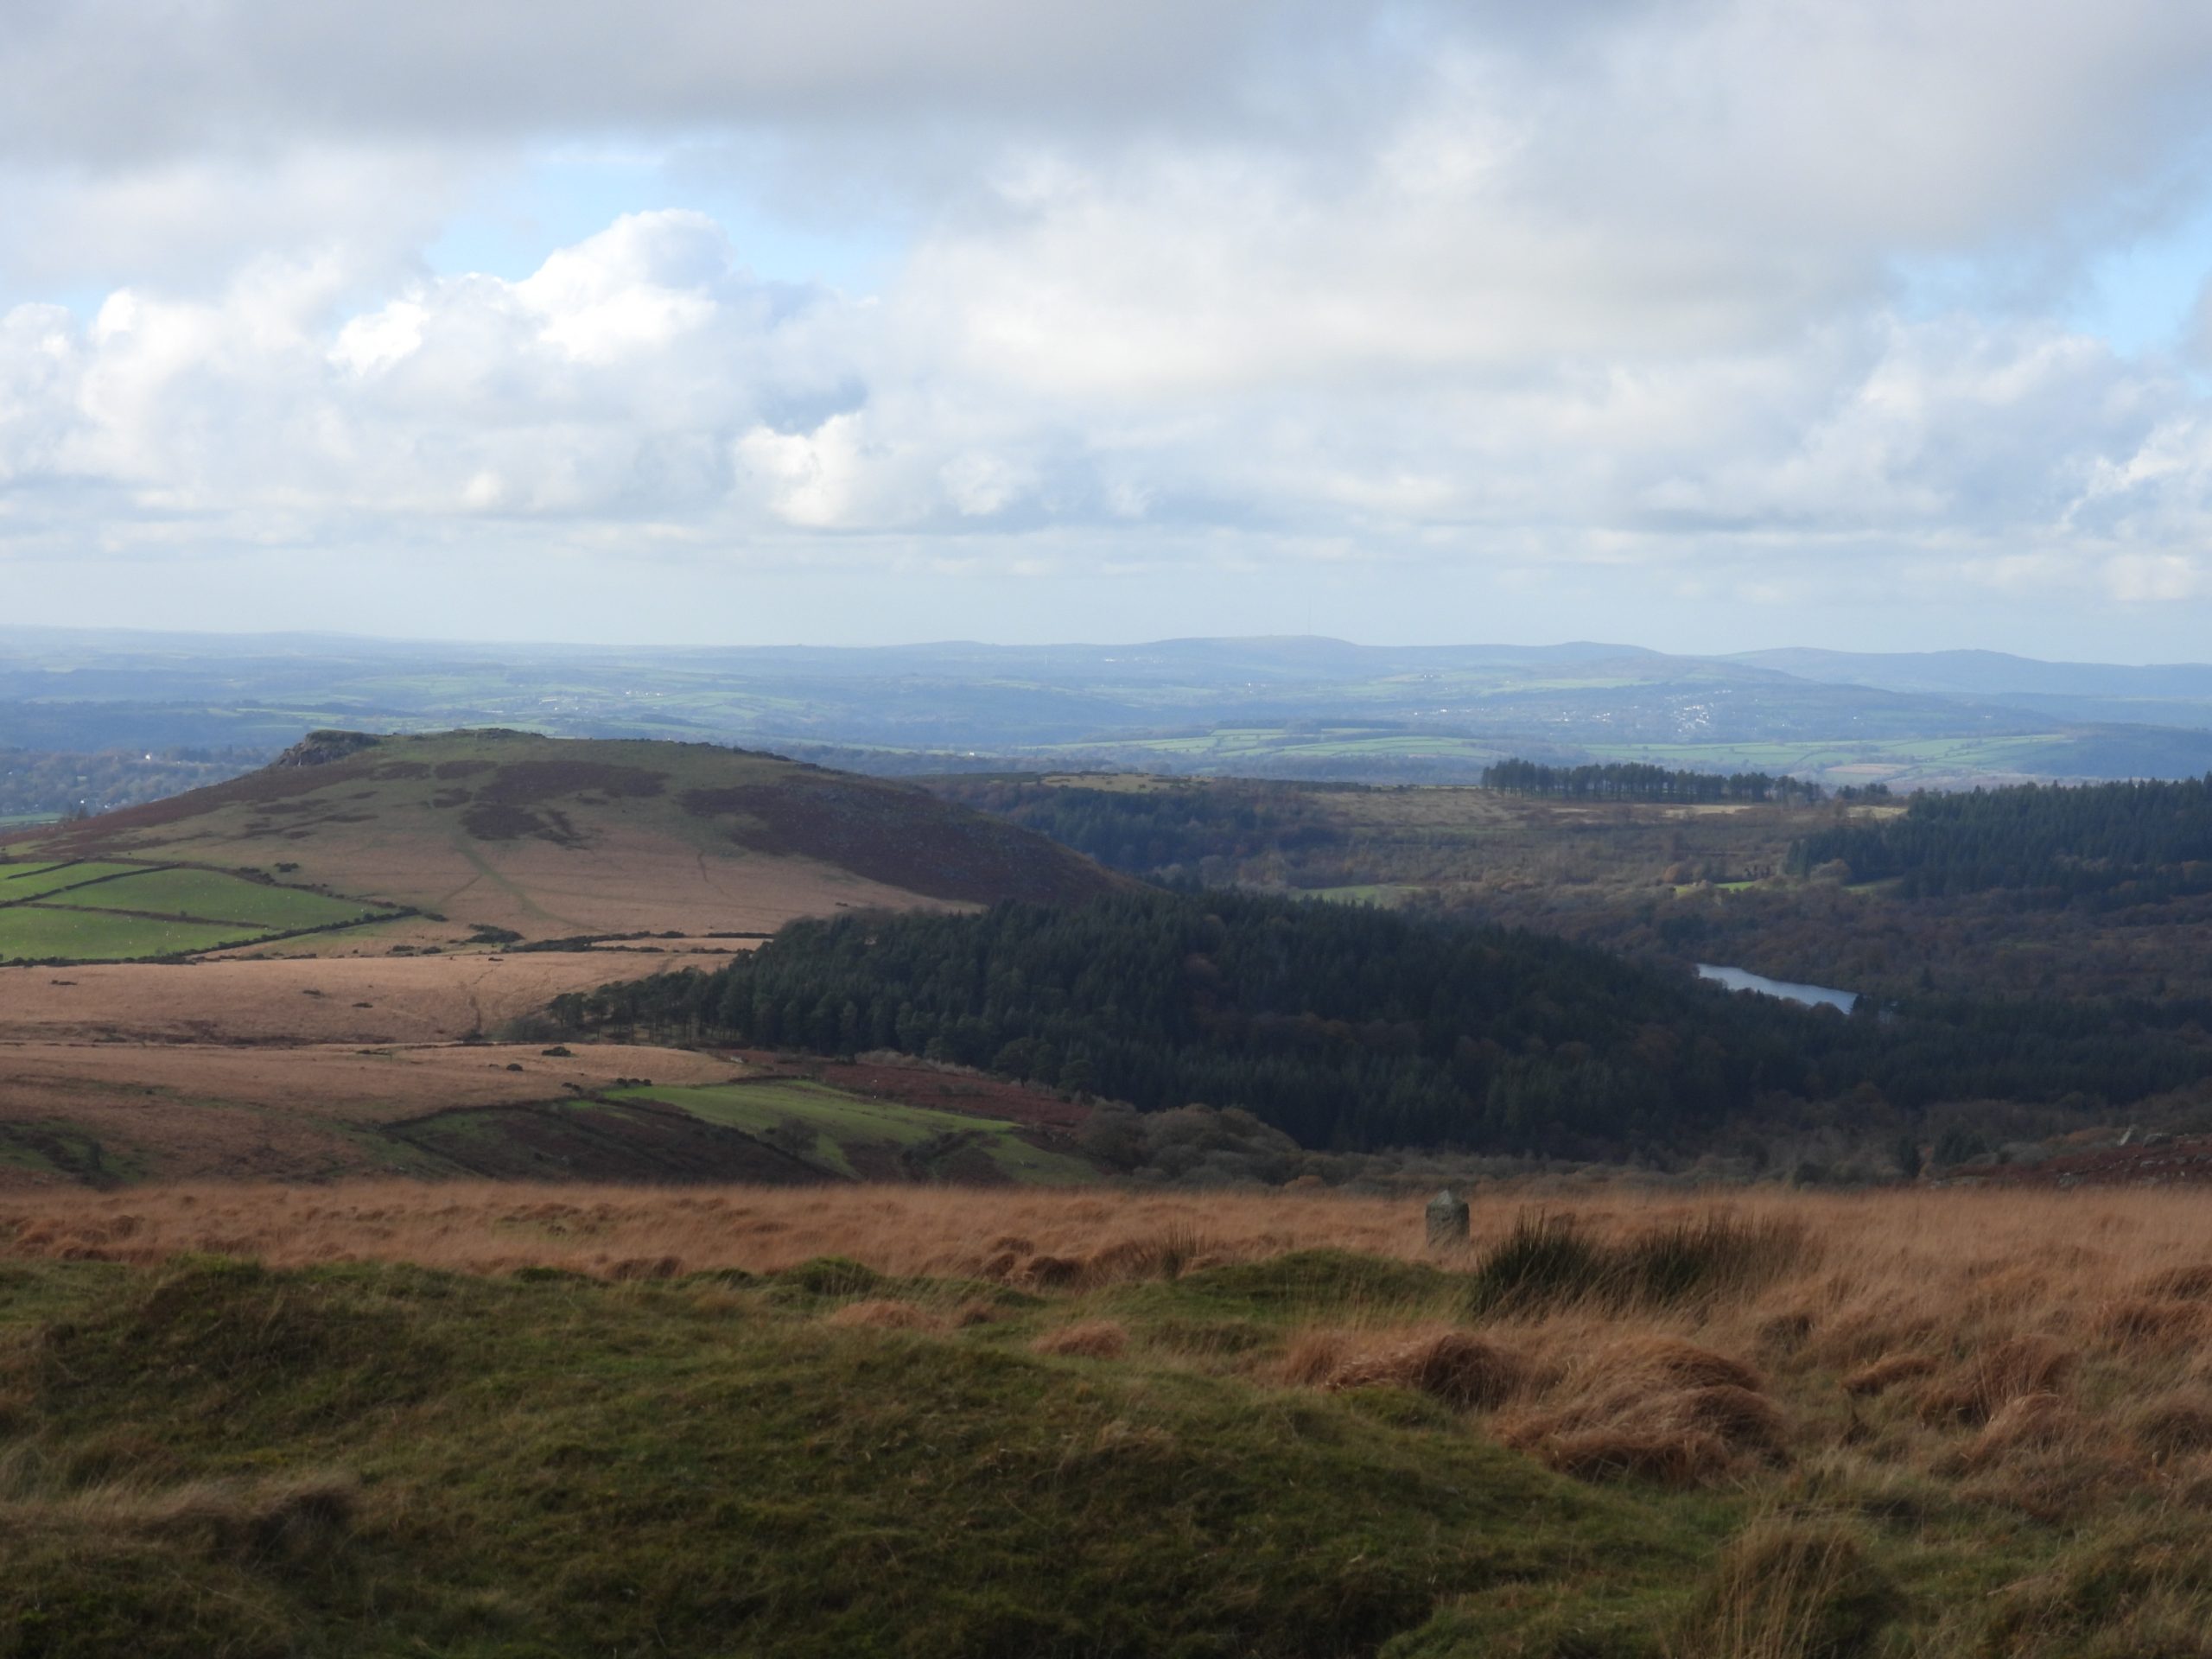
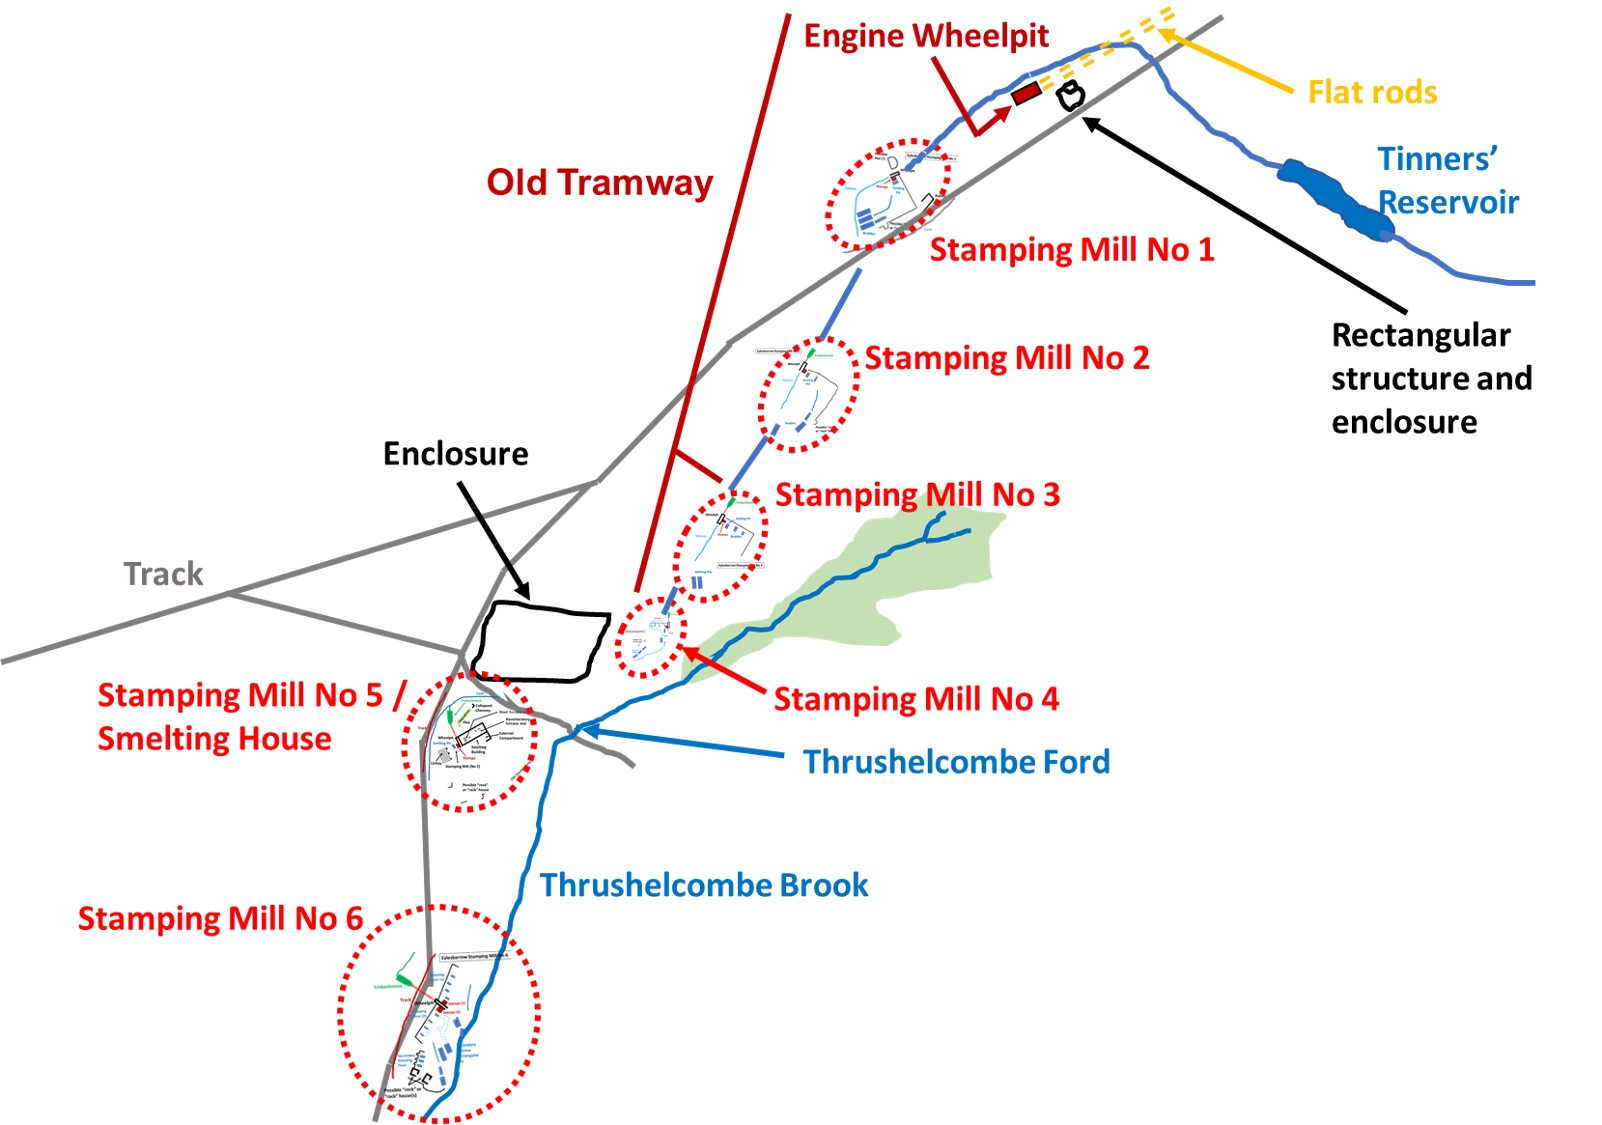
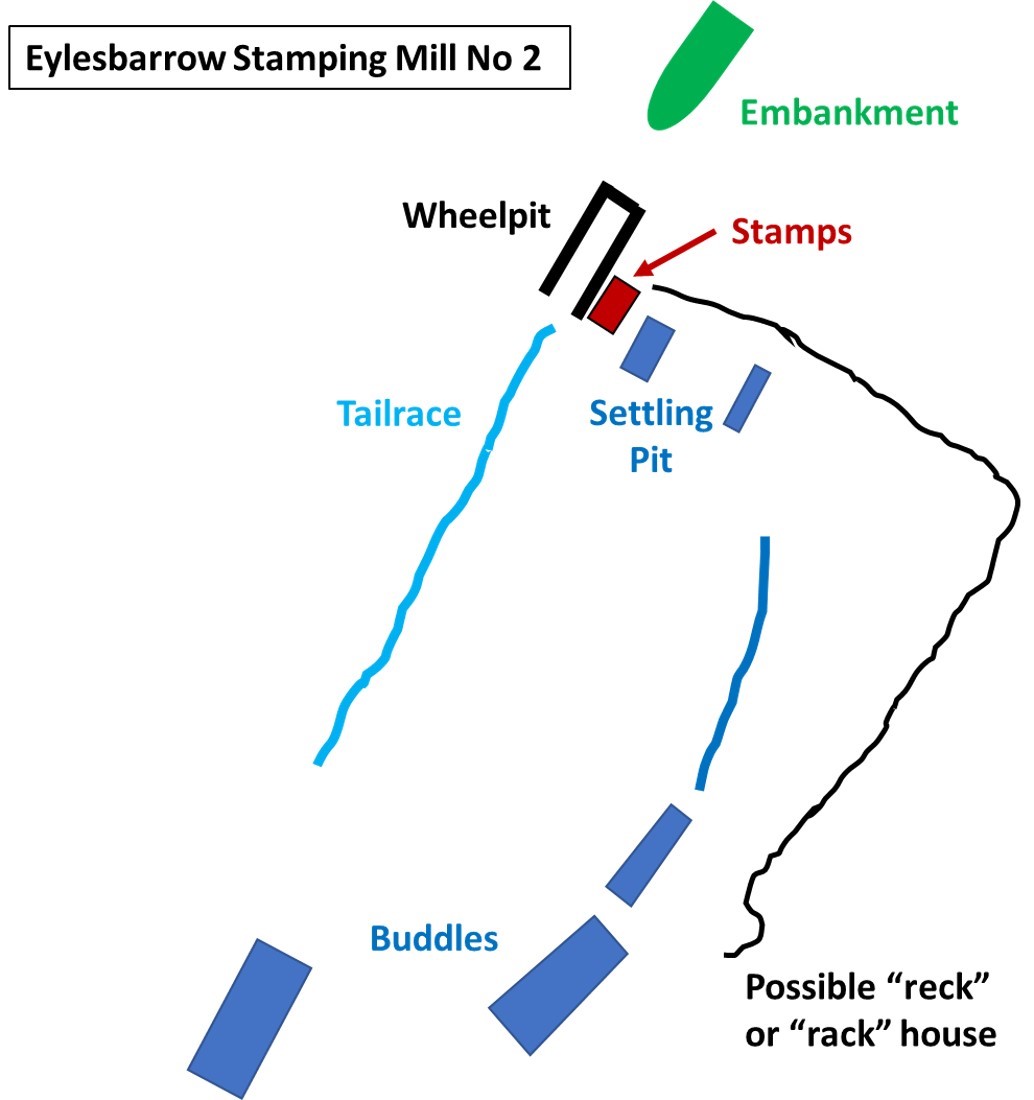
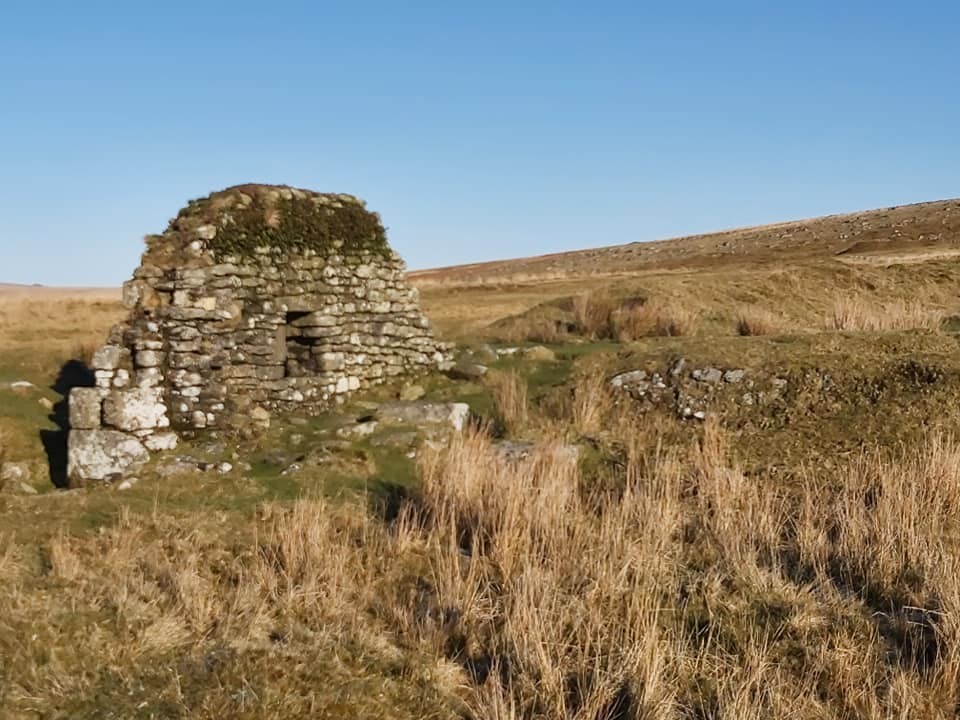
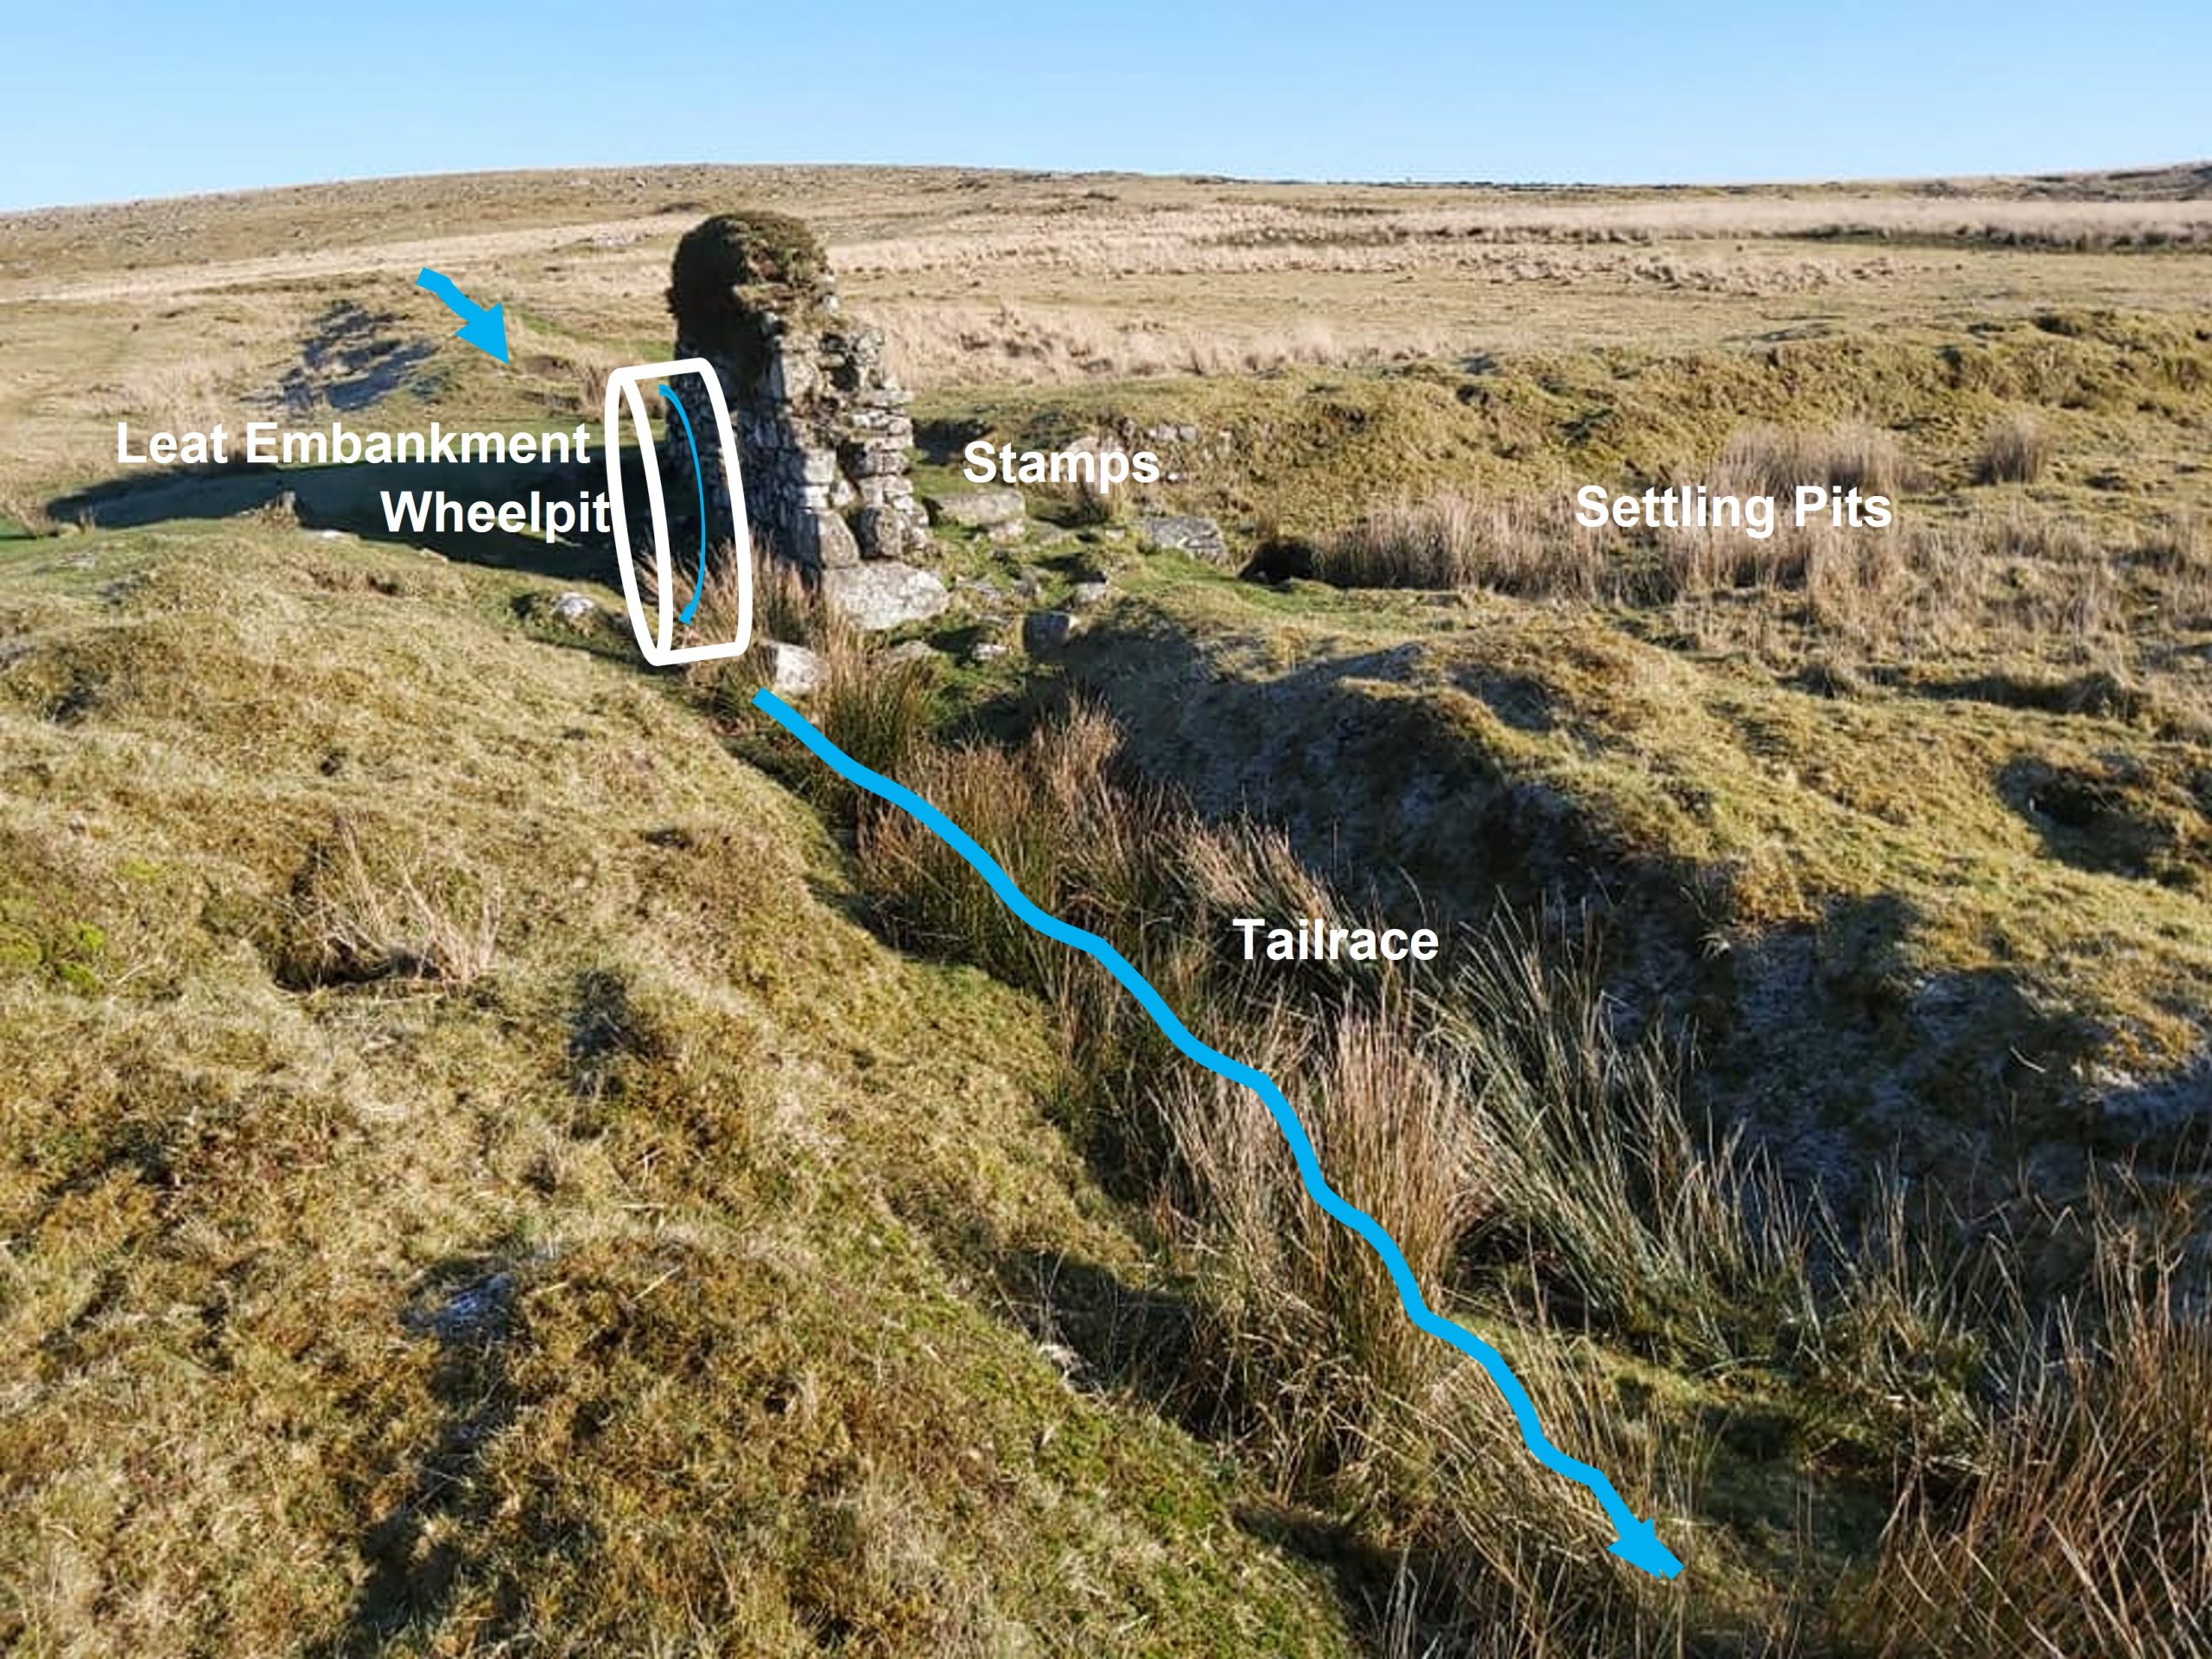
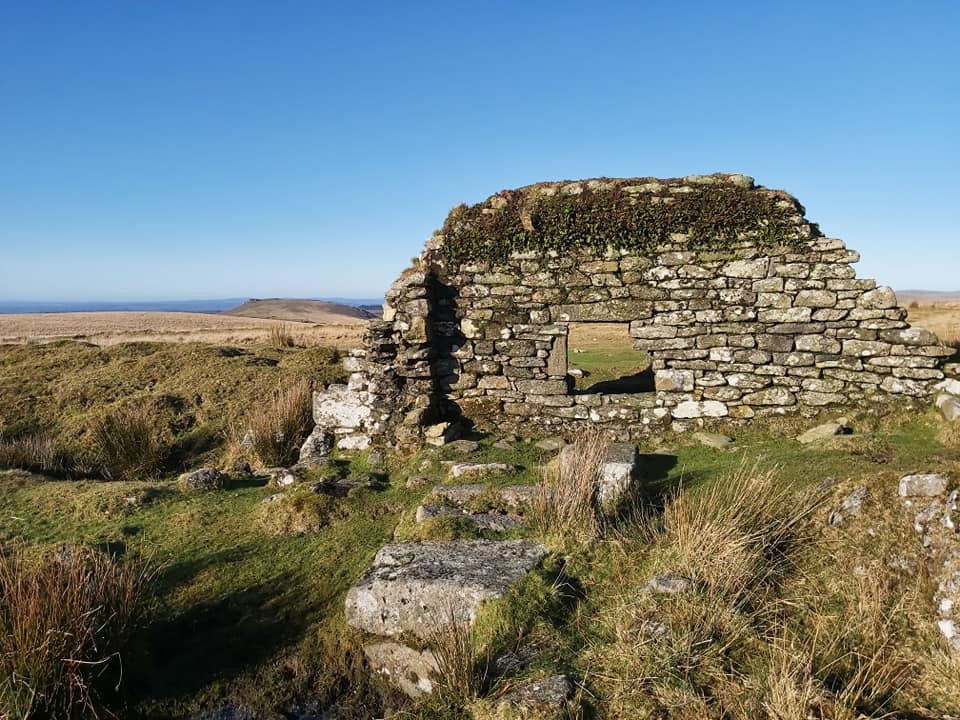
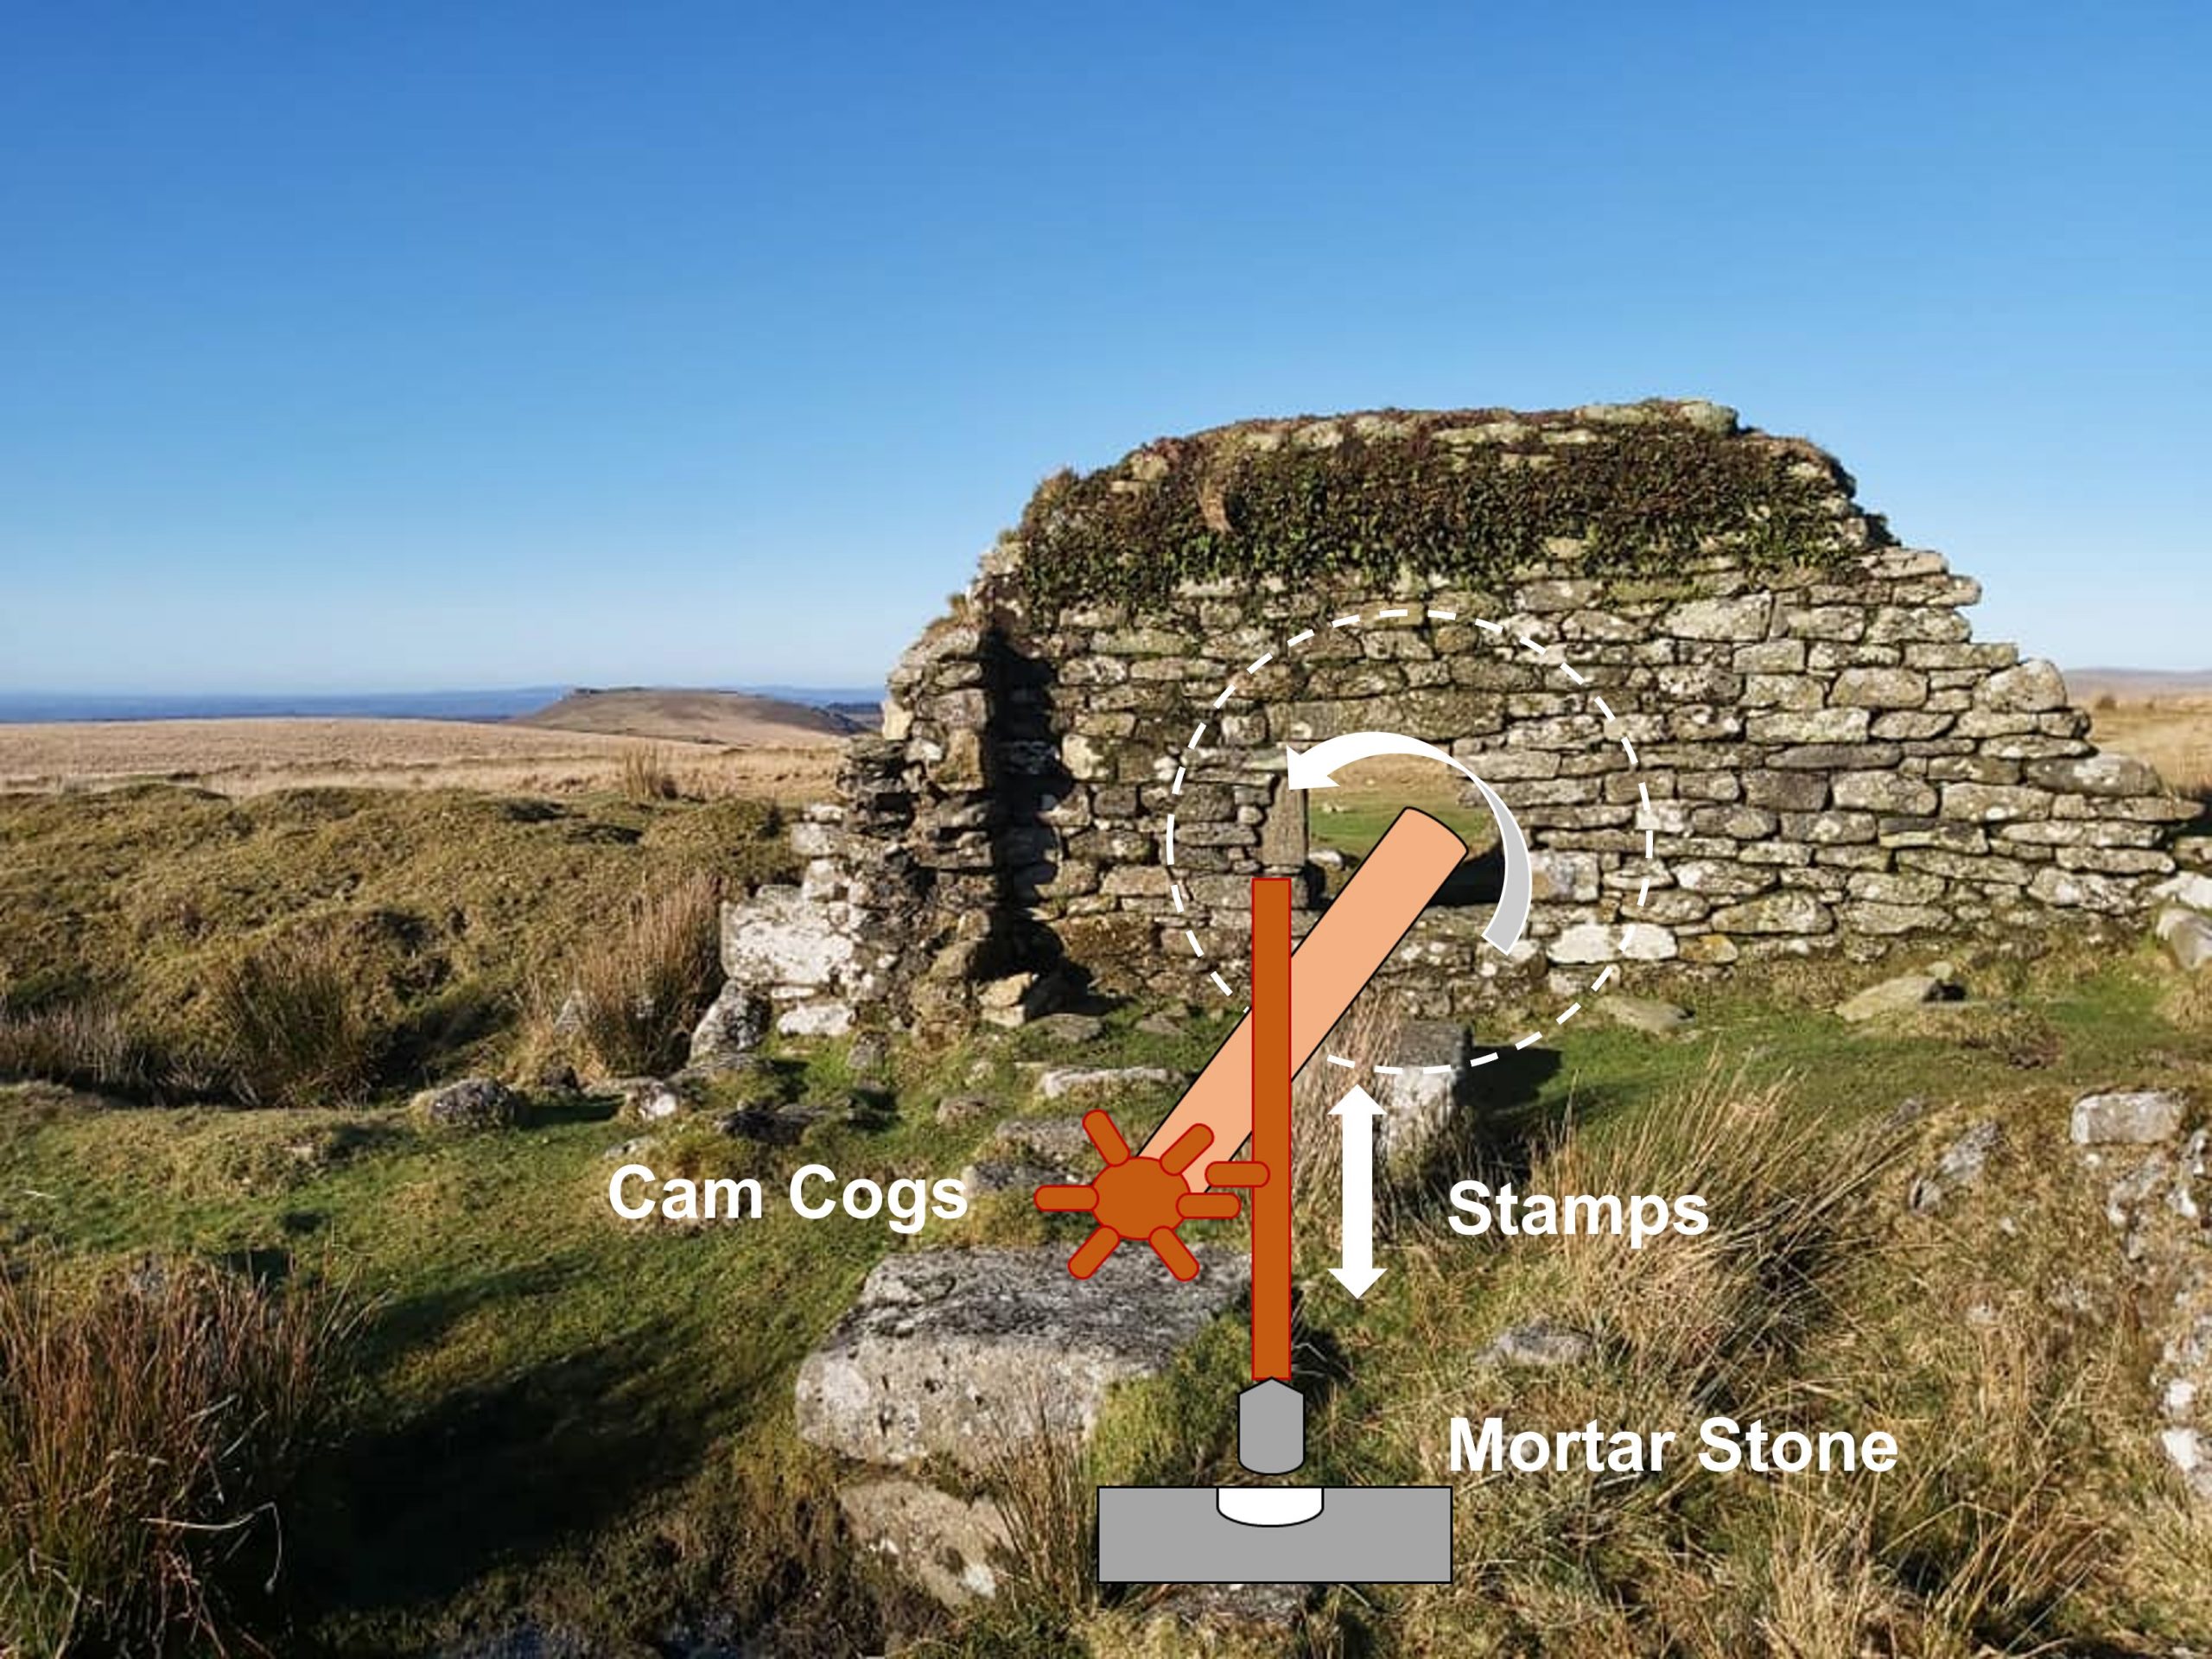
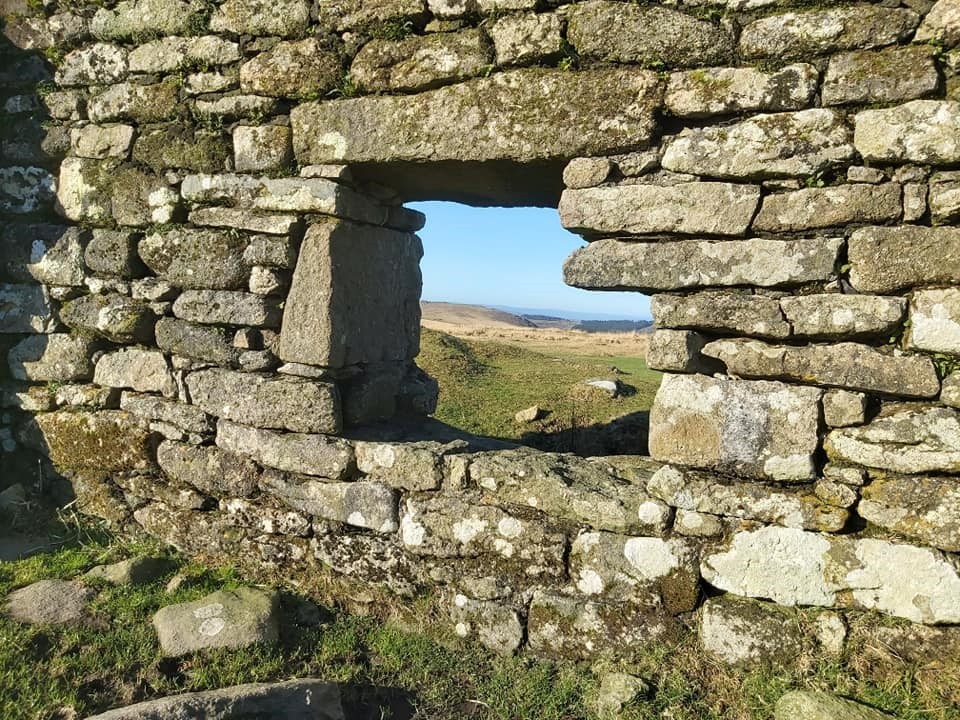
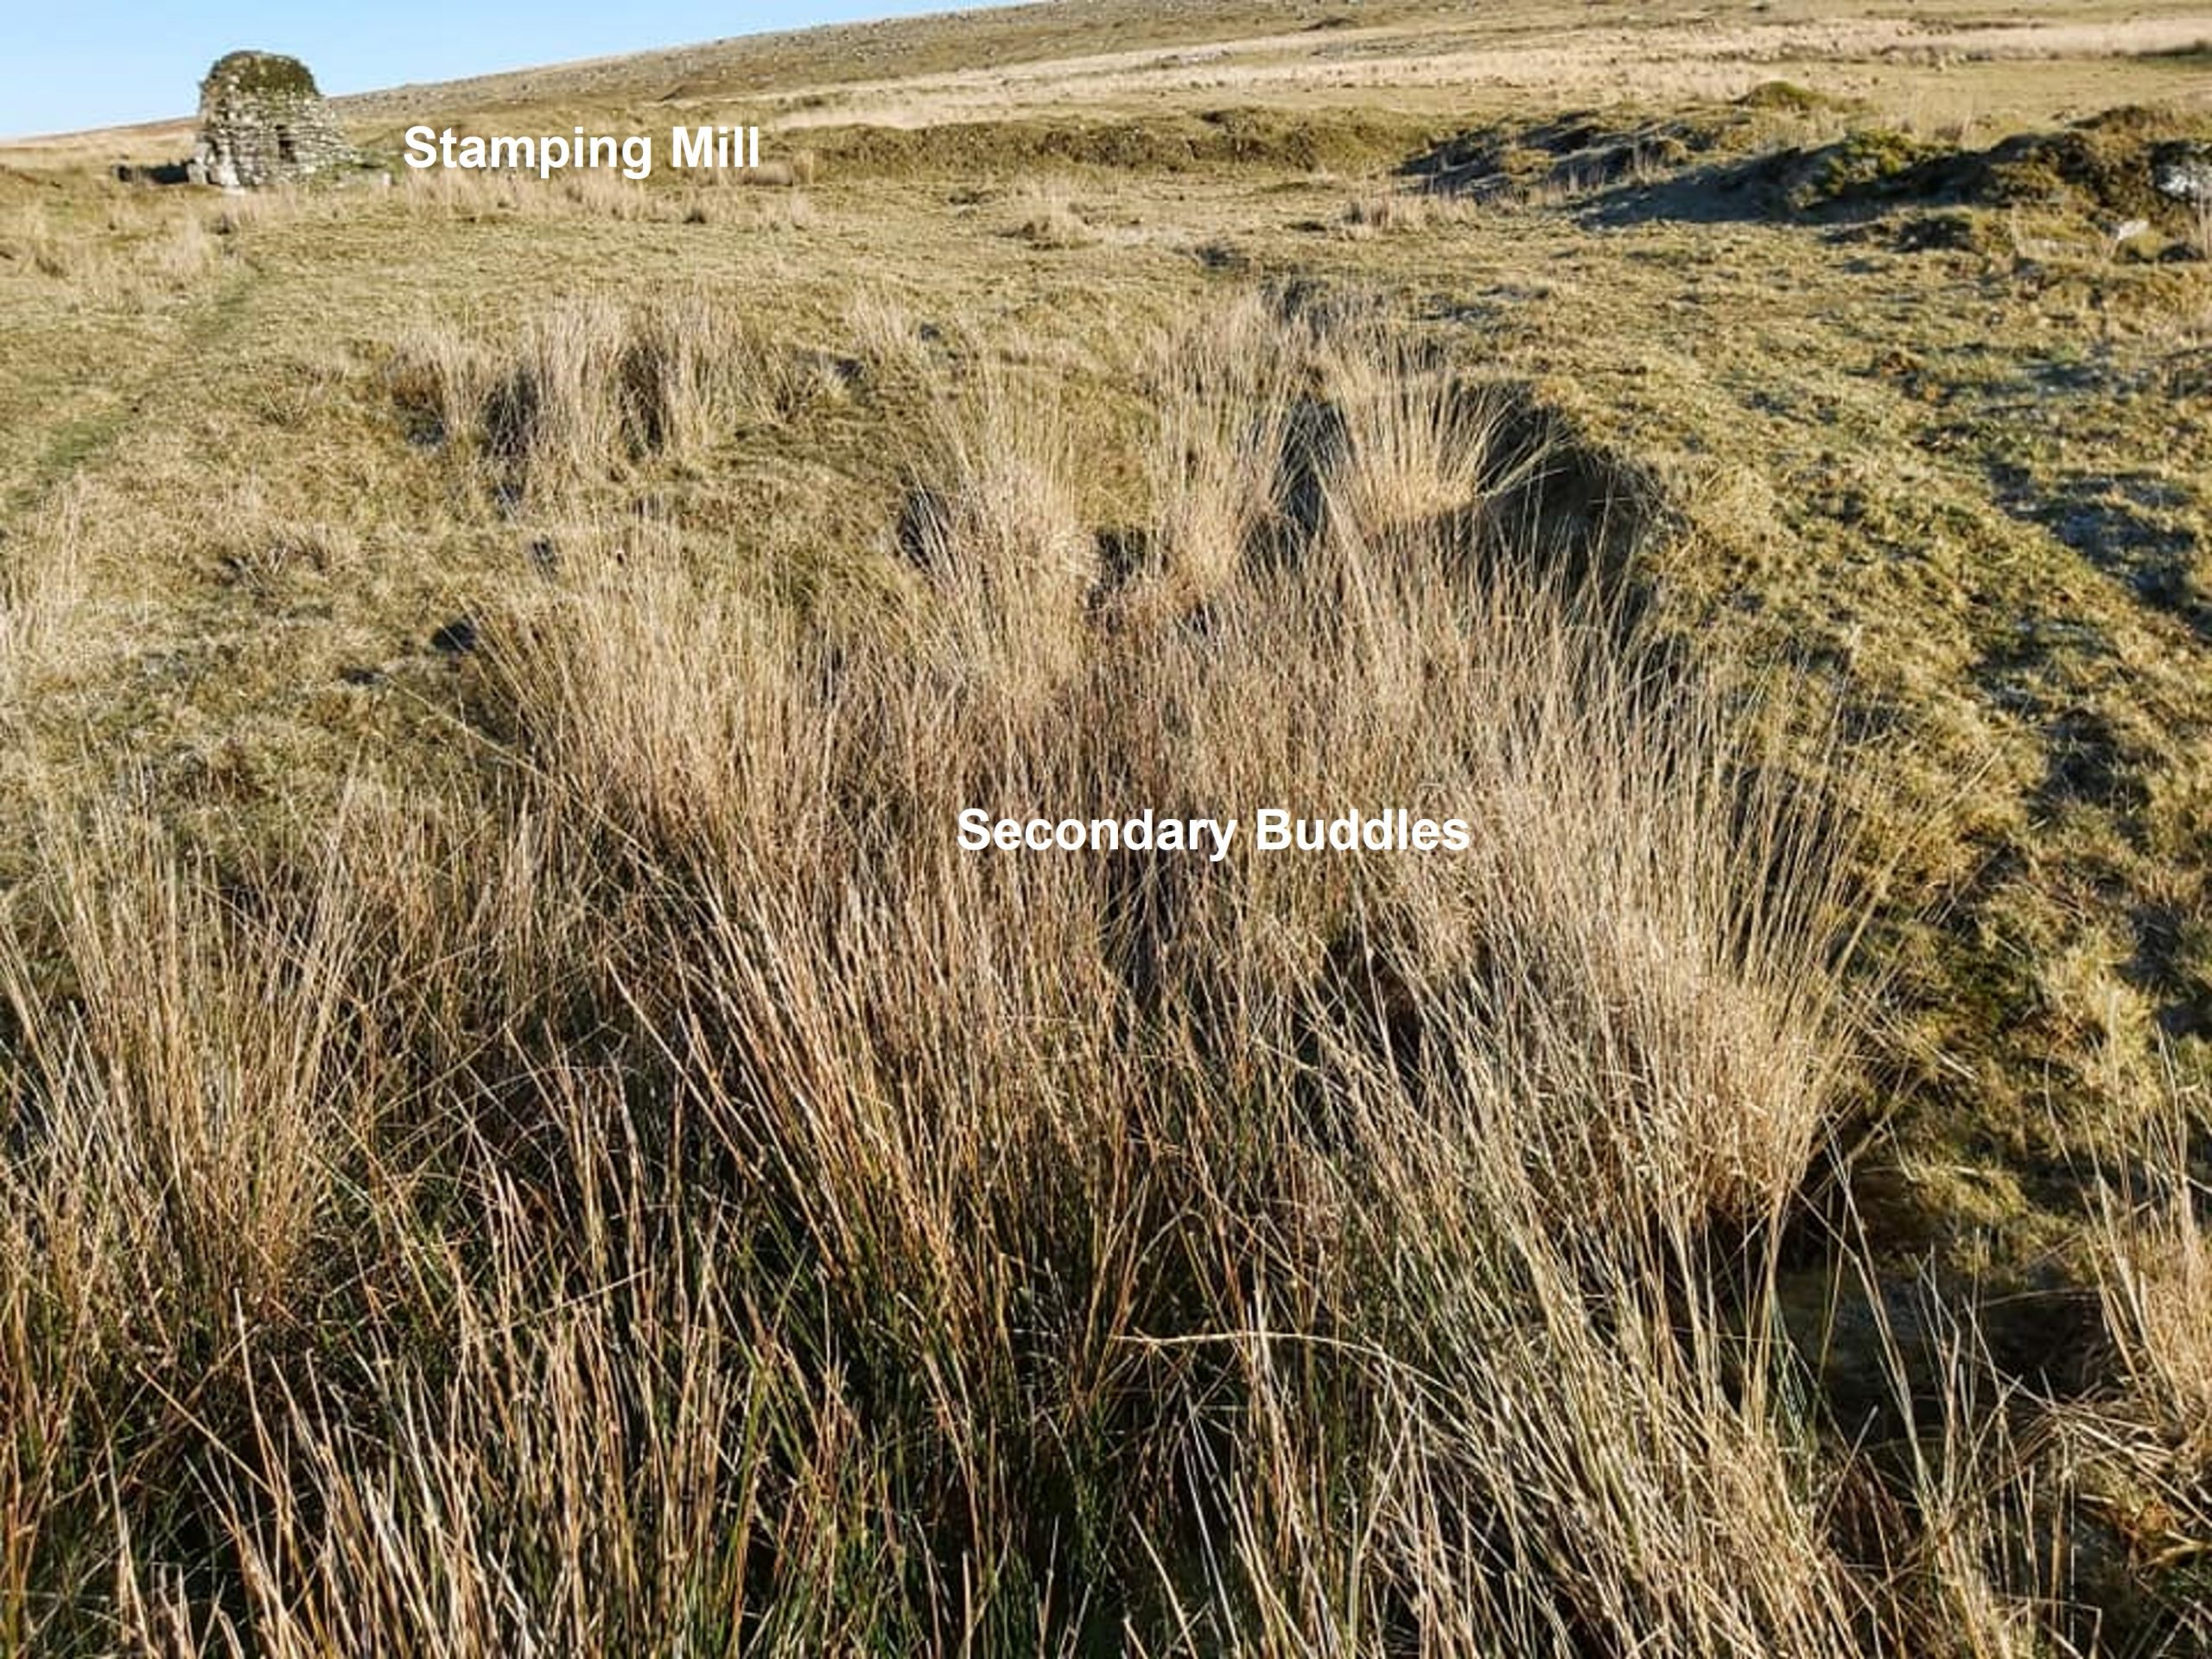
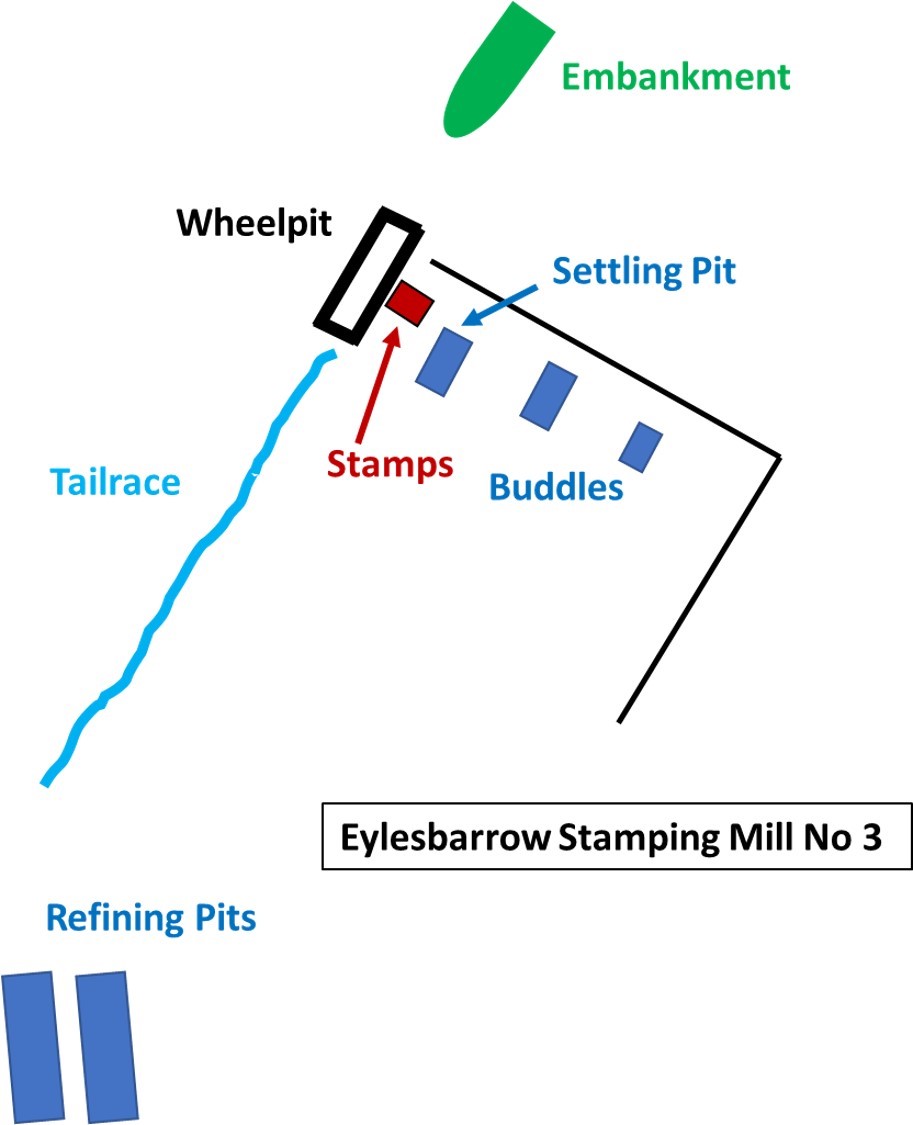
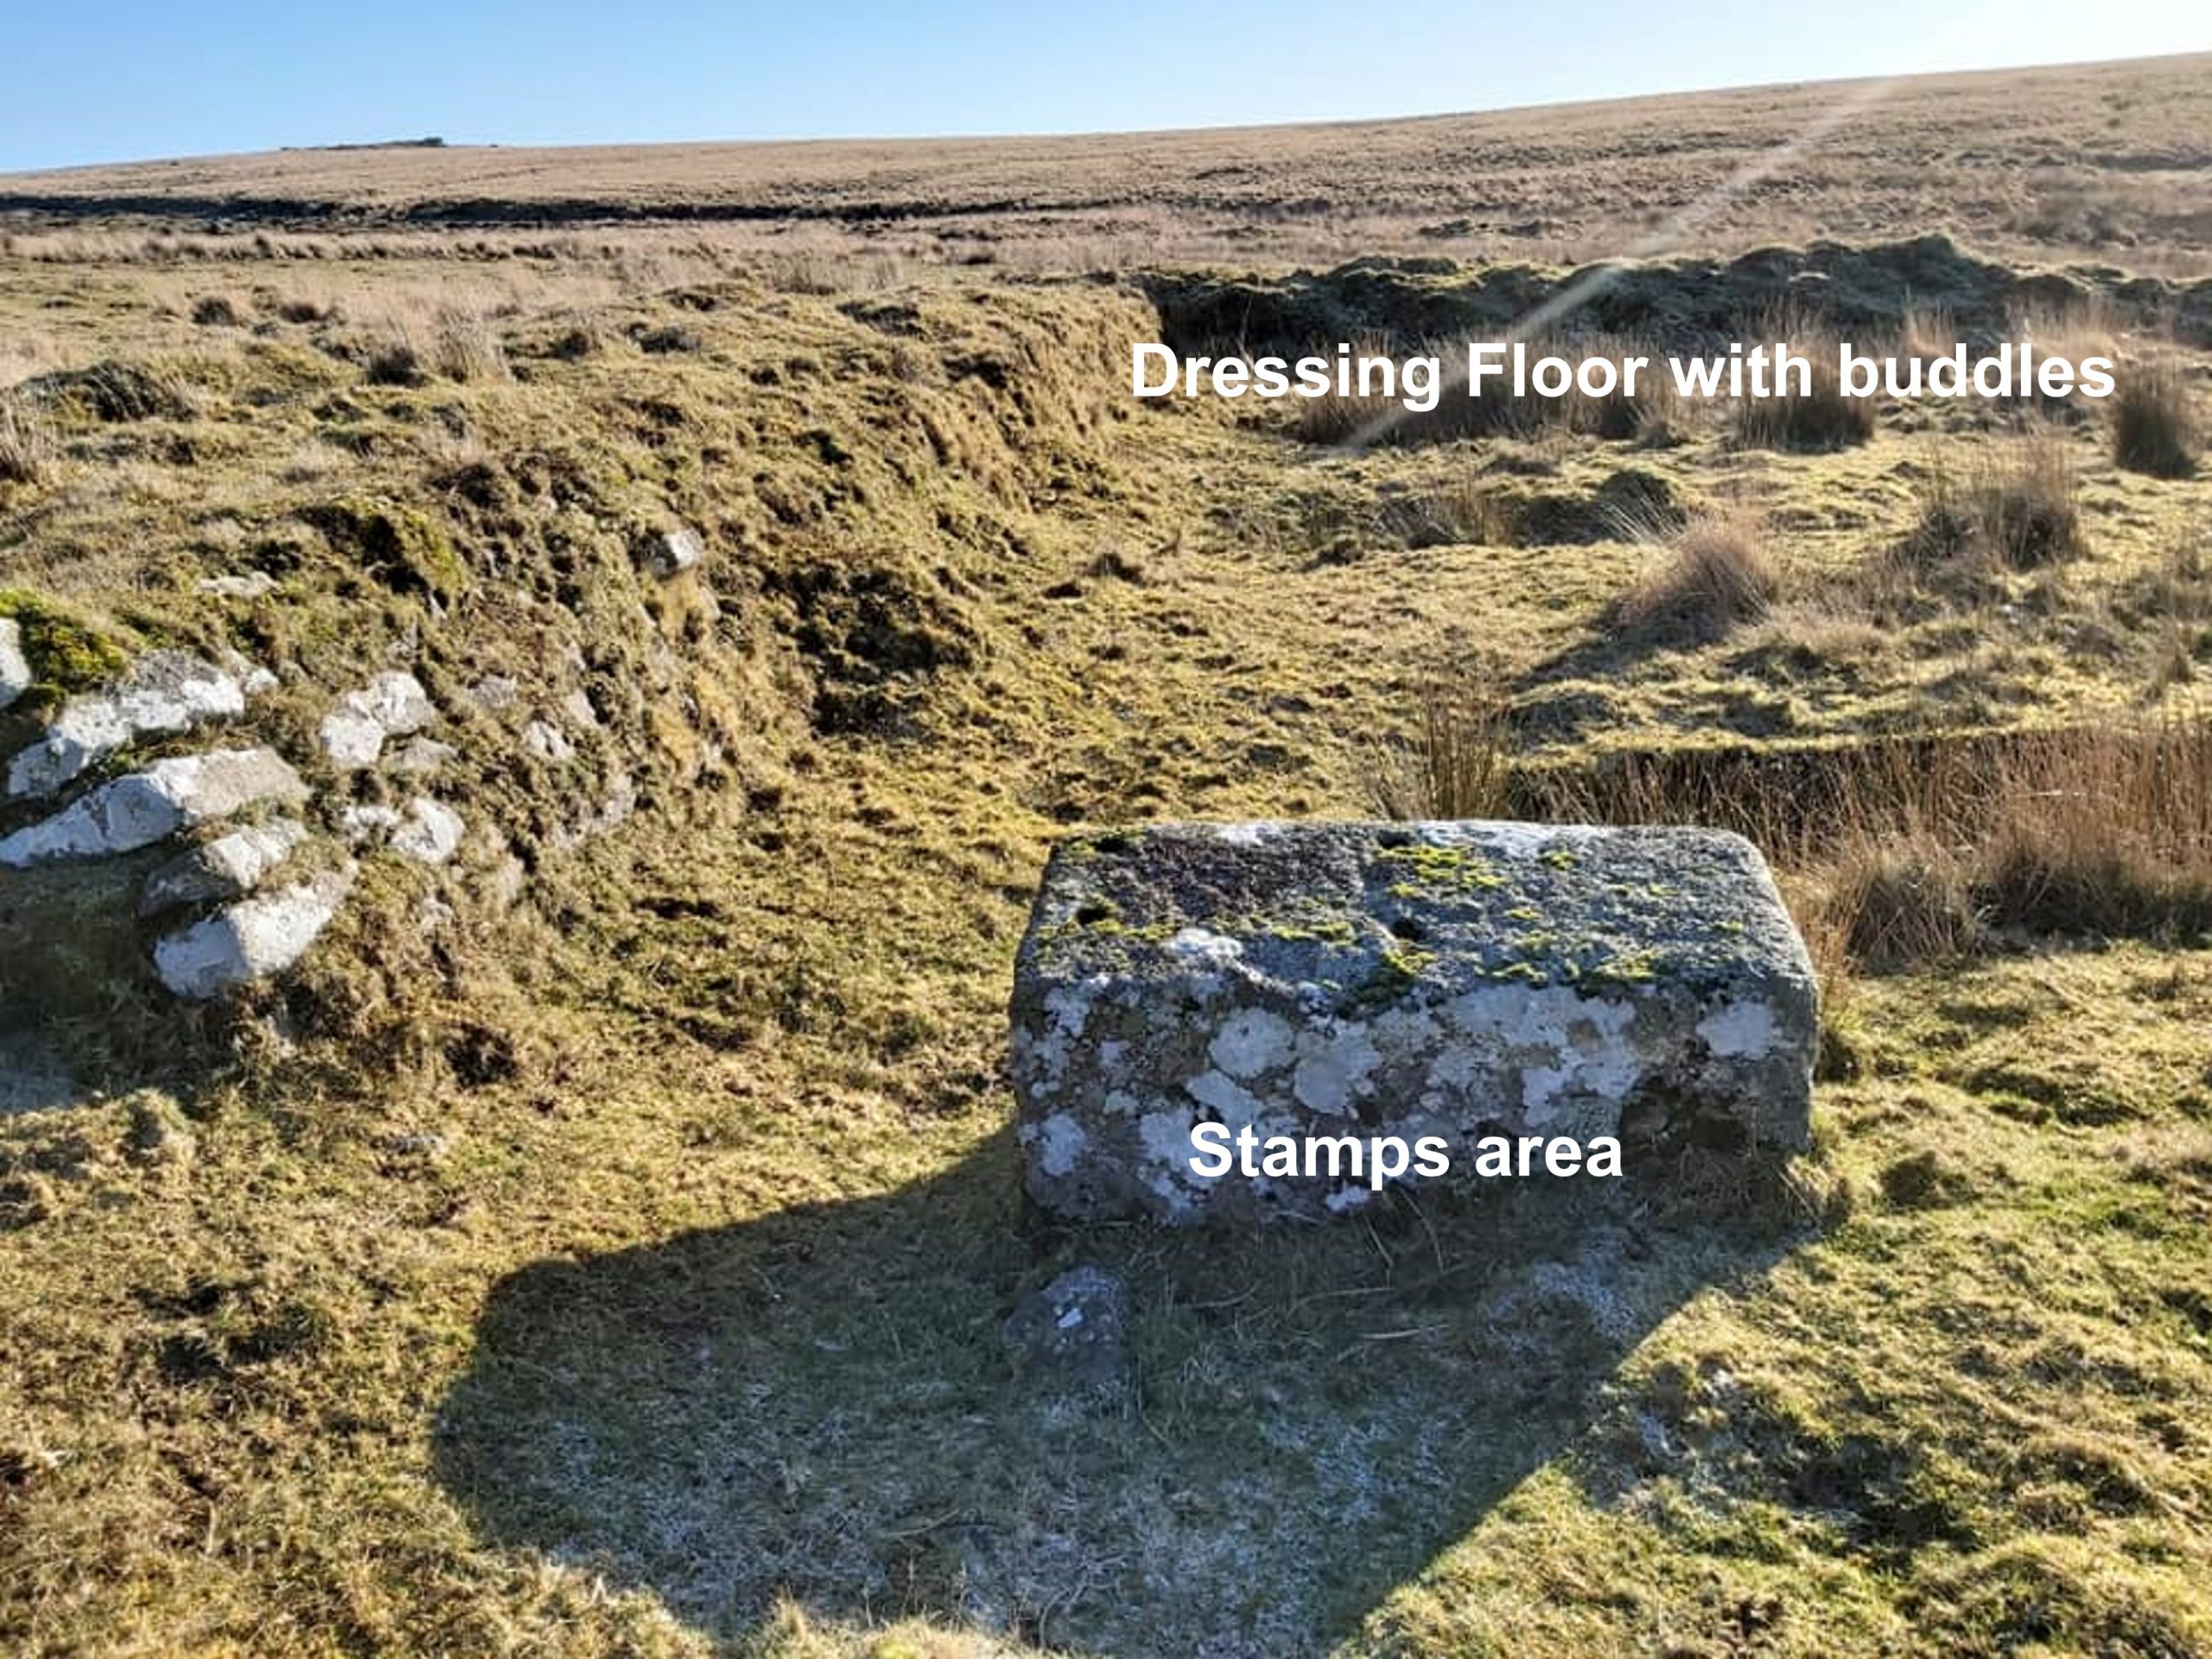
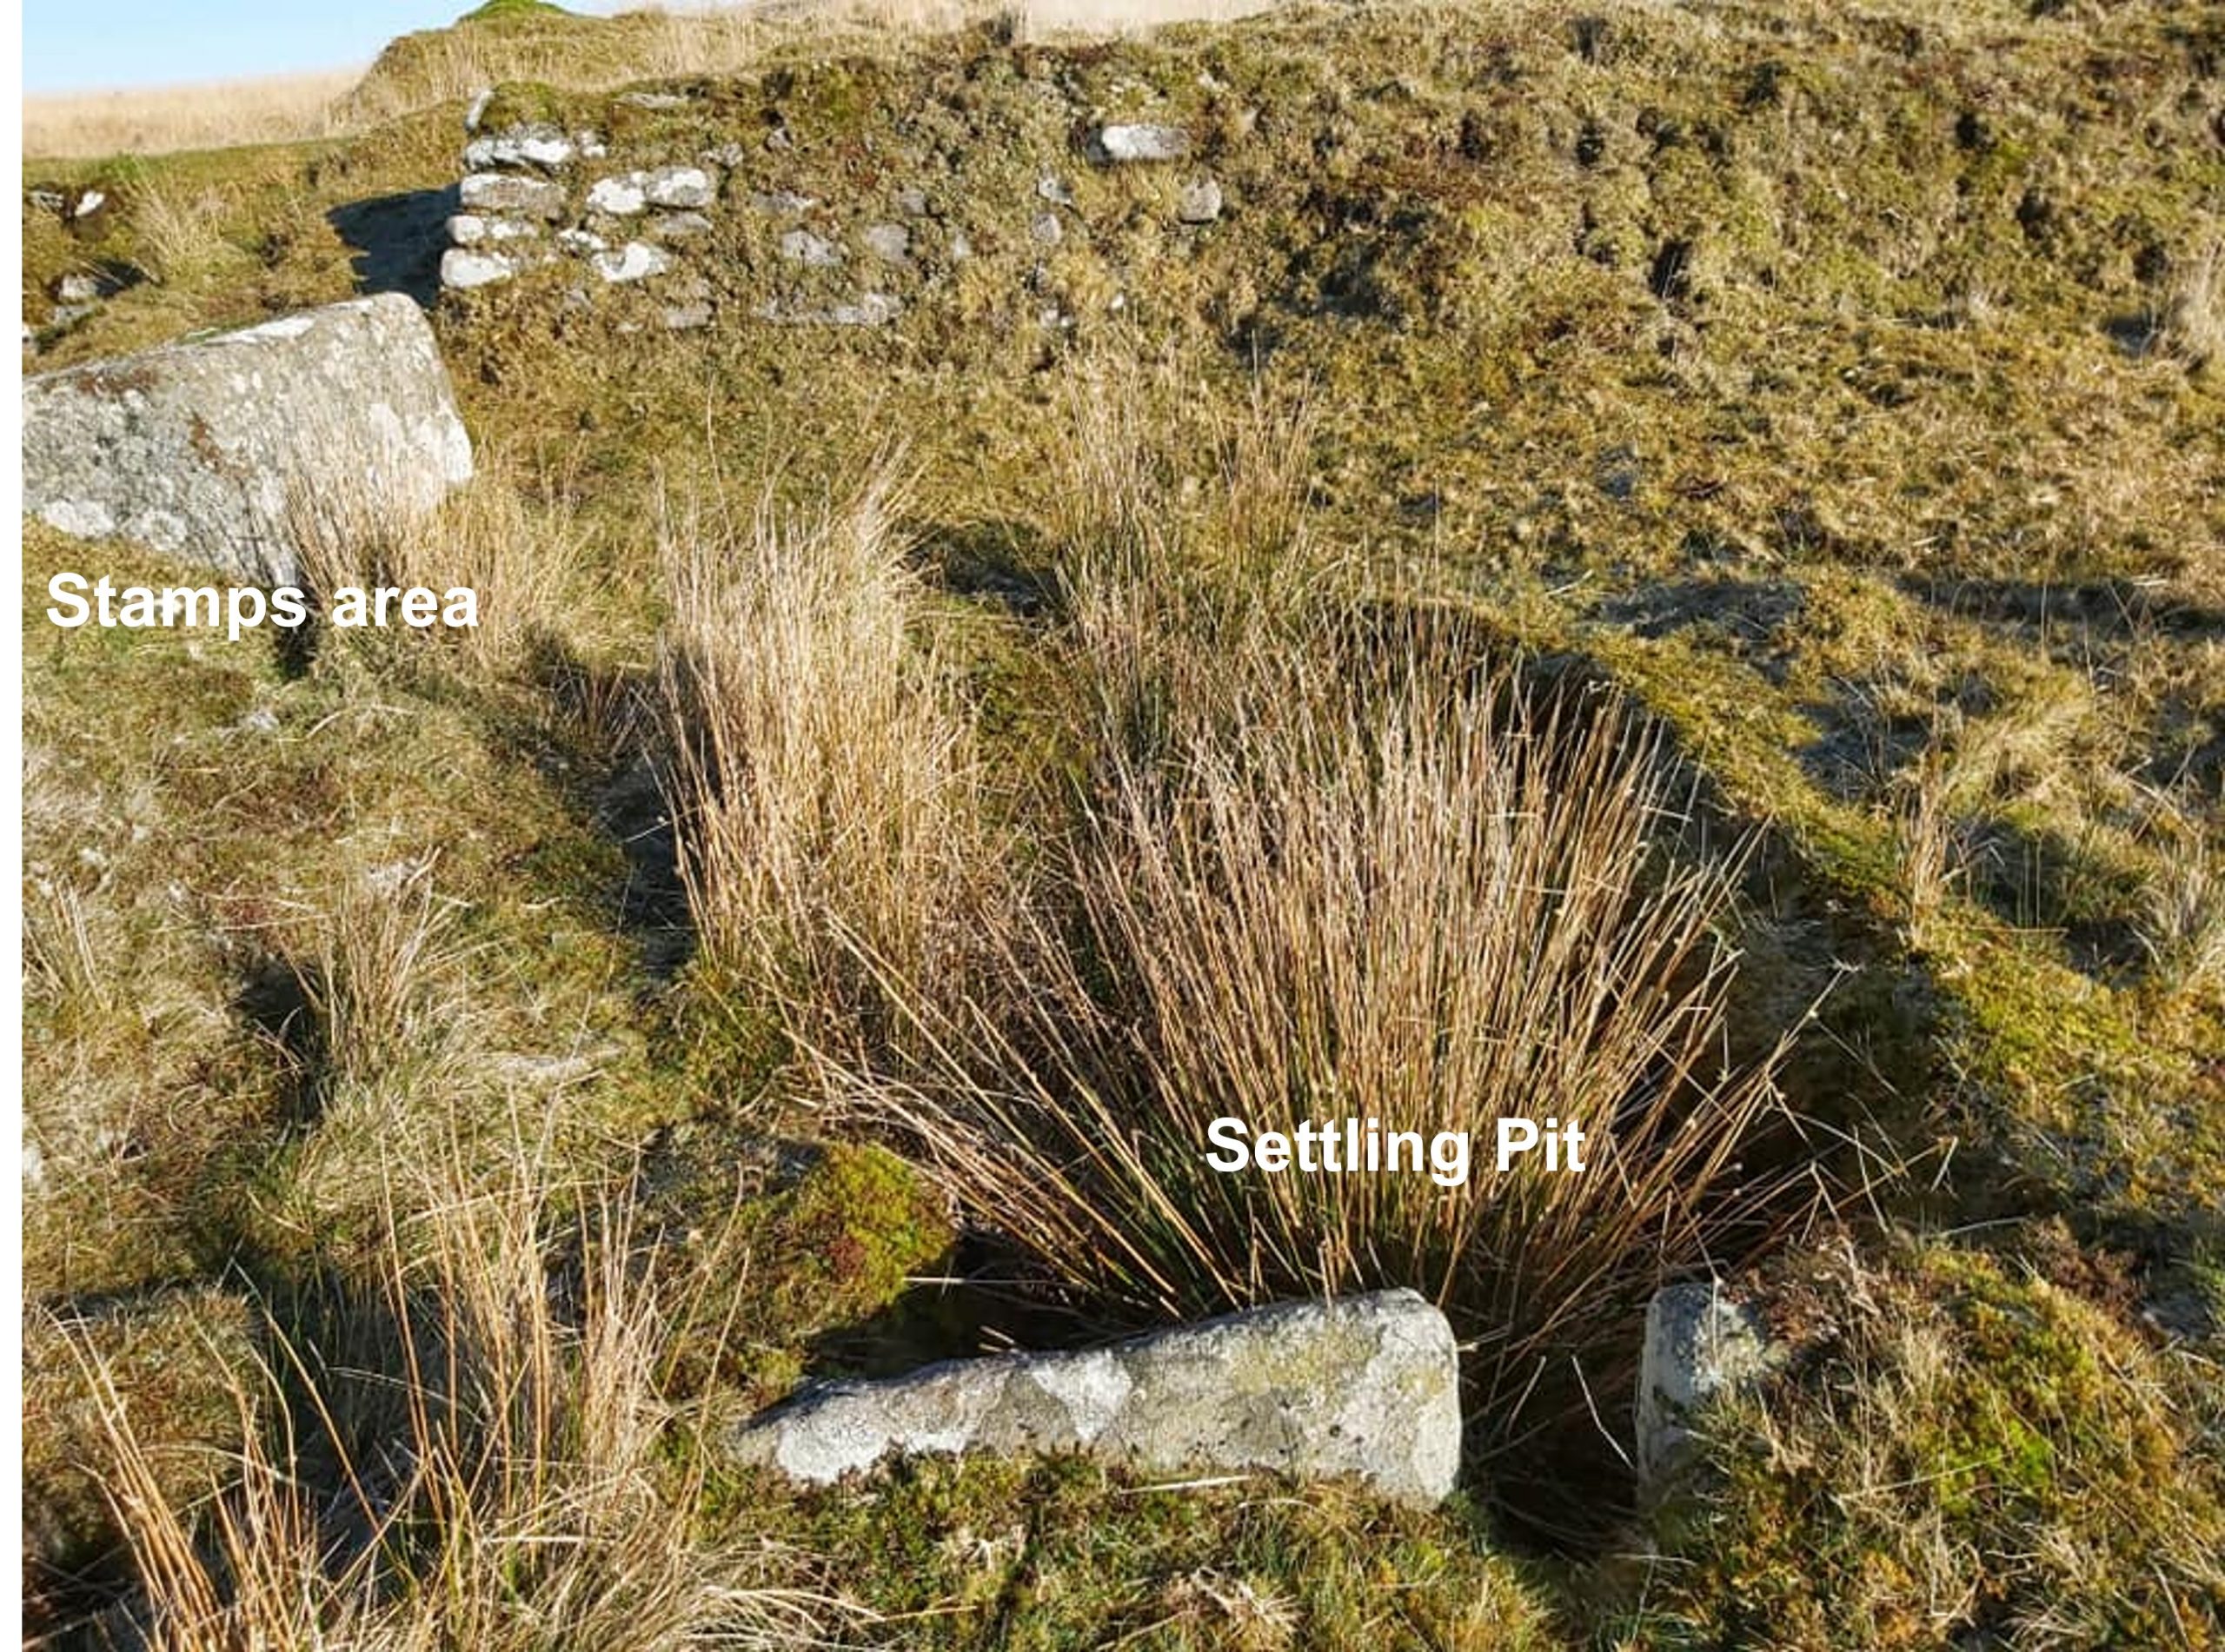
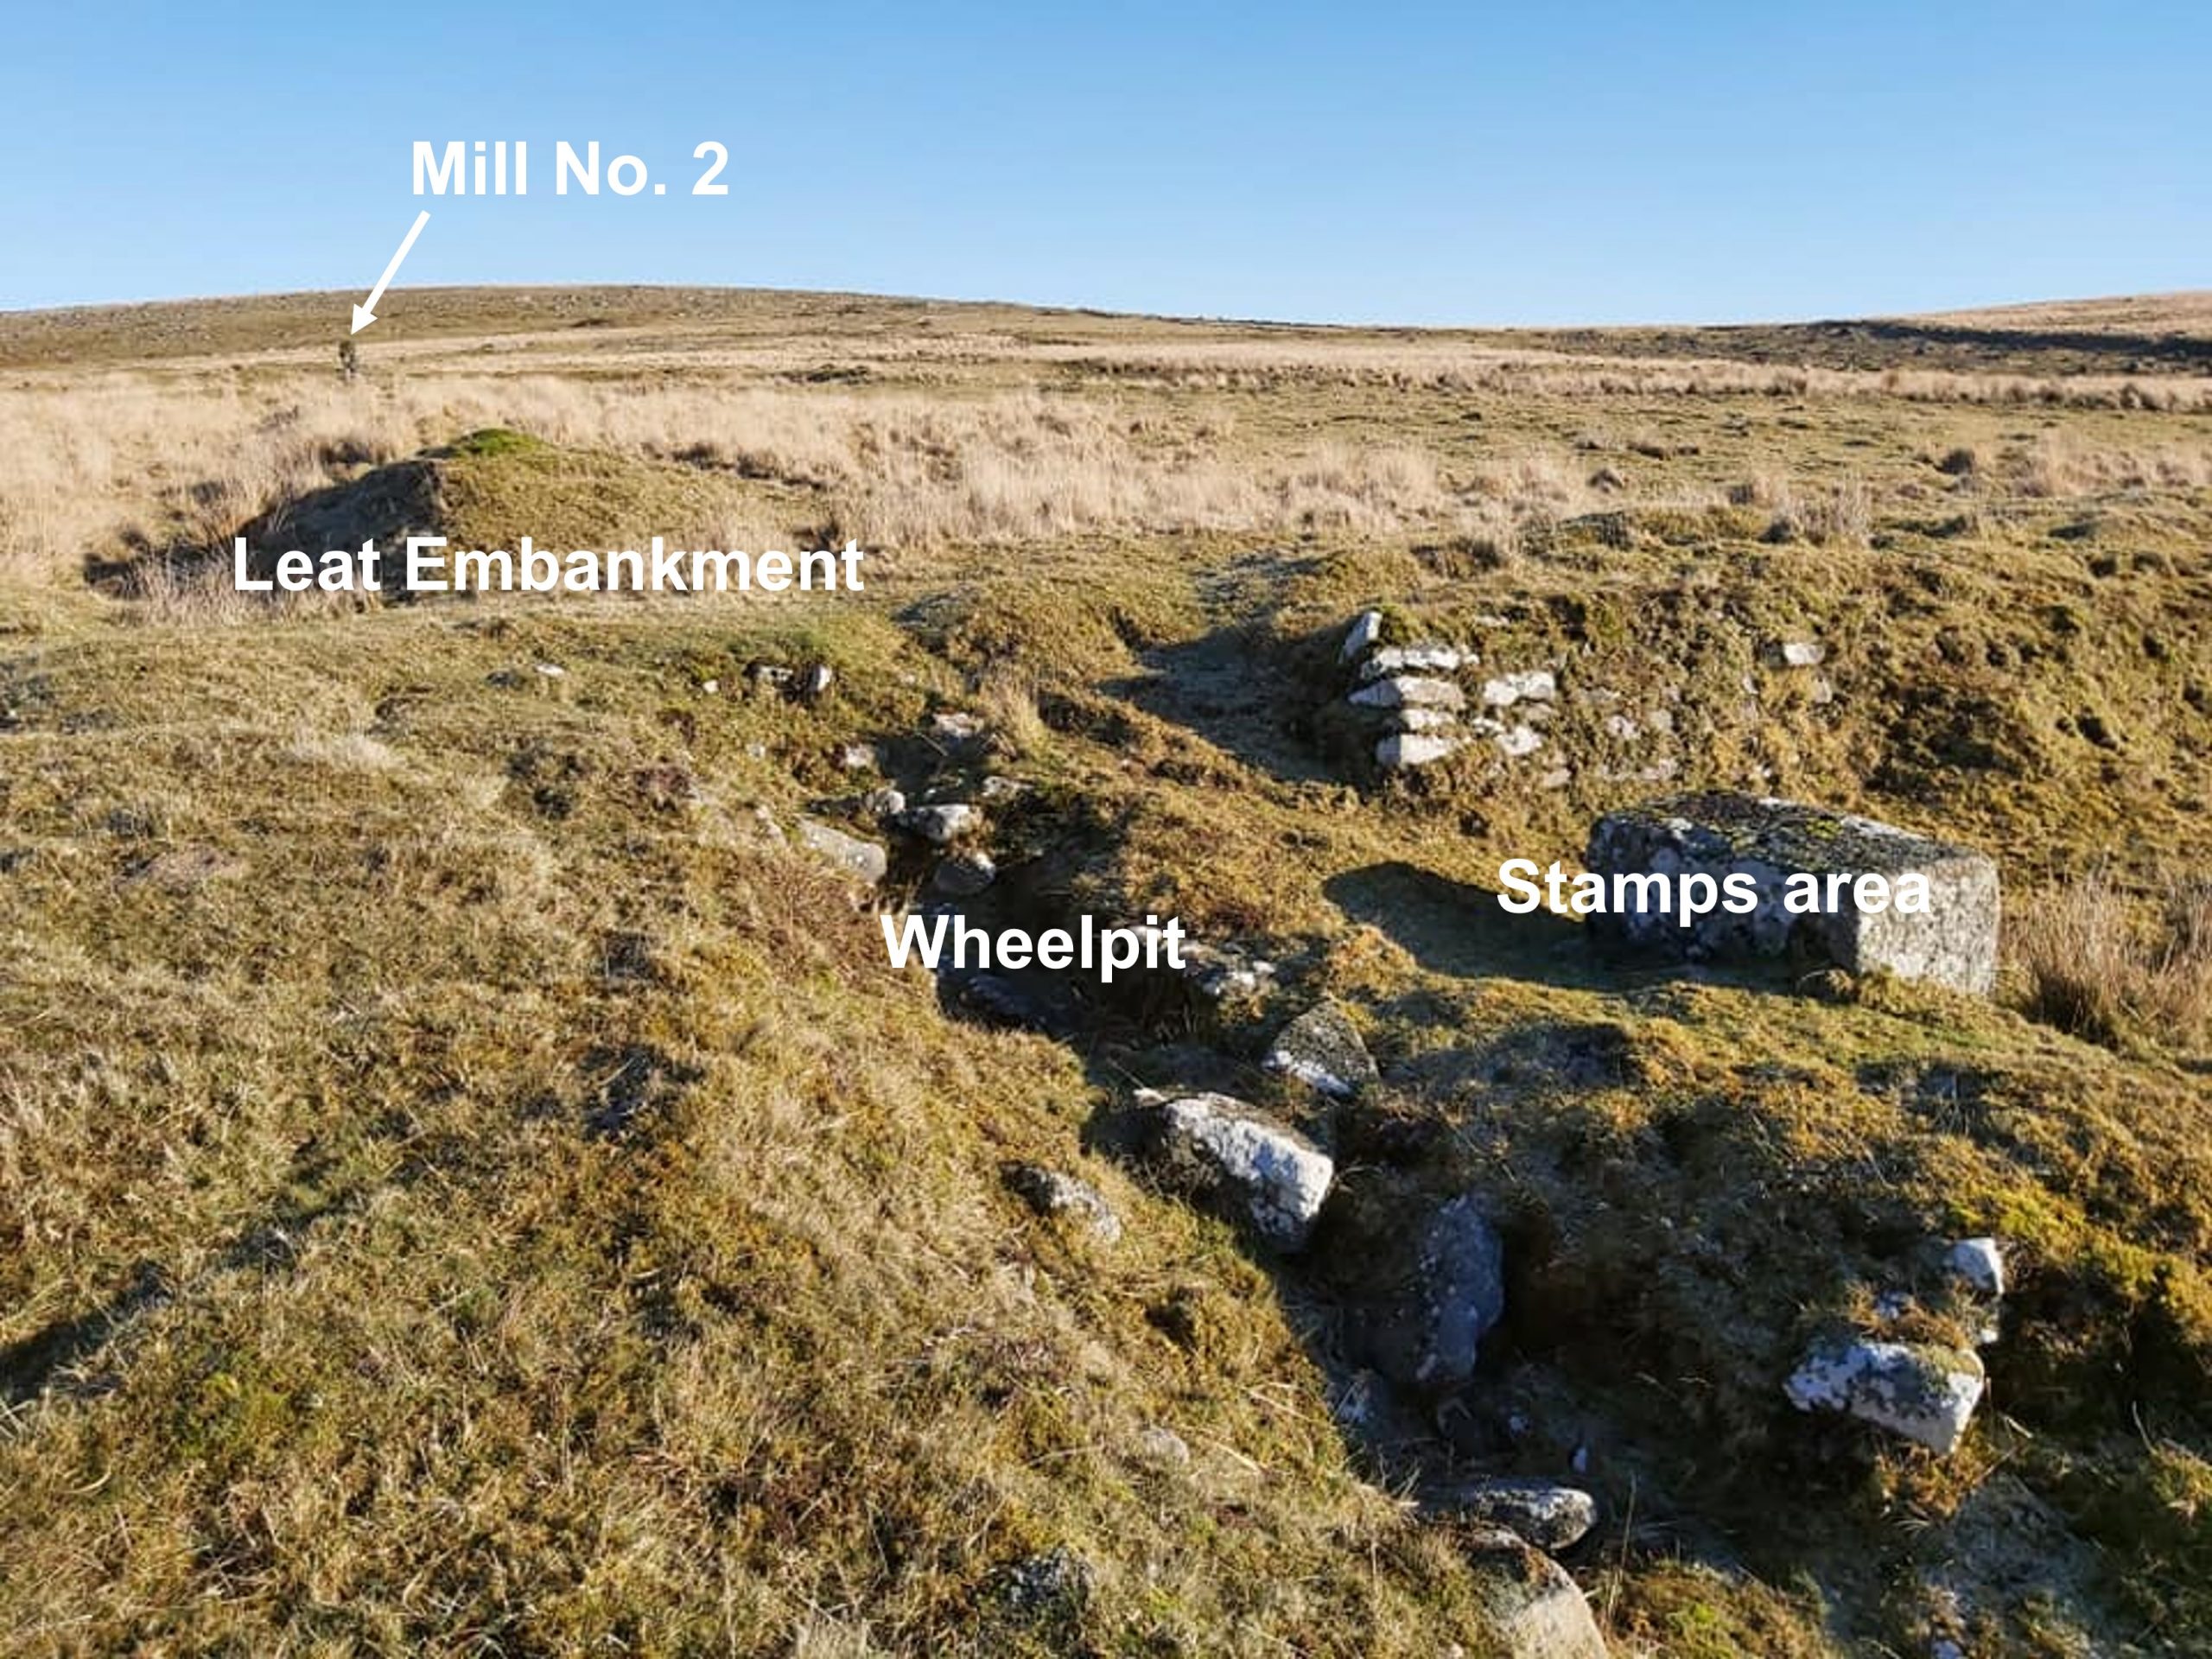
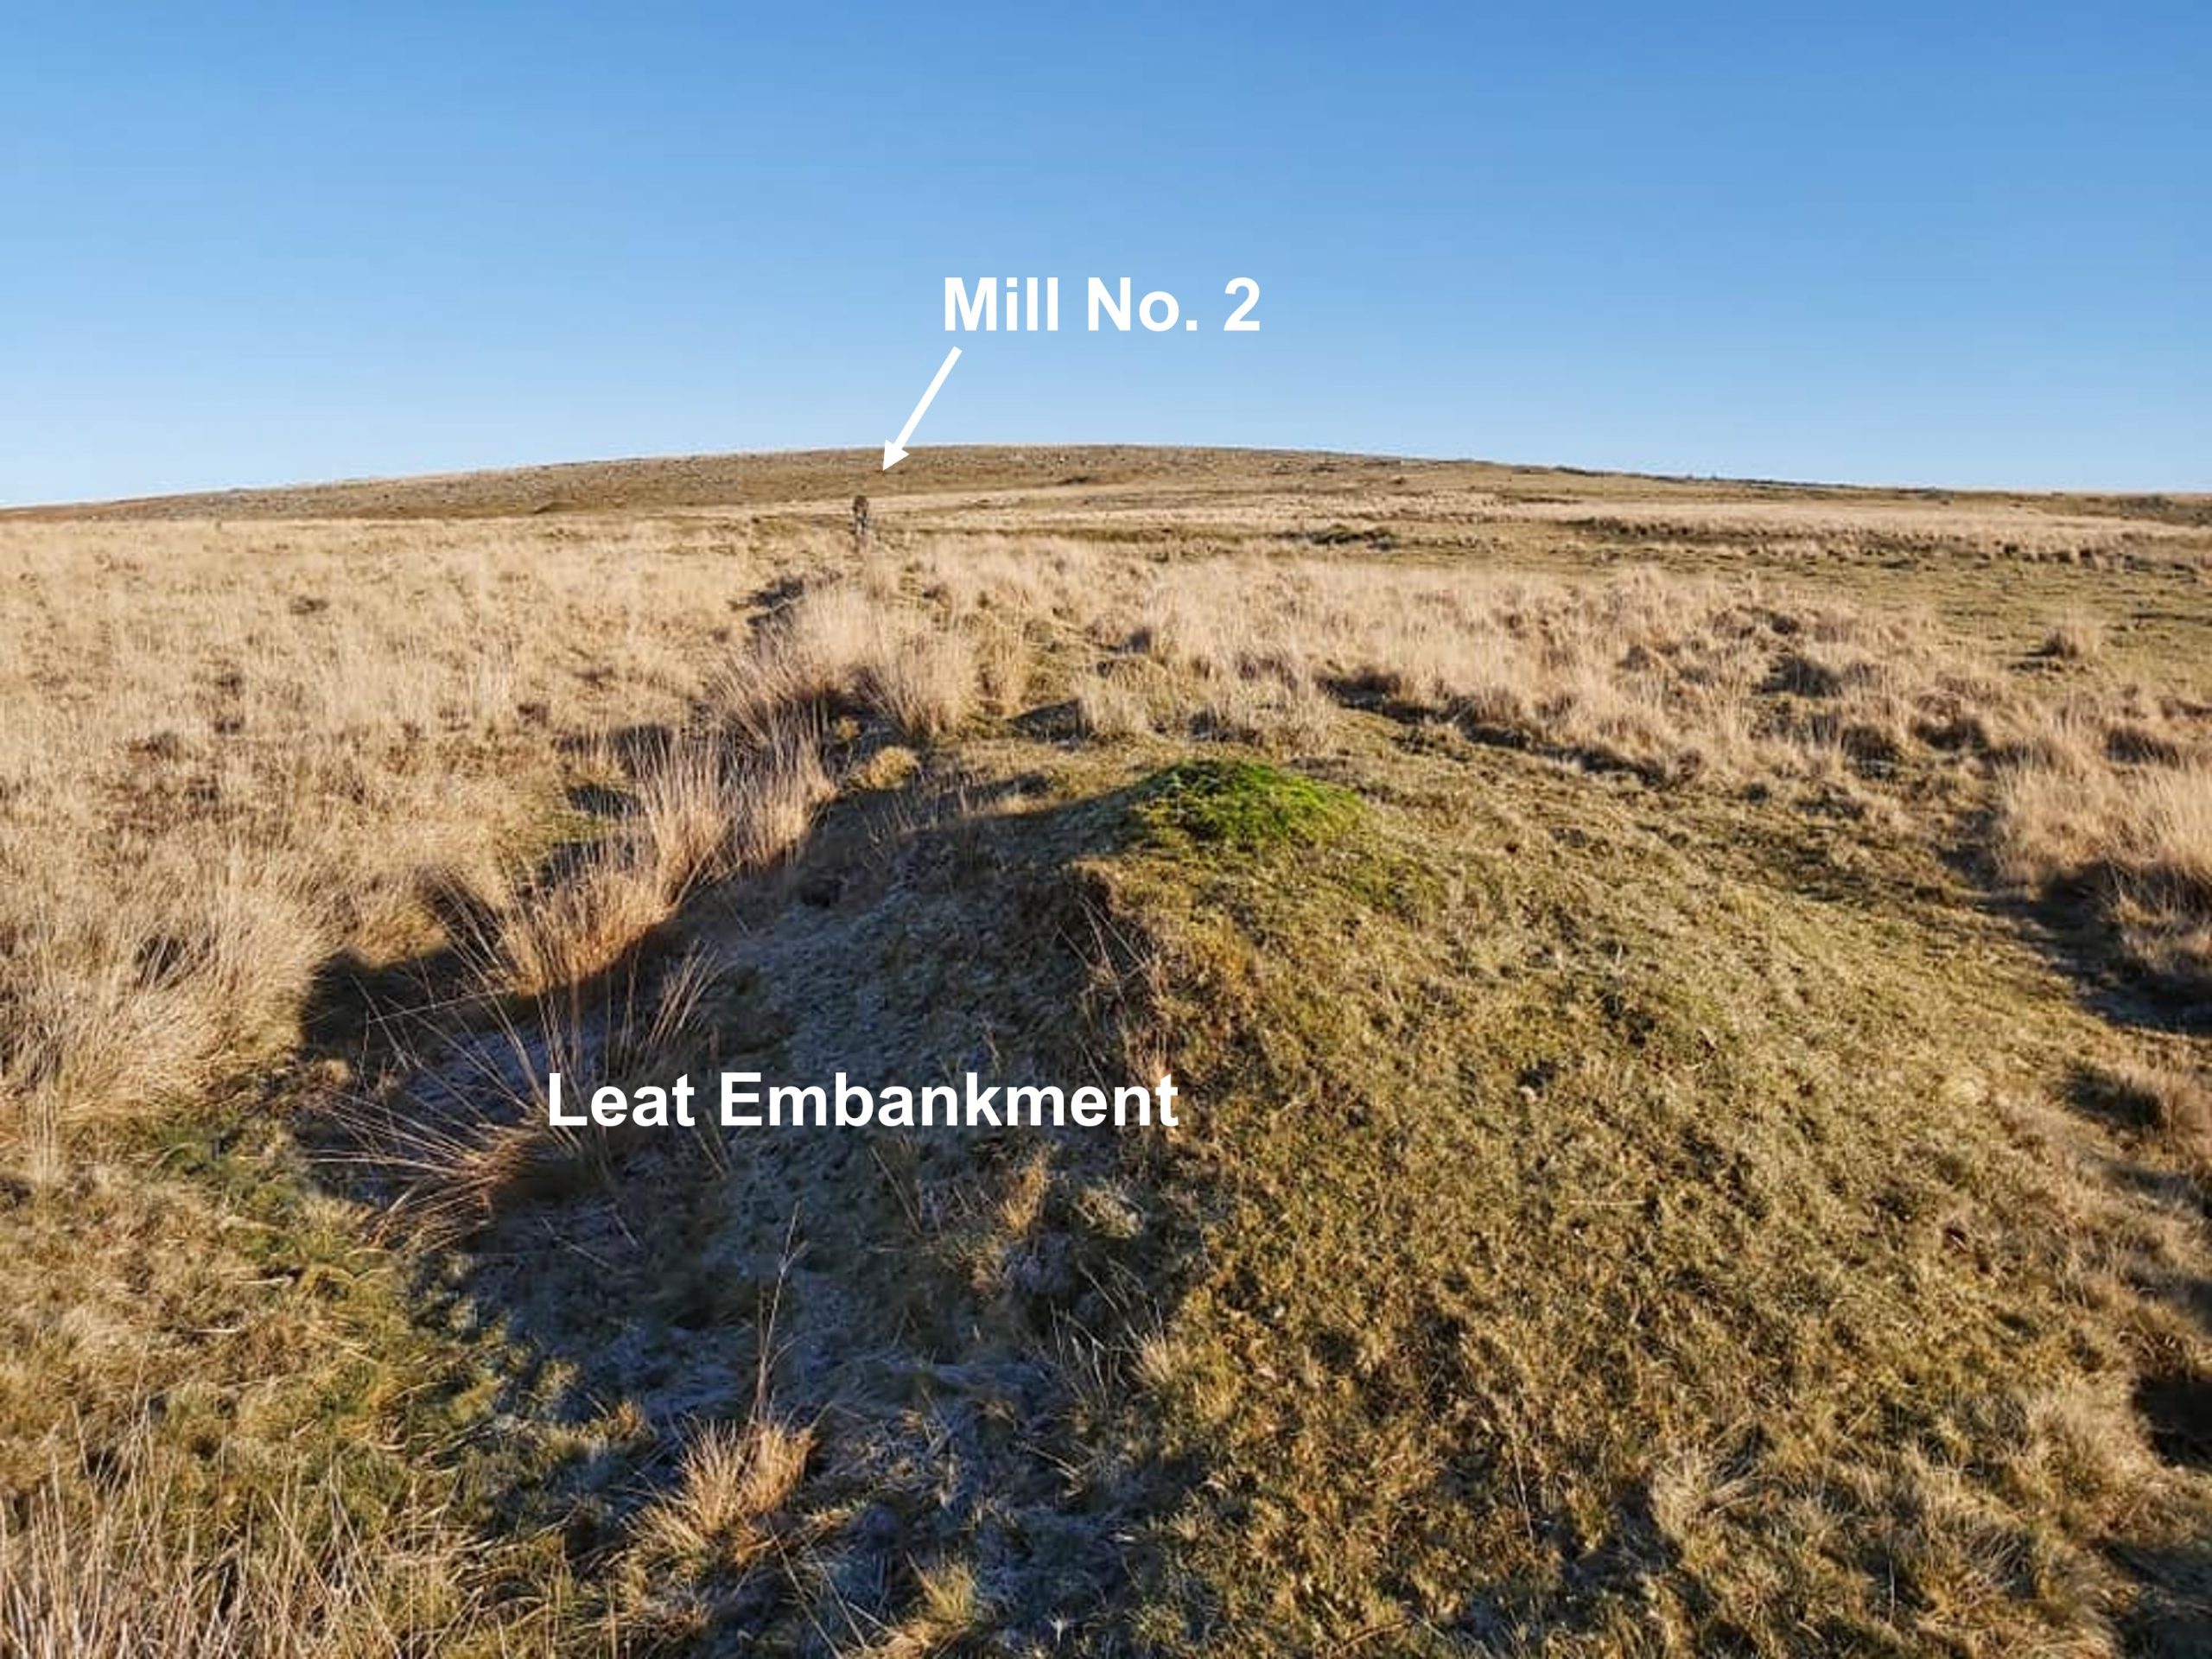
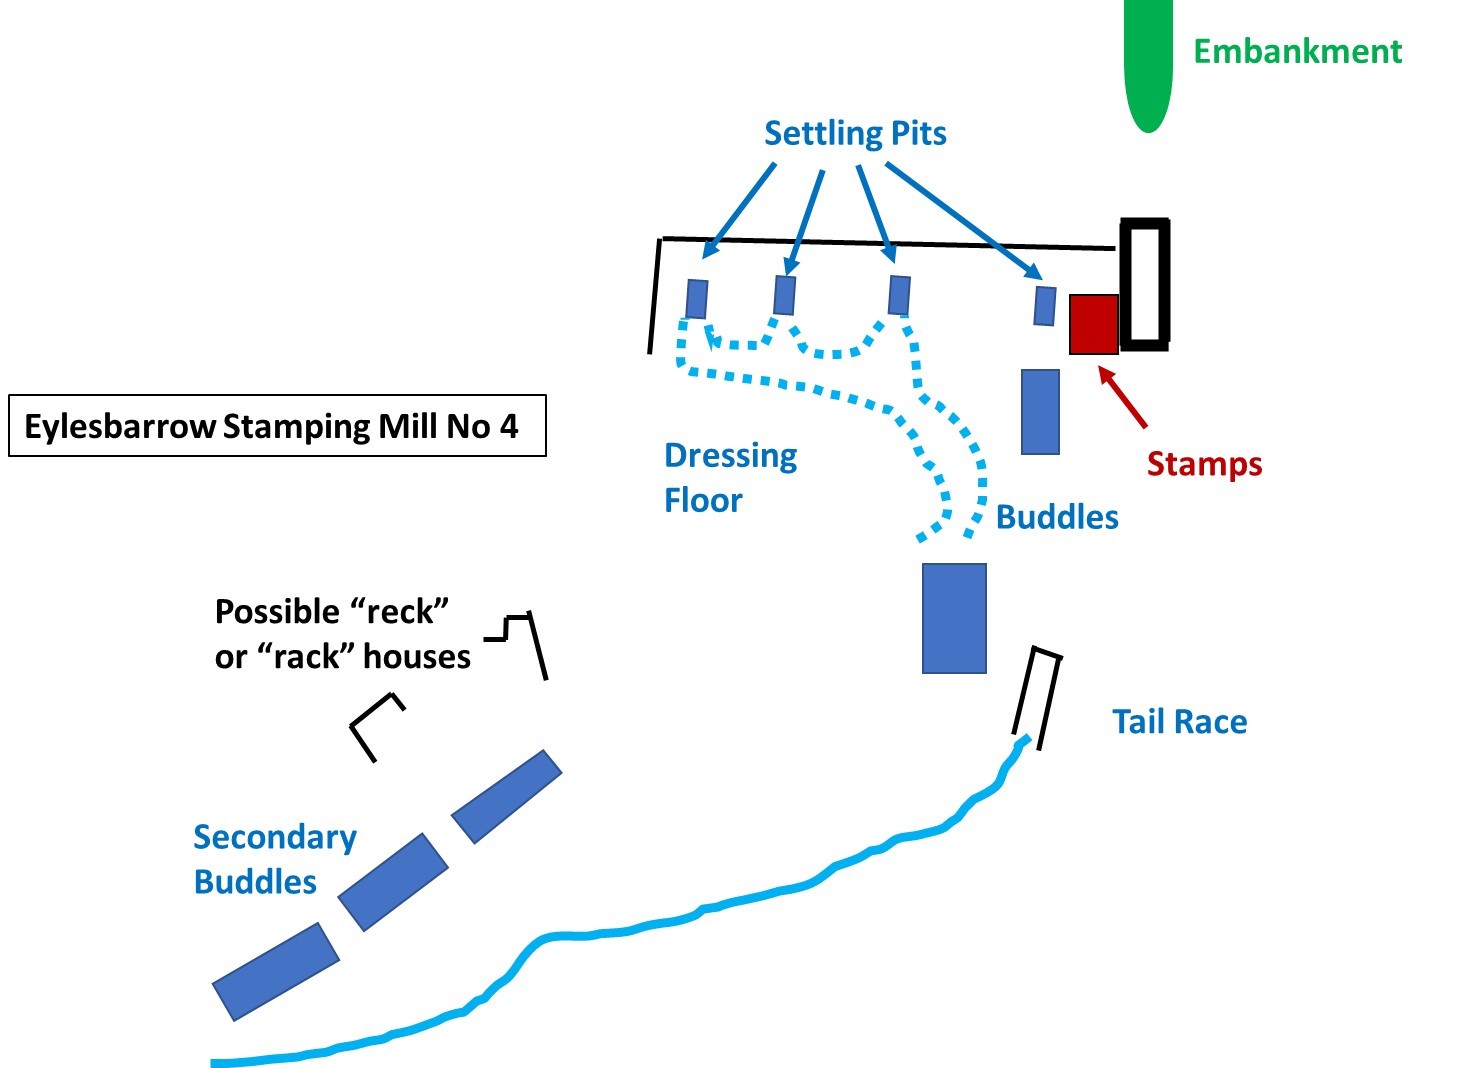
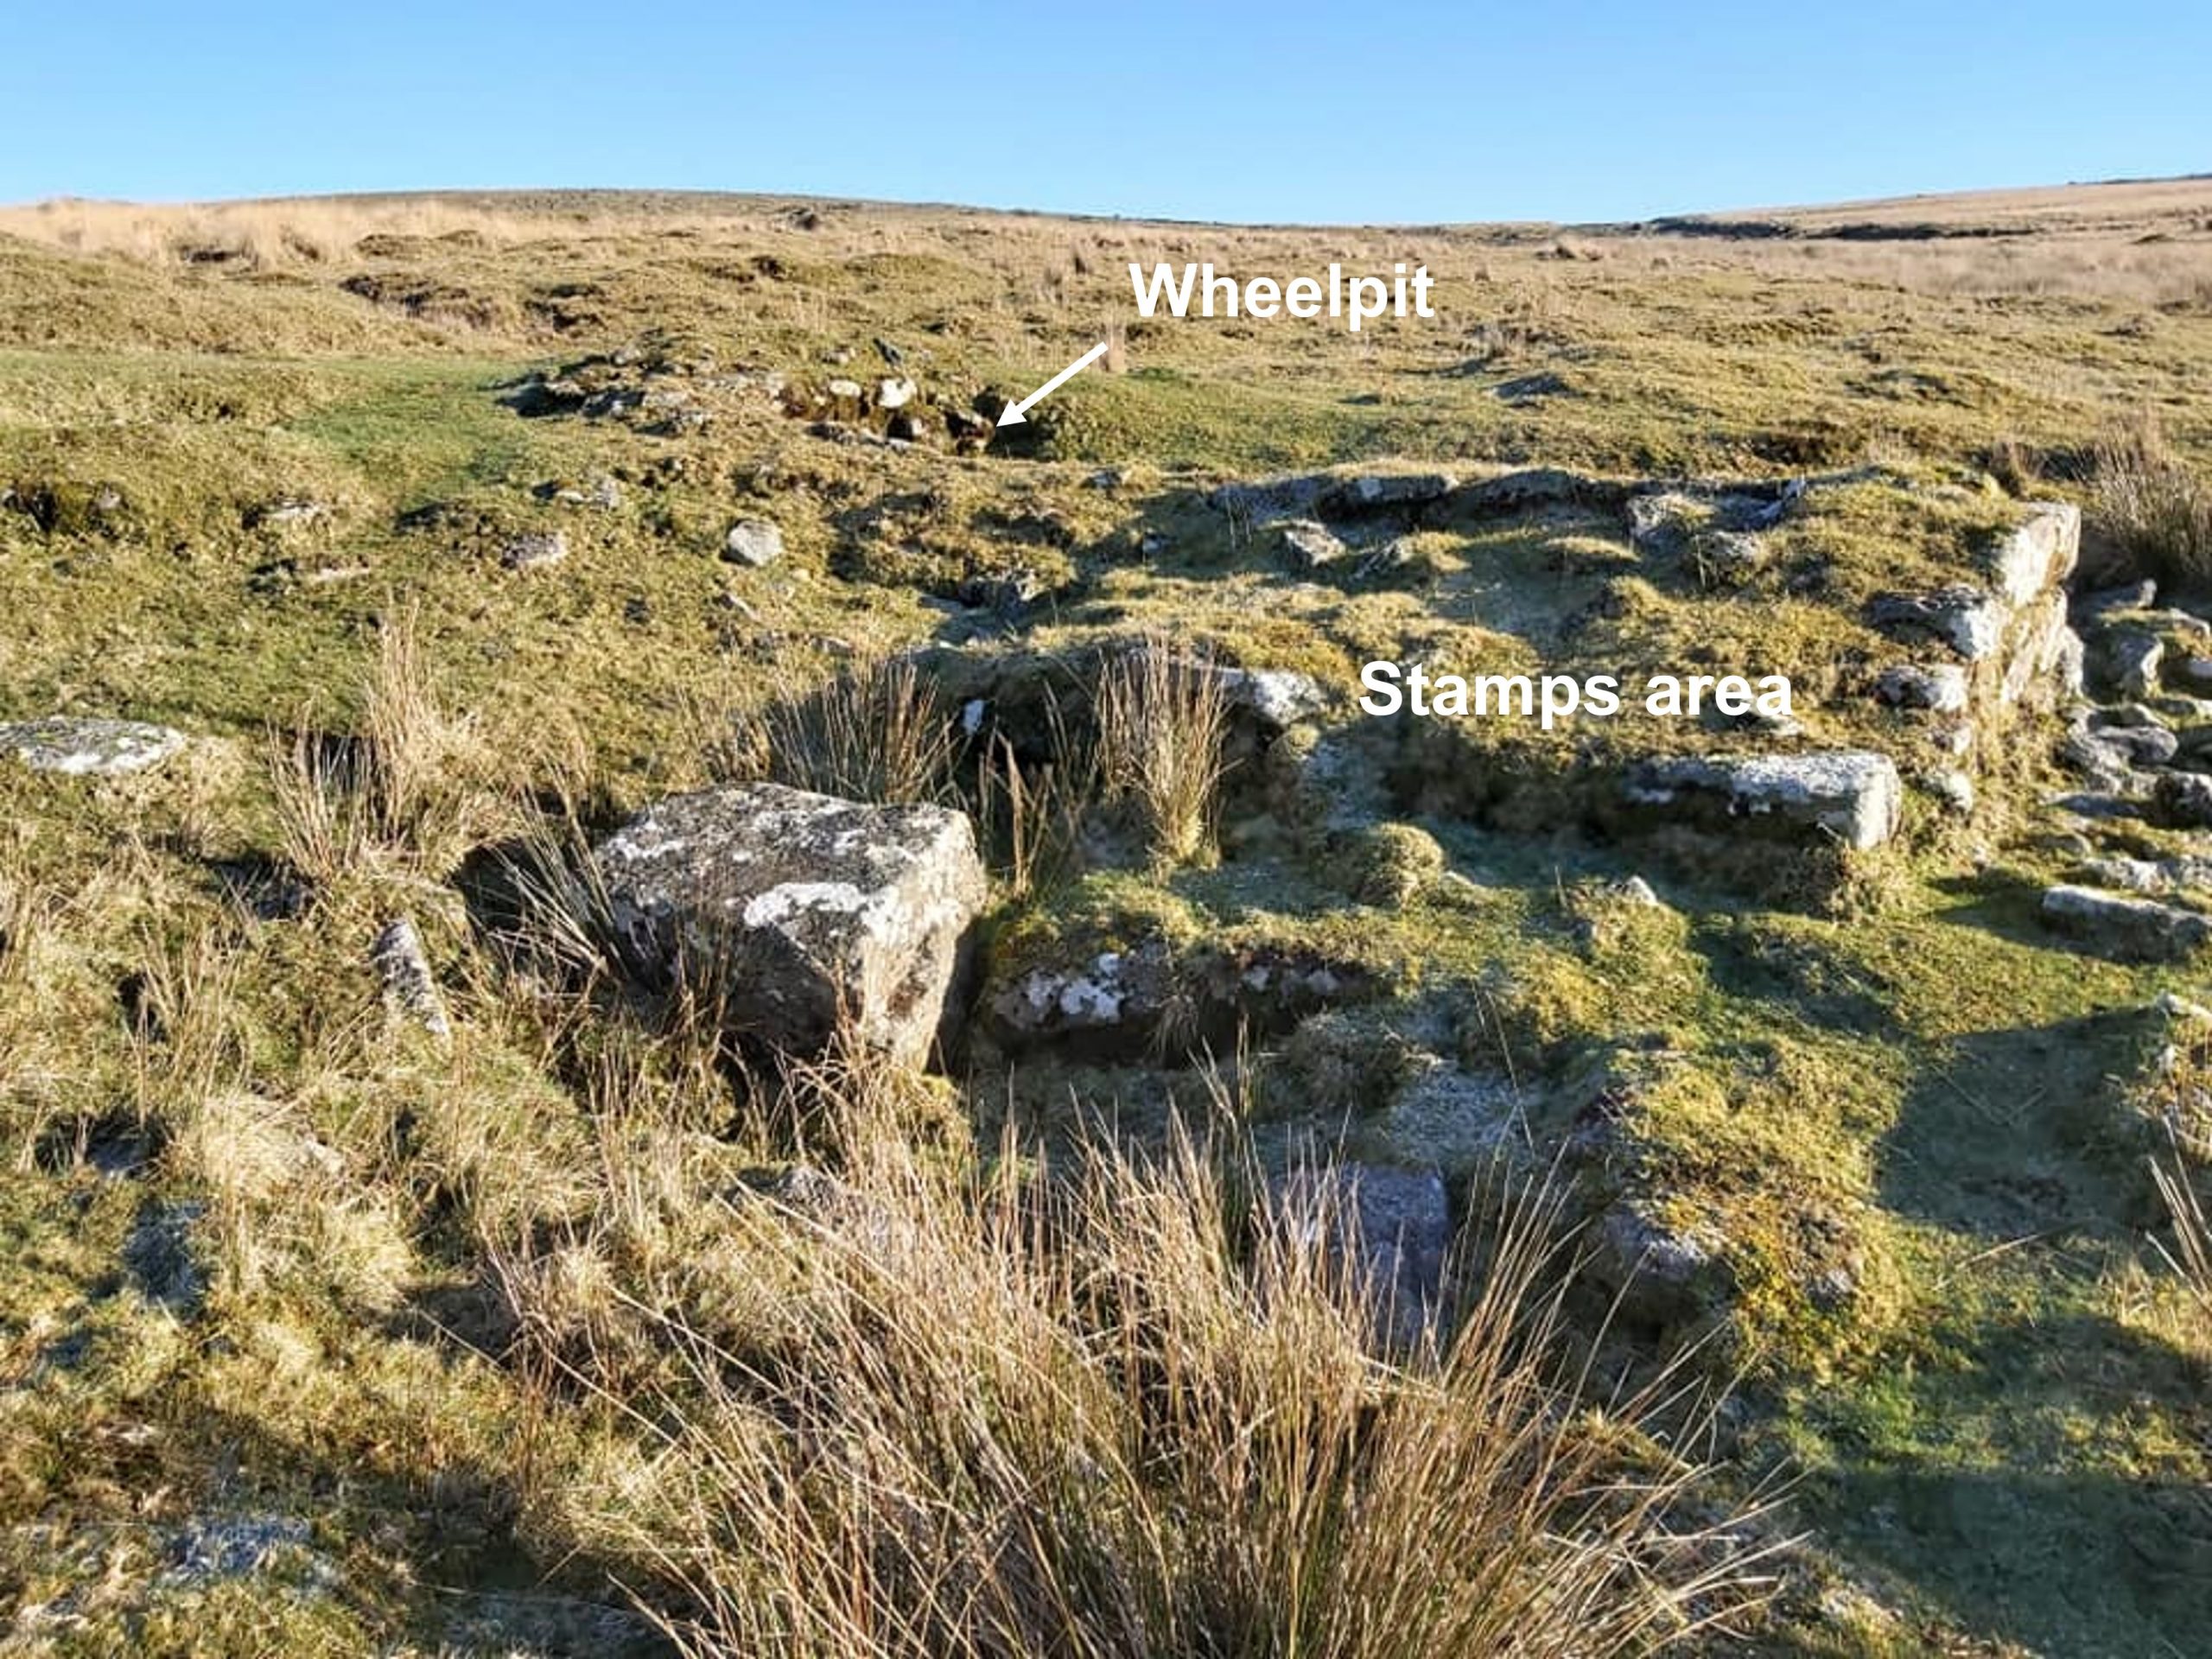
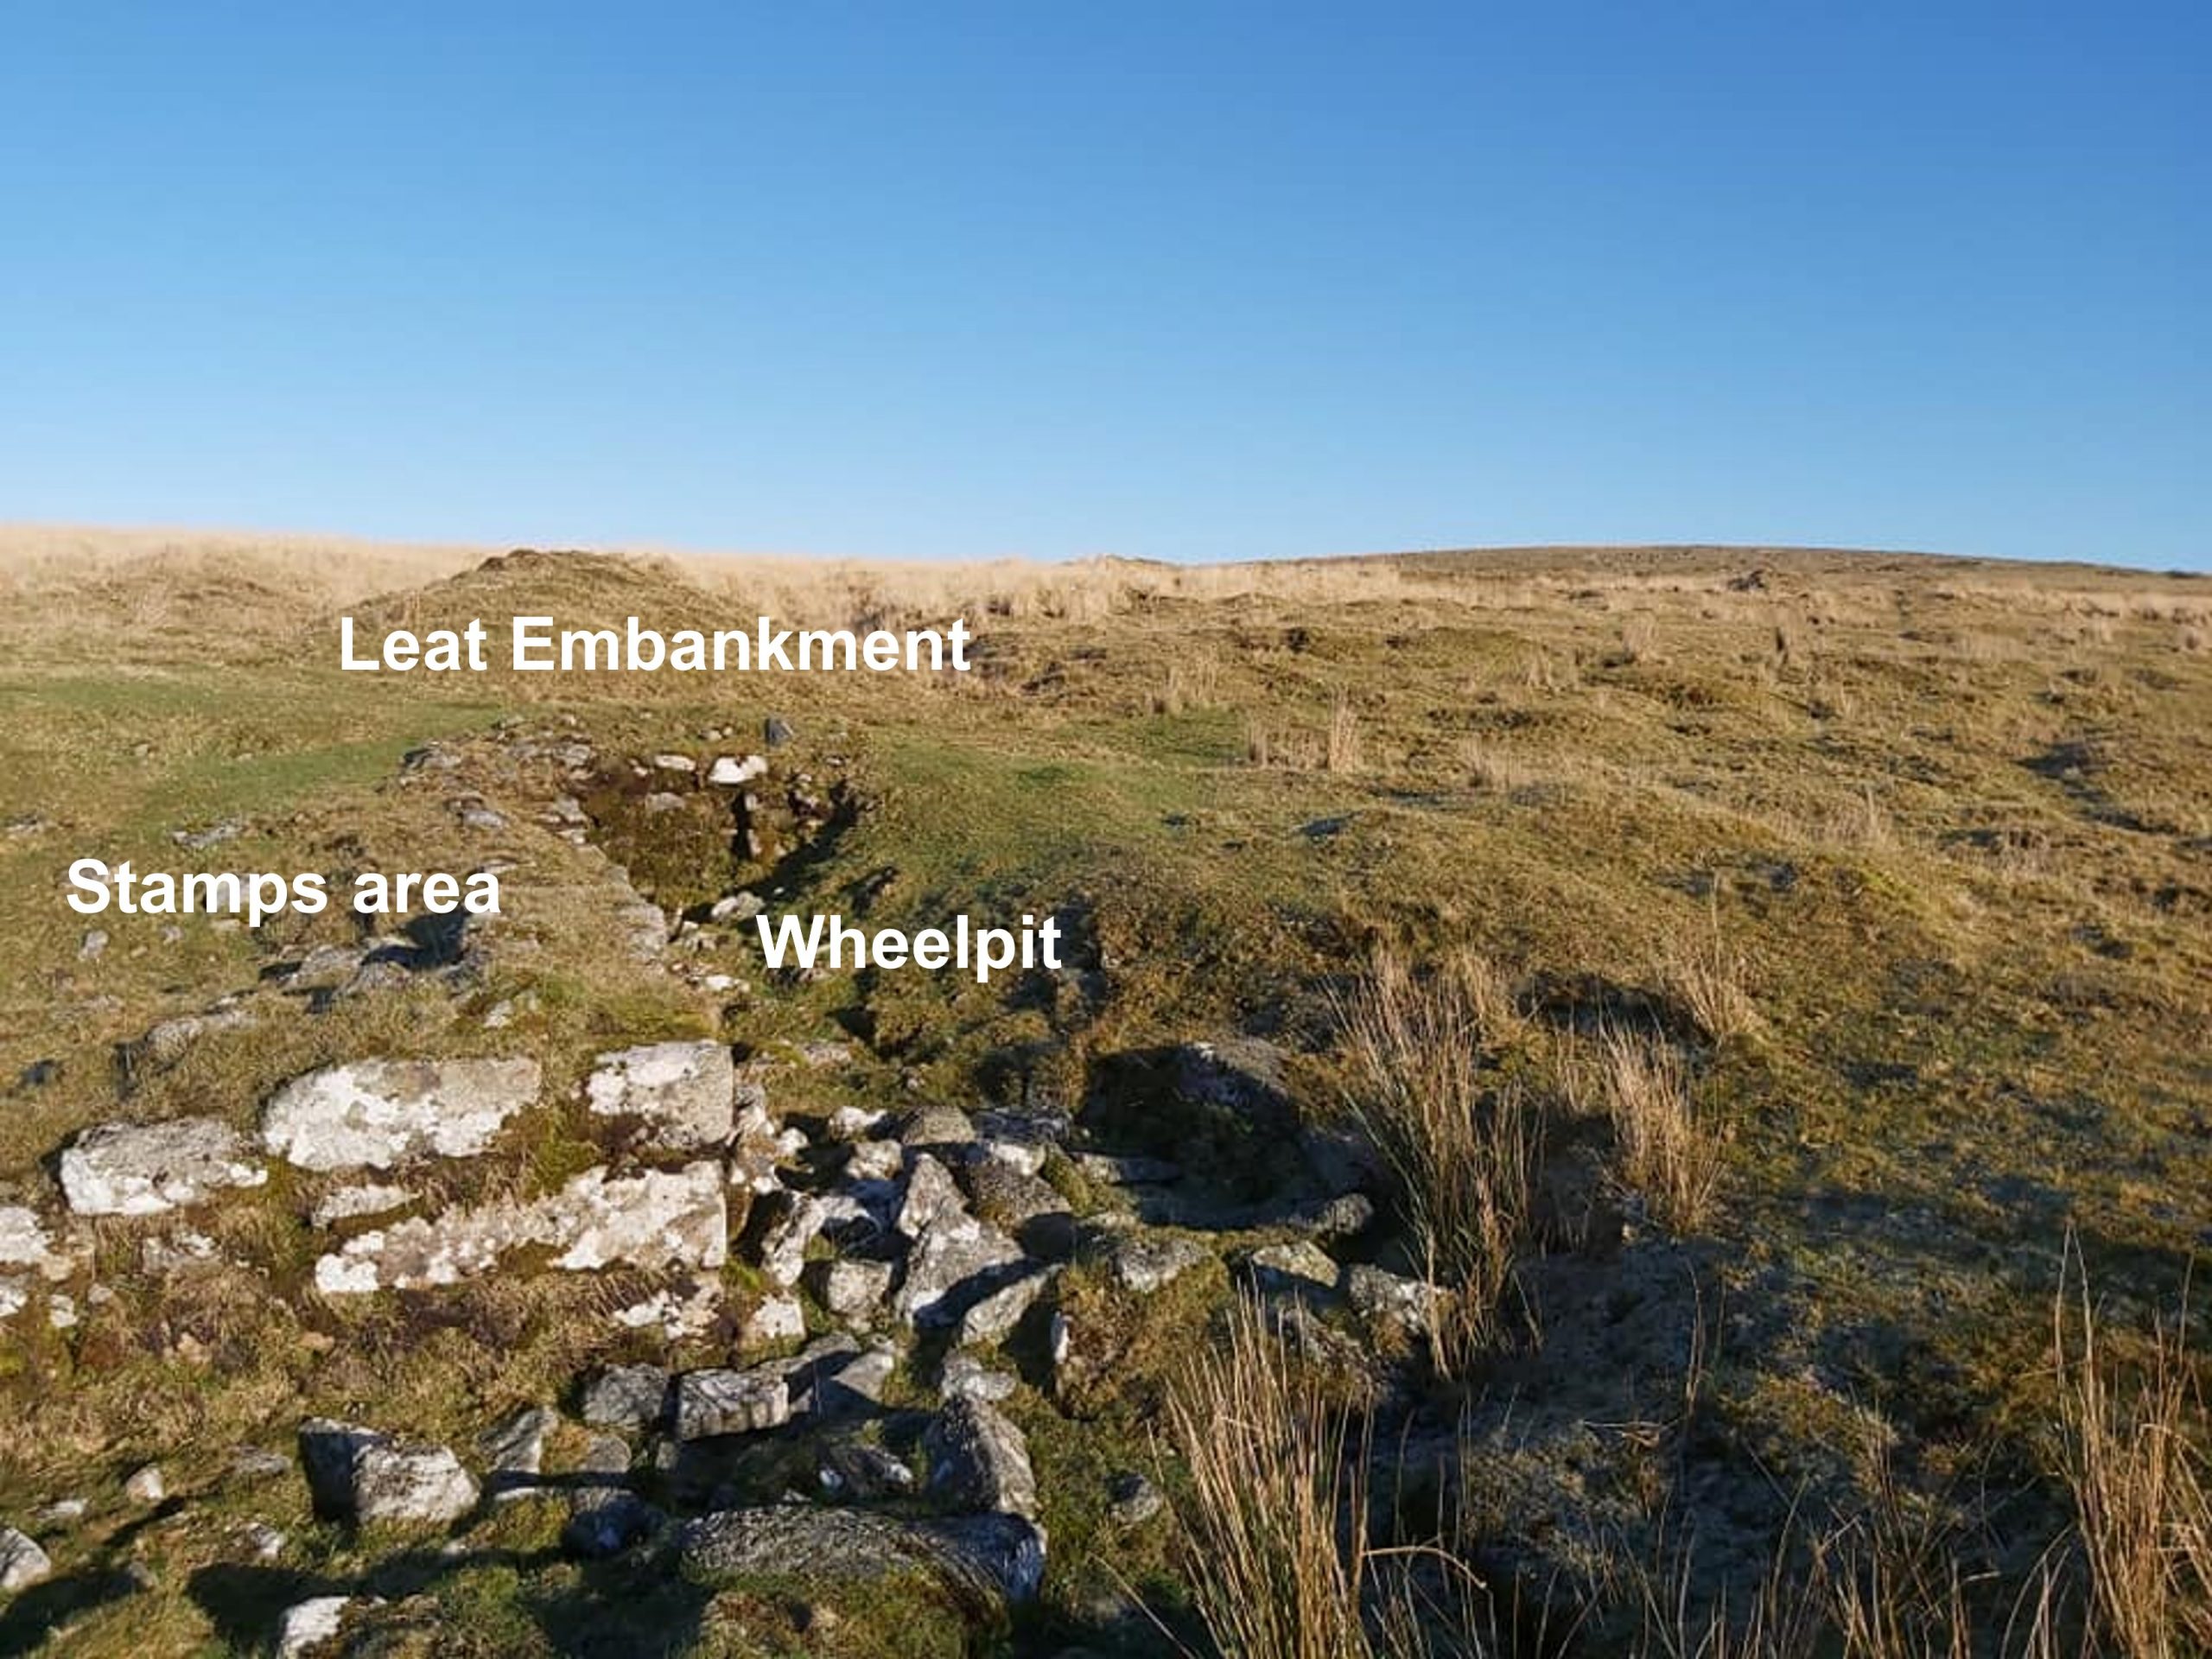
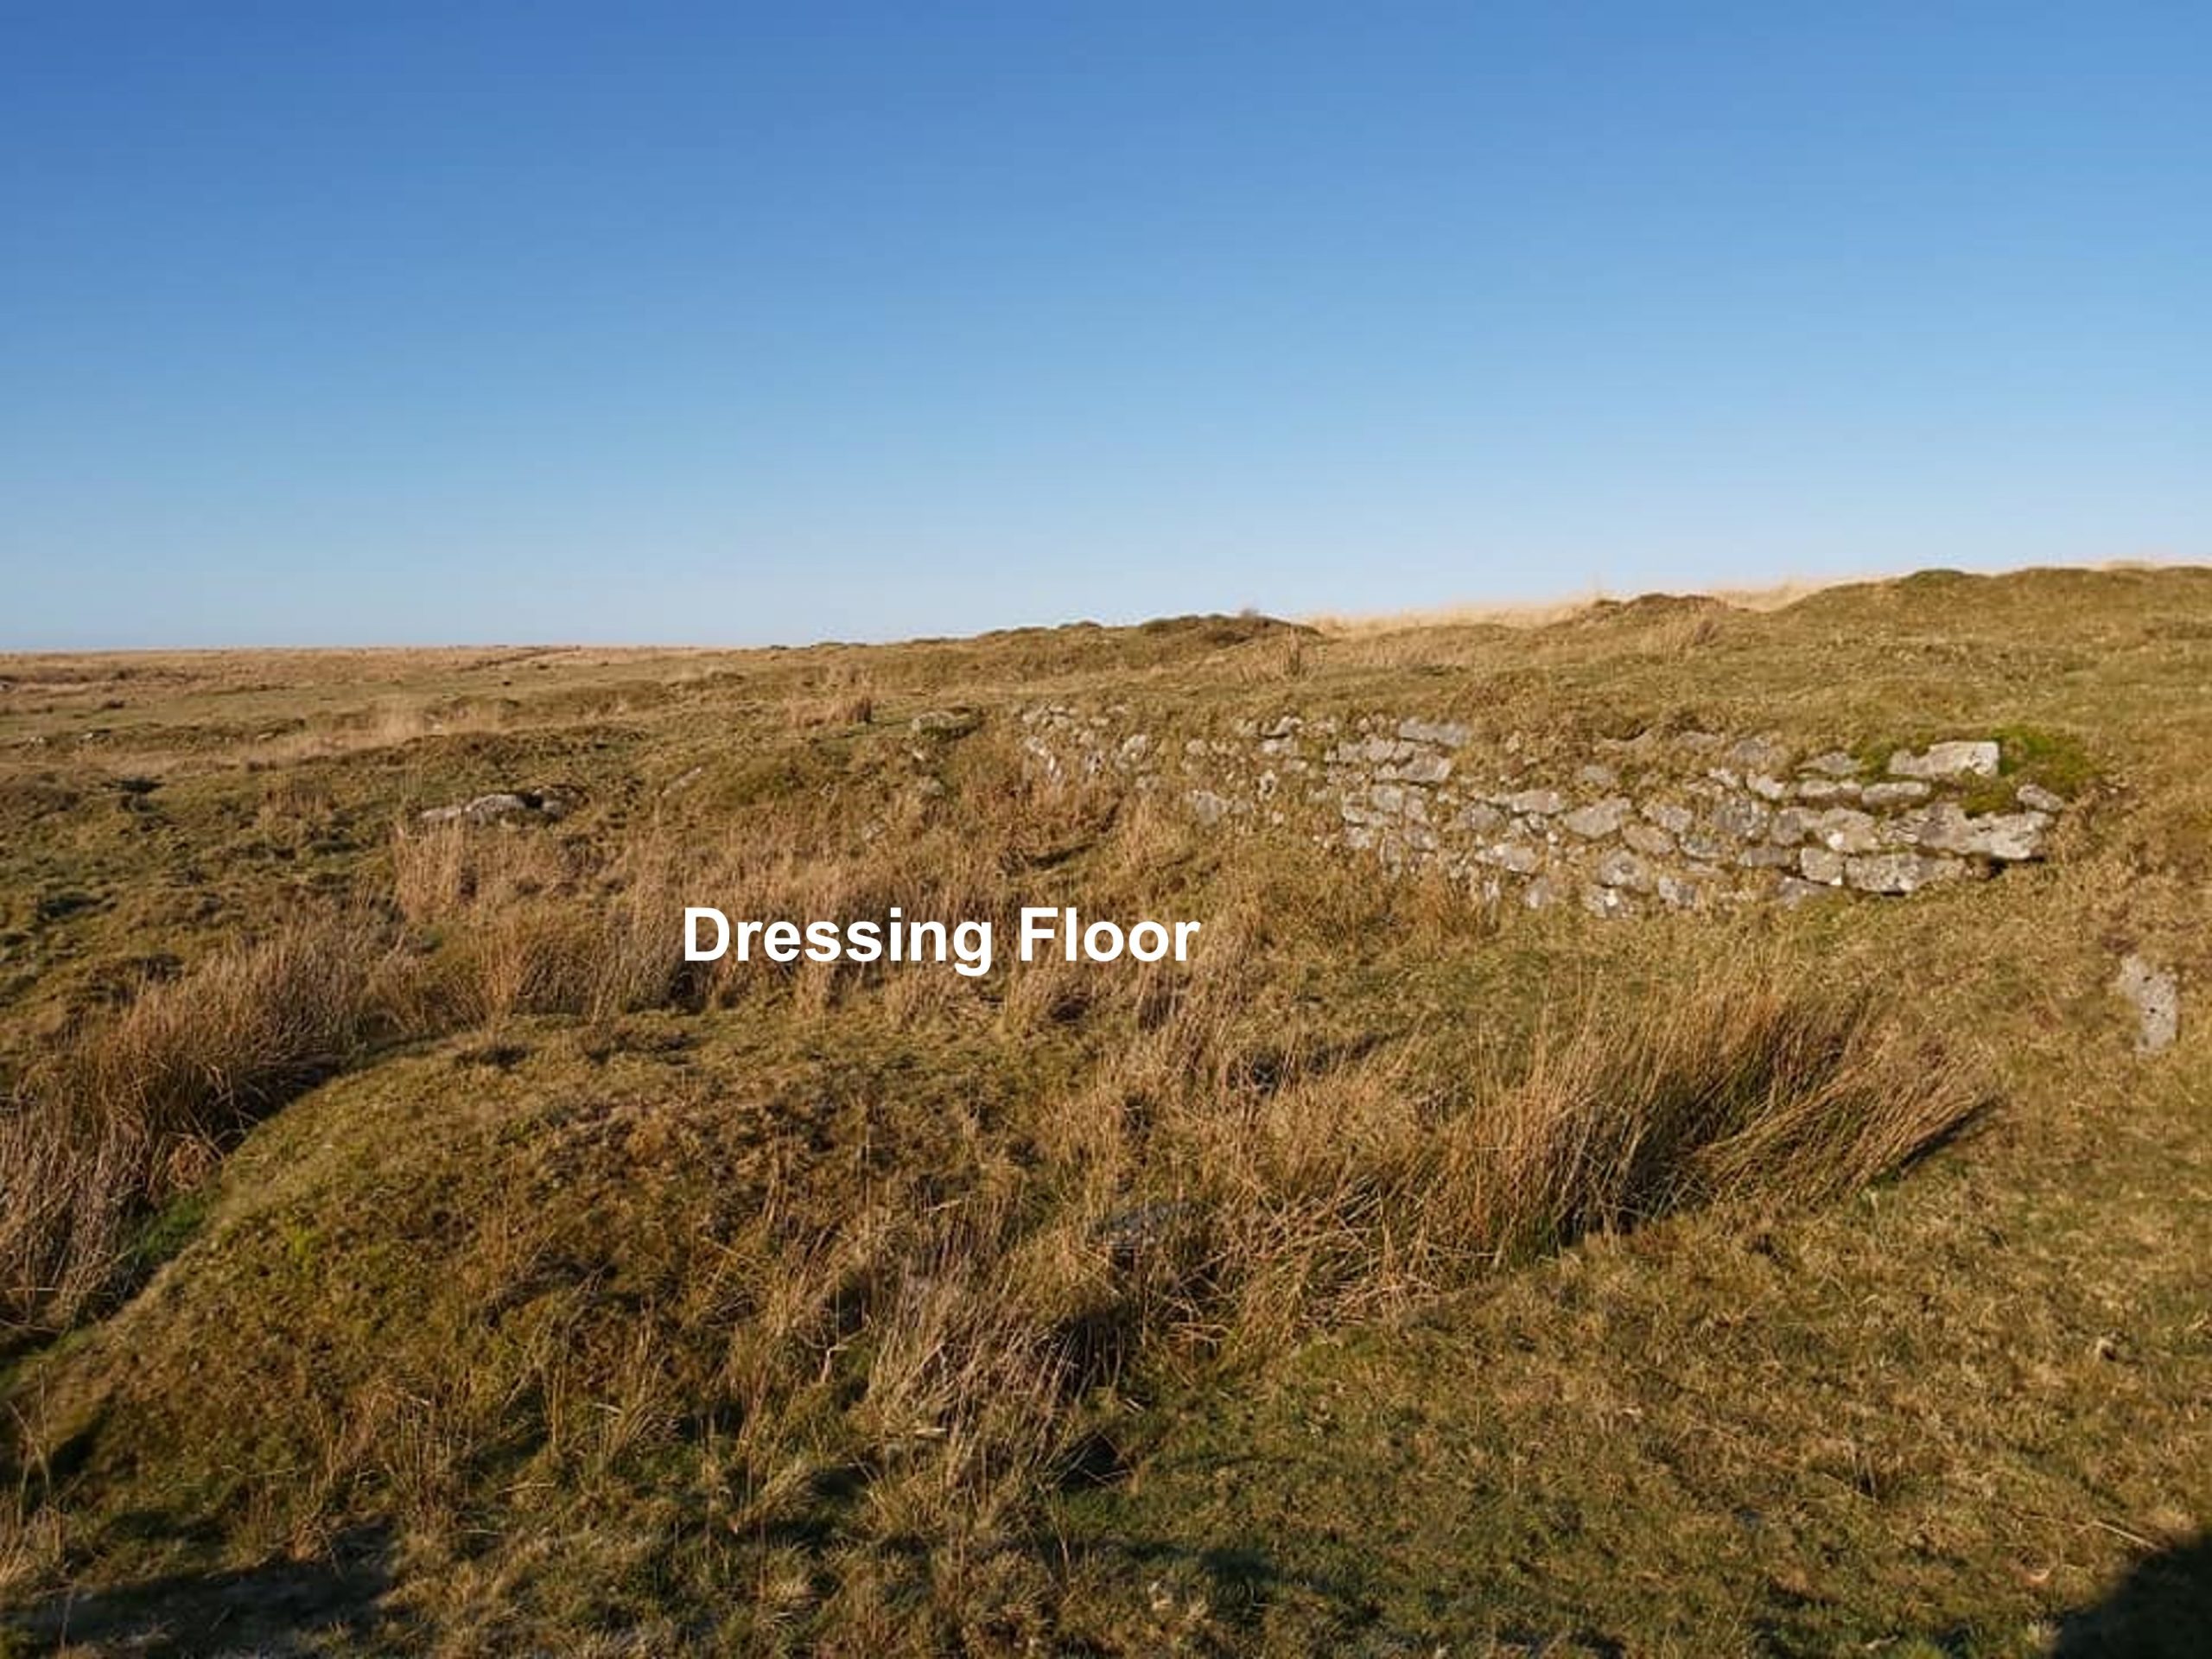
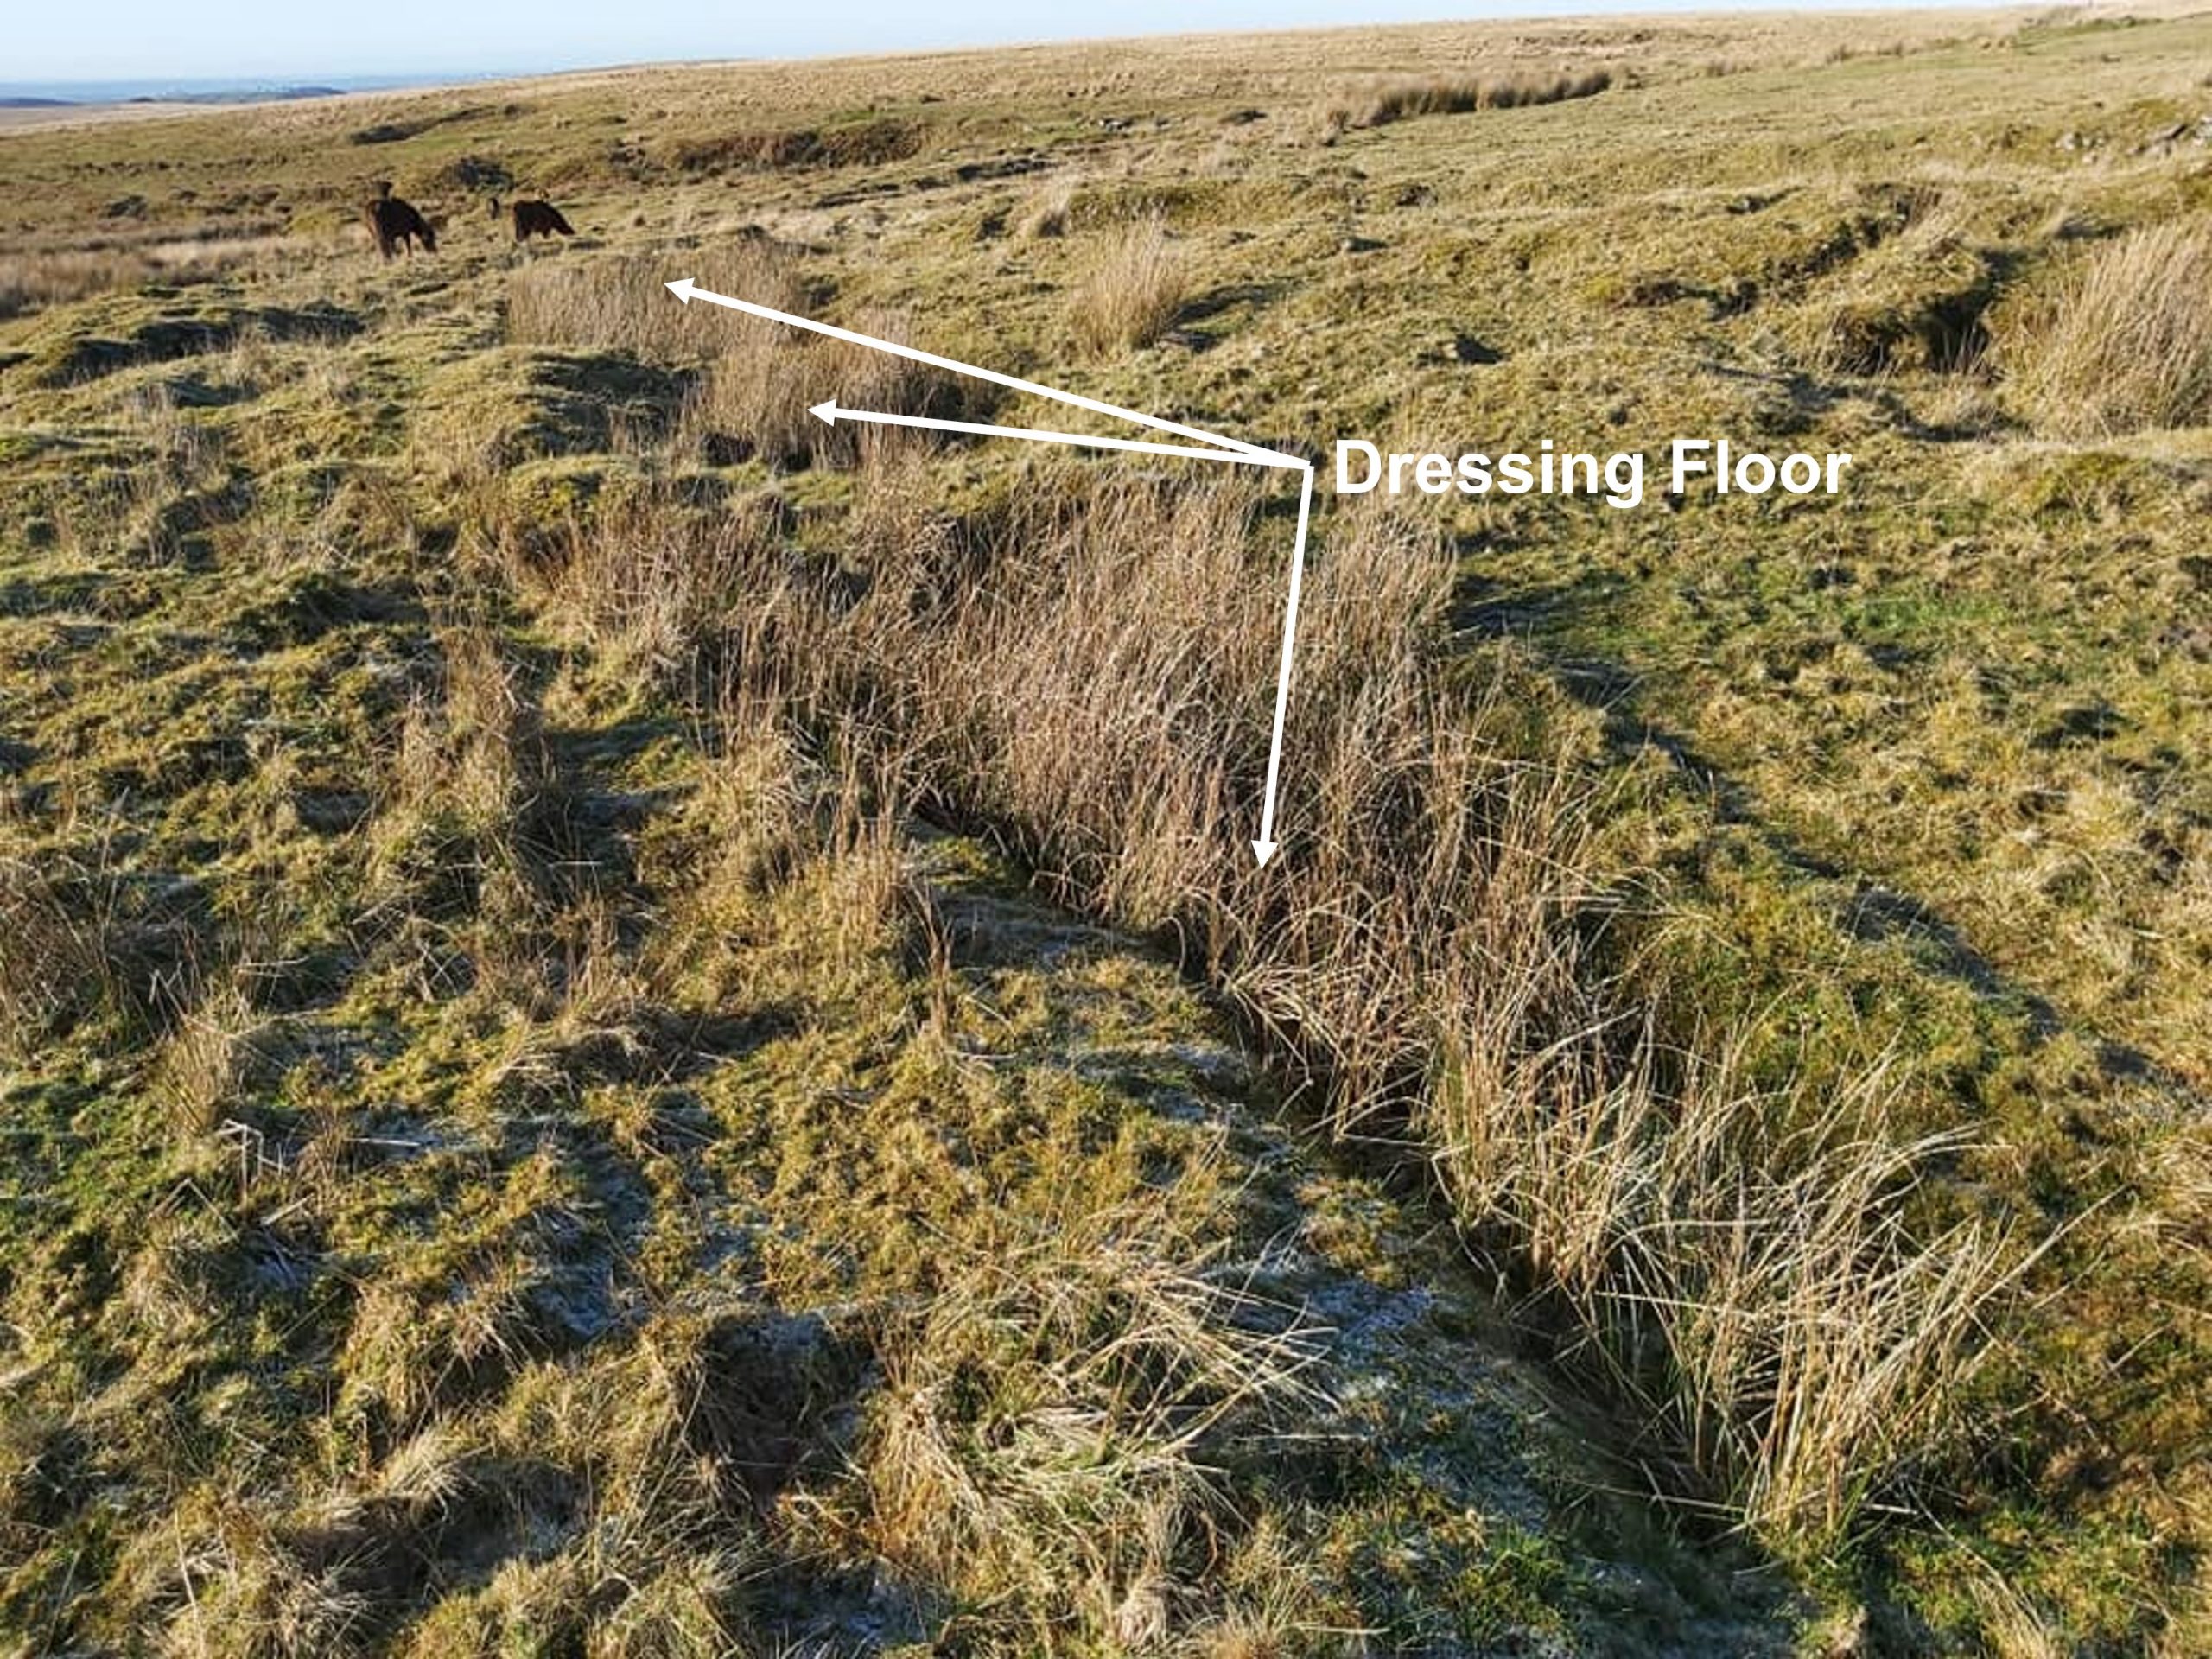
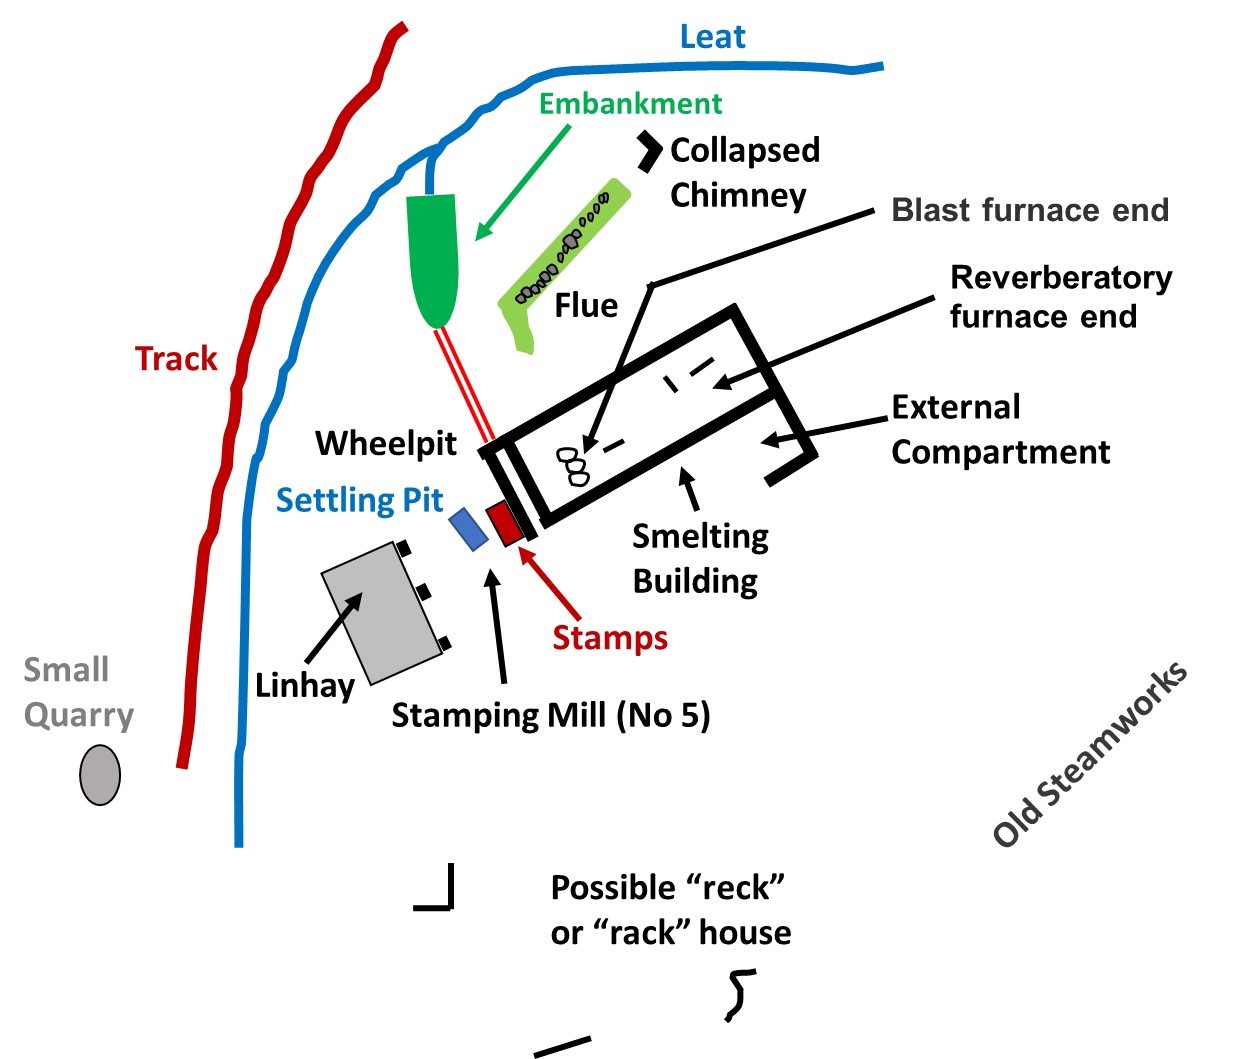
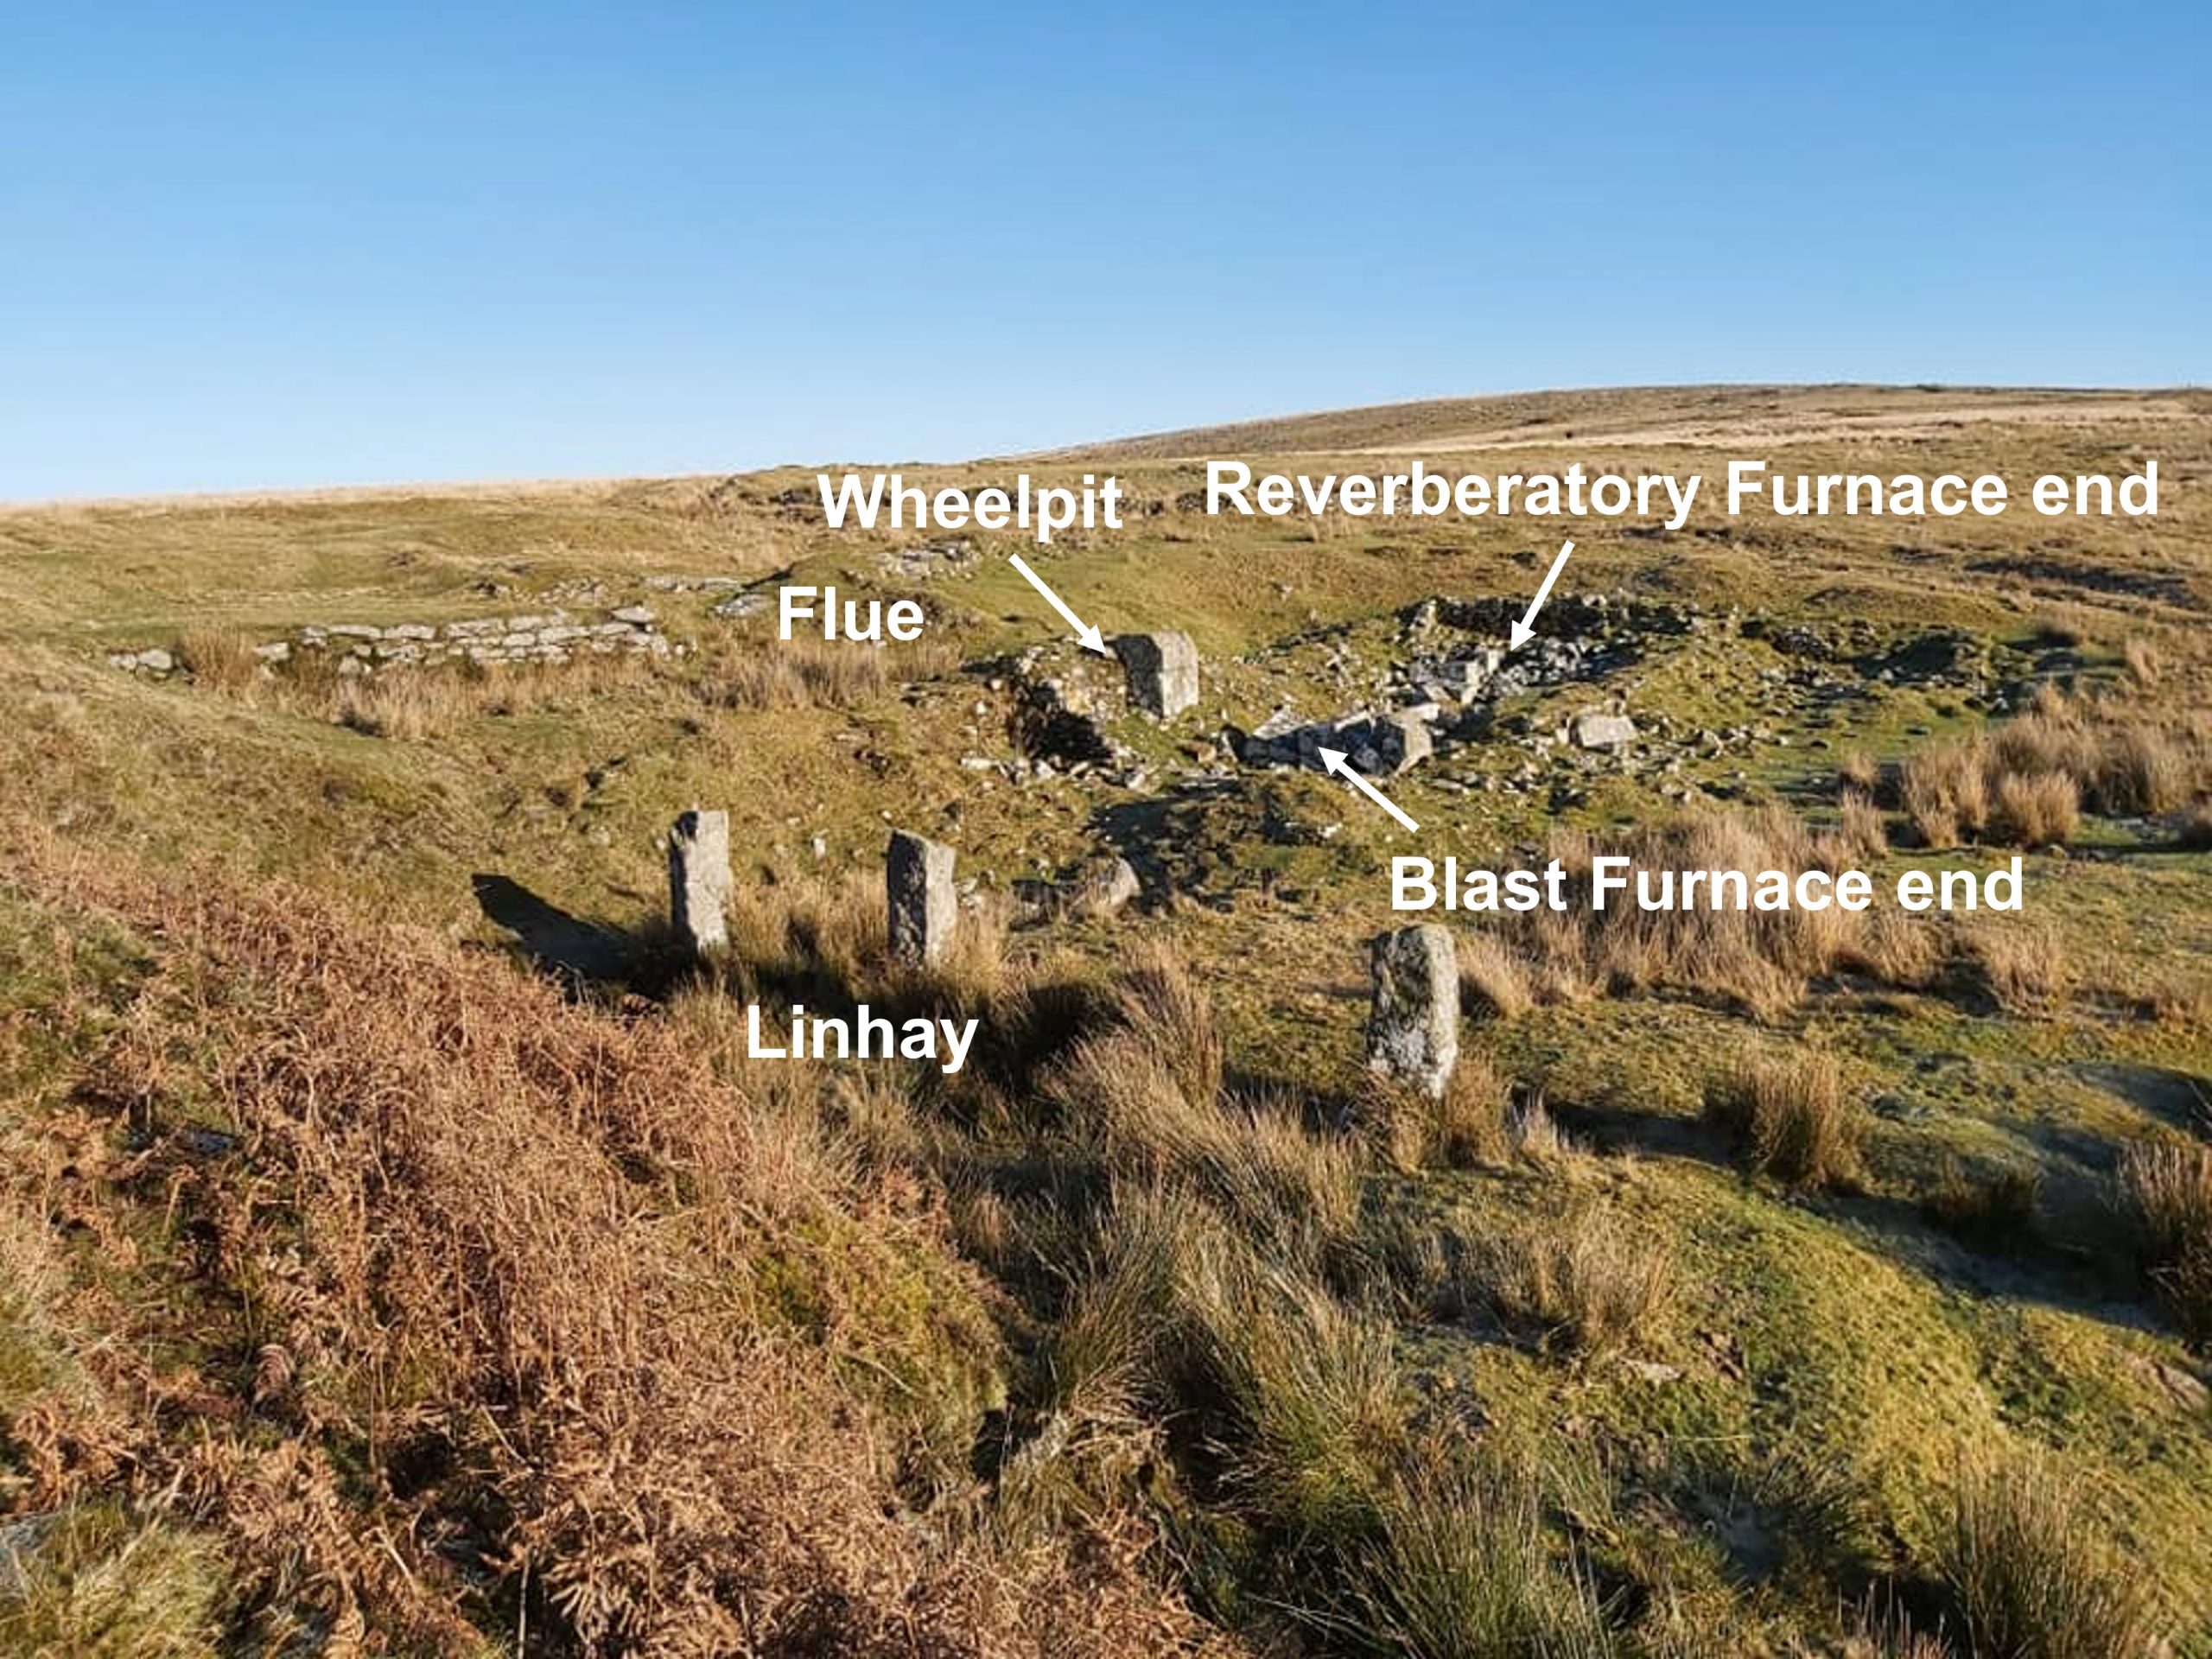
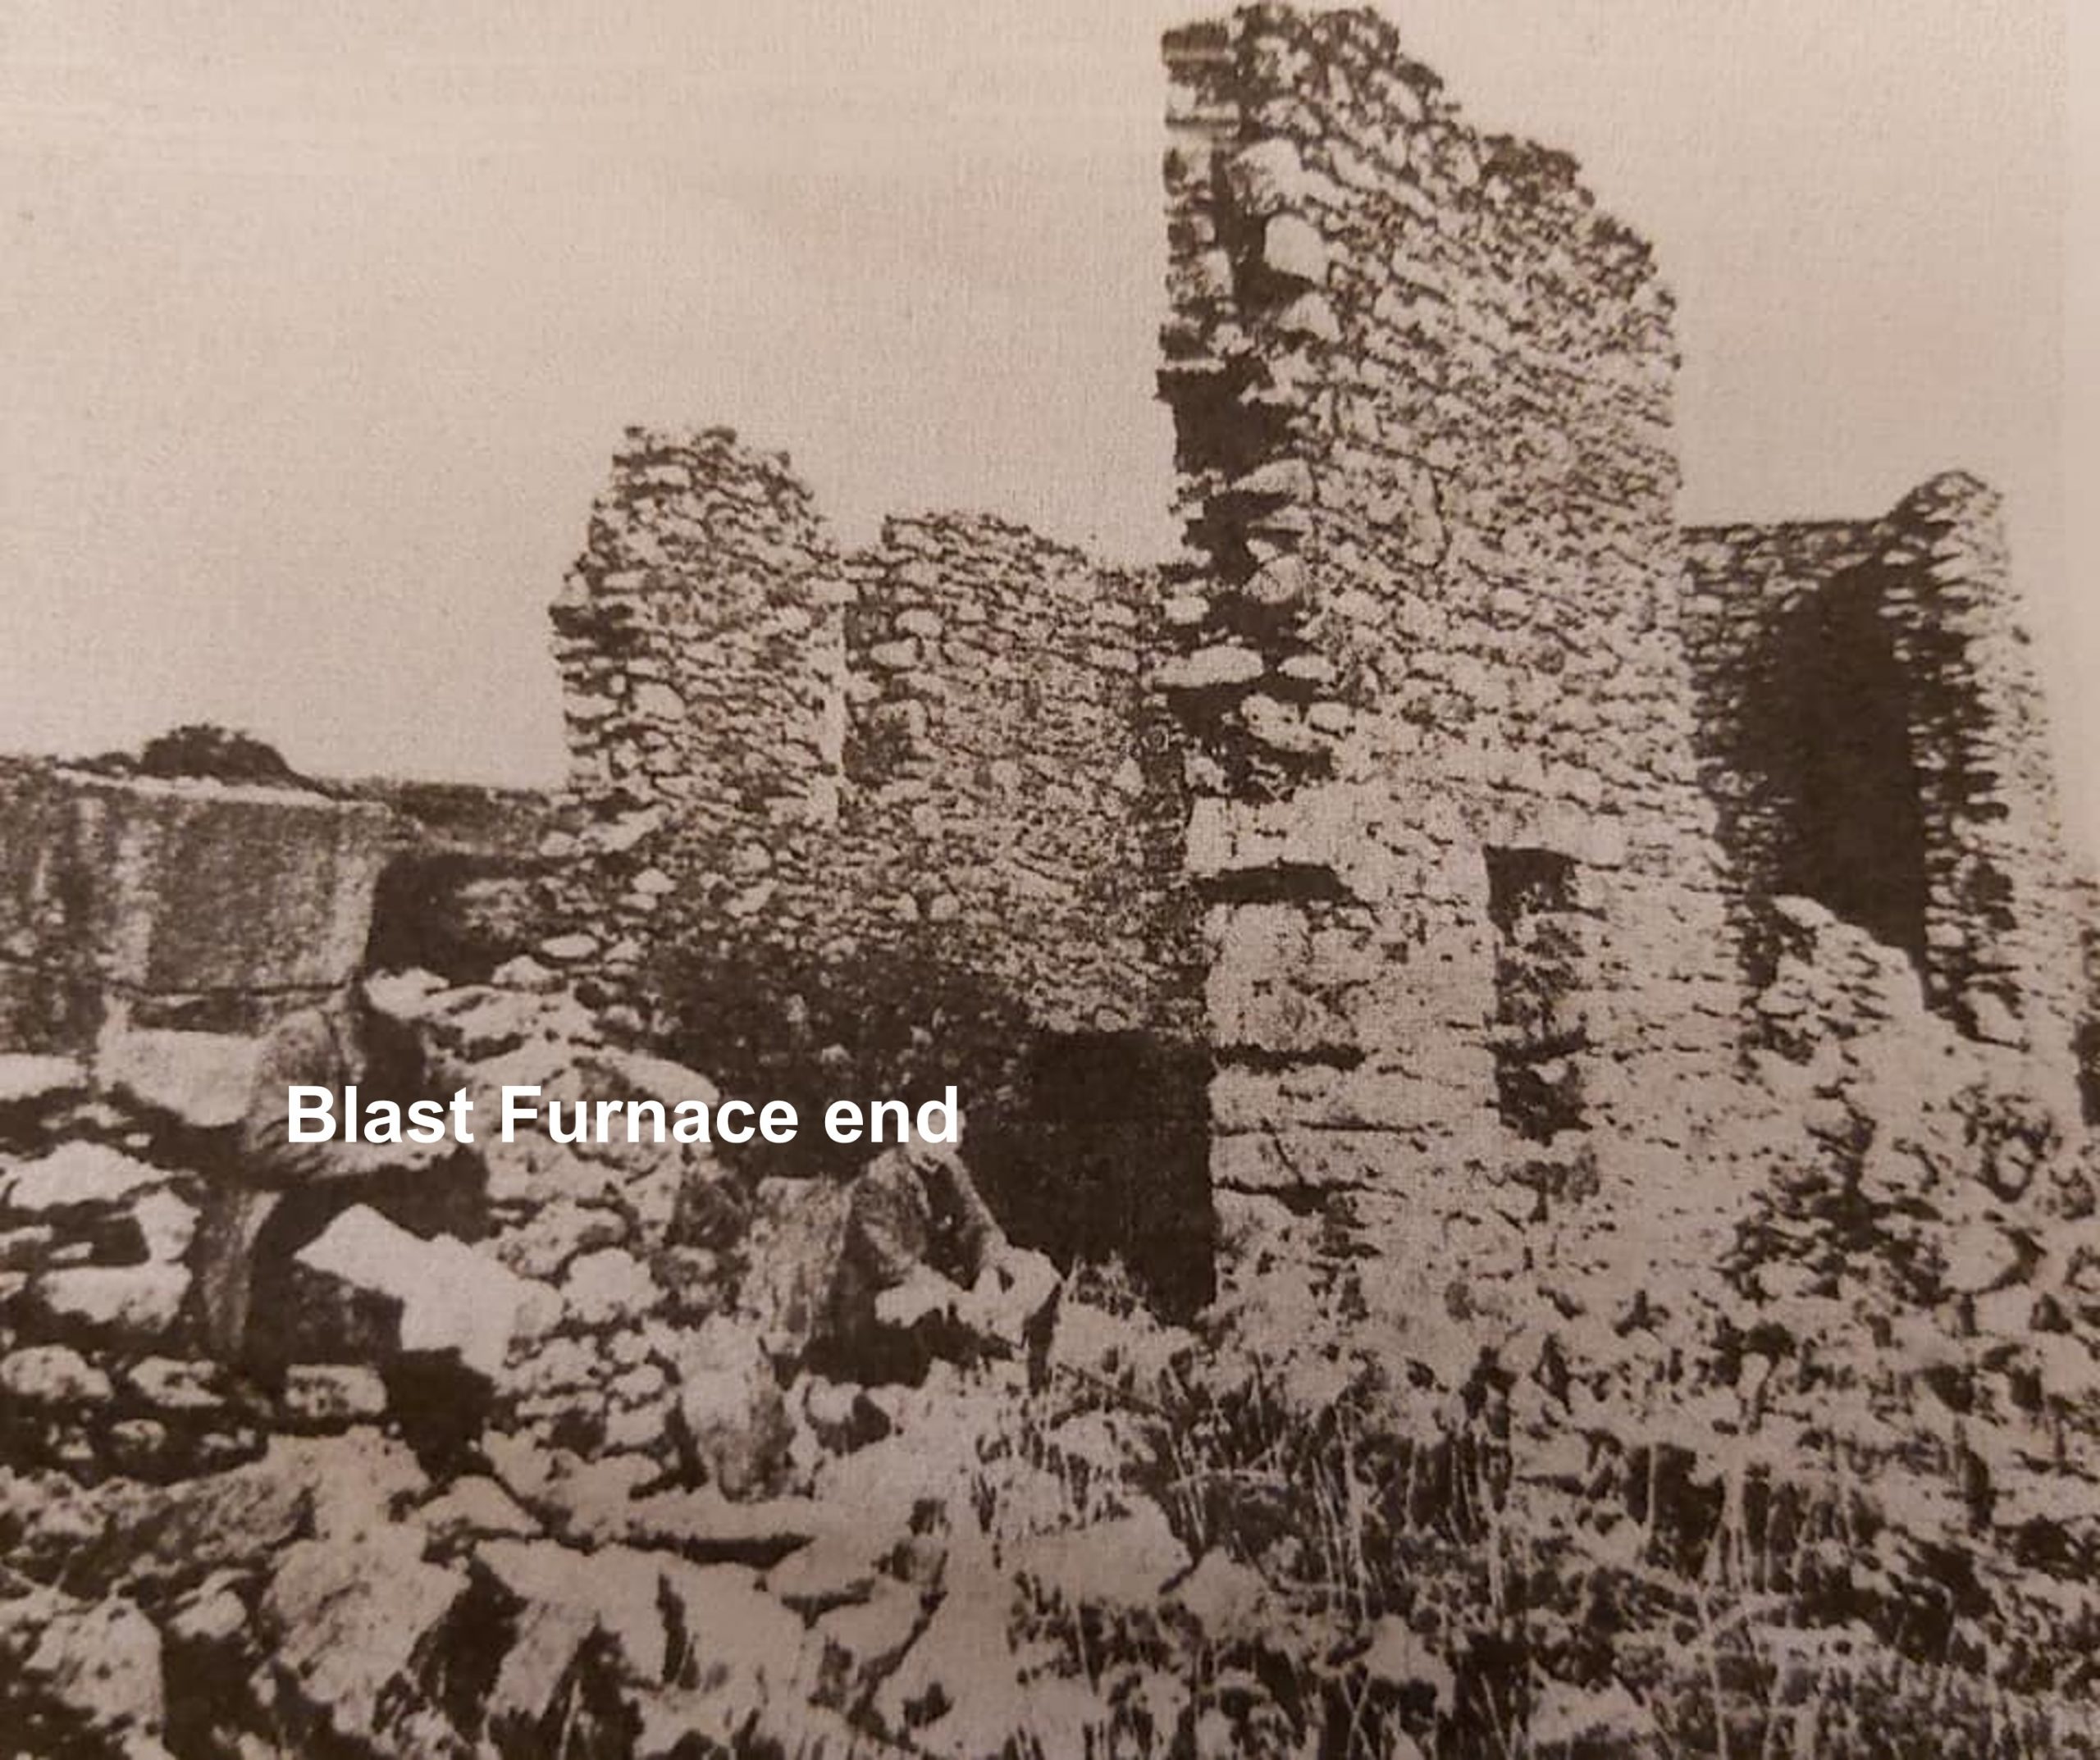
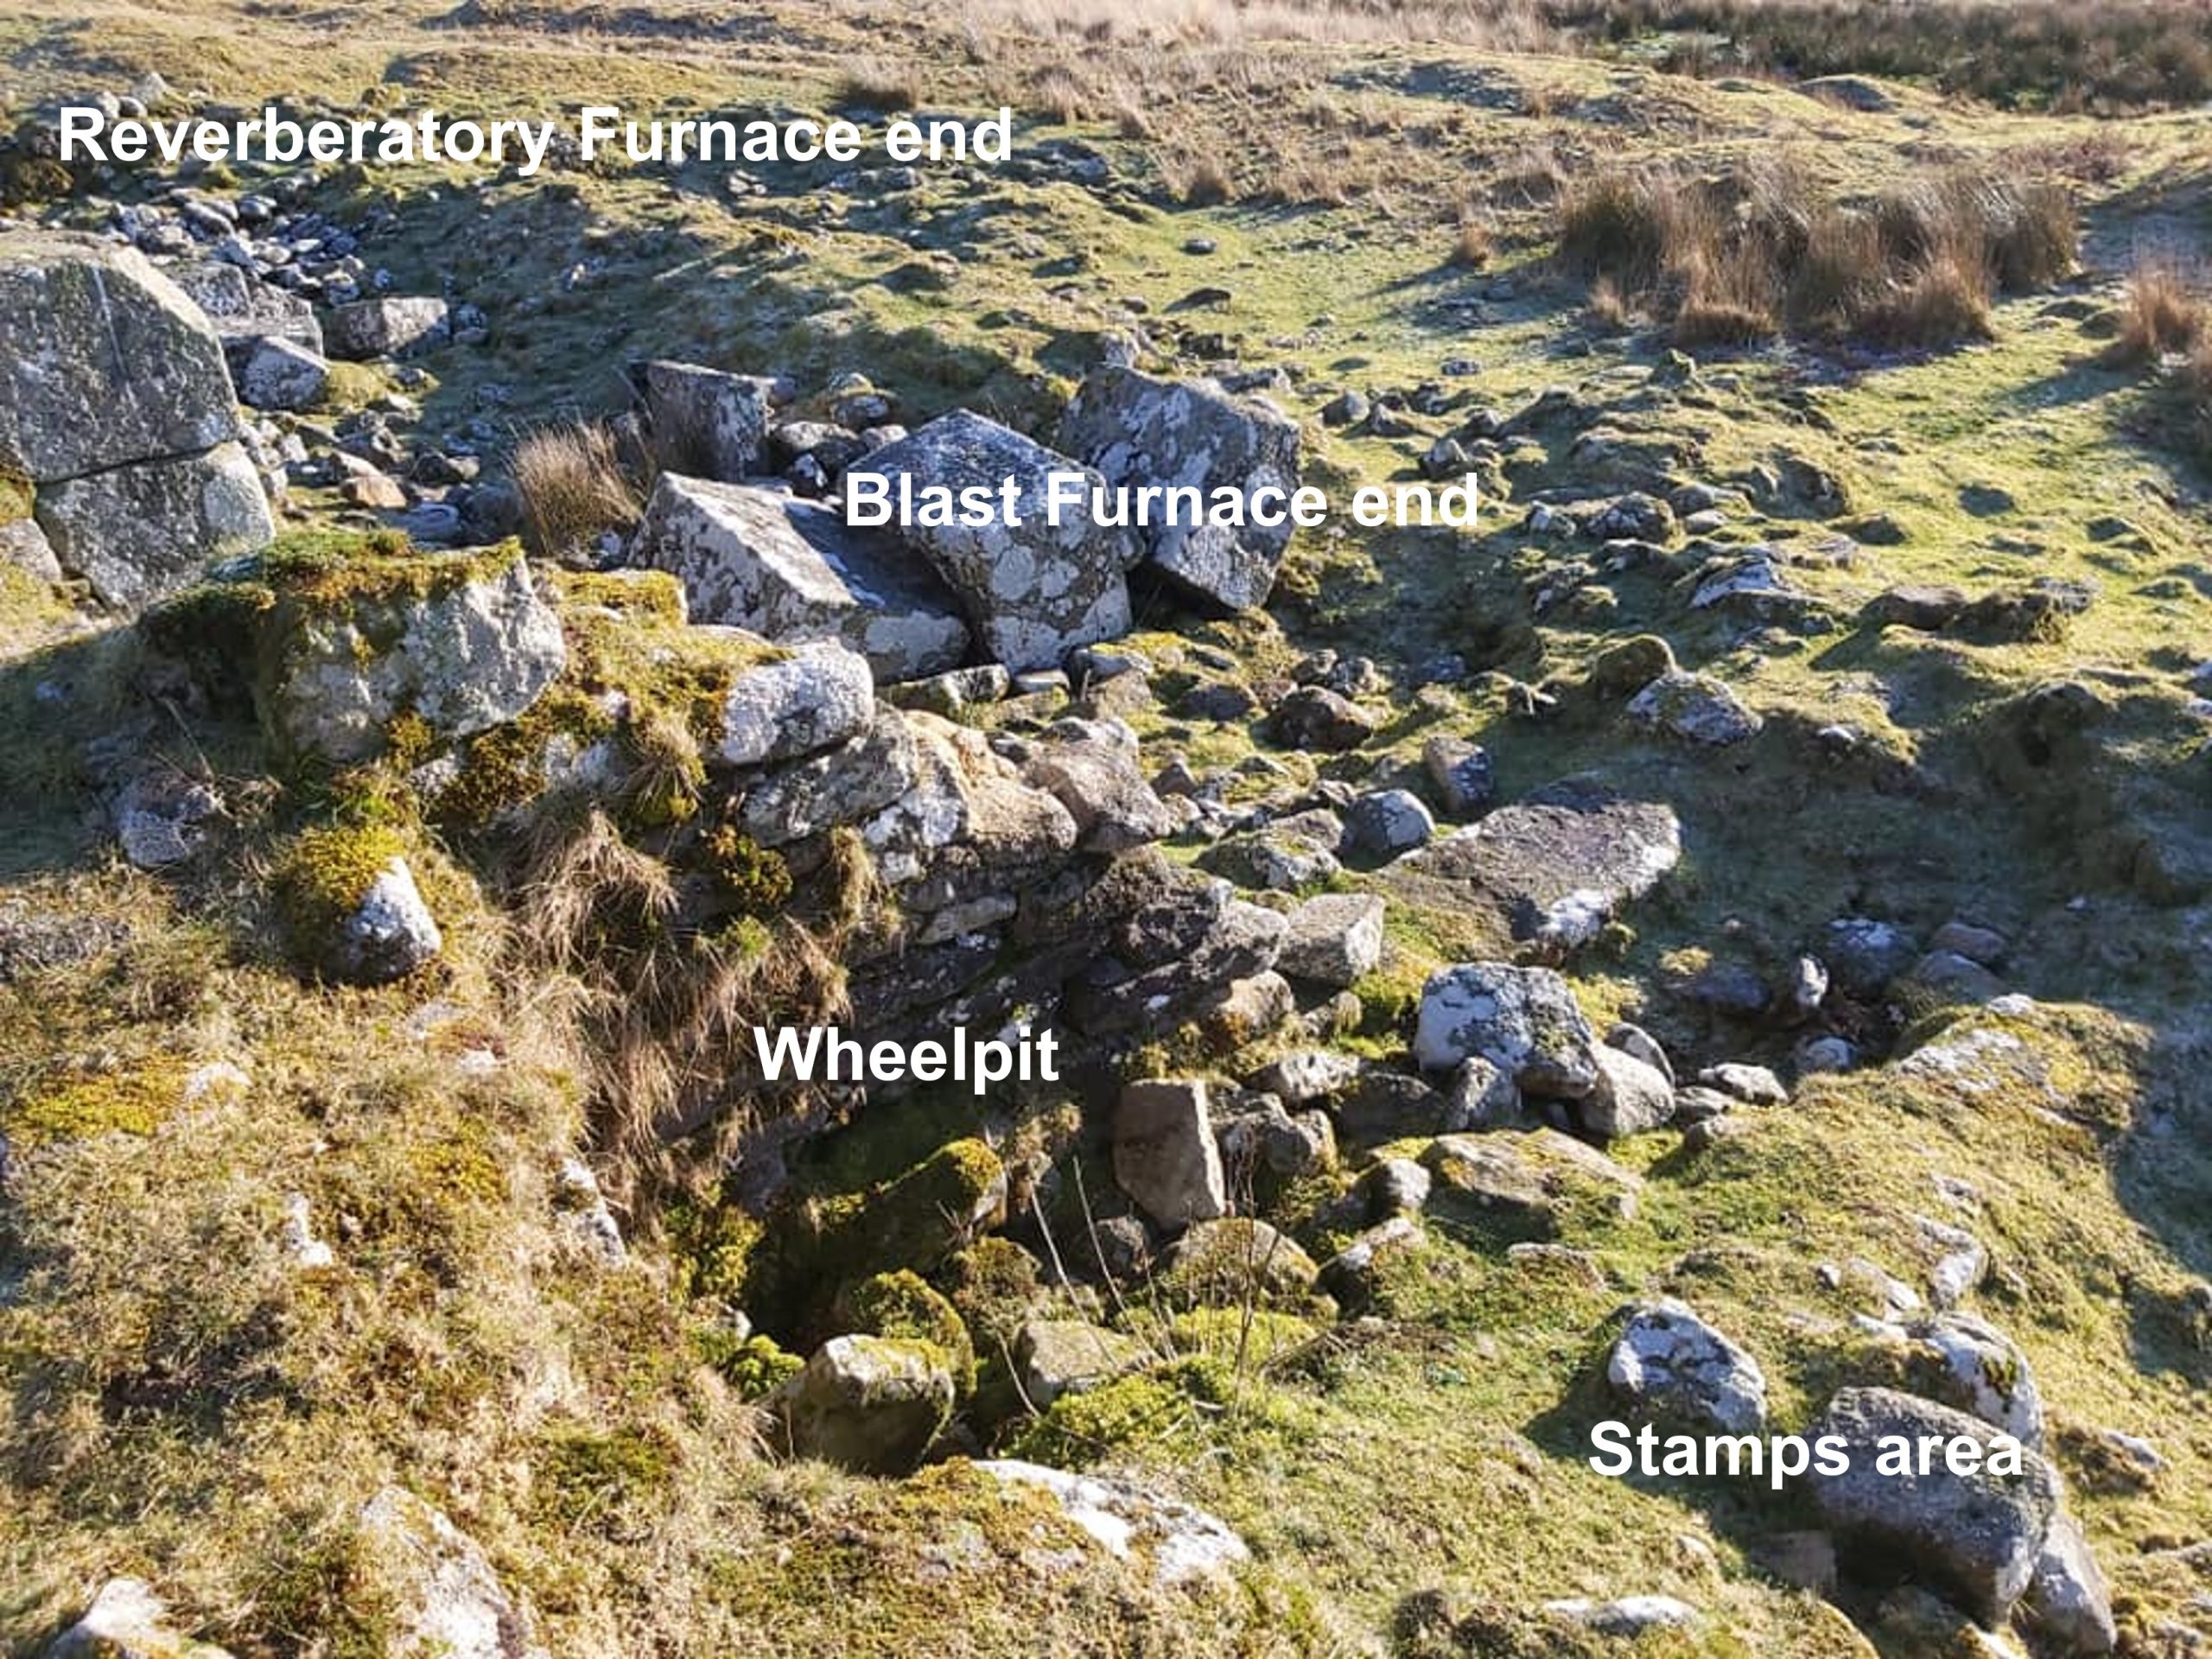
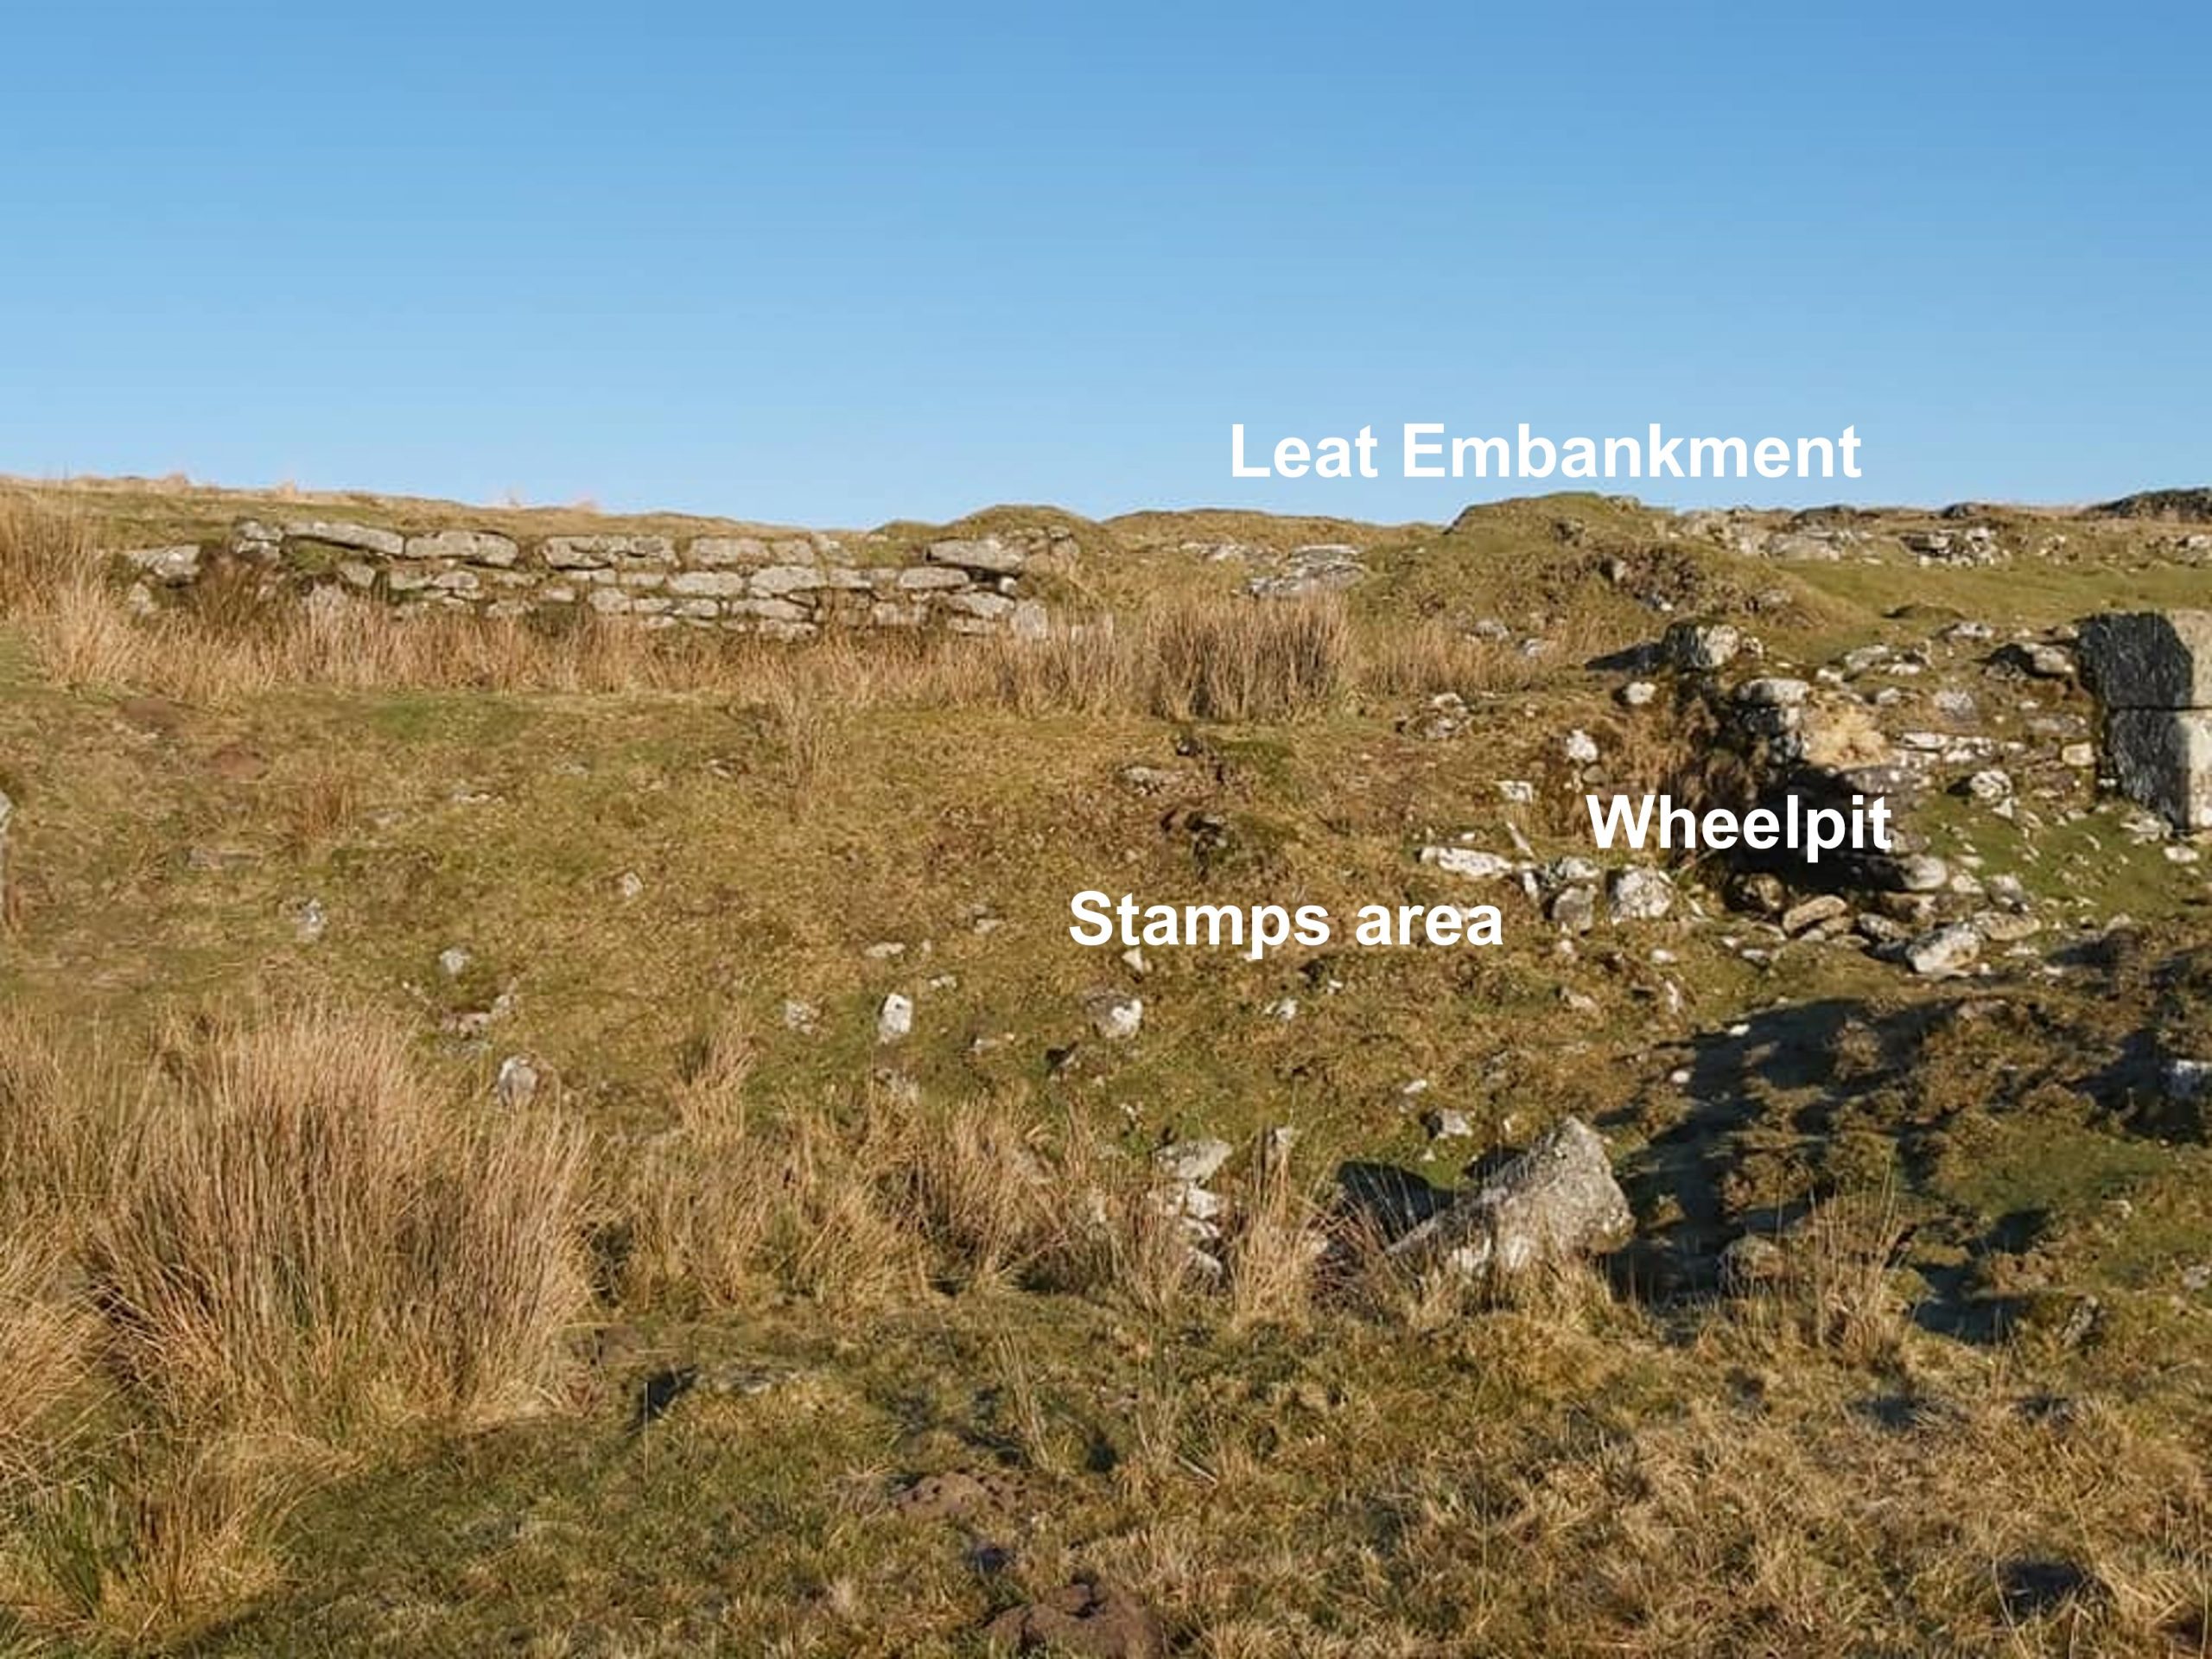
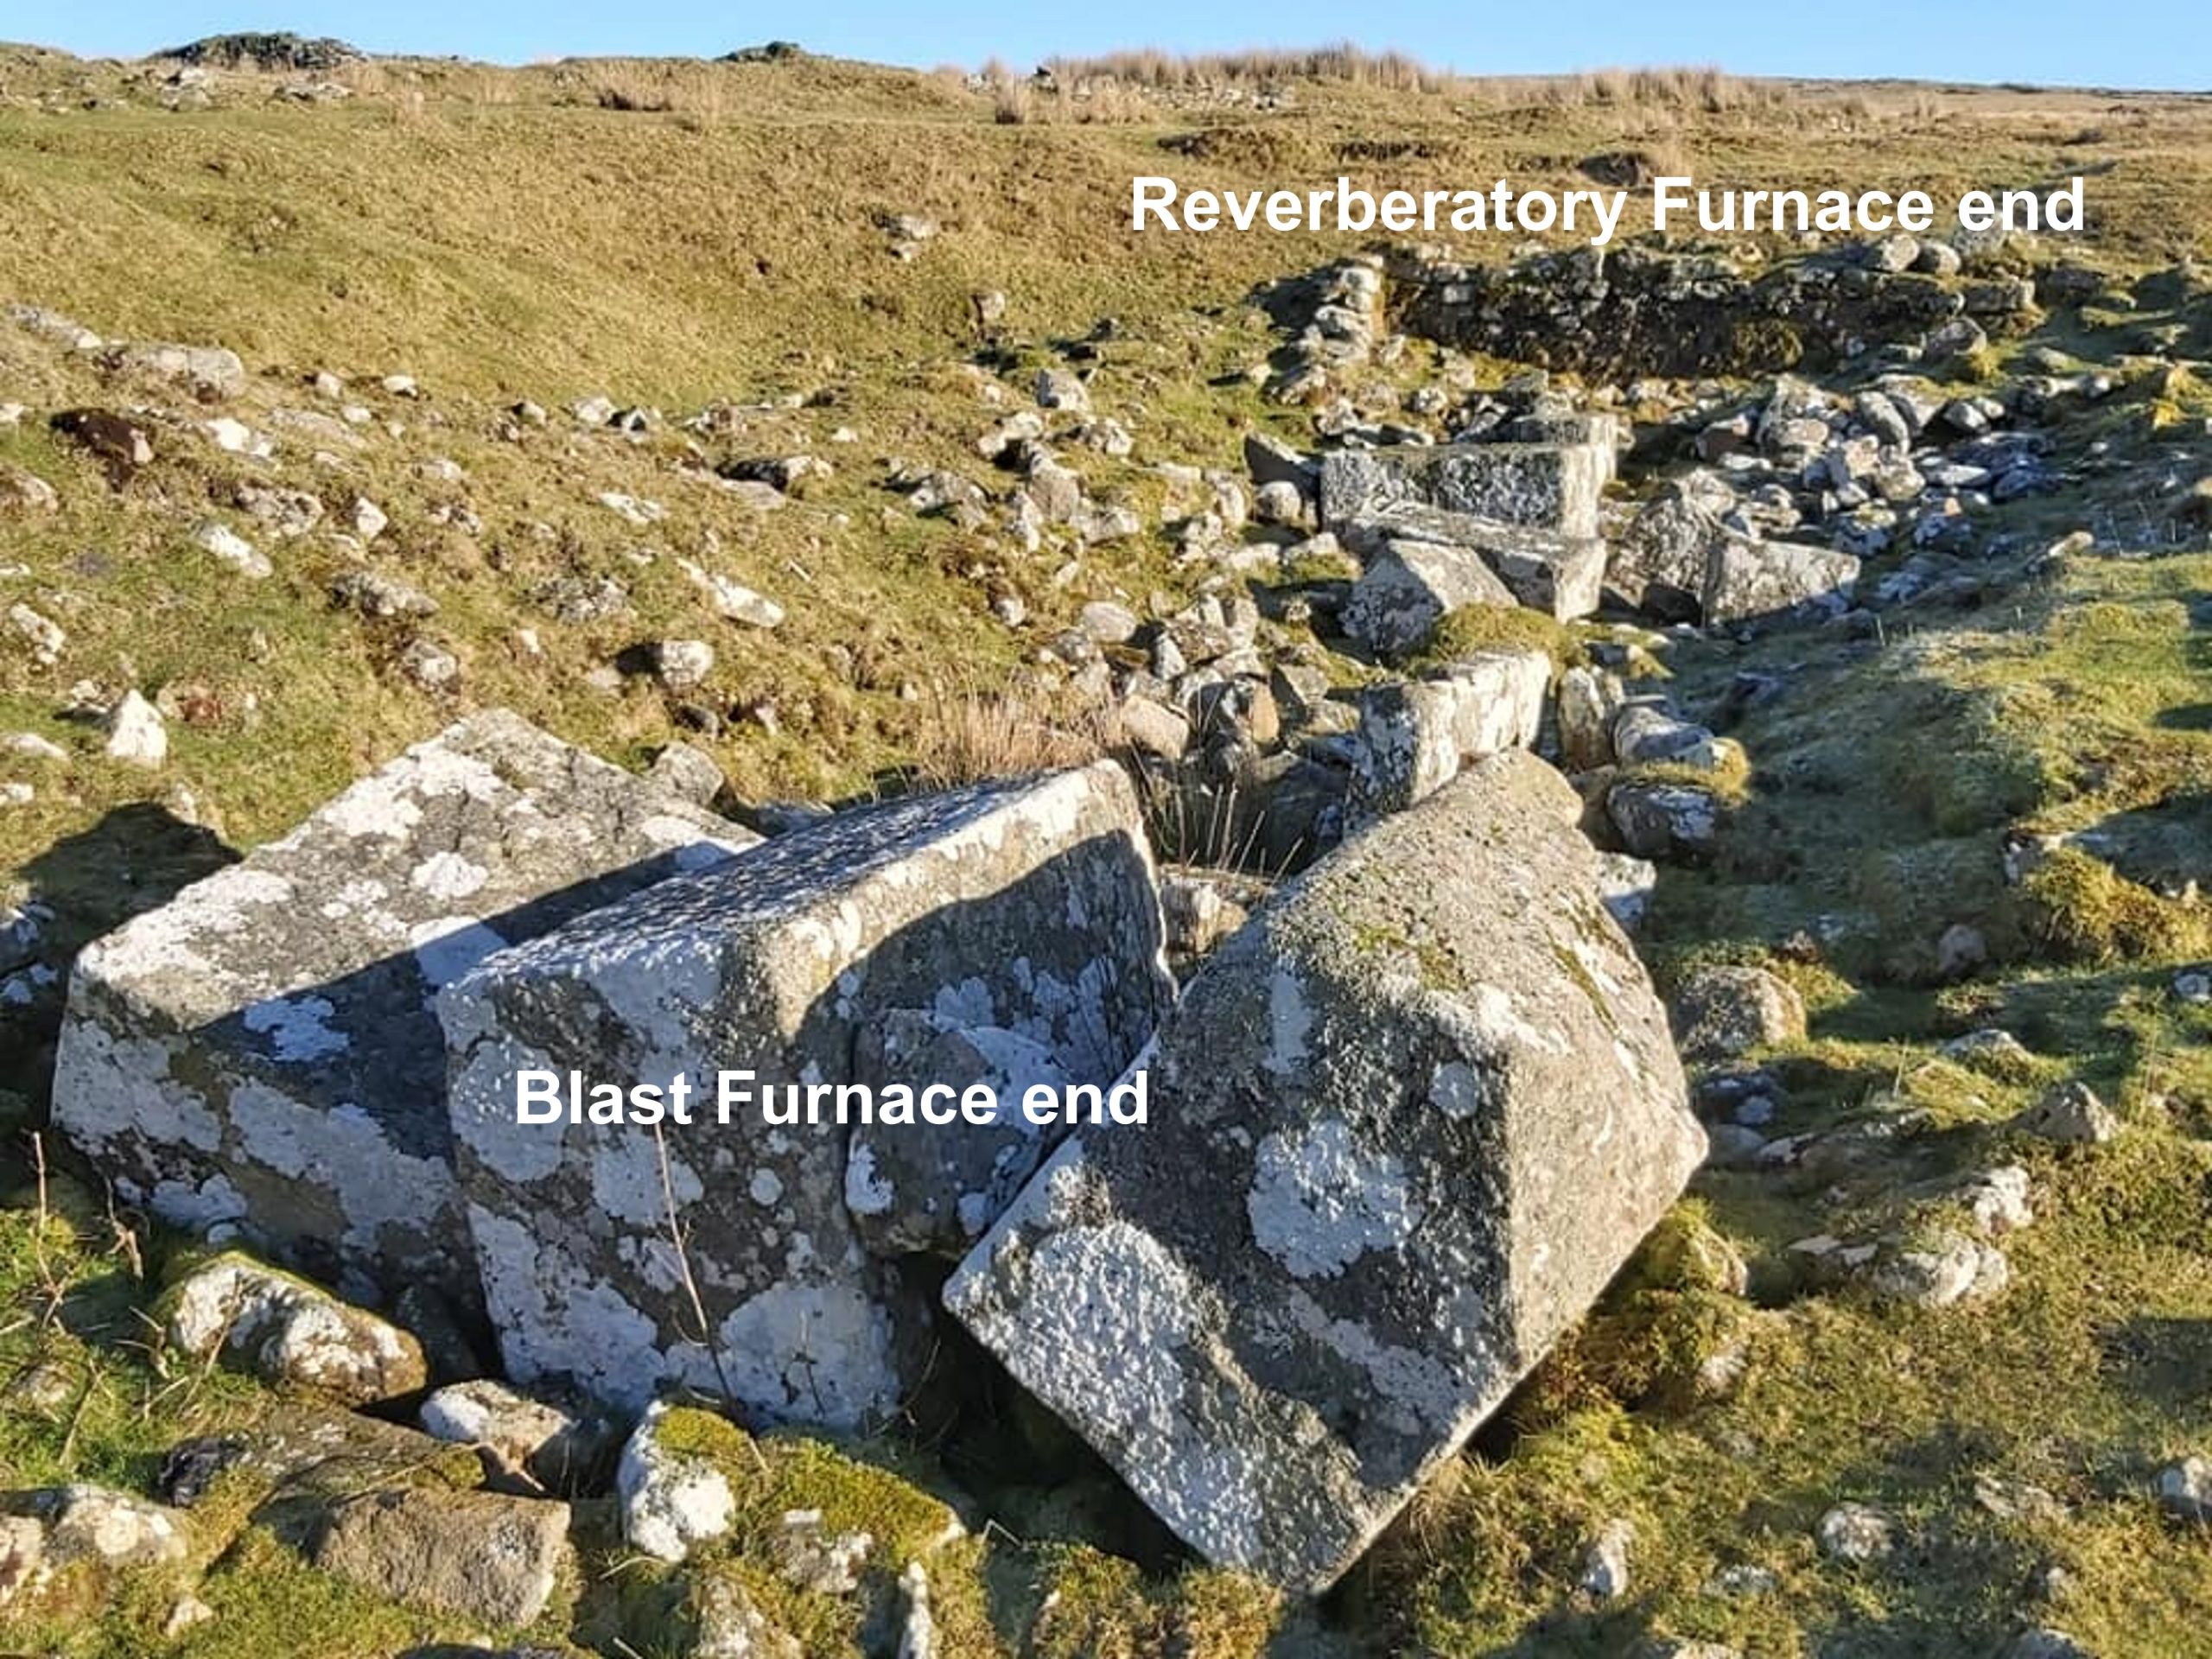
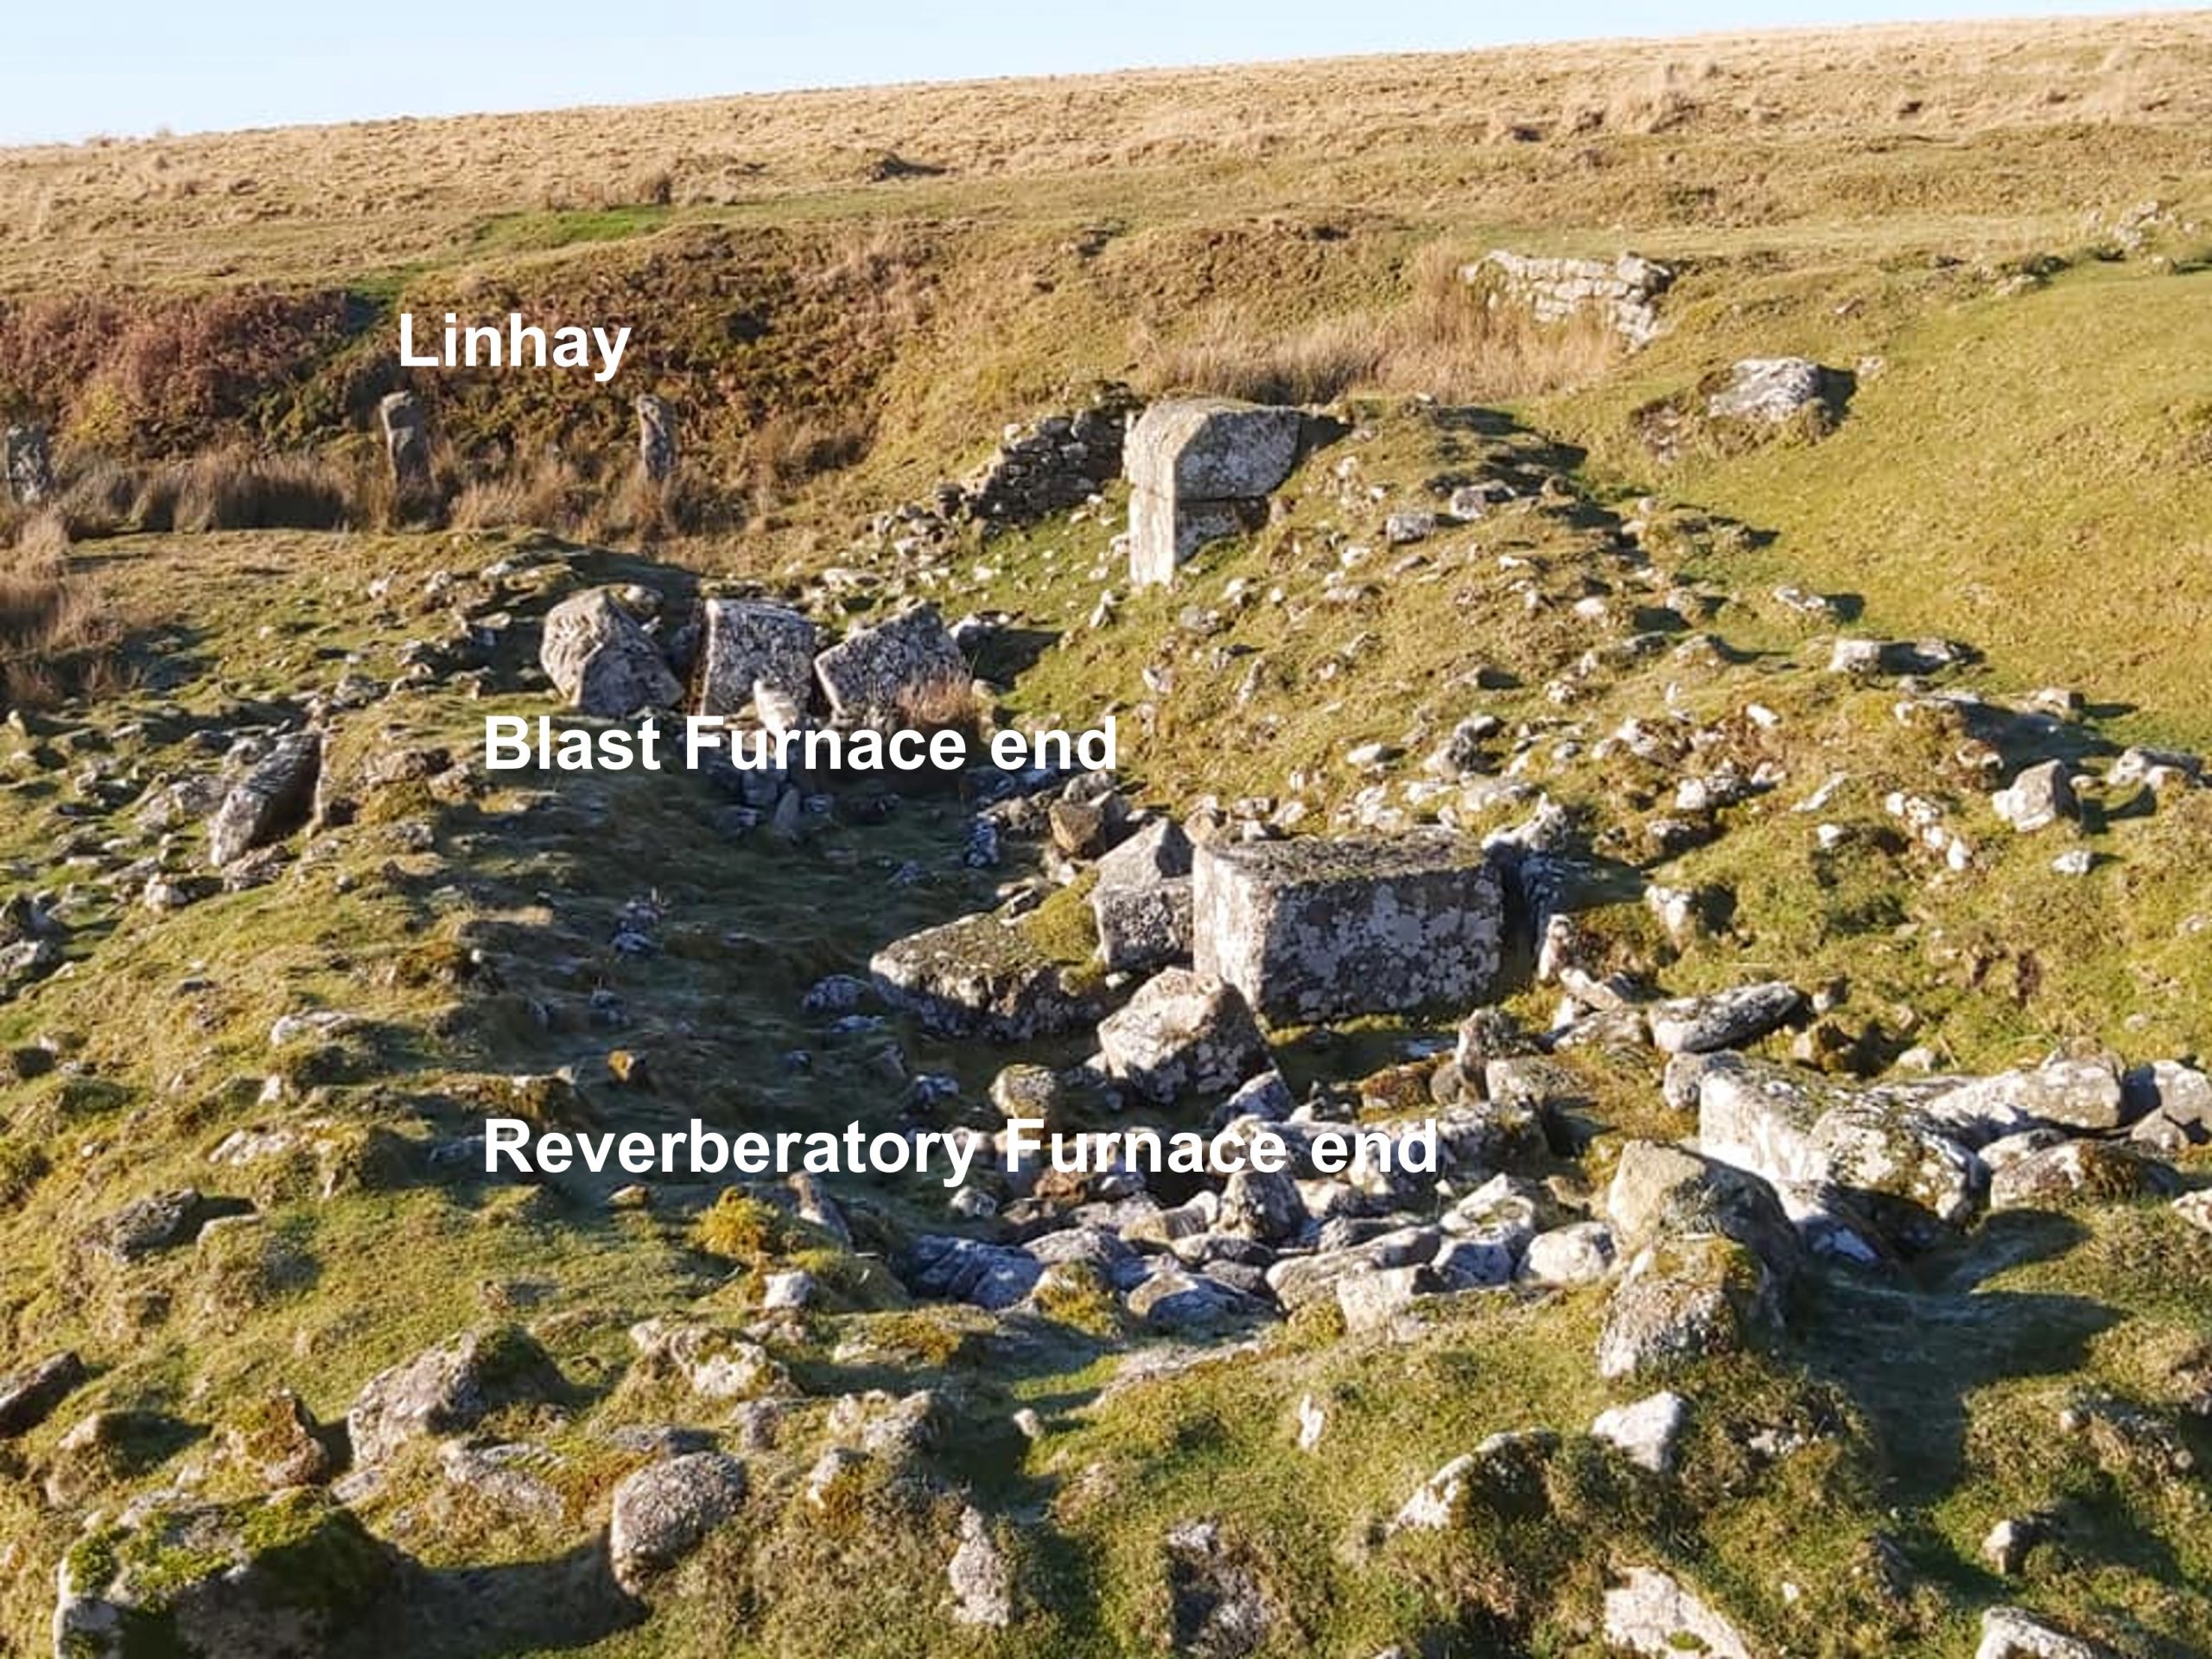
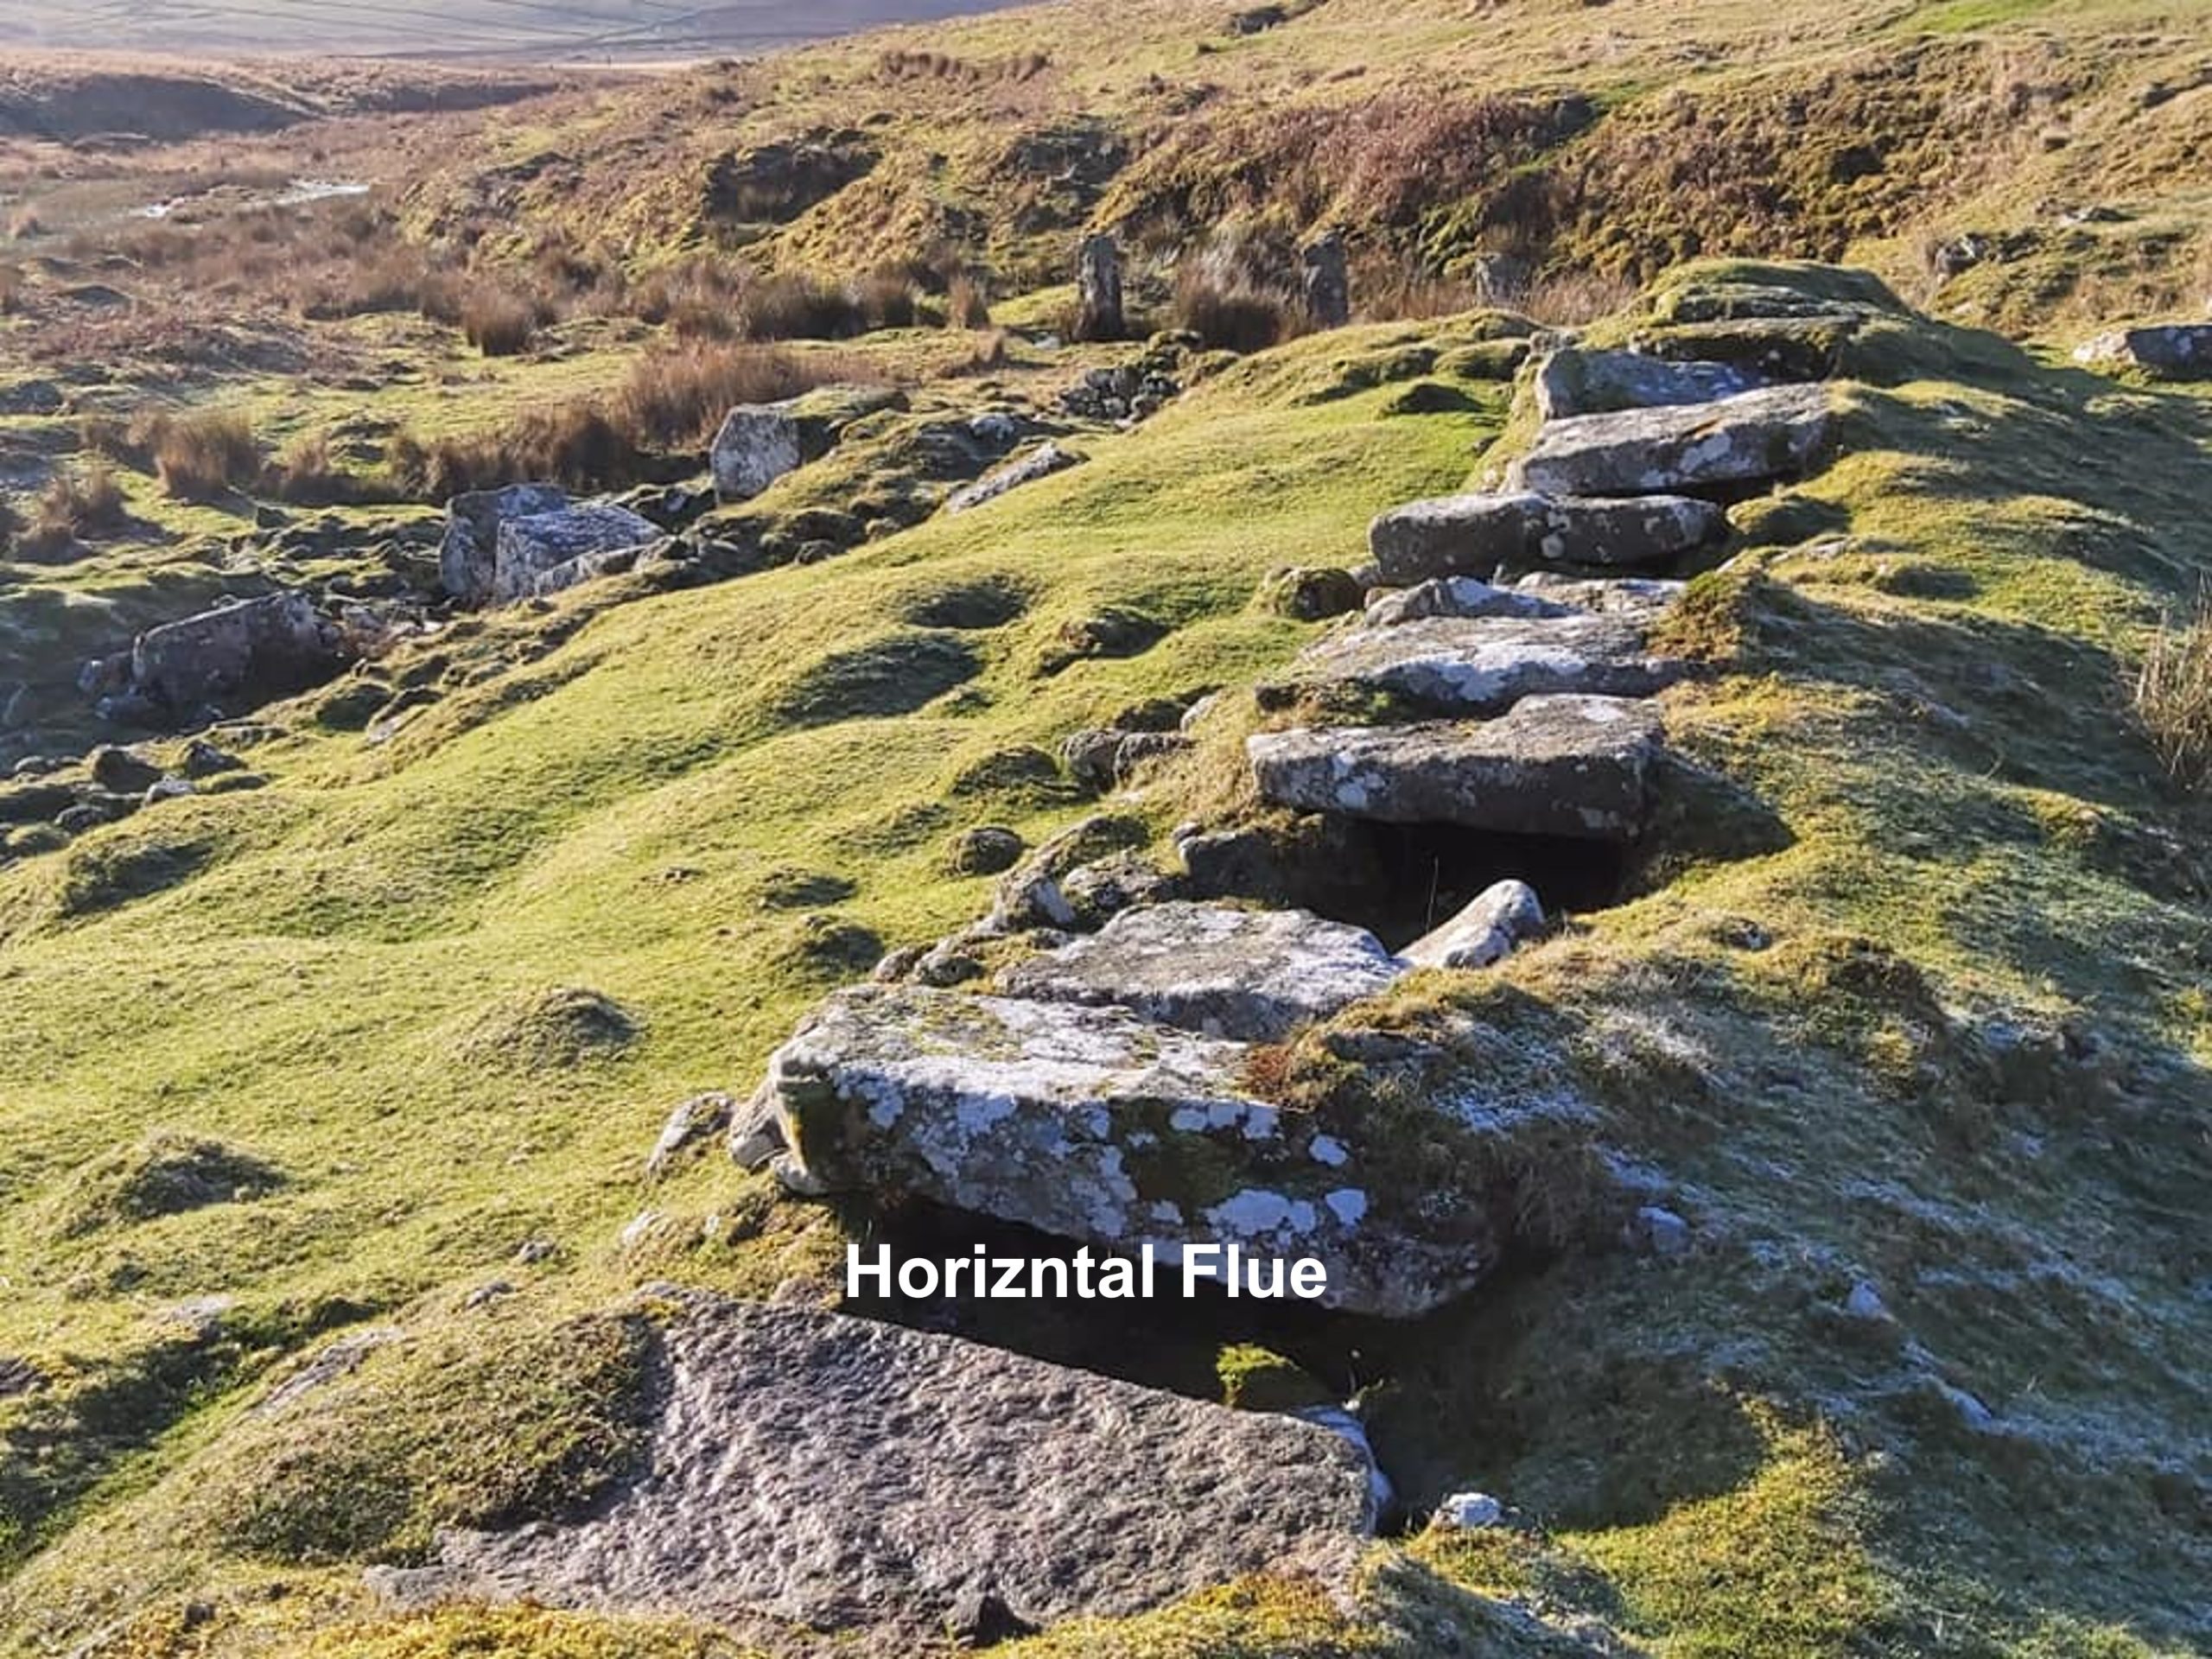
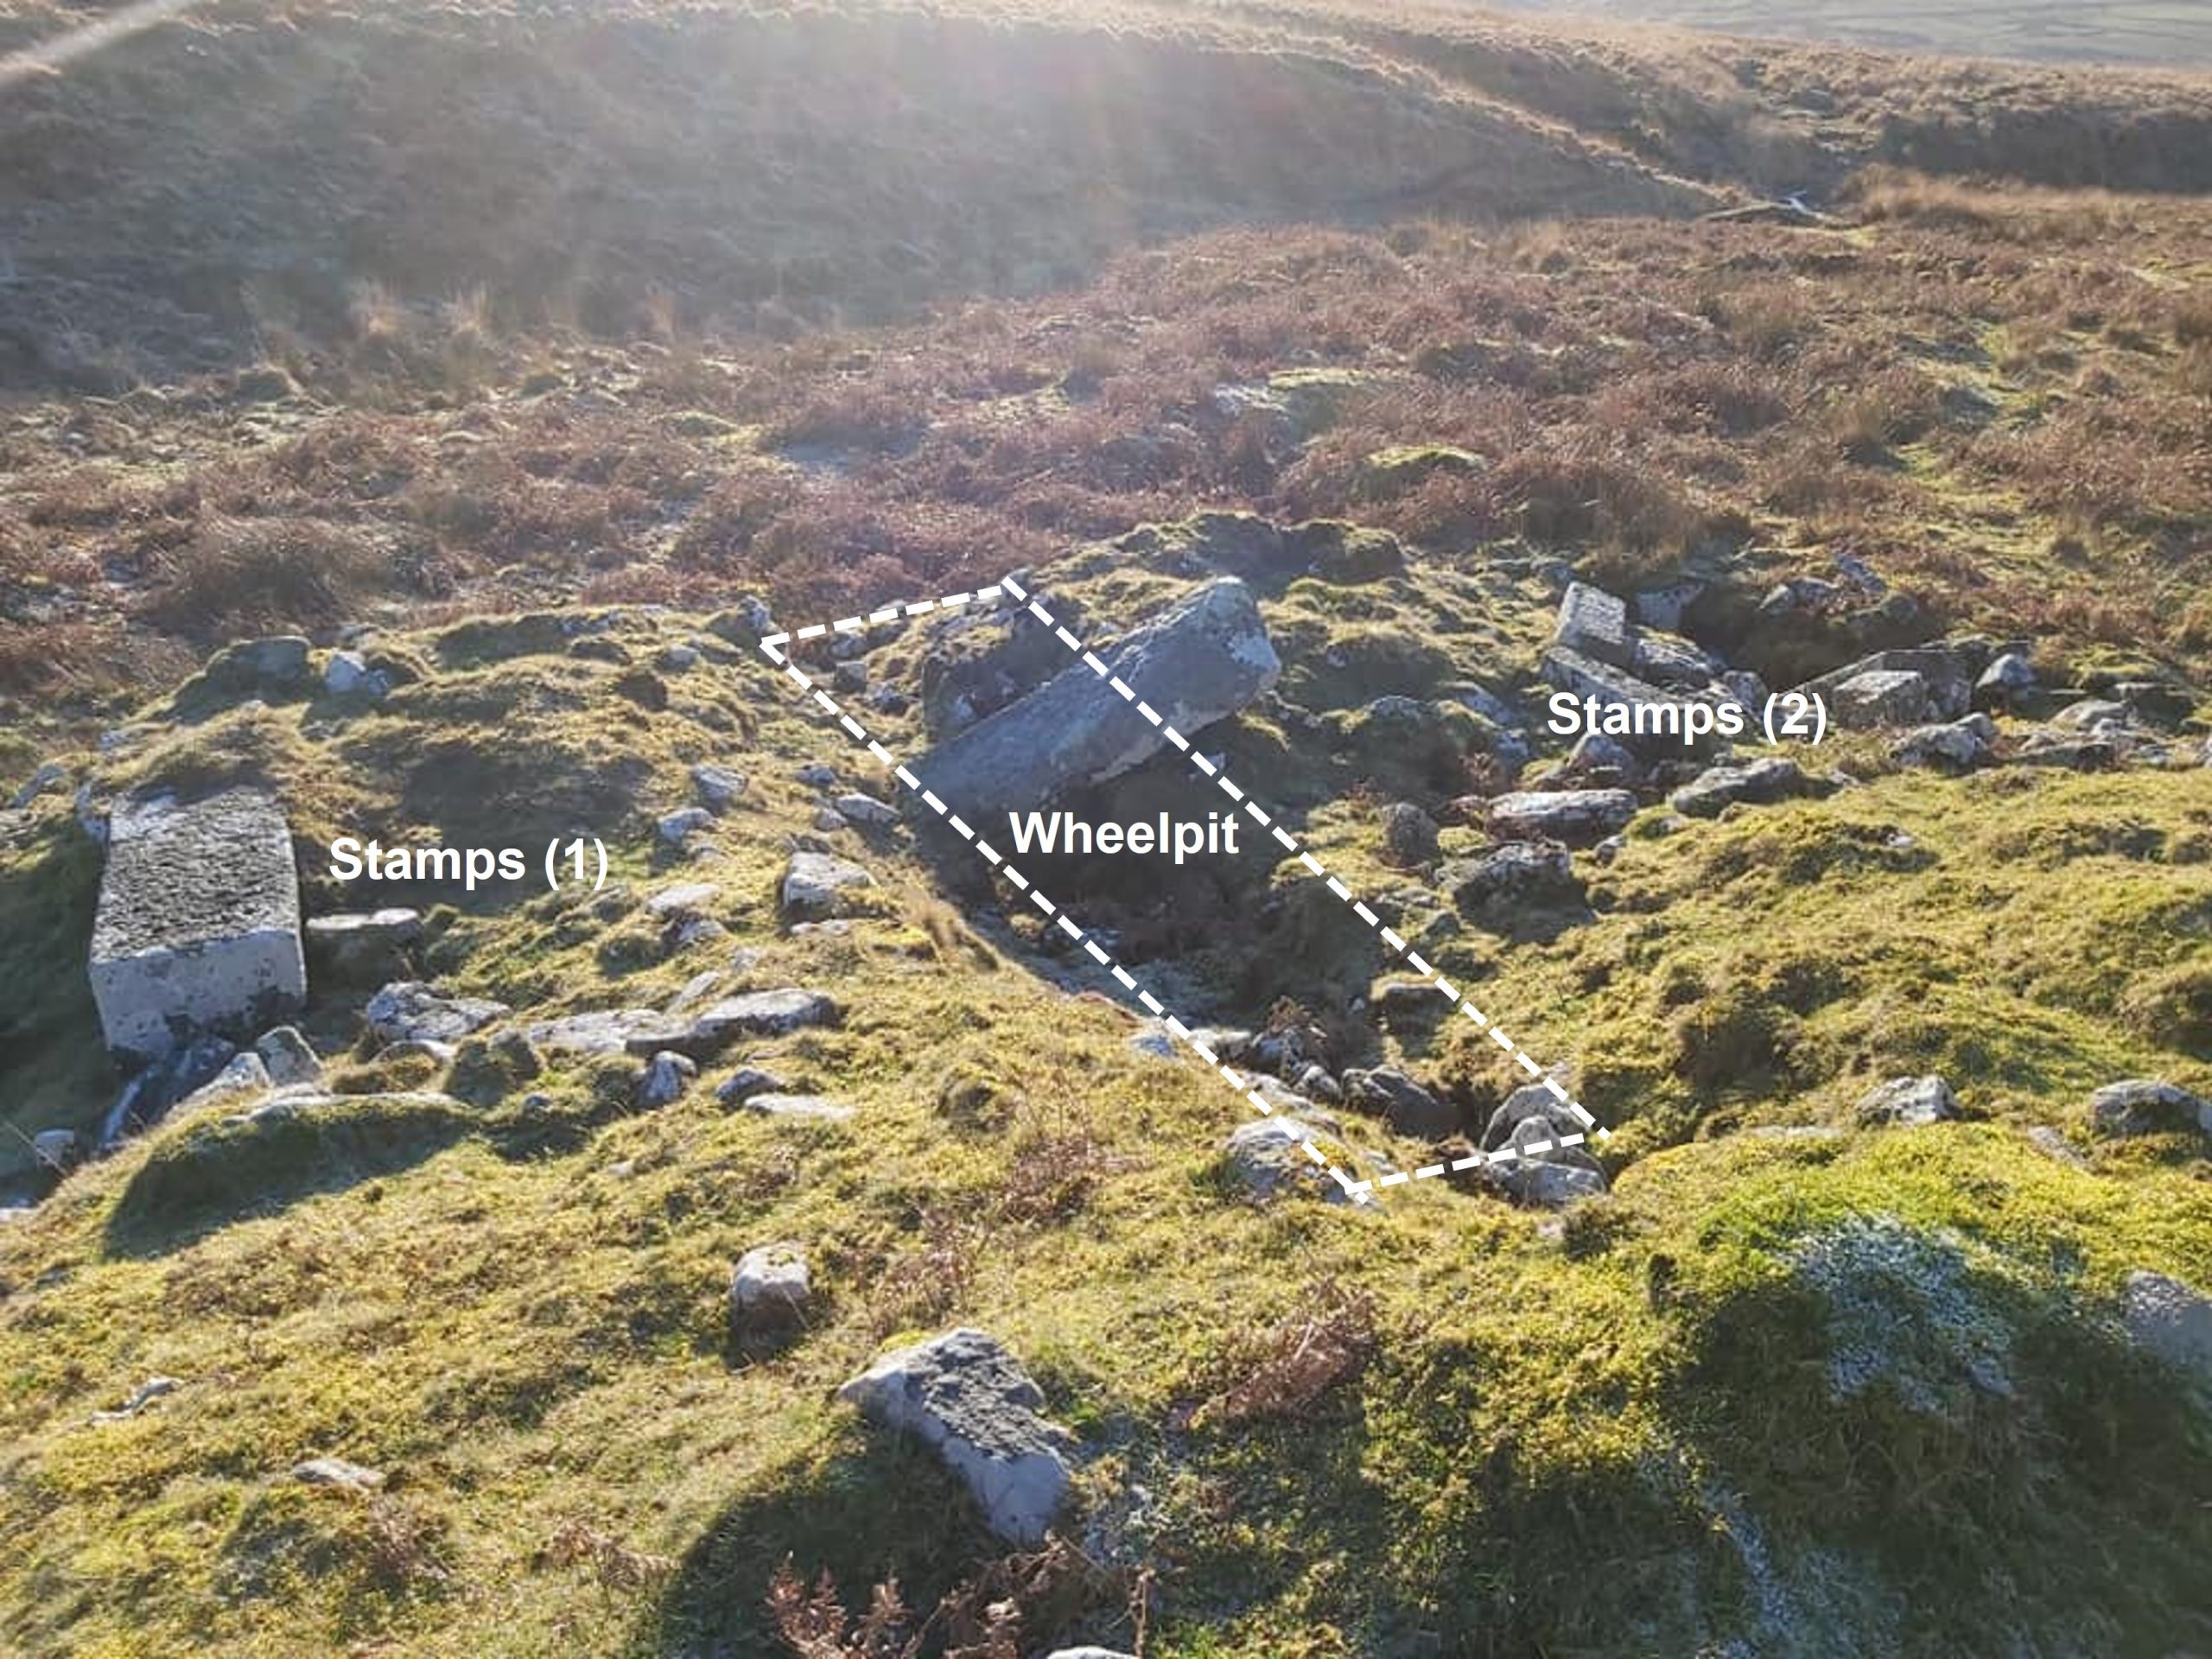
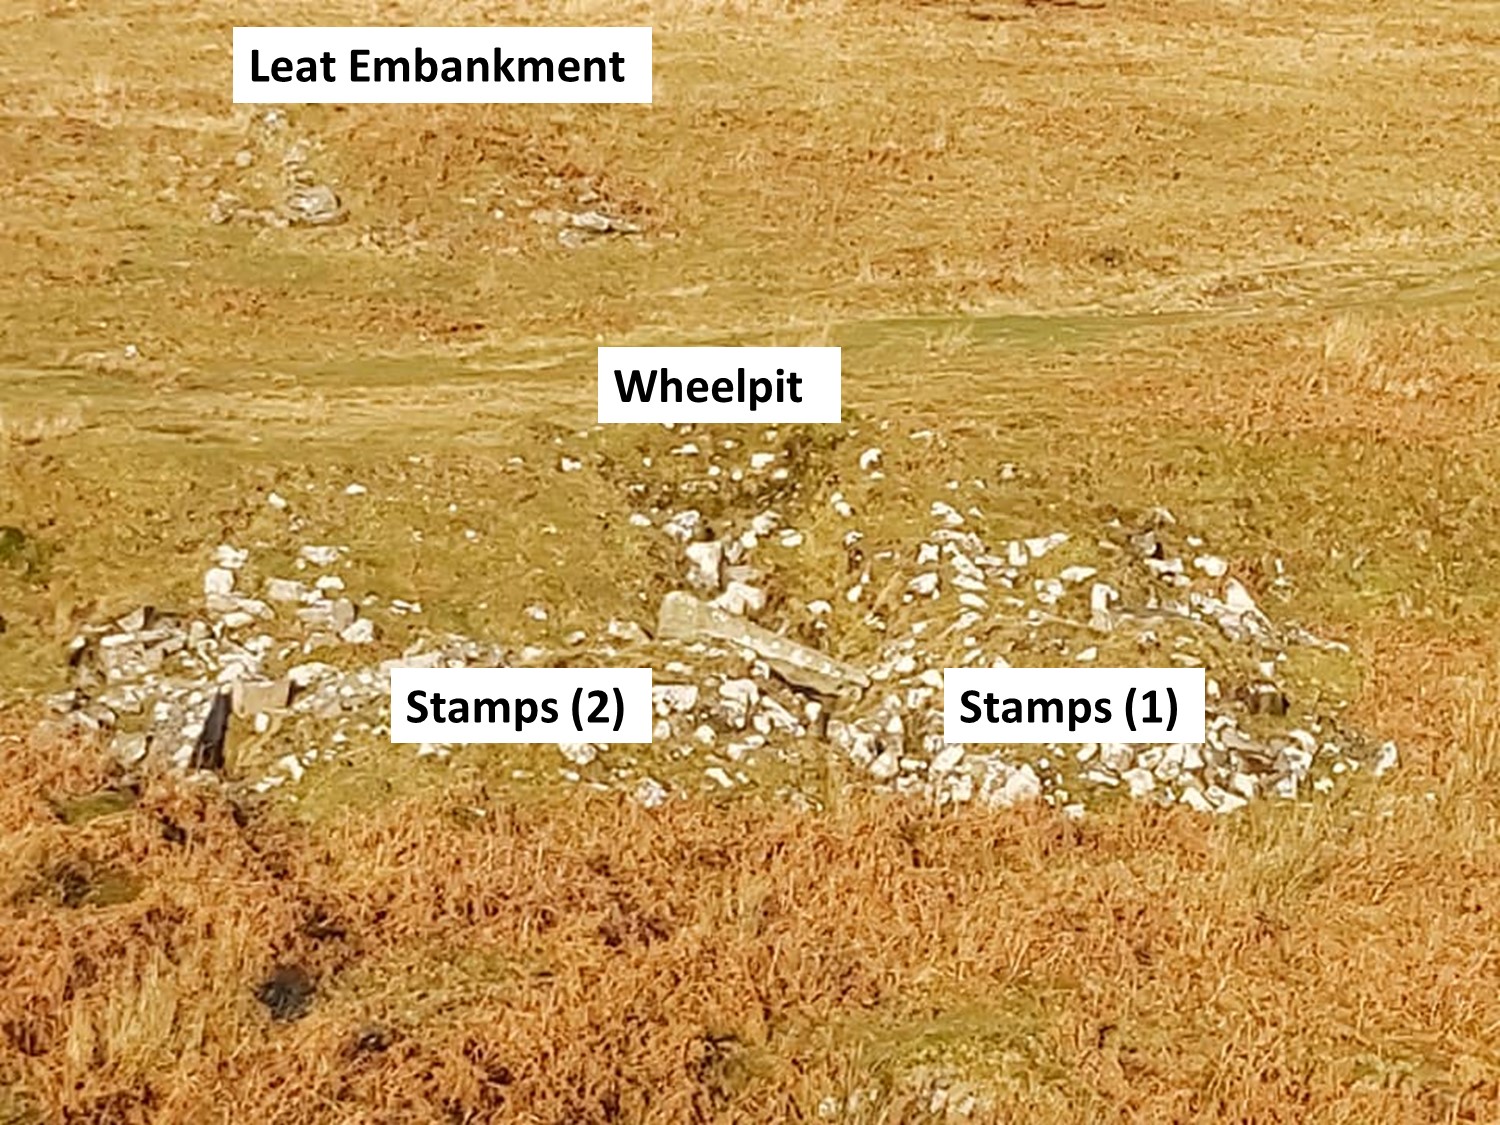
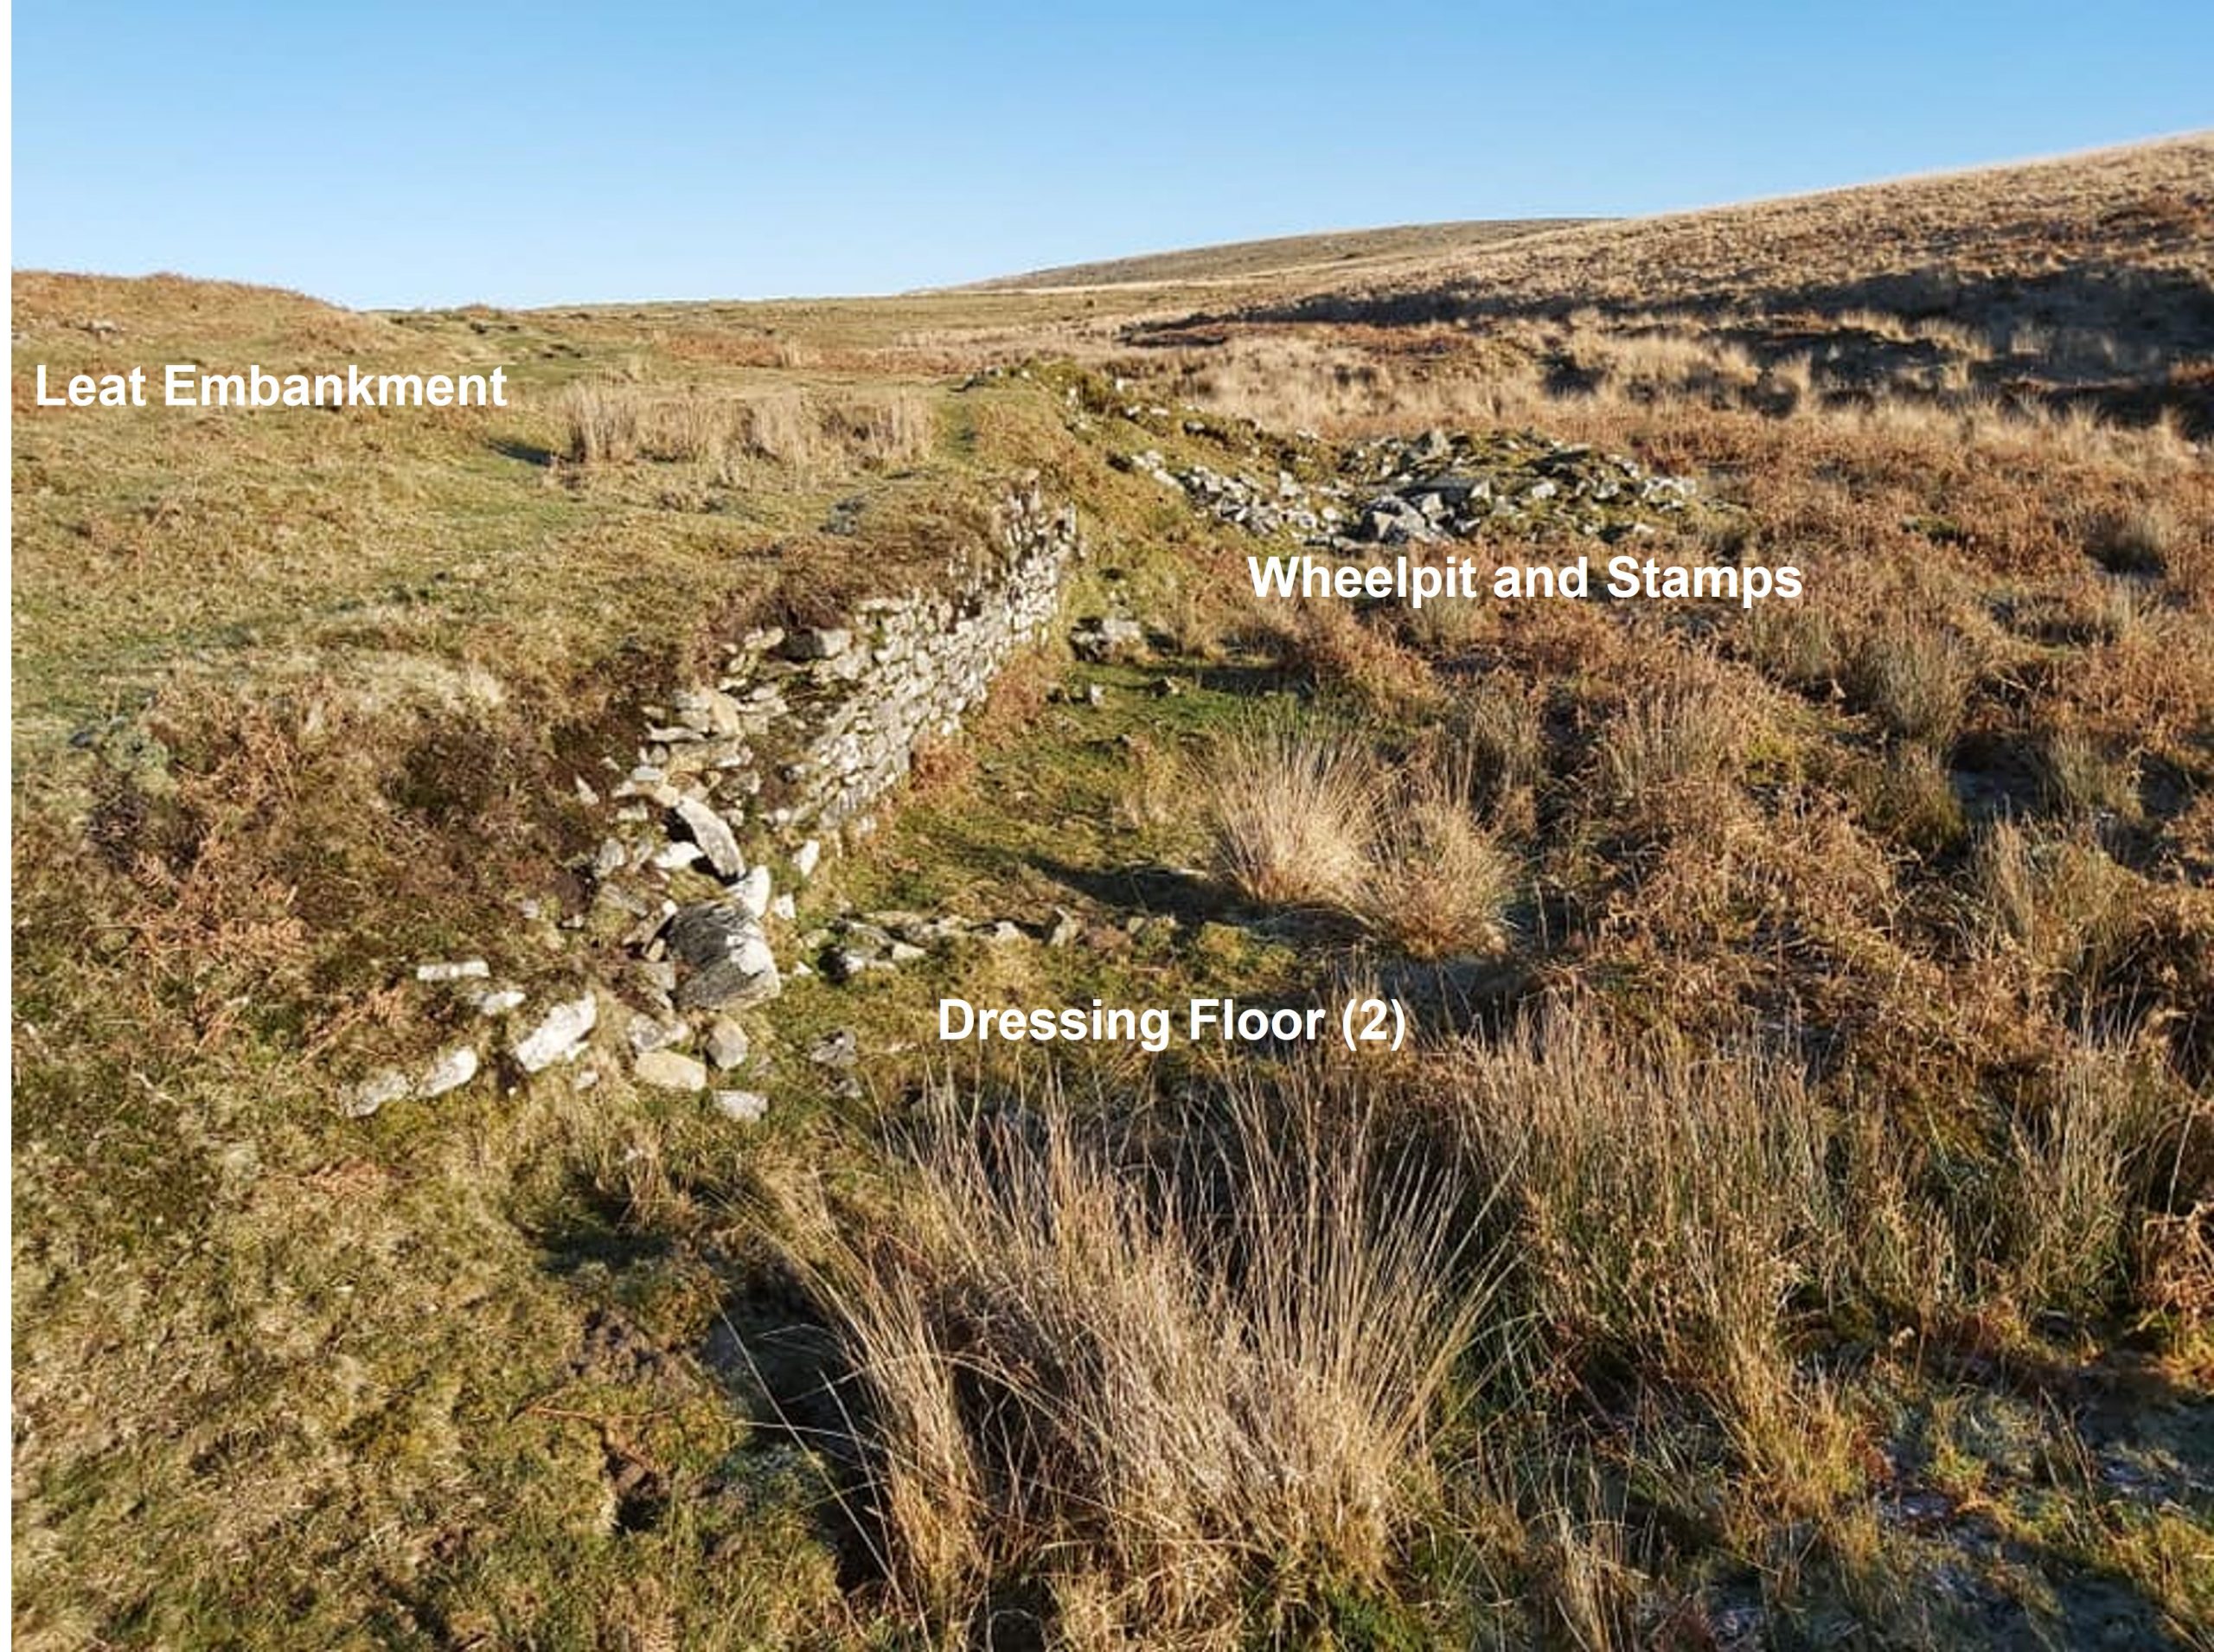
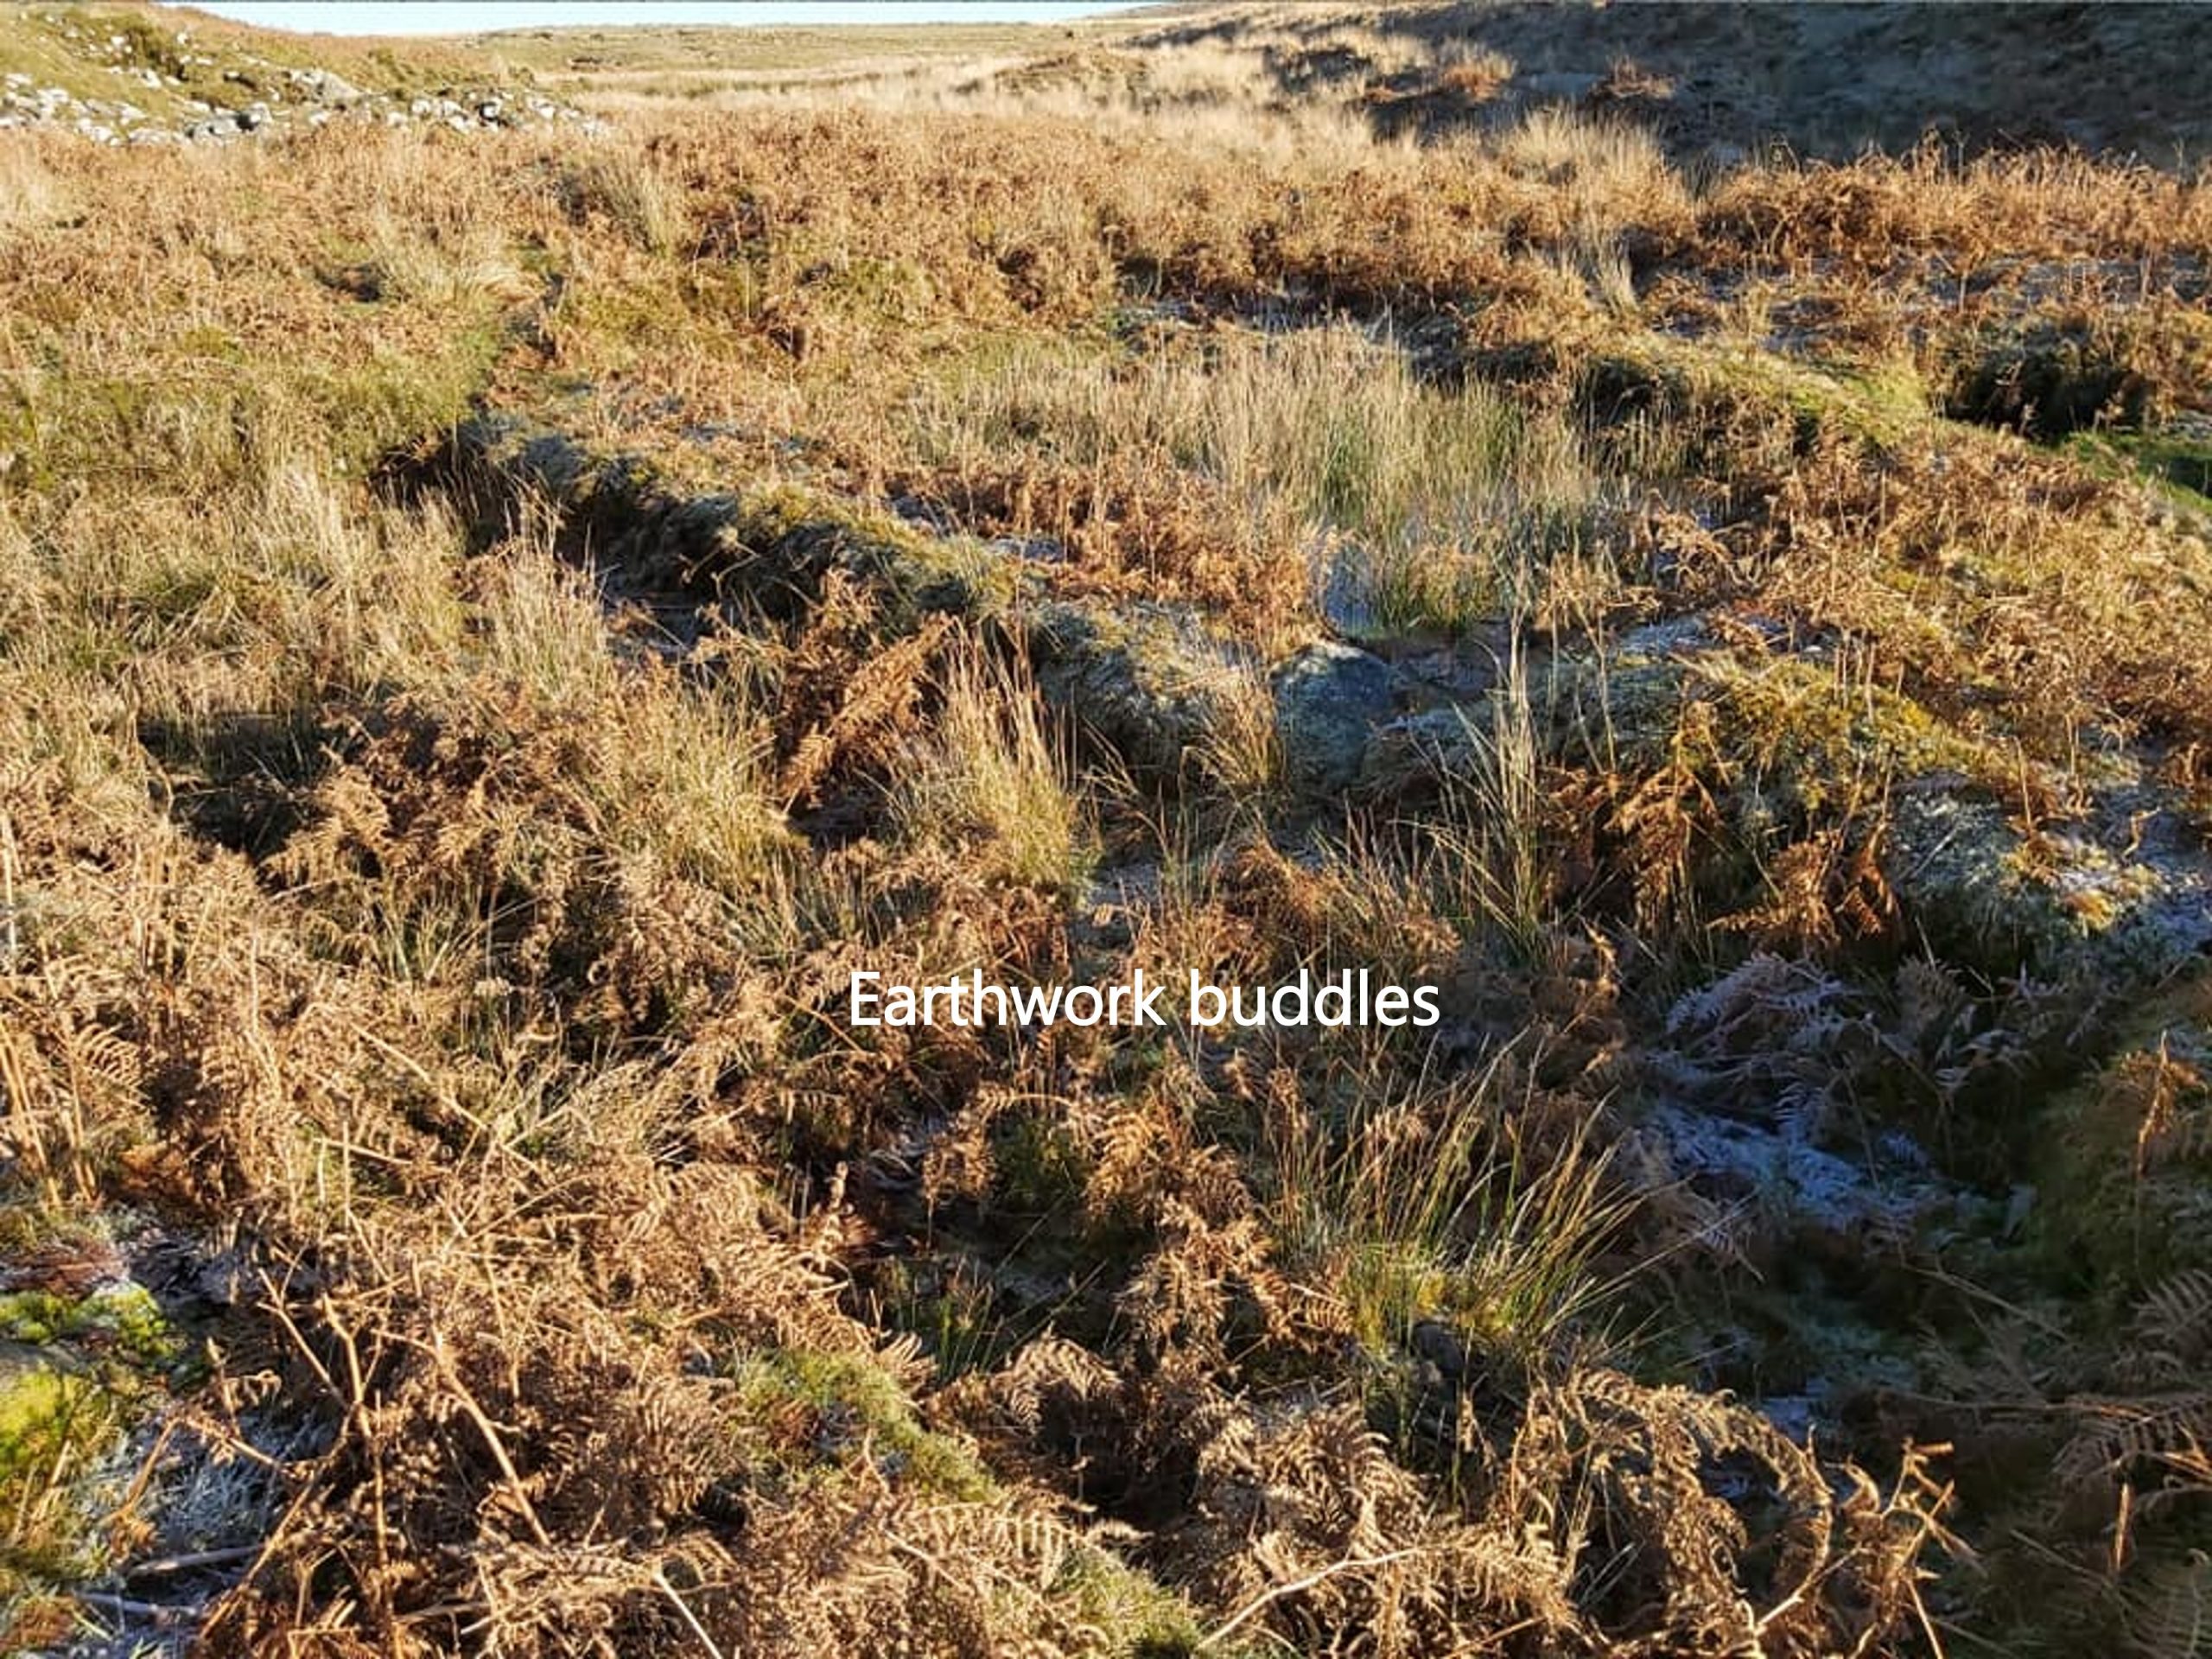
This sketch map shows the main key features associated with Eylesbarrow Mine and associated sett. This post covers all of these features, except Wheal Katherine, which is covered by a separate post which can be found here: https://dartmoorexplorations.co.uk/wheal-katherine/. The shaft numbering was devised by Dr Phil NewmanApproaching the tin mine from the west along the track from the car park below Gutter Tor. The track to the right (south) of the PCWW (Plymouth Corporation Water Works) 1917 upright leads to stamping mills 5 and 6. No 5 is also a Blowing Mill / Smelting House.This more detailed sketch map of the Eylesbarrow Tin Mine shows all the main shafts, wheelpits, flat rod locations, adits, mine buildings, tinners’ reservoirs and leats. Also shown are the locations of several pillow mounds, a mortarstone and a possible cist. All these features are recorded and shown in annotated photographs in this post. The author acknowledges the shaft numbering system was devised by Dr Phil Newman, for which is considered the defacto annotationAccess to the western shafts and adits is best achieved by using the tramway which leads off from the main Eylesbarrow track. Once the shafts get close, the ground leading to shaft 1 and the old tinners’ workings is very good.The tramway appears to be used by farmers ATV’s as the double groove in parts of it suggest. The author observed a farmer (with his dogs) on such a vehicle on the main track.A probable mortar stone can be found amid tin workings at the head of Deancombe Brook. It will have come from a stamping mill and is “out of place” as the nearest stamping mill is around 500m away to the south east. The four elliptical hollows represent wear relating to the mechanical ‘stamps’ associated with ore crushing.The mortar stone is approx. 1.8m long and can be found at SX59135 68192, which is approx 75m south east of Deep AditThe mortar stone was “found” on 21st March 2002 by Elisabeth Stanbrook, whilst on a walk led by Dr Tom Greeves as recorded in the Dartmoor Magazine (Issue 67, page 5). It was recorded on the Dartmoor HER by Dr Greeves as being 0.37 metres wide by 0.4 metres high and it is conjectured that it may relate to an early phase of tin working in the area, albeit there is no evidence of any building in the immediate vicinity.There are four adits are referred to at Eylesbarrow Tin Mine (ref: Phil Newman, (1999), Eylesbarrow (Ailsborough) Tin Mine). The four adits are named ‘Deacon’s’, ‘Deep’, ‘Two Brothers’ and ‘Shallow’. Deep Adit (shown in picture) is marked on modern OS maps.It is possible that ‘Deacon’s’ Adit and ‘Deep’ Adit are one of the same. ‘Deep’ Adit can be found at SX59136 68255. The area of the “outflow” from the Adit is quite marshy. Deep Adit is recorded from 1814 and throughout the documented history of the mine.The table shows details pertaining to 25 shafts at Eylesbarrow Tin Mine, which has been collated using information from the Dartmoor HER from records by S. Gerrard, 1990-2002, Monument Protection Programme. and P. Newman, 1999, Eylesbarrow (Ailsborough) Tin Mine. It is interesting to note that: a) 16 of the shafts also have names, b) 4 of the shafts had associated pumping systems, c) 6 of the shafts had whims and d) 2 shafts had balance bobs (located at the end of a flat rod line). Each of these shafts is recorded in this post showing key features.Shaft 1 is located at the eastern end of old tin stream workings. It is 4m deep (ref: Gerrard) with spoil to the west, forming a dump over 5 metres highShaft 1 is not named and is suggested (Ref: Newman) that it may have been an early shaft or possibly an air shaft.Shaft 2 lies on top of the bank above shaft 1 and the old tin streaming works. It is recorded as being circa 3.5 metres deep with many large boulders on its sides having a slight dump on southern side at 0.9 metres high.As with shaft 1, this shaft is possibly just a collapse of underground levels as a result of subsidence.Between shaft 2 and shaft 3 (deep adit) is what looks like a collapse. The author considered that this may have been shaft 2 at one stage but the description given by Gerrard suggested not. This hollow is not recorded in the Dartmoor HER.Shaft 3 is known as Deep Adit shaft and was adapted to a wheelpit from around 1847. The author has always known this pit as the ’50ft wheelpit’. In metric, the wheel was 15.34 metres diameter by 0.92 metres wide. The internal dimensions of the whole pit is 19.2 metres by 6 metres. The original shaft was sunk in 1815 and in circa 1825 / 1840s was marked on the map as ‘sunk 9fms’The wheel would have fitted into the southern half of the wheelpit. This would have left space to house the mechanism for the flatrods including a possible counterweight. The flatrods from this pit would have transmitted power all the way up this hill and the associated granite pillars can be followed to shafts 21 (Whitford / Henry’s Engine)* with a spur to shaft 25 (un-named), which seems to be an extraordinary distance. *The flat rods seem also to have extended beyond shaft 21, through a ‘flat rod tunnel’ to shaft 22 (Pryce Deacon)The original sinking of deep adit shaft was mentioned in 1815 around a year after the adit of the same name was recorded. The repurposed pit was known as Engine Wheelpit 2 and was completed by March 1849. In the base of the pit, on the northern side, is a drystone revetment measuring up to 2.5 metres high.These pair of rings are located above the to the east of Deep Adit shaft / wheelpit and were presumably part of the flatrod mechanism.The pair of rings can be found at SX59293 68205Two Brothers’ Adit was not mentioned on mine records until the 1840s. The entrance is marked on modern OS maps as a stream but is un-named.The entrance to Two Brothers Adit is at SX59299 68239 and is easily located by virtue of water coming out from it which creates an extensive marshy area on the slopes below. The entrance to Two Brothers Adit is variously recorded as being 1.3m or 1.5m high and 0.9m wide. The picture is the author coming out of the adit c1989/90.The entrance to Two Brothers adit from inside. Note the initial (granite blocks) low ceiling, which becomes quite high. About 5ft in the inner section from recollection. Inside Two Brothers Adit. The Dartmoor HER records that the adit is unblocked for 70metres. 30 years ago, the author explored for around half that distance and does not advocate going in these days.The trench outside the Two Brothers Adit entrance is up to 2.7 metres deep by 5 metres wide.Flatrod gully measuring around 3.5 metres wide by 1.5 metres deep at the western end near Deep Adit shaft / wheelpit (Engine Wheelpit 2). A short distance up the slope from the gully, the first ‘pairs’ of rough flat rod granite posts and slabs with semi-circular grooves cut into their tops. The semi-circular grooves held supports (iron bearings) upon which the flat-rods travelled transporting power from a waterwheel to pumps at the head of the shaft. This leat was the main supply of water which came from the River Plym (near Evil Combe)This part of the leat was constructed in 1847 to serve the Engine wheelpit 2. It was part of an extension of the original leat which served tinners’ mills 4, 5 and 6 only. The original leat (pre-extension) was probably constructed before 1814.Shaft 4 is also known as ‘Sutton’ and has a near vertical lower section as suggested by Gerrard a partial collapse of capping. The shaft also has an associated whim alongside.Horse whims were used for the raising and lowering materials at some shafts and comprised horizontal circular drums of timber rotating on a central pivot. The whim as shaft 4 does not have the remains of a central pivot. The whim is located at SX59320 68197There is a documentary reference of the ‘Sutton’ shaft dating from circa 1840.Fungi near to shaft 4 – SuttonThe spoil heap dump of shaft 5 (Henry’s) is flat topped and covered in grass, heather and bracken and is about 3.5 metres high.Shaft 5 is a very substantial pit measuring about 5 metres deepHenry’s shaft was mentioned in documents in the 1840s through to June 1849.Shaft 5 (Henry’s) has an associated horse whim with a central pivot stoneThe central whim pivot stone (also known as a melior stone) is located at SX59396 68187The whim platform is 8 metres in diameter and on its west side has a 1.2 metre wide / 0.3 metre high bank. Leading away from shaft 5 – Henry’s to the south west are the very visible remains of a tramway. It extends to the area of the stamping mills.Recorded by M.Fletcher, P.Newman, and S.Probert, (1999) in a report: Drizzlecombe, Eylesbarrow, Ditsworthy and Hartor areas in the Plym Valley, West Devon is the site of a possible cist. There is a a single upright slab 1.1m long x 0.2m wide x 0.3m high resembling a sidestone and another 1.4m long x 0.9m wide perhaps representing the coverstone. To the authors untrained eye, it does not look like a cist. It can be found at SX59402 68201Shaft 6 is also named Jenkins as named on maps from 1825 and into the 1840s.The pit at shaft 6 measures about 3 metres deep and has a large slab denoting the northern edge of the shaft.A tramway leads from shaft 6 and joins the tramway which leads from shaft 5, which as previously mentioned leads to the stamping millsView of the joint shaft 5 / shaft 6 tramway. A PCWW 1917 upright can be seen next to the tramway in the picture.Shaft 7 is also known as ‘New’ shaft and was mentioned in mine documents from 1814, so is one of the early shafts. Views to the south east show a pillow mound and the spoil dump from shaft 8.A circular pit of shaft 7 is very shallow and measures only about 2 metres deep. The spoil dump, however, is quite substantial There are a number of pillow mounds at Eylesbarrow Mine or in the immediate vicinity. Most of the mounds are of similar construction with stoney bases with turf infill and an earth upper layer. They have flat tops and squarish ends. The National Monument records state that this pillow mound is 19 metres long x 5.4 metres wide x 1.3 metres high.The pillow mound was recorded by the author at SX59541 68167This leat supplied additional water to Engine Wheel 2 and was taken from an area on the north side of the openworks near the main buildings at Eylesbarrow Tin Mine. This supplemental leat appears to have utilised hillside rainwater runoff and serves to demonstrate how much water this large ’50ft’ wheel must have required.Shaft 8 is about 6 metres deep and appears un-named.Dr P. Newman has recorded that shaft 8 is possibly may not a shaft at all and just represent the collapse of underground levels as a result of subsidence. There is a spoil heap here but it is very small by comparison to other shafts at only 4 metres wide and 0.8 metres high.Shaft 9 is named Whim or Whimb. The shaft has an associated horse whim and is adjacent to a tramway which leads to shaft 10. This shaft also appears to have sliced through a leat, which had to be recut to go around it.This shaft was mentioned as ‘Whimb’ shaft in the 1840s. Its associated spoil dump is flat-topped and approx. 3 metres high.Next to the whim at shaft 9 is a large boulder which has a drill mark, which was most likely to assist with the splitting of it.The whim at shaft 9 is located at SX59643 68153Tramway between shafts 8 and 9 through to shaft 10. The tramway comprises a 2 metre wide levelled area on a slight embankment in places.Shaft 10 appears un-named and is suggested may not even be a shaft, appearing to date from an earlier period of exploitation at the site. That said, why was a tramway built to it ?The pit of shaft 10 is up to 3 metres deep and there is a large slab lying in the base. Due to its elliptically shaped pit with a stony spoil heap this shaft has been suggested not to appear like most of the 19th century examples at Eylesbarrow mine.A short distance uphill from shaft 10 is a leat crossed by a small clapper. Although the leat would have taken water downhill (westwards) towards Engine Wheelpit 2 (the ’50ft’ wheel) its appear not to have been used to supply the waterwheel. The clapper can be found at SX59652 68250.The leat above shaft 10 is up to 1m wide in places and 0.6m deep. Its use is a mystery as it doesn’t appear to have an obvious destination. Could it have been used to direct water away from parts of the site ?Moving back to shafts 8 and 9 the leat which supplied rainwater to Engine Wheelpit 2 can be easily traced. Looking to the east some of the mine buildings can just about be discerned.The origins of this leat appears to come from near shaft 13. The leat also passes by shaft 11.Shaft 11 is recorded as being about 4 metres deep. Gerrard states: “In the base is a small rectangular sharp sided pit representing evidence of limited capping collapse”.Shaft 11 most probably pre-dates the flatrods from Engine Wheel 1, which was built in 1814. This is because the line of the rods have cut through the shaft’s spoil heap.Engine Wheelpit 1 is documented as having been constructed in 1814, some 35 years approx before Engine Wheelpit 2 (’50ft wheel’) in the adapted Deep Adit (shaft 3). The main structure is recorded as having has internal dimensions of 13.8 metres x 5.7metres. That said, it is stated by English Heritage (2013) that it is “….likely that the wheel was housed within an inner structure of less than 2 metres wide, but its outline is now obscured by collapsed masonry”. The first Engine Wheel was recorded in 1815 when Eylesbarrow Mine was opened with its installation being documented as being in 1814. To the south west of the wheelpit is a rectangular stone-lined pit 5.5 metres by 4.3 metres for the ‘Balance Bob’, which is atSX59519 68025. The Engine waterwheel is the first to be used in the mine and was used to power below-ground pumping equipment at the mine uphill via a flat rod system.The double line of flat rod support granite posts can be seen running up the hill from Engine Wheelpit 1It is recorded that the granite posts are spaced on average 0.4m apart and 5.5m and 7m between pairs. The two alignments of paired granite posts leading off to the east can easily be followed to a number of shafts. The flat rod system through its life is recorded as serving the ‘Old’ Engine Shaft (19), Henry’s Engine shaft (21), the ‘New’ Engine shaft (shaft 14) and possibly as far as Pryce Deacon’s shaft (22) up the hill. Note: Henry’s Engine shaft (21) and Pryce Deacon’s shaft (22) may also have latterly been also served by the single line of flat rods from the 1847 wheelpit adapted from Deep Adit (shaft 3)The flat rods system is very well described in the Dartmoor HER as “……consisting of rods of iron, joined together to extend between the waterwheel and the engine shafts. The rods were supported on upright pulley wheels with concave rims in which the rods could move. The axles of the pulley wheels rested between pairs of granite posts, which had semi-circular bearing slots with a diameter of 3.5cm cut into the uppermost surface”.Shaft 12 lies between the main track and an old field boundary. Gerrard records that this shaft may be in imminent danger of collapse and is about 3 metres deep at present.The dump associated with shaft 12 on the south east side appears to overlie the adjacent field boundary.Just to the south west of shaft 12 is a possible airshaft or a ground collapse. This is between shaft 12 and ‘shallow adit’The collapse is located at SX59665 68057. Gerrard observed that it may have been a former shaft (but not one of the 25 identified by Dr. Newman).Shallow Adit is marked as a spring on modern OS Maps. Shallow Adit is recorded as being “driven” in 1814 and the apparent frequency of references indicate it as one of the foremost adits at the mine at that time. The nearby shafts are numbers 8, 9, 11, 12 and 13.The opening of ‘Shallow Adit’ is now completely blocked. A stream issues from within the opening out into a boggy gully measuring about 5m wide. The water flows downhill into a very large tinners’ reservoir.The Tinners’ (Linear) reservoir at SX5966 6798 was used during the whole period of operation of the mine between 1814-1852. It is an earthwork construction and is the largest to be found on Dartmoor.The Tinners’ (Linear) reservoir has total length of 192m, with a (maximum) internal width of 13m and a depth of up to 2m as recorded by Newman, Probert and Fletcher.The south east end of the reservoir. The water for this reservoir came from a leat which can be traced across Thrushelcombe Plain before it contours around Higher Hartor Tor to its take off point above (north of) Evil Combe, near Wheal Katherine on the River Plym. The water would have been used for firstly Engine Wheelpit 1 (driving the flat rods), then it was recycled and used for each of the 6 stamping mills (plus smelting house) in turn further down the valley.The leat can be easily discerned snaking across Thrushelcombe Plain (upper reaches of the Drizzlecombe Brook)The leat channel is recorded as being 1.3 metres wide with a maximum depth of 0.6 metres with substantial downslope banks at certain points. Across the streamworks from the Tinners’ (Linear) Reservoir is a well-preserved pillow mound with similar construction to others found in the area with a stoney base with turf infill and an earthen upper layer. Like the others it has a flat top and squarish ends. It can be found at SX59888 67894. Mound measures 14.7m long, 4.9m wide and 1.0m high. This mound lies on level ground outside and adjacent to the tinners cliff marking the edge of the left bank streamworking on Drizzlecombe (Thruselcombe).The Pillow Mound is recorded as measuring 14.7m long, 4.9m wide and 1.0m high. To the east of the main track and an old field boundary lies a series of pits, the lower end of which is located a possible adit. The possible adit is now dry and comprises a linear hollow (up to 1.6 metres deep and 3 metres wide). The upper end of the hollow is located at SX59816 68028Shaft 13 lies close (just to the south west) to the main mine buildings and is about 4 metres deep. Its associated dump is up to 2.5 metres high and lies mainly on the west.Shaft 13 was also known as ‘Hawk’s’ shaft being mentioned when it was sunk in 1814 then again in 1825 and into the 1840s. It lies at the end of the north-east / south-west line of shafts 14-24. At shaft 13 the orientation through to shaft 1 appear to change direction to a more east / west line.The line of granite pillars for the flat rods to the east of shaft 13, close to the mine buildings.The western end of the mine buildings with a pair of flat rod granite pillars in the foreground.The Eylesbarrow Tin Mine Buildings and their locations. Pair of granite posts beyond which lies the ruins of the Account House, which sometimes is referred to as Ellisborough HouseThe account house is believed to have been altered some time after 1823 and the ruins we see today reflect that.Referred to as Ellisborough House on the Sheepstor Tithe map of 1843, the account house is the most substantial ruin at the mine. The dressed granite walls measures 19.3m by 9.1m and are up to 2m high. The walls were originally rendered and this still survives in a few isolated places.In the late 1830s / early 1840s, the area around the account house / Ellisborough house complex was enclosed to create several fields and a garden. This is reflected in modern OS and the array of walls makes initial understanding of the site a bit more difficult.The Account house is also referred to as the Counting house or Mansion house. It is said to have had at least seven rooms built over more than one phase.The fields around the Account house are recorded on the Tithe Apportionment. These include arable and pasture and it is conjectured that this may represent some small-scale farming by captains and workers at the mine.The Account House / Ellisborough House has several room partitions and two visible entrances. The entrance in the picture is located close to the Barracks ruins.The Barracks were probably constructed mainly from timber. As there is little fallen stone it suggests that the remaining walls represent the total of the stone structure. The author had lunch in the ruins and found it very atmospheric.The Barracks survive today as revetted stone wall foundations sunk into the base of an old tinwork to a depth of between 1m and 1.5m. As the name suggests the building would have provided accommodation for miners.The Sample house building adjoins the Barracks to the east.The Sample house was a rectangular building with drystone revetments on the north and south sides which stand up to 1m high. One of two Powder Houses can be found to the east of the Sample house. The Powder house is a structure recorded a being 1.6 m x 1.5 m with walls being 0.5 m wide x 0.5 m high. The location of this Powder house is unusual insofar as it was located quite close to other buildings.Shaft 14 was known as ‘Barrack’ and ‘New Engine’ shaft. It lies at the end of one line of flat rods from Engine Wheelpit 1 and there is evidence for a bob pit. Thus it was pumping shaft.The first mention of ‘Barrack’ shaft was in 1814. It was further mentioned in 1825 and into the 1840s. However, the shaft appears to have been referred to as ‘New Engine’ shaft between 1847 and 1851. The reason for the change of name is unknown to the author.Shaft 14 (Barrack / New Engine) has a surviving “masonry collar”. Shaft 14 is sited in an area which was initially exploited by streamwork and openwork. The pit is one of the deepest at approximately 8 metres, hence it is fenced off.After shaft 14 (on east side), the evidence of the flat rod system (ie pairs of granite pillars) continues. The “dual” flat rods below shaft 14 (on west side) become a “single” flatrod system at this point.Shaft 15 was known as ‘Old Ladder’ around 1814-1815 but became ‘Old Ladderway’ from 1825 onwards.Although the shaft only survives as a 2.4 metre deep pit there is a rectangular sharp sided hollow in the centre, which is obscured by reeds.The Blacksmith’s Shop lies nest to the track leading to Wheal Katherine. It consists of three conjoined rectangular structures, all of which are now in a ruined condition.Blacksmith’s Shop is 20m x 4.2m with the the central section being open fronted.Sandy Gerrard records the Blacksmith’s shop appears to have been extended in an easterly direction with each subsequent addition getting larger from 3 metres wide to 4.1 metres wide and finally 5 metres wide.The holed stone can be found near the central section of Blacksmith’s Shop, one of many.Timber house was probably a wooden construction and has dimensions of 14.1m x 6.4m. It is located to the south of the Blacksmith’s shop.Another view of the timber house. There are traces of a stone lined trench which is likely to have been a saw pit.Only stone foundations survive today at the Timber house, which re-enforces the evidence that the original construction was probably wooden.This building is known as the turf house and would have been used to store peat. It is located to the west of the Timber house and to the south of the Account house. The internal dimensions of the Turf house have been recorded as 14.5m x 6.4m and there is one internal partition. This building is butted by all the field boundaries leading from it.The second Powder house at Eylesbarrow mine appear to be more sensibly located away from other buildings. The building is 3 m x 2m It has mortared walls are 0.5 m thick and stand 0.5 m high. The Powder house may have been built over the existing field boundary.To the south of the (southern) Powder House on a wall corner, there is the remains of a structure approx 2m x 2m. The mystery structure doesn’t appear to have any solid foundations here, so the author speculates that it may have been used as a temporary animal enclosure / pen (for a single animal) at one point ? It is located at SX59826 68063This tinners’ reservoir lies to the south of the Turf house and Powder house. It has a dam which is a 5 metre wide bank standing up to 0.9 metres high. It can be found at SX59895 68062The reservoir is curvilinear and has a small leat leading from it towards the nearby stream work and it is probable that the water was used for this purpose and pre-dates the 1814-1852 mine.A short distance to the east of the previously recorded tinners’ reservoir is another reservoir with this pillow mound, which like the others in the area has a stoney base with turf infill and an earthen upper layer. It has a flat top and square ends. This pillow mound has unusually been built within a disused tinners reservoir and is located at SX59960 68069The second curvilinear reservoir in the area “wraps” itself around a pillow mound. It has a concave dam up to 7.8 metres wide and 0.8 metres high. The water was most likely used to serve the streamwork to the south.The pillow mound which is within the tinners’ reservoir is recorded as measuring 12.5m long, 4.8m wide and 1.2m high. There are drainage ditches around the mound.A third tinners’ reservoir a short distance to the south east from the two curvilinear reservoirs can be found at SX59991 68007. The dam is a 5 metre wide bank standing up to 0.9 metres high. There are several stones on the dam and appear to have been set on their edgesTo the east of the Blacksmith’s shop and to the north east of the two curvilinear tinners’ reservoirs is another very well defined pillow mound. It is within a few 10s of metres from the Eylesbarrow to Wheal Katherine track.The pillow mound is located at SX59964 68153. The mound measures 13.6m long, 5.7m wide and 1.1m high. As with the other mounds in the area, this one has a stoney base with turf infill and an earthen upper layer. It has a flat top and square ends. To the east of the three previous tinners’ reservoirs and to the south of the Eylesbarrow / Wheal Katherine track is yet another reservoir. Gerrard records that this reservoir has a rectangular shaped dam measuring 11 m long by 4.5 m wide denoted by a bank standing up to 3.5 m wide and 0.8 m high.This tinners’ reservoir is centred around SX60146 68088The single line of flat rod granite pillars continue past shaft 15 in an easterly direction to the terminal point at shafts 21 (‘Whitford’, ‘Widford’ and ‘Henry’s Engine’) where there was a balance bob and shaft 22 (Pryce Deacon)The pit today at shaft 16 (Philips, Philip or Phelps) is around 4 metres deep and cuts into an earlier openwork which is about 2 metres deep. It is very close to the main track.Shaft 16 was also known as ‘Philips’, ‘Philp’ and ‘Phelps’ and was first mentioned in 1814 (followed by 1825 and into the 1840s). On the north side of shaft 16 (Philips, Philp or Phelps) is a almost level part circular area nearly 12 metres in diameter. This is a horse whim-plat, which is bordered by a low bank. It was used to effect the raising and lowering of materials into the shaft. There is no sign or evidence of a centrally placed bearing-stone here though. It can be found at SX59975 68242Shaft 17 (also known as ‘Footway’) lies next to the track which leads to Nun’s Cross. It is now a very steep sided pit measuring about 7 metres deep, with a sharp sided rectangular hollow in its base.The spoil dump lies some distance away to the south and is about 5 metres high. On closer inspection on the southern side of the pit is a and is ‘cut’ or flat rod trench which measures 1 metre wide x 1.4 metres deep. This trench can be made out in the photographs. Shaft 17 ‘Footway’ was mentioned in 1814 when it was “collared” and cleared and a new ladder was put in (ref: Newman).Shaft 18 is un-named and is in an area of earlier activity where deposits were initially exploited by openwork methods. It is close to shafts 17 and 19 being near the track which leads to Nun’s Cross. All that remains today is a 3 metre deep steep sided pit.Shaft 19 (also known as ‘Engine’ shaft) lies just a few metres along the track from shaft 17 (Footway) and is in an area of earlier ‘openwork’ activityThe pit of shaft 19 is 7 metres deep and has a few loose stones lying in the base. This shaft was served by the single line of flat rods from Engine Wheelpit 1 and was mentioned in mine documentation throughout the life of the mine from 1814 until 1852.Some observers think this may only have been an air shaft. It is un-named and the pit is about 4 metres deep. Shaft 21 was during the life of the mine been known variously as ‘Whitford’, ‘Widford’ and ‘Henry’s Engine’. It is located in an area of earlier activity where deposits were initially exploited by openwork methods.Shaft 21 has an associated bob pit where flat rods terminated. Unlike other shafts vegetation hasn’t entirely taken hold throughout the pit. The shaft also has an associated horse whimThe shaft pit is about 8 metres deep. The spoil dump is about 5 metres high.At the south-west corner of shaft 21 is a rectangular open sided structure which is believed to be where there was a balance bob, which was associated with the flat rod system. The structure measures 3.8 metres long by 1.8 metres wide and has a drystone revetment standing up to 2.2 metres high.Shaft 21 whim has been formed by levelling of the spoil dump. There is a rectangular hollow at the centre of the whim which is recorded by Gerrard as being: “2 metre long, 1.5 metre wide and 0.5 metre deep steep sided……..orientated east to west. Leading from this at 340 degrees is a narrow 0.7 metre wide and 0.4 metre deep hollow”. The whim platform lies south of Shaft 21 and is at SX60142 68312There is a rather splendid ‘flat rod tunnel’ to the east of shaft 21, which unusually does not appear in the Dartmoor Historic Environment Record (HER). This feature, is however recorded in Newman, P., 1999, Eylesbarrow (Ailsborough) Tin Mine – Proc Devon Archaeol Soc 57 1999 on page 124. It does look like it was originally a flat rod channel cut through an existing spoil tip before being ‘topped’ with granite and covered over.The ‘flat rod tunnel’ is located at SX60154 68328 is the evidence that flat rods extended to the east of shaft to shaft 22 (Pryce Deacon)The least discernible of all the pillow mounds in the area is located at SX60198 68266. Recorded by Sandy Gerrard as 10.3 metres long by 4.2 metres wide by 0.8 metres high.Evidence of a section of a tramway leading to shaft 22 (Pryce Deacon)Shaft 22 was also known as ‘Pryce Deacon’s’ shaft or simply ‘Deacon’s’. It was mentioned in mine documents from May 1838 until October 1847. There are two whims associated with this shaft.Two whim platforms located at the ‘Pryce Deacon Shaft’ are to the north and south sides and it is suggested that they may have been manpowered capstans (like on an old sail boat).It is probable that the flat rods extended from shaft 21 to this shaft as there are remains of a balance bob here. Shaft 21 ( ‘Whitford Shaft’), was renamed ‘Henry’s Engine’ after conversion from mining to pumping. The pit that remains at shaft 22 is about 3 metres deep.The whim platform on the south side of the shaft has been formed on top of a spoil dump, with a surrounding drystone wall in places measuring 1.2 metres wide and up to 1.1 metres high. The whim is at SX60251 68337The whim platform on the north side of the shaft has an associated whim or melior stone (like shaft 5). There would have been a horizontal circular drum of timber rotating on this central pivot. The melior stone is 0.7 metres long by 0.6 metres wide and the hole is 9 centimetres in diameter and 8 centimetres deep. The whim is located at SX60242 68355The whim is located at SX60251 68337Shaft 23 is also known as ‘Midsummer’, mentioned in mine documents in the 1840s. The pit apparently measures about 6 metres deep, but as can be seen from the photograph is prone to flooding.Shaft 23 lies where there is plenty of evidence of former open works. Its associated spoil dump is up 1.5 metres highShaft 24 has the delightful alternate name of ‘Michaelmas’ and like ‘Midsummer’ was mentioned in mine documents of 1840s.The Dartmoor HER suggests that this shaft may have an associated whim but doesn’t record its location and which the author failed to locate. Like shaft 23, this shaft has a pit measuring about 6 metres deep and an associated spoil dump up 1.5 metres high. This shaft represents the most easterly point of this post. That said the Eylesbarrow sett did extend eastwards at Wheal Katherine.Beside a track which leads northwards from shaft 20 (between shafts 21 and 22) is a well defined tinners’ reservoir. The tinners’ reservoir has a lovely concave shaped dam on its east side which measures up to 4.6 metres wide and 1 metre high. The centre of the reservoir was recorded at SX60203 68415.To the north west of shaft 18 in an area of tussocky grass, a line of ‘pairs’ of granite pillars which support a flat rod system which started at Engine Wheelpit 2 (’50ft wheelpit’) can be found.
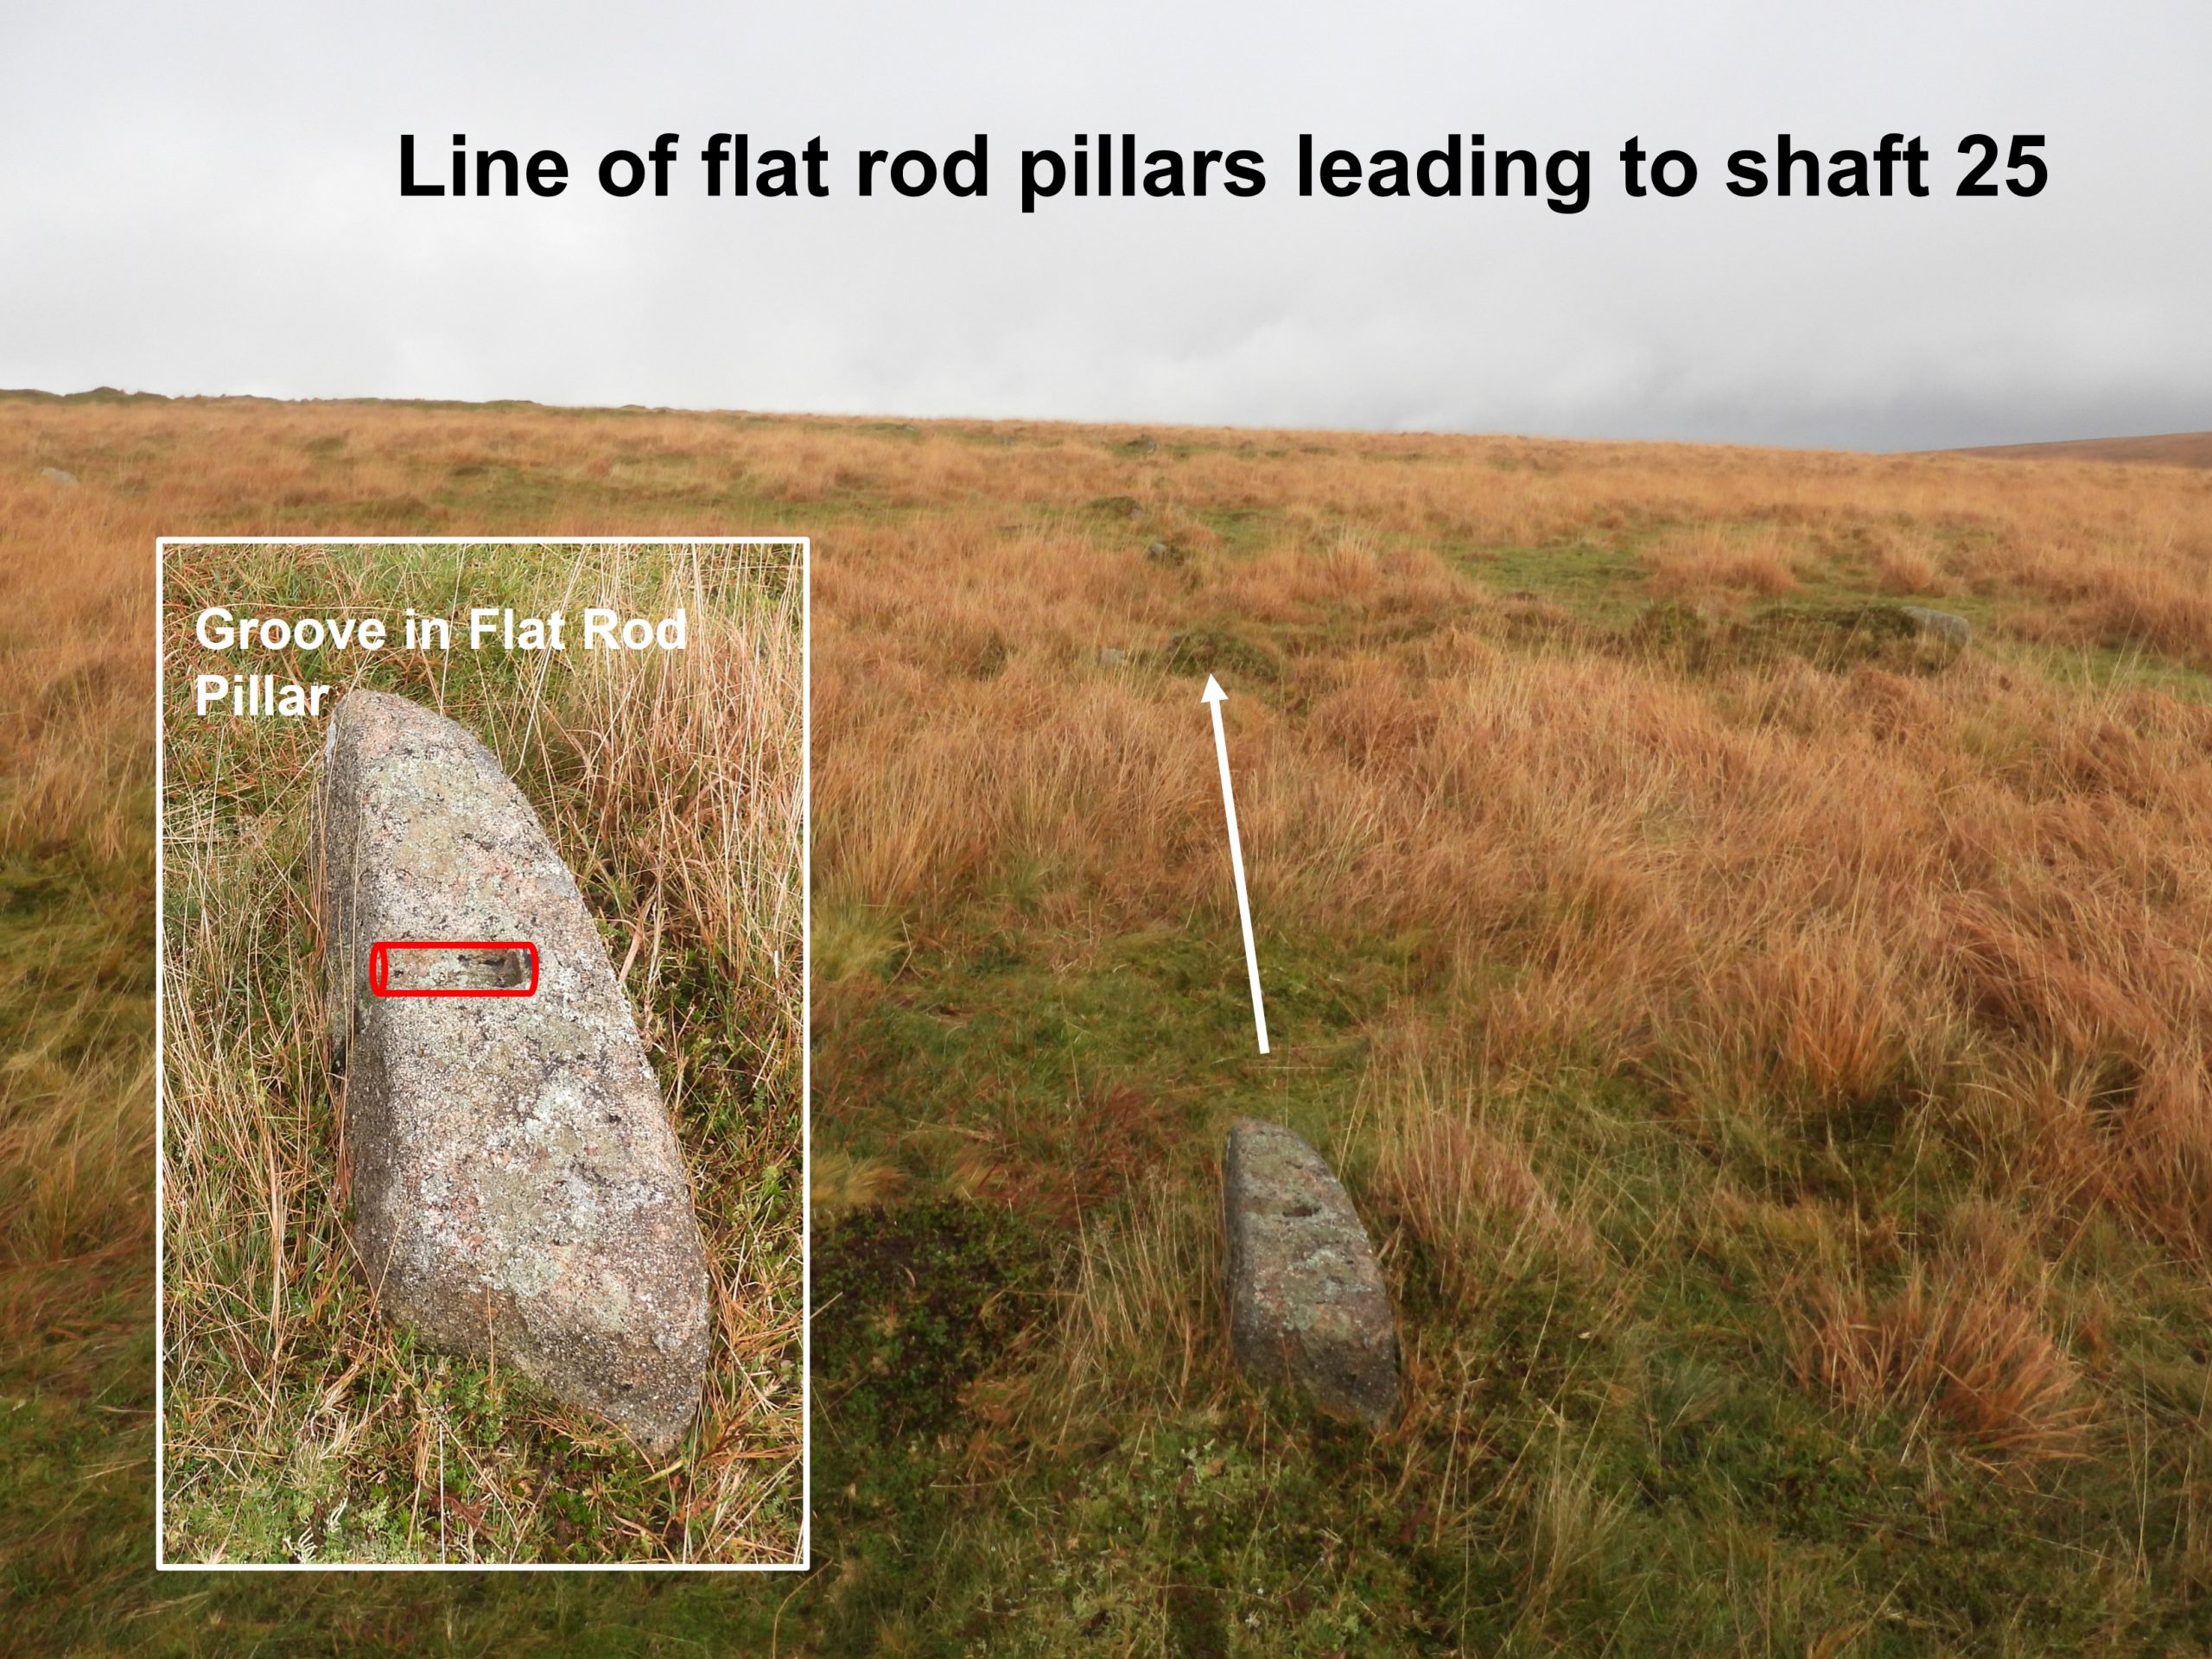
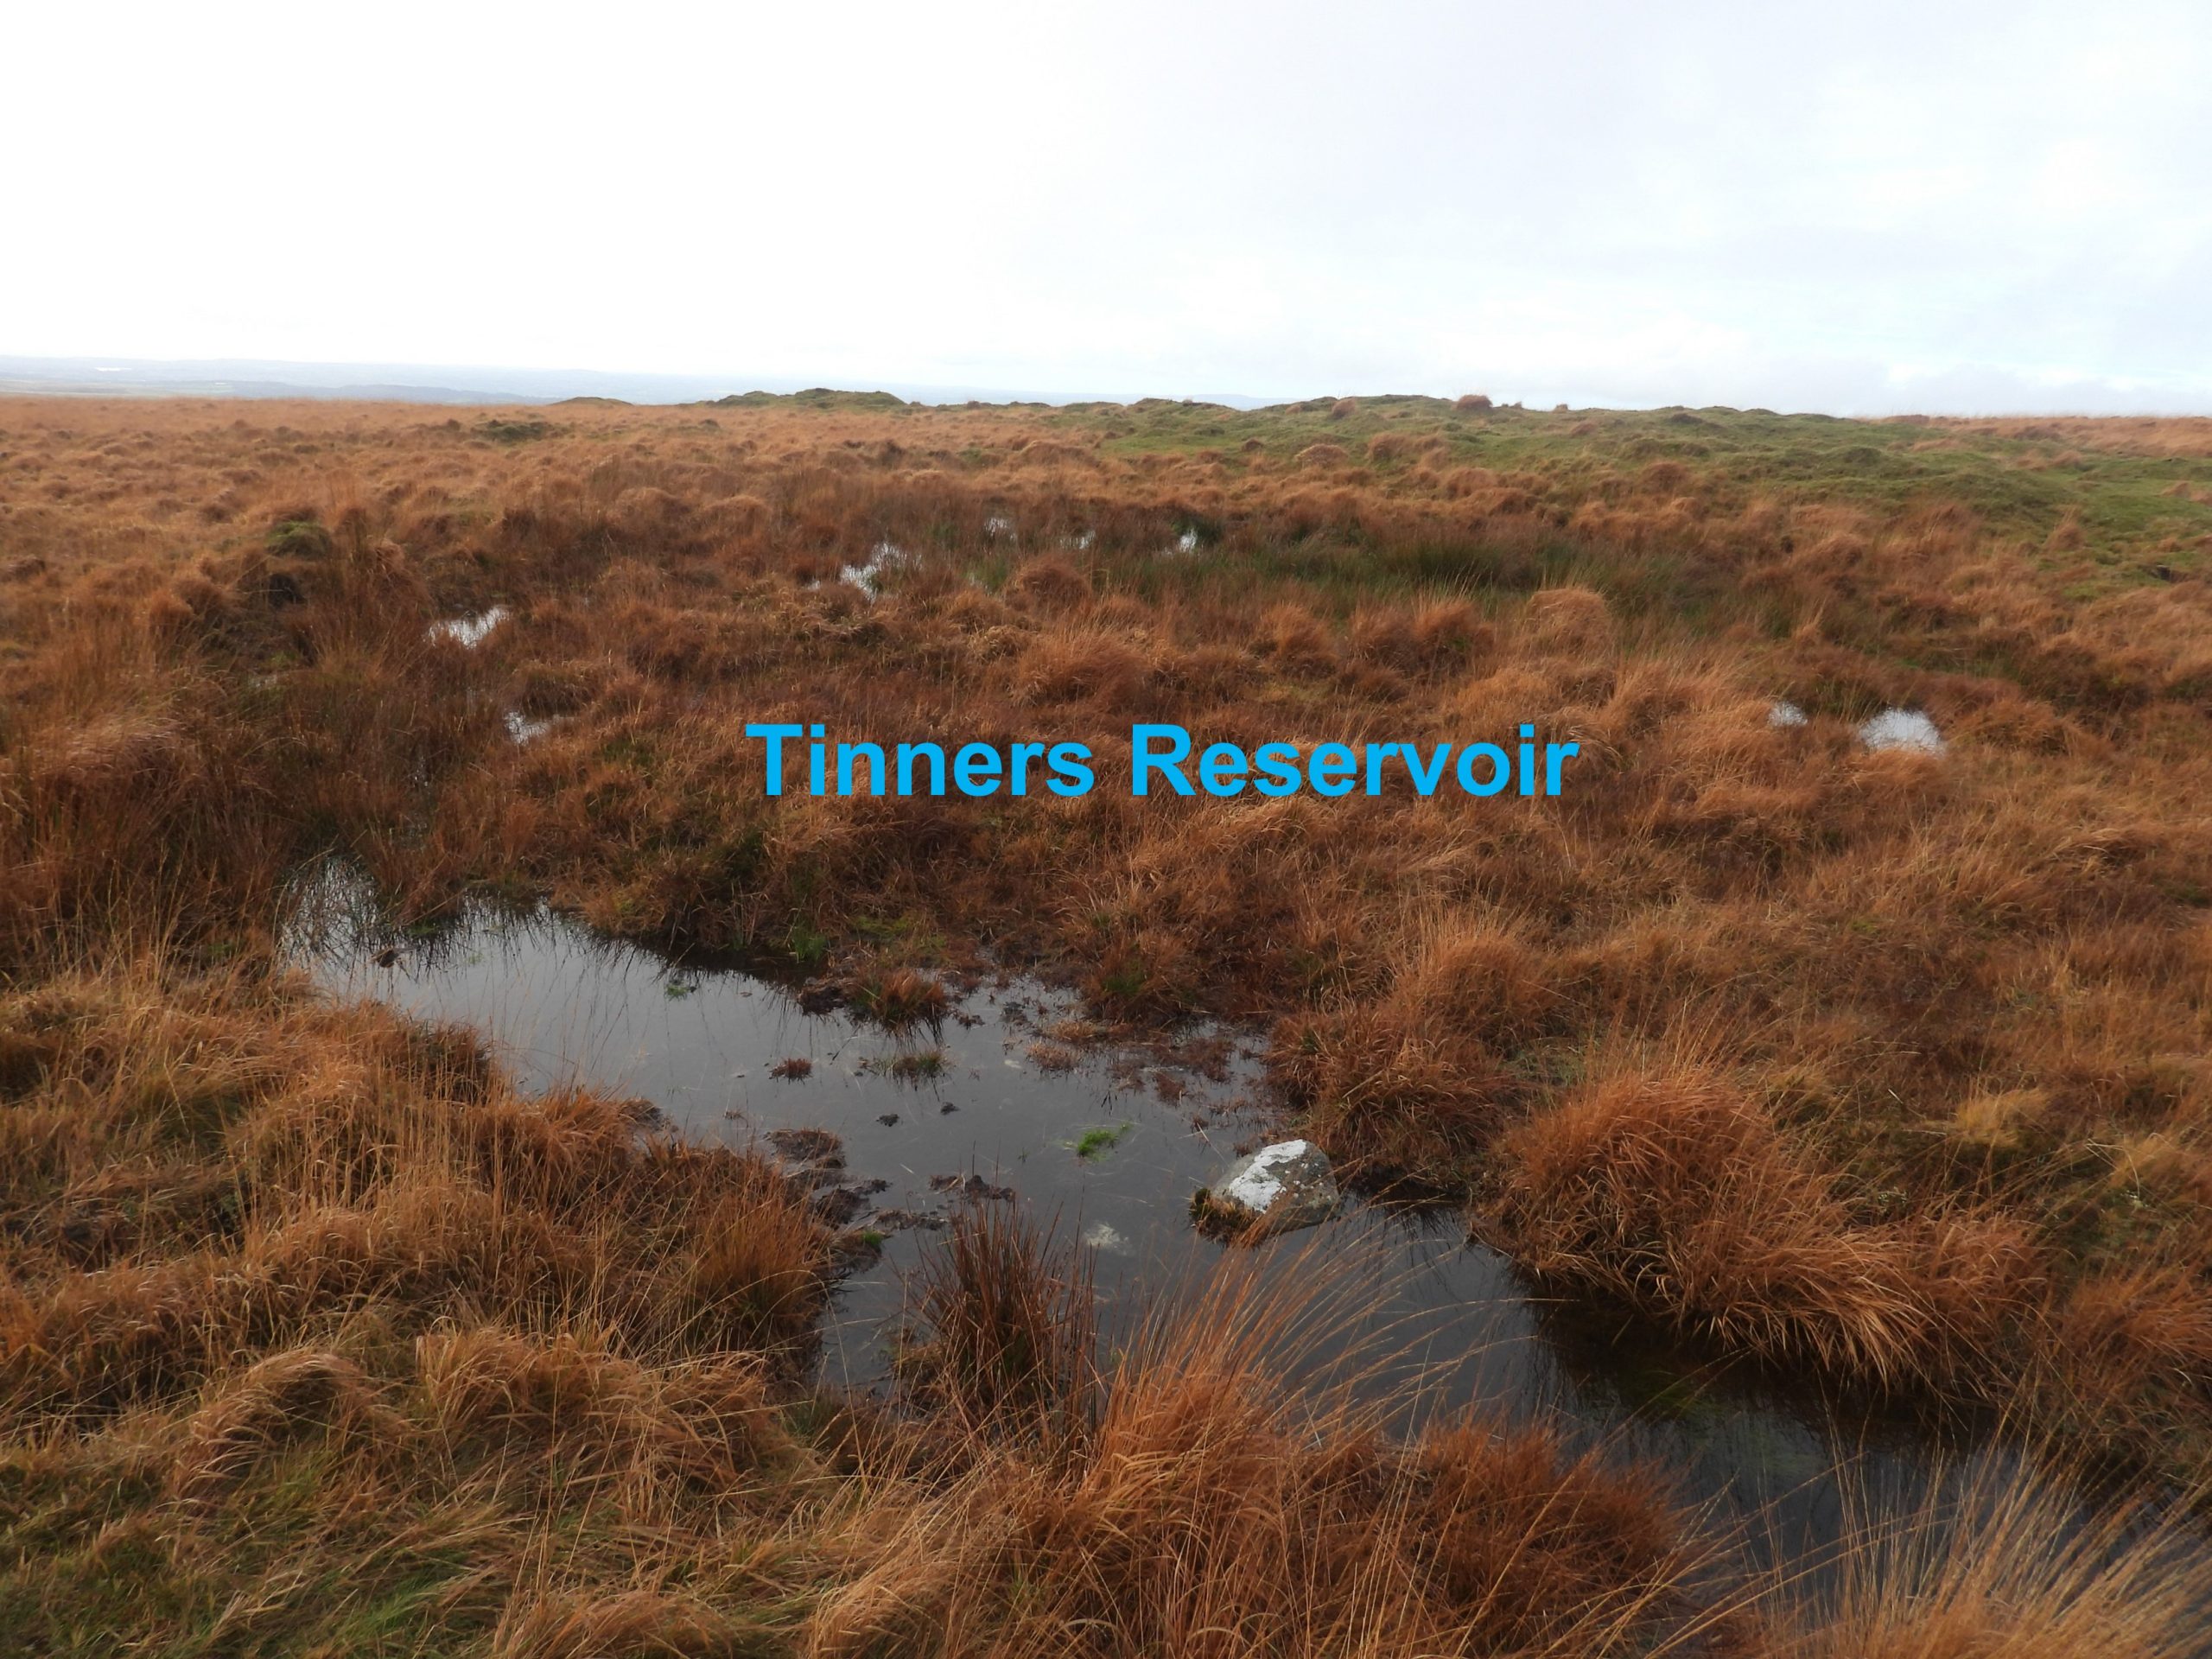
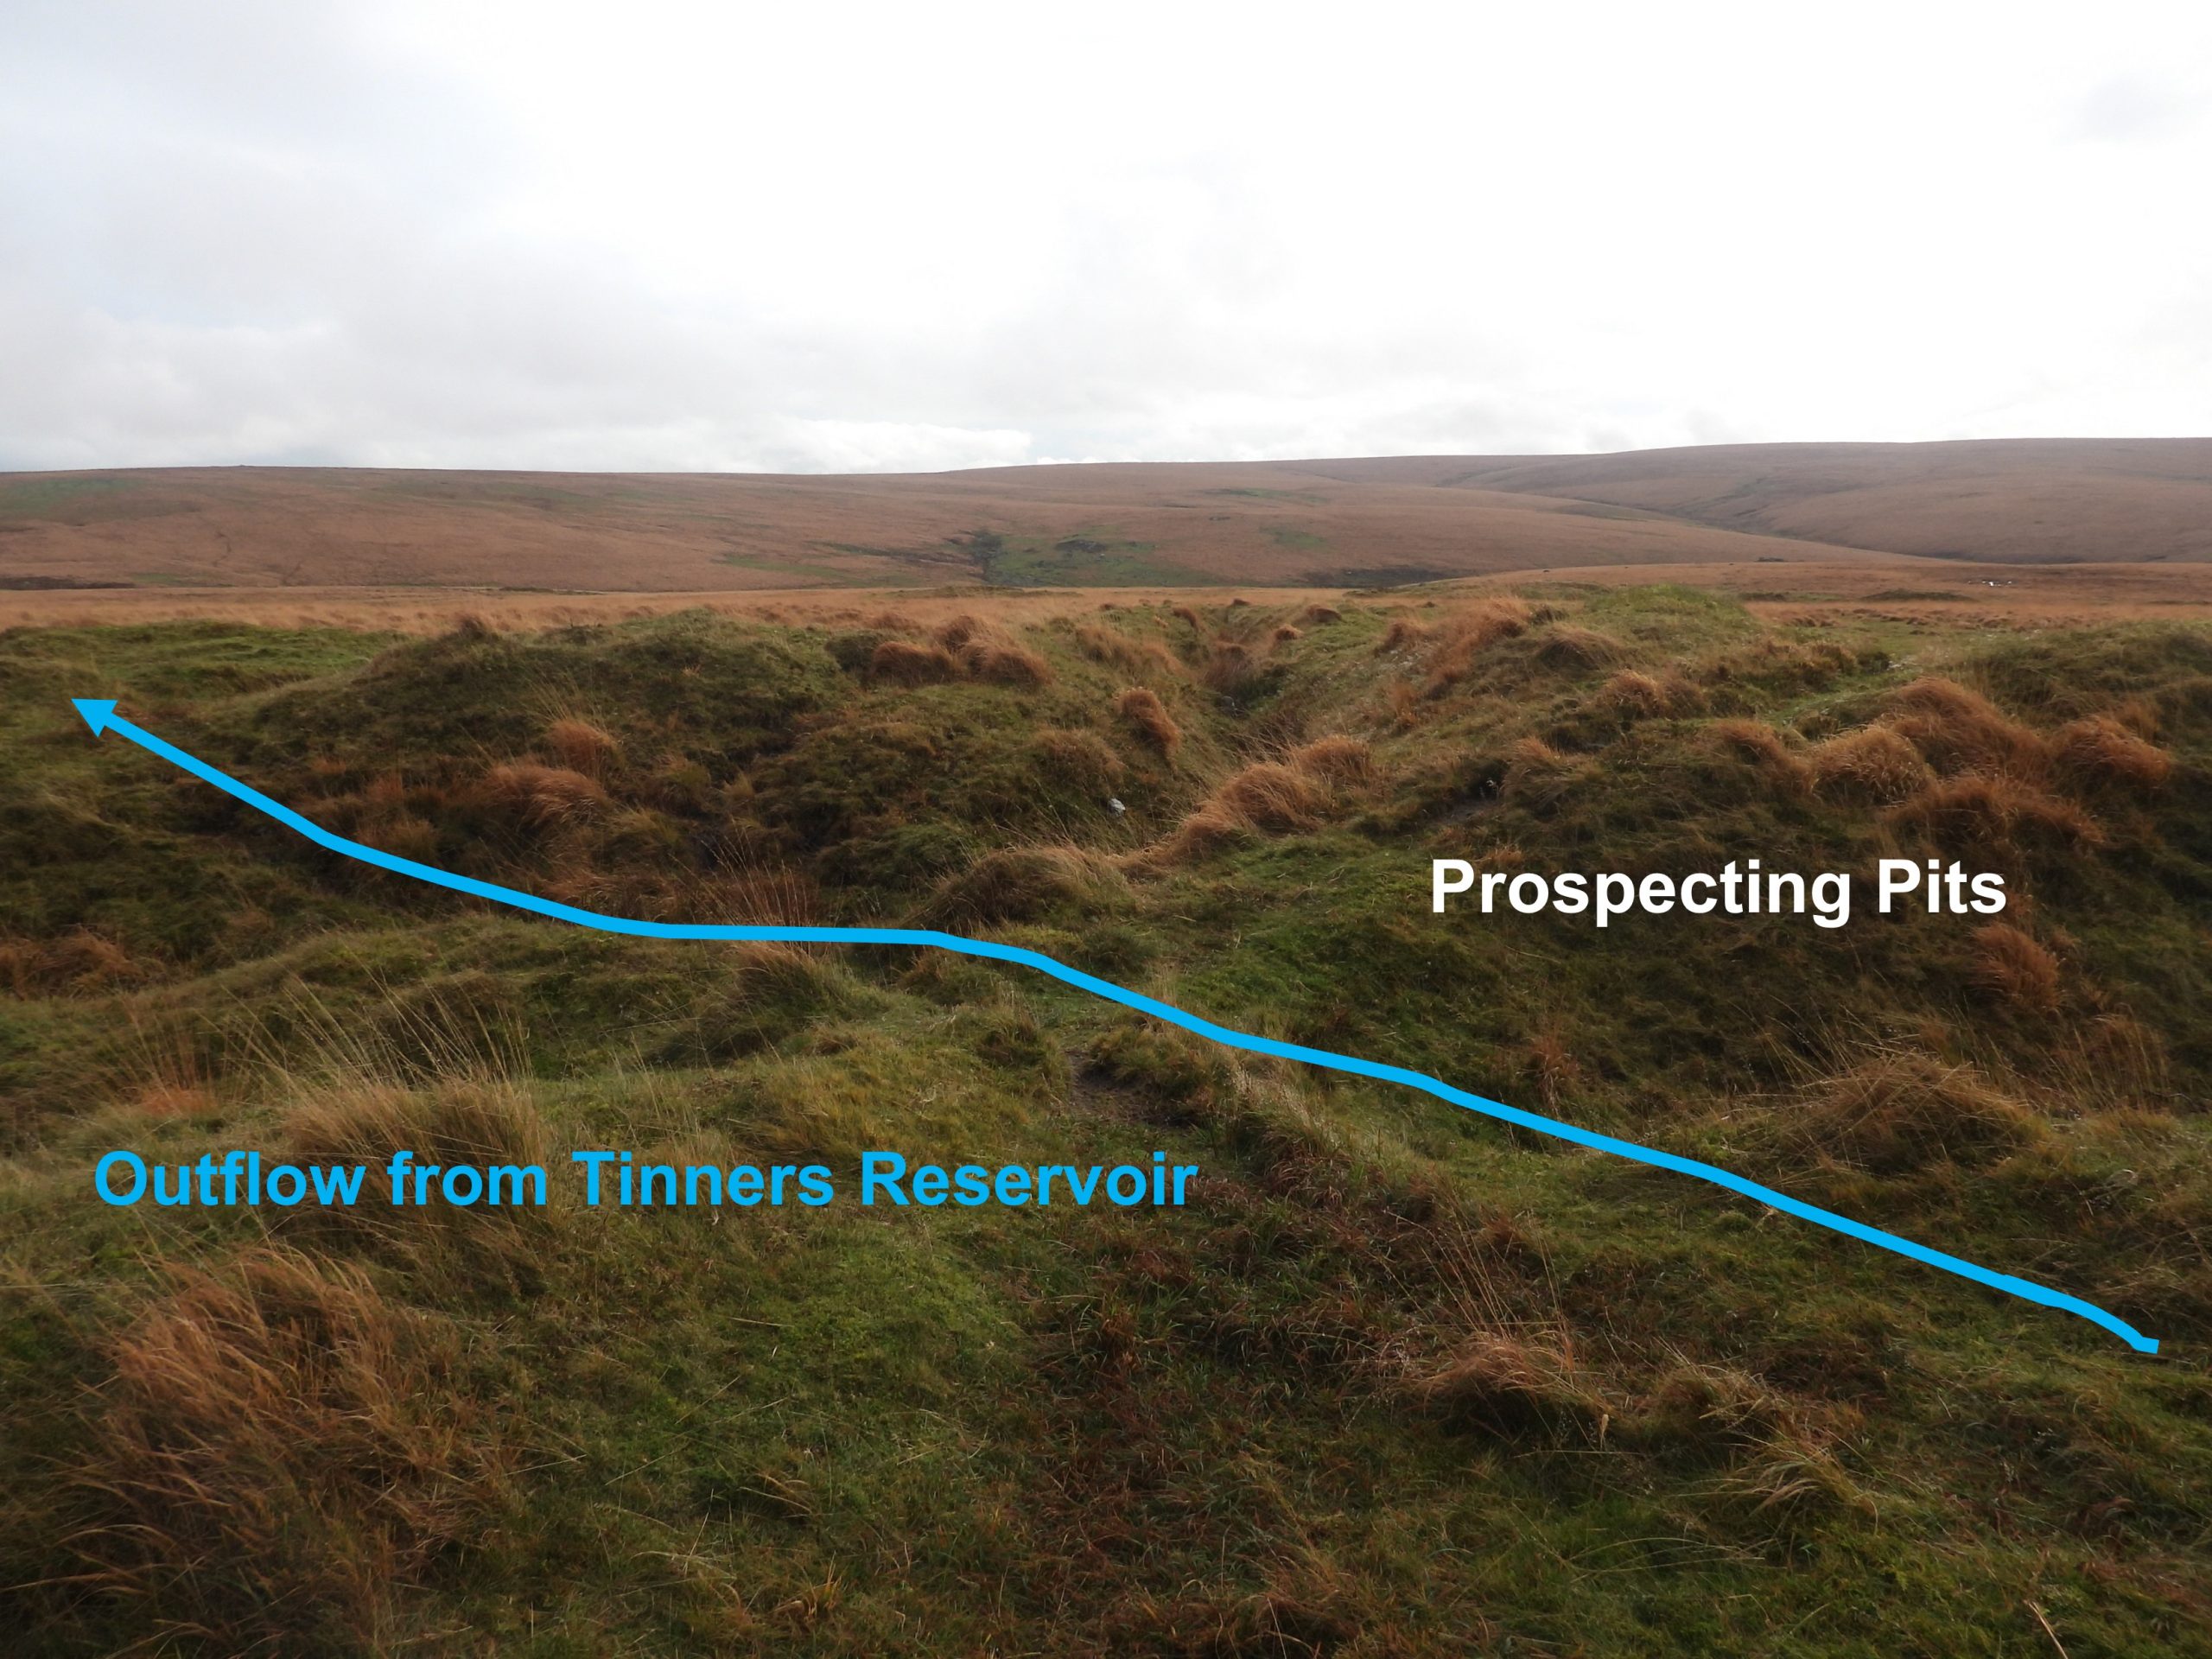
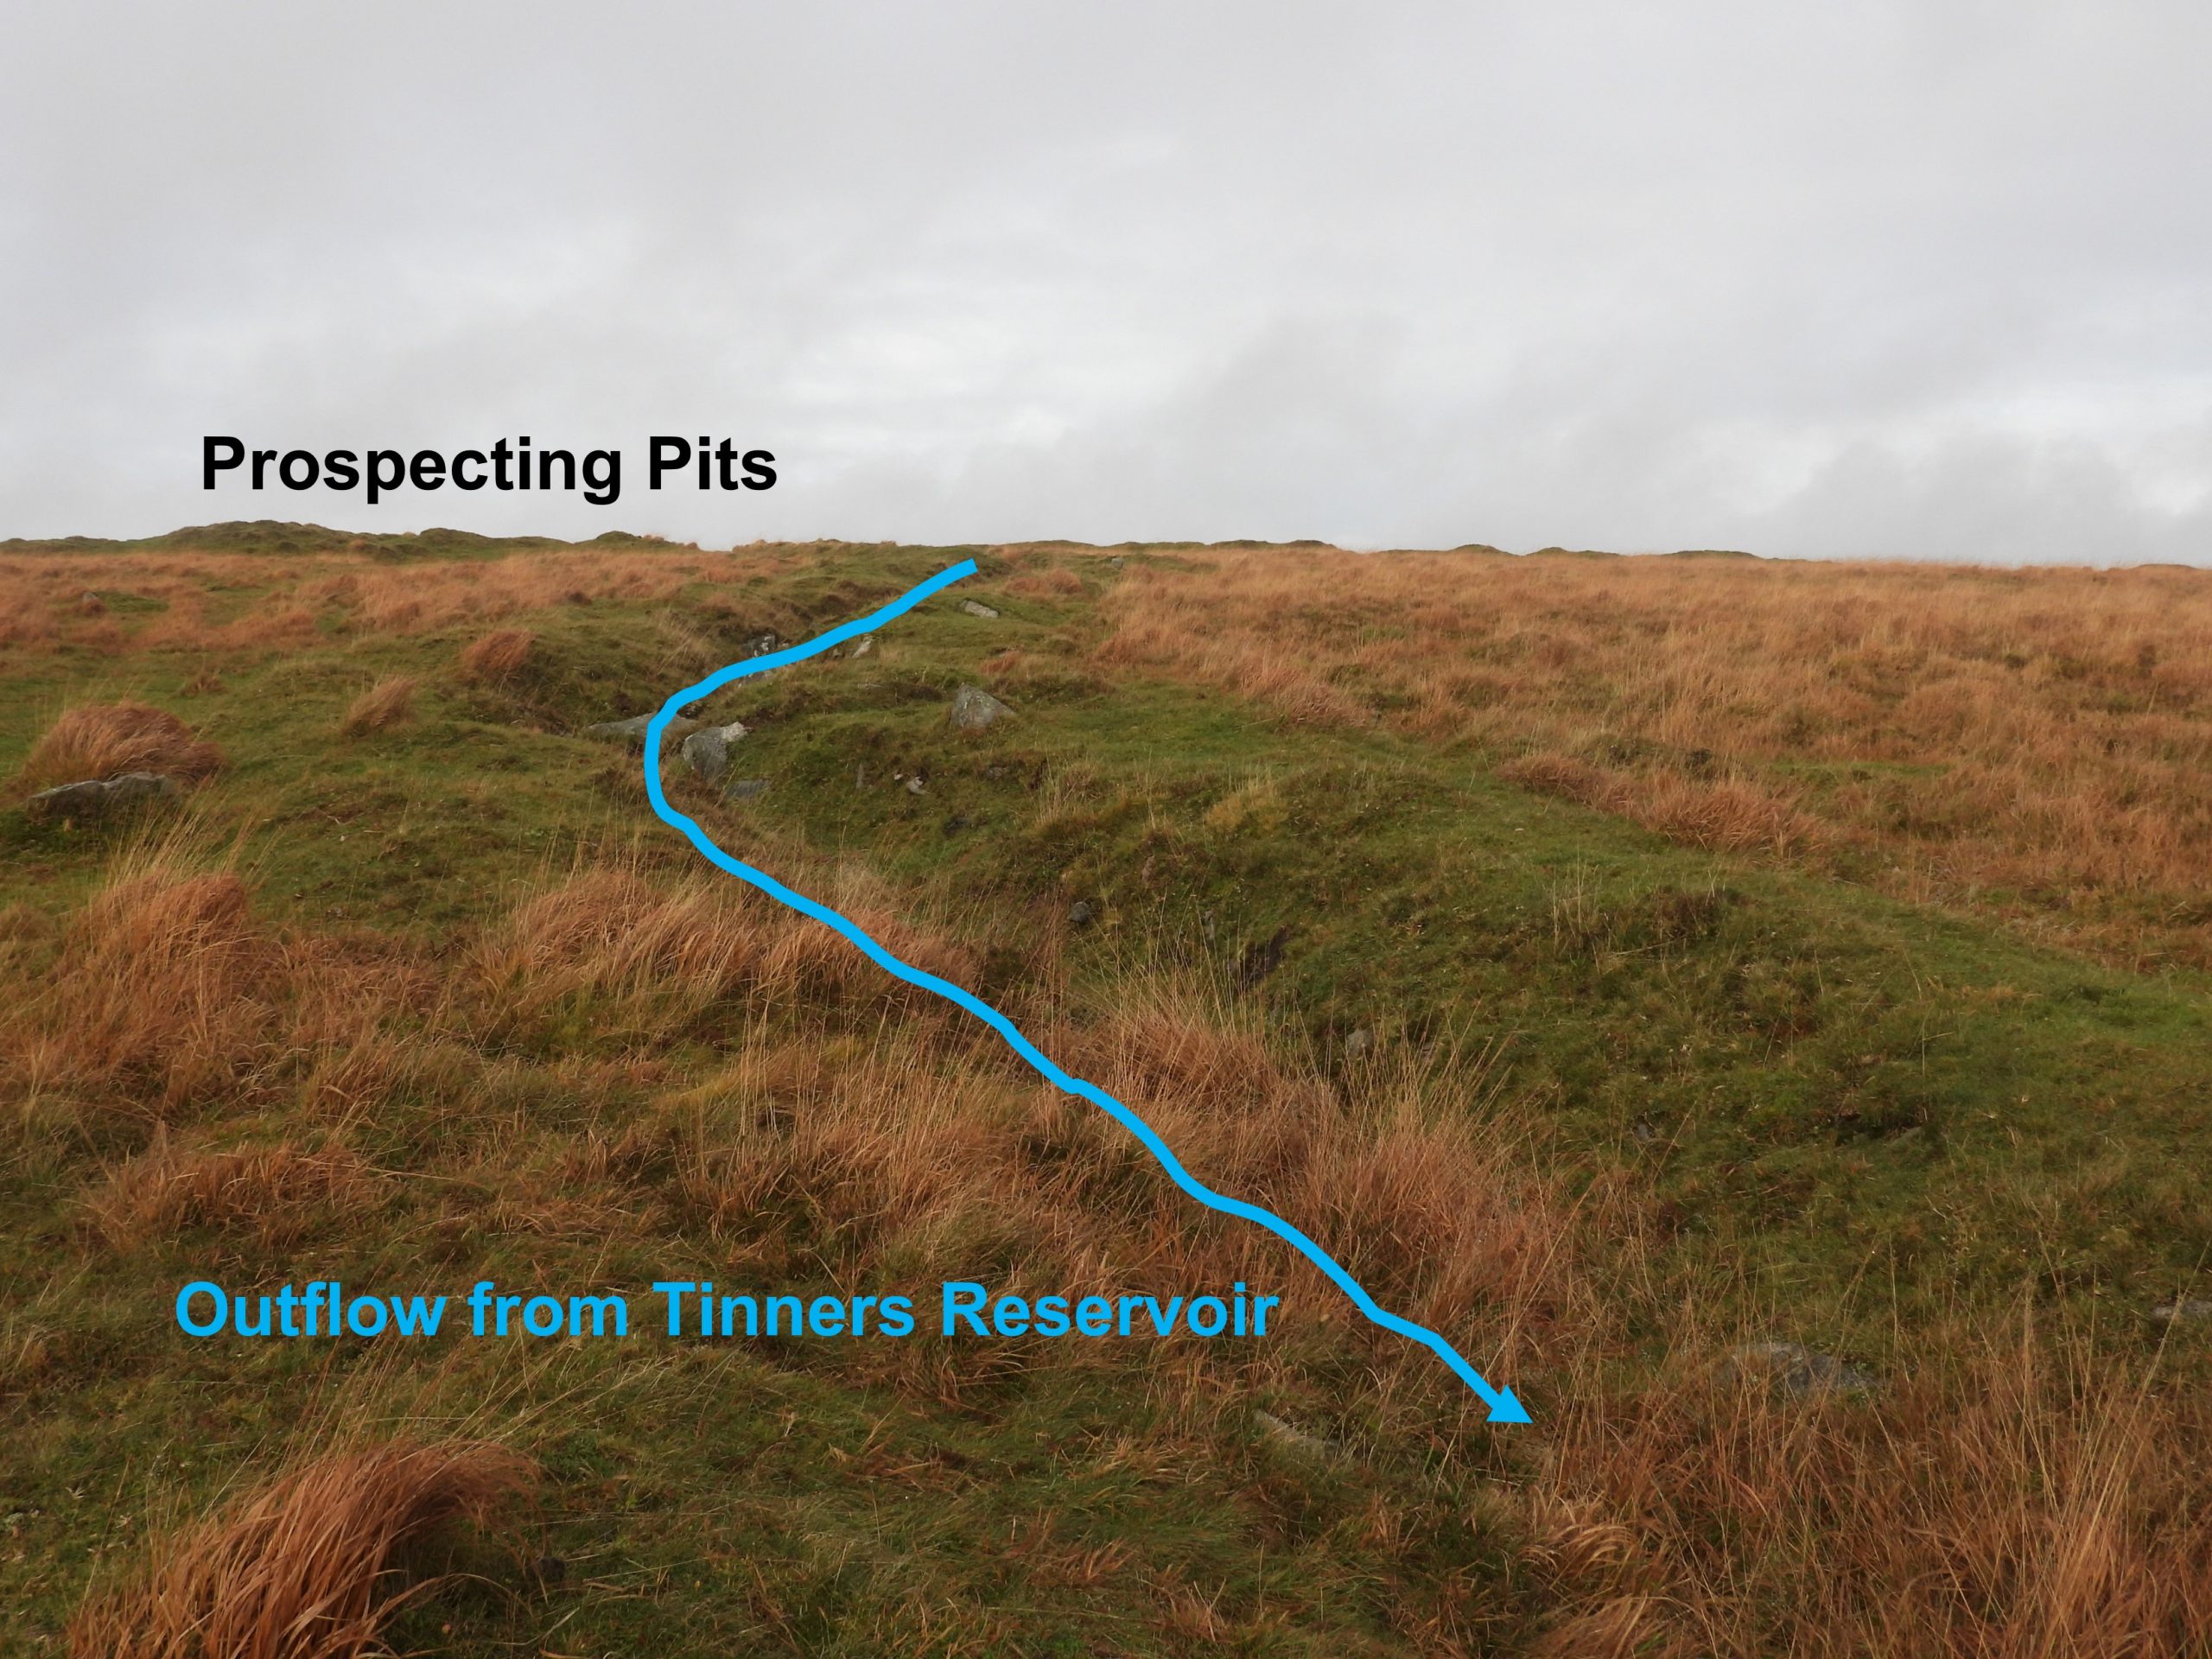
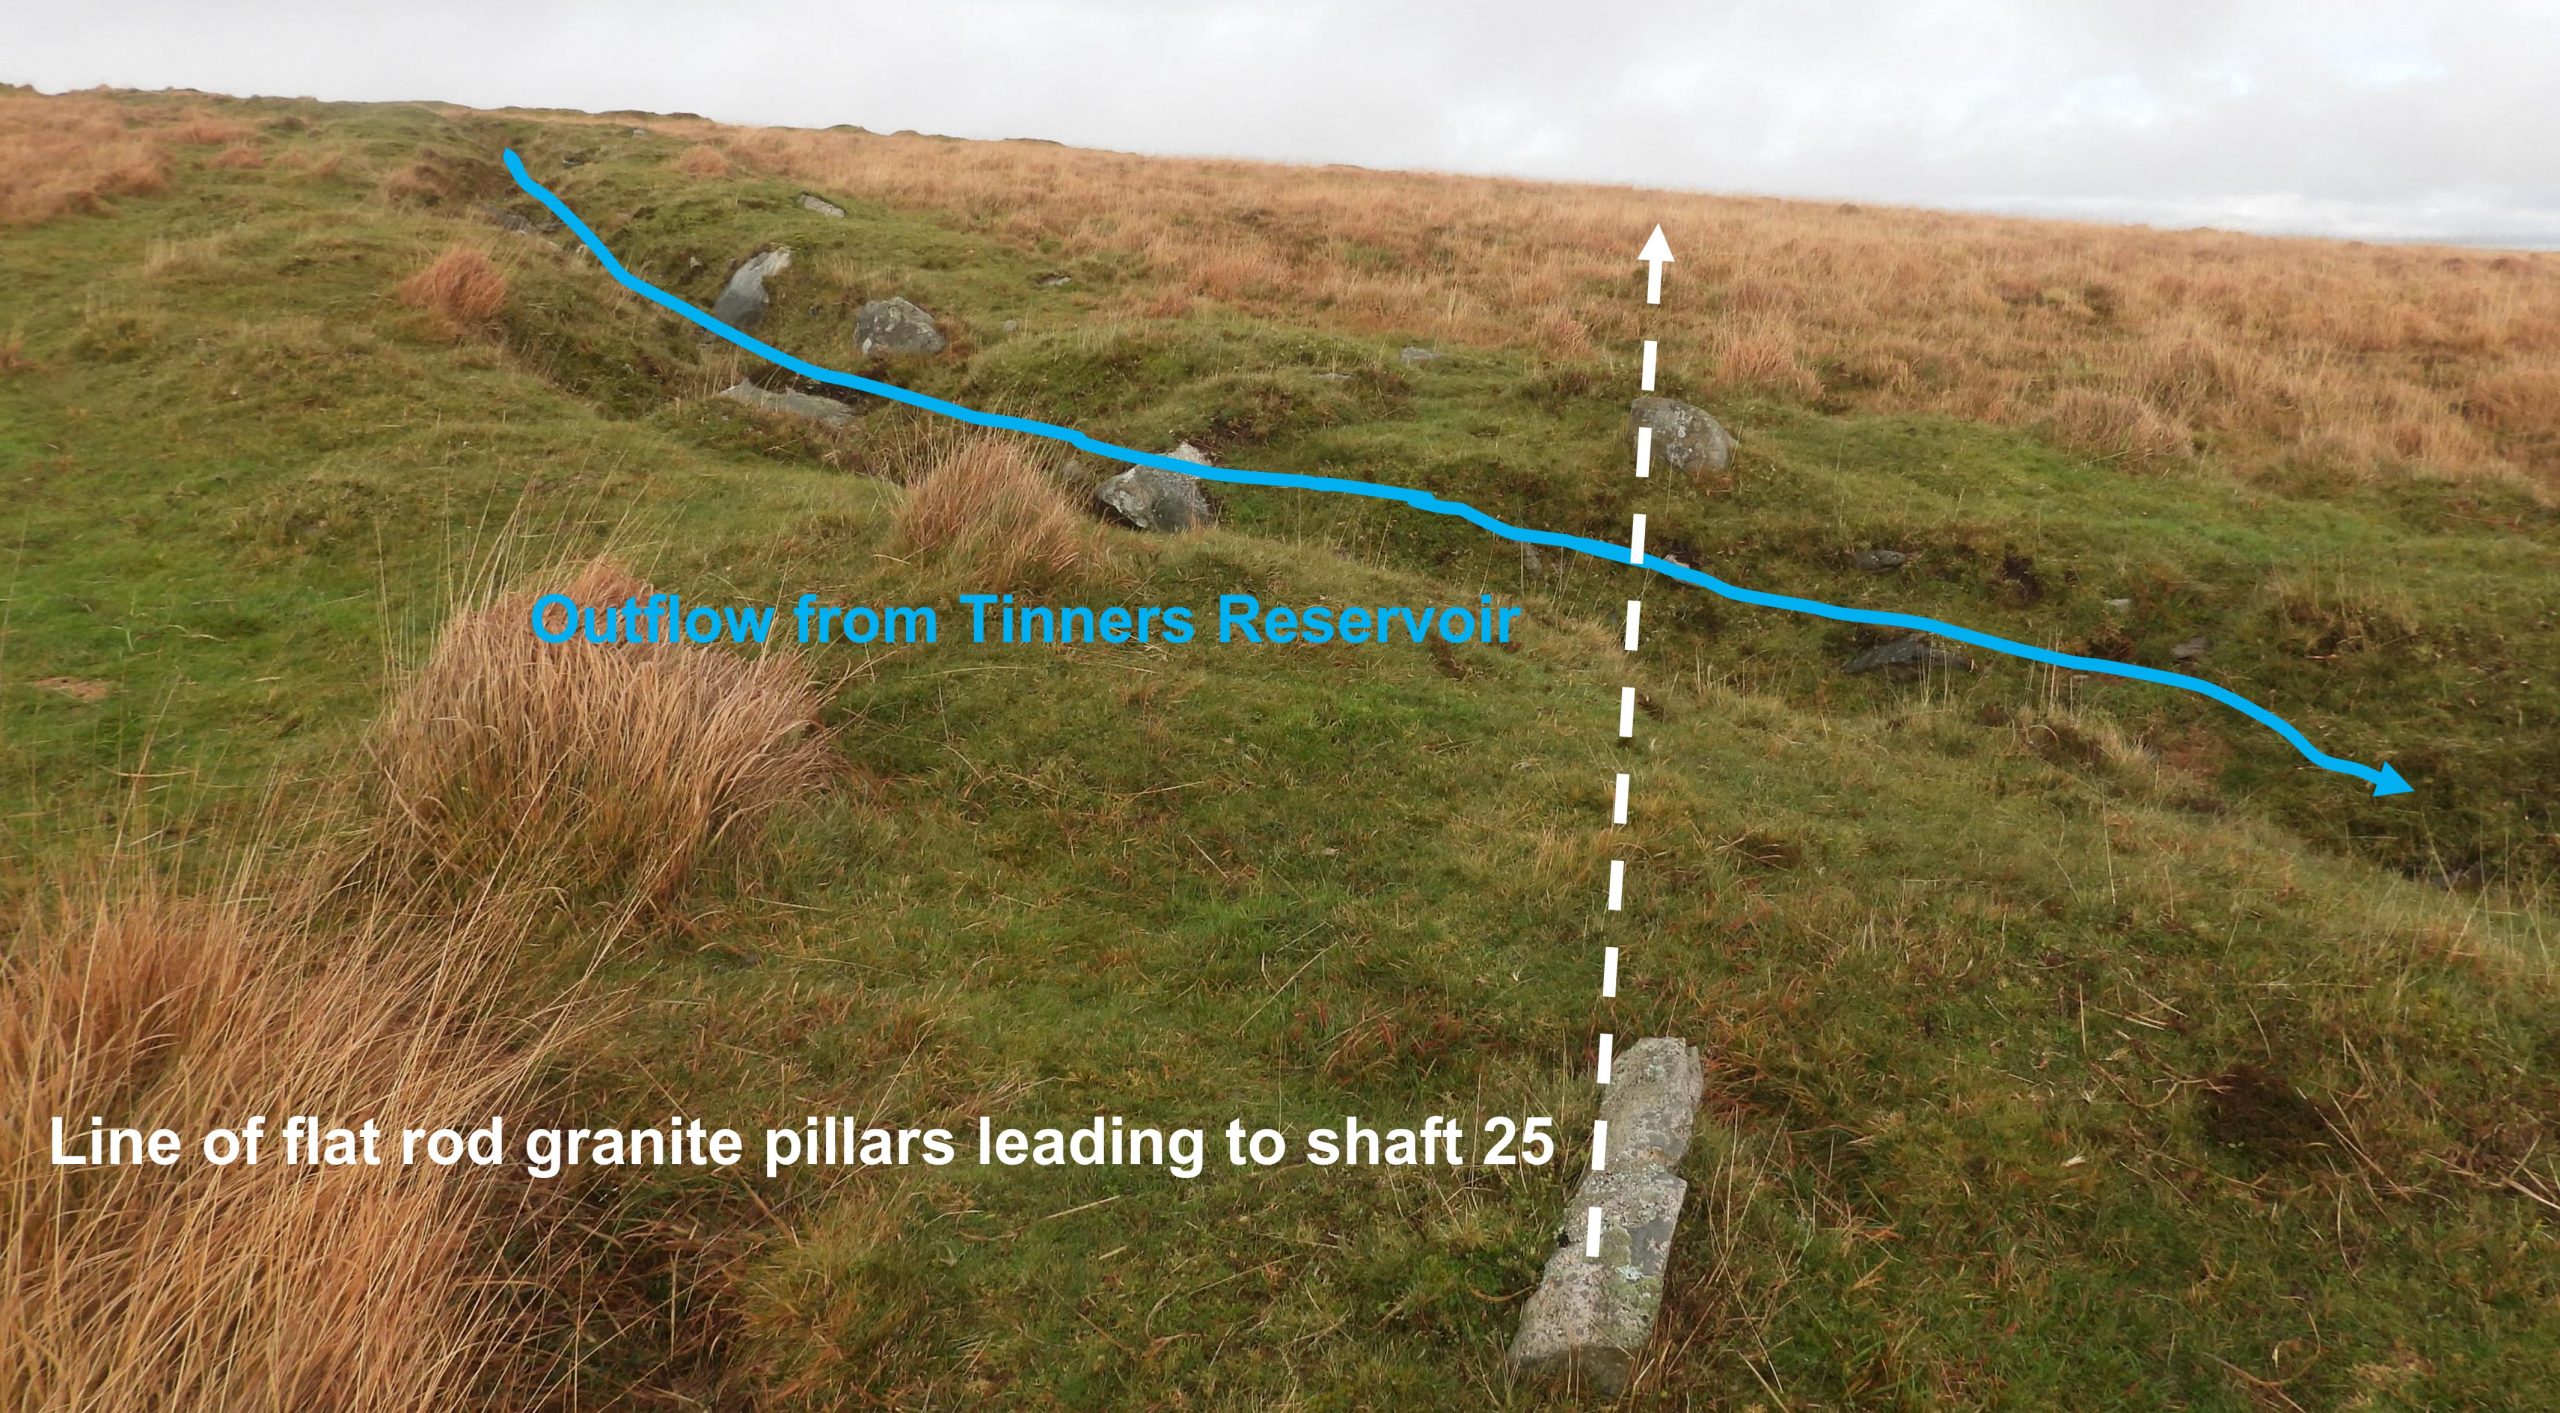
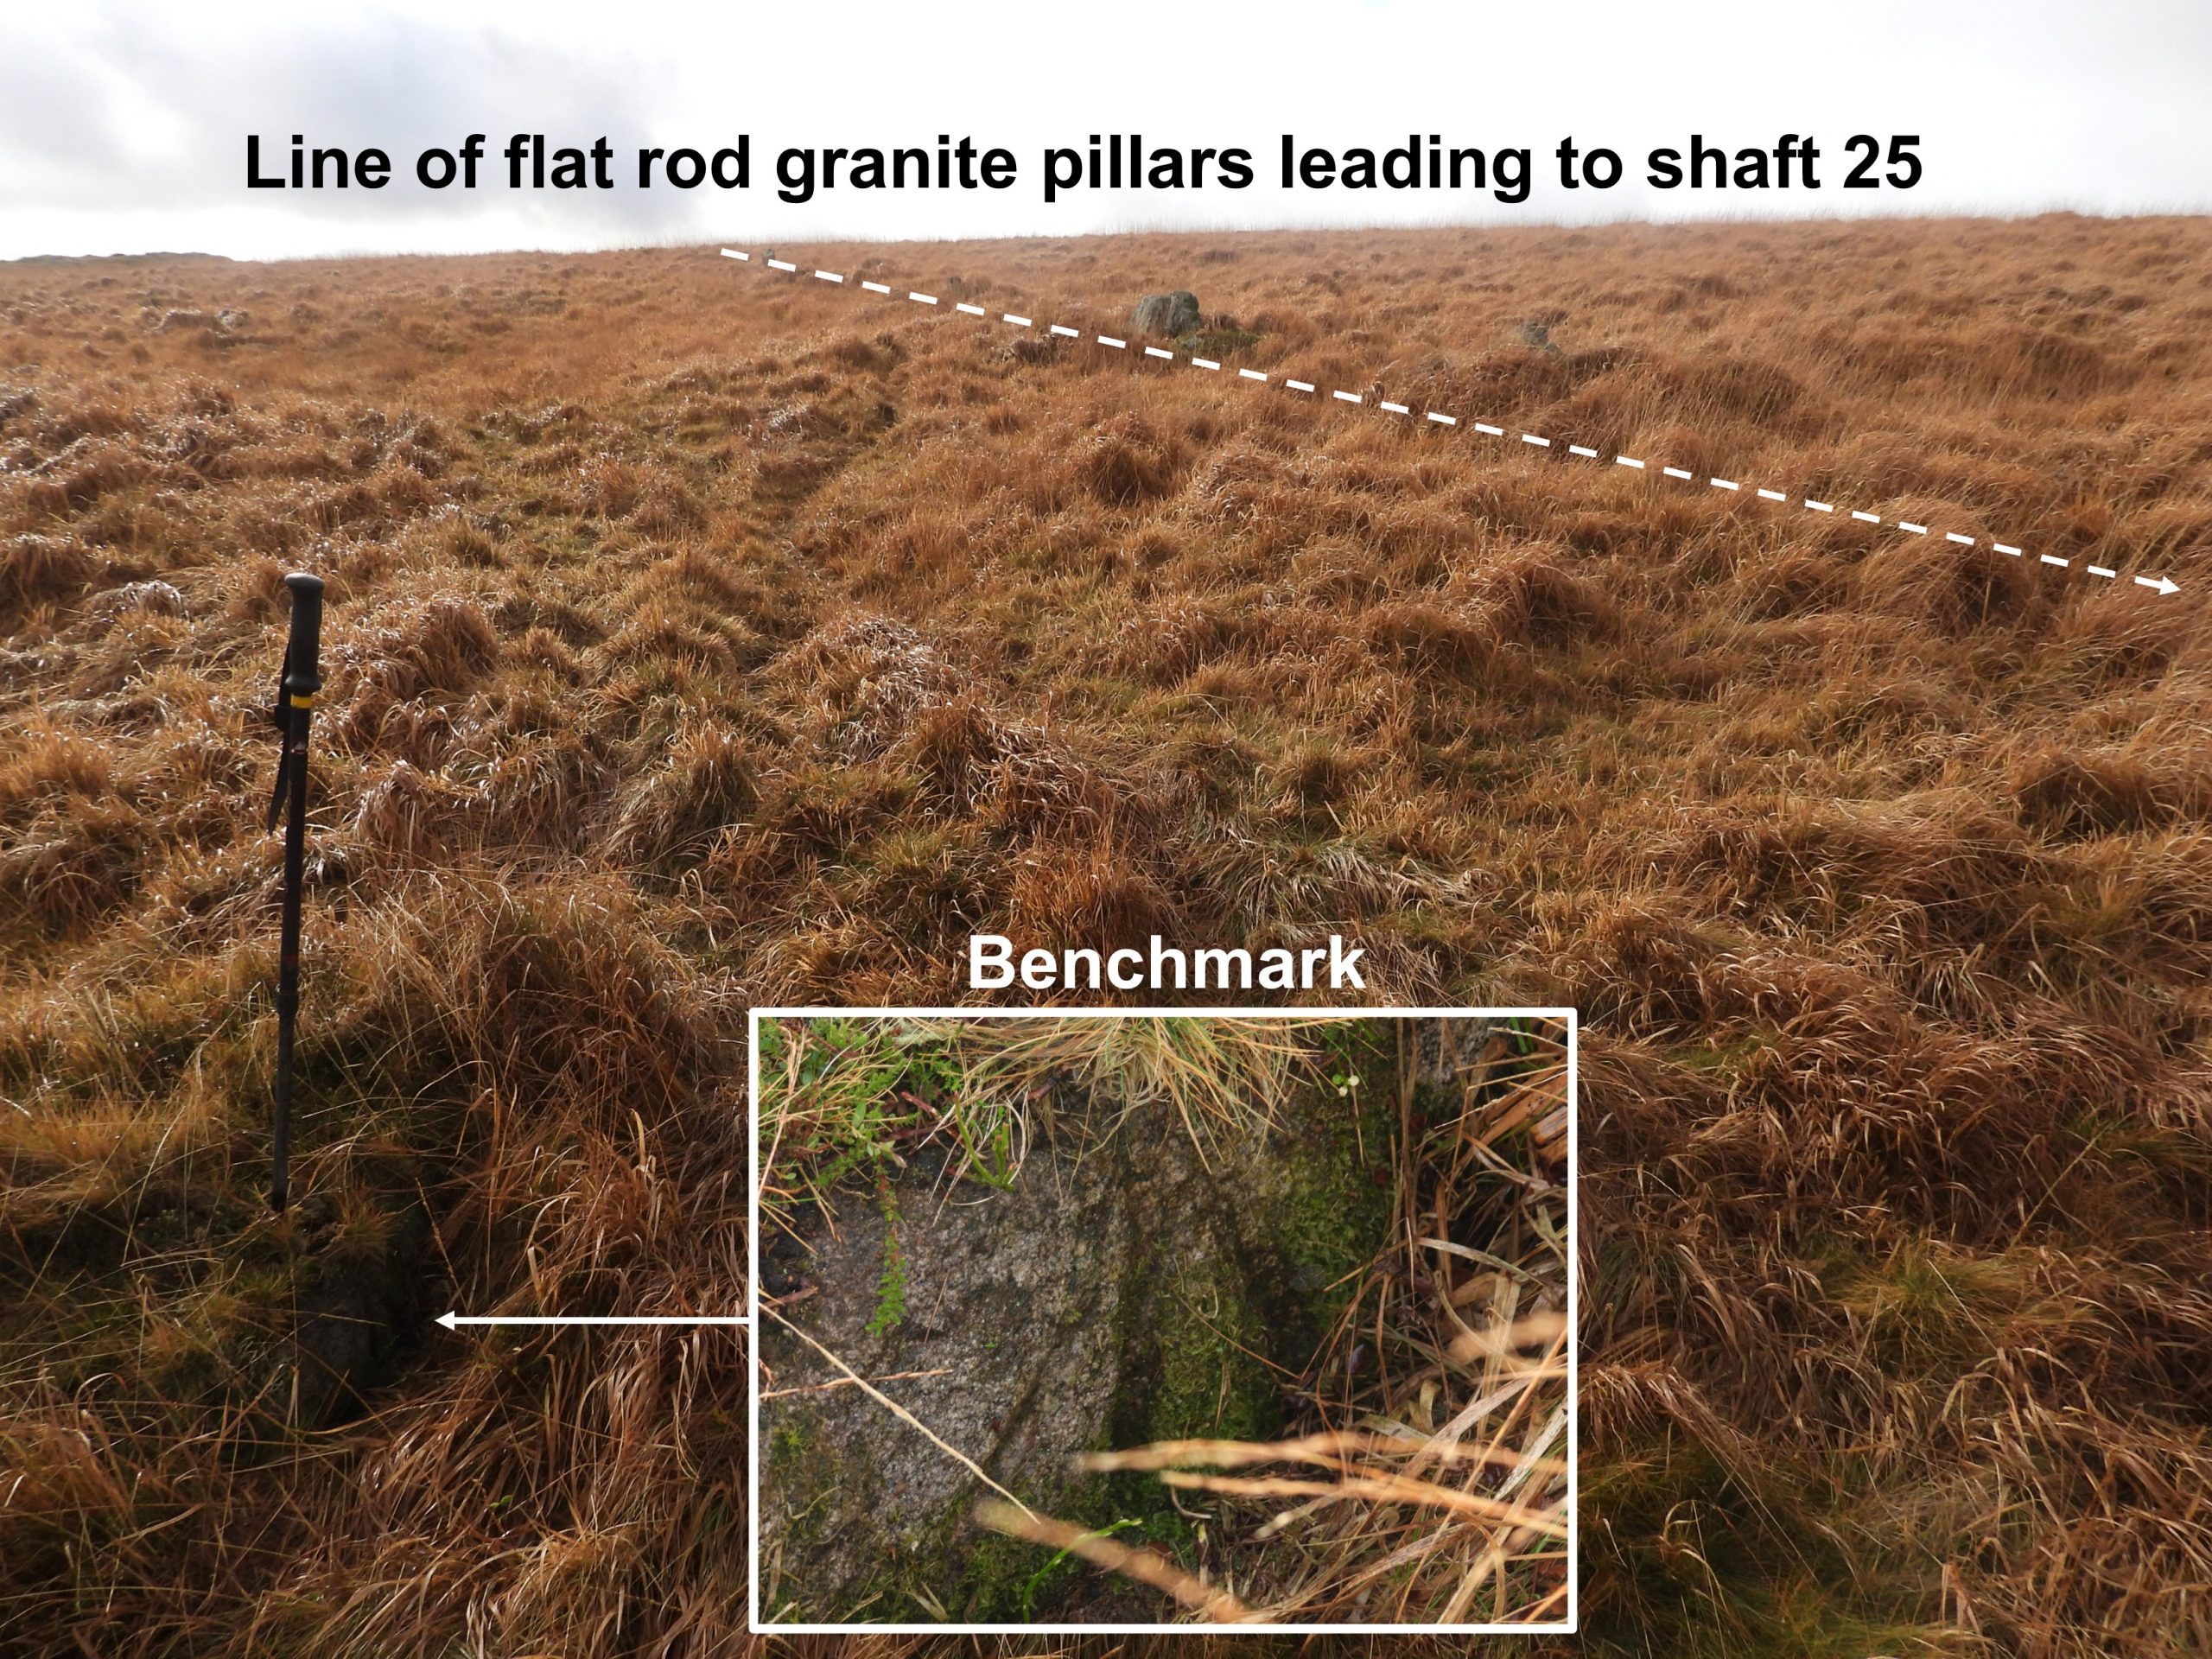
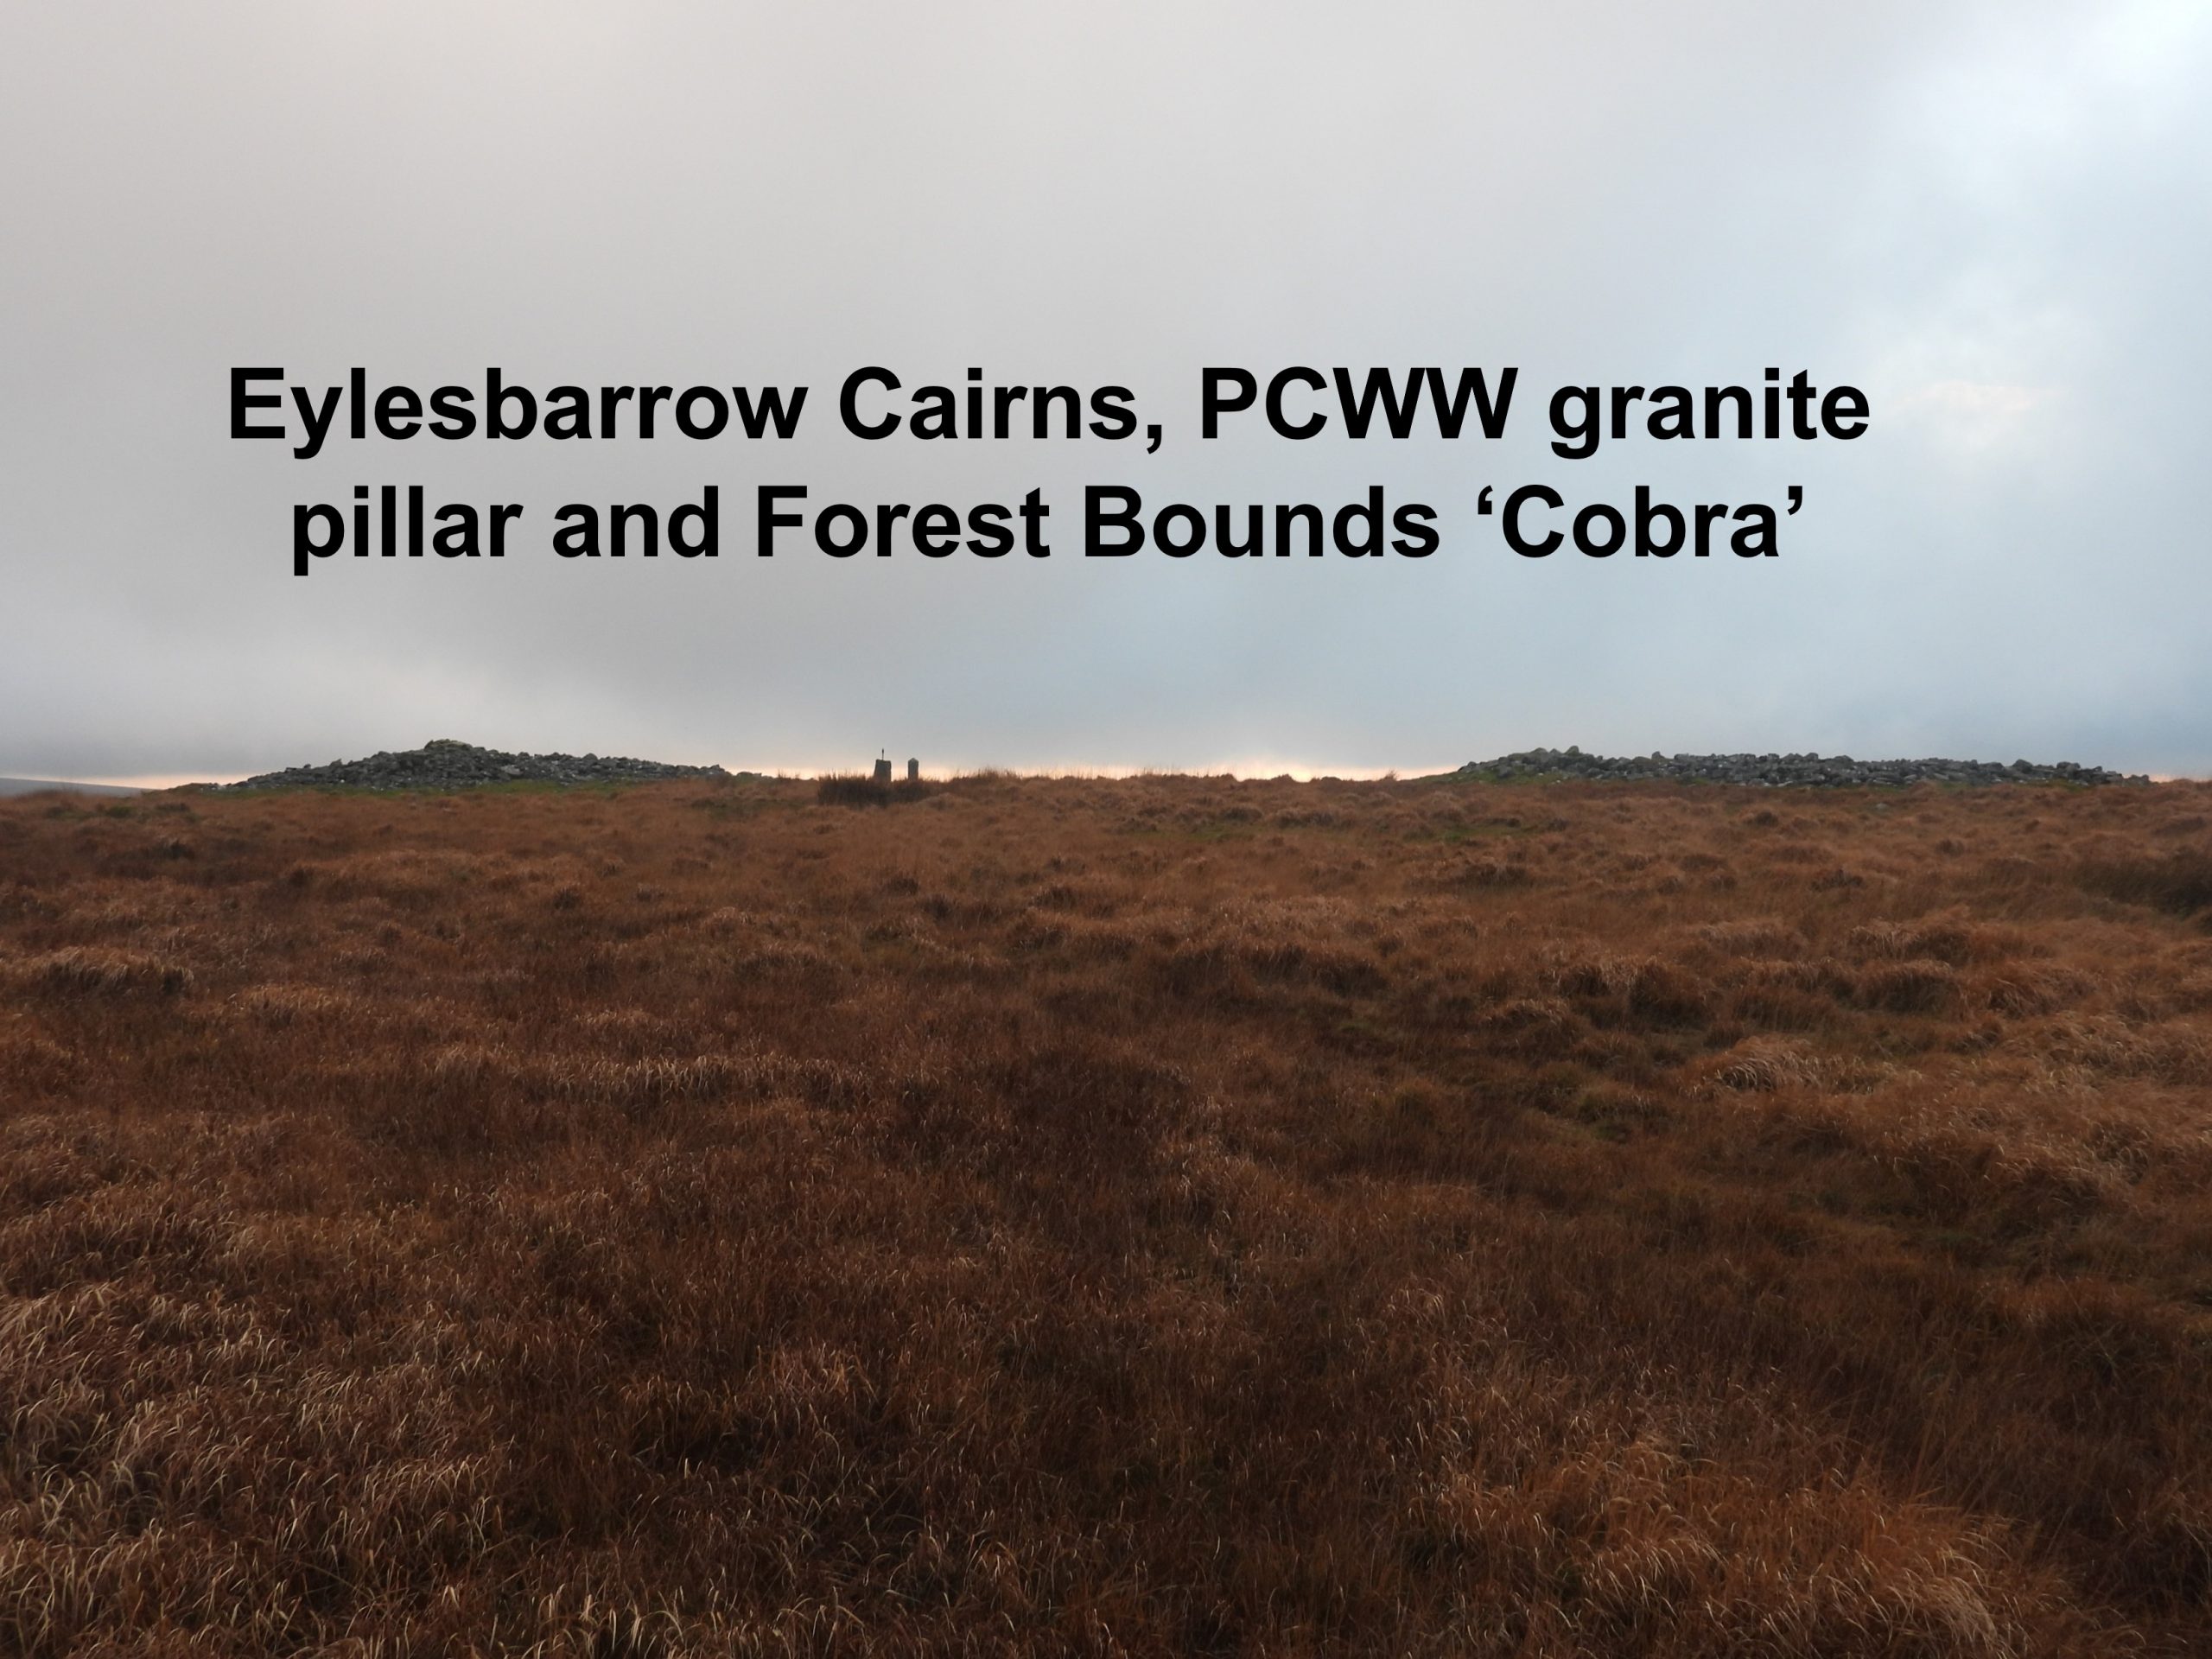
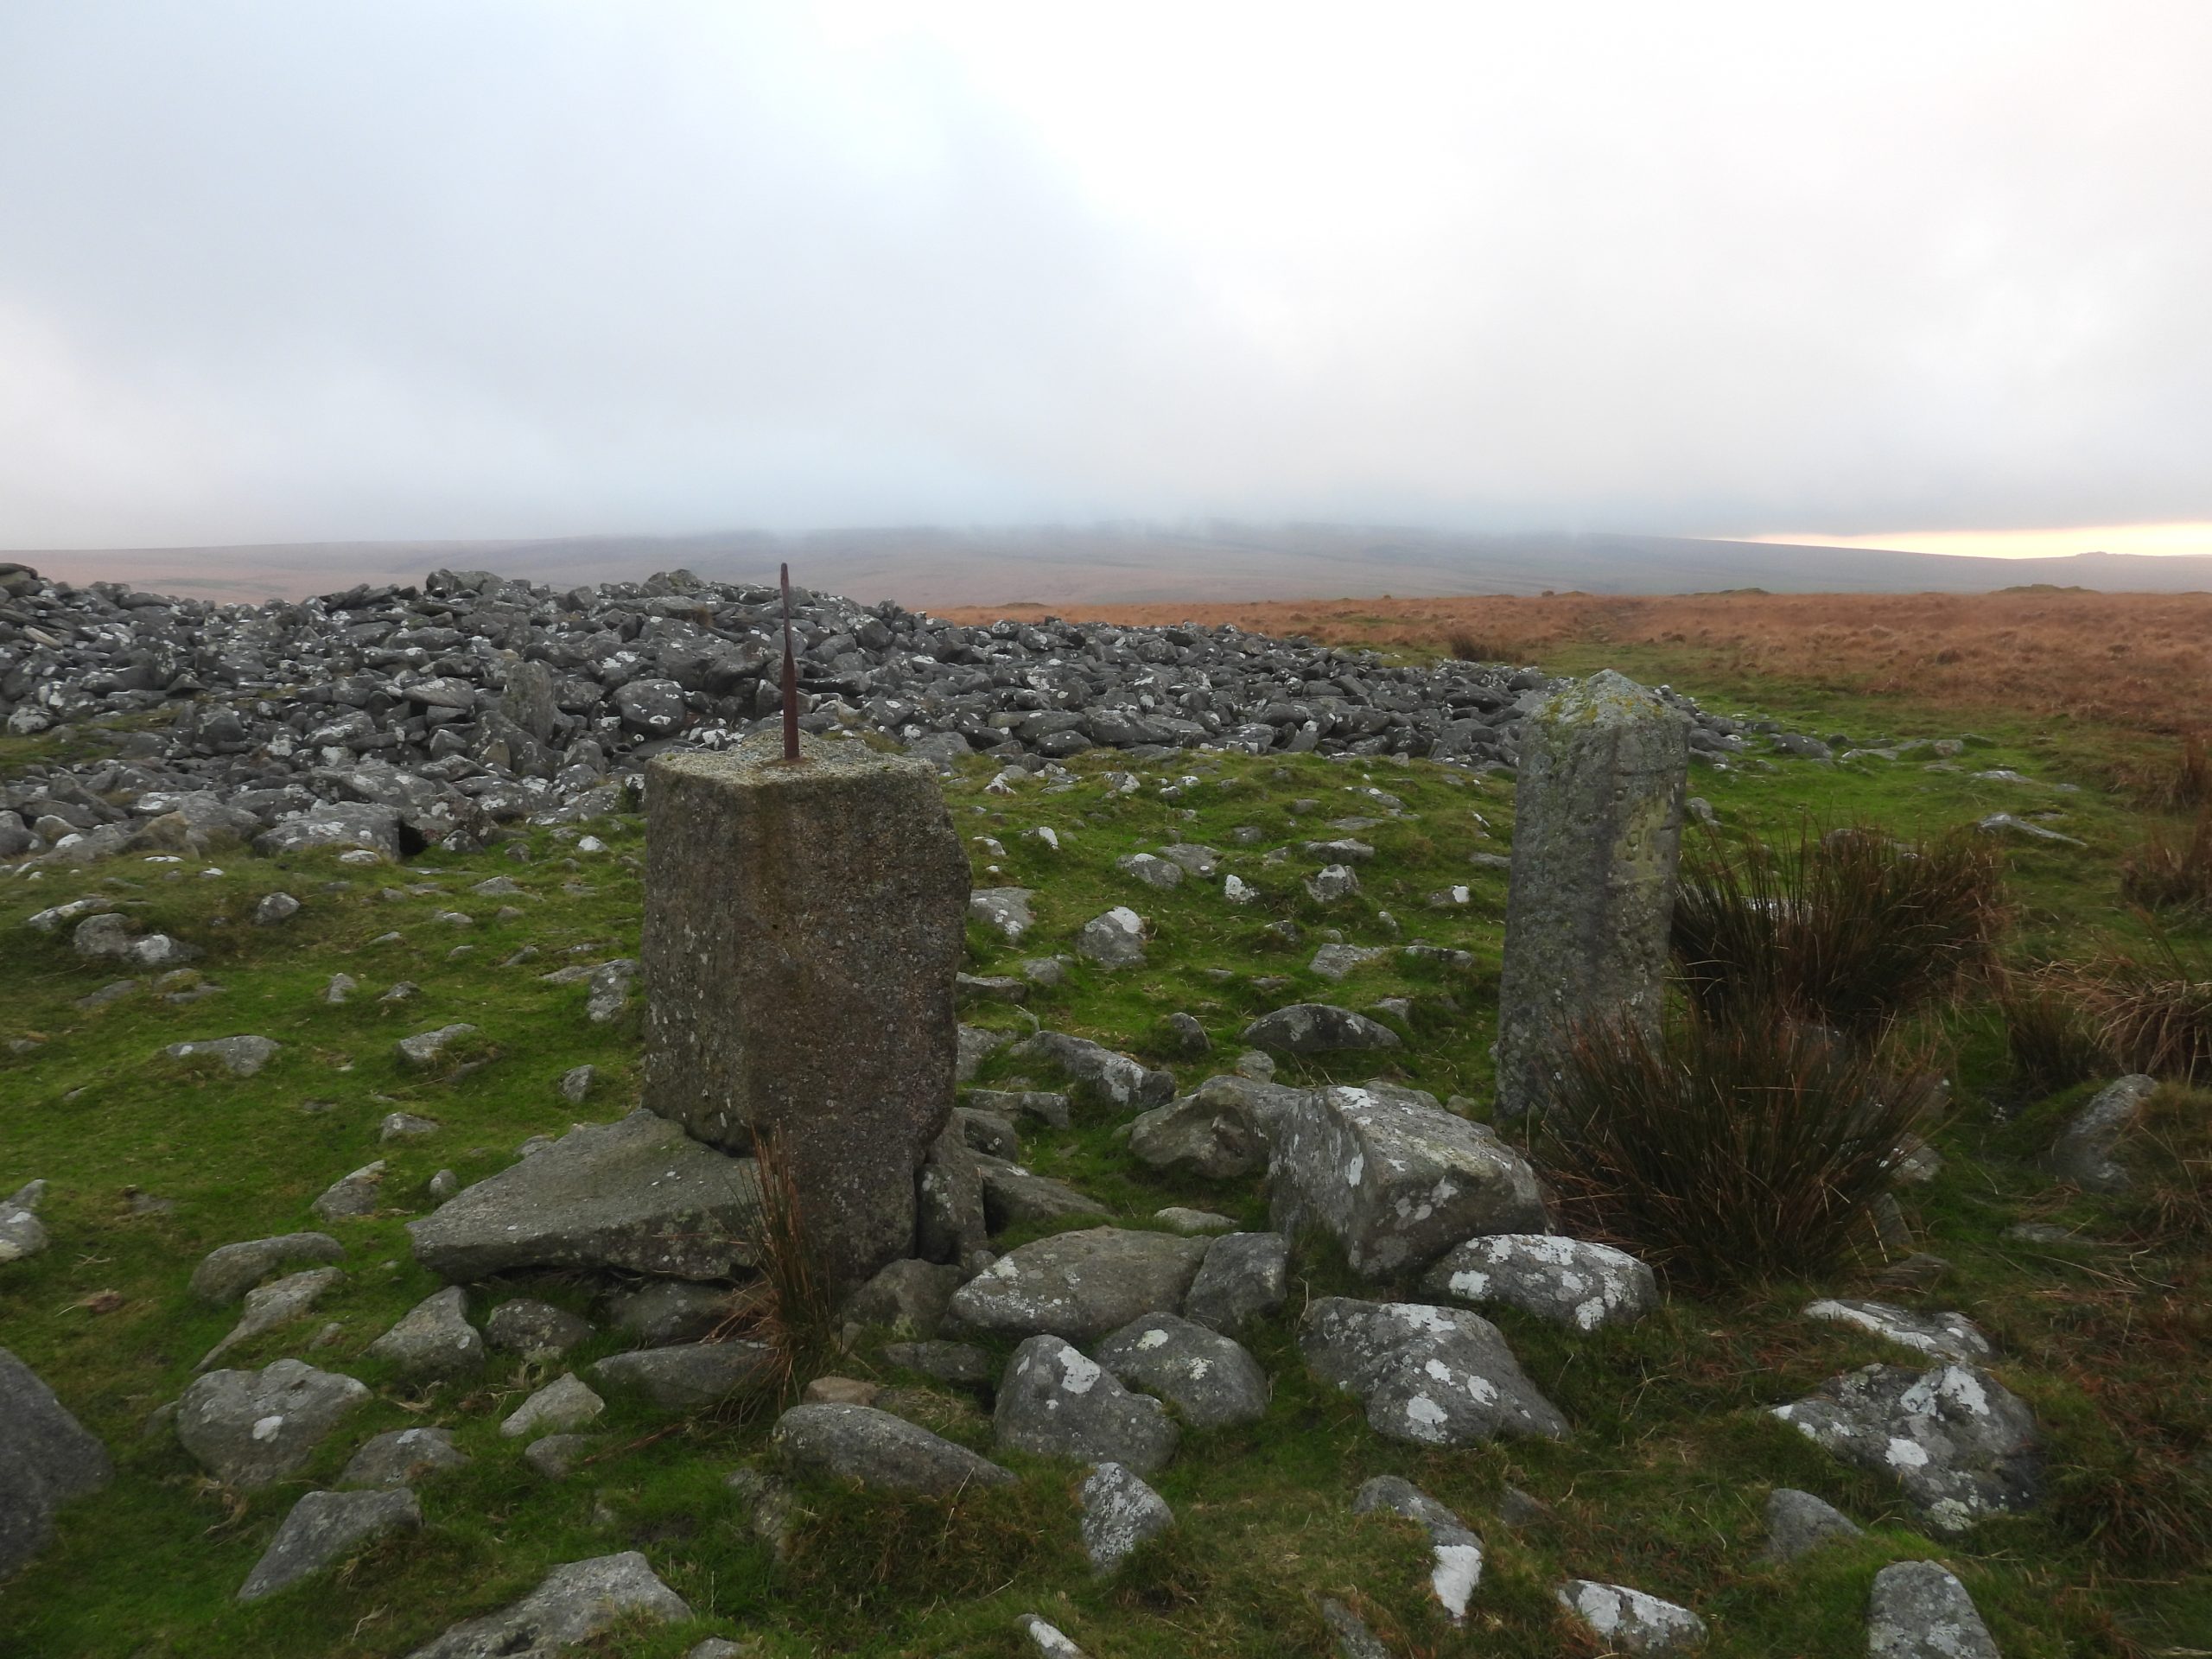
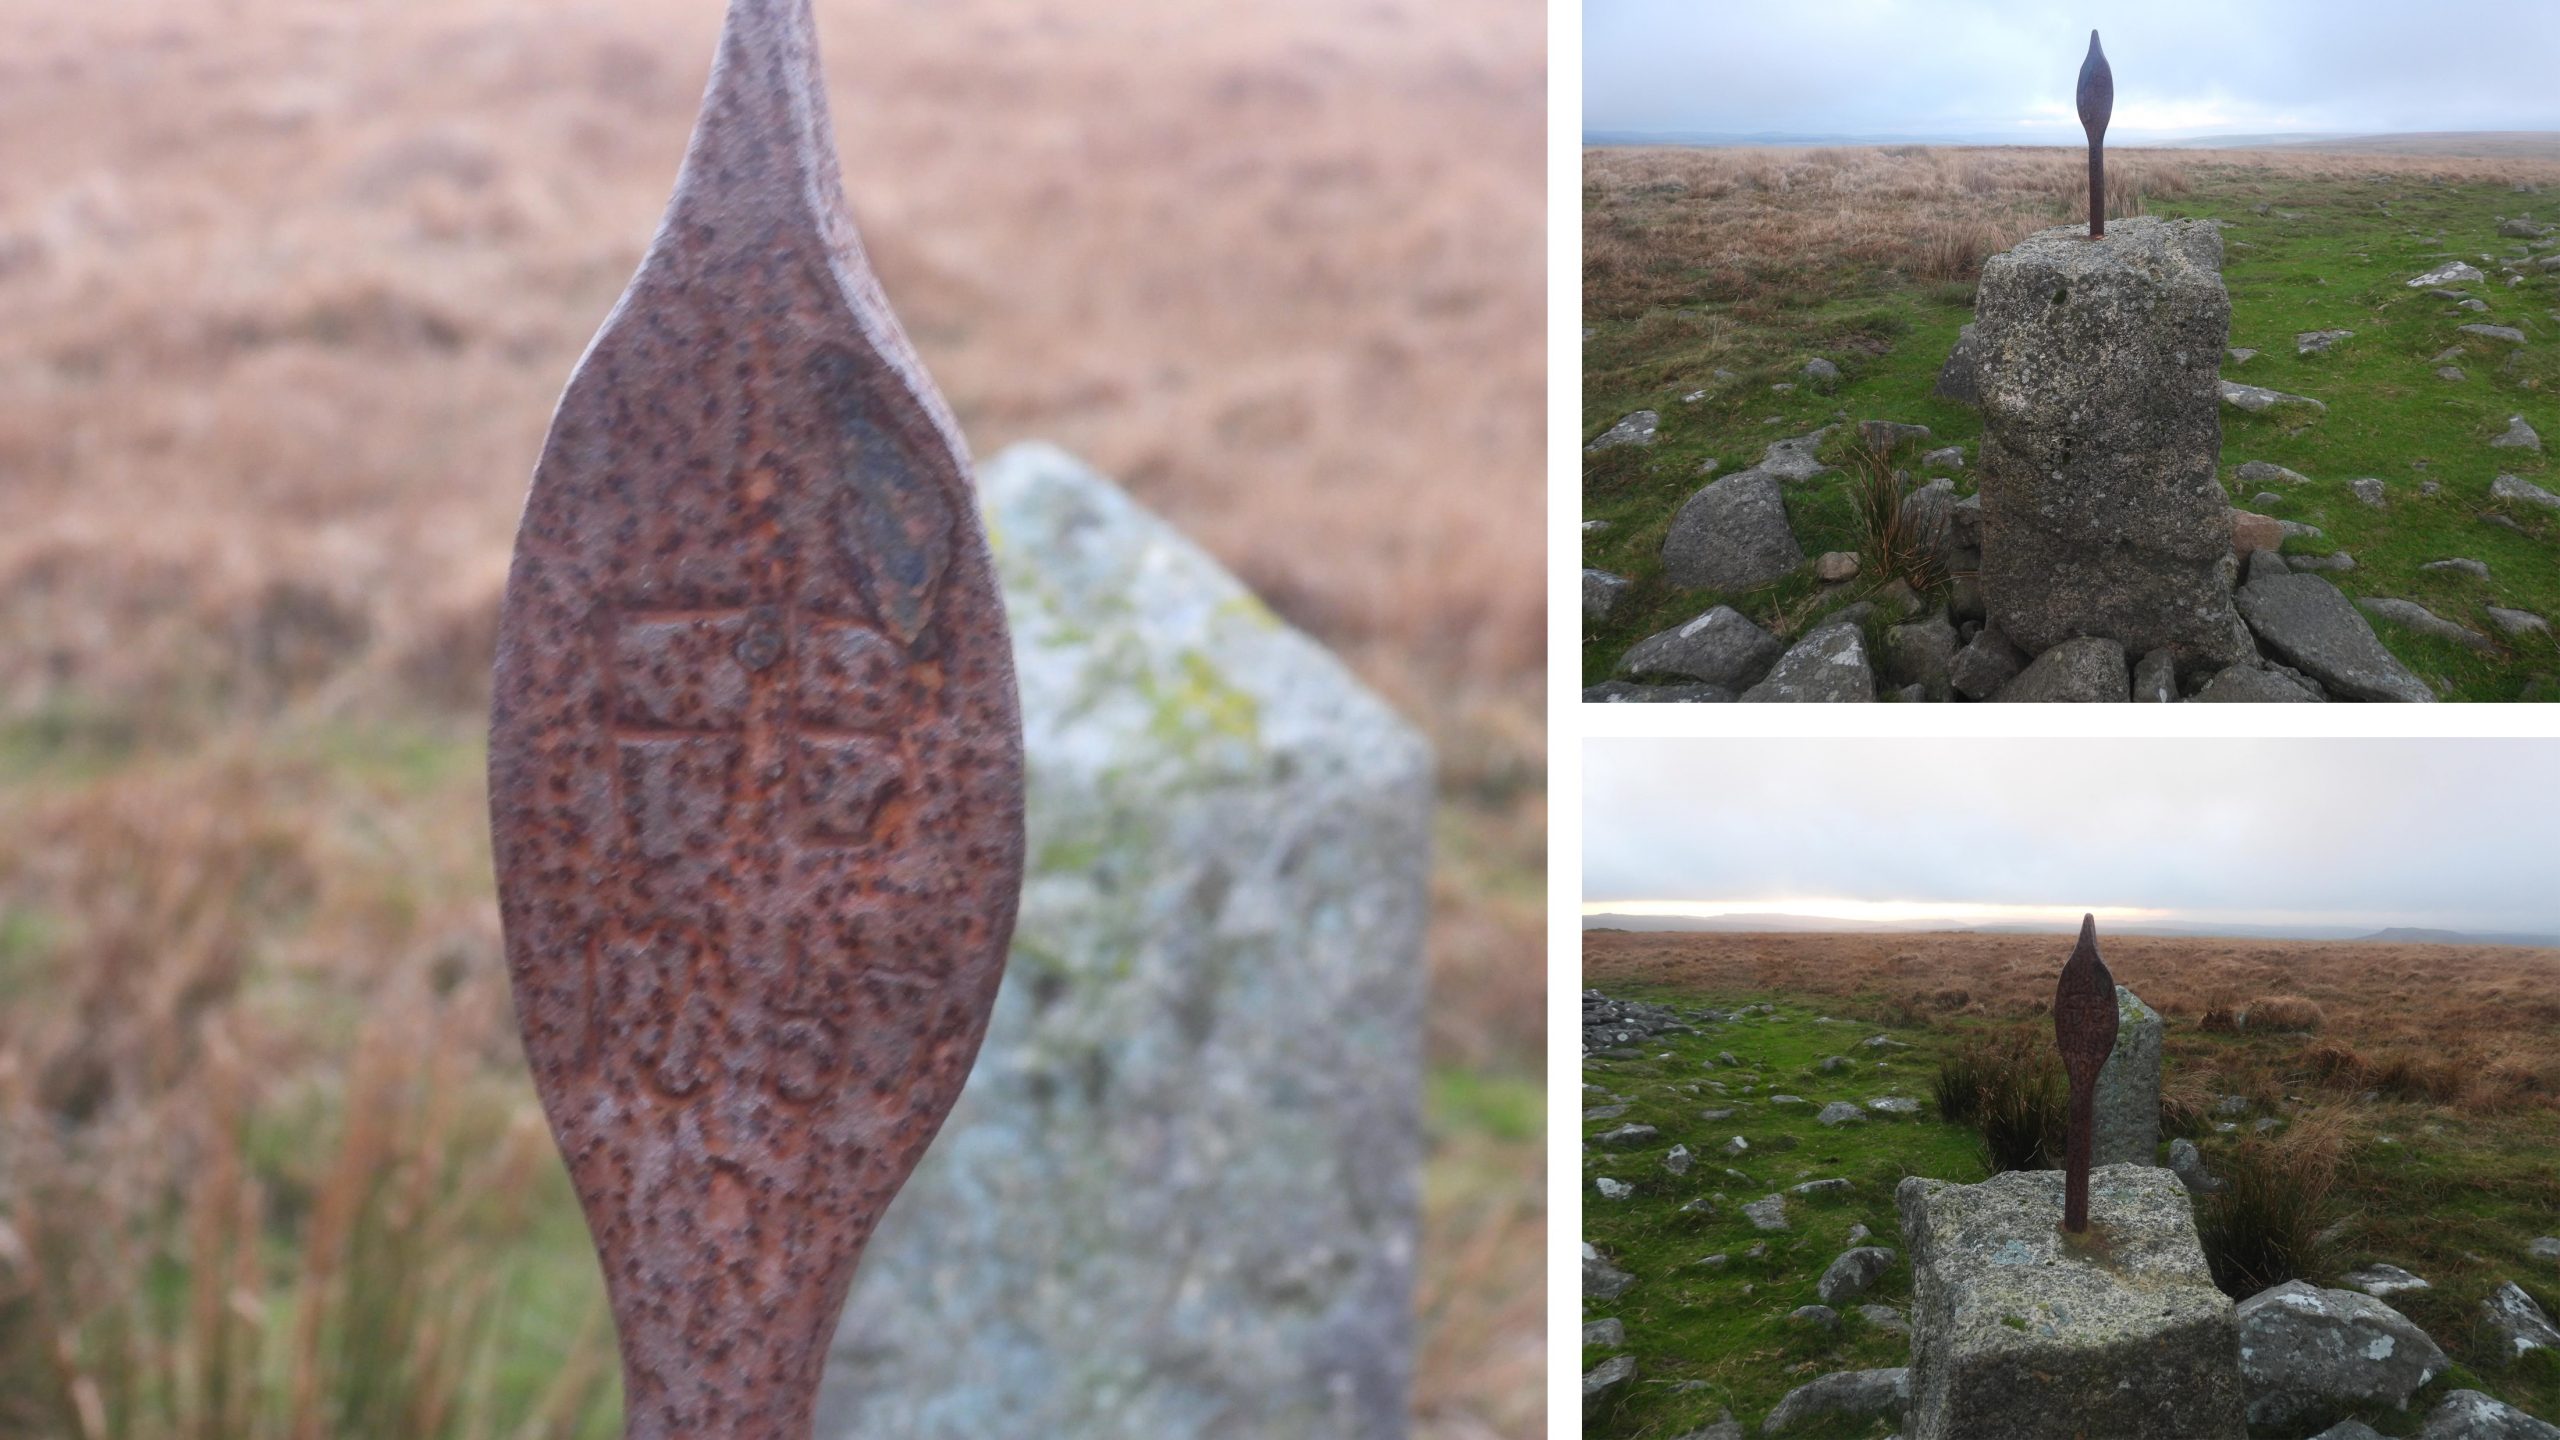
This 3 minute video was taken by the author where the line of flat rod granite pillars (east-west) from the Engine Wheelpit 2 to shaft 21 would have had a northern extension to shaft 25. The point where the east-west flat rods would have connected to a northern extension is at approx SX60007 68304. These granite pillars would have, in all probability been placed here around 1848 when shaft 3 (‘Deep Adit’) was converted to a wheel pit. This would have been around the time of the final throes of the mine which closed in 1852.From the new 50ft wheel flat rods (for pumping) ran up the hill and over a crest terminating a Pryce-Deacon (shaft 22)On approx 6 of the flat rod supports, black deposits can be found, which is the (whale) grease used to lubricate the flat rod mechanismClose up of groove with grease on one of the flat rod supports. This support is at SX59930 68293These flat rod supports were likely to be in use from 1847 through 1852 (when the mine closed)Various flat rod pillars with (whale) greaseThe northern extension of flat rod granite pillars can be followed all the way to shaft 25. The recesses (grooves) in the supports held the iron bearings upon which the flat-rods travelled transporting power from a waterwheel to pumps at the head of the shaft. This very large tinners’ reservoir lies between the flat rods granite pillars in the previous set of photographs and Eylesbarrow summit cairnsThe reservoir has an irregular shaped dam standing up to 5.5 metres wide and 1 metre high covered in grass and heather (ref: Gerrard). The reservoir still partly filled with water is at approx SX59968 68479The tinners’ reservoir has a well defined outflow point leading to a leat which took the water downhill towards shaft 18 area.The leat leading from the tinners’ reservoir cut across a series of prospecting pits.Sandy Gerrard (ref Dartmoor HER) speculated that these leats probably carried water to the tinworks to the south and may have drained the lode-back (which the author has called ‘prospecting’) pits to the north. These leats are comparatively large measuring up to 2 metres wide and 1 metre deep.Gerrard further comments that these leats are comparatively large measuring up to 2 metres wide and 1 metre deep with their size may support the hypothesis that they are ‘hushes’ draining water from the mine workings. ‘Hushing‘ is an ancient and historic mining method using a flood or torrent of water to reveal mineral veins. It is possible that the reservoir was built to provide the water for the ‘hushing’ through the pits seen today.The ‘hushing’ leat is crossed by the line of flat rod granite pillars which lead northwards to shaft 25Following the line of flat rod granite pillars north to shaft 25. The line crosses an area of prospecting tine pits of medieval or possibly later origin. The line of tin pits runs northeast to southwest and the pits range between 5 metres to 12 metres in diameter. Close to the line of flat rod granite pillars as they descent a moderately shallow slope a well cut benchmark can be found.The benchmark (ref: National Library of Scotland maps – side by side) is B.M. 1456.2 and is located at SX 60175 68650. The flatrod granite pillars would have been erected around 1848, in all probability at approx the same time the benchmark was being cut as the first Geodetic Levelling Survey was between 1820 and 1860. Did the tinners’ see the surveyors ?Shaft 25 in actual fact is two shafts side by side with the southern one (nearest the camera) being largest measuring about 5 metres deep.Although not named, this shaft in all likelihood is one which is mentioned in mine documents from 1851 and thus represents the final phase of activity at the mine. Shaft 25 is in an area of earlier activity where deposits were exploited or openwork methods.A screen shot of the Devon County Council Environment Viewer (which links to HER records) shows the line of flat rods (granite pillars) running to the east of shaft 25. What is unusual is that a ‘cut out’ L-shaped section, which the author believes was the terminal point for the flat rods (balance bob) is not recorded.L-shaped cut out section to the north of shaft 25 is what the author believes was the location of a balance bob, where the flat rod system terminated.The sections of the L-shape is approx 1m high x 1m wide. The author would welcome any further information on this feature and his observations. The ‘balance bob’ pit is located at SX60217 68742Climbing the hill to Eylesbarrow summit where there are three cairns, a PCWW 1917 granite pillar, an iron ‘cobra’ and a benchmark.The benchmark is very low down on a long thin rock. It is recorded on 19th century maps as B.M. 1490.2. It can be found at SX 59976 68611The PCWW 1917 granite pillar, the iron ‘cobra’ and one of the summit cairns. There are 71 granite PCWW boundary posts in total as follows: PCWW 1917 (57) , PCWW 1919 (10) and PCWW 1932 (3) plus one post which is not inscribed and one inscription on North Hessary Tor (total 72). The (Burrator) reservoir watershed, was at one point owned by others, in the main Sir Henry Lopes of Maristow. and was 5300 acres. The selling of the watershed lands to the Plymouth City Water Works in 1916, 1919 and 1932 led to the erection of these granite boundary markers. https://dartmoorexplorations.co.uk/plymouth-corporation-water-works-pcww-granite-boundary-posts-and-cast-iron-markers/In February 2015 this replica ‘Cobra’ was made at the Princetown forge and was instated at Eylesbarrow summit on 25th March 2015, the cost was borne by the Duchy of Cornwall and the Dartmoor National Park Authority. The “Cobra” original had became loose, then was vandalised (in 2014) before being replaced. The cobra has been also nicknamed “excalibur”.The ‘cobra’ has “FB” (Forest Bounds) and “WB” (Walkhampton Bounds) inscribed of its two faces. The date 2015 can also be found on one side of the shaft. The story of this replacement ‘cobra’ was covered by BBC Spotlight: https://www.facebook.com/bbcspotlight/videos/869162879815878From the Eylesbarrow summit following the line of PCWW 1917 granite pillars is a westerly direction another group of prospecting pits can be found. View of Sheepstor and a glimpse of Burrator reservoir from the prospecting pits. A PCWW 1917 granite pillar is in the foreground.This sketch map shows the featuresrelating to the post processing of the ore, namely crushing, separation and smelting. The author has created a sketch for each Stamping Mill (and the one Smelting House) showing the features associated with their operation. The sketches are based on the originals by Dr Phil Newman found in (Newman, P., 1999, Eylesbarrow (Ailsborough) Tin Mine – Proc Devon Archaeol Soc 57 1999) and the annotations (Mills 1-6) are his. This post only shows a few photographs per mill and more can be found here: https://dartmoorexplorations.co.uk/eylesbarrow-stamping-mills-smelting-house-engine-wheel-pit-and-tinners-reservoir/Stamping Mill No. 1 is believed to have been built in 1814. It is the first of six aligned Stamping Mills along the Drizzlecombe Valley to the south west of the Engine Wheelpit 1. It uses the same water supply as the Engine Wheelpit 1. The sketch map shows the key features of the Stamping Mill. Sketch is based on original, SM1 by Dr. Phil Newman (page 138 Eylesbarrow (Ailsborough) Tin Mine – Proc Devon Archaeol Soc 57 1999)The stamping area immediately adjacent to the south of the wheelpit Next to the mine track lies the ruins of a rectangular building of unknown purpose. It is sited on the SE corner exterior of the dressing floor of Stamping Mill No. 1. It is constructed from stone and parts of the walls are missing. It has approximate internal dimensions of 11.9m by 3.7m. It is located at SX59458 67957.Below the main dressing floors there are a range of secondary buddles and tailings pits, which were used for further refining. The author recorded the centre of these buddles at the south west of the site at SX59425 67948.Stamping Mill No. 2 is believed to have been built in 1814. It is the second of six aligned Stamping Mills along the Drizzlecombe Valley to the south west of the Engine Wheelpit. The sketch map shows the key features of the Stamping Mill. Sketch is based on original, SM2 by Dr. Phil Newman (page 138 Eylesbarrow (Ailsborough) Tin Mine – Proc Devon Archaeol Soc 57 1999) One of the most recognisable features at this part of Eylesbarrow mine. This wall has a wheelpit on its west side and a stamps area on the east side.This annotated photograph shows where the wheel would have been placed. The wheelpit measures 8.2 metres by 0.9 metres and next to the stone revetment atSX59384 67866.The probable stamping area is adjacent to the wheelpit revetment and consists of a 1.9 metre by 2.4 metre stone level platform. Like Stamping Mill No. 1 there were a set of Cornish stamps operating using a wet stamping process. The stamps are located at SX59392 67859.Impression (not to scale) of how the wheel would have been connected to cam cogs to convert the rotational motion to linear motion to power the stamps and crush ore in a mortar stone.The classic view through stamping mill 2 “window”.Associated with Stamping Mill No. 2, there are three secondary buddles and tailings pits.Stamping Mill No. 3 is believed to have been built in 1814 as was Mills 1 and 2. It is the third of six aligned Stamping Mills along the Drizzlecombe Valley to the south west of the Engine Wheelpit. The sketch map shows the key features of the Stamping Mill. Sketch is based on original, SM3 by Dr. Phil Newman (page 138 Eylesbarrow (Ailsborough) Tin Mine – Proc Devon Archaeol Soc 57 1999)The wheelpit and the stamps area of Stamping Mill No.3. The machinery block in the stamps area is atSX59336 67770.All that remains of the stamps is a 3.0m by 2.2m stone revetted level platform, raised above the dressing floor onto which the stamps would fall, contained within a timber coffer. On the platform is a machinery block which is 1.2 metres long, 0.58 metres wide by 0.58 metres thick. Four holes cut into the north-east end are 5 centimetres in diameter and 8 centimetres deep. Source: Dartmoor HER.The settling pit would have had crushed tinstone from the stamps running into it.View of the wheelpit, the machinery block in stamps area in relation to the leat embankment.The leat embankment is recorded as being 52.5m long with an average width of 4.5m. The end of the leat embankment which fed the water to an overshot wheel is atSX59337 67784.This water powered stamping mill and associated dressing floor processed tin ore at Eylesbarrow Tin Mine. It is the fourth of six aligned Stamping Mills along the Drizzlecombe Valley to the south west of the Engine Wheelpit. The sketch map shows the key features of the Stamping Mill.Sketch is based on original, SM4 by Dr. Phil Newman (page 138 Eylesbarrow (Ailsborough) Tin Mine – Proc Devon Archaeol Soc 57 1999)The stamps area as defined on the Dartmoor HER consists of a 2.4m by 2.7m stone revetted level platform and is located atSX59296 67709View of the wheelpit, stamps area and the leat embankment. The leat embankment would have supported a wooden launder channel at the correct height to bring water to an overshot wheel. To the west of the wheelpit is the stamps area and dressing floor. The wheelpit was recorded at SX59297 67706To the west of the stamps area and wheelpit is a dressing floor with four settling pits. The ‘centre’ of the dressing floor was recorded atSX59287 67707At the south-west part of Stamping Mill No 4 complex lies a row of three secondary buddles arranged north-east to south-west. The northernmost buddle is triangular with the other two being rectangular. The ‘centre’ of the three secondary buddles was recorded at SX59268 67681.This tin smelting house and water powered stamping mill served Eylesbarrow Tin Mine. The Stamping Mill (No 5) was one of six mills to serve the mine and was operational between 1822 and 1831.Sketch is based on original, SM5 by Dr. Phil Newman (page 138 Eylesbarrow (Ailsborough) Tin Mine – Proc Devon Archaeol Soc 57 1999)General view of the mill. The smelting house consists of a rectangular building with internal dimensions of 17.9m by 6.1m, split into a Reverberatory Furnace end (to the east) and a Blast Furnace end (to the west). This Robert Burnard picture was taken 19th January 1889, nearly 40 years after Eylebarrow Mine closed. It is the Smelting House and the blocks on the left are still there today. The window nearest the camera is shown in a Richard Hansford Worth sketch from 1922.The three large (approx 1.2m by 0.9m) granite blocks at the south-east end of the building were part of the blast furnace plus two similar pieces stacked one above the other and built into the north wall. The external wheelpit is recorded as measuring 9m long by 0.8m wide and is an integral part of the smelting house structure which has been suggested that the stamping mill was constructed as part of the same building phase. The wheelpit was recorded by the author atSX59170 67645. Next the wheelpit is a very disturbed stamps area atSX59168 67643.There was a very high tonnage of tin recorded as being smelted in the period 1822 to 1831. The Reverberatory Furnace would have required many tons of coal while the Blast Furnace would have required charcoal.Looking beyond the smelting house to the west are three pillars which mark the location of a linhay. It is thought that the linhay structure was likely to be a fuel store. The centre of the structure was recorded by the author at SX59160 67634The horizontal, angled flue as being used to “direct fumes from the blast furnace to a square stack, 19m from the back of the furnace”This water powered stamping mill served Eylesbarrow Tin Mine. The Stamping Mill (No 6) was one of six mills to serve the mine and is believed to have been one of the first to be operational. It is last in the chain of mills. Sketch is based on original, SM6 by Dr. Phil Newman (page 138 Eylesbarrow (Ailsborough) Tin Mine – Proc Devon Archaeol Soc 57 1999)The wheelpit is badly ruined with fallen stone filling much of the wheel housing. It was recorded atSX59154 67482. The Dartmoor HER records the wheelpit internal dimensions as being 8.5 metres by approximately 1 metre wide. There are stamps areas either side of the wheelpit.General view of Stamping Mill (6) from across the Thrushelcombe Brook looking north.The Stamping Mill had two sets of stamps (each side of the wheelpit) with each side having an associated Dressing Floor. The stone revetment is measured as 54 metres long either side of the wheelpit albeit it is collapsed in many places. Dressing Floor (2) revetment remains. The centre of the Dressing Floor (2) was recorded atSX59141 67470.The secondary dressing floor is situated to the south of the main area of the mill and contains two or three earthwork buddles.The author whilst leaving the mine in mid-November was treated to this spectacular sunset
Hi, I am honestly stunned at you input, very good reading, I have in my past explored the above, now sadly I am old rusted N busted but still enjoy all you have given here. very good, David Bradbury , Brixham…all wonderful thank you
Many thanks for taking time to comment on the Eylesbarrow Tin Mine post. I am very humbled. The website is my retirement hobby, which I am enjoying creating and am very pleased is being visited by Dartmoor lovers.


Rich December 17, 2022
Unbelievable piece of work,,enjoyed the breakdown of the site ,it has explained so much about it . Thank you for posting it .
david bradbury March 21, 2023
Hi, I am honestly stunned at you input, very good reading, I have in my past explored the above, now sadly I am old rusted N busted but still enjoy all you have given here. very good, David Bradbury , Brixham…all wonderful thank you
SteveGriggDartmoor March 22, 2023 — Post author
David,
Many thanks for taking time to comment on the Eylesbarrow Tin Mine post. I am very humbled. The website is my retirement hobby, which I am enjoying creating and am very pleased is being visited by Dartmoor lovers.
Kind Regards,
Dartmoor Explorations (Steve)