A collection of walks, discoveries, insights and pictures of exploring Dartmoor National Park
May 29, 2021
Wheal Katherine
This mine was originally named Crane Lake Mine being located at Crane Lake in the upper reaches of the River Plym, just over half a mile east of the Eylesbarrow Mine. The earthworks of the tin mine and its associated processing were documented as far back as 1792 when it was recorded as ‘only recently been opened’ (Cook, Greeves & Kilvington). That said, Crane Lake itself had prior to this been heavily streamed for tin, which is assumed to date to the late Medieval period, circa 15th/16th century.
The name of the mine may have changed to Wheal Katherine when it was part of the Eylesbarrow Mine, the main hub of which is located to the west. Certainly, in 1817 a Wheal Katherine Tin Sett was granted, by the manorial lord, which appears to be the earliest record of this name. Three years earlier in 1814, the same manorial lord had granted Ellisborough (Eylesbarrow) Tin Set, to a company known as Ellisborough United Mines (Cook, Greeves & Kilvington). What is not certain is whether the Wheal Katherine Tin Sett was acquired by Ellisborough United Mines or by another company. Of note is that Ellisborough United Mines operated between 1814 to 1835 and were most successful between 1818 to 1830, so it would seem likely that most of the development at Wheal Katherine took place sometime within this period, especially as the sett had been granted in 1817.
Several archaeological field surveys have been carried out on the mine and features recorded include: openworks, leats, pits, shafts, a stamping mill, dressing floors and buddles (or settling pits). The Dartmoor HER refers to these surveys and provides excellent summaries of features and is a valuable resource for the would be explorer and it is this source that the author has used in the construction of this post. Although mining at Eylesbarrow ceased in 1852, this didn’t include the Wheal Katherine Sett. Wheal Katherine was still in operation in 1856 when it was advertised as a working mine. It is assumed that the mine ceased operations sometime around this time. There are numerous features associated with Wheal Katherine which remain are quite well preserved considering the intervening 160 years since its closure. This post attempts to record some of the main features.
Bibliography
Eylesbarrow (1814-1852) A Study of a Dartmoor Tin Mine – R.M.L. Cook, T.A. Greeves & C.C. Kilvington, The Devonshire Association Report and Transactions Vol 106, pages 161-214 -1974
Eylesbarrow (Ailsborough) Tin Mine – Phil Newman, Devon Archaeological Society Proceedings No. 57, pages 105-148 – 1999
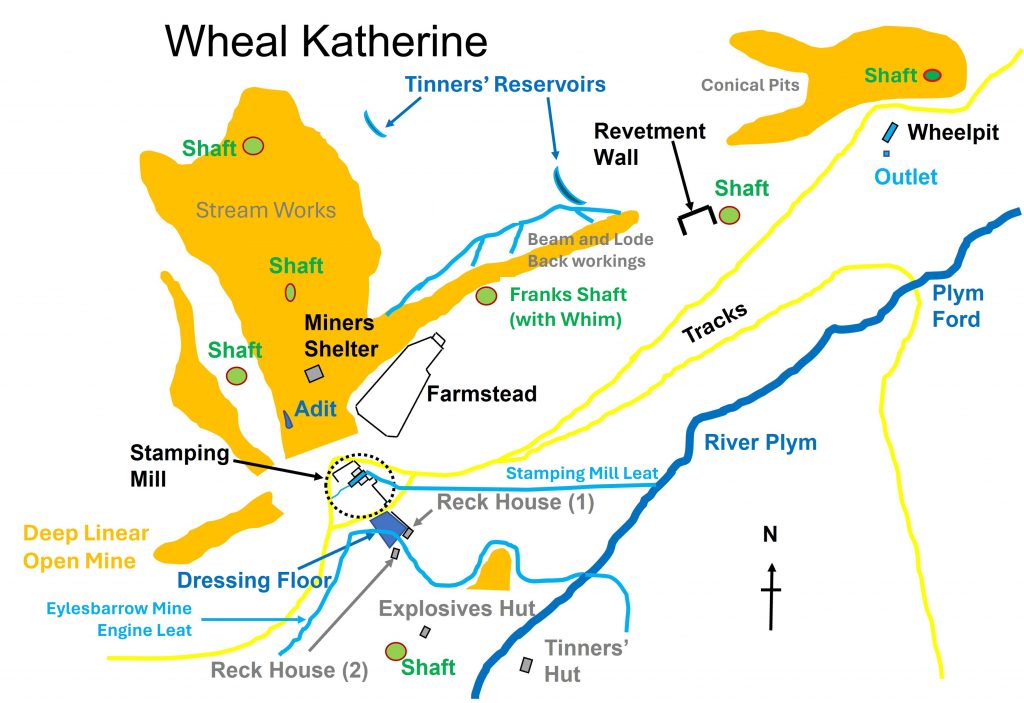
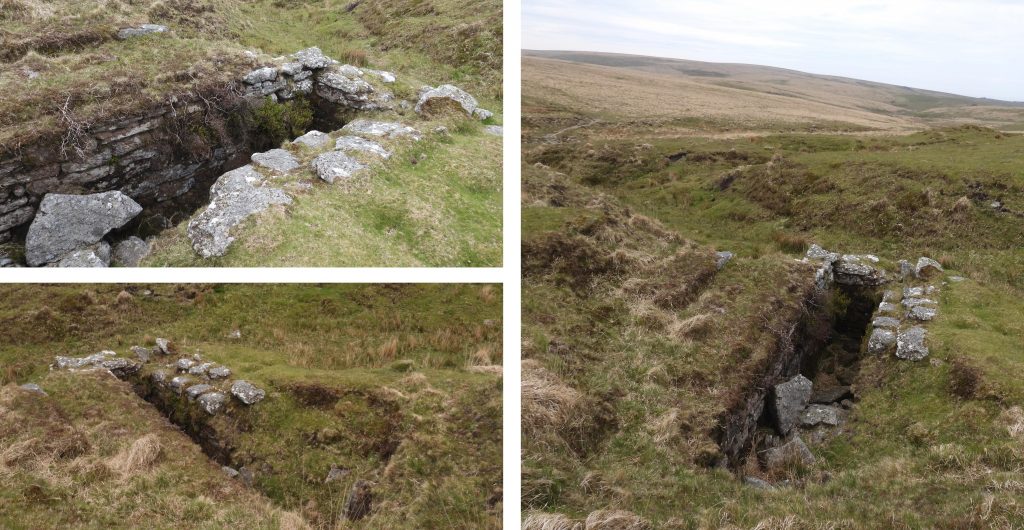
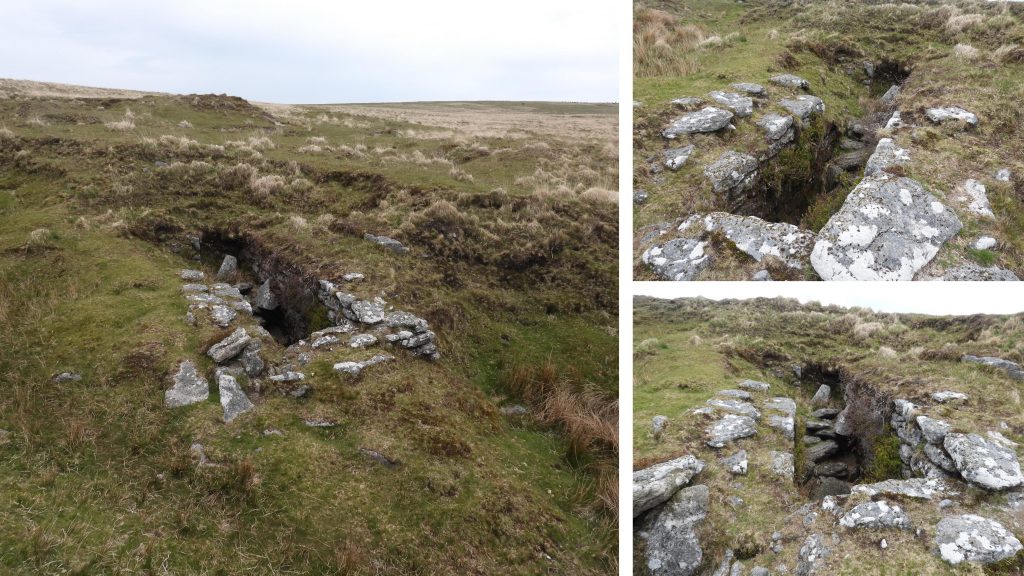
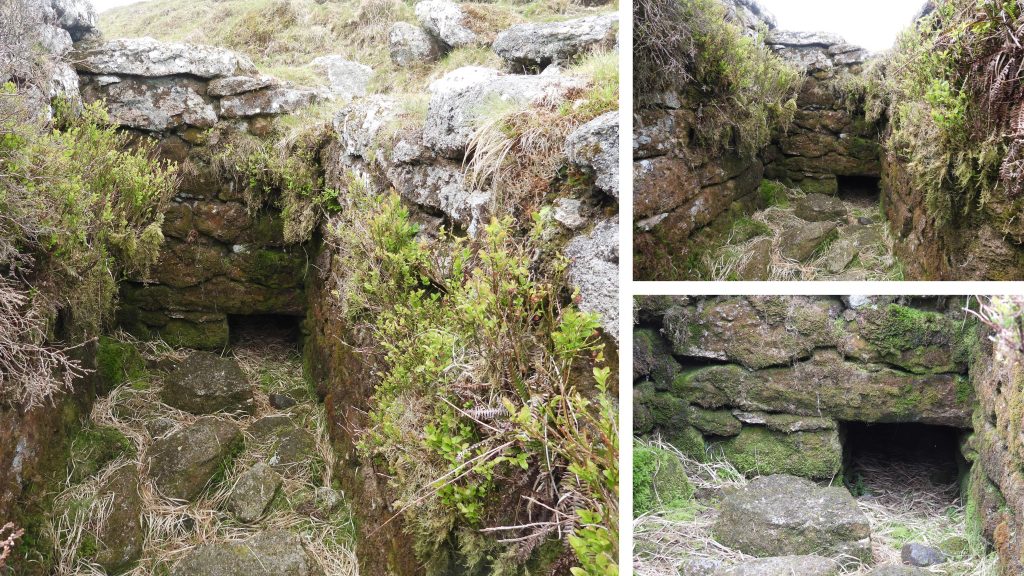
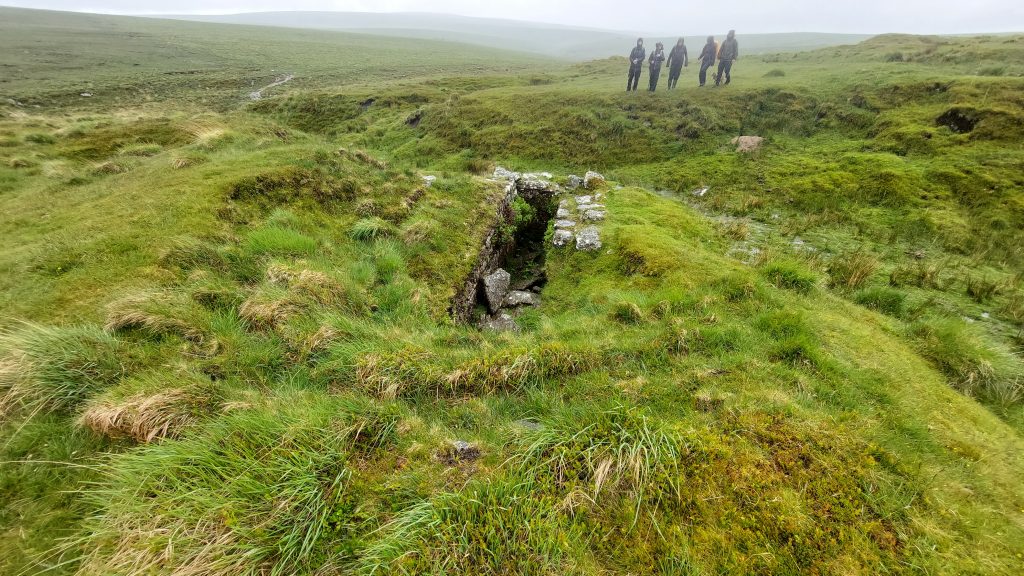
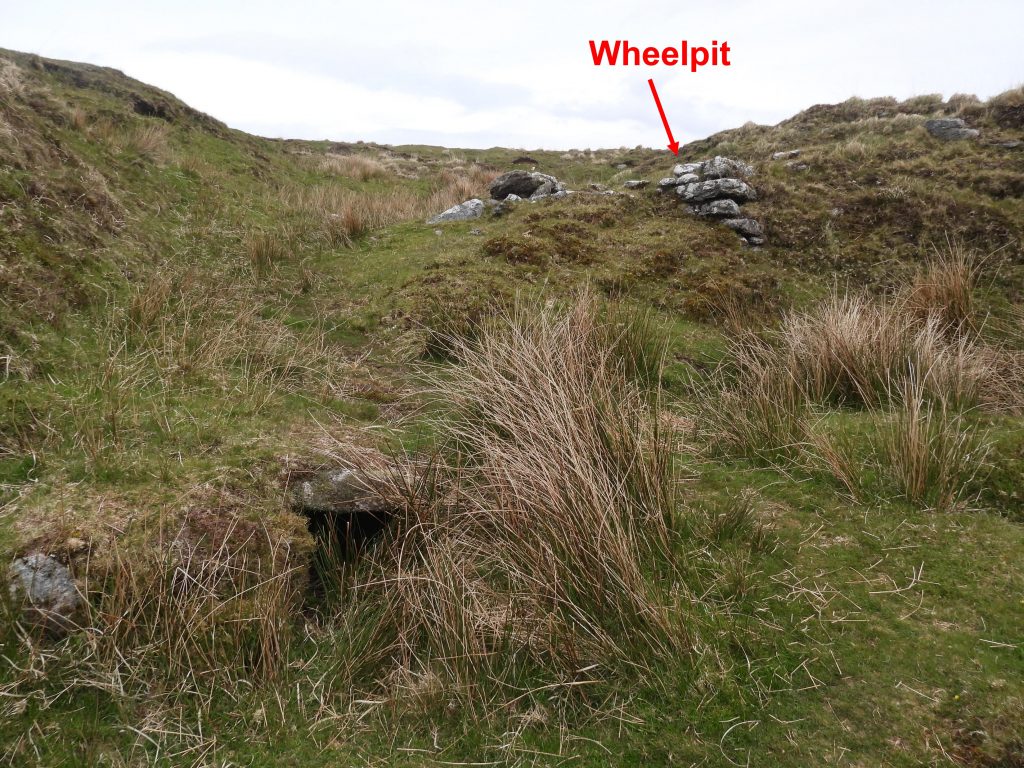
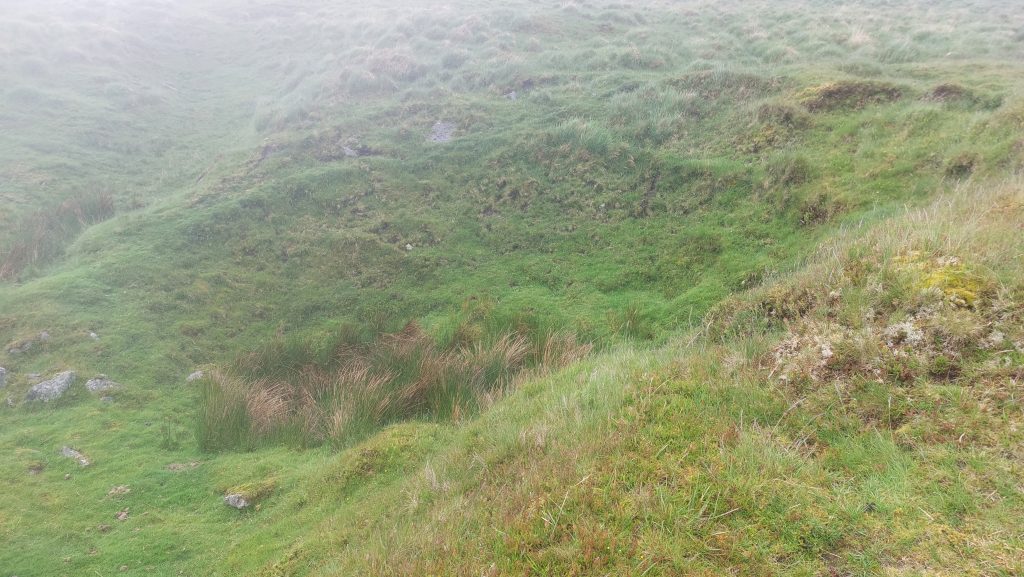
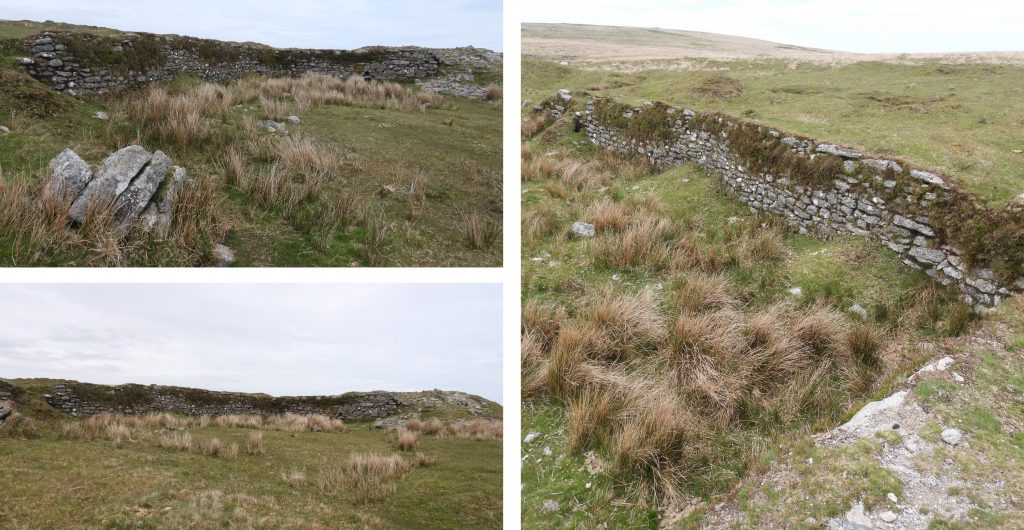
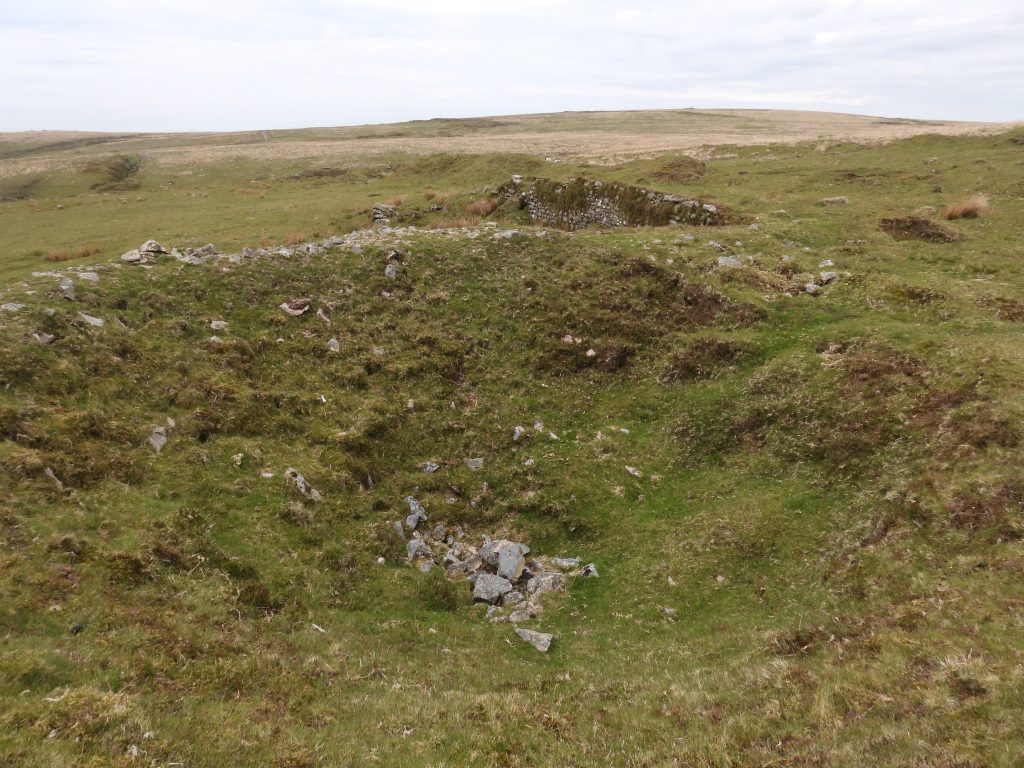
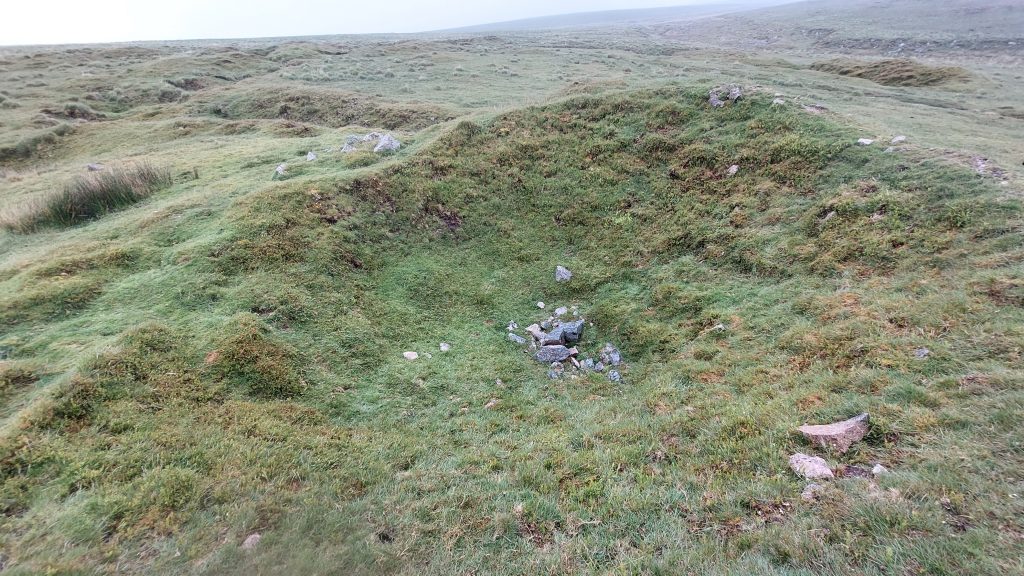
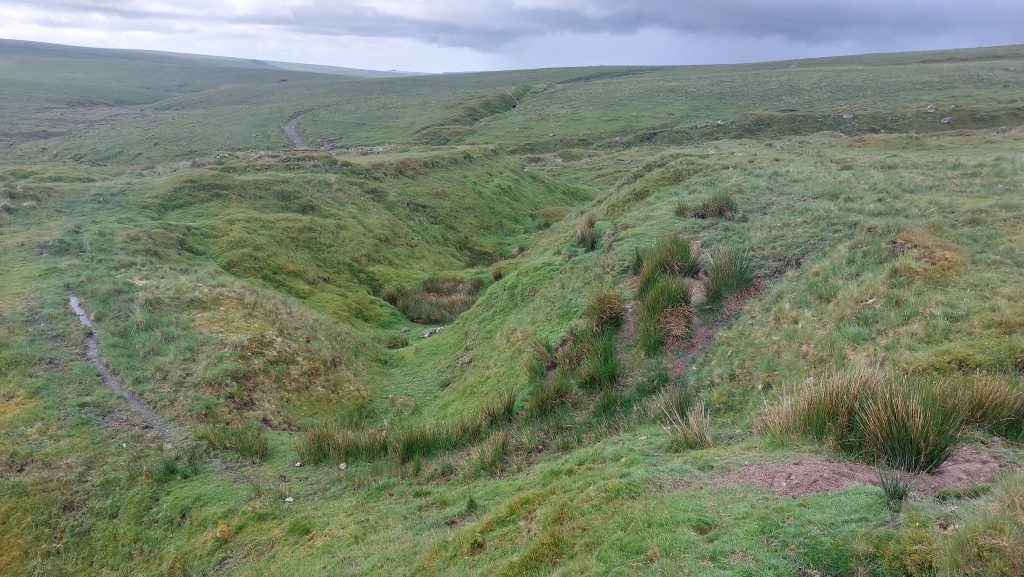
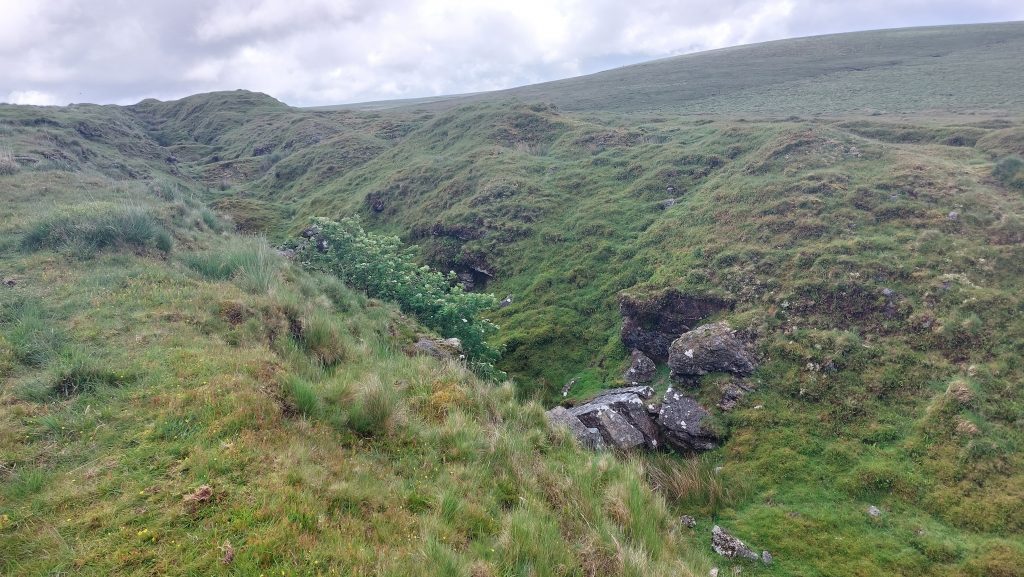
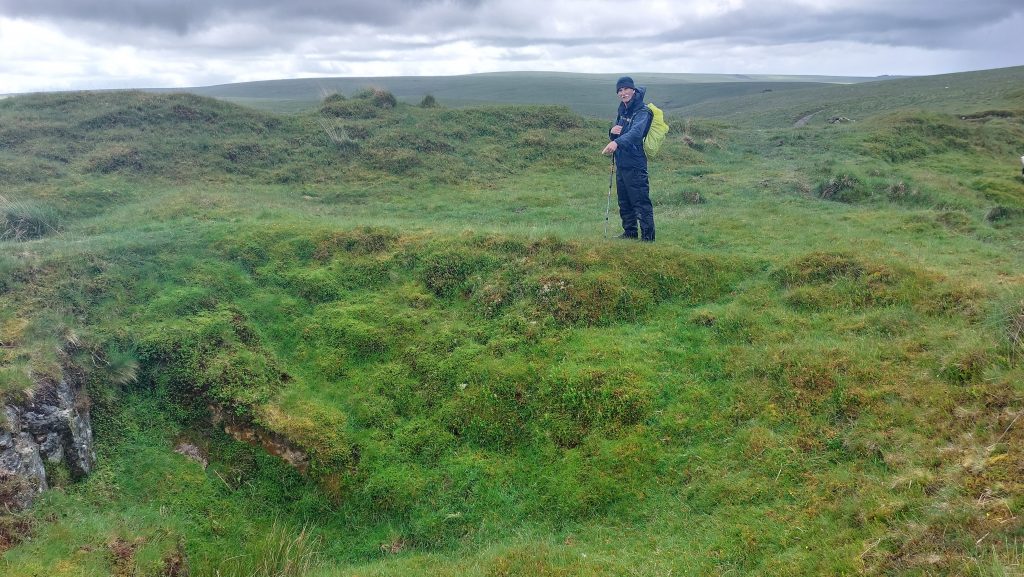
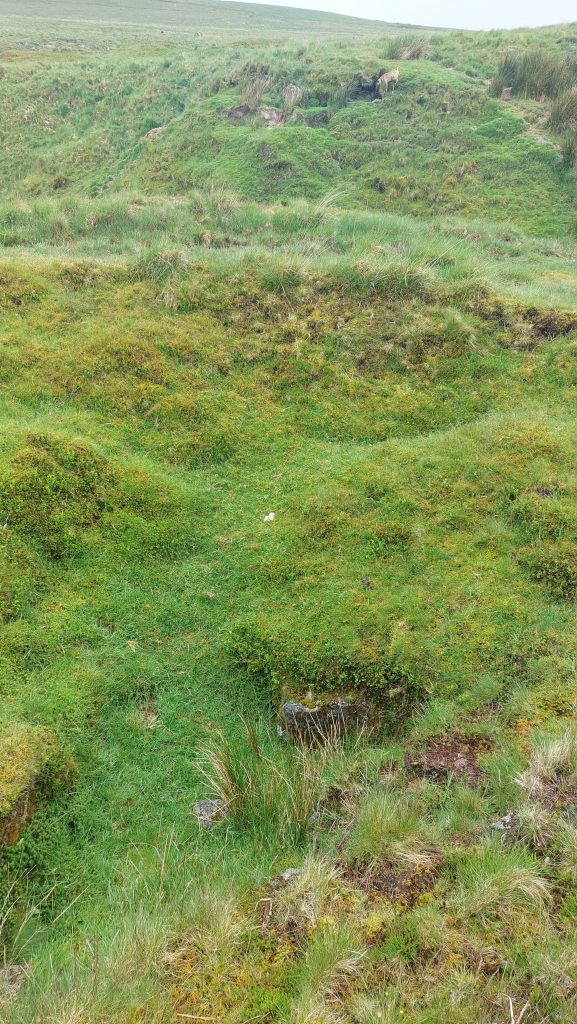
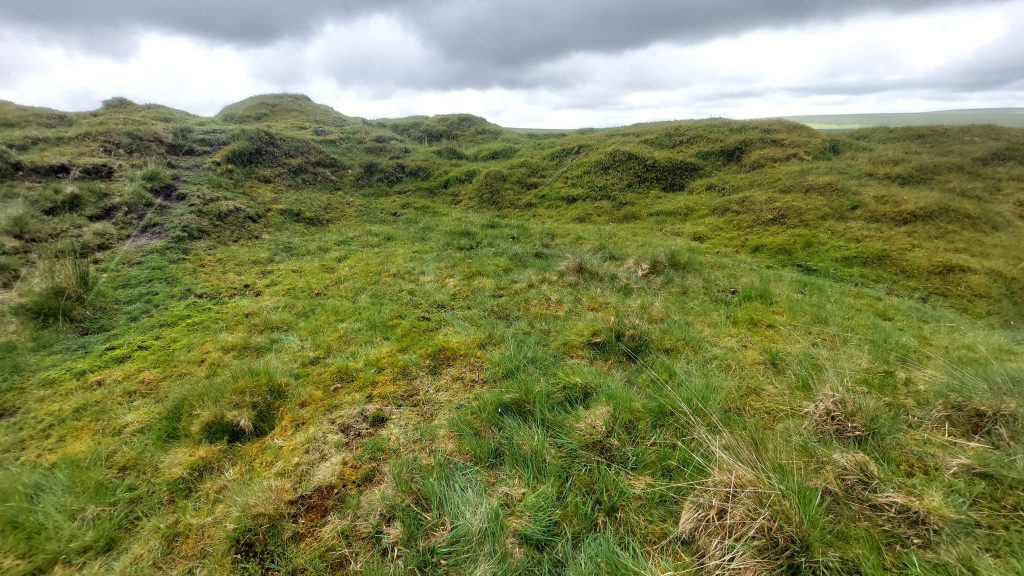
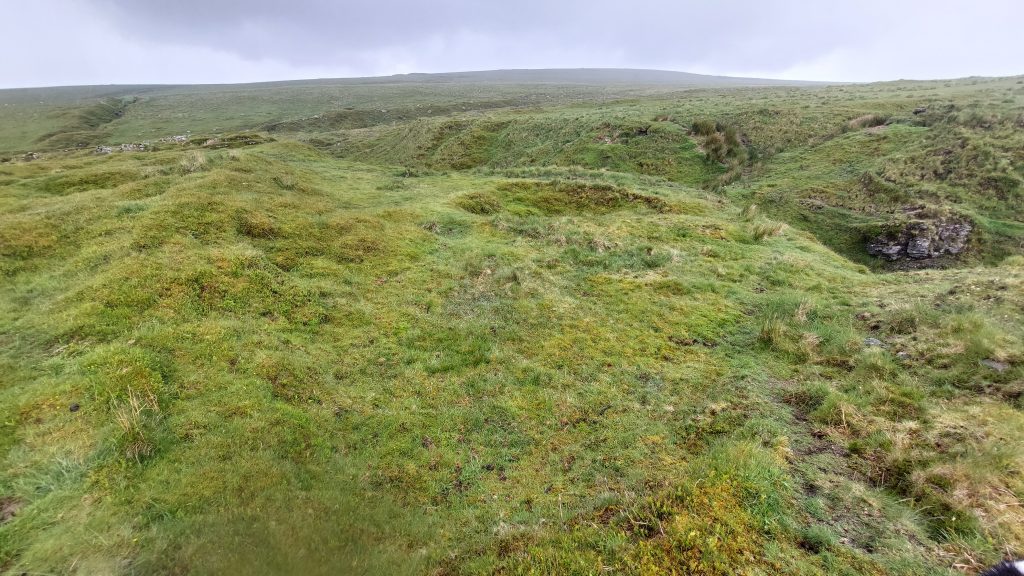
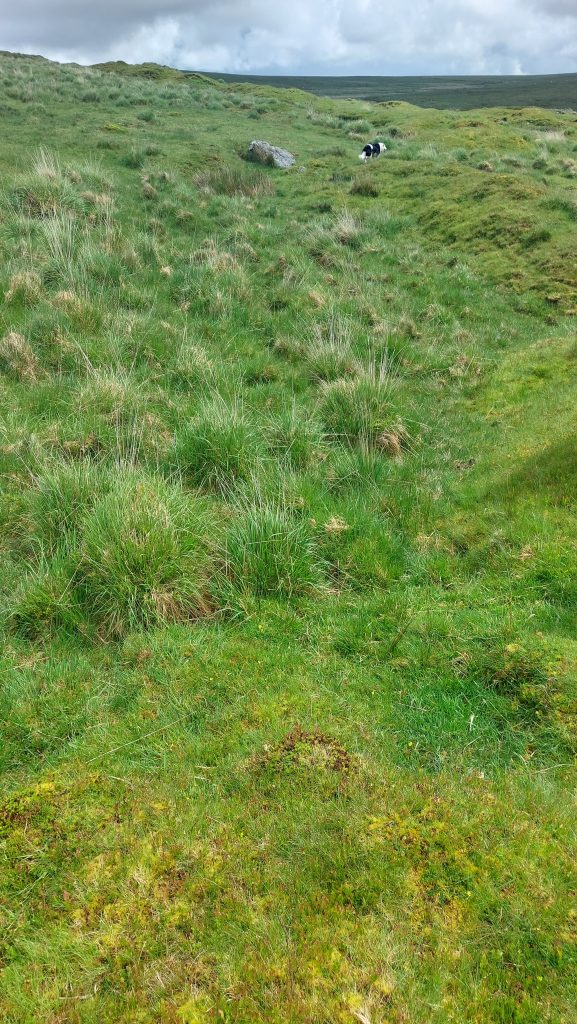
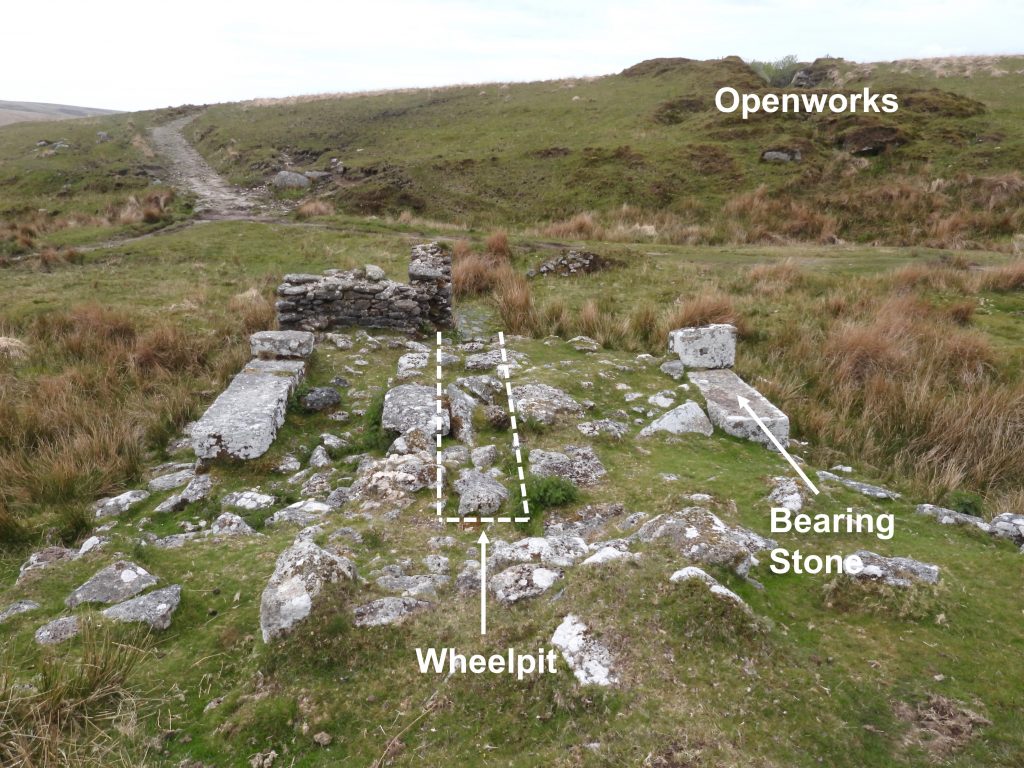
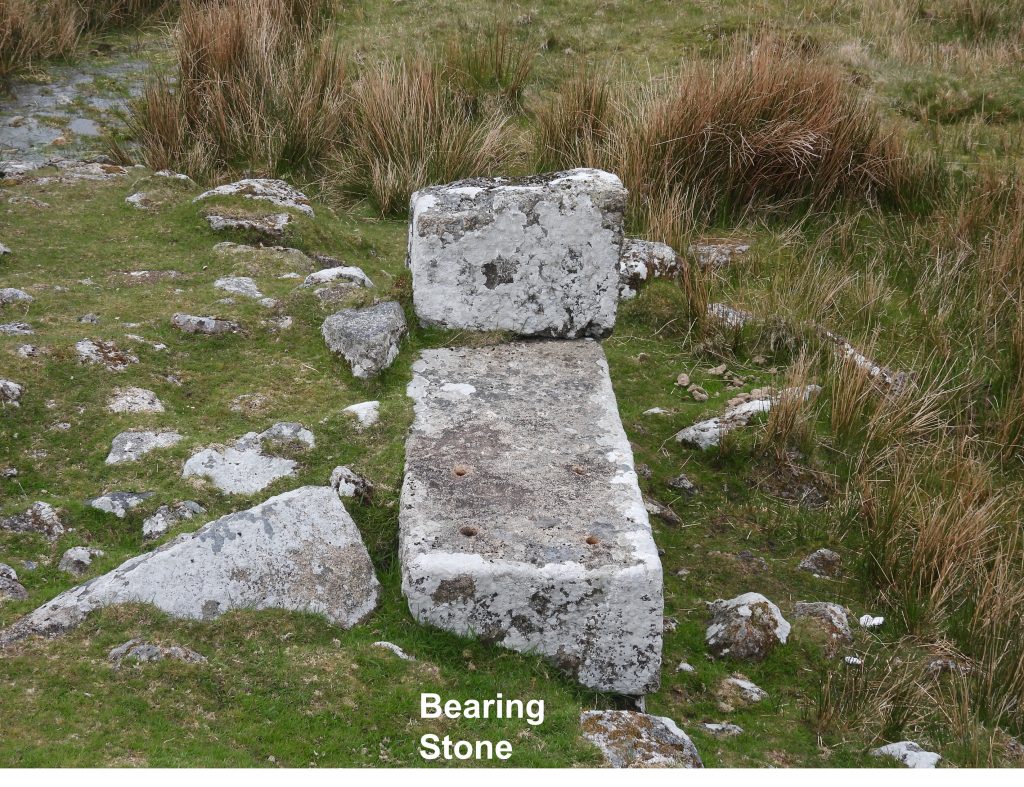
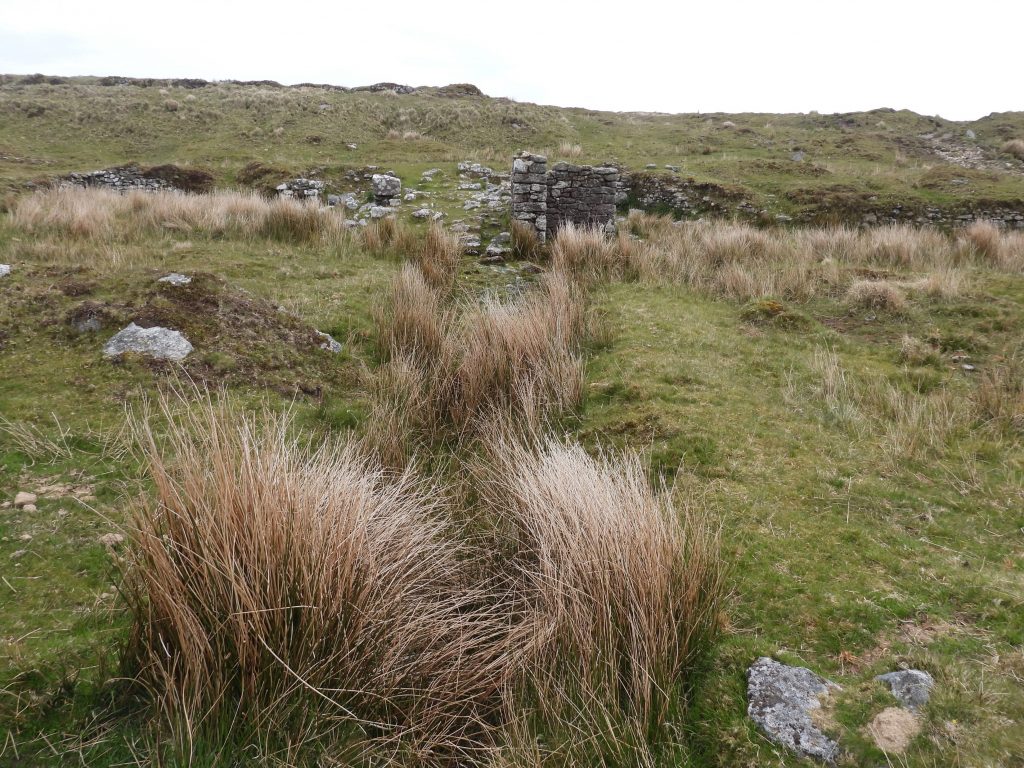
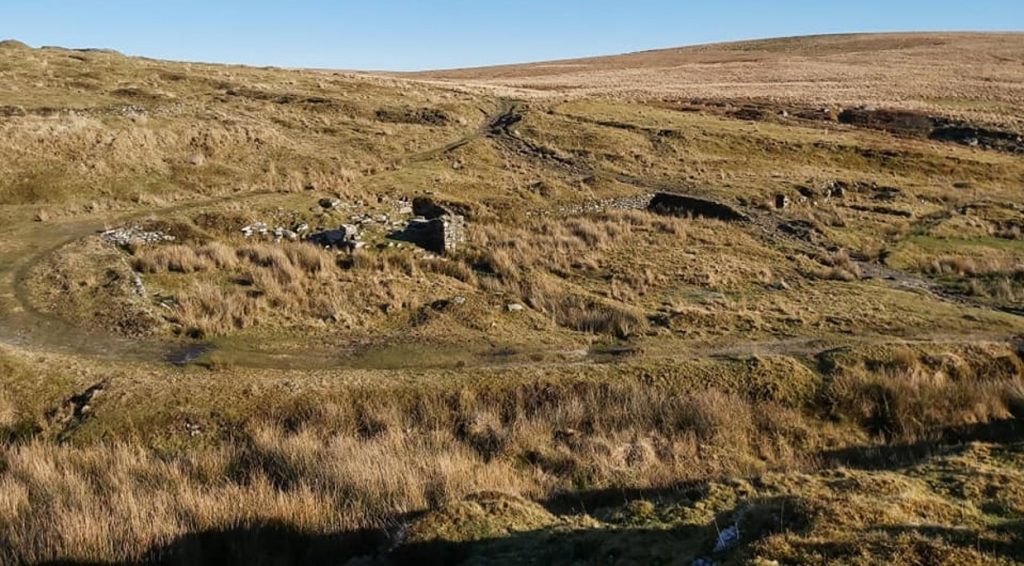
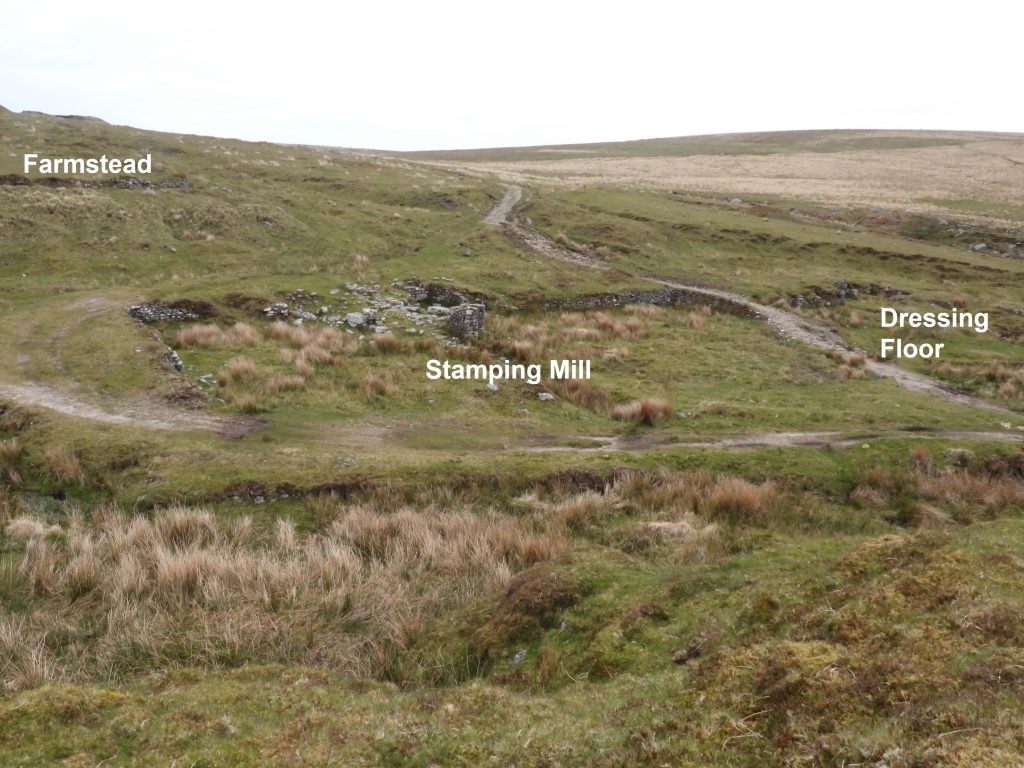
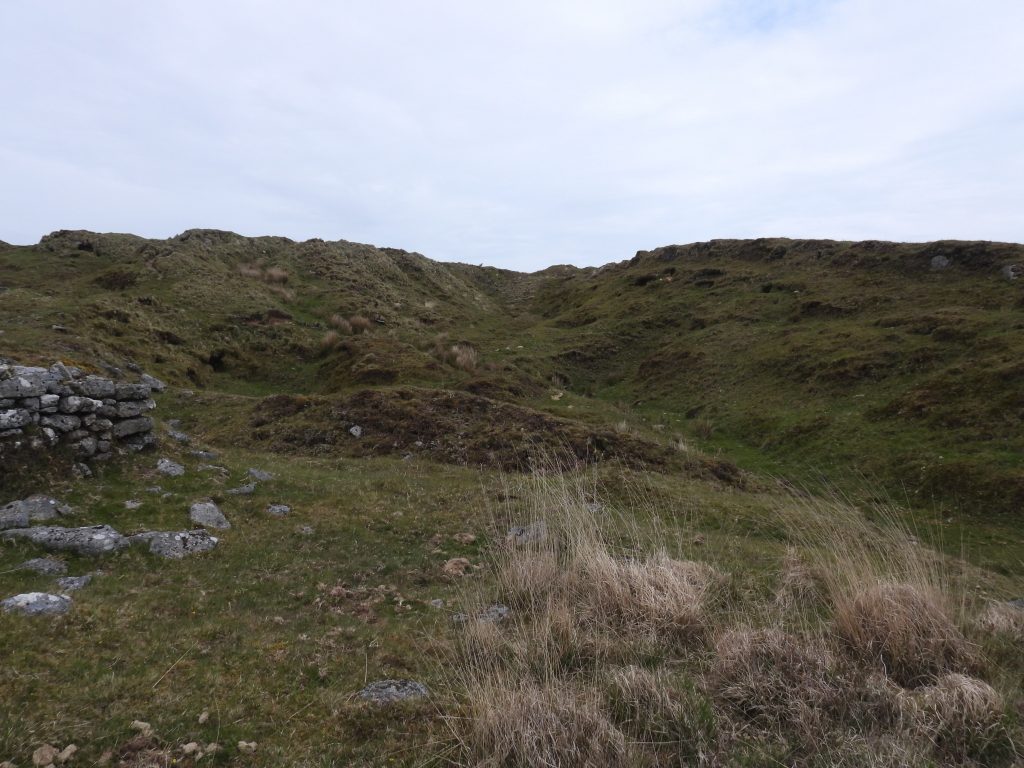
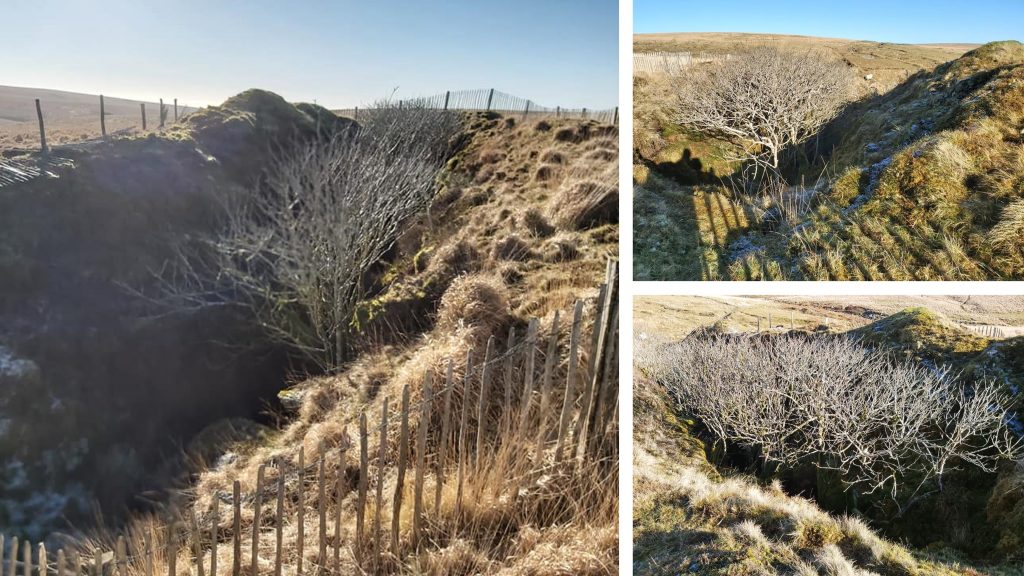
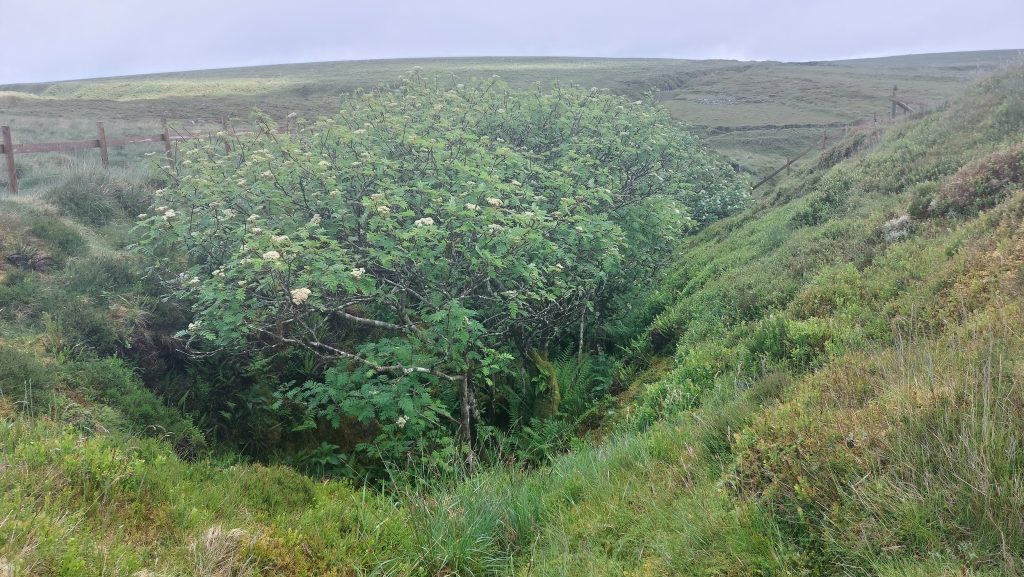
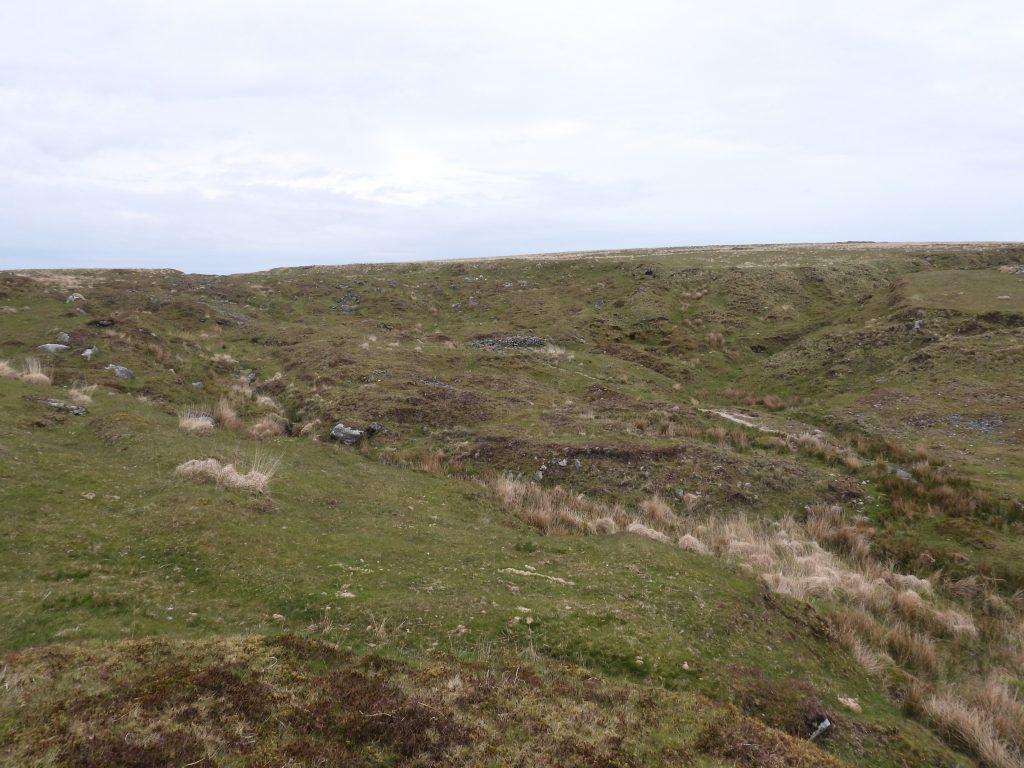
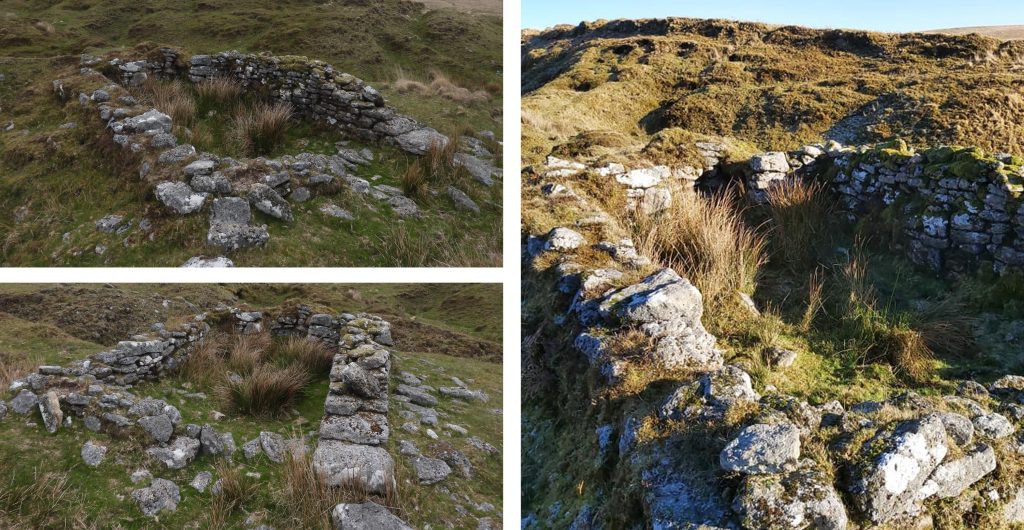
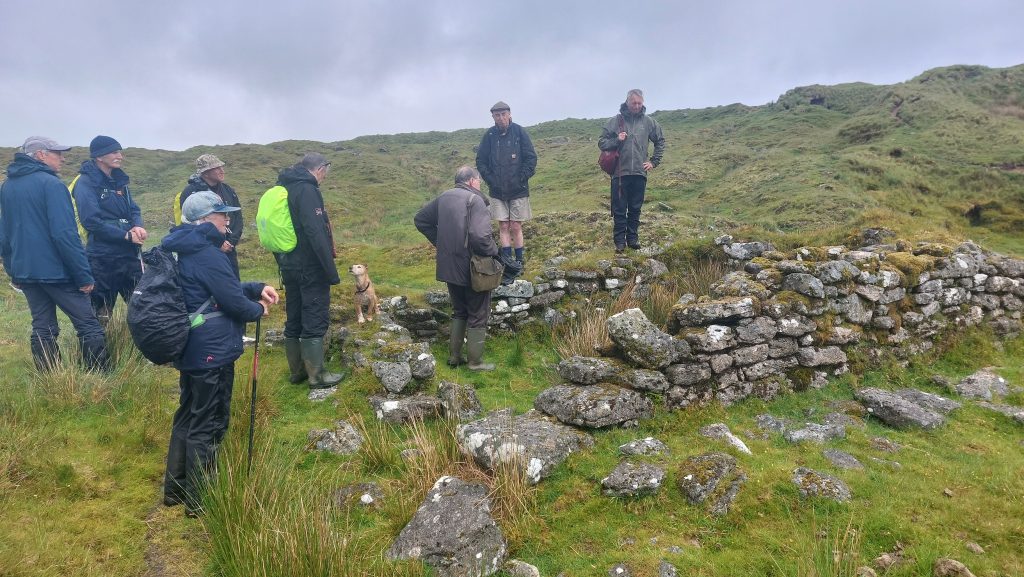
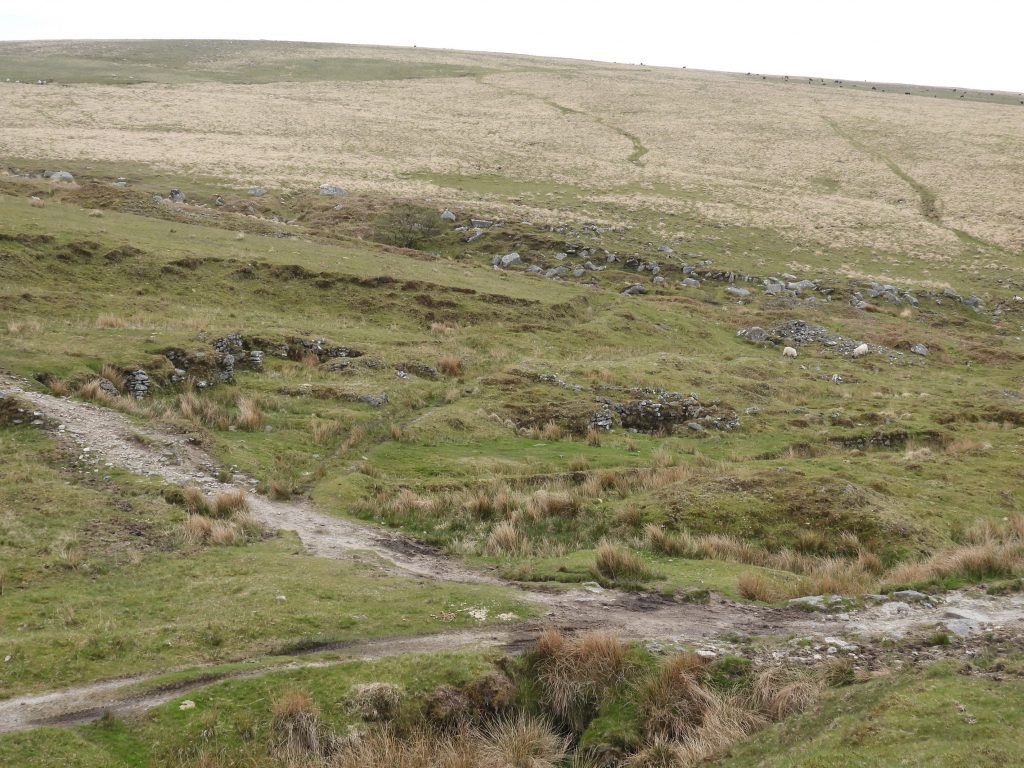
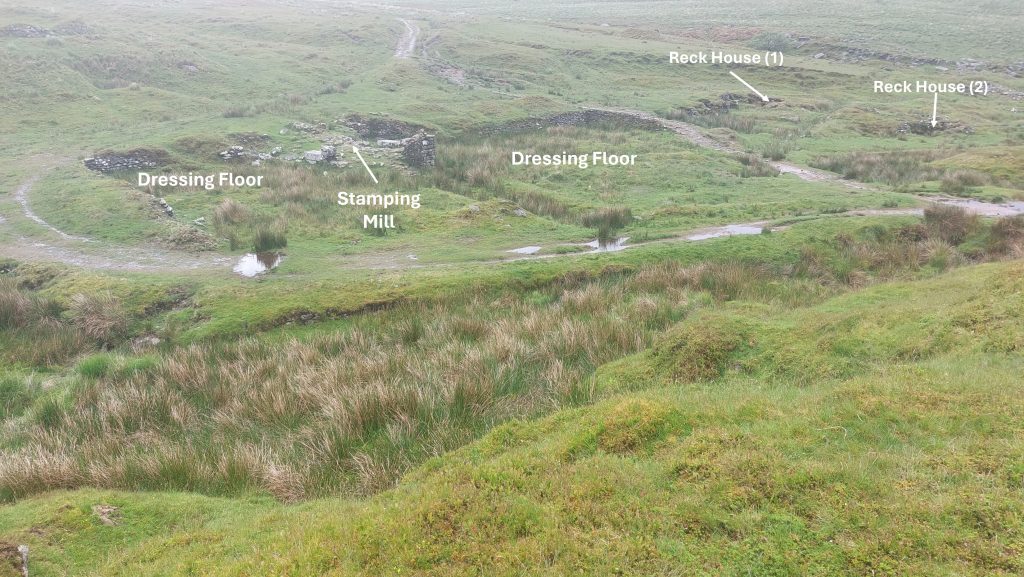
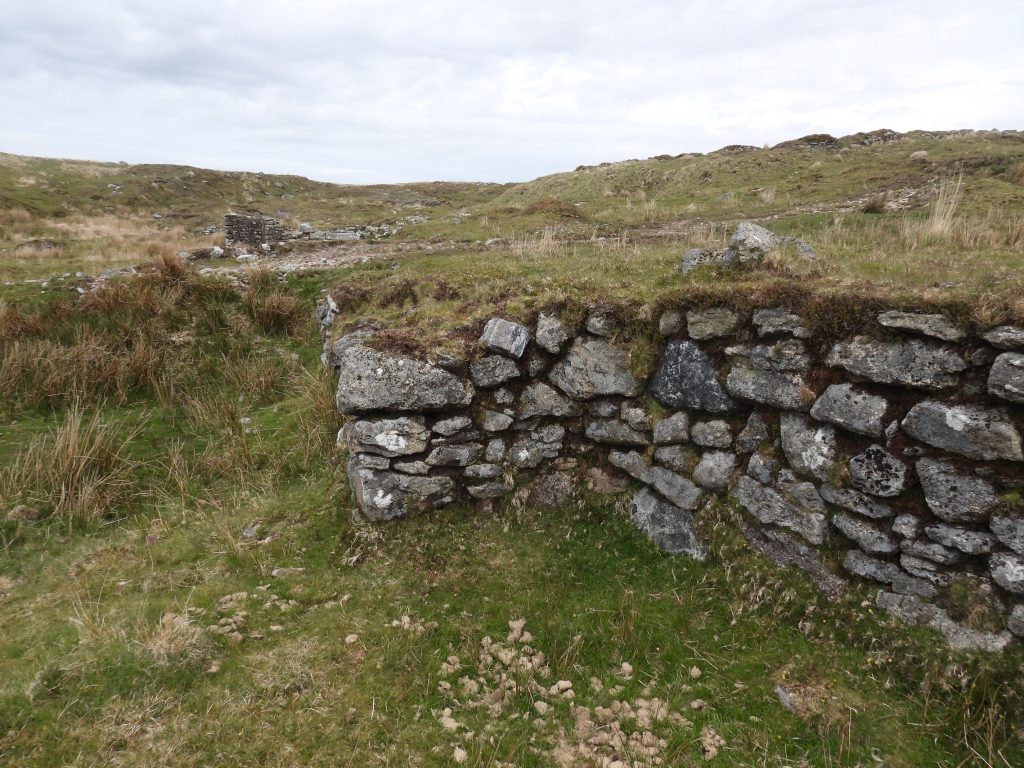
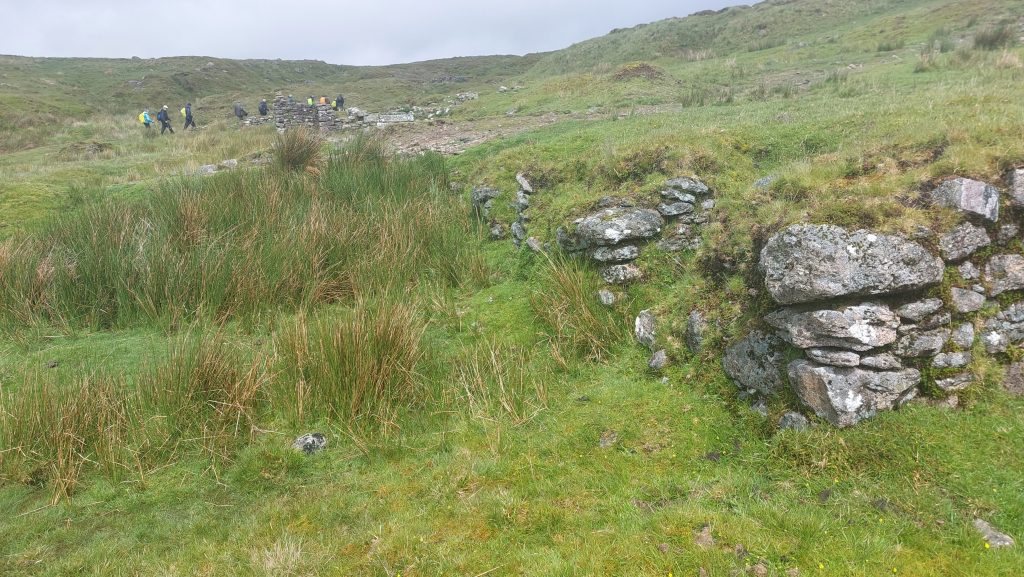
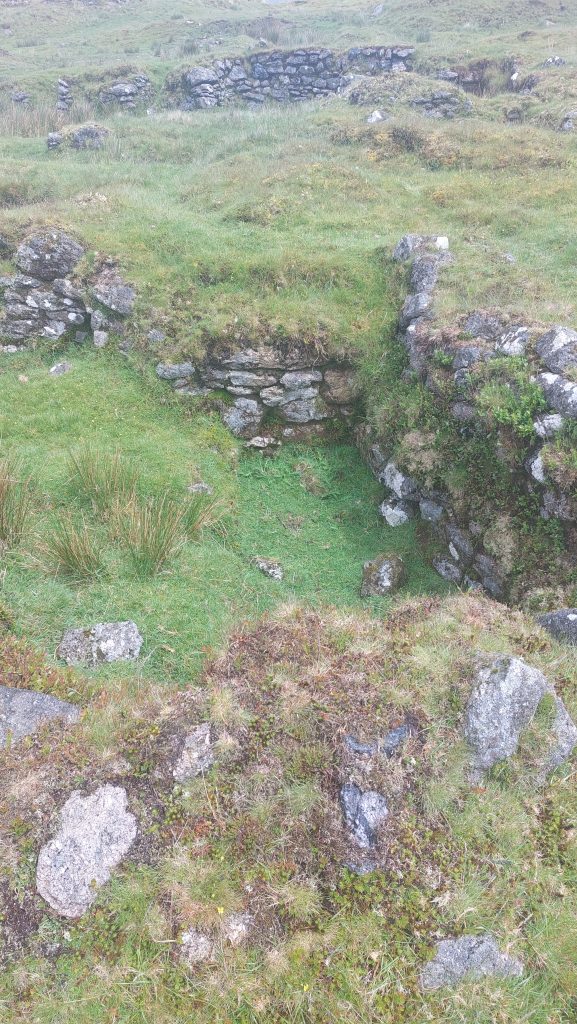
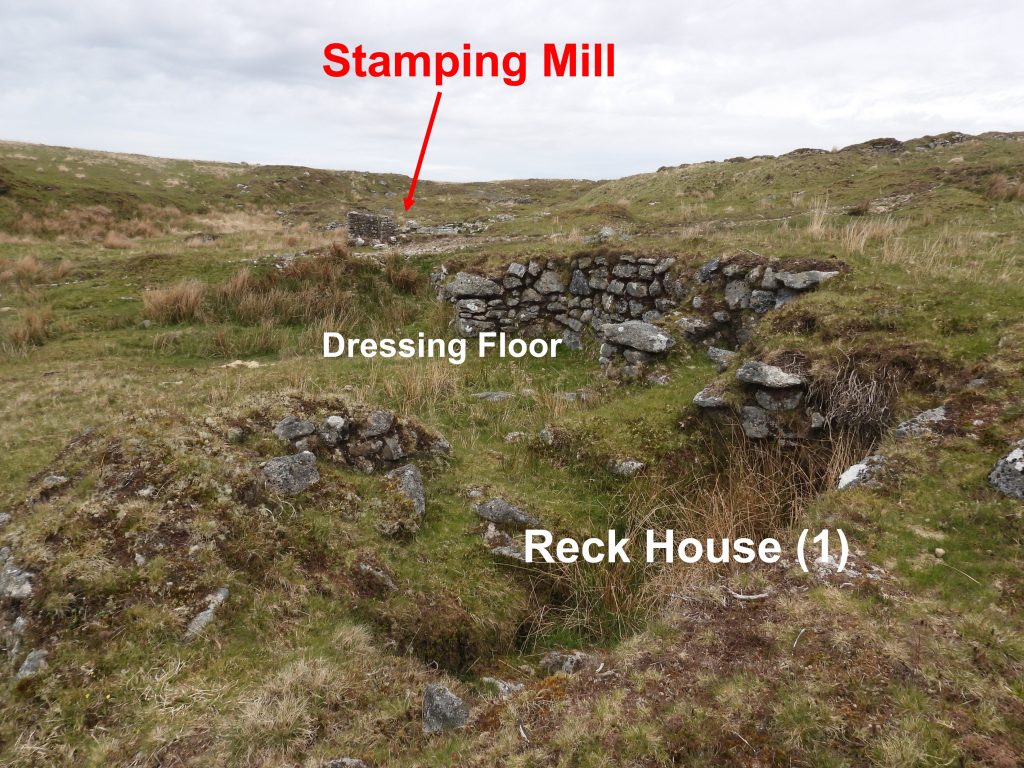
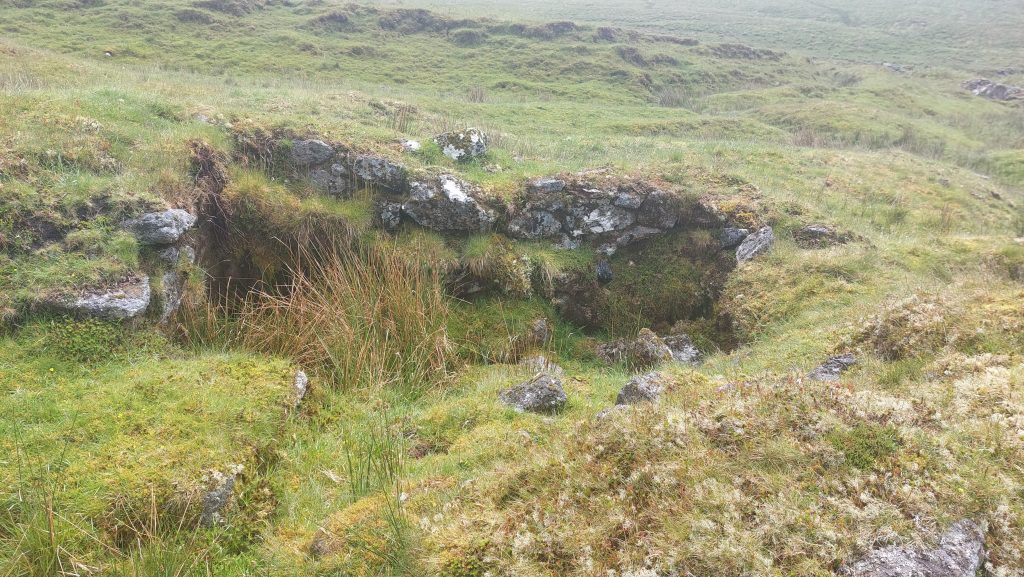
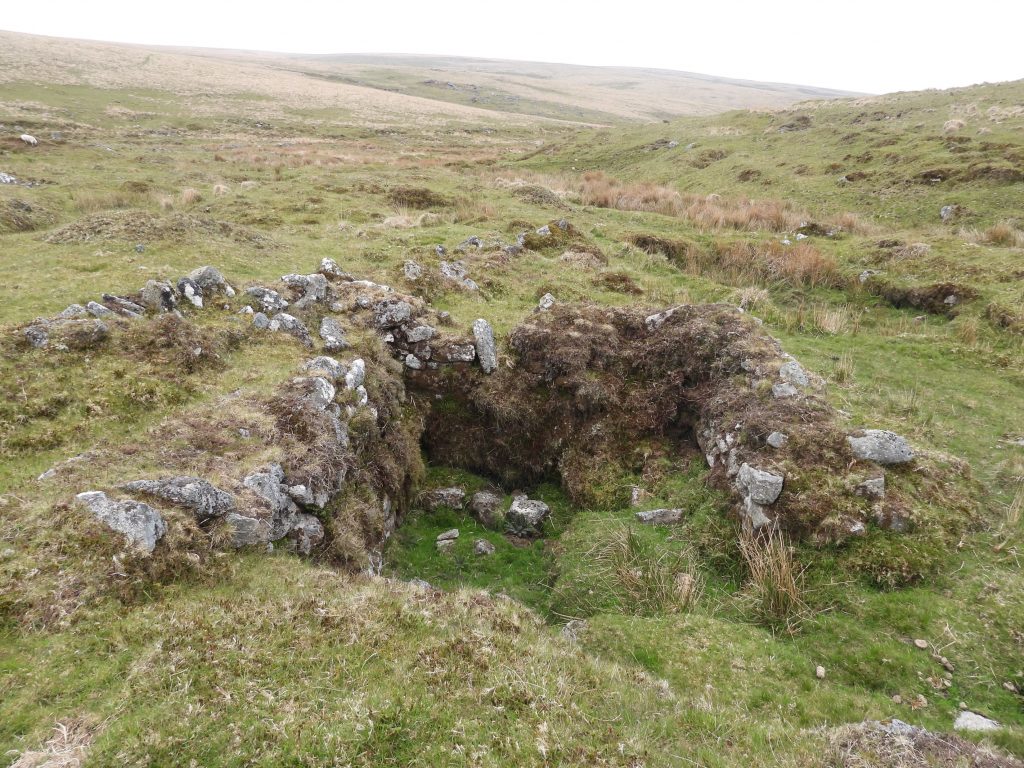
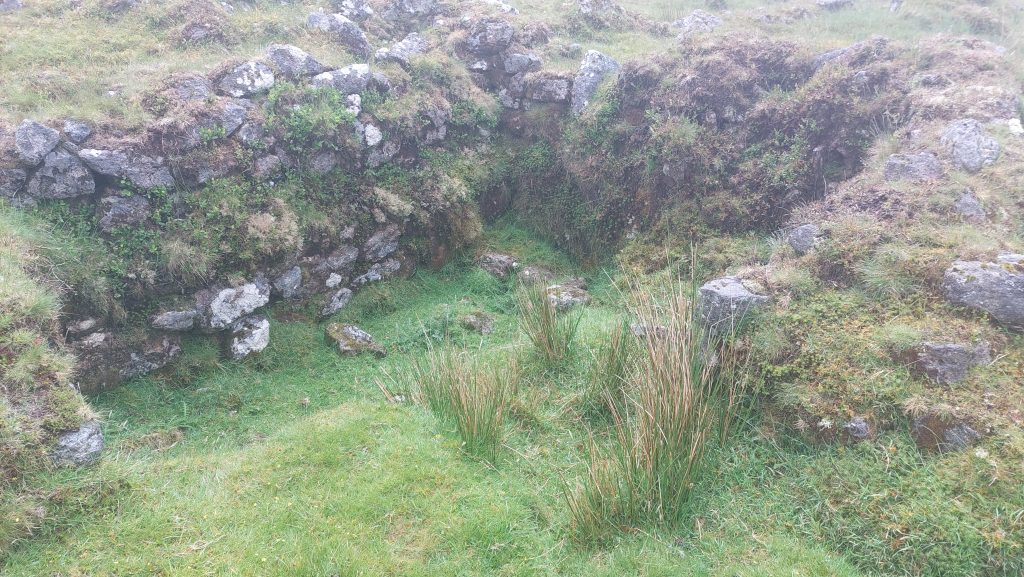
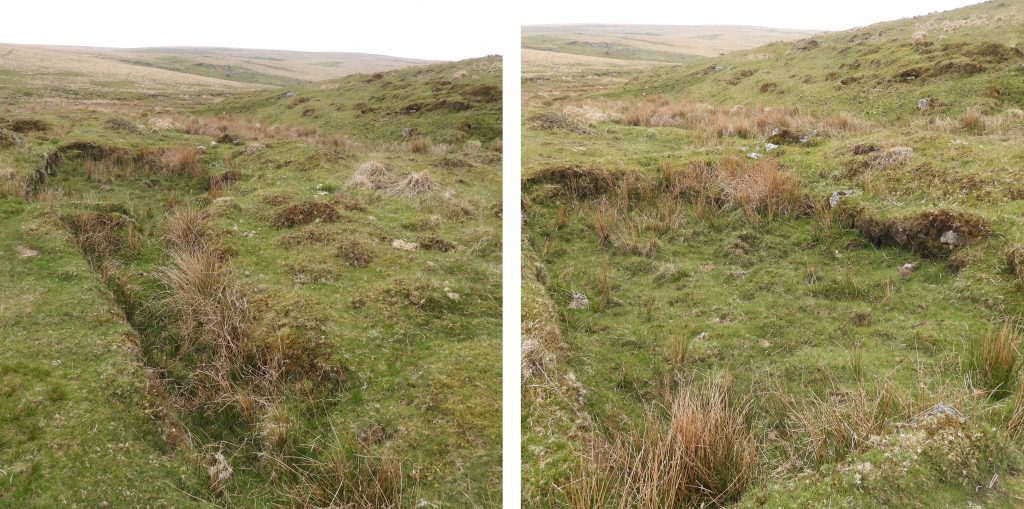
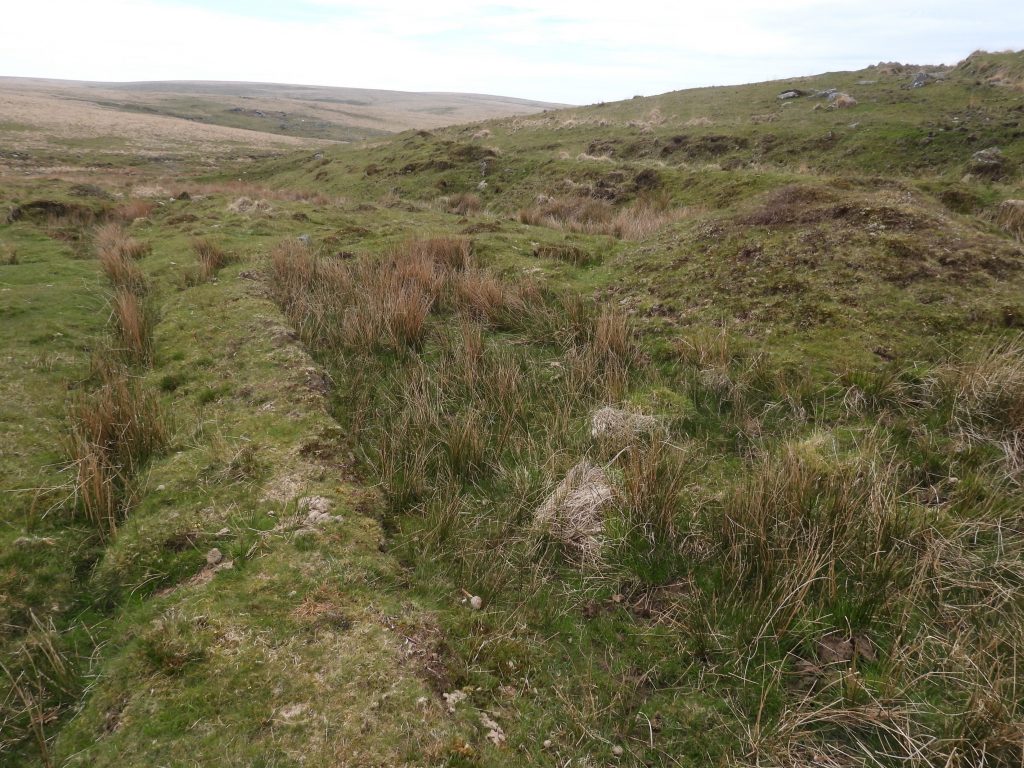
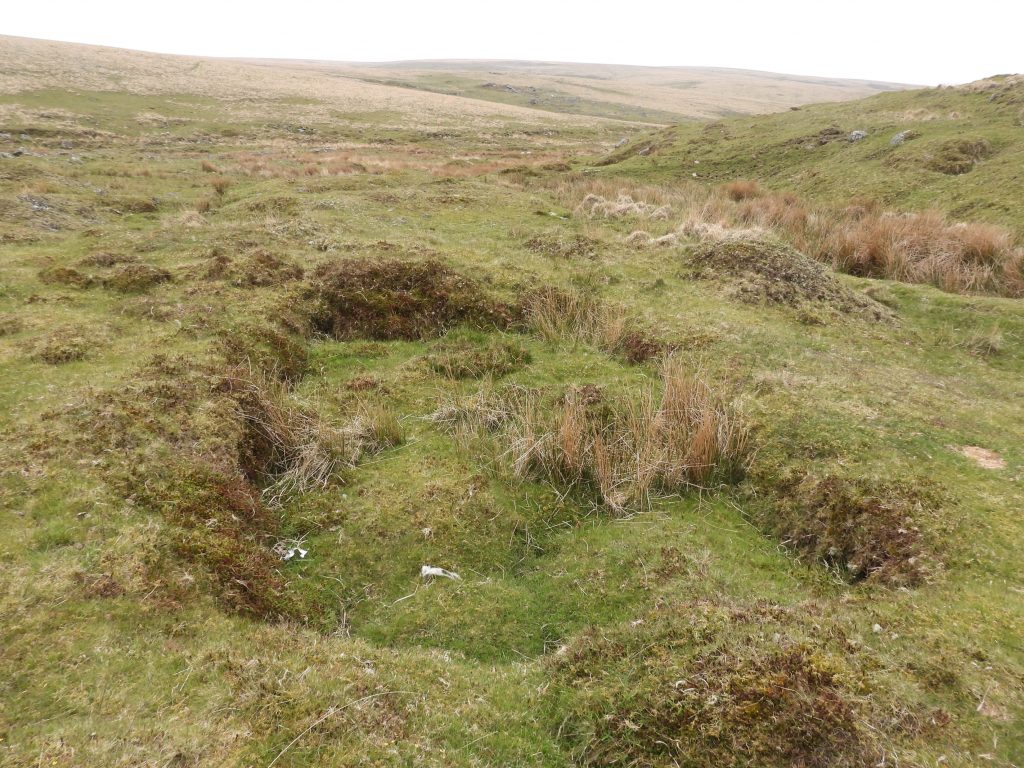
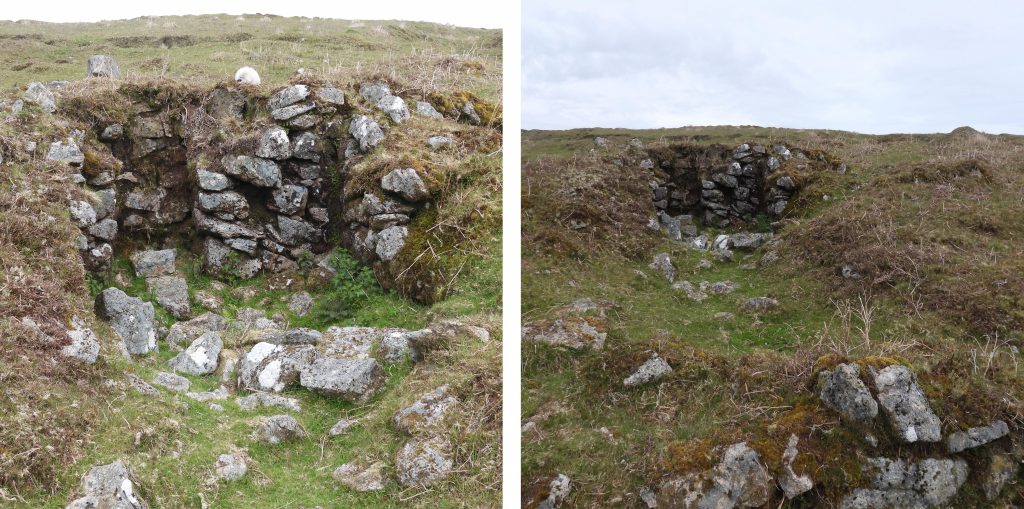
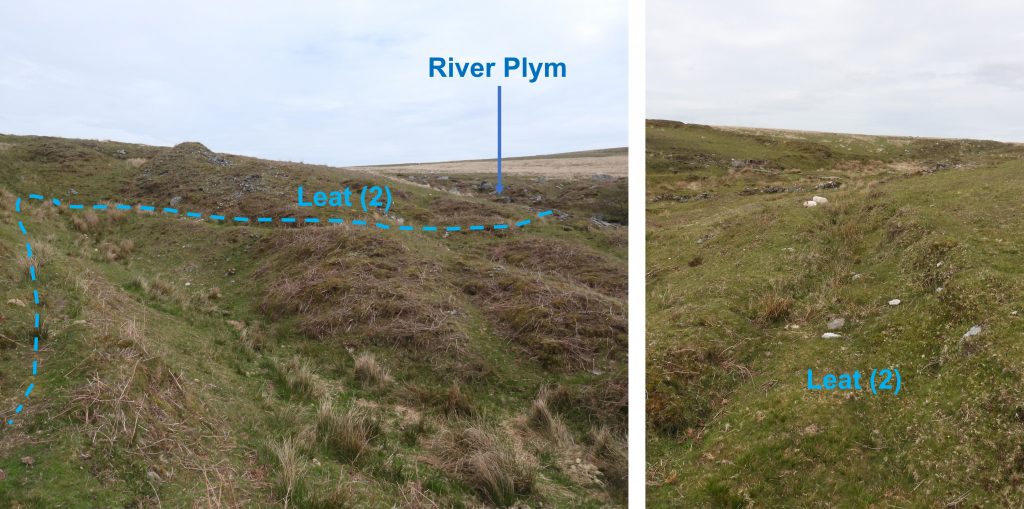
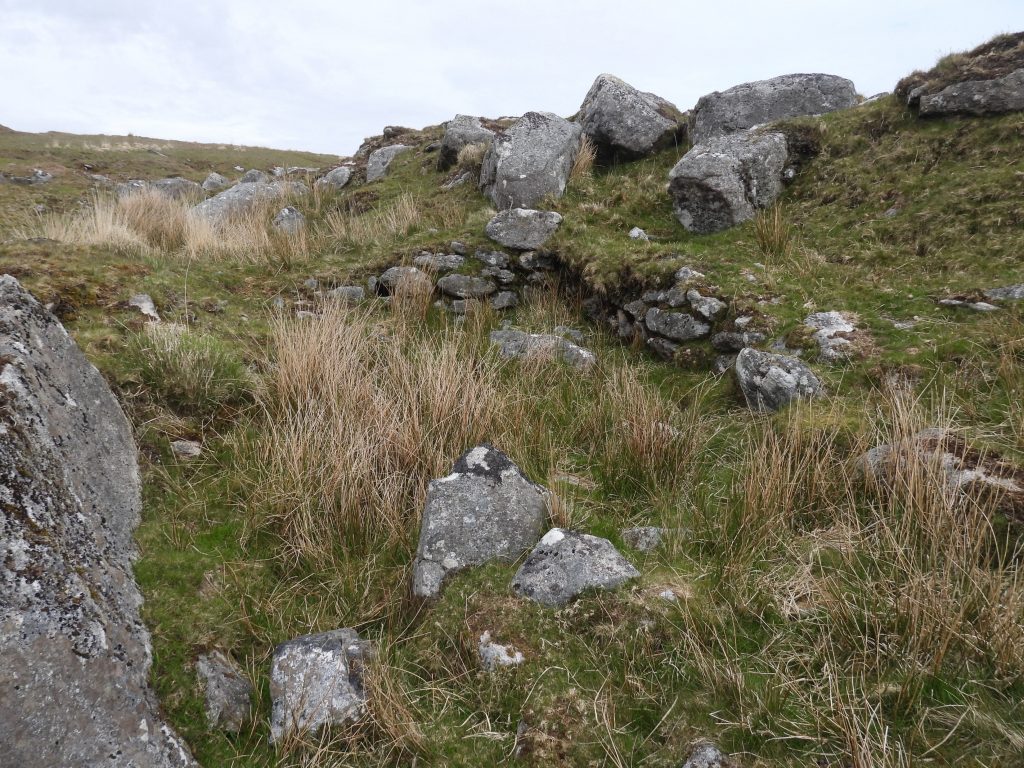
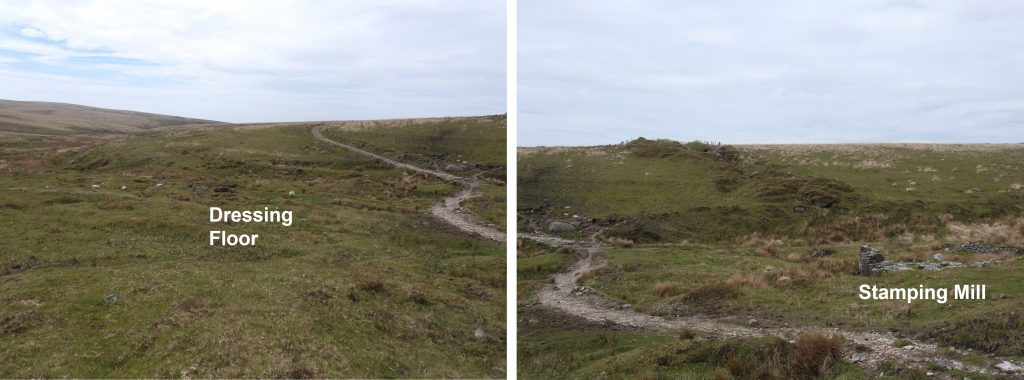
Wheal Katherine plan has been drawn by ‘overlaying’ drawn features onto Dartmoor HER and Side by Side Maps ‘layers’ (before removing them to leave just the plan). The result is a relatively accurate scaled plan of the mining operations.Starting at the eastern end of the operation, there is a quite a substantial wheelpit (which could also be called a wheelhouse), which is not shown on modern OS maps. A feature of this size is normally shown as a black rectangle on OS maps. The wheel probably powered pumping rods for shafts north of this pit. It is mid 19th century. It can be located at SX61026 68495. The wheelpit can be found at the top of and sunk into an old openwork just below the track. As recorded in the Dartmoor HER, there is ‘no evidence of a bob pit or flatrod system survives but the wheel was intended to power pumping equipment in the shaft’. It is an impressive wheelpit and is described by a 1983 survey as having ‘Internal dimensions 7 metres by 1.1 metres’ and in a 1999 survey as having dimensions of ‘6.4 metres by 1.7 metres’. The source of water for the wheel is not very obvious.Inside the Stone-lined wheelpit there is a good example of an ‘exit lobby’ to discharge water further down the gully.Member of the Dartmoor Tinworking Research Group looking at the wheelpit / wheelhouse in May 2024The discharge ‘outlet’ from the wheelpit can be found approx 10 metres down the gully at SX61025 68482This shaft to the north more or less lines up with the wheelpit / wheelhouse and might well have been the intended location for a flatrod system. There is no evidence to support this. The shaft lies at SX61043 68527Continuing west down the track from the wheelpit / wheelhouse, a large revetment wall can be found (this is marked on modern OS Maps). This is a level area and it has been suggested that this may have originally been a dressing floor but there are no other features present to add to this theory. Another suggestion is that it could have been a covered area for storage or processing but is a long way from the main dressing floor. The wall is 2 metres high and is made from dry coursed stone. The revetment wall is at SX60920 68448Shaft by the Revetment Wall. In the Dartmoor HER, this is called Shaft 31. As the are 25 shafts at Eylesbarrow and 7 at Wheal Katherine this is likely to be number 31 of 32The shaft by the revetment wall is located at SX60930 68451To the west of the conspicuous revetment wall is a Beam with Lode Back workingsLooking east (up) the Beam with Lode Back workings. These are labelled as Plym Lodes on an 1825 mapApprox half way along and just to the south of the Beam with Lode Back workings is Frank’s Shaft. The picture shows members of the Dartmoor Tinworking Research GroupFrank (Collinson) at Frank’s ShaftFrank’s Shaft is located at SX60801 68399Adjacent to Frank’s Shaft is a flat area which probably represents Whim Plat. It is located at SX60804 68400Whim Plat, Frank’s Shaft and the Beam with Lode Back workings. Eyesbarrow can be seen on the horizonTo the north of the Beam with Lode Back workings, one of two curve-linear tinners’ reservoirs can be found. This one is located at SX60829 68471Moving onto the main ore processing part of the mine. One of the key impressive remains of the mine is the stamping mill, which is easily found being surrounded by the tracks to and from the mine. During a 2002 survey it was noted that the wheelpit was largely filled with loose rubble and was 0.6 metres wide and the wall is up to 1.87 metres high on the southern corner. The wheelpit was centrally located allowing stamping on both sides. To the north of the wheelpit (right side of picture) is a bearing stone. This picture looking from east to west shows off these features from the descriptions. The stamping mill is at SX60721 68303More views of the former stamping mill. The bottom two pictures are looking north (left picture) and south (right picture) and show additional walling and alcoves surround the mill. The stamping mill is may have been constructed as early as 1804 (when the Eylesbarrow mills were also constructed) and was probably refurbished before the mine closure in 1856.Close up of the bearing stone, which is recorded as measuring 1.46 metres long, 0.58 metres wide and 0.65 metres thick having four circular holes cut into its eastern end. The holes are recorded as being are 3 centimetres in diameter and 8 centimetre deep. View of the stamping mill from the west, looking at the ‘tail race’ from the water wheel. There is a small stream still flowing here hence the reedy area.General view of the stamping mill (picture from January 2020), looking east showing the tracks that surround the millThis view was taken in May 2021 and shows the farmstead and dressing floor in relation to the stamping mill. The farmstead is said to date from at least the early 19th century. The farmstead when surveyed in 1999 was described as being ‘within a peninsula of unworked ground…….consisting of a ruined building and outhouse within two enclosures covering 1.2 hectares’The picture is taken adjacent to the Miners’ Shelter (see walling on left) and is looking east towards the main east / west Beam and Lode Back workingsThese fenced off openworks (marked as ‘deep linear open mine’ on map) are on the westernmost part of the mine. The tree is at approx. SX60644 68270The tree at ‘deep linear open mine’ – May 2024General view of the Crane Lake Streamworks (where the Miners’ Shelter is located – upper middle part of the picture).Miners’ Shelter (as described on the Dartmoor HER). Pictures taken in January 2020 and May 2021. From a 2002 survey this building is described as being ‘3.9 metres long by 2.8 metres wide denoted by a 0.55 metre wide coursed drystone wall standing up to 1.25 metres high’ Furthermore there is a ‘fireplace at the east-north-east end is 1.02 metres wide, 0.83 metres high and 0.6 metres deep. The doorway in south-west corner is 1.08 metres wide’. It is located at SX60696 68365Stephen Holley, chairman of the Dartmoor Tinworking Research Group explains that this building was marked as a ‘dressing house’ on an old map dated 1825. Whether the word ‘dressing’ referred to tin or the miners clothing is open to conjecture.This view was taken from near the westerly openworks and shows the dressing floor, two reck houses, a leat and settling pits / buddles just below the track and stamping mill.The main dressing floor are with the main features labelled upGeneral view of the dressing floor. According to the 2002 survey there are ‘a range of well preserved structures denoted by revetment or walling on three sides. The revetment stands up to 1.25 metres high’ . Furthermore, ‘three small recesses in the revetment wall probably represent the site of jagging boards used together with the adjacent buddles’. Close up of dressing floor revetment with stamping mill behind. Dressing Floor revetment wall recesses with stamping mill beyondThe two probable reck houses at Wheal Katherine. The reck or rack was an additional piece of apparatus in which fine residue tin trapped within ‘tailings’ (known as slimes) underwent further refining. The reck house in the foreground appears to have two floor levelsA ‘reck’ or ‘rack’ house is described in a 1999 survey by Dr Phil Newman where ‘The apparatus consisted of single or paired boards onto which the tailings were placed and over which a gentle flow of water was introduced. The concentrate would build up and then it was removed either by tipping the board or washing it into a separate launder by a more powerful stream’. Reck House (1) is located at SX60751 68270Reck House (2) at SX60743 68258Reck House (2) has two floor levelsBuddle 1 with ‘lead in’ trench. The buddle (right hand picture) is at SX60738 68254Buddle (2) at SX60731 68268.Buddle (3) at SX60745 68242This small structure to the south-east of the stamping mill / dressing floor with an entrance to the south is believed to have been a possible explosives store hut. It is located at SX60770 68216A view of leat (2) (aka Eylesbarrow Mine Engine Leat) taken from just above (north east) of the explosives hut. The left hand picture shows the leat snaking around an open work and the right hand pictures shows it leading towards the dressing floor. Leat (1) in the area would have supplied water to the Stamping MillA possible tinners’ hut is located on the south east side of the River Plym at SX60816 68183. The Dartmoor HER states that it ‘probably’ formed part of the Wheal Katherine Tin Mine.Dressing floor and stamping mill as viewed from the east


1 Pingback