A collection of walks, discoveries, insights and pictures of exploring Dartmoor National Park
July 20, 2020
West Vitifer Mine / New Vitifer Consols
This mine is located in a delightful little hidden gem of a valley just to the east of Hurston Ridge and the Two Moors Way. The water course through the valley has been variously named (infant) River Bovey and Hurston Water but is recorded as ‘North Walla Brook’ by Ordnance Survey . The valley is generally known as ‘Boveycombe’ so it seems the name ‘Bovey’ should be the name to use perhaps. However, for the purposes of this post, the name North Walla Brook has been used as this is the most commonly referenced in historical mining books and papers. The mine here is named in Jeremy Butlers Atlas of Antiquities Volume 2 (North) and in Hamilton Jenkin’s Devon Mines as West Vitifer and by Dr Phil Newman in The Field Archaeology of Dartmoor (English Heritage) as New Vitifer Consols
The valley shows lots of evidence of the ‘old men’ and their openworks and elluvial streamworks, which the 19th century miners attempted to exploit further and is similar to mining remains (although not nearly as extensive), which are found on the south side of the B3212 in Redwater Valley, namely Birch Tor and Vitifer Mine. The first lease for the ‘modern’ mine was obtained in 1850, when an adit close to the North Walla Brook was started to connect with a proposed Engine Shaft to the south west. Remains of the adit and Engine Shaft can still be found today. John Penrose and James Browning, mine agents with offices in Chagford were amongst those initially keen in the venture. However, through failure to obtain the necessary capital, the project was abandoned in 1852. The mine remained dormant for 14 years until, in 1866, William Skewis who was the agent at New Birch Tor and Vitifer Consols, sunk trial pits and trenches in setts known as Waterhill and Kings Oven. Not long afterwards, two shafts, known as Valley Shaft and Water Hill Shaft were started to the south of the mining area explored in 1850 – these are thought to have been around the Kings Oven area.
In December 1869, the mining here had major water problems as the horse-engine couldn’t keep pace with the required rate for pumping. It was therefore proposed to construct a leat from the North Walla Brook and erect a pumping wheel. On 21st October 1870 a group of Bristol adventurers (George Cole, Christopher Penny, George Thomas and Wilberforce Tribe) formed New Vitifer Consols Tin Mining Company and capital of £12,000 was raised (6,000 shares at £2 each). Consequentially, a 60ft (18.3m) by 5ft 9in (1.75m) wheel was erected, which was used for both pumping (of the Engine Shaft) and for stamping the ore. Also at this time there were further opening up of lodes. Through the excavating of the wheelpit and the old men’s workings (on a lode known as Black Pool) samples of tin were found up to the value of £10 per fathom. 1870 appears to have been the halcyon period for the mine and 14 men were employed. The infrastructure included several buildings on the east side of the river and three large circular buddles, the remains of which can still be seen. The sett at this time included Bush Down and West Vitifer and was 2.5 miles in length and 2 miles wide. The lease on the property was for 21 years at 1/18th dues plus £10 per year in rent to the Duchy.
By 1873, the original capital had been exhausted and a further £5,000 was raised. On 27th August 1873 the directors passed a resolution to the effect that the affairs would be wound up voluntarily. The company was reformed on 6th November 1873, after which the £5,000 was raised. However, two years later in 1875, this additional capital had also been spent and the company was wound up. In spite of the recorded promise of valuable lodes here, there was no recorded production. West Vitifer tin mine was also known as Chagford Tinworks.
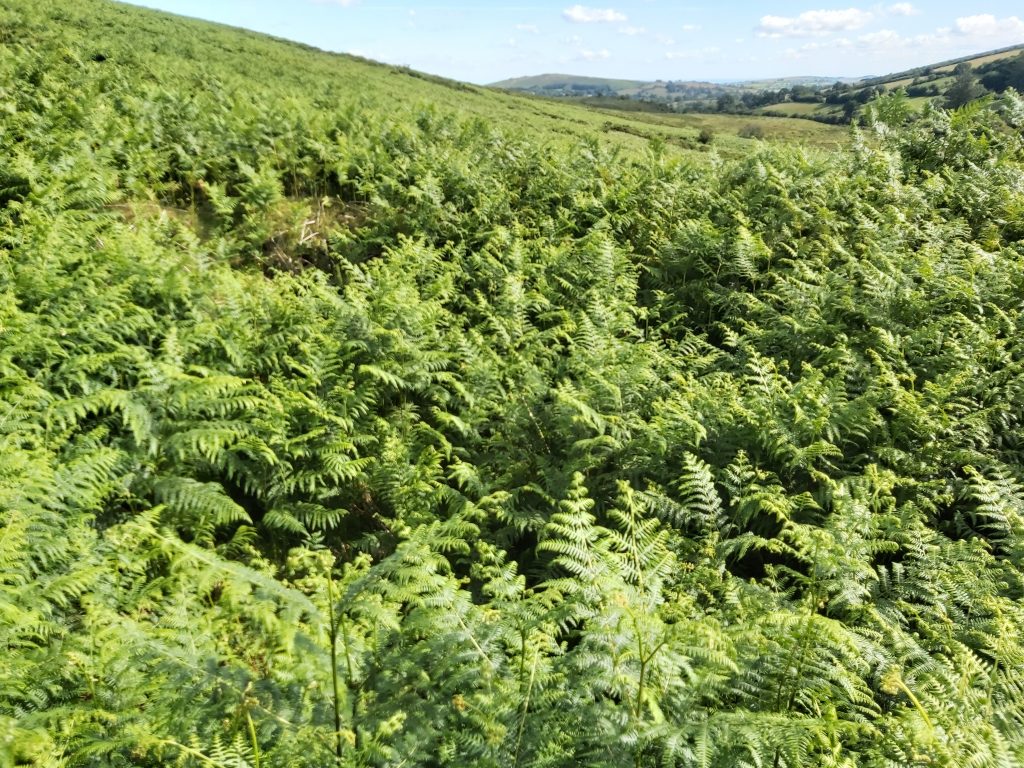
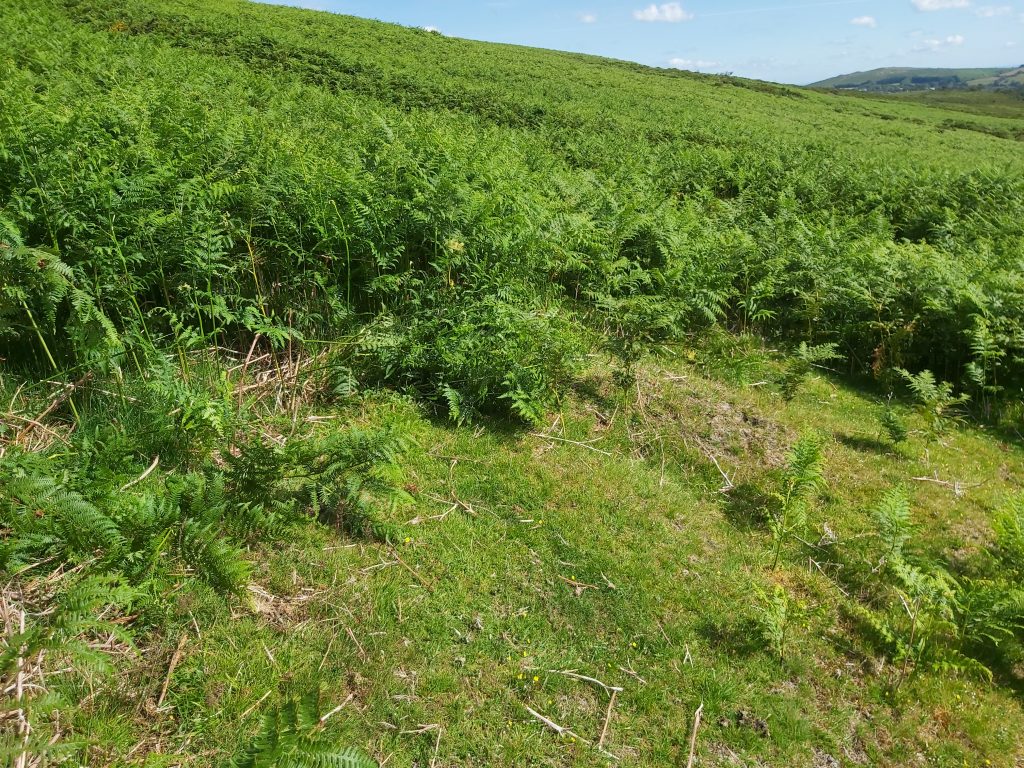
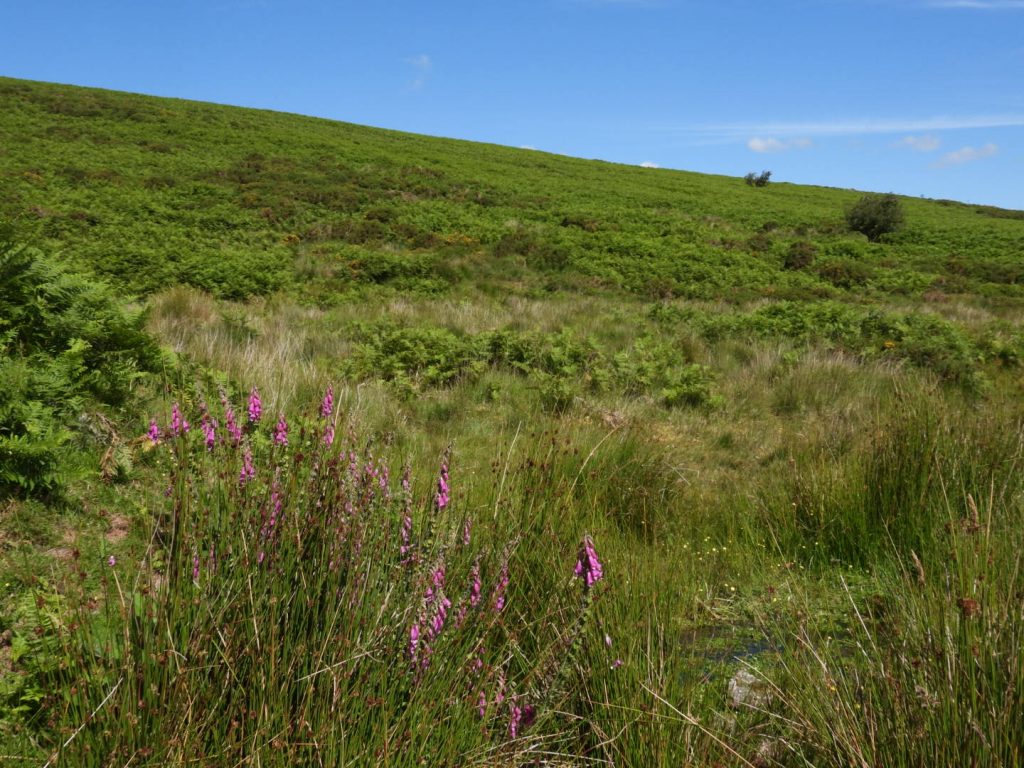
The mine and valley gets rather overgrown with bracken, so the author would suggest any visit to take place in the winter and spring when all the artefacts aren’t engulfed
Bibliography
Dr P. Newman (2011) –The Field Archaeology of Dartmoor (English Heritage) – page 209
A.K. Hamilton Jenkin (2005) – Mines of Devon – page 57
A.J Passmore (1997) – Boveycombehedd, Chagford, Devon: an archaeological investigation of a Diachronic landscape
D.G.Broughton (1968-9) – Birch Tor and Vitifer Mining Complex
Dartmoor Tinworking Research Group (2017) – The Tinworking Landscape of Dartmoor in a European Context (Dr P. Newman)- page 44
J.Butler (1991) – Dartmoor Atlas of Antiquities: Volume Two – The North, 33, Map 25
David Eeles (2026) – Pers. Conv.
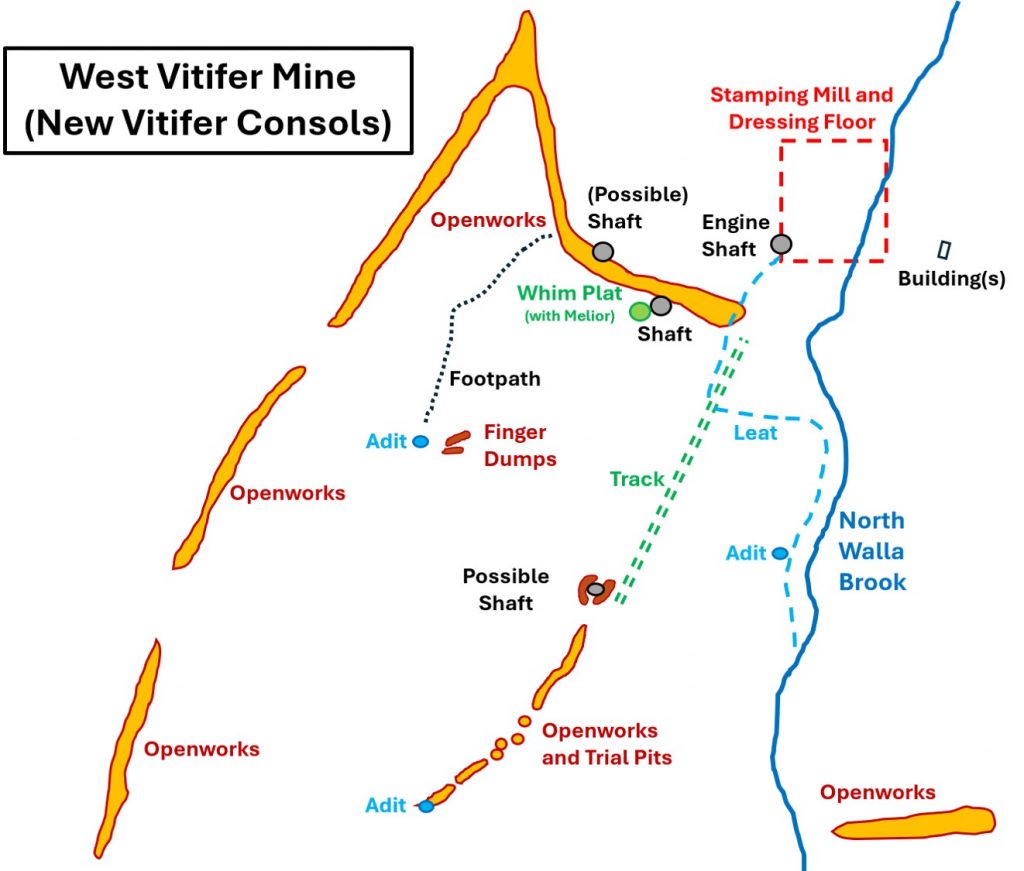
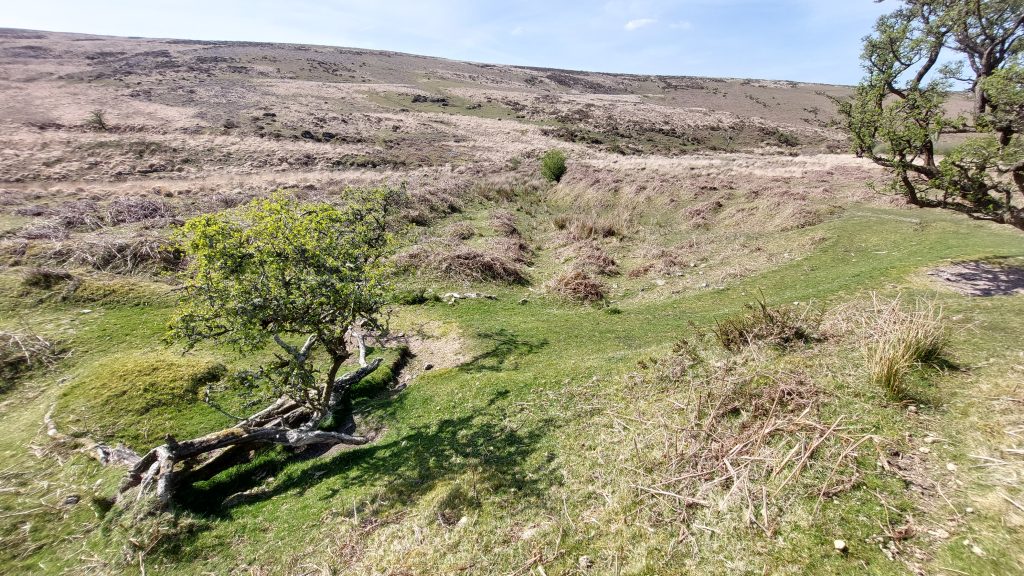
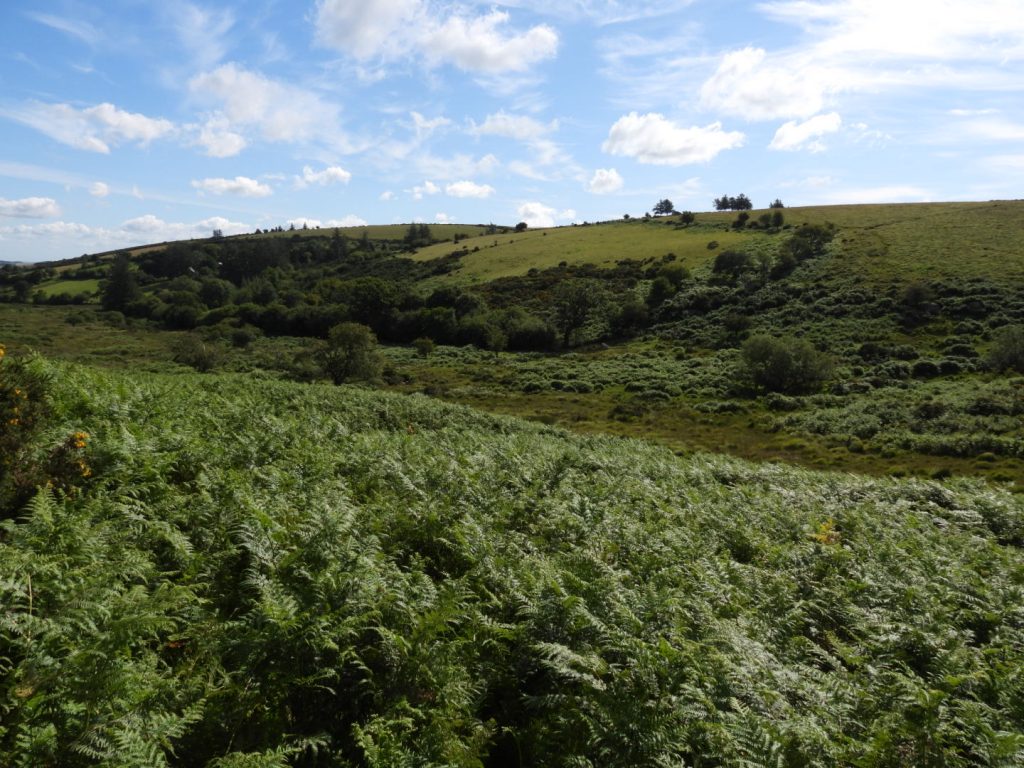
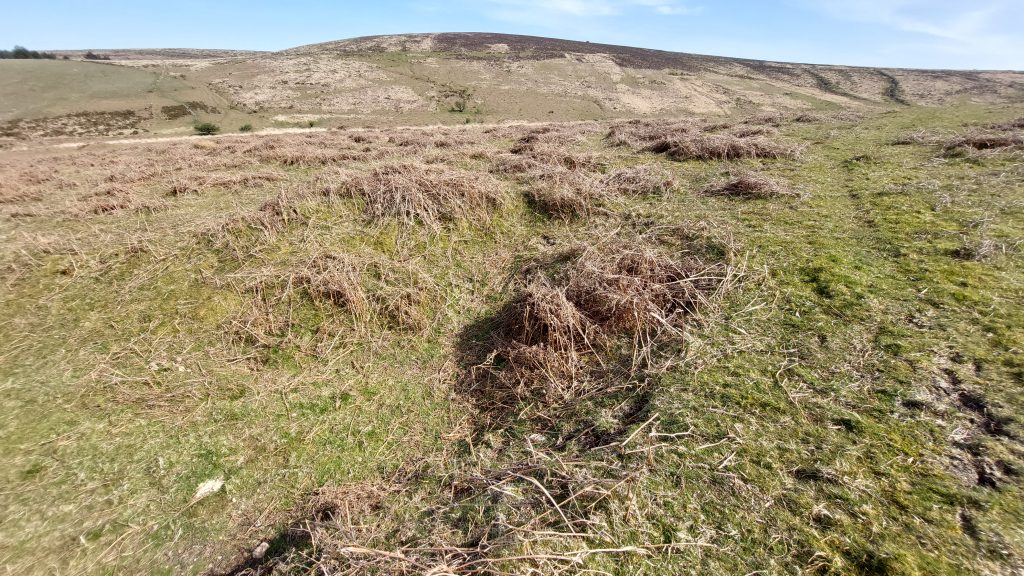
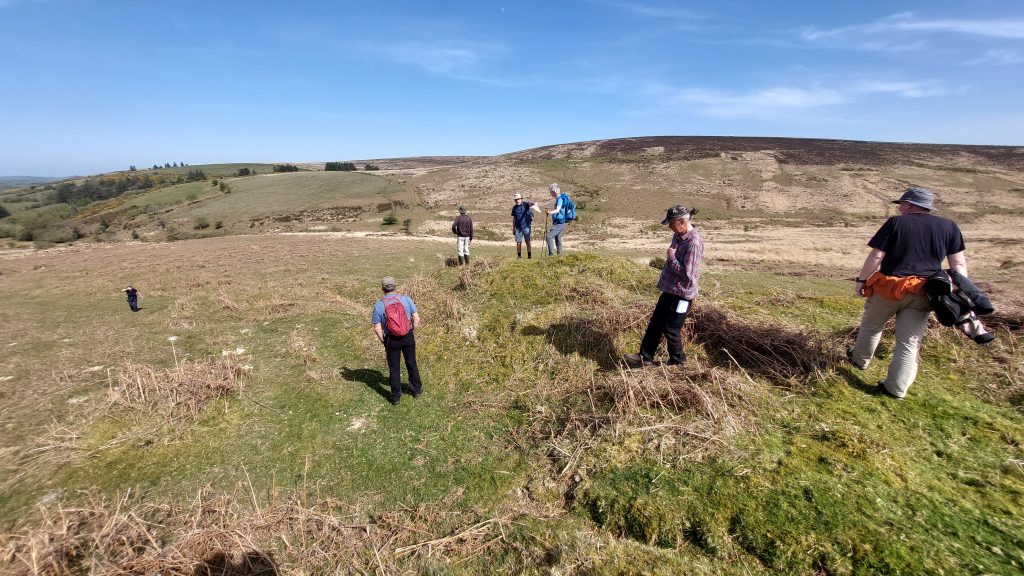
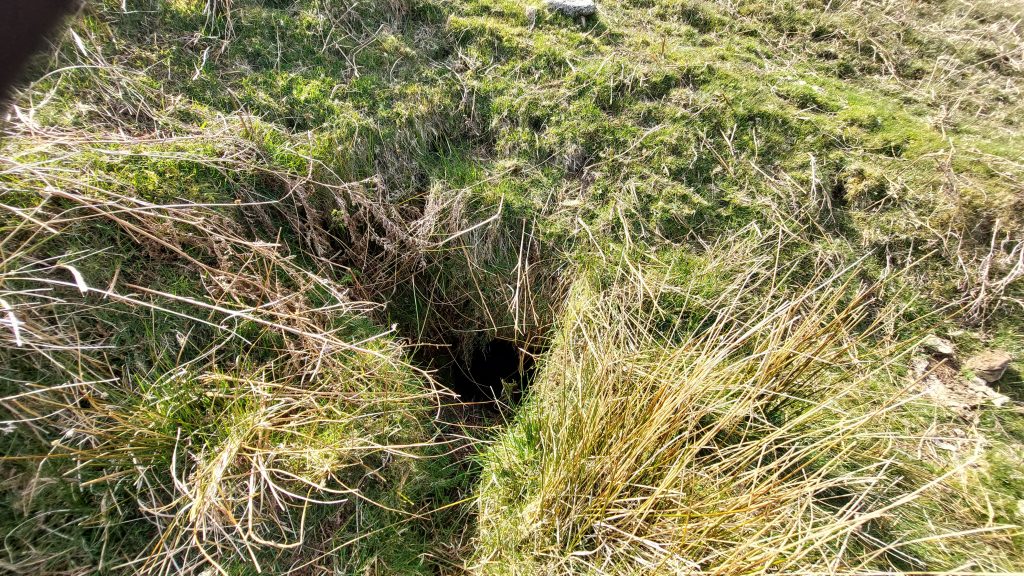
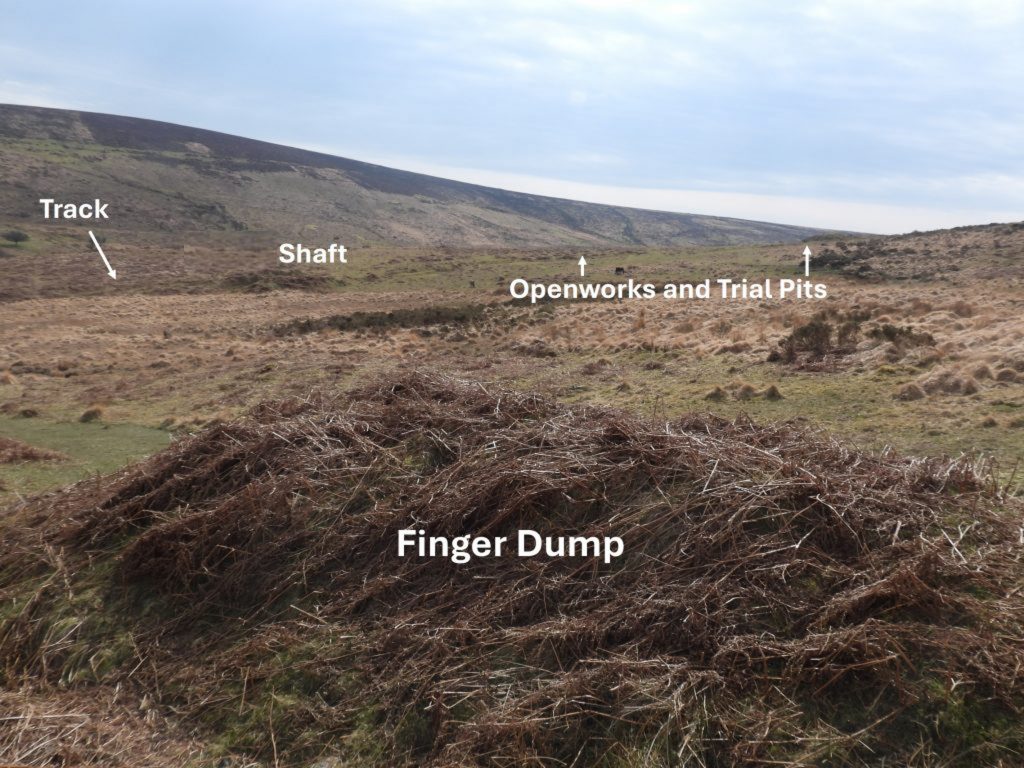
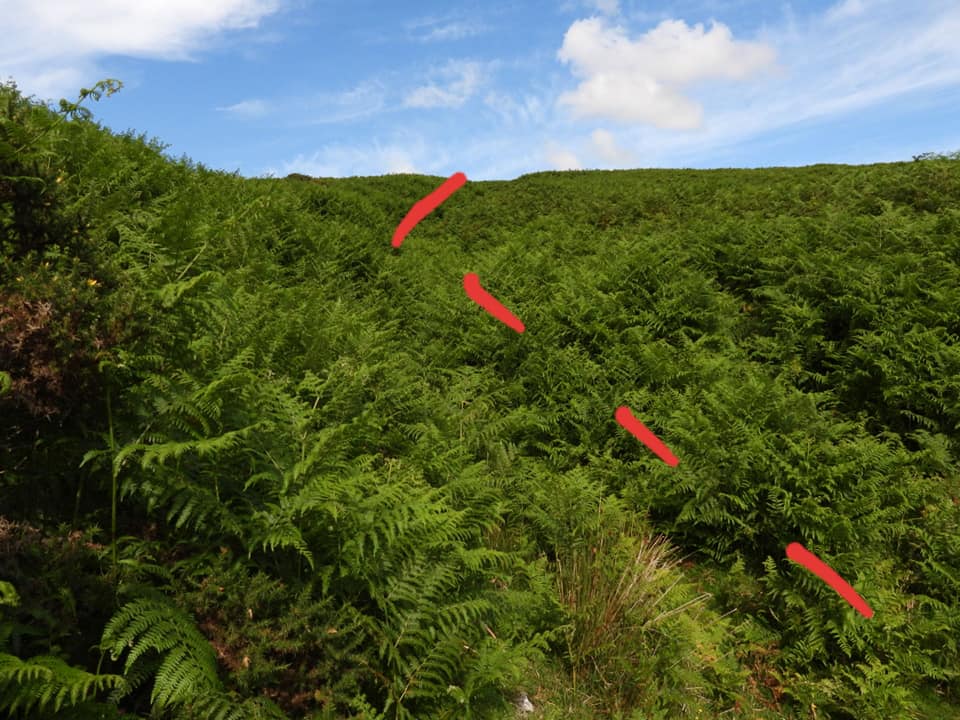
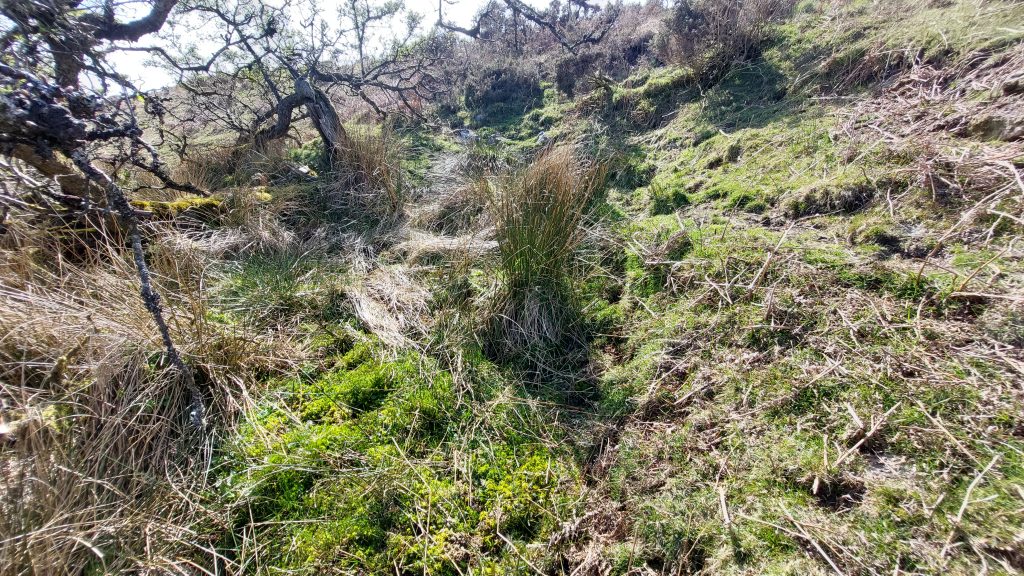
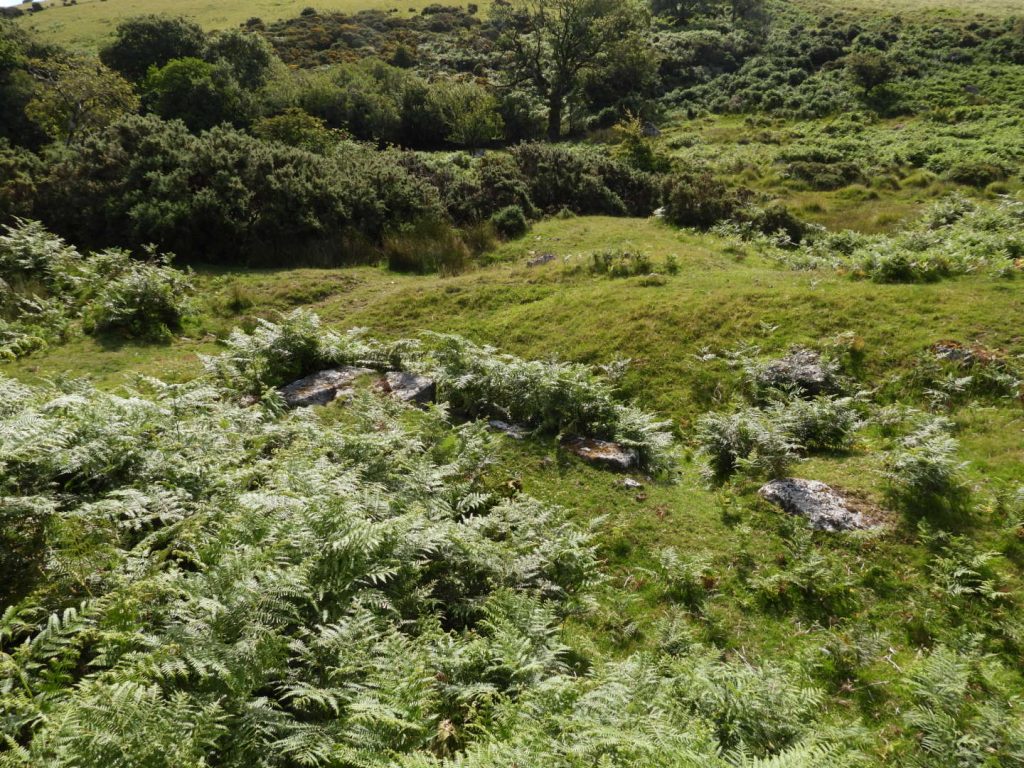
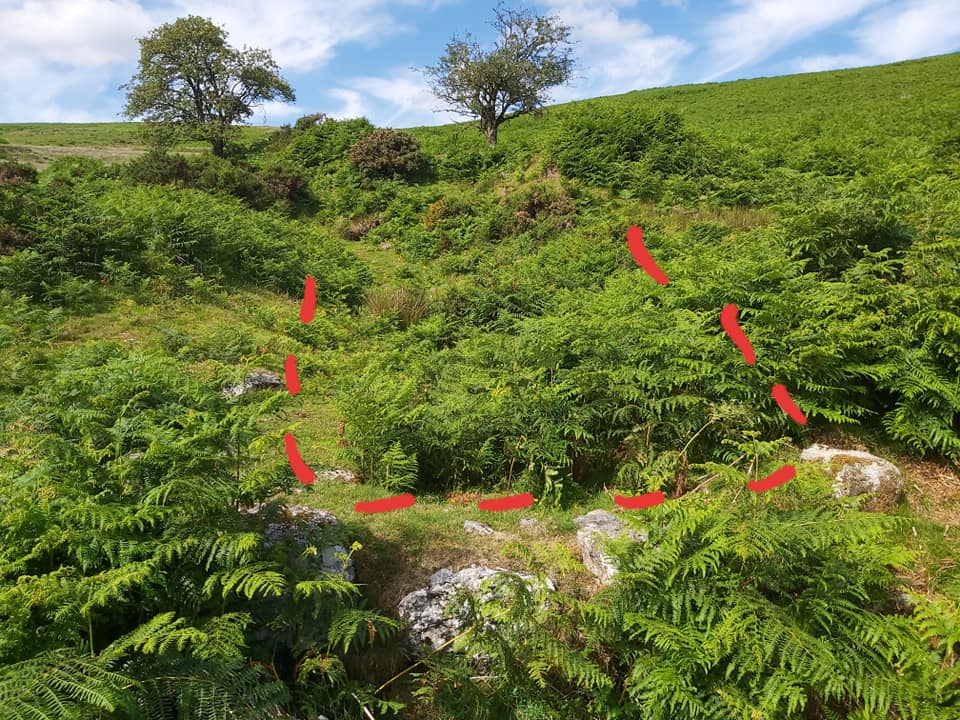
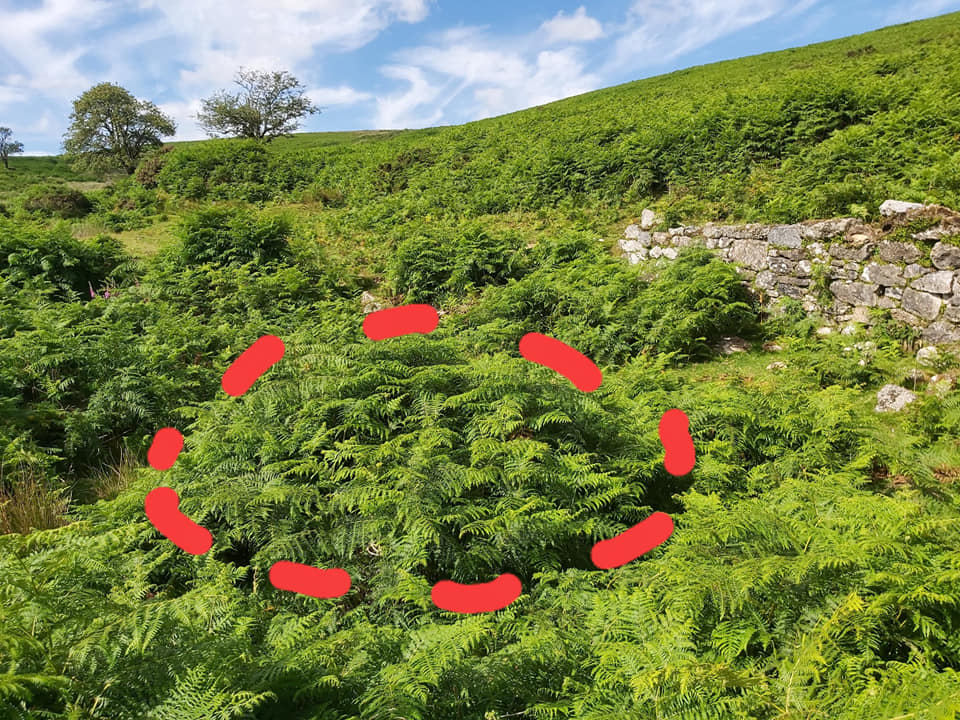
Sketch map of the mine and the various key features. There is a second sketch map contained in this post covering the stamping mill and dressing floor areas. The LiDAR (Light Detection And Ranging) plot for the area highlights quite significantly the openworks and shaftsOpenworks on the East side of river at SX67935 82318The valley with evidence of a lot of early tin steam works. This view was taken in July when the bracken was high. Any visit to the mine is recommended in the winter and spring months to appreciate all the featuresHigh up on the west flank of the valley shallow openworks dug by the ‘old men’ can be found In Boveycombe valley, openworks and trial pitsIn Boveycombe valley. These openworks and trial pits can be found towards the south end of the area covered by the sketch map and LiDAR plot shown earlier in this postOpenworks at SX67688 82435DTRG Members at OpenworksAdit at top of Openworks at SX67625 82377Ponies at shaft. This shaft is located at the south end of a track (or tramway) which is shown on LiDAR and late 19th century maps(Possible) Shaft is located at SX67726 82504Behind the pony, the track (or tramway) can be seen, which extends down to the Dressing Floor and Stamping Mill. The shaft is on the far left of the pictureThe track (tramway) from on top of the upthrust adjacent to the shaftFrom the shaft to the north west there is a boggy area next to two earth ‘Finger Dumps’. This is evidence of an adit run off.The Adit at SX67620 82588. The evidence of the finger dumps suggest that much ore would have been dug out here. The author does not believe the adit is connected to a shaft. A small amount of tin but mostly iron was found here around 2005Adit in April 2026The adit runoff One of two finger dumps with Valley shaft, the openworks and trial pits beyondThe two Finger Dumps near the AditThe two Finger Dumps are located at SX67644 82600To the north west (uphill) from the Adit and Finger Dumps more evidence of the old men’s openworks can be found. The picture shows an openwork which runs approx. south west to north eastLooking along the south west to north east openwork, close to its junction of the north to south openworkThe largest and deepest to the old mens openworks runs approx north to south initially before changing course to north west to south east, presumably because the lode changed courseLooking down the lodeIn the Devon Historic Environment Record (HER) reference Passmore , three shafts are plotted; the Engine Shaft, the shaft the author has annotated with a whim plat and a third shaft approx at the location shown in the picture. It is possible that there once was a shaft here but there is very little earth upthrust. Interestingly, the HER does not mention the track (tramway) or what might have been shaft up the valleyThis obvious shaft has a whim platShaft is located at SX67776 82676Shaft with its adjacent whim is totally engulfed in bracken in the summer months (the shaft is the dark area in foreground).Adjacent to the shaft is a rather splendid Whim Plat with a Melior Stone still extantThe Whim Plat is almost totally engulfed with bracken in the summer monthsThe Melior Stone is located at SX67763 82676Bottom of the north west to south east openworksBottom of the main north west / south east openwork overgrown in Summer.Near the bottom of the north west to south east openwork, the leat which was constructed to feed water to a 60ft Waterwheel at the Stamping Mill and Dressing Floor can be locatedFollowing the leat southwards where it appears to disappear through the elluvial streamwork. This point is where the track (tramway) extends down from the Valley shaft enroute to the Dressing Floor and Stamping Mill. The leat appear to cross over the shallow elluvial streamwork depression. It may well have been laundered hereCrossing the elluvial streamwork and looking south the shallow ‘V’ shape of the track (tramway) becomes evident. The other end, as previously mentioned is shaft up the valleyThis picture shows the leat on either side of the elluvial streamworkSlow worm in the dry leatThe leat heading towards its take off point with the North Walla Brook. The height of the sides of the leat here are at least 1m and it would appear that a lot of rock had to be removed in its constructionThe leat contouring around a slopeThis boggy area and the stones from the streamworks by the North Walla Brook is where the leat becomes a little harder to discern. There is a possibility that the leat’s course could have gone either side of the stony moundAdit by Leat at SX67836 82483Line of reeds near North Walla Brook, which could indicate where the leat coursePossible leat take off point just to the east of the mound of stones. This point is at SX67855 82467The second possible leat take off point to the south of the mound of stonesOn the opposite bank (east) to the Dressing Floor and Stamping Mill are several buildings or structures of unknown origin. The structure in the picture is located at SX67948 82701This structure was marked on late 19th century OS maps. Passmore mentions (from various sources) of there being a ‘Mining House’, a smithy and other buildings hereThis small building measures 8.7 metres by 6.3 metres and contains two roomsThis building is located at SX67953 82714The alignment of the building is approx north south and there appears to have been two entrances and a cross passage dividing the two roomsIn the Dartmoor Tinworking Research Group (DTRG) publication from 2017 – The Tinworking Landscape of Dartmoor in a European Context (Dr P. Newman) – page 44, there is shown on the plan a possible bridge abutment at the location shown in the picture, which is where a track crosses the brookAt the location of the bridge abutment, there only appears to be a fordThis simple sketch map of the Dressing Floor and Stamping Mill is based on a more comprehensive plan produced in the aforementioned DTRG publication. Any visit to the area should ideally avoid the summer months when the bracken is high as the three buddles and the wheelpit in particular are difficult to discernThis is the general view of the Dressing Floor and Stamping Mill from the west. The mine buildings are located across the brook near the line of trees The Dressing Floor and Stamping Mill remains To the south of the Stamping Mill, the line of the leat can be picked upThe leat passing through some small gorse bushesTo the west of Engine Shaft, there appears to be a sloping track leading down to the Stamping Mill and the west side of the Dressing Floor. At first glance the author thought this was the course of the leat, but with the watewheel being 60ft, this course wouldn’t have been suitable, especially if the wheel was overshotApproaching the Engine Shaft from the south, where the last positive known location of the leat was seen, this pile of stones can be found. The stones are located at SX67847 82715. Passmore describes the water from the leat being fed via an aquaduct to the wheel. The author’s interpretation of these stones is that they were part of the foundations for a launder support as they seem too far away from the shaft to have simply been from ore extraction. If a launder came through this route, it could have passed close to or even over the Engine ShaftThe Engine Shaft is located at SX67850 82720This mound is described by Butler in his Atlas of Antiquities, Volume 3 as a launder bank. However, in the publication by Dartmoor Tinworking Research Group, The Tinworking Landscape of Dartmoor in a European Context (Dr P. Newman) there is a plan on page 44, which suggests its purpose was a tipping platform. This mound is located at SX67860 82727The Wheelpit, Stamping Mill and Tipping Platform (mound)Another view of the Wheelpit, Stamping Mill and Tipping Platform (mound)This view is from above the wheelpit (where the stamps would have been) during the summer, indicating how overgrown the area can get Outline of the wheelpit in the summer at SX67879 82730Wall remains at the wheelpit. It was filled in during 1877 (ref: Passmore)End on view of the Wheelpit looking southThe Stamping area adjacent to the WheelpitThe Stamping area is located at SX67870 82741There is little which can be seen of the stamping floor, except one obvious earthfast rockAt the northern end of the Wheelpit, there would have been an Underground Tailrace. It appears that this would have been punctuated by at least three hollows. To the left (north west) of the line of hollows is a fourth hollow (stone lined), which has been interpreted at a second wheelpit, which the author assumes was used to drive the brushes for the three circular Buddles on the Dressing FloorThe two wheelpits and the line of hollows (Underground Tailrace). The smaller wheelpit (stone lined) is located at SX67899 82750The Dressing Floor contains three Buddles with central mounds which survive complete with drains. These features are still shown on the latest OS map. The picture is Buddle A (as annotated on the sketch map in this post)Buddle A is located at SX67892 82747Buddle A, looking across the Dressing FloorAnother view of Buddle A – note the subterranean drain where the small rocks are located on the side of the BuddleThere is a wall (on right), partly encloses the three buddles. Buddle B is circled under its cloak of bracken in summer. All the buddles are around 5m in diameter.Buddle B without the bracken. It is located at SX67886 82755Buddle B with the Dressing Floor wall, which is still in remarkable conditionBuddle CBuddle C is located at SX67892 82765General view of the Dressing FloorDressing Floor wall with stamping area in top left corner of this pictureBuddle drainMore Buddle drainsAnother Buddle drainClose up of a Buddle drainAll three Buddles combine and waste left via a semi-subterranean drain leading back to North Walla Brook.The three Buddles and Dressing Floor wallAt the north west end of the Dressing Floor wall there is a another wall structure perpendicular to it. Its function is unknownThis pit / hollow is adjacent to Buddle C. It is one of four other pits in the vicinity of the Buddles and was probably used as part of the dressing process.Possible Adit as described by Hamilton Jenkin. It might be part of the original outflow of the 60ft wheelpitIs this boggy area evidence of the Adit This lovely valley is worth the diversion down from Hurston Ridge, across which, the author suspects most hikers will walk between Kings Oven / Warren House Inn and the Heath Stone / FernworthyLeaving the valley to the north a view of Hurston Castle Tor can be had. The tor was described by William Crossing as being situated on a small spur above the infant River Bovey. The tor comprises two main outcrops