A collection of walks, discoveries, insights and pictures of exploring Dartmoor National Park
January 7, 2022
The Ferro Ceramic Company Ltd including Shaugh Brick (and tile) works
The Ferro-Ceramic Company Ltd was a very brief (December 1879 to May 1883) 19th Century venture. It included the Shaugh Brick (and tile) works as depicted on 19th Century maps. The company used iron ore from the nearby mine (albeit the quality was poor) and by-products from the nearby china clay drying works in the manufacture of the bricks. The operation appears to have been disused by 1886. The origin of iron mining at Shaugh is unknown as it was not depicted on the 1840 tithe map, suggesting that mining would only have commenced between 1840 and 1879.
A very good summary of the operation can be gleaned from the initial lease as described in the National Trust record (see link below) thus: “On the 25th December 1879 a 21-year lease was granted to Ferro-Ceramic Company Ltd. This lease gave authority: 1) to mine and search for all iron and iron ores and for their export; 2) to obtain materials for, and the manufacture of, bricks and other plastic forms; 3) for the original bridge to be lowered and widened (it also set out the tolls to be charged per ton of material carried across the bridge; 4) to construct buildings for all purposes connected with mining and brick making – except for the burning and smelting of iron ore. The lease laid out the terms of the rights to mine, the grants of way and the rights to draw water from the River Plym”.
Most of the raw materials for brick production appeared to have been available in the immediate locale. An iron mine provided iron oxide and possibly alluvium, a clay works provided the clay, mica and sand by-products for the bricks and the River Plym for waterpower. The only key raw material missing was coal to fire the furnace.
The Dartmoor HER as also used for information: Shaugh Brickworks, Meavy (MDV62876) and Shaugh Bridge Prior Mine (MDV2396) – I think there is a typo here and the word ‘prior’ may be ‘iron’
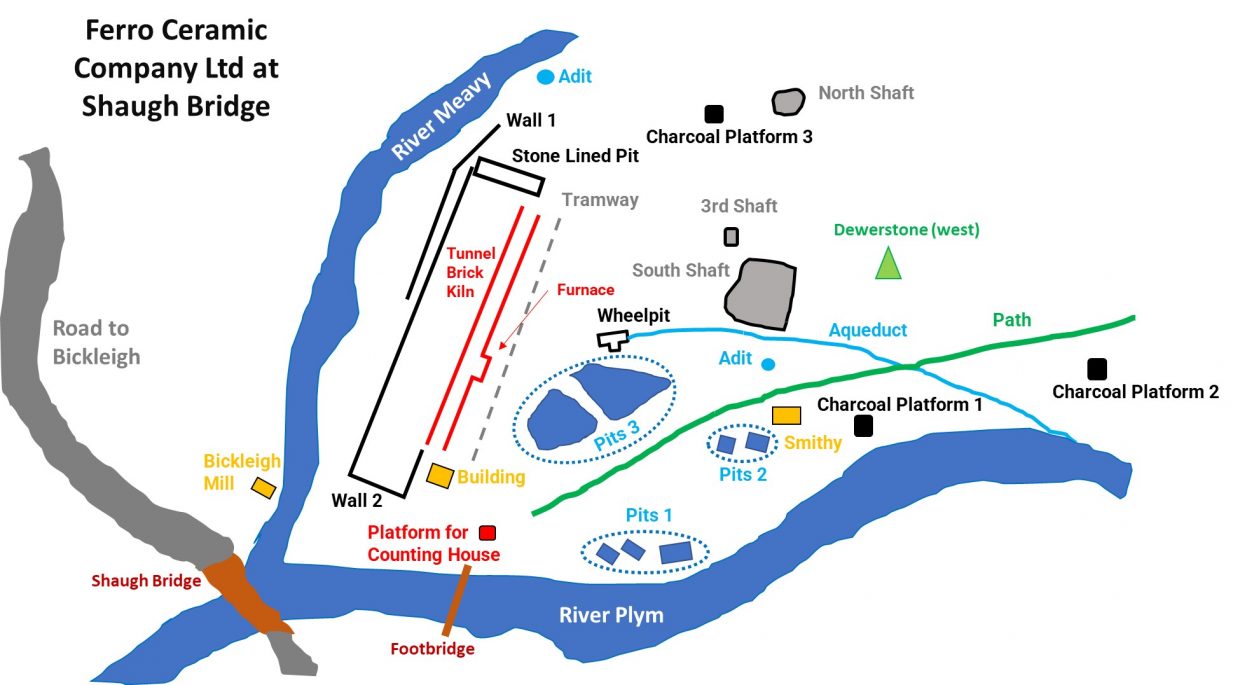
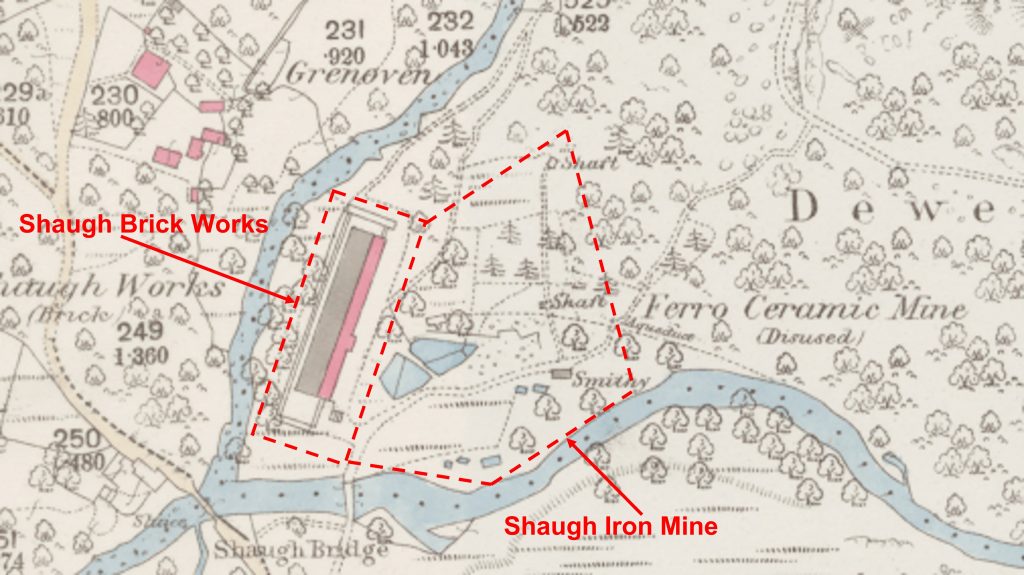
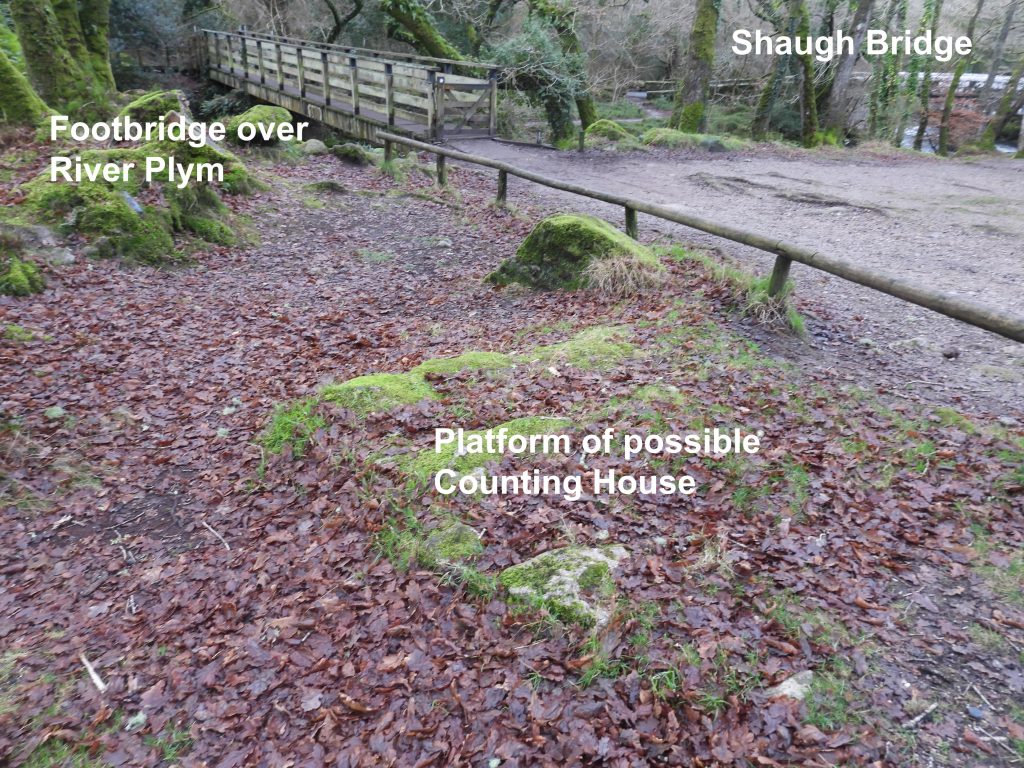
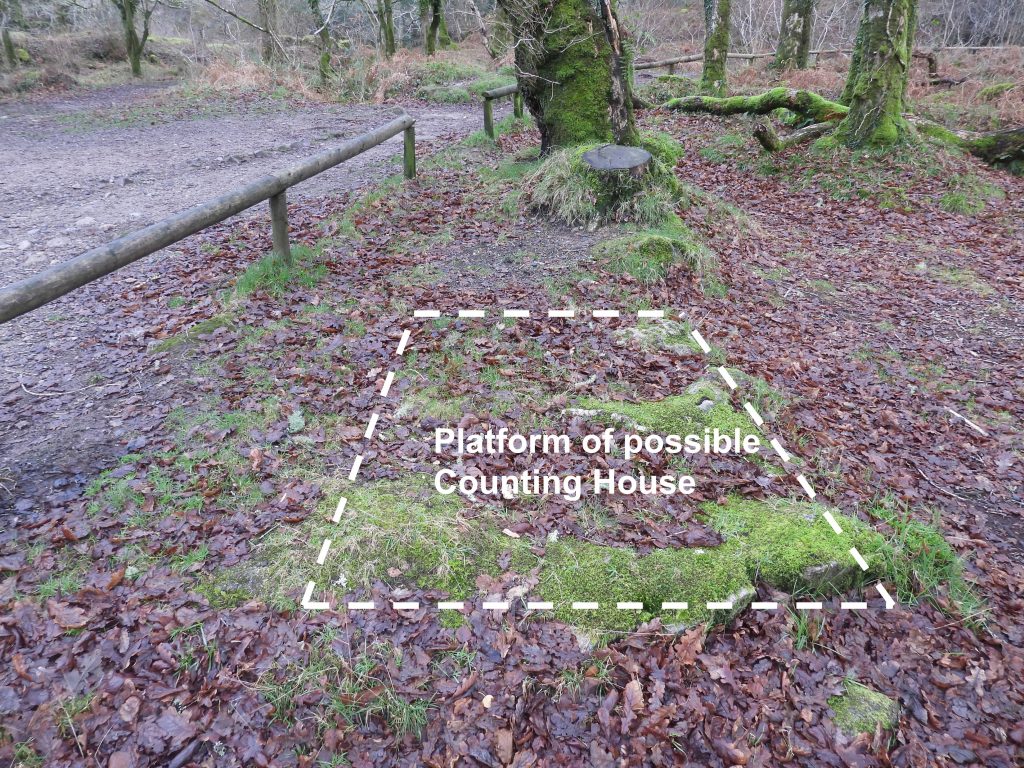
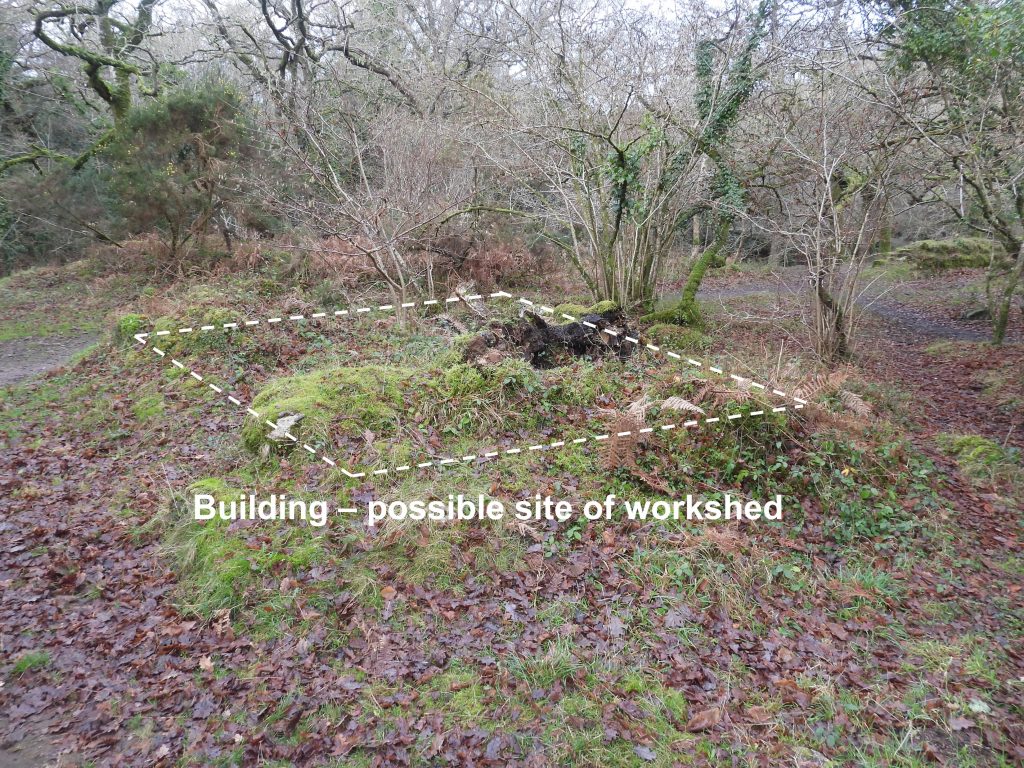
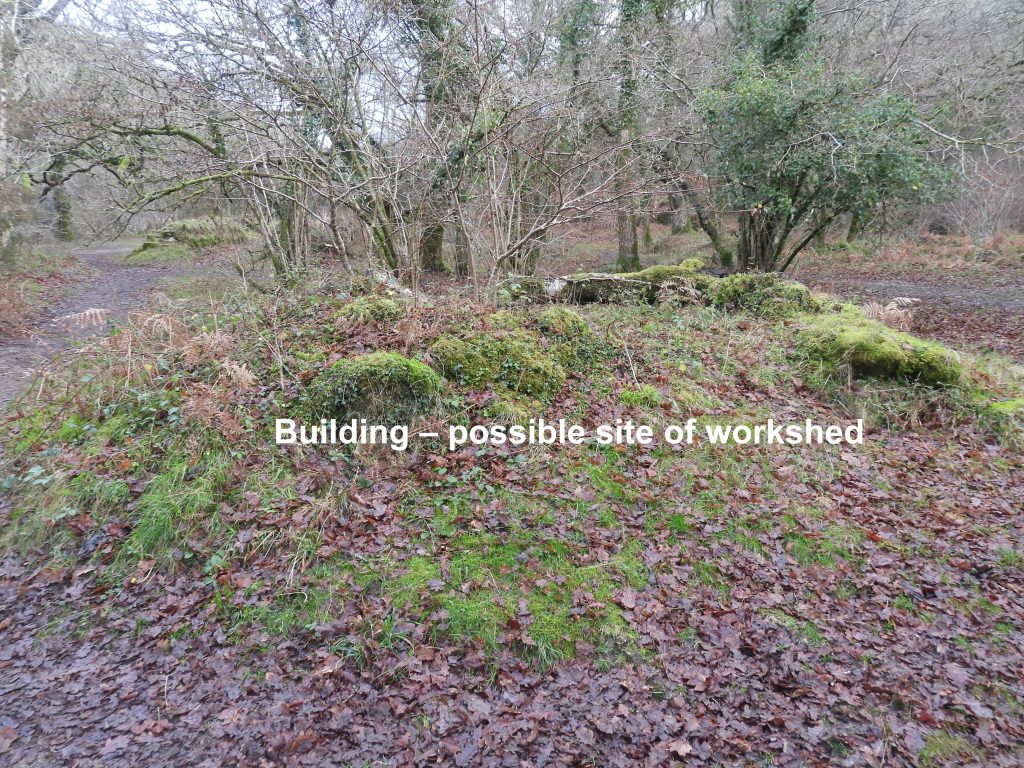
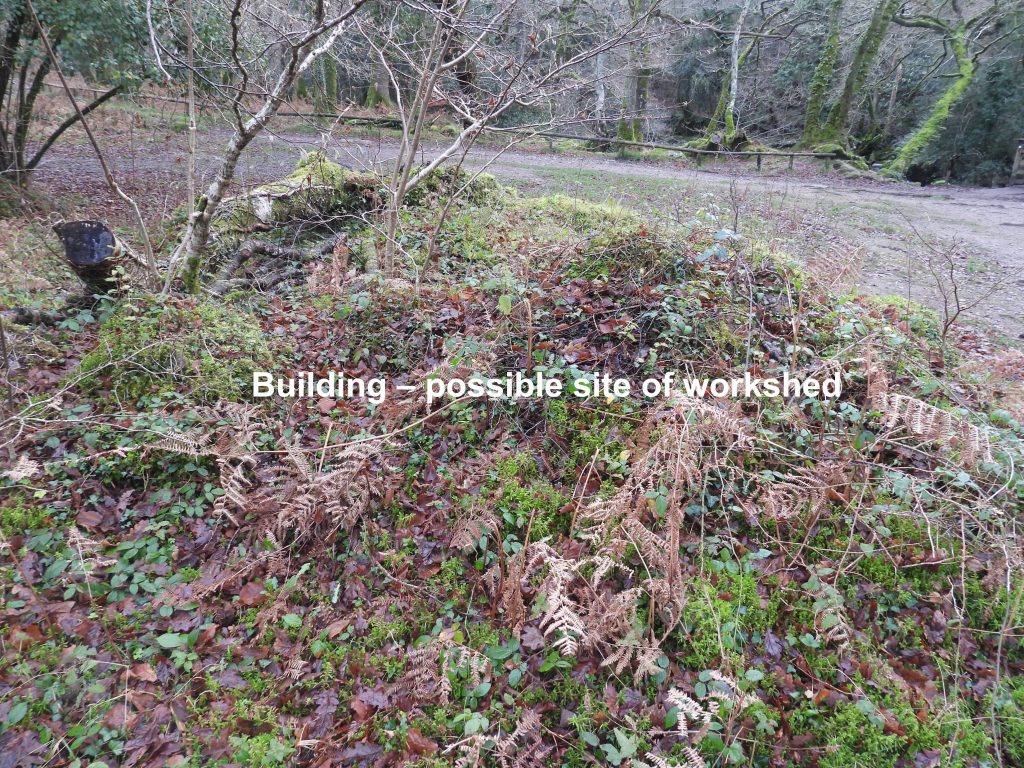
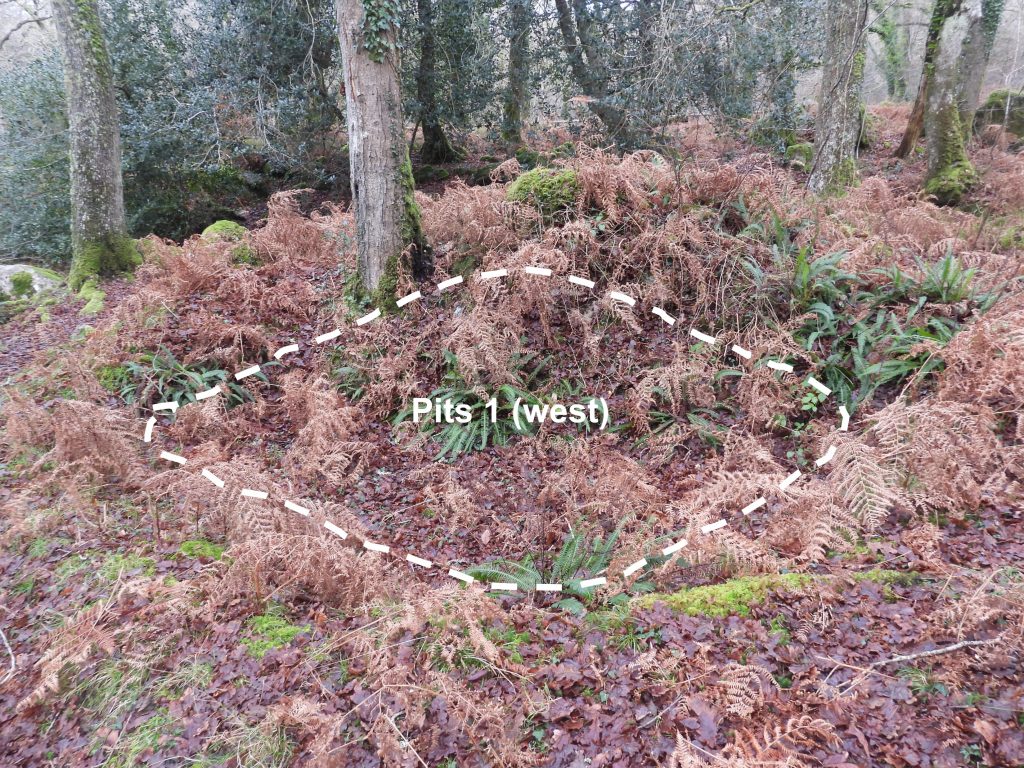
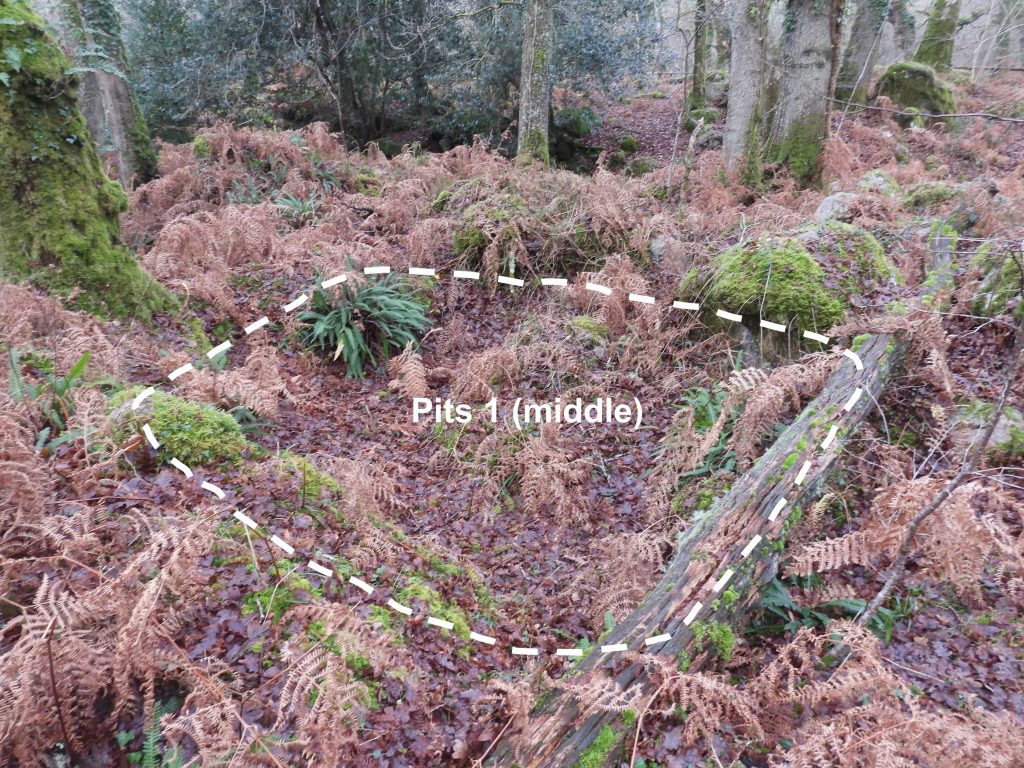
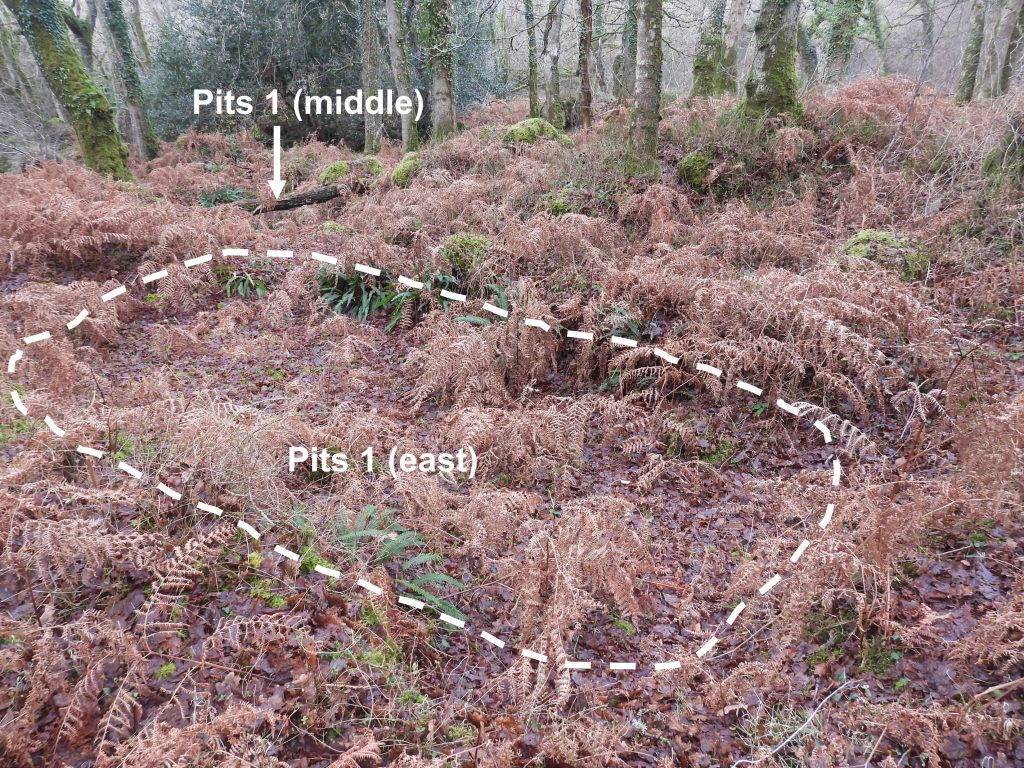
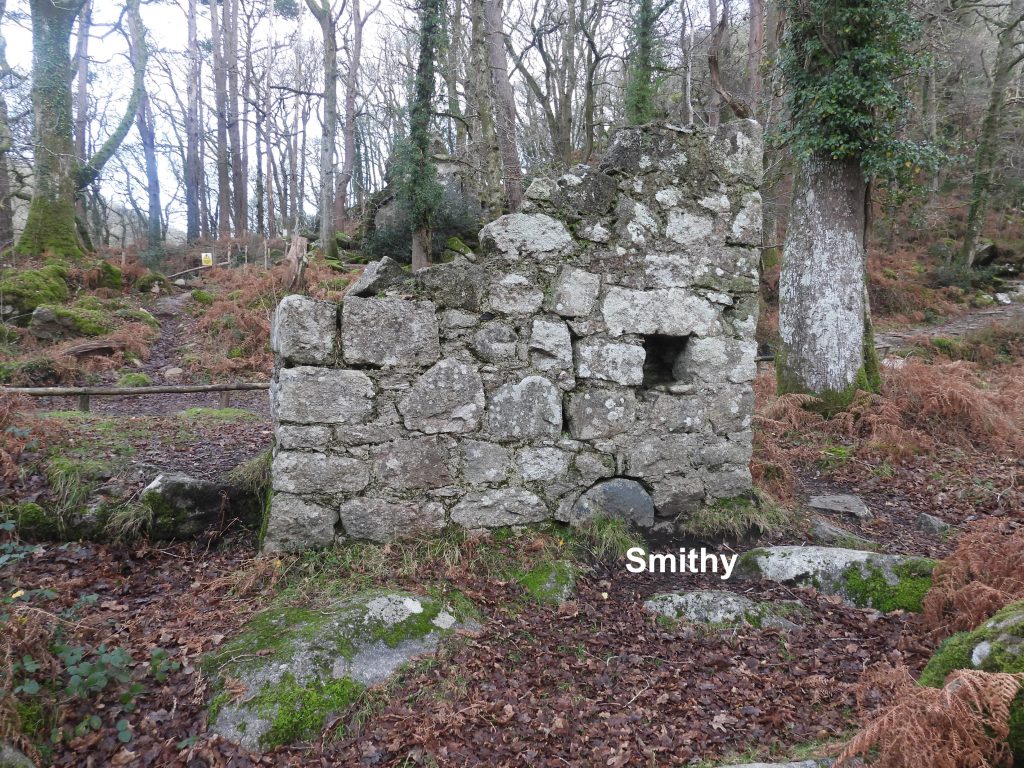
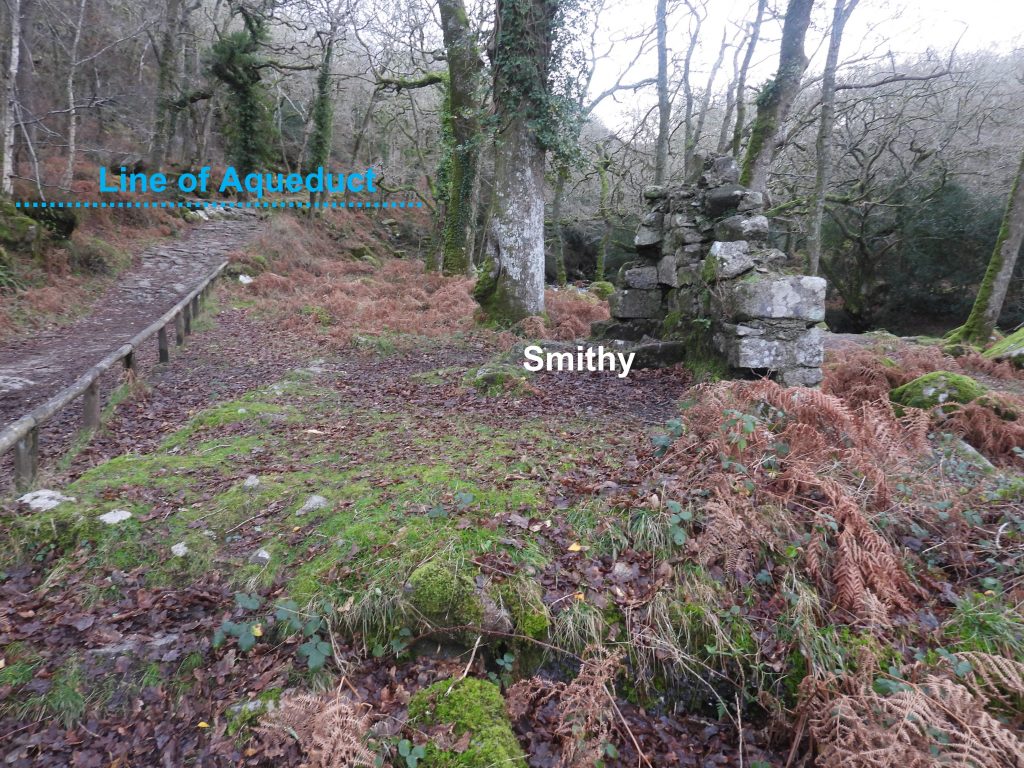
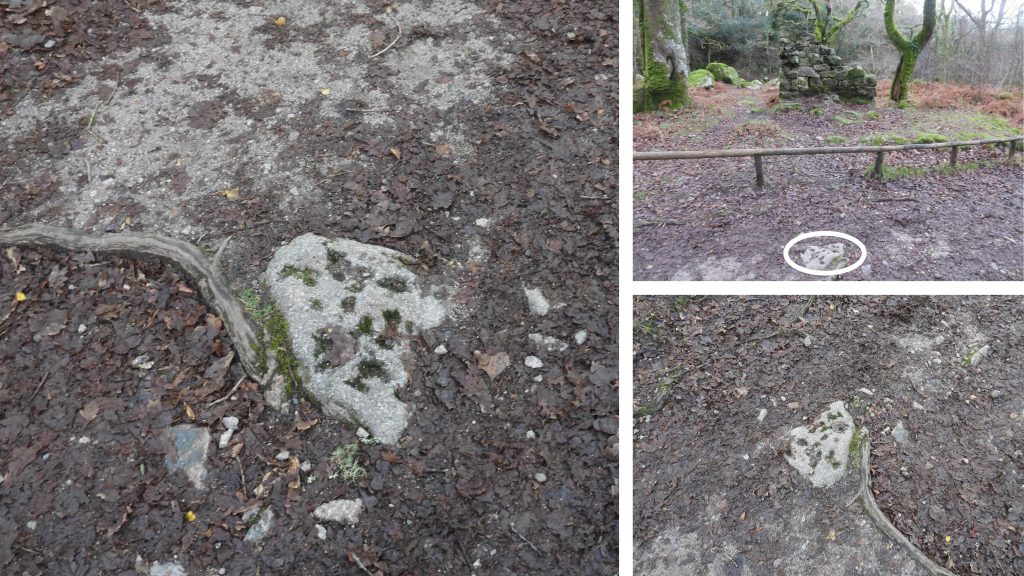
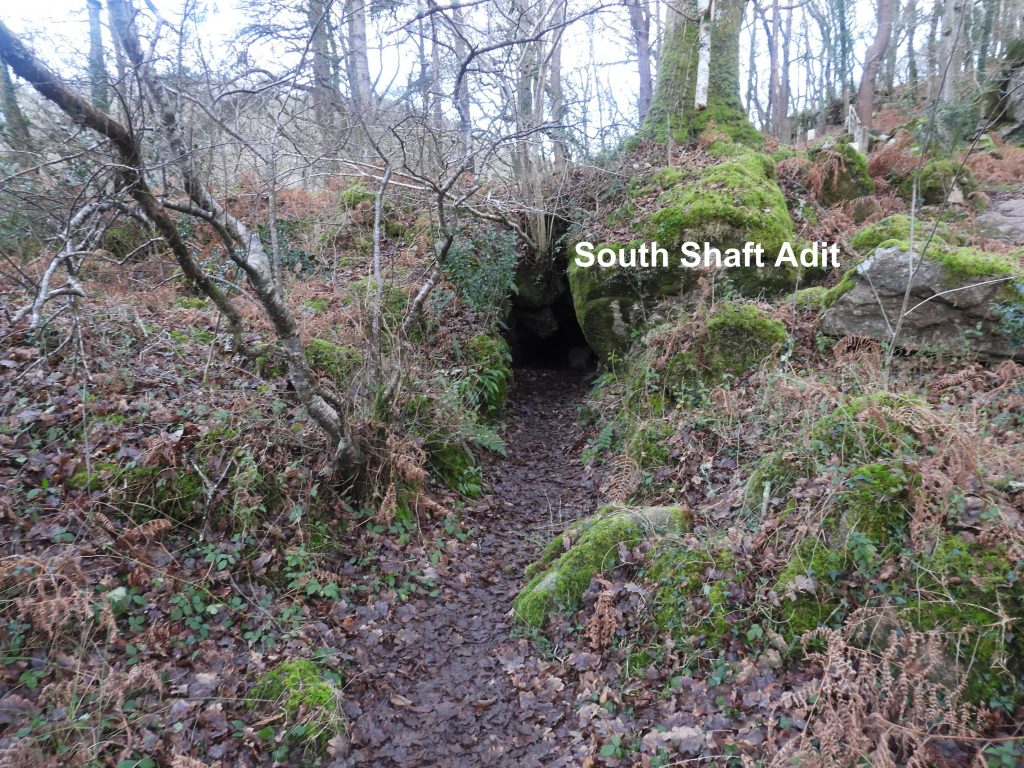
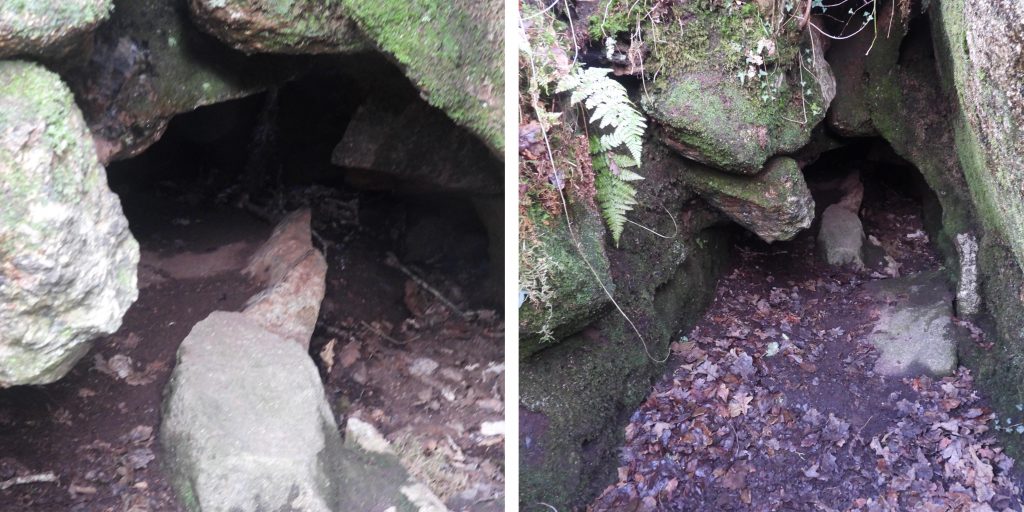
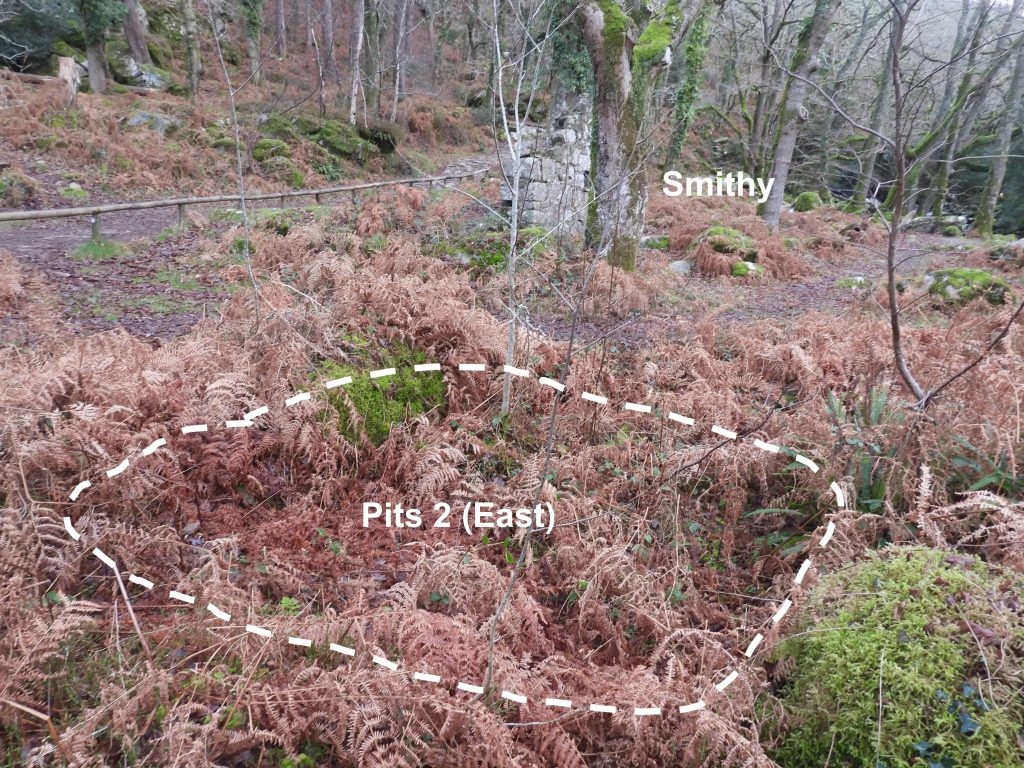
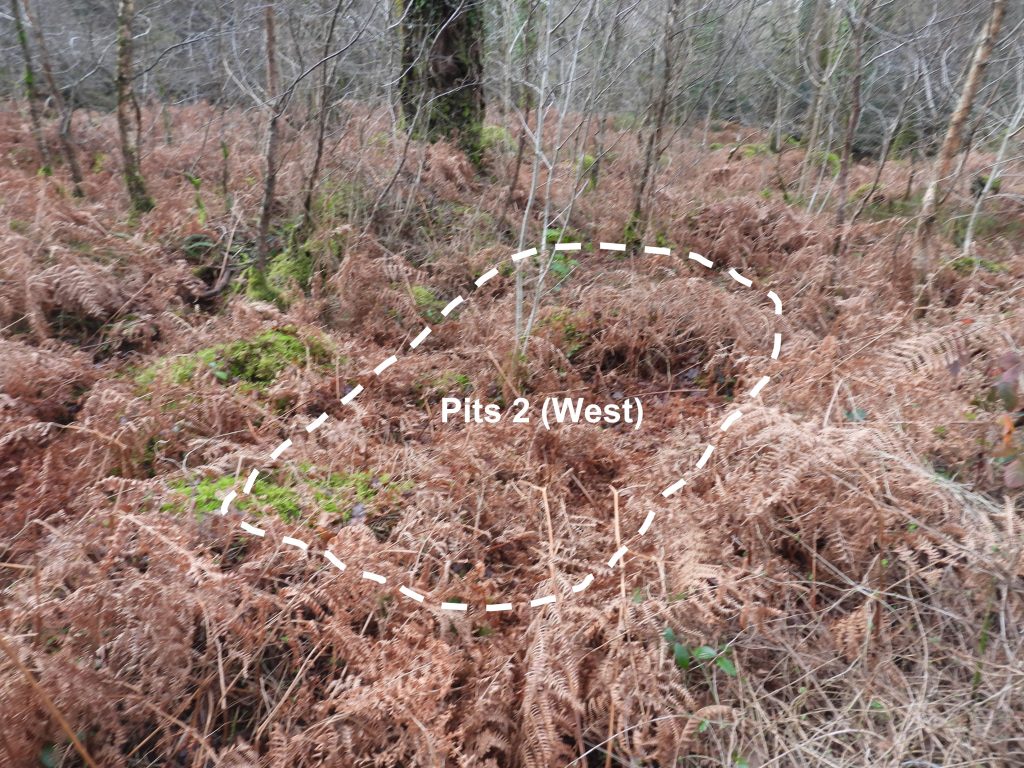
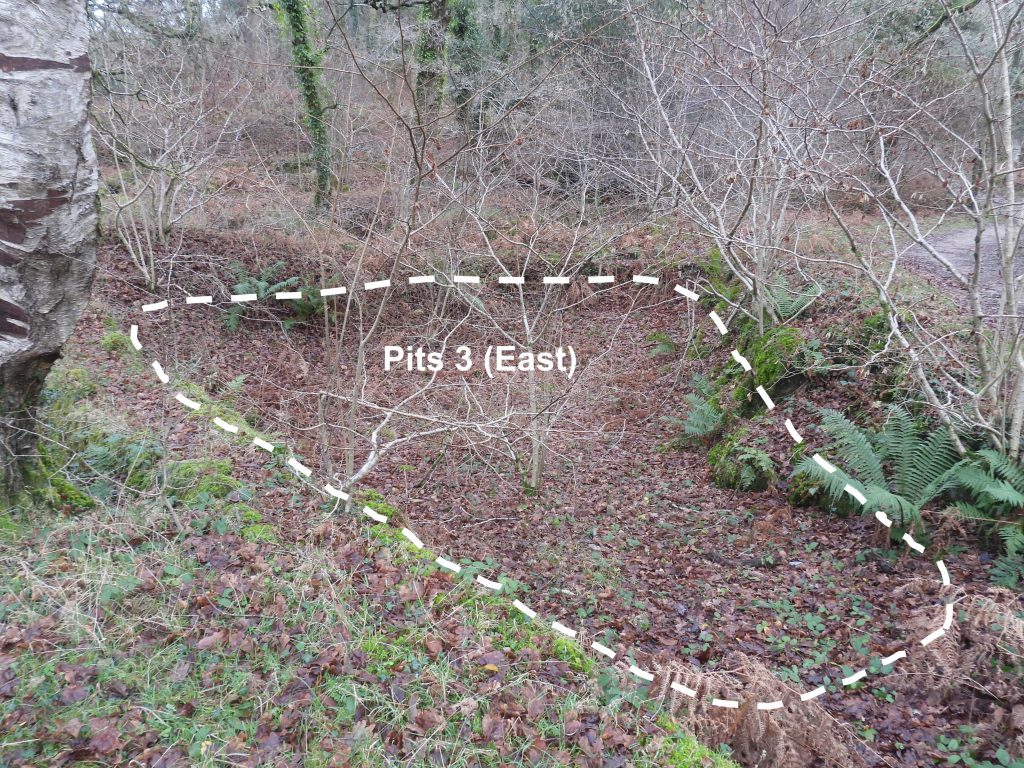
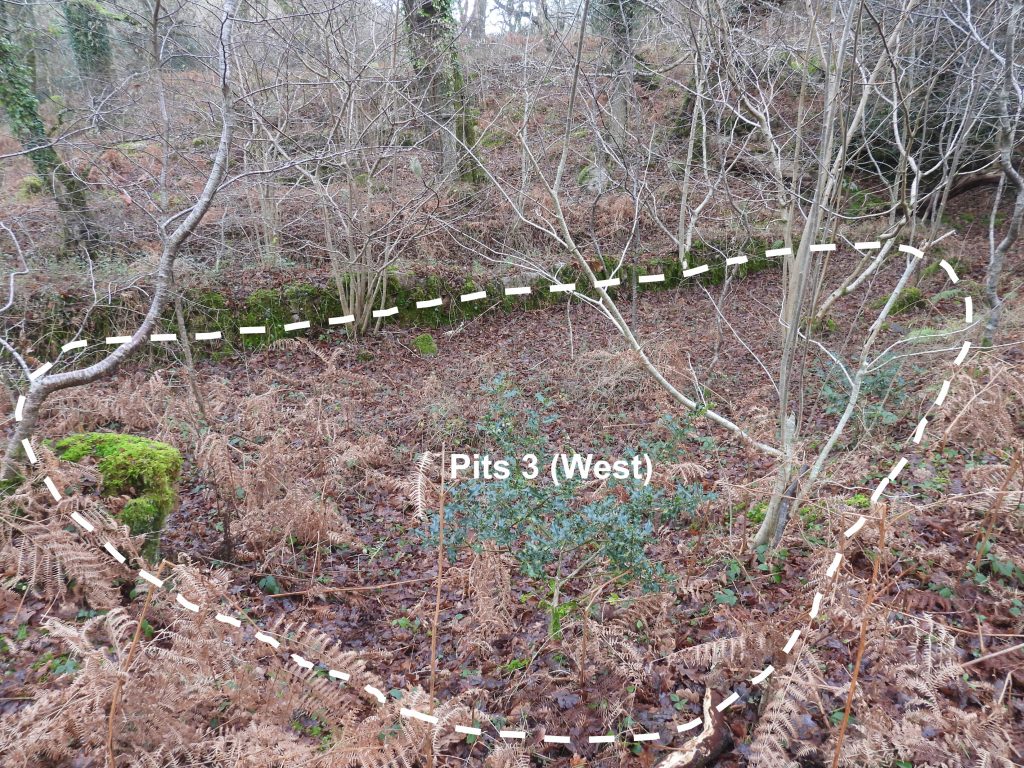
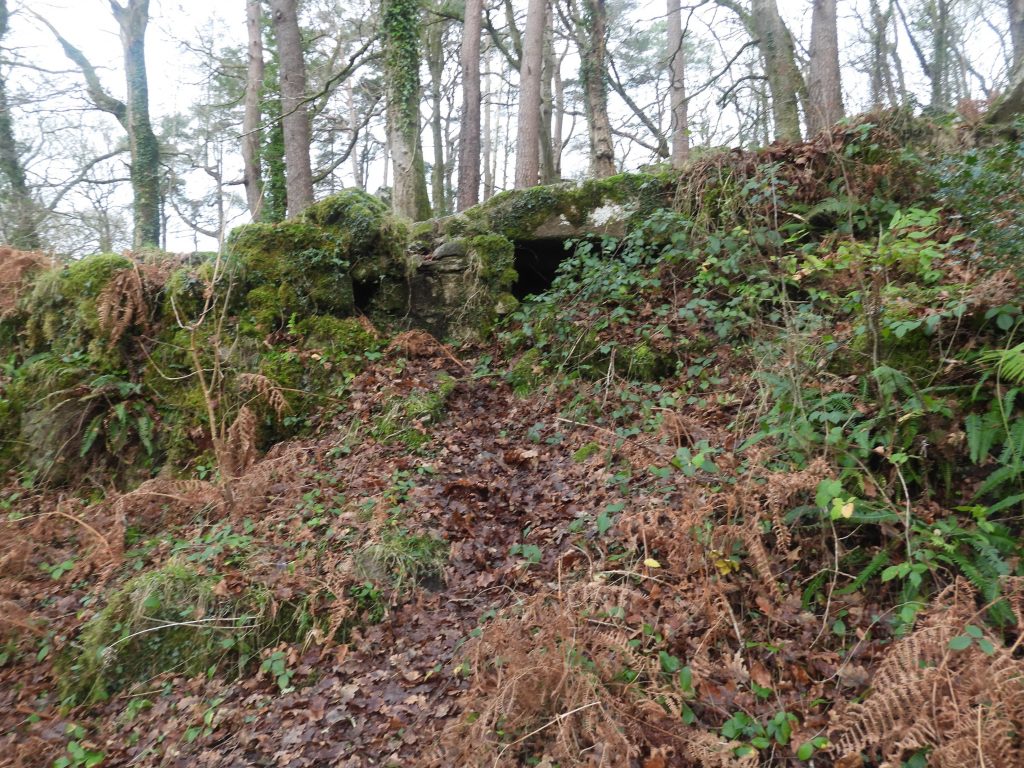
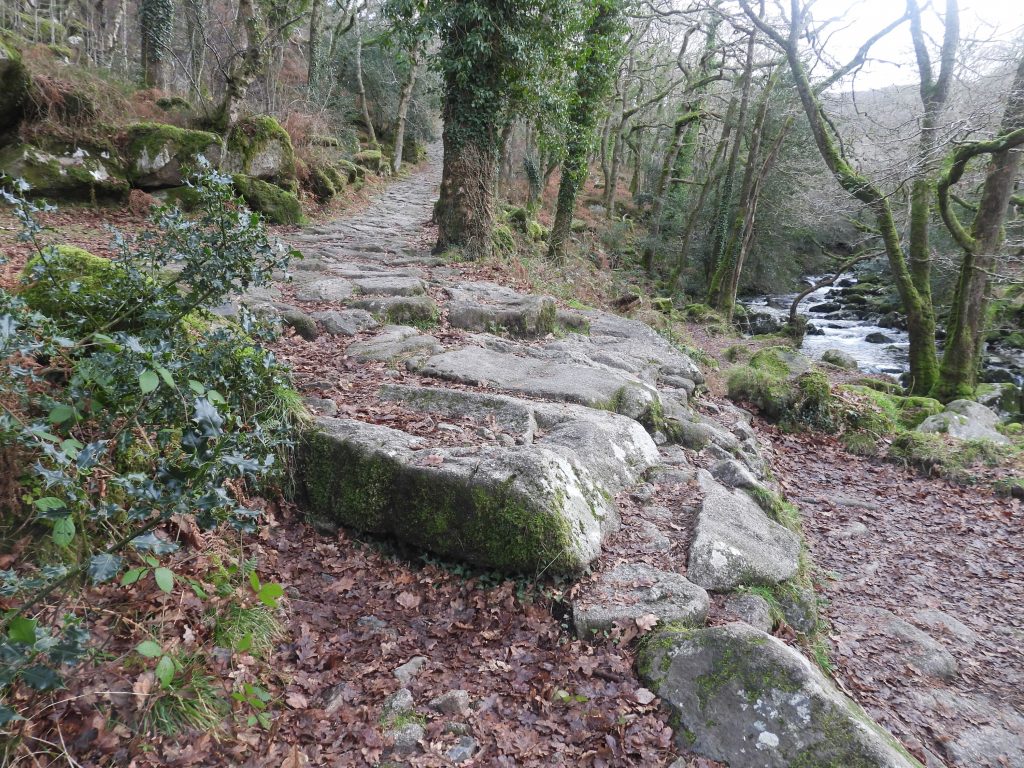
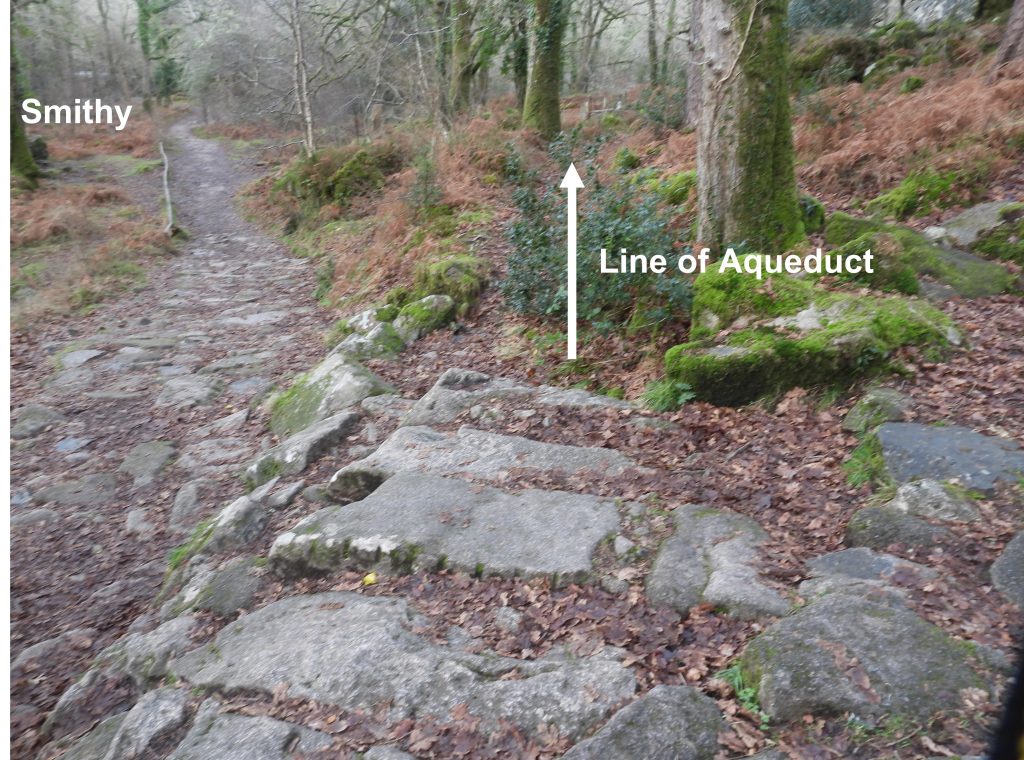
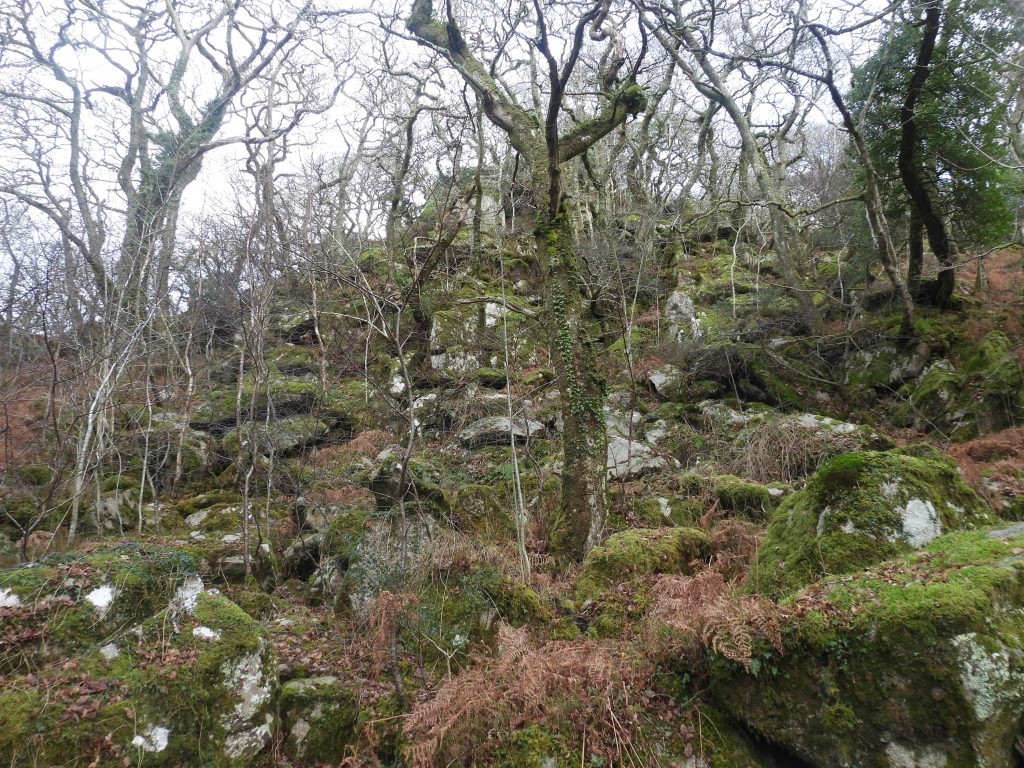
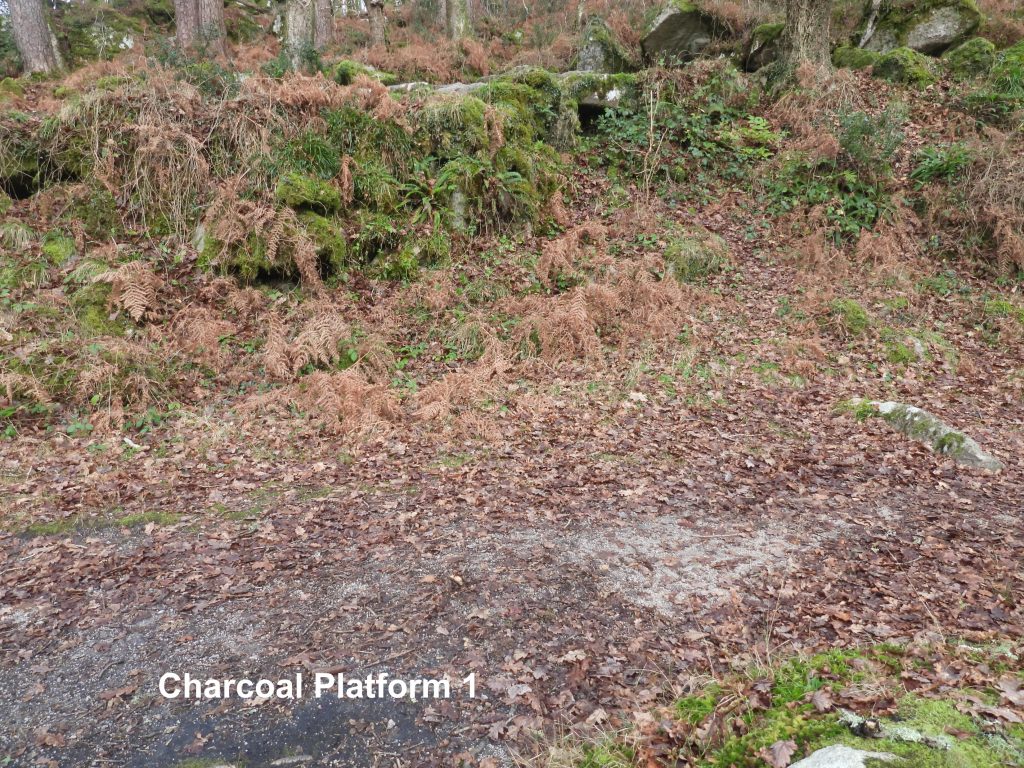
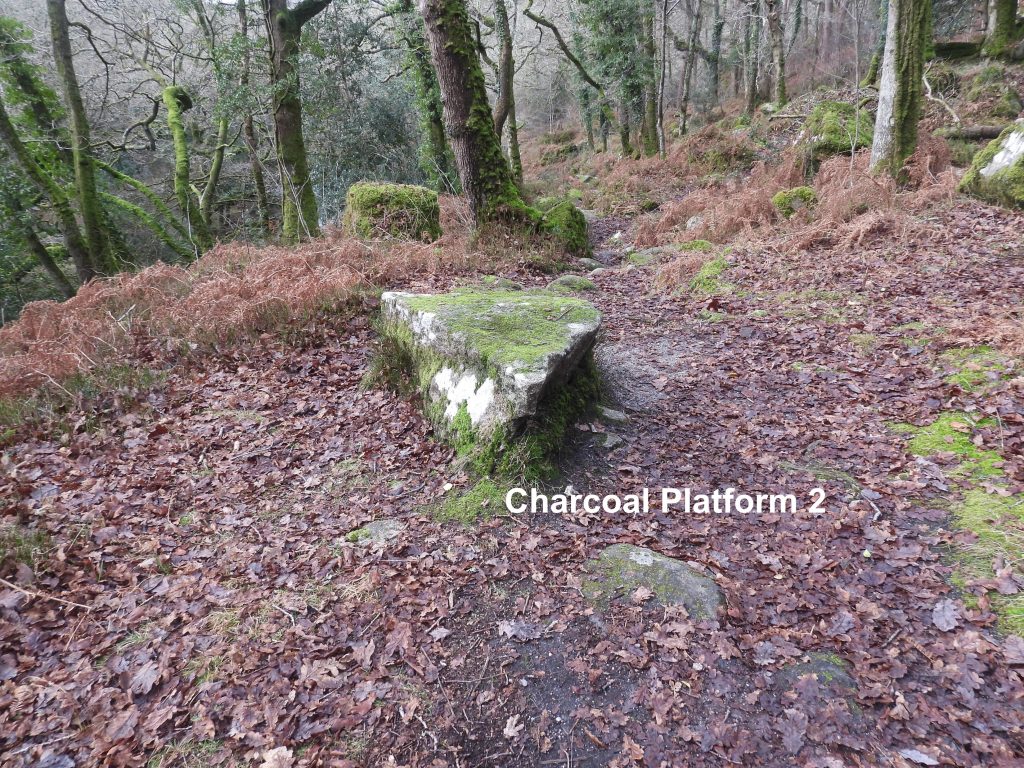
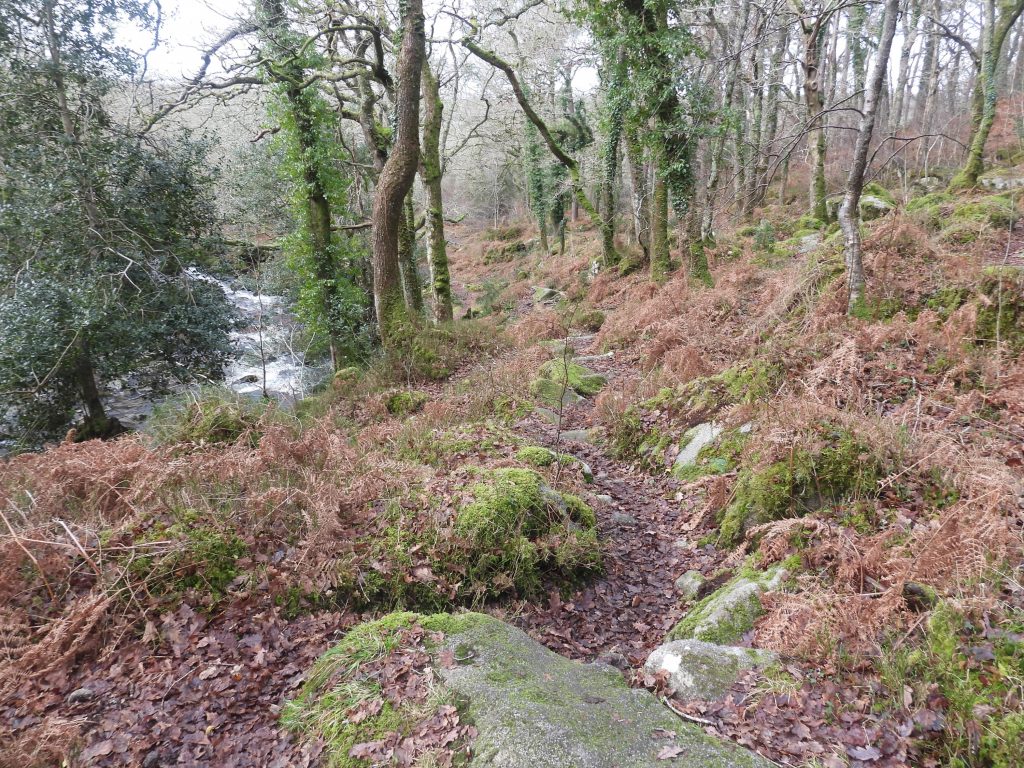
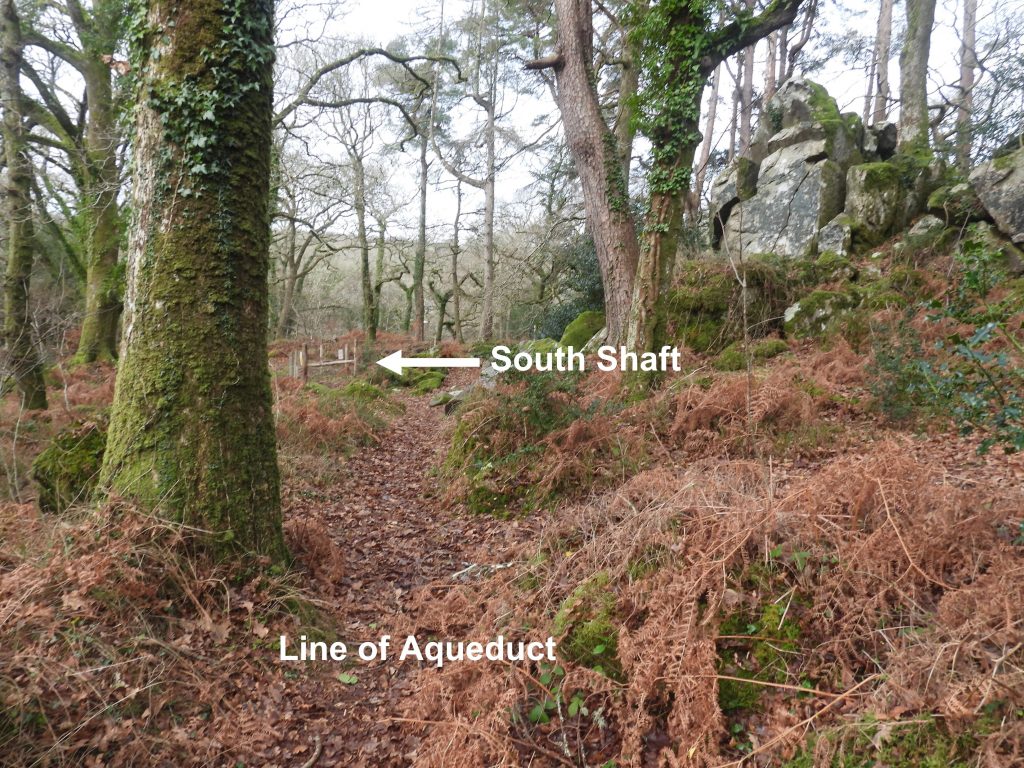
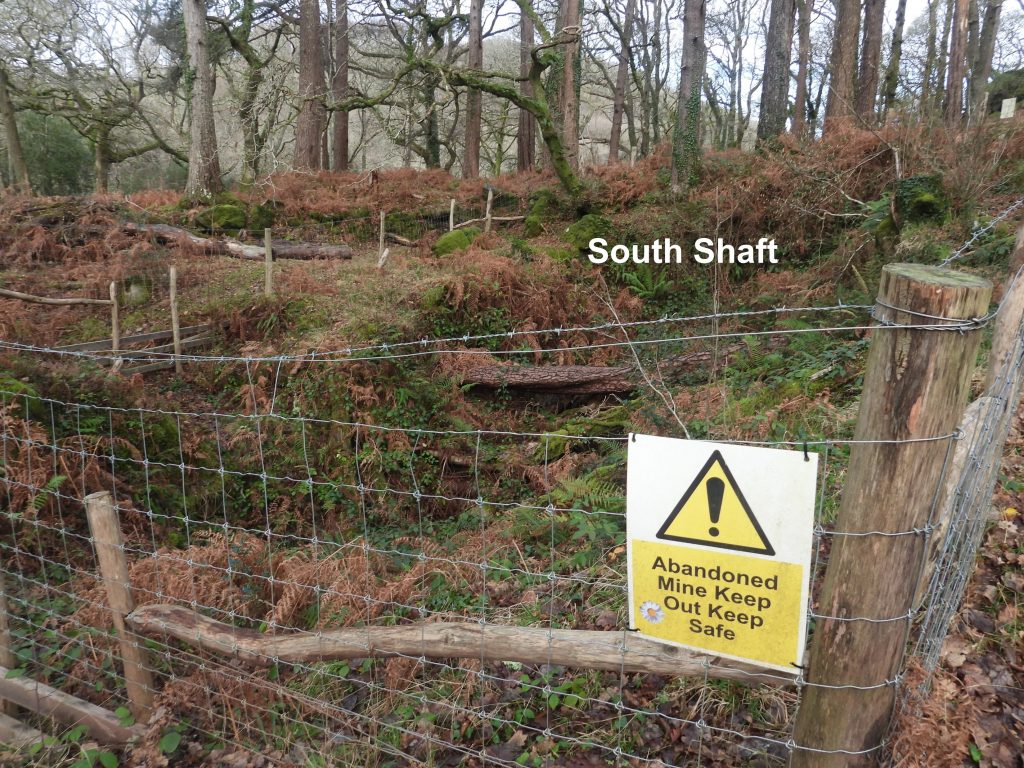
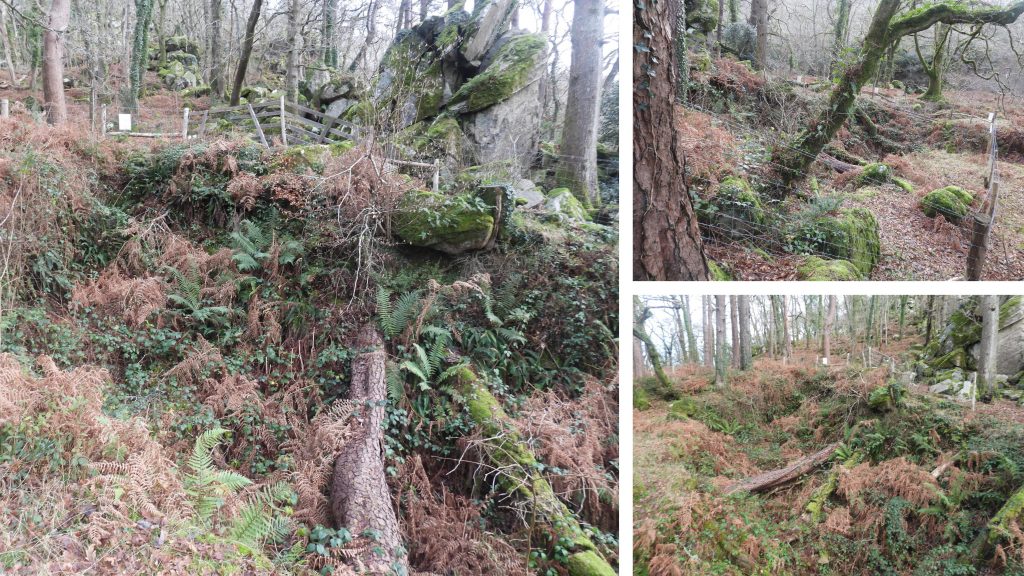
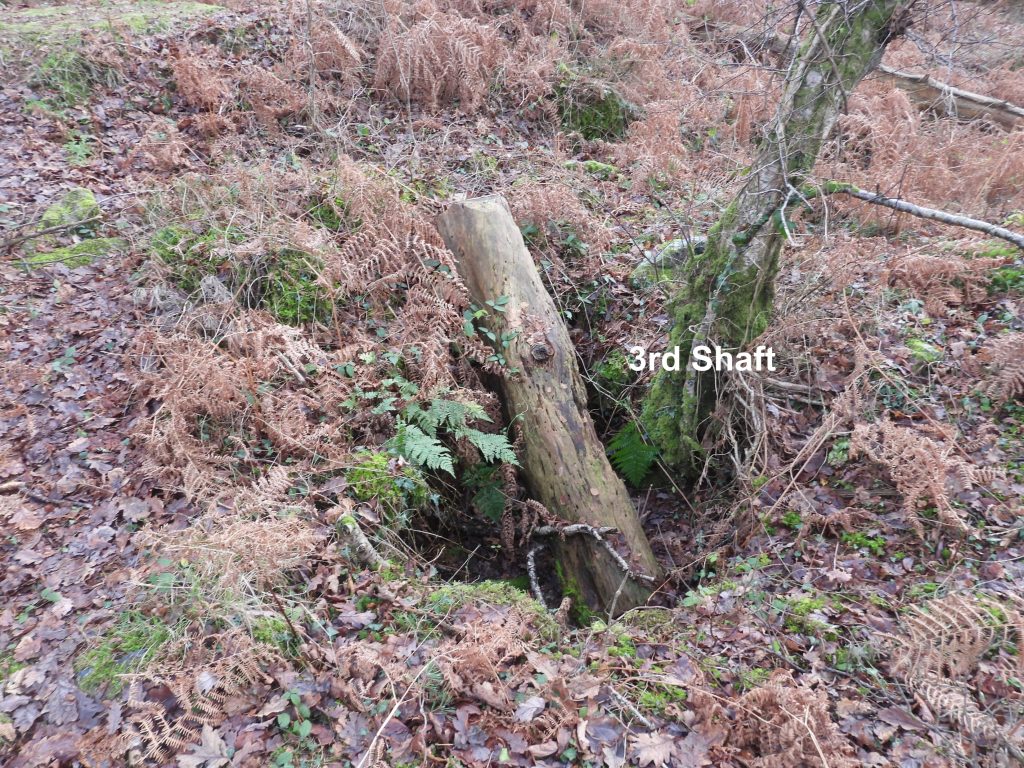
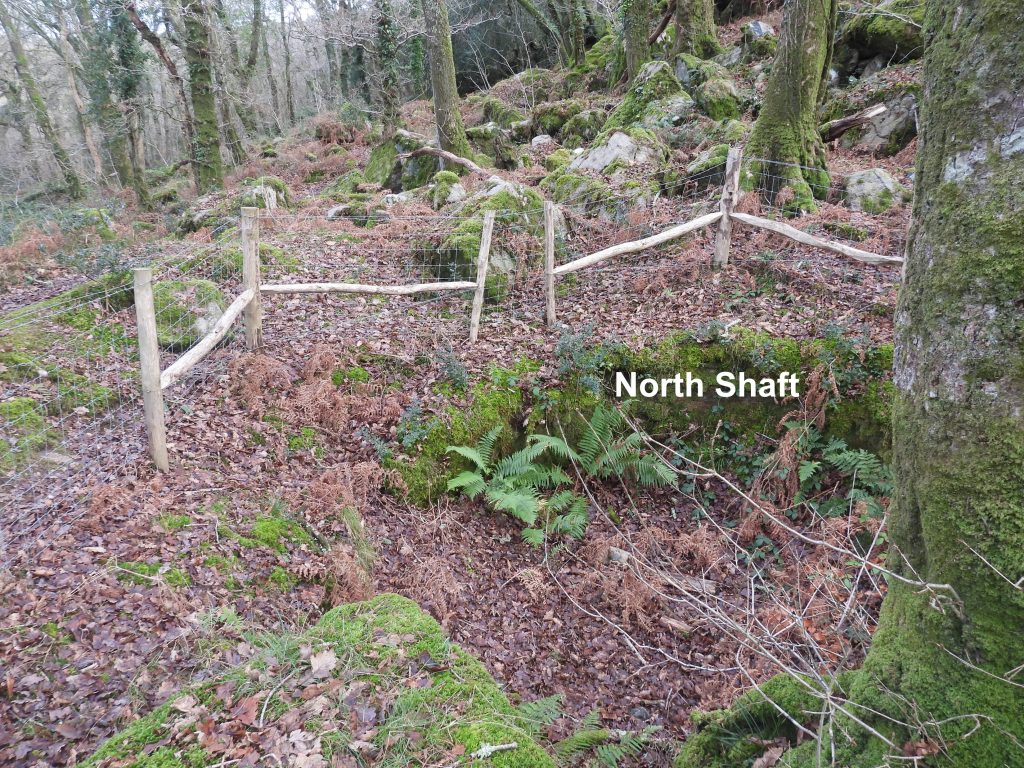
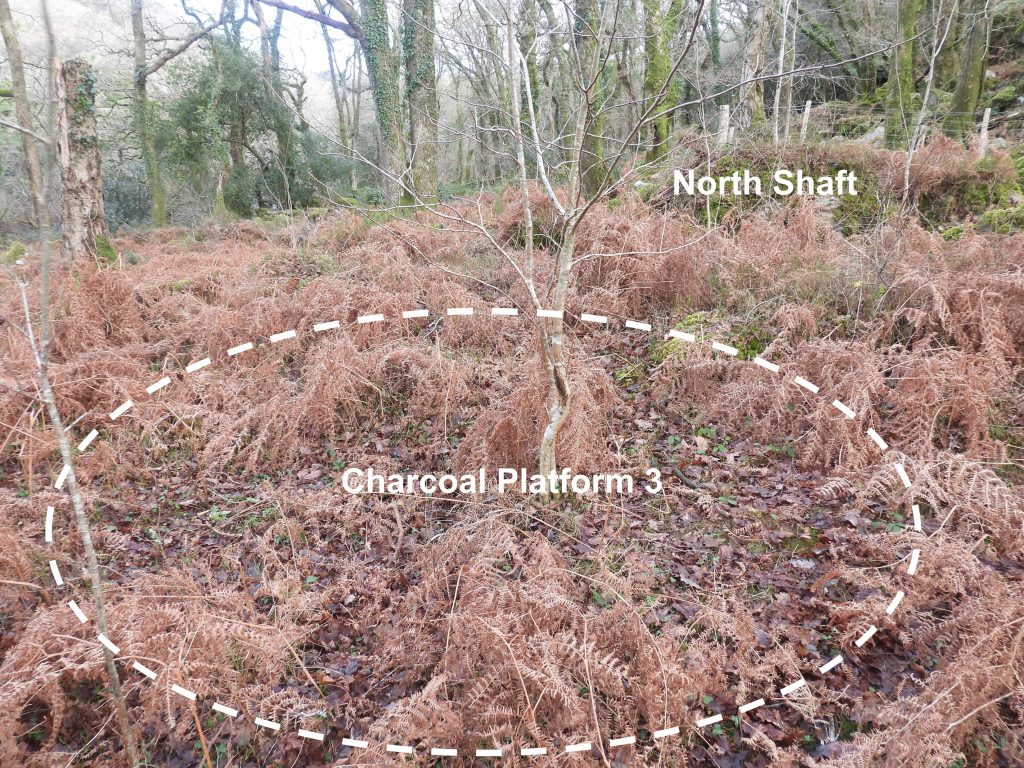
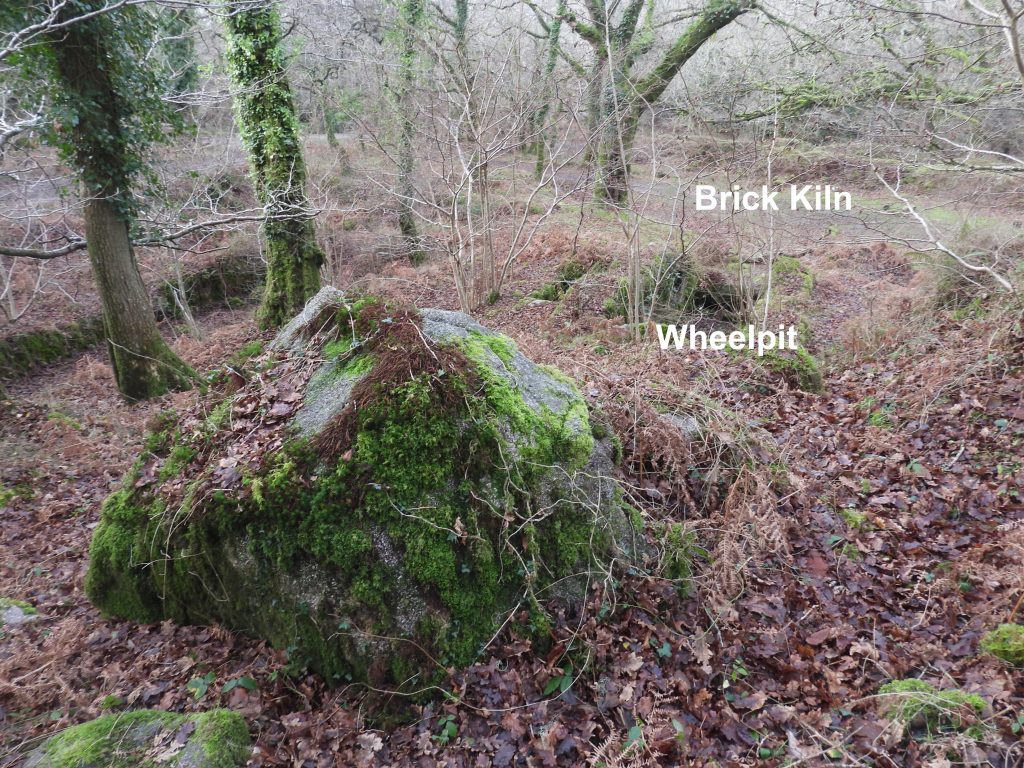
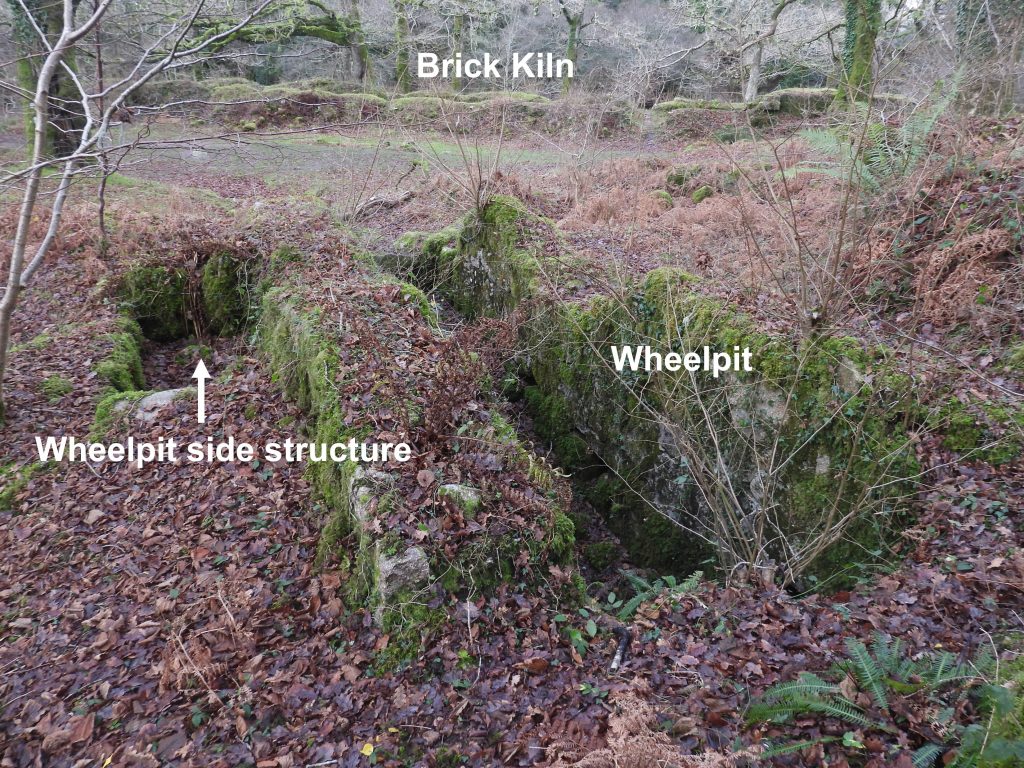
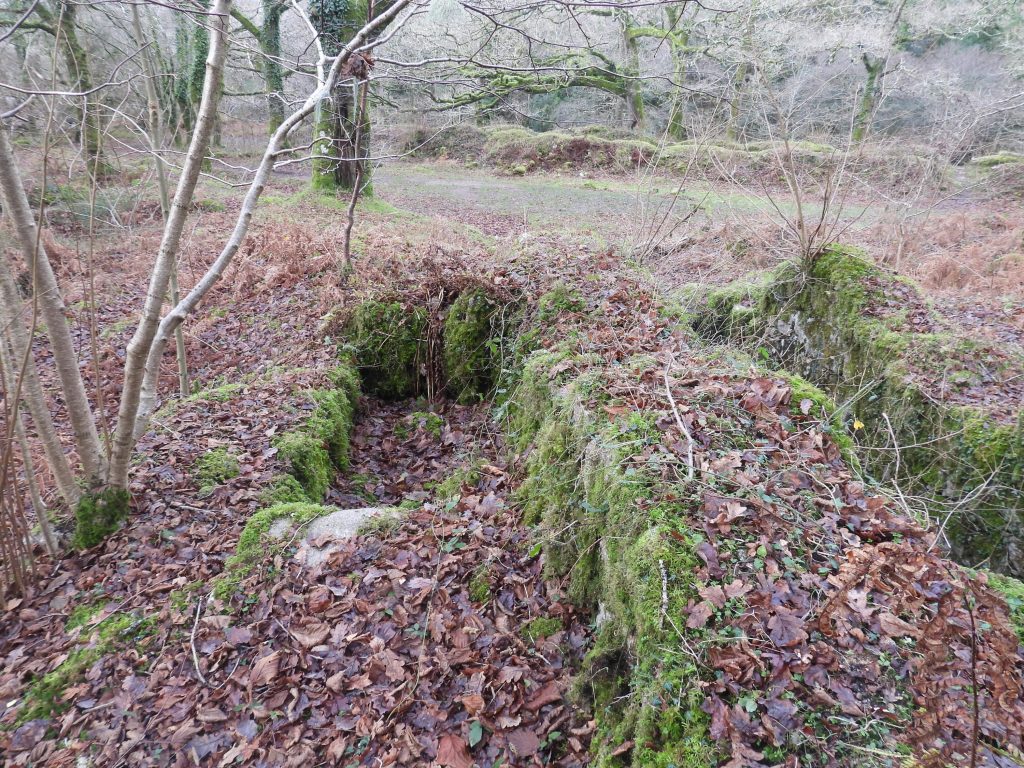
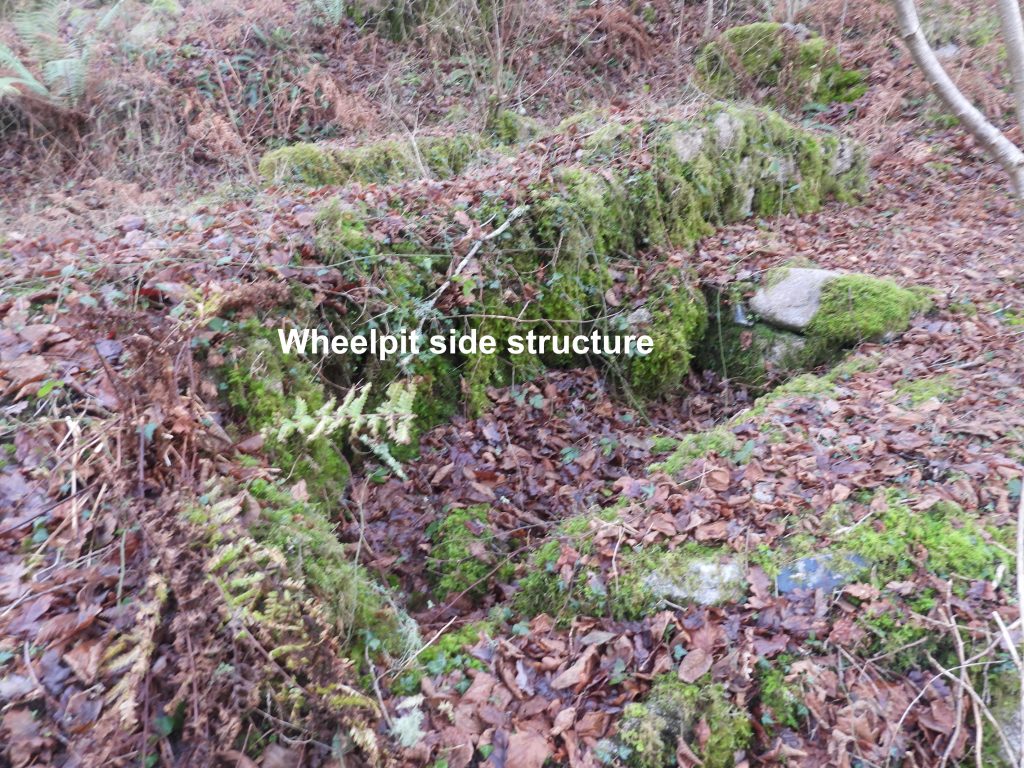
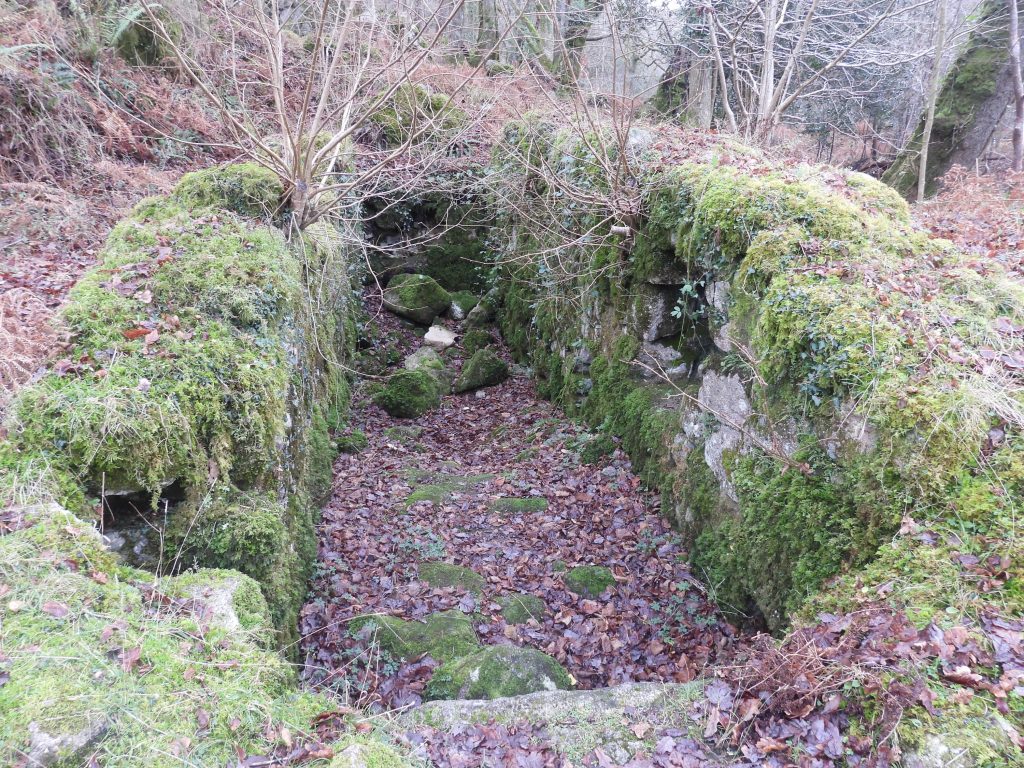
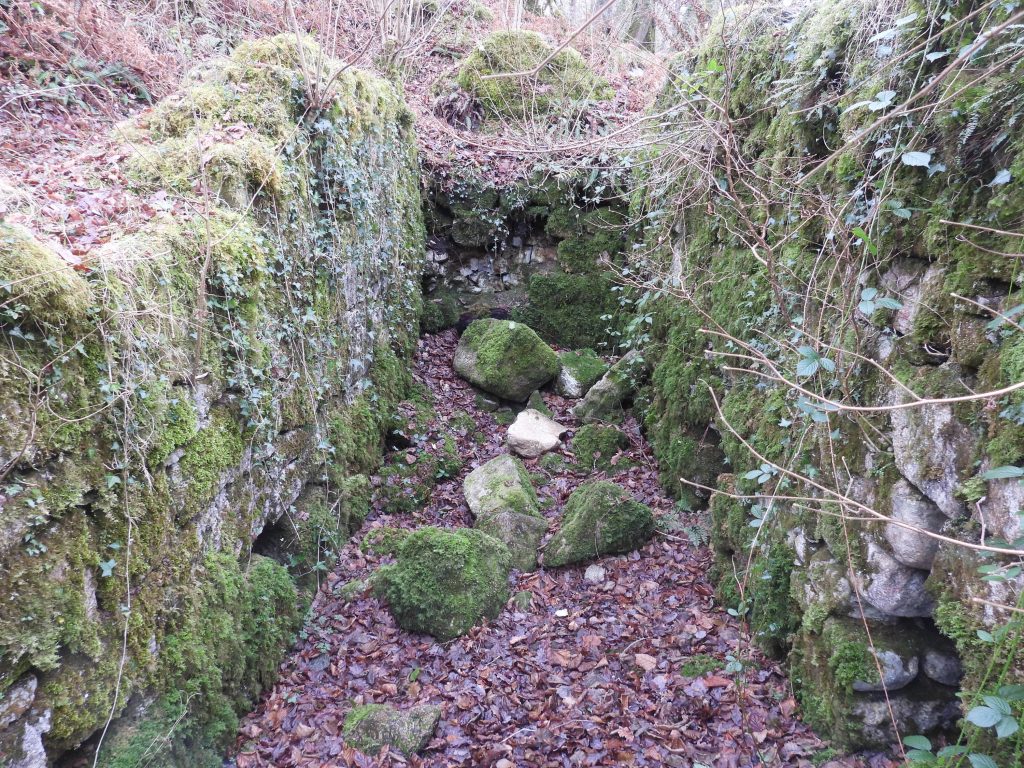
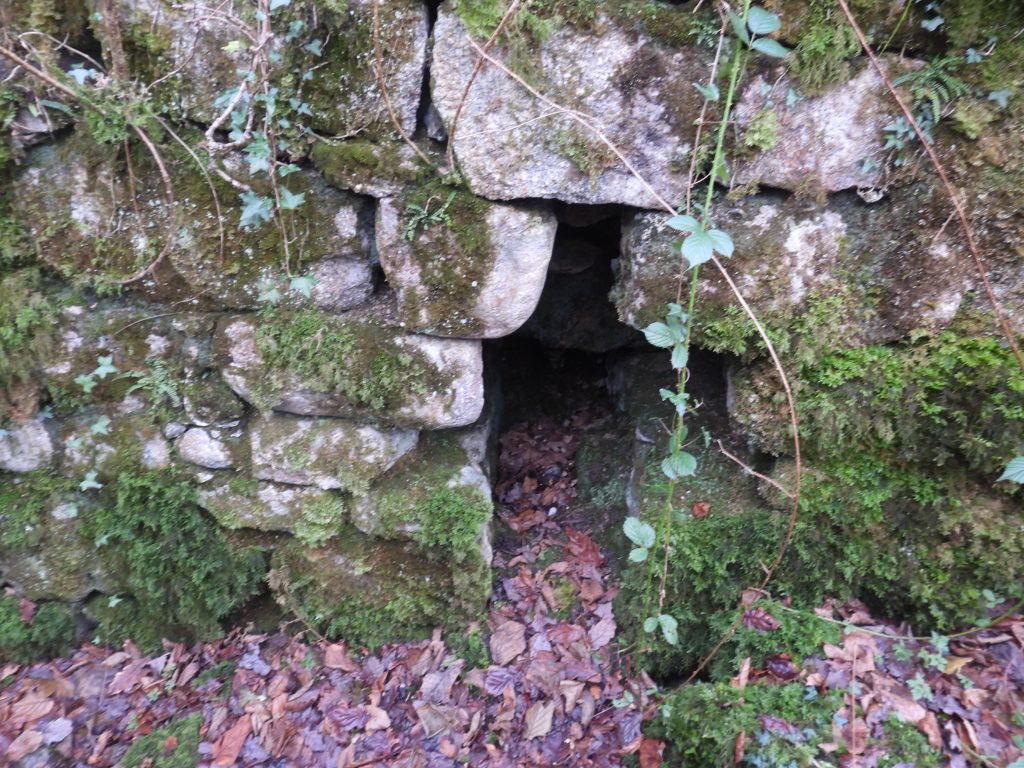
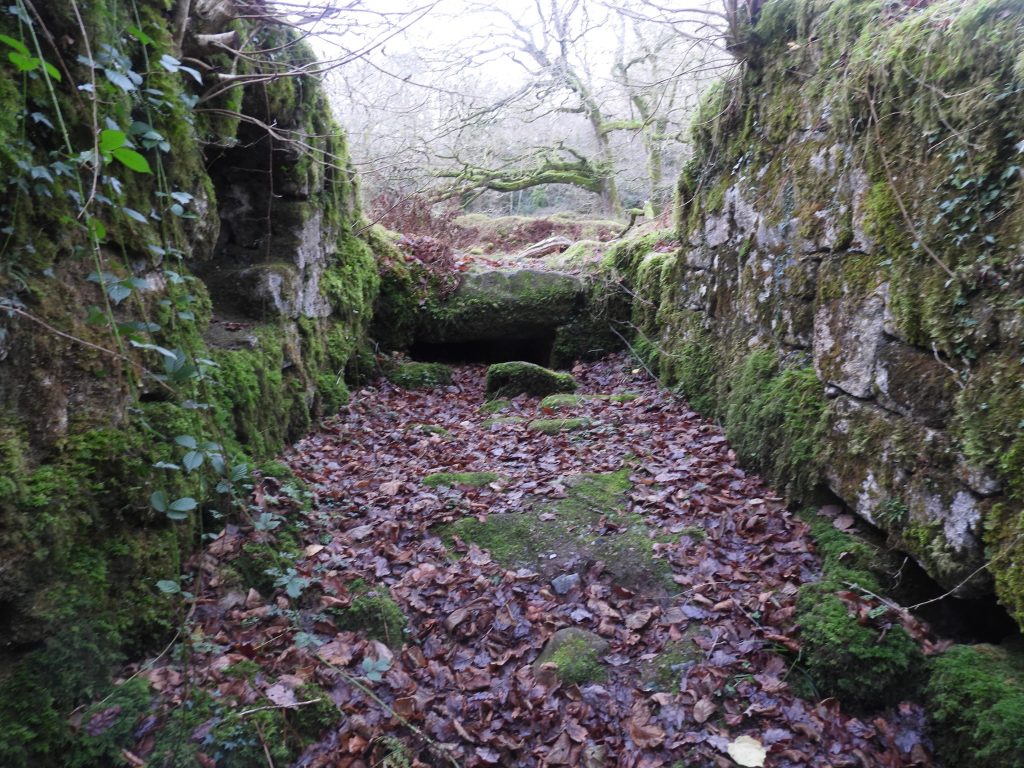
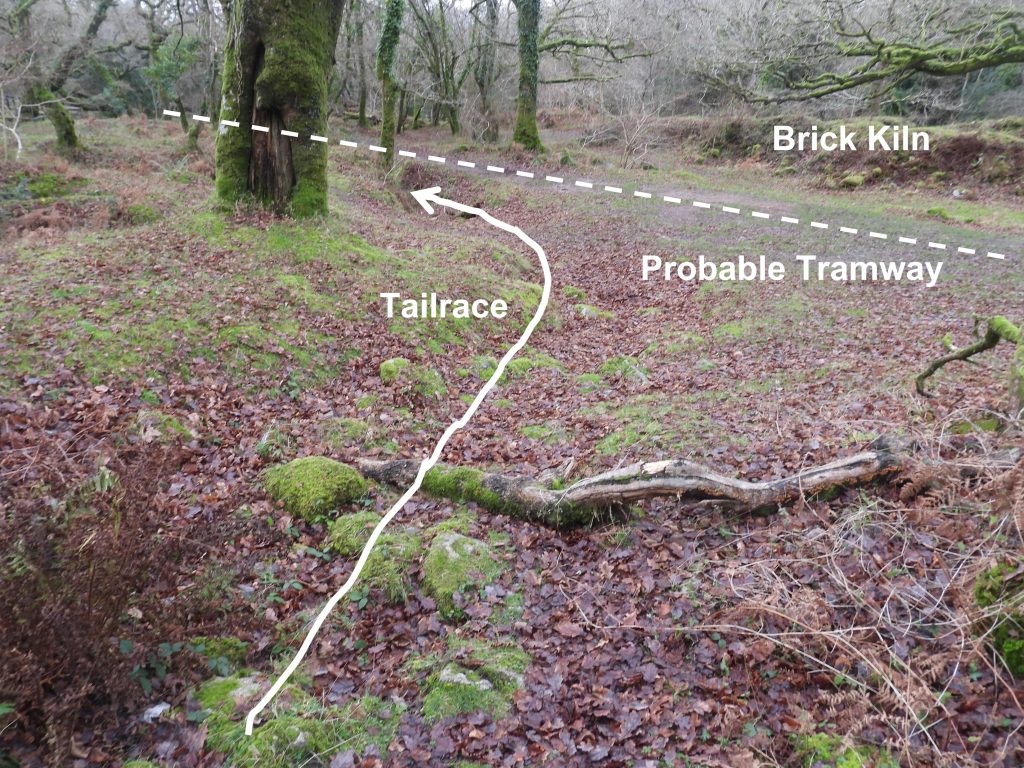
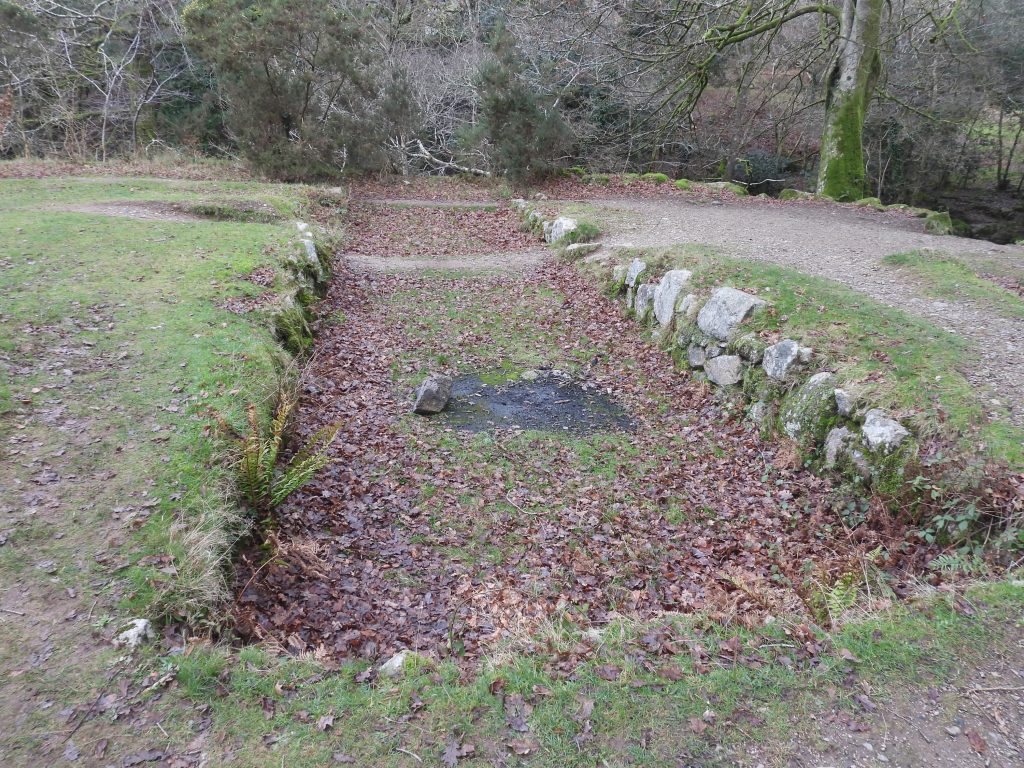
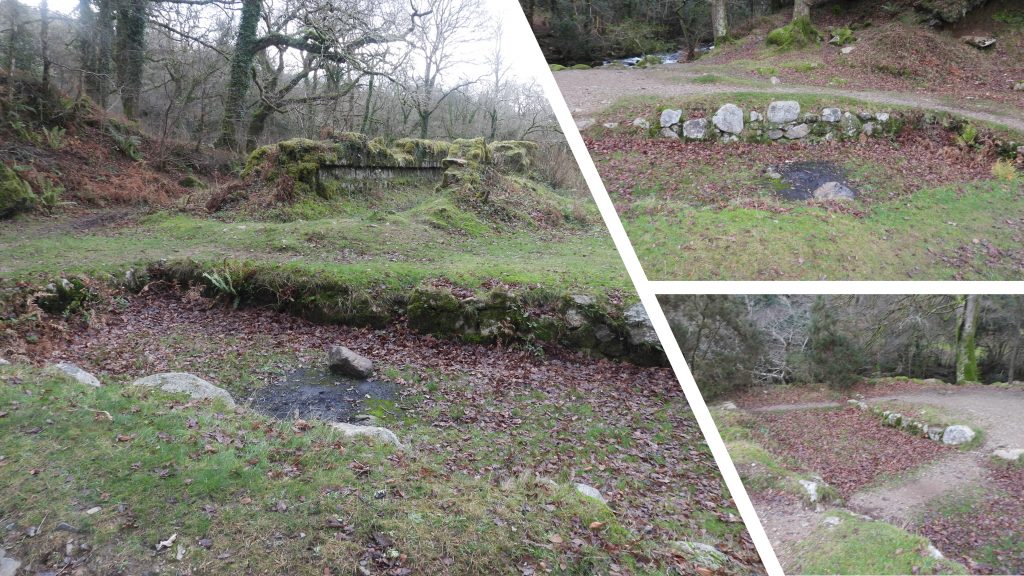
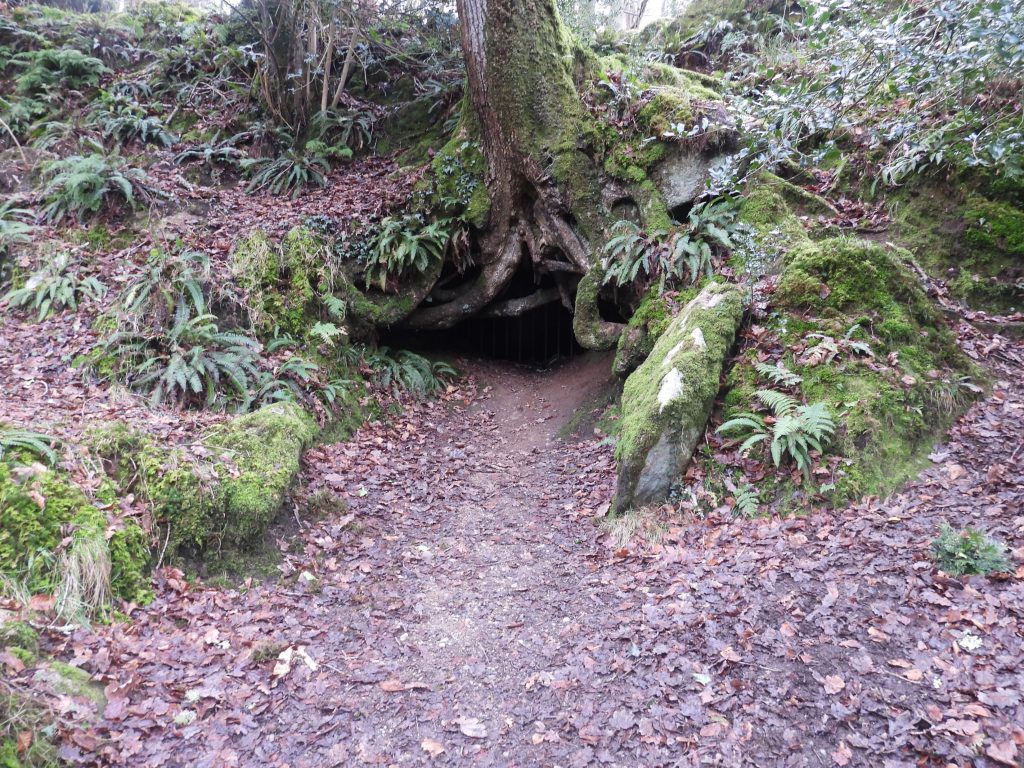
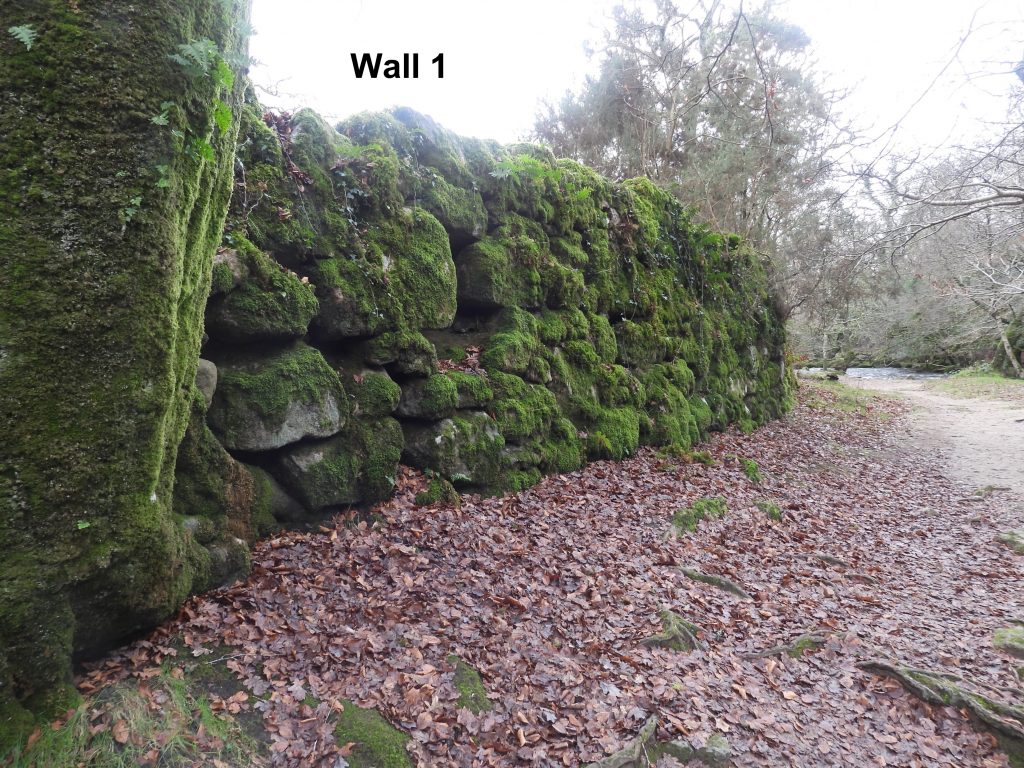
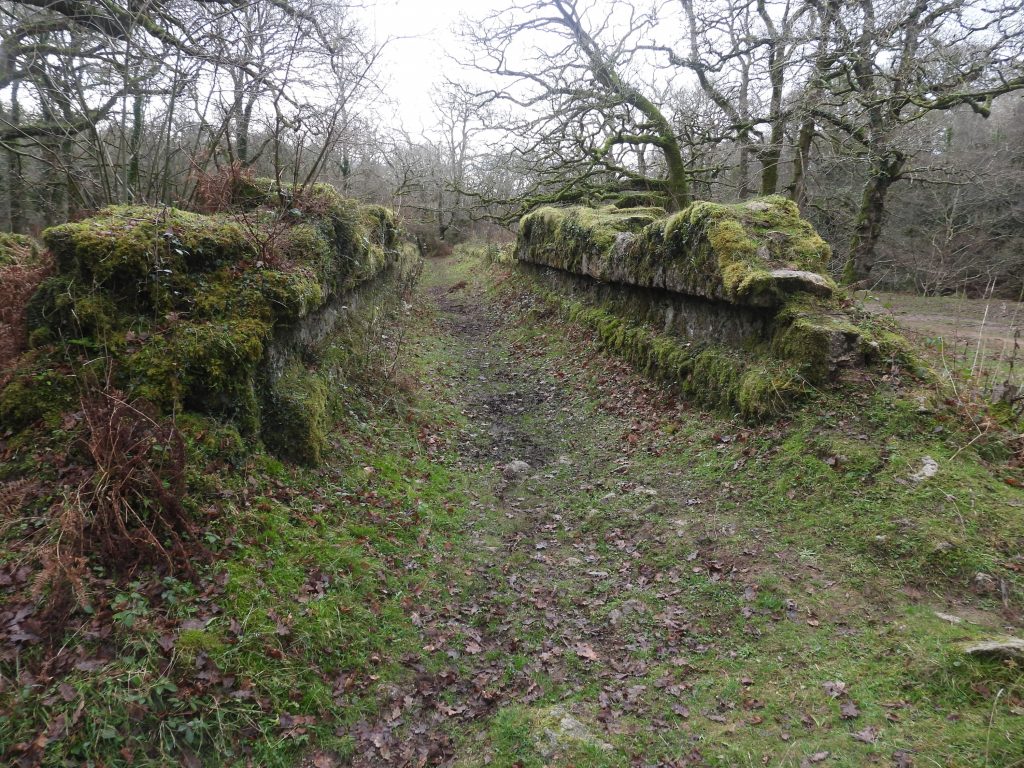
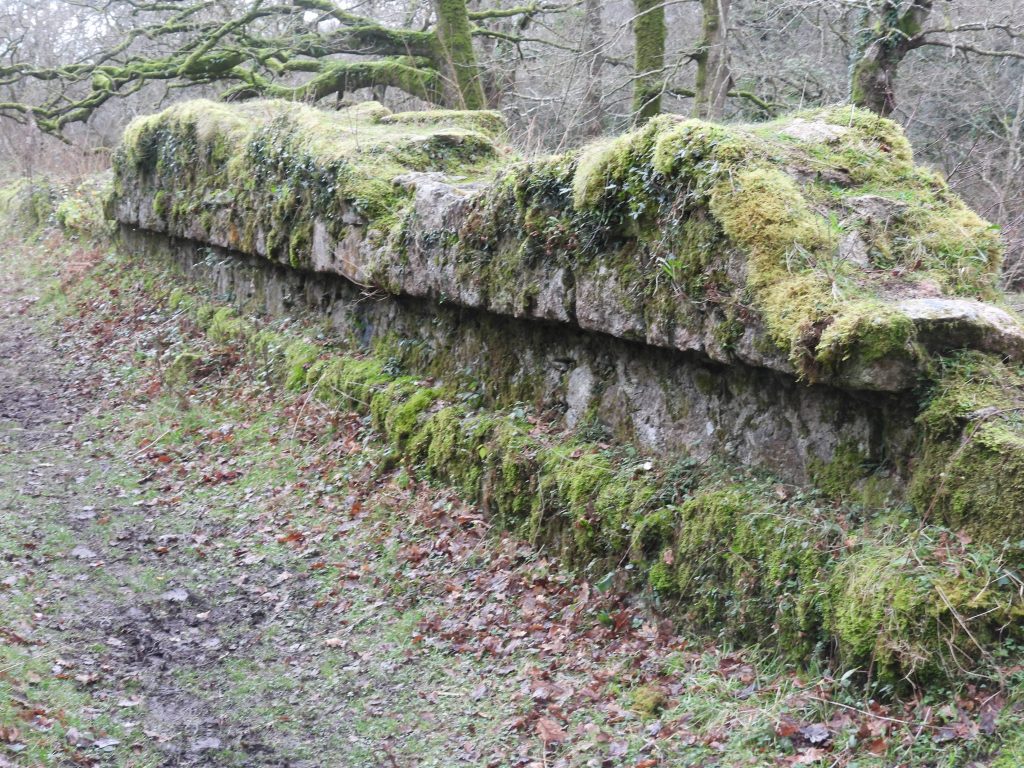
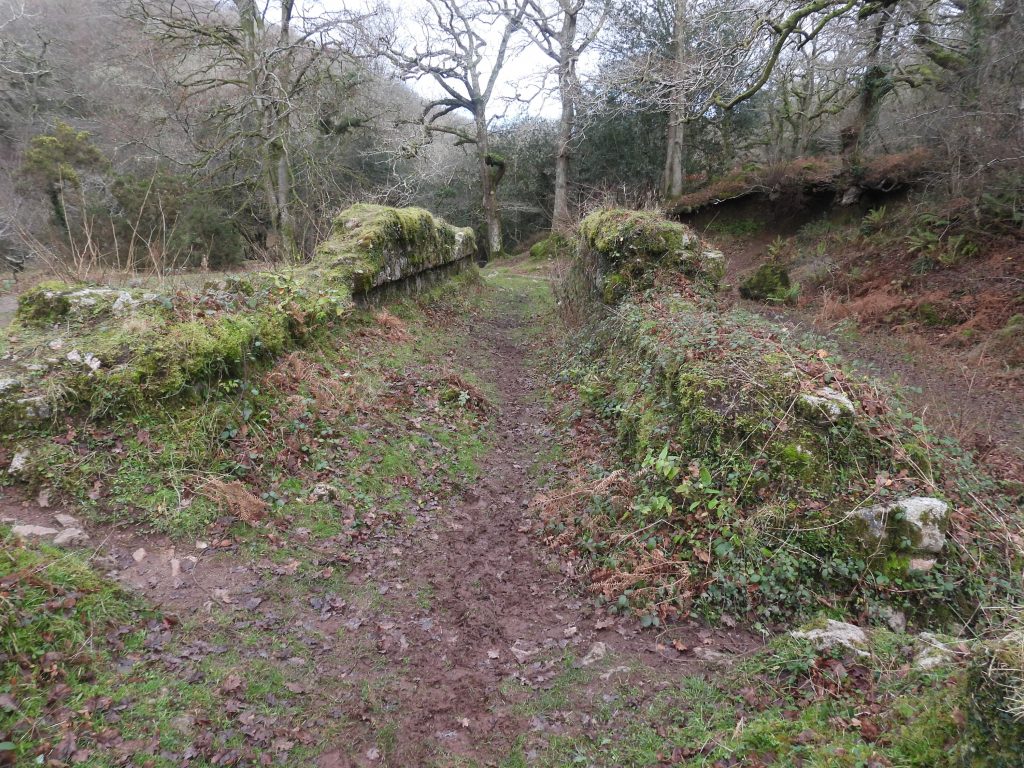
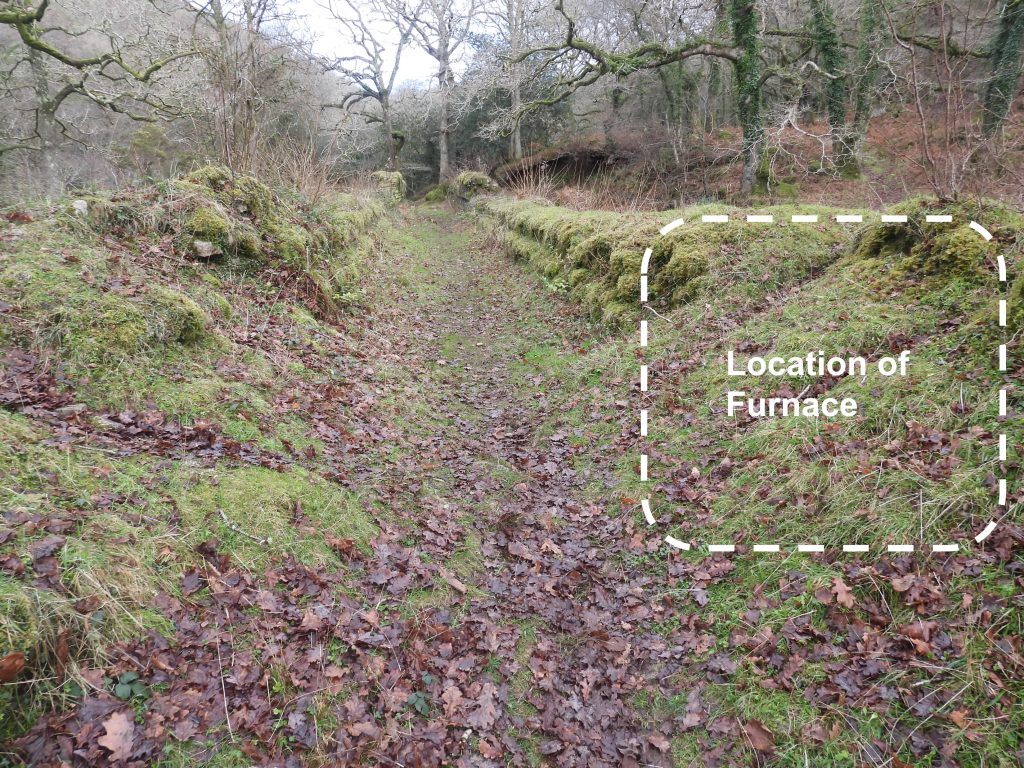
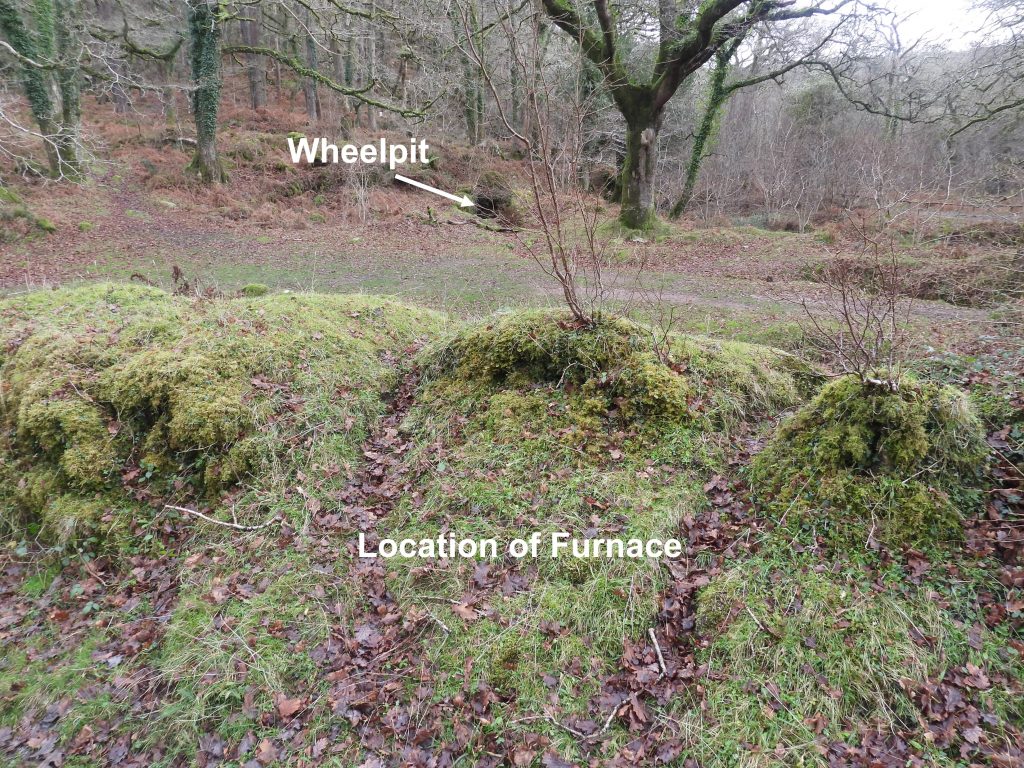
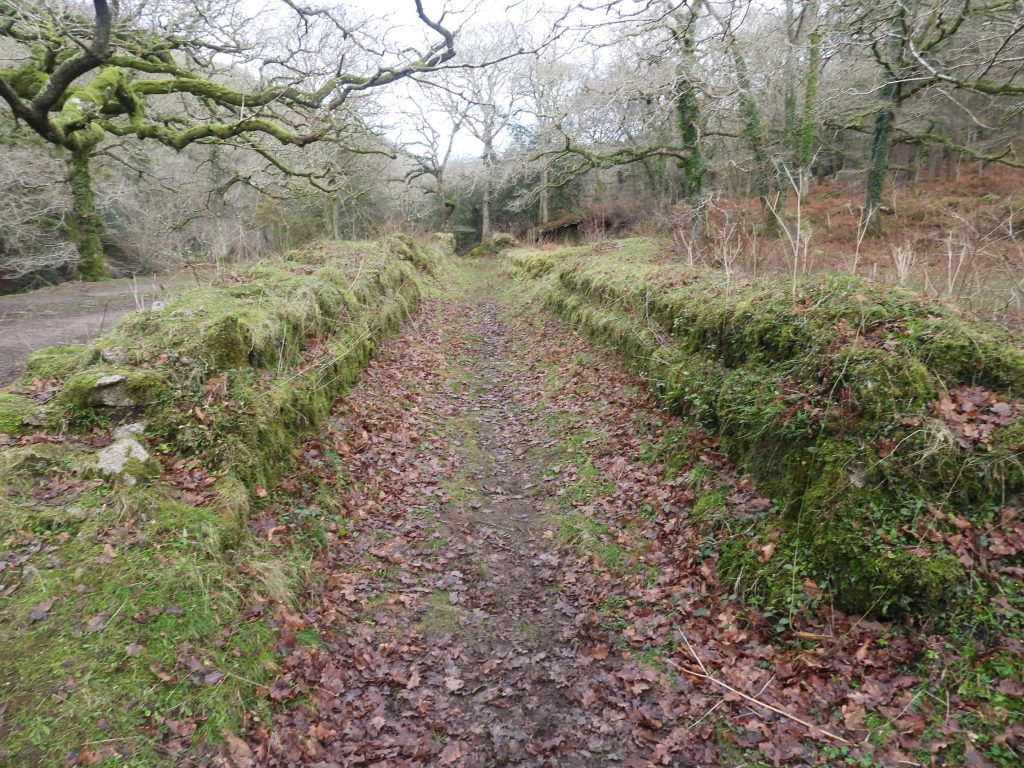
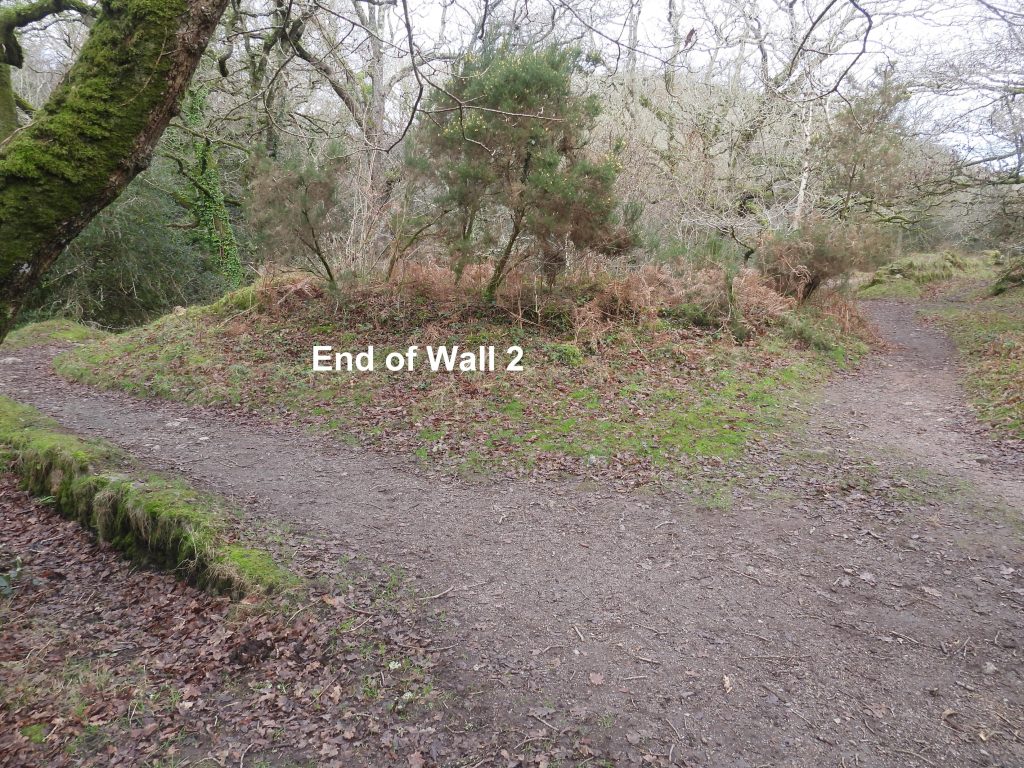
Late 19th century map annotated with the relative locations of the Brick Works and the Iron Mine (marked as Ferro Ceramic Mine).Sketch map showing the locations of the main features of the Brick Works and the Mine. This post covers all the features in a rough anti-clockwise direction from the footbridge.View of the River Plym from the footbridge.Just over the footbridge is a stone platform which are believed to have been the foundations of a wooden ‘counting house’ building. This building would have been necessary given that every ton of material crossing the bridge had to be recorded. A tramway would have crossed the River Plym here via a bridge carried on the large granite abutment (NOTE: The old bridge is now occupied by the wooden footbridge as the old one was washed away by the river in spate).The platform on which the probable counting house was located can be found at SX53339 63685The footings of the small building to the south of the kiln are believed to be the remains of a workshed. These footings are located at SX5332763701It is recorded that located alongside this structure are the remains of a circular structure, which are thought to be the remains of the tile kiln listed in the auction inventory when the Brick Works closed. It is recorded as being approx. 8.8 metres diameter which is almost totally obscured by walling up to 1.1 metres high. It appears very difficult to discern.The three small pits (marked ‘pits 1’ on the sketch map and clearly shown on the 19th Century map) located on the riverbank of the Plym may be the forerunners of the larger pits to the north. The western pit is small and squarish, being approx 0.7m deep and is located at SX53372 63692The middle pit is a small narrow rectangle is 0.9m deep and is located at SX53374 63692The eastern pit is a larger rectangular structure being 0.6m deep and is located at SX53383 63692The ‘Smithy’ building mine is named on a plan of 1886. It is located at SX53419 63718.The smithy is located next to a track and just down from where the former aqueduct would have been located. Its stone platform is recorded as being 5.8 metres by 3.6 metres and 0.7 metres high. The remains of a 1.7 metre high wall of mortared rubble forms part of the south side. Experts believe it was a timber building with a stone furnace built against the south wall. The square hole in this wall was probably for a chimney flue. In the middle of the track next to the smithy is a stone with holes in it. This possibly could have been a drilling test stone. It can be found at SX53417 63717Across the track from the smithy and drilling test stone is the entrance of the south shaft adit.The adit is recorded as measuring 1.1 metres high by 0.9 metres wide. It is located at SX53397 63727Close by and to the south west of the smithy lie two more of the shallow pits shown on 19th century maps and marked ‘pits 2’ on the sketch map in this post. The eastern most of the pits is rectangular and located at SX53388 63713The western most of the two pits (‘pits 2’) can be found at SX53388 63689The third and final set of pits appear to be the most substantial, being large and having stone faced wall. The eastern most structure is recorded as being divided into two large and one small section. If the author has interpreted information correctly about the site “the large stone-lined pits and working floors were used for the weathering of the raw materials and the lengthy preparation processes necessary for the production of the plastic clay mix ready for moulding”. Were these pits used for such a function. Pits 3 (east) is located at SX53364 63719 Pits 3 (west) is recorded as being divided into two parts and is located at SX53356 63721. The retaining walls are approx 1m high.The waterwheel located between the south shaft and the kiln was powered by water from the River Plym, which flowed via a leat and aqueduct. The location of where the aqueduct / leat crossed the paved track can easily be located. From below (see picture), the location of where the water would have flowed can be seen. The crossing point of the aqueduct on the track is SX53442 63715.The picture shows where the ‘leat’ ran through a conduit constructed of granite slabs under the broad paved path.Looking south west from the path the course of the leat can easily be made outThe lower slopes of Dewerstone (west) can be seen from the leat channel. More information can be found at : https://www.torsofdartmoor.co.uk/tor-page.php?tor=dewerstone-westJust below the track a Charcoal burning platform can be found. The platform diameter is recorded as being on level area below the ‘leat bridge’ 4.5 metres diameter. The ‘leat bridge’ can be seen at the top of the photograph.Charcoal platform 1 is at SX53438 63717. There are a considerable number of these platforms in both Dewerstone and Knowle Woods and are believed to date from as early as 1500 and late as 1900 (Dartmoor HER). There are also many such platforms located in the Teign Gorge Valley between Fingle Bridge and Clifford Bridge.A second charcoal burning platform can be found to the east of the first one. It is defined in the Dartmoor HER as being “On level area below the granite track with a large granite boulder in the centre. Platform diameter of 6 metres”. This platform is located at SX53517 63711Looking downhill from the 2nd charcoal burning platform is a path which appear to follow the probable line of the aqueduct which fed the waterwheel in the mine complex.Following the line of the aqueduct / leat the south shaft associated with the Shaugh “Ferro Ceramic” (Iron) Mine can be located.The fenced off south shaft. The fence edge was recorded at SX53405 63745The Dartmoor HER describe the south shaft as being “roughly rectilinear hollow is identifiable as an earthwork approximately 15m by 17m” with “The eastern half of the visible earthwork appears to be slightly deeper than the west”. This shaft is one of two depicted o 19th century maps.Between the south shaft and the north shaft lies a possible 3rd shaft which was recorded in 1999. The author surmises that this is a possible collapse between the south and north shafts as it is located between the two (assuming there were excavations between the two shafts). This ‘3rd shaft’ can be found at SX53408 63776The northern shaft is described as being 1.6 metres deep and 4 metres across and is partially enclosed by a spoil heap. From the fence edge it was recorded at SX53415 63781The 3rd charcoal burning platform in the area was difficult to locate (and the location pictured is an assumed location based upon the Dartmoor HER description). The HER describes it as being “in moderate condition and on a large level circular area quite difficult to discern. The level area 6 metres diameter”. The location shown in the picture is at SX53390 63782Following the leat / aqueduct channel from the south shaft area the wheelpit can be reached. The way is blocked by a large boulder as can be seen in the photograph. Is it possible that a wooden launder could have been placed on top of the rock to feed the wheel below ?The wheel is said to have been 16ft (4.88m) in diameter. The wheelpit is recorded at SX53362 63737There is a small structure attached to the side of the wheelpit and is 2.1 metes by 1.1 metres internally. The use of this is unknown – perhaps there was a secondary wheel attached here (albeit the relative disparity in heights between the wheel axle point and this structure probably would discount this theory).The wheelpit “side structure” is at SX53366 63734The waterwheel is sited within the Shaugh brickworks complex. That said, the 1880 lease for the works suggests that it was used in connection with the mine and it does seem very conceivable that it probably would have been linked to the mine (south shaft) by flat-rods to provide pumping and / or lifting power. The author has read that there is speculation that stamps may have operated here (to crush ore for the brick making) but there doesn’t appear to to be any evidence to support this from the sources quoted. Inside the wheelpit. The Dartmoor HER records the wheelpit as measuring “8.9 metres by 1.8 metres. The wall is 0.7 metres thick and the partially silted pit is now up to 2.4 metres deep”.Inside the wheelpit. Is this a collapse or a deliberate design to connect to the “side structure”?Looking south inside the wheelpit, there appears to be a exit point for the water leading to the tailrace.The waterwheel tailrace can easily be identified and lead away from the kiln. There is what is believed to be trackbed (6 metre wide) to the east of the kiln area which (probably) marked the route of a tramway used to carry the finished bricks, tiles and the iron ore across the river. The line of this trackbed seems consistent with meeting up to the modern footbridge. This would link up with the already established routes used for the export of china clay from the clay drys on the eastern side of the Plym.As described in the Dartmoor HER: “At the northern end of the kiln is a pit 15.1 metre long by 3.5 metre wide and 0.9 metres deep. The stone lined pit is defined by a drystone revetment”.The picture on the left shows the relative distance between the pit and the kiln tunnel. The precise reason for this pit is not known to the author (was it a mixing tank?). The centre of the pit was recorded at SX53337 63771A short distance upstream (of the River Meavy) is an adit believed to relate to the northern shaft of the mine. The author can remember seeing “potholers” coming out of the adit in the 1970s well before the time when the grille was placed at its entrance. The adit entrance is 2.2m wide by 1.3m tall and is located at SX53391 63844The Dartoor HER describes this structure as “Wall 1”. As the brickworks were constructed on an artificially levelled piece of ground it was necessary to build up the natural western side over much of the river flood plain. The retaining wall is recorded as being up to 2.7 metres high. The centre of the wall was recorded at SX53324 63783The principal surviving structure of the Shaugh Bridge brickworks is the now roofless remains of a kiln, which was a “Brogden and Casper” Improved Tunnel Kiln. The picture shows the structure of the north end at SX53355 63766. The kiln today measures over 50 m long but evidence suggests that it originally measured about 62 m long. There were automated mechanical brick presses in the late 19th century which could produce large quantities of bricks. This process is likely to have been used at Shaugh. There are horizontal grooves located sides of the walling are each 0.05m wide and 0.01m deep and were cut / built to accommodate the wide decking on the trucks / wagons carrying the bricks through the kiln.The linear Brogden and Casper tunnel kiln was designed for continuous firing with trucks, running on rails, used to carry the bricks through the stages of drying, firing and cooling in one operation. The kiln was sub-divided by vertical doors, which were raised and lowered to allow the passage of the trucks between each stage. These doors, part of Brogden and Casper’s modification, prevented the through flow of cold air that proved to be a shortcoming of earlier tunnel kilns. These descriptions come from the HER.Just over half way (north to south) of the kiln is a pronounced bulge on the eastern side of the wall of the kiln. The Dartmoor HER records this a most likely the position of the furnace. It is located at SX53330 63731Close up of the probable location of the furnace in relation to the wheelpitThe southern end of the kiln looking North. SX53328 63724There are footings of a stone wall on the west and south side of the kiln which is surmised as being the remains supports for an extensive roof. The wall is annotated “Wall 2” on the sketch map at the start of this post.
Detailed and very interesting reading. When I recently photographed the remains of the brickwork tunnel kiln, I had no idea what those parallel walls were for. Now I know.


Jean Fry February 4, 2023
Detailed and very interesting reading. When I recently photographed the remains of the brickwork tunnel kiln, I had no idea what those parallel walls were for. Now I know.
SteveGriggDartmoor February 5, 2023 — Post author
Dear Jean,
Thank you for taking time to read the post.
Regards,
Dartmoor Explorations (Steve)
Emma Cunis February 24, 2023
Excellent research and descriptions as always Steve, thanks
SteveGriggDartmoor February 24, 2023 — Post author
Hi Emma,
Thank you for reading the post and for making your comment.
Kind Regards,
Steve