A collection of walks, discoveries, insights and pictures of exploring Dartmoor National Park
October 9, 2020
WILLSWORTHY TARGET TRAMWAYS
Probably the most well known and photographed of all the Dartmoor Military Target Tramways (Railways) is the one near Row Tor. Also on the Okehampton Range are two other tramways, namely on Blackdown and near East Mill Tor (OP6), which are covered elsewhere on this website. The tramways would have a target(s) mounted on a small “tram” or sledge which ran on narrow gauge rails, which enabled the military to practice shooting at moving targets. Many of these tramways were originally built in the late 19th century and into the early to mid 20th century.
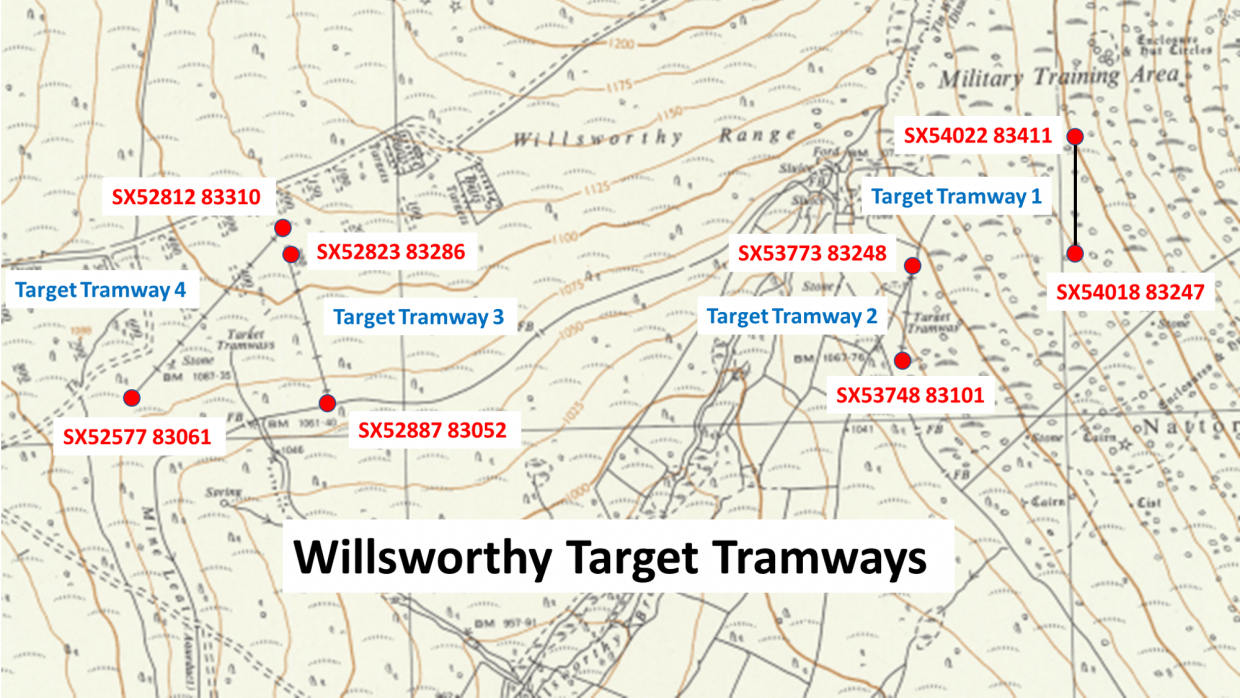
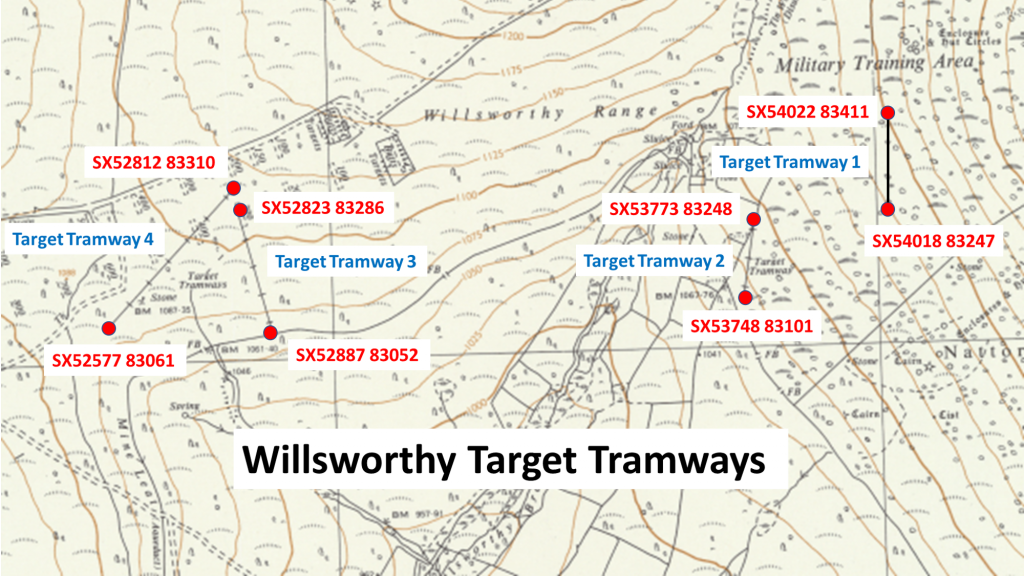
In addition to the aforementioned tramways, there are four more within the National Park, which can be found in the Willsworthy Range area. These tramways are described by two separate entries in the Dartmoor Heritage Environment Record (HER), both referenced SDV35068 (see Bibliography below). The first two inclined target tramways are described as lying on the gently sloping SW flank of Nattor Down (these are labelled Tramway 1 and Tramway 2 in this post) and the second two are described as lying on the crest and gently sloping SW flank of White Hill (these are labelled Tramway 3 and Tramway 3 in this post). Supplementary to these entries tramways 1,2 and 4 are shown on a map in the Reddaford Farm Survey by Dr Tom Greeves (Page 5 – Fig.1 – Location map – from Probert (1998, fig. 20)), albeit little reference is given to them in the survey itself.
This post has been compiled over two visits to the area (October 2020 and August 2022), which accounts for the differences in light conditions seen in the photographs. Thanks to Jeremy Clark for providing the Reddaford Farm Survey reference.
Bibliography: Probert, S. + Fletcher, M. + Newman, P., 1998, Willsworthy Training Area, Peter Tavy, Devon: An Archaeological survey by the Royal Commission on the Historical Monuments of England (Report – Survey).
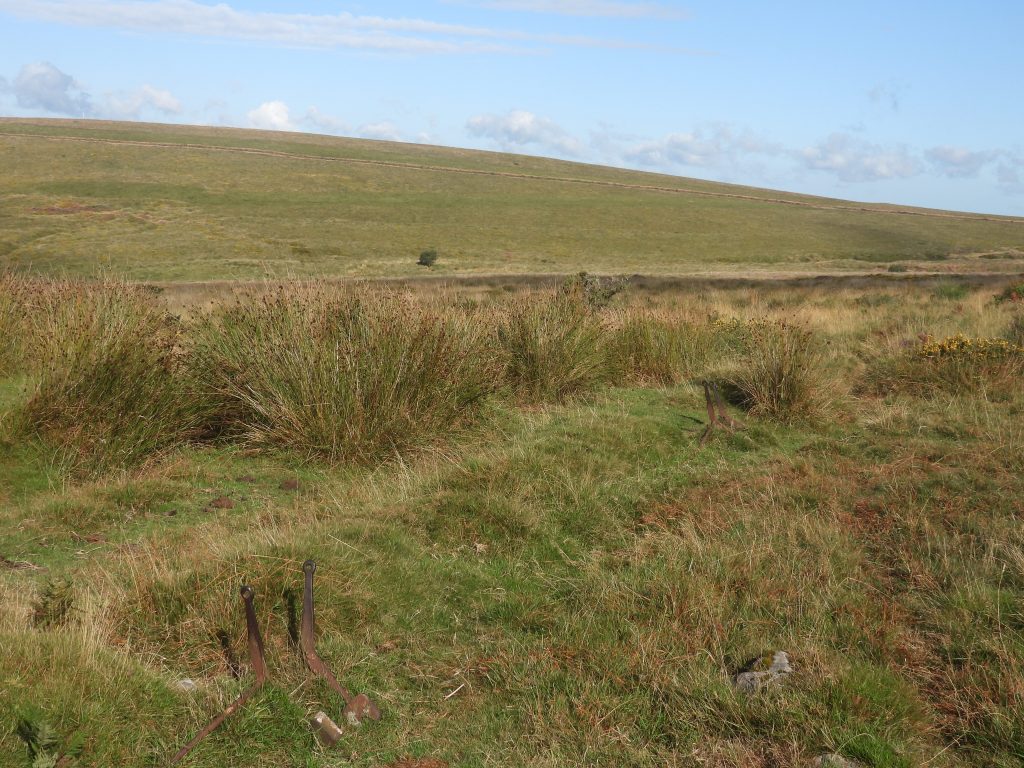
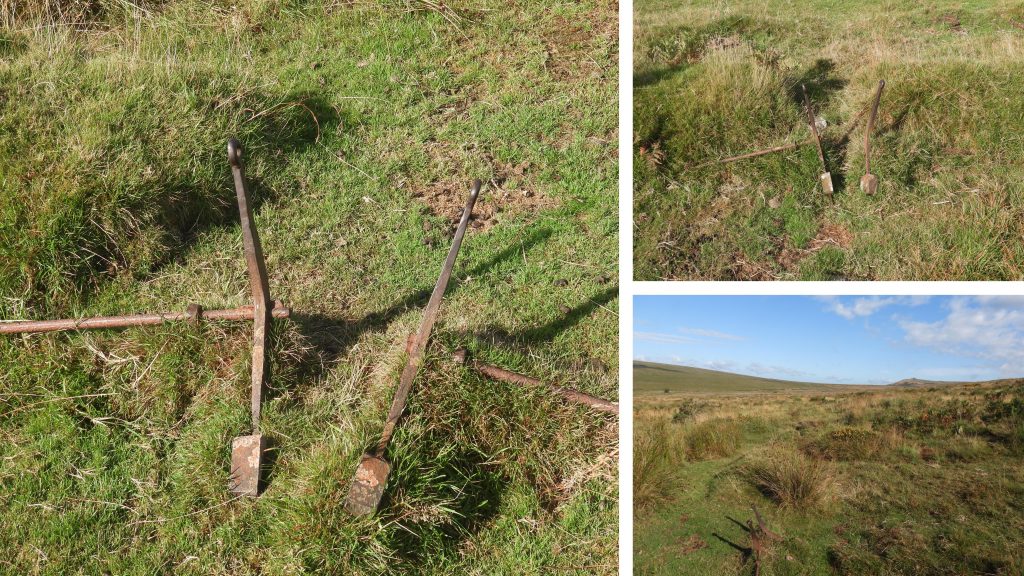
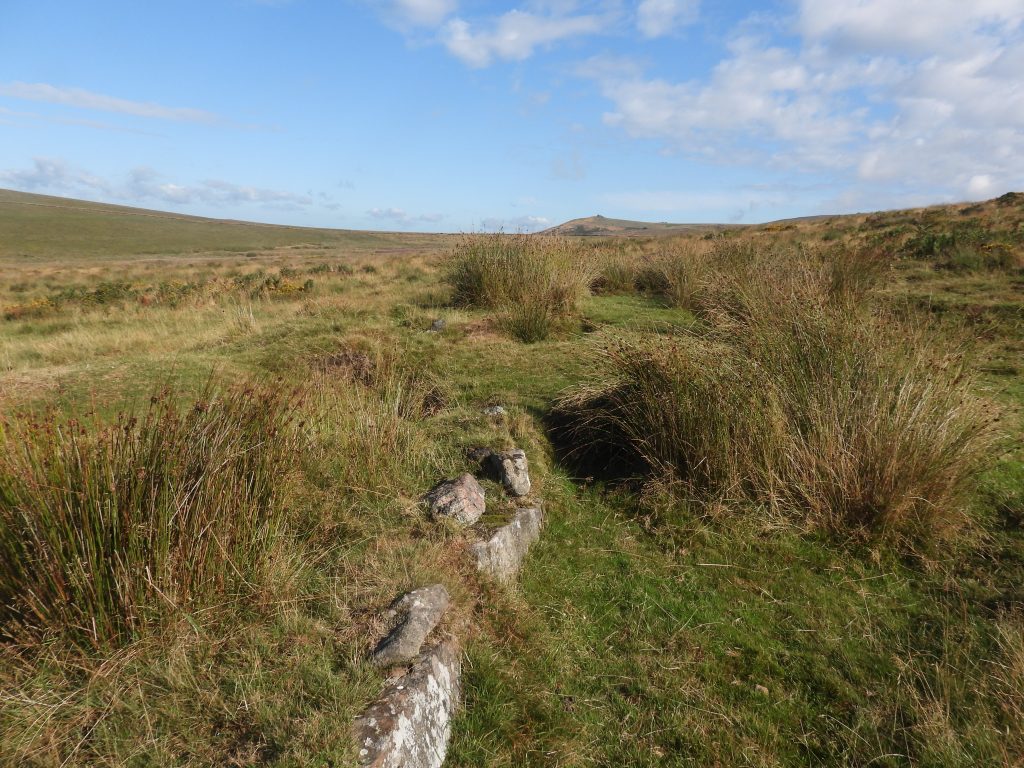
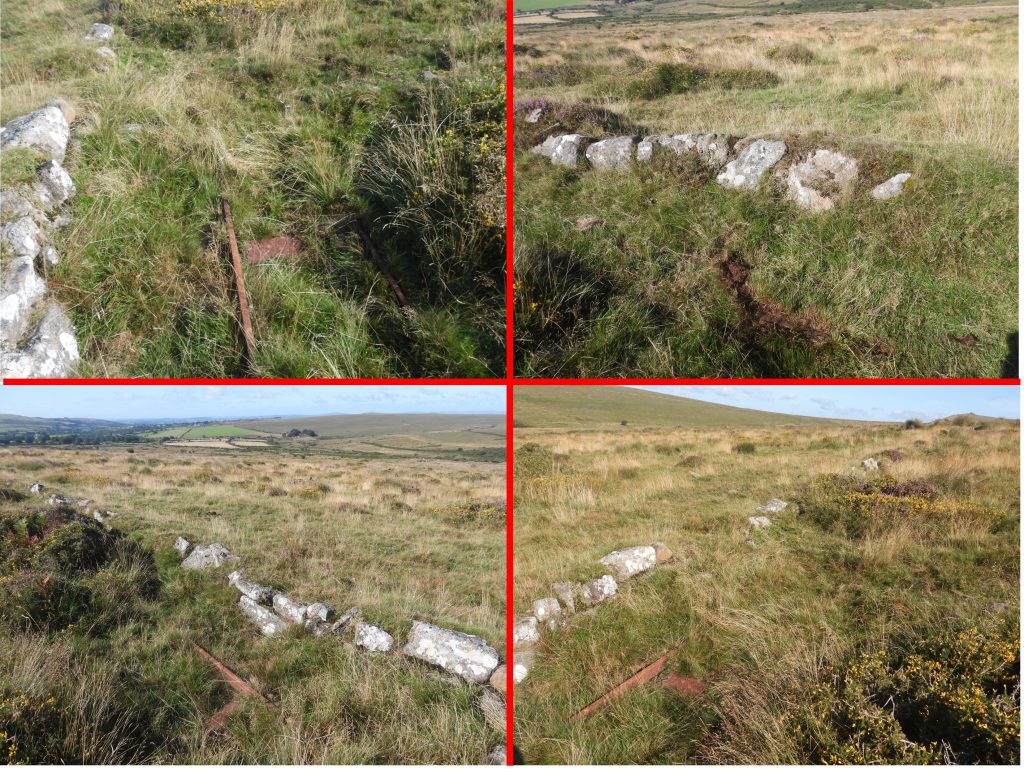
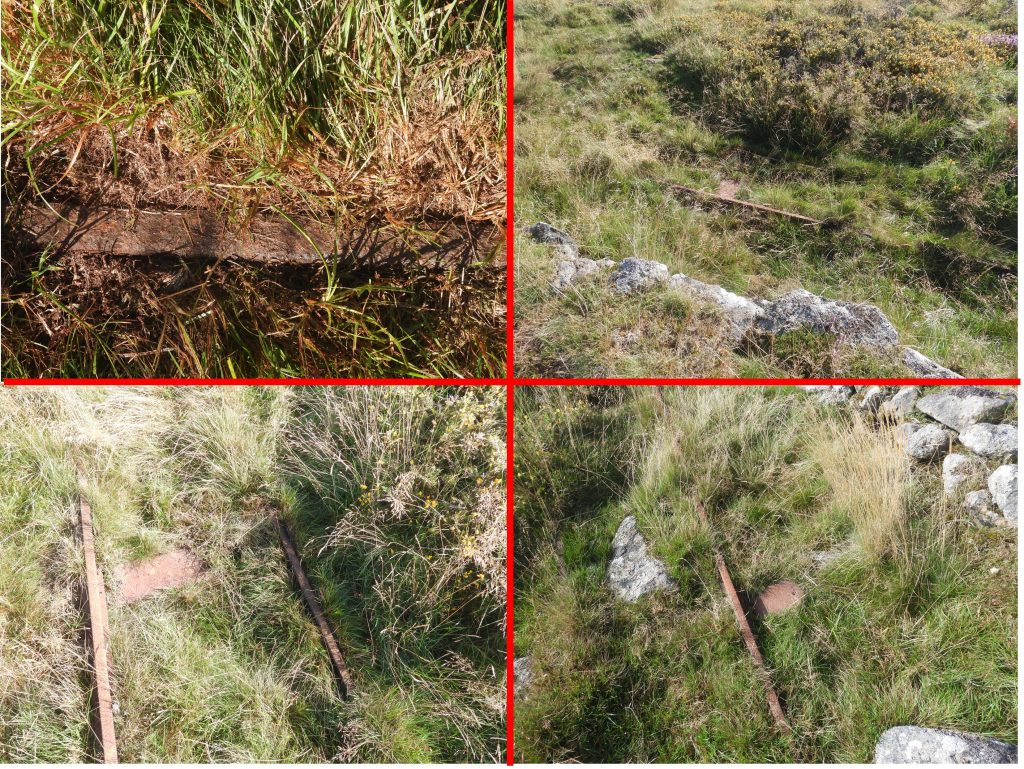
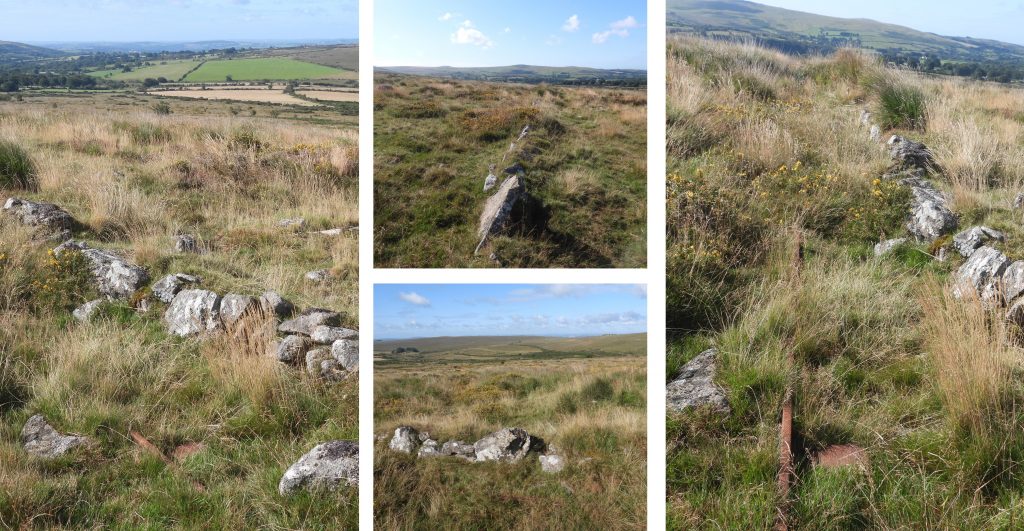
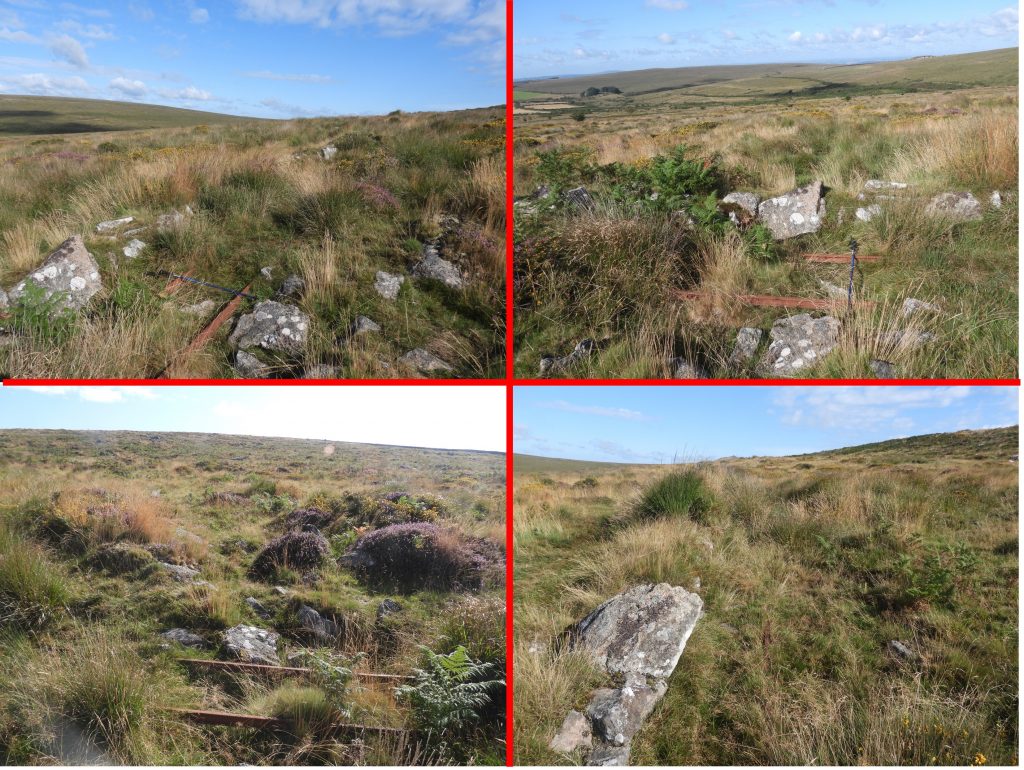
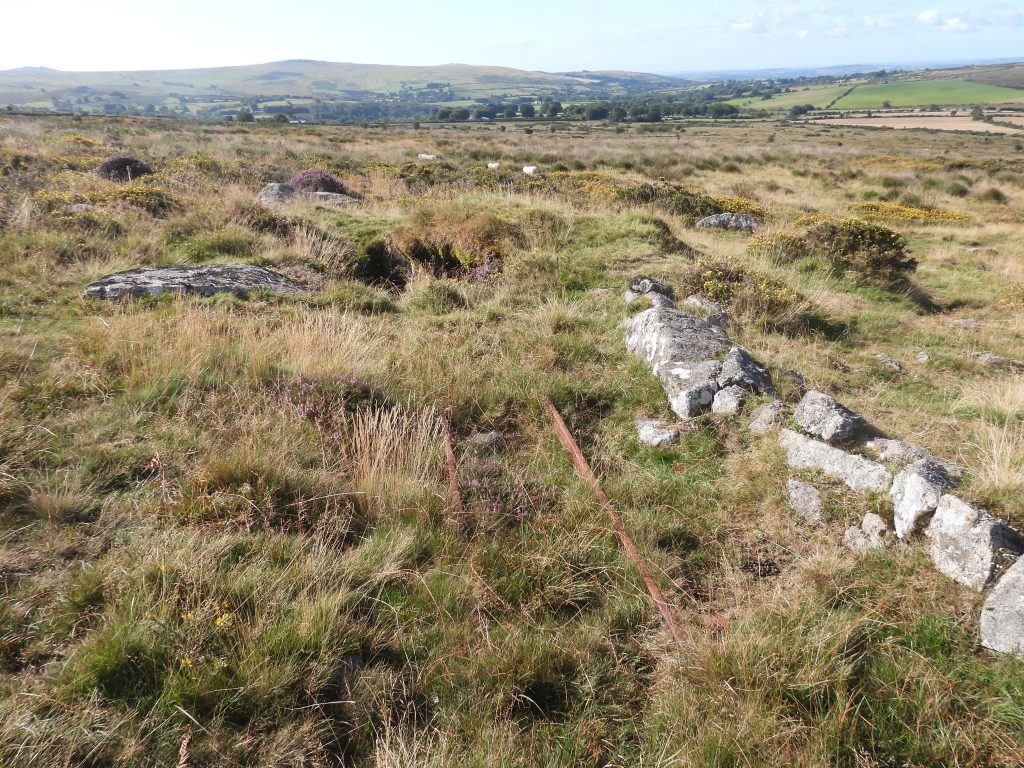
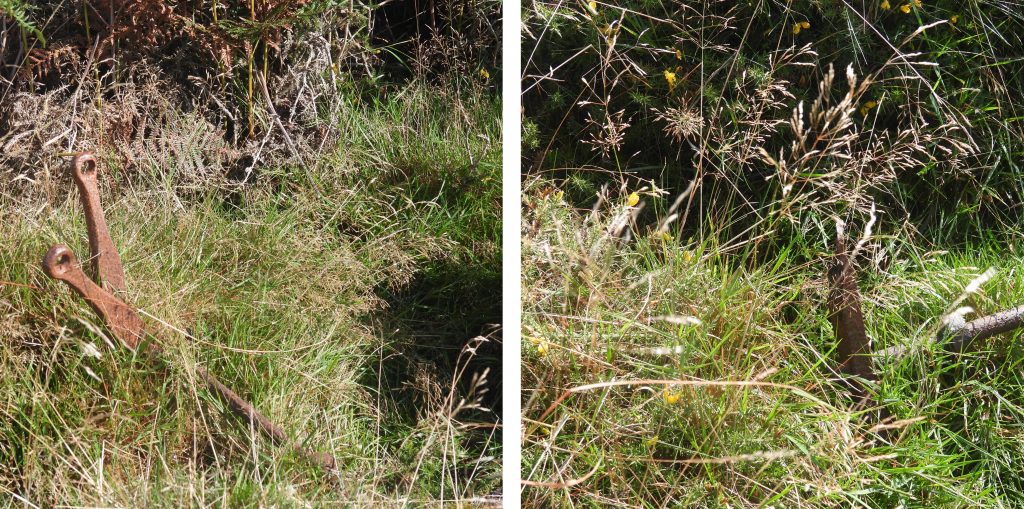
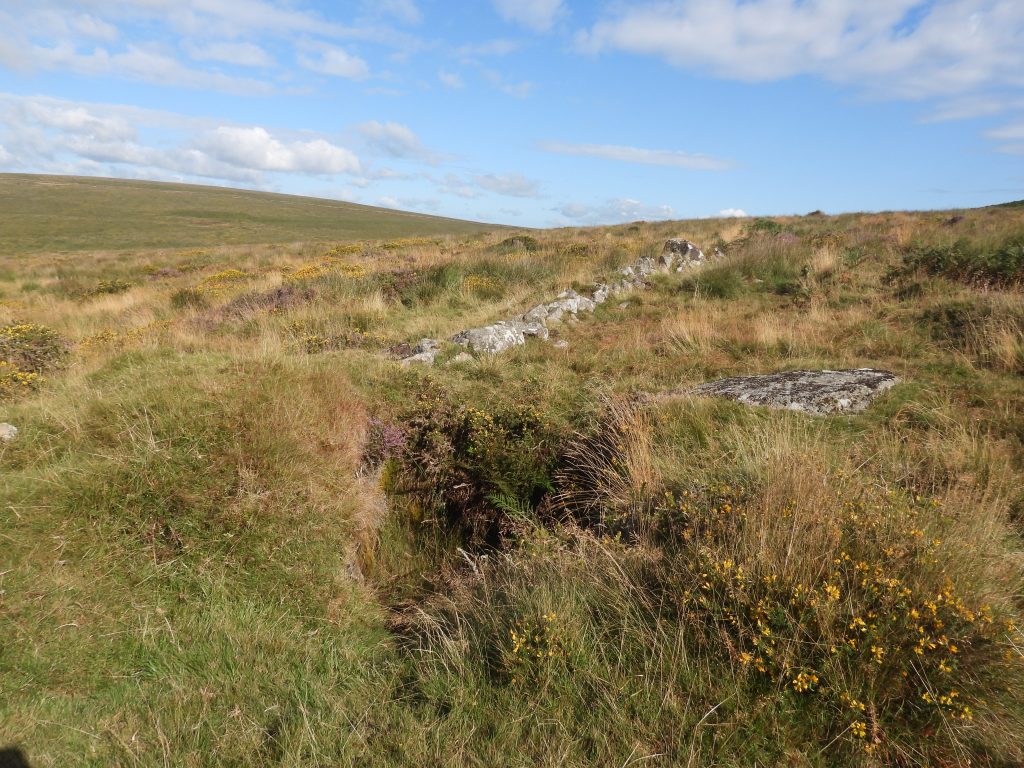
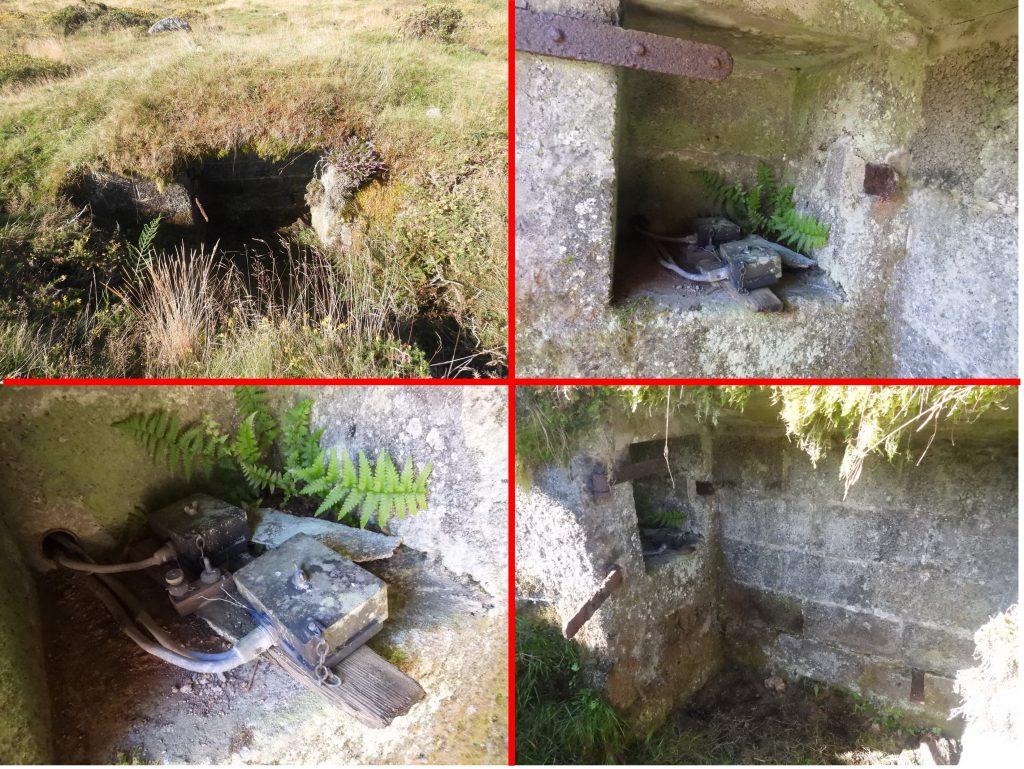
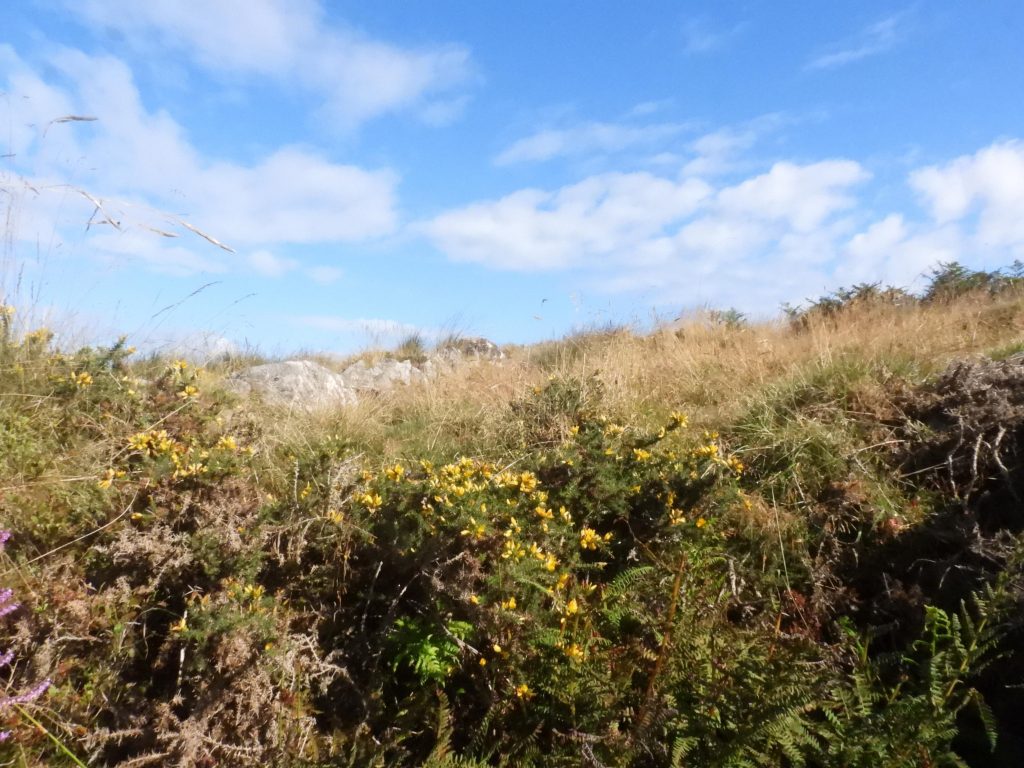
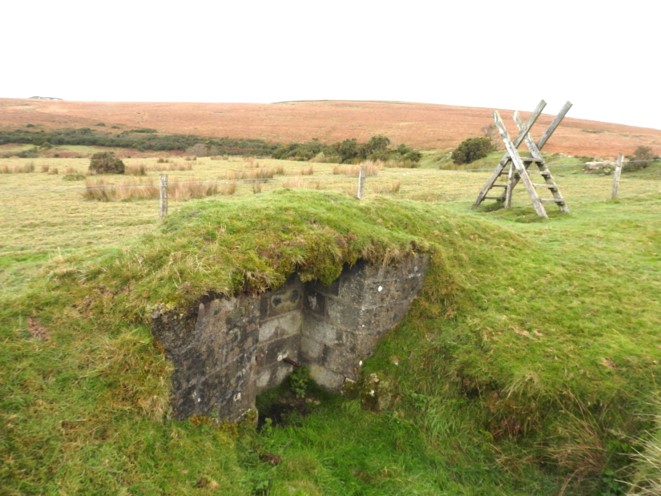
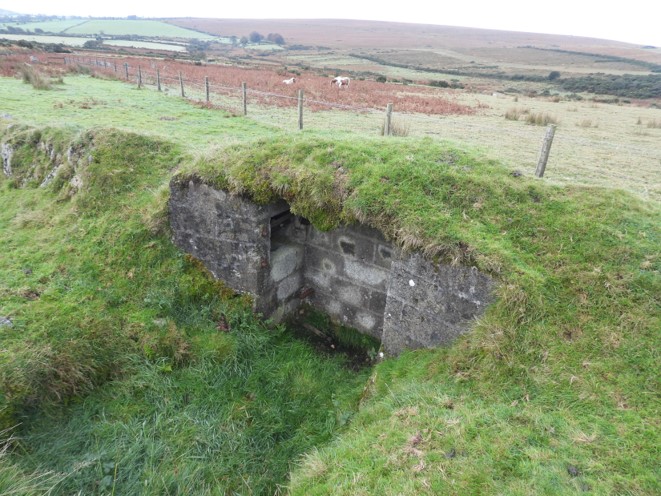
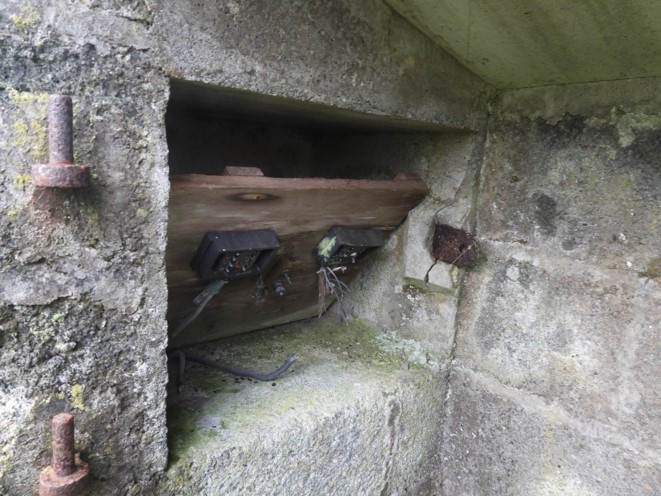
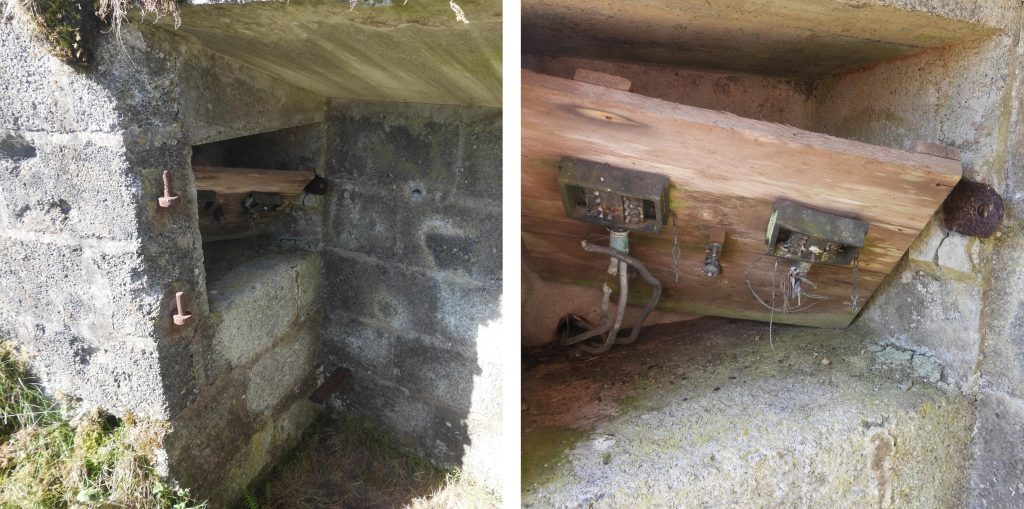
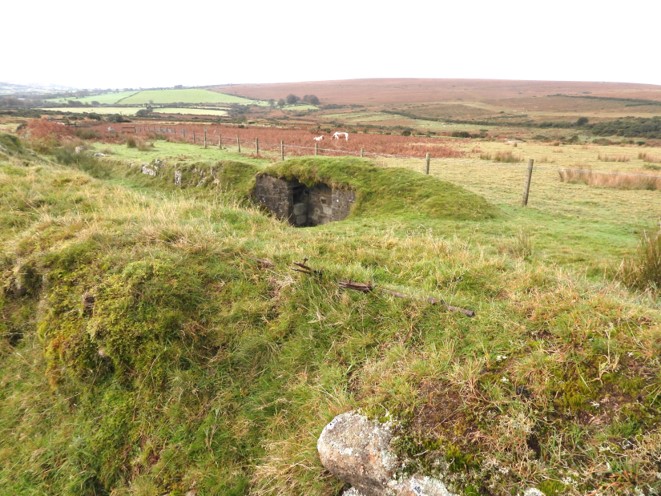
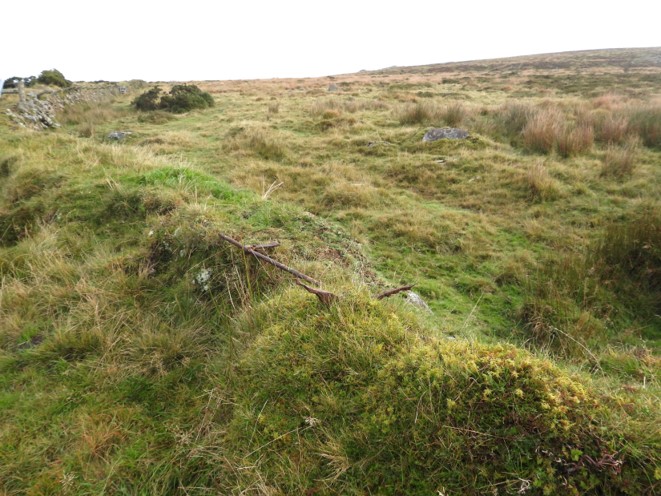
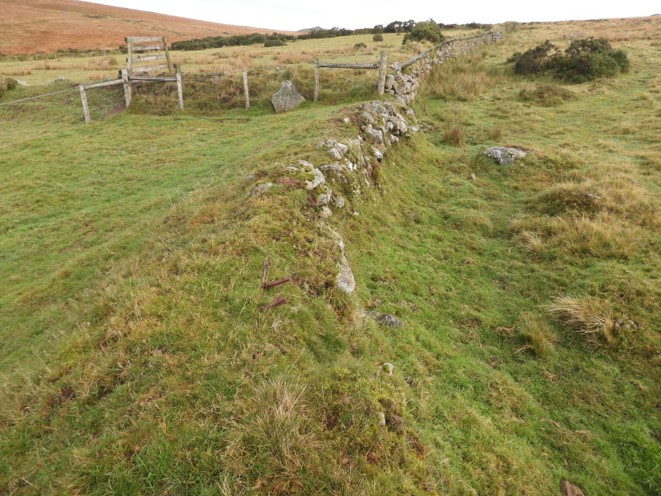
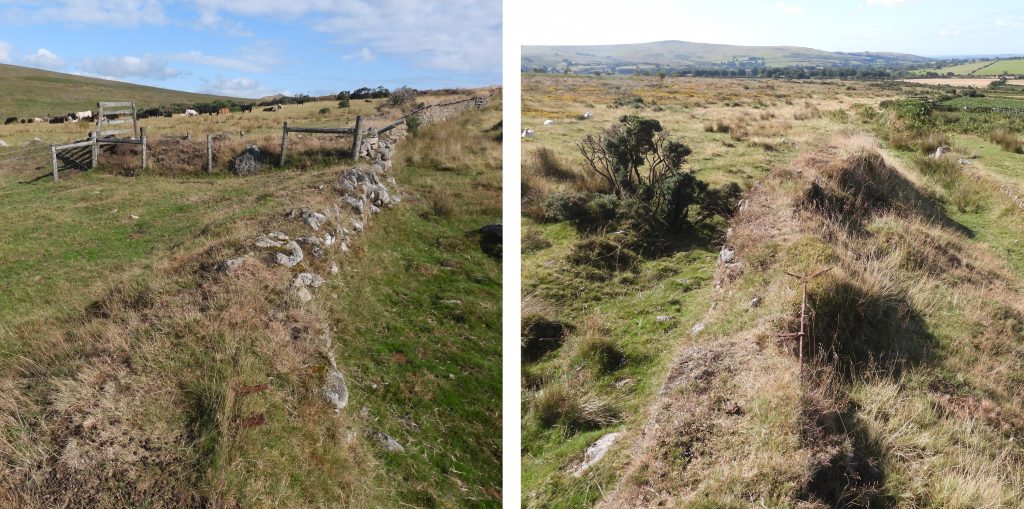
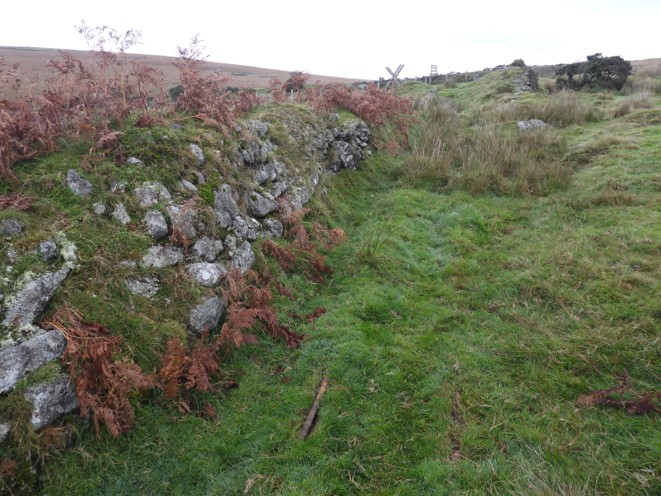
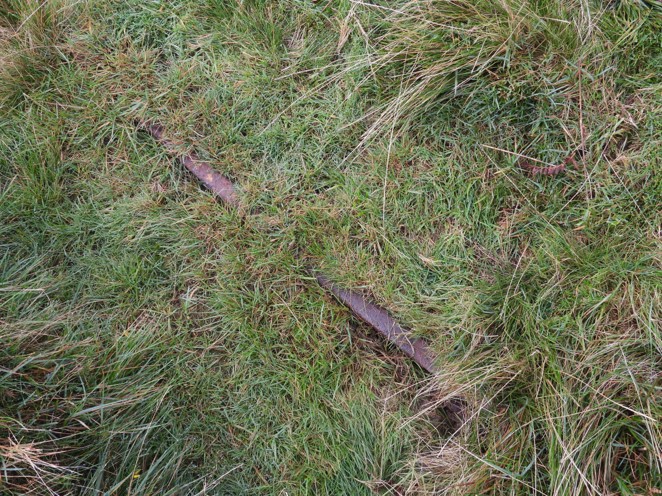
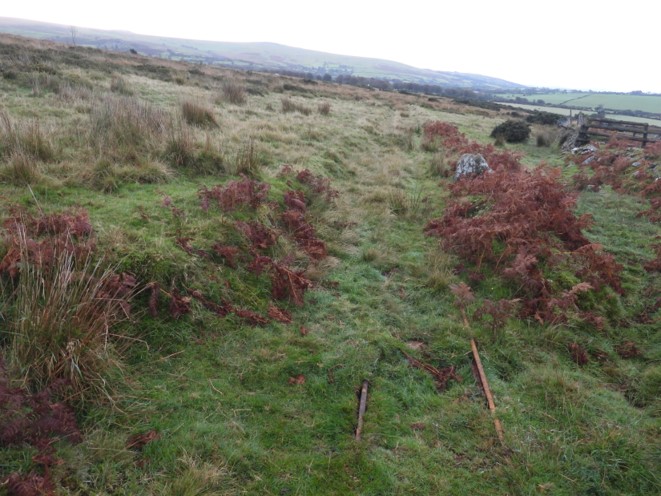
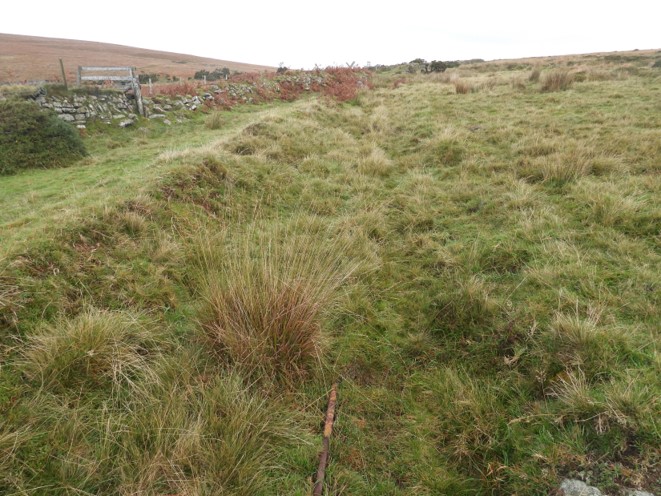
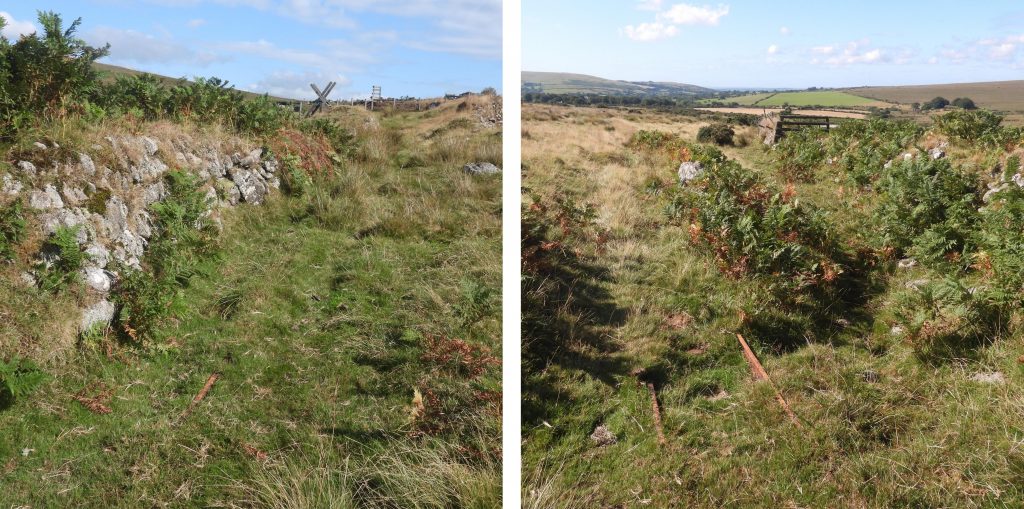
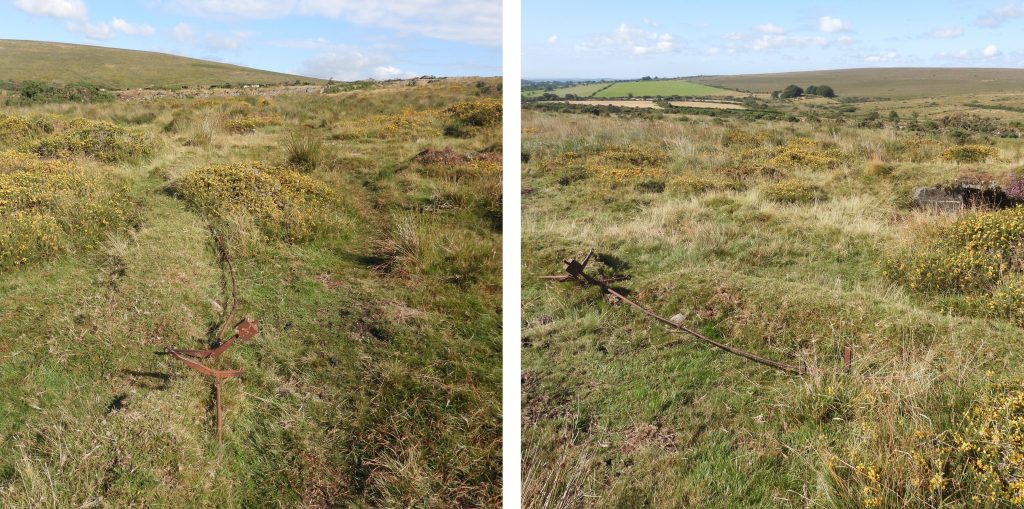
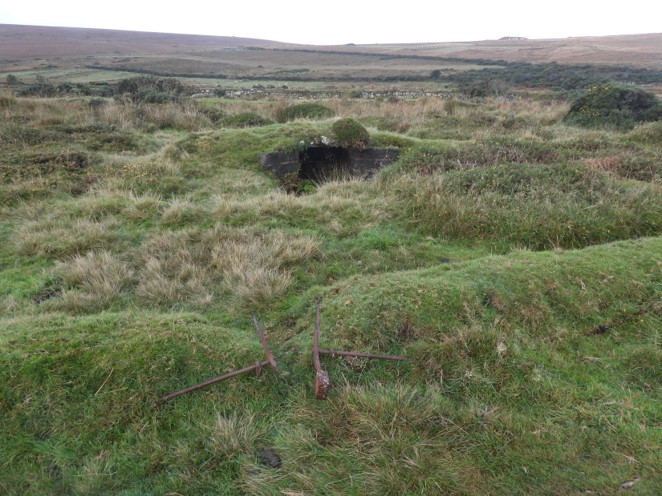
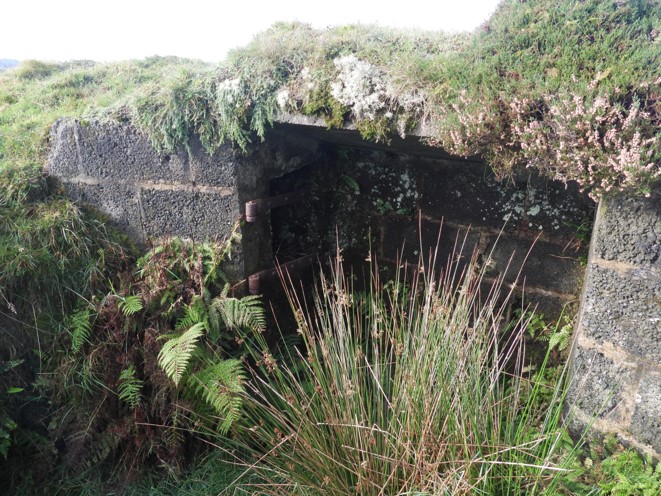
The 1949-1969 map taken from the National Library of Scotland (side-by-side), shows the location of three tramways (labelled 2, 3 and 4). The author has superimposed the location of the fourth tramway (labelled 1) onto the map.Tramway 1 – At the north termination of the tramway is a bunker, which has collapsed and has very little of the (probable) original features, which would have been alcove for a telephone and the controls for mechanism to run the winding gear. The bunker is located at SX54022 83411.Tramway 1 – Near the north termination of the tramway bunker lies a set of “(swivel) target hoists”. An operator in the bunker would have controlled these swivel targets.Tramway 1 – Target hoists with view towards the northern flanks of White Hill.Tramway 1 – Various views of Target hoists including (bottom right) view towards Brat (Brai) Tor. The ends of the target hoists are at SX54030 83411 and SX54029 83419Tramway 1 is approx 150 yards in length and descends on an incline. The picture shows the start of a low revetted wall / bank (next to the northern bunker) which lies on the W side of the tramway to protect the “trams” during firing. Tramway 1. Along the entire length of the tramway the low revetted bank / wall is still extant. The rails, set at a gauge of 2 feet or perhaps 60cm remains in situ.Tramway 1. The rails are still in situ along the entire length of the tramway. In particular, the rails are exposed from vegetation at SX54022 83373, SX54020 83331, SX54019 83279 and SX54017 83252Tramway 1. Various viewsTramway 1. Various viewsTramway 1. Approaching the bunker at the southern end of the tramwayTramway 1. Target hoist neat the southern end bunker. SX54021 83251Tramway 1. The southern end bunker is in better condition than its counterpart at the north end. There isn’t any trace of the wires or capstans which would have been used to move the target trolley.Tramway 1. The southern bunker is still intact and includes containing an alcove for a telephoneTramway 1. A soldiers eye view of the tramway from the southern bunker.Tramway 2. The northern end has a concrete block shelter which is located close to an old stile which leads to the footbridge over Mine Leat which allowed access to Reddaford Farm.Tramway 2. North end showing the operators bunker and the wall where the target hoists are located.Tramway 2. A close up of the concrete block shelter is located at SX53772 83248Tramway 2. Looking down the tramway (between the walls) from the northern bunkerTramway 2. Inside the northern concrete block shelter (bunker) are the remains of some electrics, which looks like the field communication system. This may help to age the system, which the author believes may have been from the 1950’s / 1960’sTramway 2. More views from inside the northern bunkerTramway 2. Next to the northern bunker are the remains of a target hoist system. This one was at SX53779 83253Tramway 2. Another part of a target hoist system at SX53773 83248Tramway 2. The target hoist system appears to have been constructed on top of a wall, which leads away from the Reddaford Farm enclosures. Can one assume that the walls are older than the tramway target hoists ?Tramway 2. More views of the northern target hoistsTramway 2. Turning south along the course of the old tramway from the northern concrete shelter, the first rails of the old tramway can be found. Tramway 2. Close up of a railTramway 2. The rails were crudely measured using the markings on a walking pole and the gauge of the tracks appear to be around 2′ (60cm) as with Tramway 1.Tramway 2. Descending the tramway and looking back northTramway 2. General viewsTramway 2. At the southern end of the tramway, some more target hoists – this one is at SX53757 83094Tramway 2. Southern end target hoists
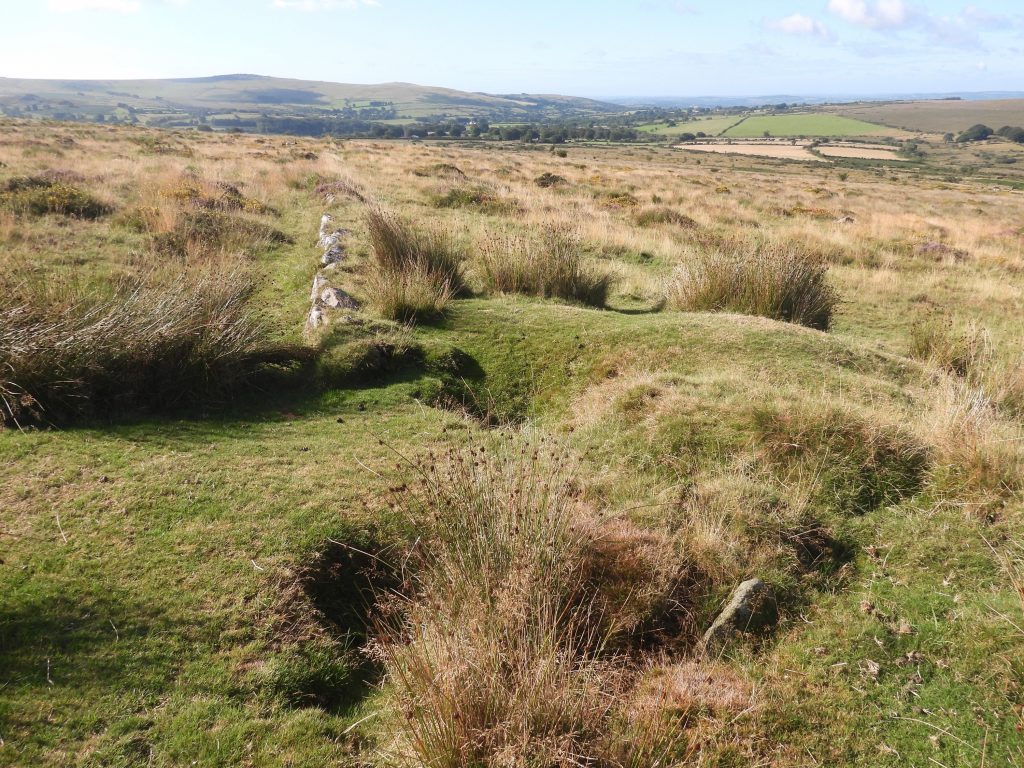
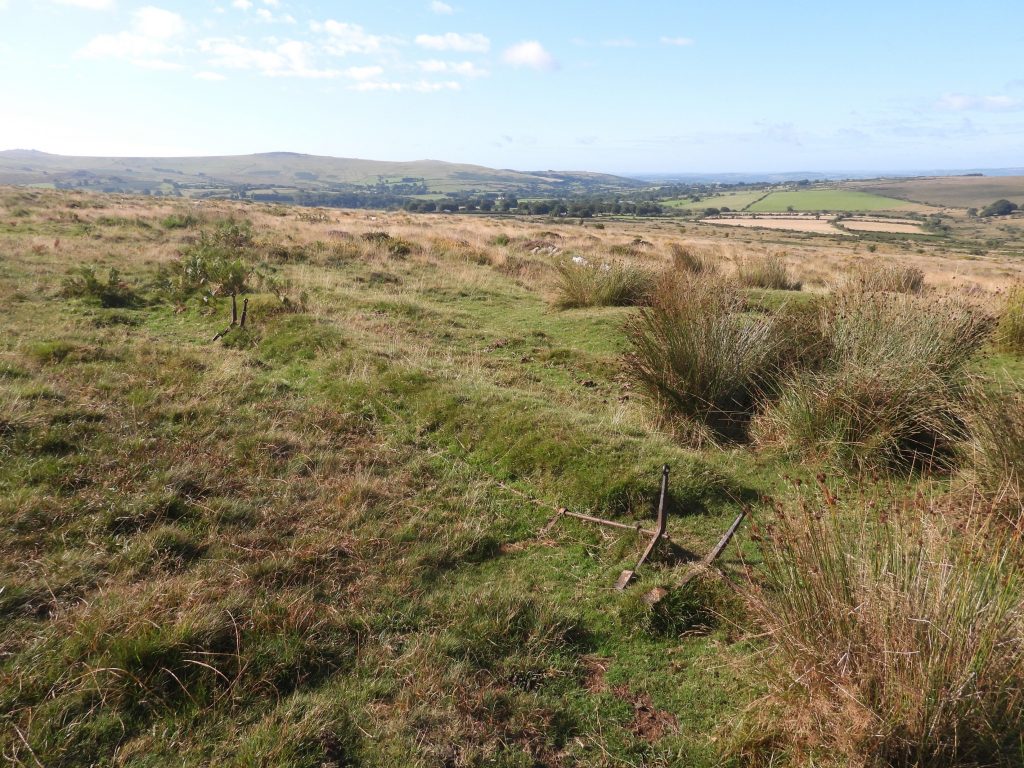
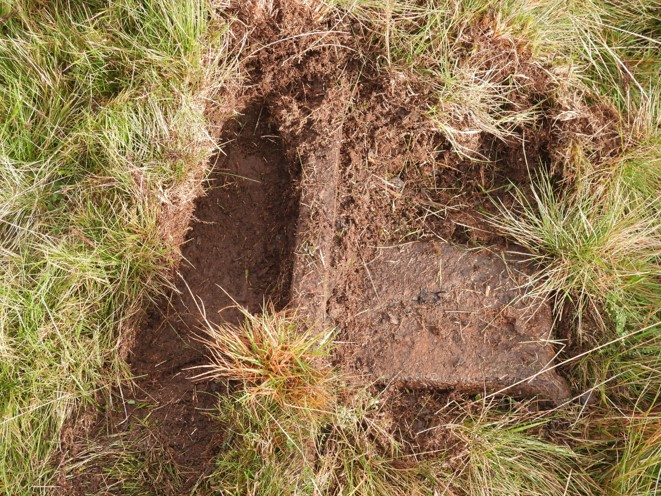
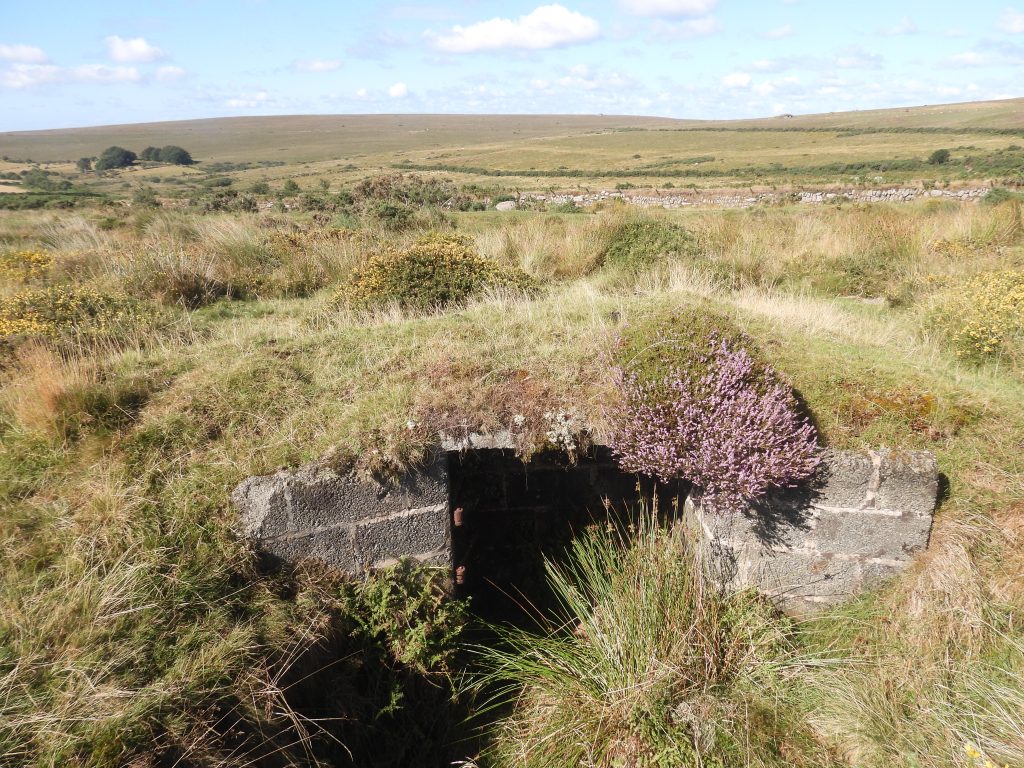
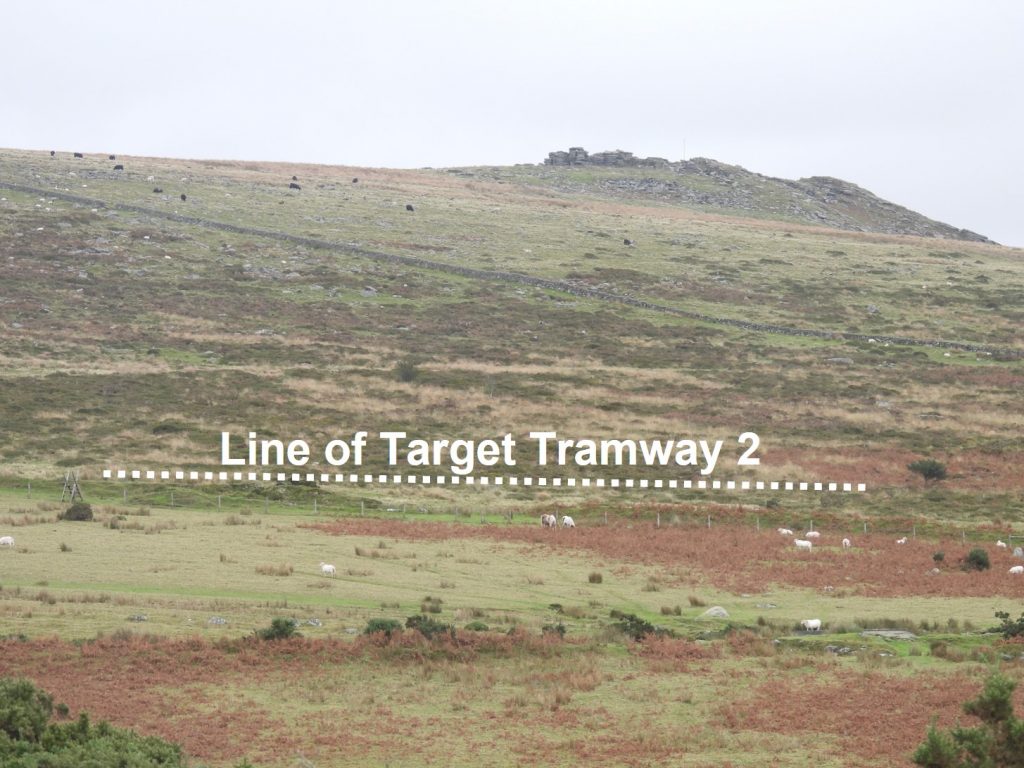
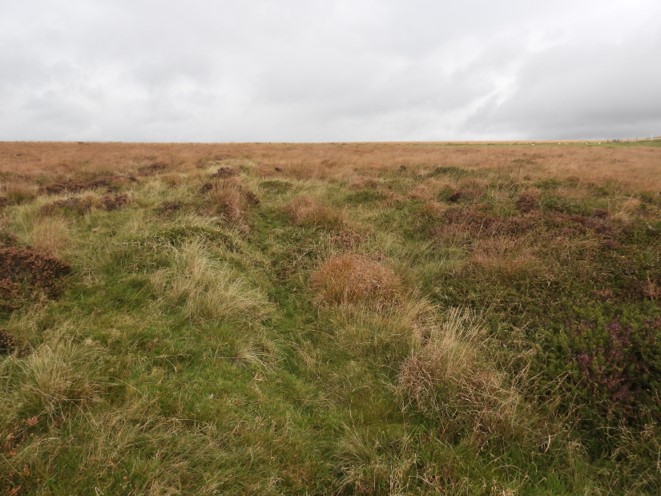
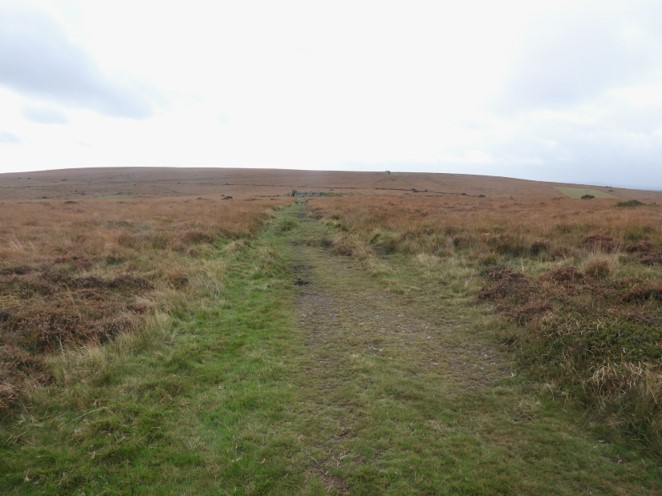
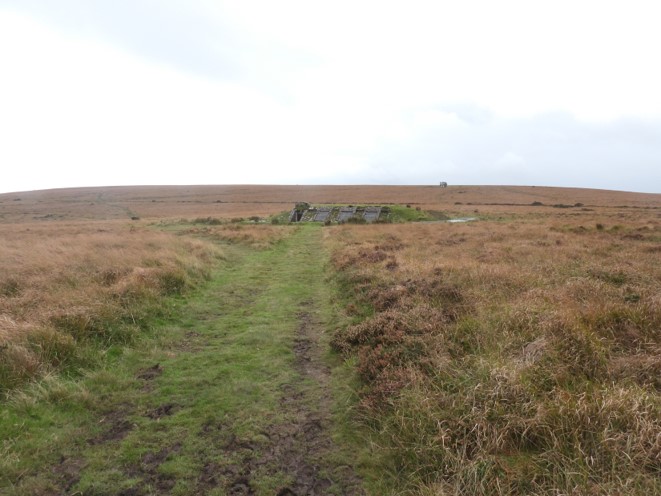
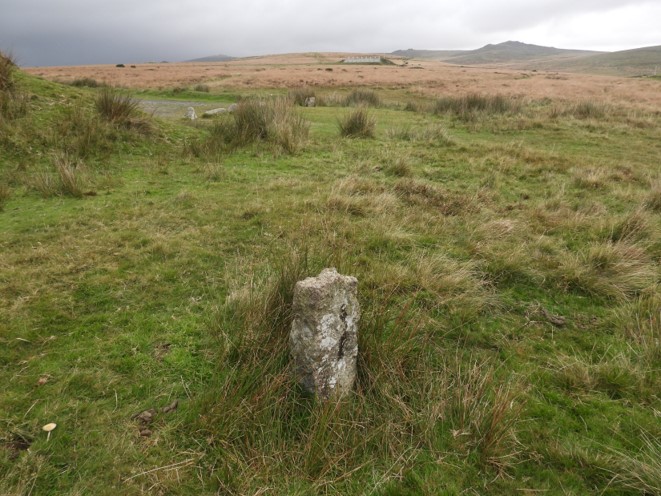
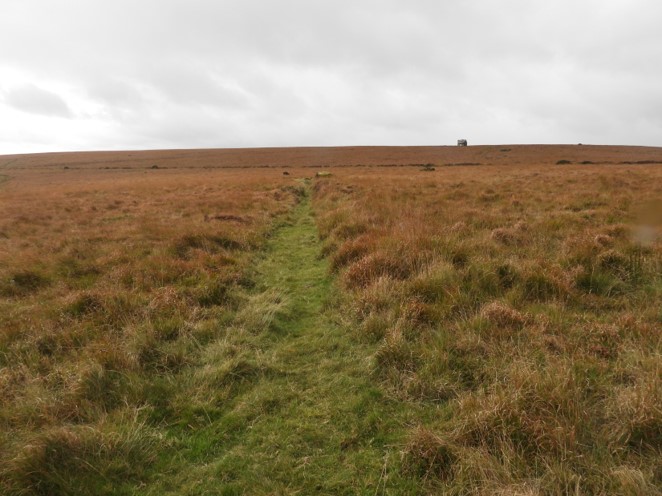
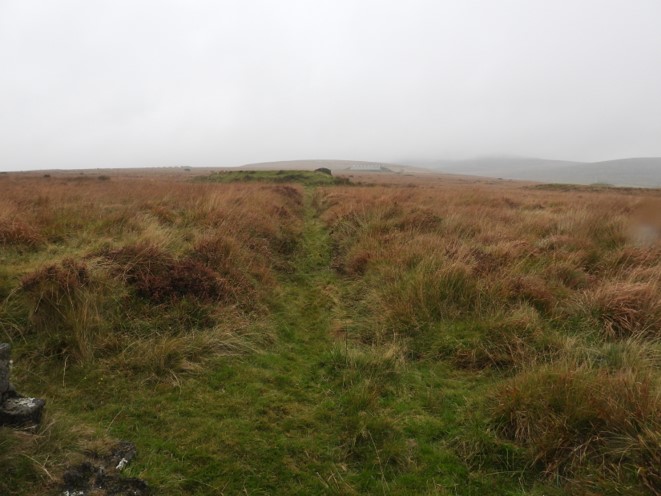
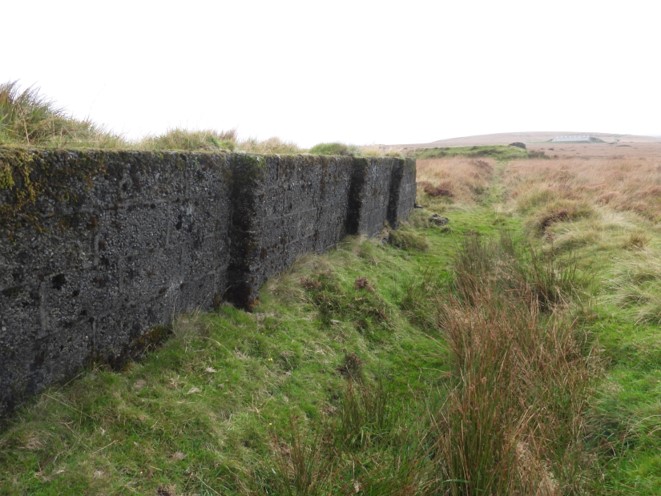
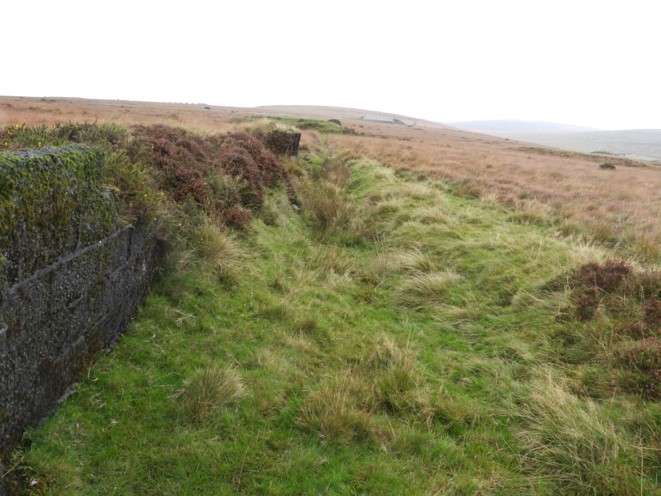
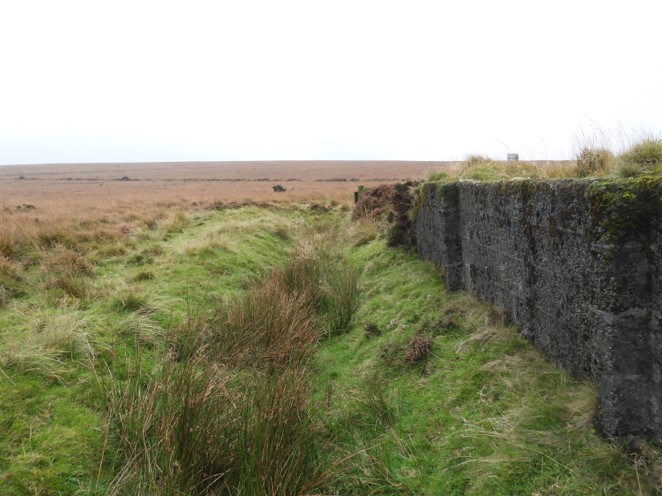
Tramway 2 The target hoist at the southern end of tramway 2 is still movable. Please note the title on the video is incorrect, it is Tramway 2.Tramway 2. In one location, a sleeper was close enough to the surface to be seen. The sleeper was metallic. This is located at SX53762 83173Tramway 2. At the southern end of the tramway is a second concrete bunker. This one is at SX53751 83097Tramway 2. Location of the target hoist in relation to the southern target hoist. The conjecture is that the the tramway may have had both fixed and moving targets. The firing position(s) look like they may have been from across Mine Leat in what is known at Willsworthy Camp today.Tramway 2. Close up of the southern concrete bunker. This one doesn’t appear to have any remaining communications electrics but does have a recess, which presumably housed the system historically.Tramway 2. Southern bunkerFrom across Mine Leat looking towards the Target Tramway 2, with Ger Tor behind. Was this the location, where the firing took place or was it a little closer?Tramway 3. There is very little left of this one, especially at the southern end by the Mine Leat. This picture shows part of a ditch, which would have housed the tramway. The tramway has been mutilated by the construction of B Range involving the removal of topsoil to create firing positions.Tramway 3. Northern end at SX52823 83286Tramway 4. Runs NE to SW. This is the northern end (which is close to tramway 3 north end) at SX52812 83310. The tramway appears at this end to have been repurposed into a track wide enough for vehicles.Tramway 4. Walking along tramway it becomes clear that “track” leads to a military bunker / troop shelter.Alongside Target Tramway 4 and the bunker is a standing stone at SX52650 83122. This is possibly one of the Hamlyn’s stones.Tramway 4. Beyond the bunker the tramway seems to revert to its original size. This is looking SWTramway 4. Looking back along the tramway (NE) to the bunkerTramway 4. Termination of the tramway at a concrete block wall at SX52577 83061Tramway 4. Looking NE from the end of the tramway towards the bunker and White Hill beyond. The tramway is protected by the breeze block revetted bank which is 1.4m high and is presumably the target shelter. Tramway 4. Termination point looking SW
What you have missed is that there is a fourth target railway which is not shown on the OS maps (but is shown in Tom Greaves survey of Reddaford Farm). The southern end of this extra line is about 100 yds northeast of the northern end of line 1 and is on a parallel NW-SE alignment. It is of the same 2 ft gauge and about the same length as line 1 and still has some track in situ. A careful study of Google Earth will reveal the line.
Thank you Jeremy for bringing my attention to what I have missed in the post. I was aware of the fourth tramway but for some reason failed to photograph it.
I have previously read the Dr Tom Greeves survey on Reddaford and note the map of the tramways on Figure 29. Apart for the map Dr Greeves there is minimal mention of the tramways (only one sentence). There is good information on this fourth tramway in the HER.
I will have to address the omission on this post at some point.


Jeremy Clark August 6, 2022
What you have missed is that there is a fourth target railway which is not shown on the OS maps (but is shown in Tom Greaves survey of Reddaford Farm). The southern end of this extra line is about 100 yds northeast of the northern end of line 1 and is on a parallel NW-SE alignment. It is of the same 2 ft gauge and about the same length as line 1 and still has some track in situ. A careful study of Google Earth will reveal the line.
SteveGrigg1961 August 6, 2022 — Post author
Thank you Jeremy for bringing my attention to what I have missed in the post. I was aware of the fourth tramway but for some reason failed to photograph it.
I have previously read the Dr Tom Greeves survey on Reddaford and note the map of the tramways on Figure 29. Apart for the map Dr Greeves there is minimal mention of the tramways (only one sentence). There is good information on this fourth tramway in the HER.
I will have to address the omission on this post at some point.
Thank you once again.
Kind Regards,
Dartmoor Explorations