A collection of walks, discoveries, insights and pictures of exploring Dartmoor National Park
September 18, 2020
WHEAL MARY EMMA
Wheal Mary Emma straddles the Lyd near the moorland tract of High Down and was originally worked by the ‘old men’ for alluvial tin, before in several places being developed with pits and opencast excavations drained by a shallow adit. Cassiterite can be found in a granite hosted matrix on one side of the river and in a dark metamorphosed tourmaline rich killas on the other side (ref: Mindat.org). The mine is located a short distance downstream from the Captain Hunter memorial at Black Rock for those wishing to visit.
The ‘modern’ mine was begun by Stephen Paull of Crowndale in 1849 and was named after his daughter Mary Emma who was 10 years old at the time. One of the first recorded references of the mine was in the Mining Journal dated 4th October 1849, stating : “two lodes have been found, standing 40fm apart and thought likely to form a junction about 160fm to the west. In a sink put down to a depth of 5ft below the old men’s adit, one of the lodes was 20in wide and yielded some cassiterite ¼ to ½ inch in size. Payable values were also found in a lead-bearing cross course, a deeper adit was started to test the ore bodies 10fm beneath the old men’s workings. As the surface of the ground rose steeply to the west it was estimated that by driving 60fm the level would gain backs of nearly 30fm deep”. There are two shafts shown on 19th century maps on the west bank of the Lyd which might well have been sunk in the early days of the ‘modern’ mine.
By January 1850, an Engine Shaft had been commenced on the course of the lode to below the shallow adit level. On 1st May in the same year, after a delay, a 40ft waterwheel with 8 head of stamps was made operational with the wheel having been bought second hand for £55. By August, the miners had reached a cross-course at the top of the slope and were being paid 50s per fm and although there had been problems with setting up the dressing floor, they had 2 tons of tin ready for market. By 1851, the mine was stated to be just paying cost. The sett at that time was recorded as being ¾ mile east-west and 2 miles north-south. Of the two lodes, the north lode contained some copper ore with the south lode producing the tin across an expected 8ft wide course. In May 1851, a recommendation was made to sink a new Engine Shaft, between the two lodes so as to allow access to both lodes without the need for expensive cross-cuts. The expectation was to sink a shaft below the deep adit level . In 1851, tin was sold to the value of £100.
In February 1852, under the supervision of Mining Captain James Carpenter, a ‘Tindall’s Shaft’ is recorded, which was the (original) Engine Shaft. From this shaft there is a distinct ‘V’ shaped gully for flatrods leading down to the waterwheel. The directors were informed that the ‘rods will be erected forthwith and further sinking on the shaft will continue’. With mention of stamps and flatrods, the 40ft wheel appears to have been used for both stamping and pumping. The new licence issued in 1852 had been granted to three merchants from London and the sett was stated as being bounded by River Lyd to the south and east, by enclosed lands of Lydford to the west and by a rivulet called Lake to the north. On 25th June 1853, in a meeting chaired by George Tindal (possibly the same person whose name was given to the Engine Shaft), there appears to have been some hint of a problem where the shareholders were written to demanding amounts due from them, else within 14 days they would default the shares ‘to be absolutely forfeited for the benefit of the company’. Of note is that there was a ‘Lane’s Engine Shaft’ recorded during the mine’s working life, but it is not clear precisely whether this is the main Engine Shaft (Tindall’s) renamed. 1853 seems to have been a fallow year with only £25 of tin sold and a year later in 1854, the mine was sold realising £210.
In 1856, a new licence was granted to William Doble and Joseph Matthews of Tavistock, with an extension to the limits of the sett, now to include the east side of the Lyd. In the December of the same year what is described as ‘several men’ were employed at the mine. By June 1857, 4 men were employed which increased to 13 by the December (6 underground and 7 at surface). At this time a small tramway was employed for conveying ore from adit level. In 1858, a shaft had been sunk on the east side of the Lyd and had reached 12fms below surface, 2fms under adit, with both copper and tin being exploited by the 14 men employed. With this information we can conclude, there were at least 4 shafts, 3 on the western side of the river, and at least 1 on the east side… although there is evidence of many other trial shafts and another away from the main mine to the west near the modern day car park.
In January 1859, a W.Goldsworthy recorded that: “The shaftsmen continue cutting trip-plat. In the 58 east we have driven on the course of the lode about 12 feet….driving at 55s per fm. In the 46 west, we are still cutting in south through capels, in hopes of meeting better ground for driving”. (Note: One assume 58 east and 46 west refers to the horizontal workings of the mine). 5 men were employed in the January of 1859 and by May of the Engine Shaft was 22fms from surface with the shaft being 10ft x 6ft. By July improvements were recorded on the 58fm level with the lode in the east with 2 ½ tons per fm. Towards the end of 1859, 12 men were employed including a Blacksmith.
On 10th May 1860 there is a record that 6 miners and 3 labourers were driving the 12 fathom level with there being a total of 12 men including the blacksmith working. On 26th July 1861, the accounts for the three months ending May 1861, showed the mine had a debit balance. That said, optimism prevailed and Captain W. Doble reported they had broken “some fine tons of tin in a pit opened on the back of the lode by a large cross-cut course” and was “convinced there would be a fine lode of tin there for a great length”. No doubt this optimism was for the benefit of shareholders. In 1862 there were 5640 shares and 10 men were employed
The beginning of the end appears to have been around 1864 when a list of materials for sale appeared on a winding up order. The items included a 40ft. wheel (wood) and iron axle, 8 head stamps, 20 sets of railway iron, an iron tram waggon, 40 in. smith’s bellows, round and clearing buddles plus 3 winze kibbles. In spite of the sale, in 1871, the waterwheel is known still to have been at the mine.
After 1864, the mine continued to be worked spasmodically under different company’s and it was known as owned by North Dartmoor Consols in 1872. The last license to work the mine was granted from 5 August 1887 for 1 year – Rent £5 p/a – Dues 1/20th – Deposit £10. However, in a letter July 1888, it was suggested that ‘no workings have taken place since the license had been granted’. The last licence was granted to Charles Harry Le Mortimer McIntosh of Brixton.
Bibliography:
Hamilton Jenkin (Mines of Devon)
Mining Journals (various)
Dr Phil Newman The Tinworking Landscape of Dartmoor in a European Context..(2017) . pp34-35
Dr Tom Greeves – Devonshire Association – Industrial Archaeology Section notes from September 1971
Dartmoor Chris pers conv and emails
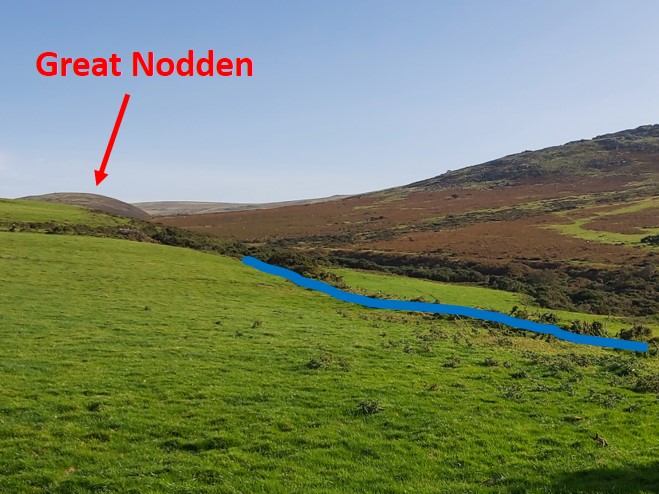
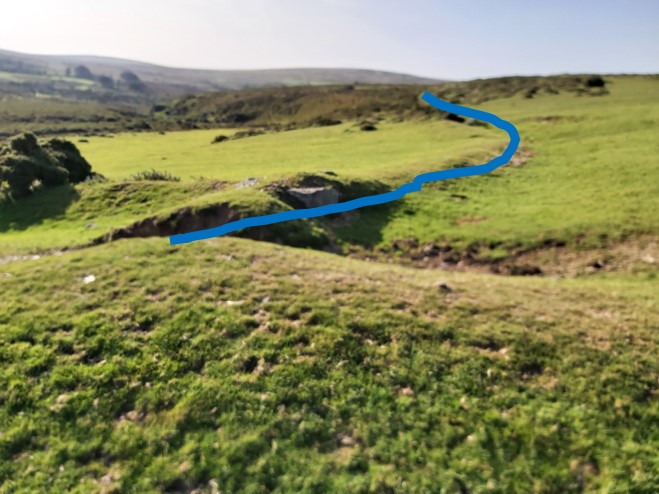
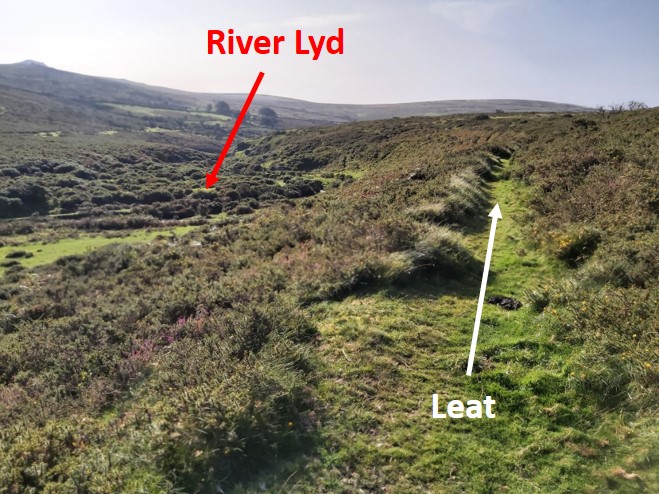
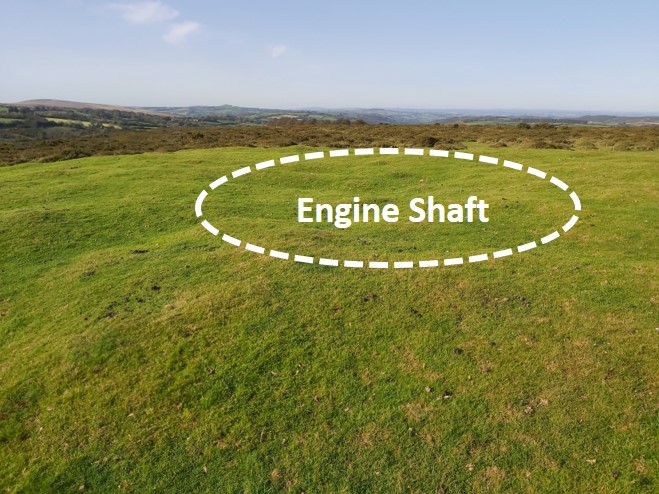
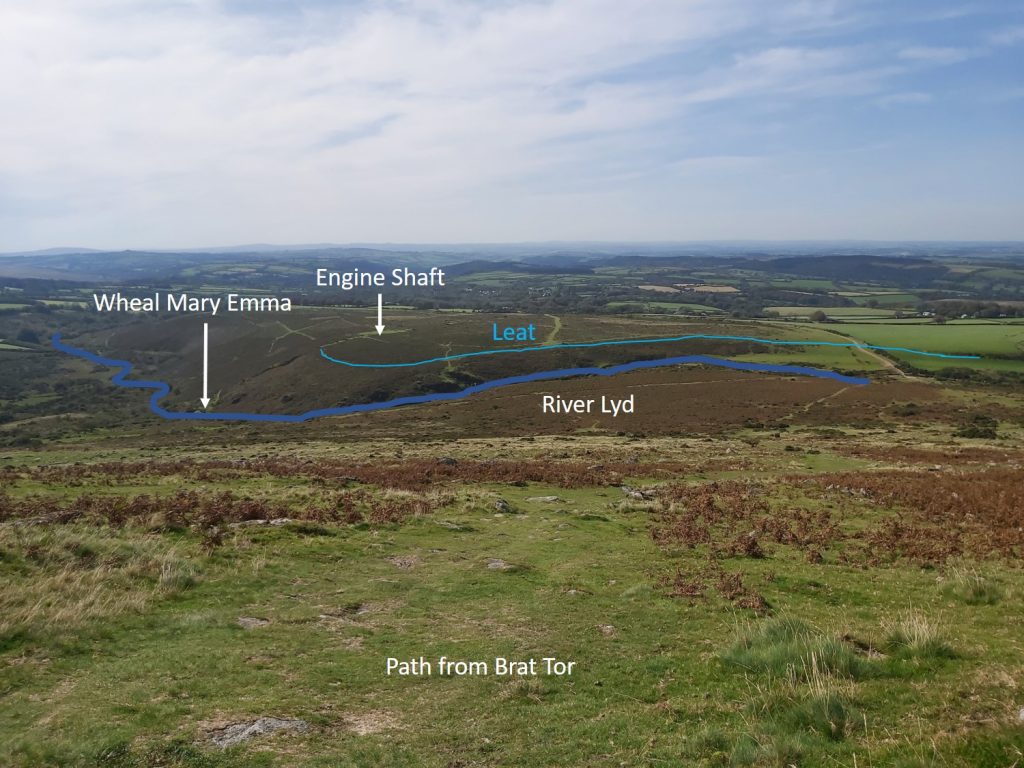
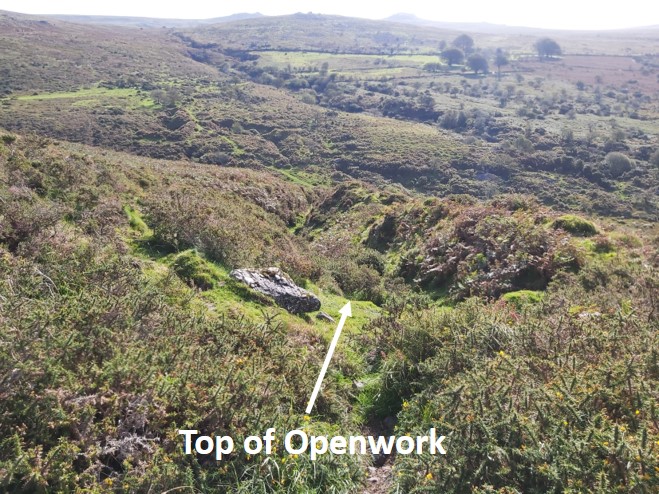
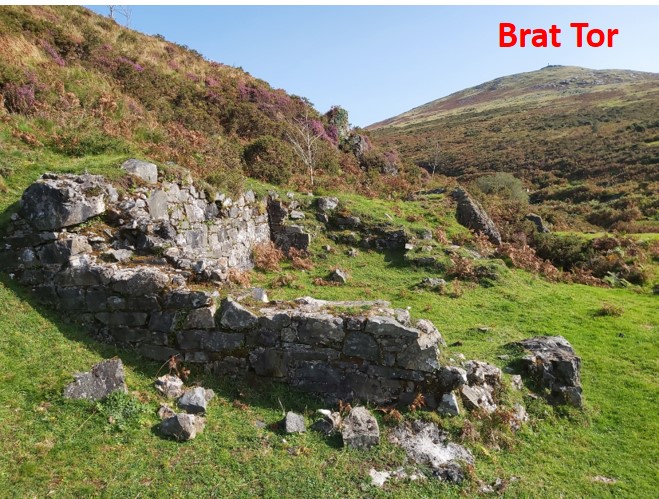
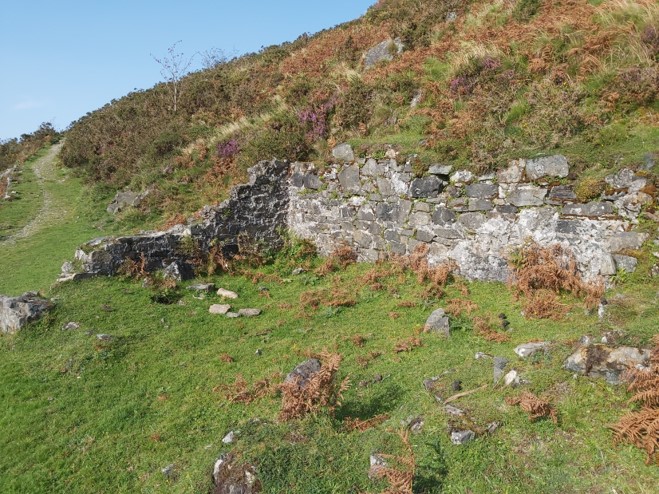
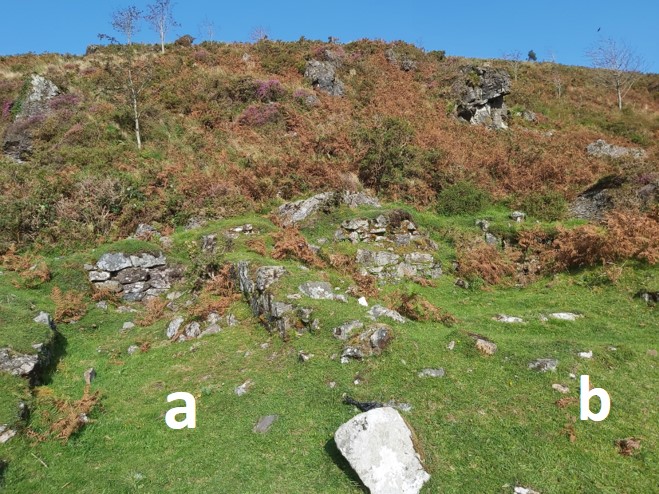
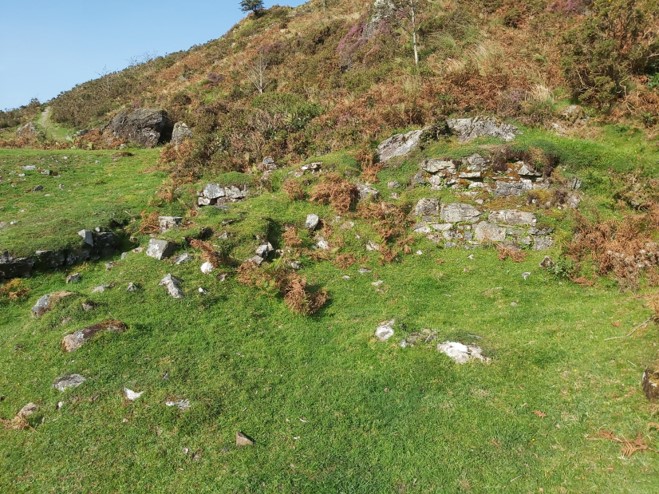
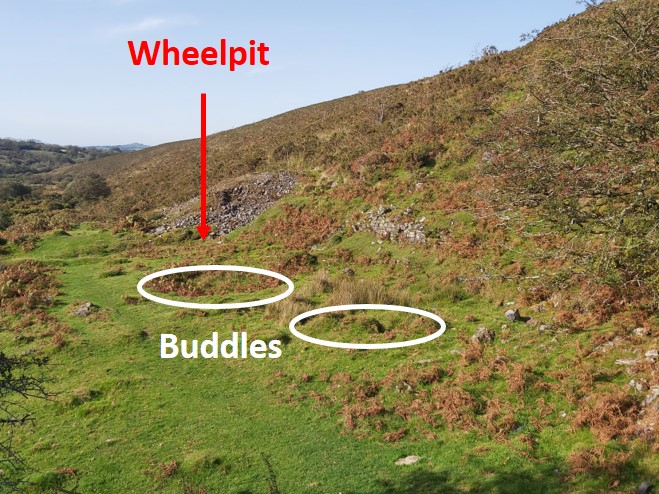
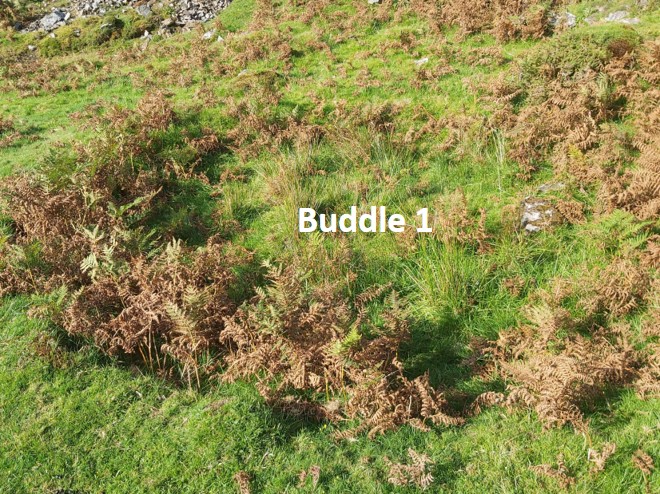
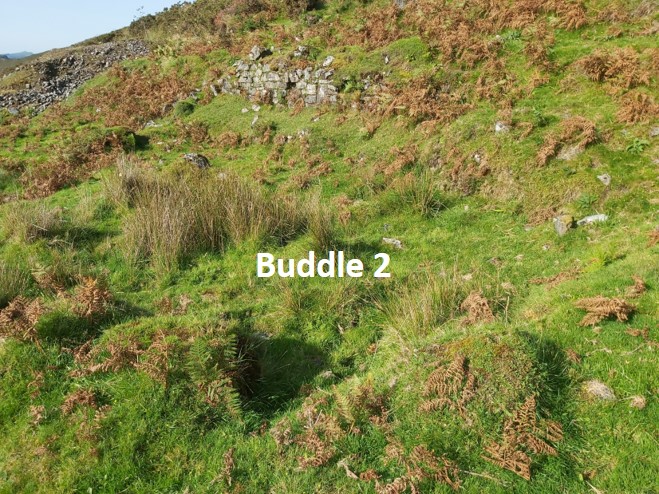
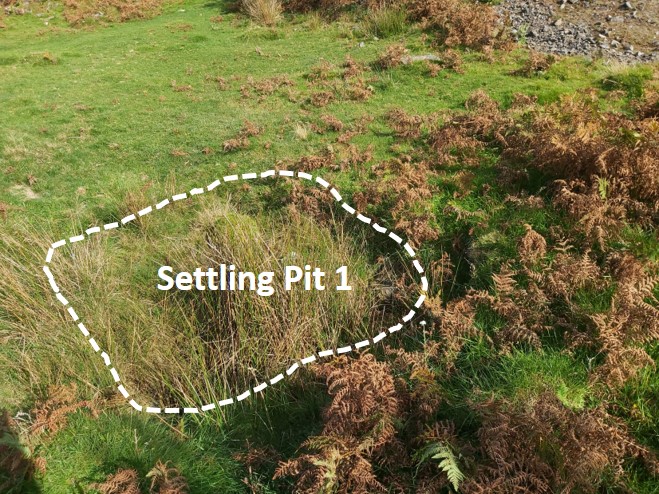
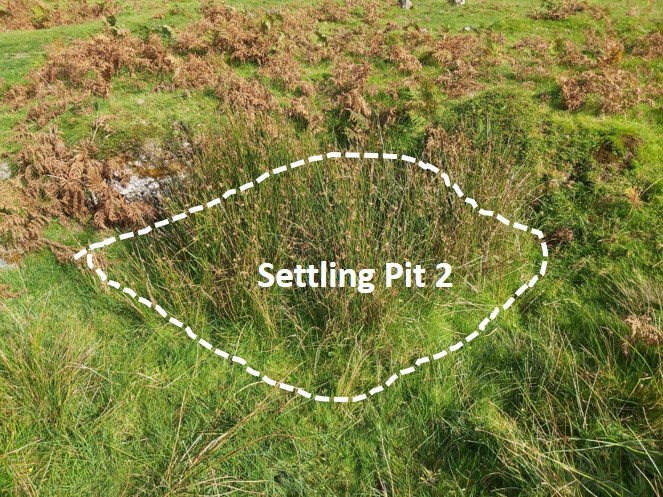
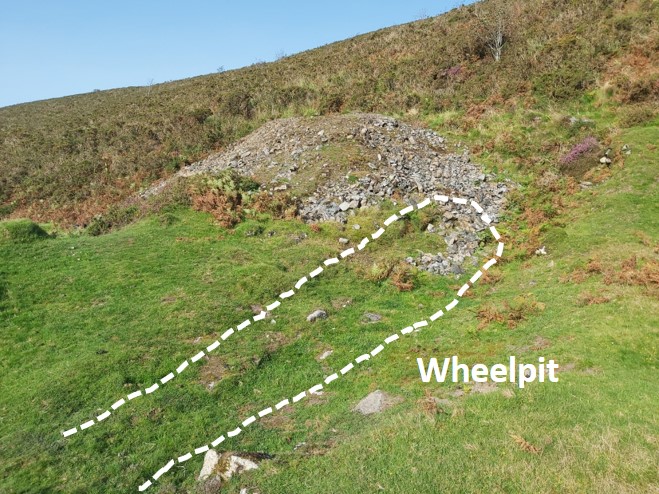
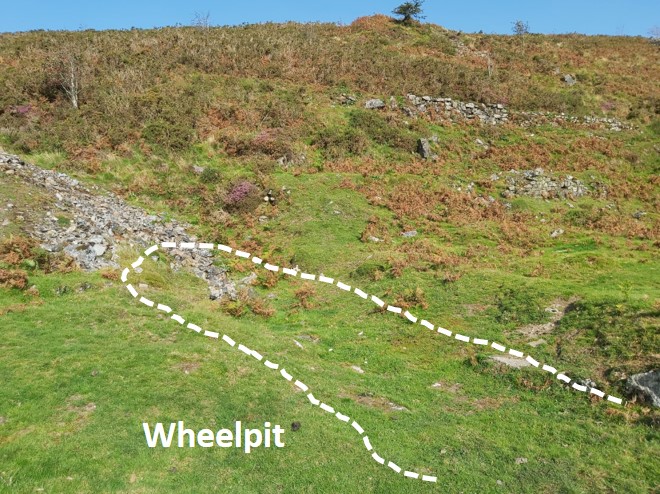
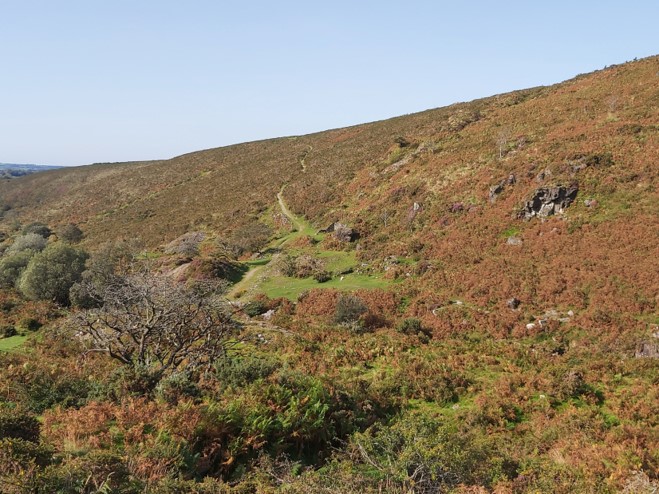
The layout plan of the mine resketched and annotated from a plan published by the Dartmoor Tinworking Research Group (DTRG) in ‘The Tinworking Landscape of Dartmoor in a European Context’..(2017) . pp34-35Two shafts to the south of High Down car park may well have been part of Wheal Mary Emma trial exploration. The shafts are located at SX52552 85165The smaller of the two western shaftsCrossing High Down towards the Lyd and close to the main area of Wheal Mary Emma, this holed stone can be found. The hole goes completely through the stone and is around 30cm in diameter. But why is it here?The function of the holed stone is unknown although options suggested have been a) a lost venville stone (ref: T. Soby – 2014), b) a whim stone, c) a stone used by the miners for purpose unknown or d) a flagpole base. The stone can be found at SX52937 85300The location of the stone in relation to the main Engine Shaft (Tindall’s) of Wheal Mary Emma may offer a clue to this mystery stone. The distance between the capped shaft at the mine and the stone is around 113m. The author’s initial theory is that the stone was originally a whim stone used at the mine (to assist hauling ore and materials into / out of the shaft) and was then repurposed when the mine finally closed around 1888. However, the size of the hole suggests it was never a whim stone as it is roughly twice the size of the largest holed whim stone ever found (ref: Dr Tom Greeves). The author’s second theory is that the stone had been used by 19th century miners but for some other purpose and was moved (possibly with hole widened?) to be used by the military as a flagpole. The timeline of the mine closing and High Down camps taking place between 1892 and 1906 seems to fit with this theory.Relative locations of the ‘Whim Stone’, the ‘Engine Shaft’ and Wheal Mary Emma ‘Dressing Floors’Before this post explores the mine complex, consideration should be given to the source of power. The leat take off, was from the Lyd around 2km upstream heading towards Great NoddenThe leat crosses the High Down track, which leads down to the ford and stepping stones at SX53086 85702From the track, the leat can be seen snaking its was southwards high above the River Lyd towards the mine complexFollowing the leatAs the leat approaches the mine complex and just over 100m from the aforementioned ‘Whim Stone’ is the Engine Shaft (now capped) on a rather non descript grassy area. The picture was taken in September 2020. The location is SX53042 85251View from the Engine Shaft looking towards Arms Tor and Great Nodden. The picture was taken in January 2025The lumps and bumps of the capped Tindall’s Engine Shaft. Remnants of snow can be seen on Brat TorThe capped Engine Shaft looking towards the location of the ‘Whim Stone’A shallow gully and earthworks extending south east from the Engine Shaft as depicted on the mine planLooking from the slopes of Brat Tor, the Engine Shaft and leat can easily be picked out – picture from September 2020Just downhill from the Engine Shaft, the main openwork of the mine can be picked up.Descending the openworksLooking back up the openworksBetween the shallow gully to the south east of the Engine Shaft and the main openworks with careful exploration amongst the gorse and bracken the ‘V’ channel for the flatrods can be foundThe flatrods between the Engine Shaft and the 40ft wheel were 190m longAt the bottom of the hill, next to the path / track are the foundations of a buildingIt is conjectured (Plymouth U3A), that this building was either a counting house or a miners dry. The author has been told by others that this was the Blacksmiths Shop. The path can be seen in this picture. The building is located at SX53238 85189The Blacksmiths Shop – January 2025Another view of the Blacksmiths ShopThe locations of the OS recorded shafts on the west side of the LydThe old shaft as shown on the 19th century OS map, next to the Blacksmiths Shop. The old shaft is at SX53249 85194Old Shaft and likely site of old adit (taken from the original plan from DTRG publication). The authors interpretation could be incorrect as the adit is uphill from the shaft !The old shaft in relation to the bottom of main openworkThese stones might represent where there was once and aditA short distance from the Blacksmiths Shop is a two roomed building, believed to have been the office and accommodation. Locations a = SX53266 85200, b = SX53266 85203. The room annotated ‘a’ was most likely the office and ‘b’ the accommodationView of the offices, looking back towards the path and the Blacksmiths ShopView of the office (left) and accommodation (right) taken in January 2025In the north west corner of the accommodation section of the building is a recess, which might possibly have been part of a fire / chimneyFrom the office looking across to the Dressing FloorAnother view of the office and the slopes where the main openwork is locatedLooking across the ford on the Lyd towards the east workings of the mine with Brat Tor beyondJust below the ford there was a footbridge at this locationThe footbridge connecting the two sides of the mine. The postcard suggests it was from 1920, but the lack of a cross (or at least it being obvious) suggests a much earlier dateThe bridge location – picture from September 2020Picture combination showing its location on a 21st century photographThe location of the bridge. The large (black) rock in the photograph provides the evidence. There is a small abutment on the west side of the river“So were all agree then, this was where the bridge was located?”. The second old shaft near the Lyd as identified on 19th century mapsCrossing the path, heading in a southwards direction, two circular depressions can be found. There is one Buddle here as shown on the DTRG publication (Dr Phil Newman) plan, which is the one here nearest the wheelpit. However, to the authors untrained eye there might be two Buddles here. The ‘confirmed’ Buddle (1) at SX53229 85160. Buddles were rotating heather brushes which stirred the crushed ore allowing a feed of water to carry away rock sand leaving behind the heavier casserite tin ore.Also on the Dressing Floor is a second (less well defined depression). Was this another Buddle (2). Recorded at SX53233 85160. Note the Dressing Floor walling in the backgroundThe confirmed Buddle (1) taken in January 2025The walling above the Dressing Floor. It is possible ore was delivered to this area along a path above the wallBetween the two Buddles and the Lyd are what looks like to an untrained eye, two possible settling pits. This one is at SX53244 85160A second possible Settling Pit location in relation to the Buddle(s). Location is at SX53239 85158Settling Pit detail. Are the reeds a giveaway or just synonymous with a damp shallow hollow ?The wheelpit where a 40ft wheel would have stood. There would have been a launder here. Of interest is that the leat (which can be traced from the Lyd nearly 2km upstream) did not terminate at the mine but at the top of the slope near the Engine Shaft continued onwards towards High Down House.The wheelpit is located at SX53227 85156Measuring the wheelpit – January 2025The authors measurement confirms 40ft !The wheelpit walling is still discernible in place, some 175 years (2025) after construction. The wheelpit is around 5m higher that the Lyd, so where is the tailrace ?The answer to the tailrace question (or the draining of the wheelpit) is in the form of an exit lobby. This wheelpit drain which can be found by the river a few metres below the level of the wheelpit.This exit lobby was covered in vegetation before this picture was taken. It is a fine example and probably one of the best that can be found within the National Park. The location is SX53232 85141The interior to the exit lobby (without extra illumination) The interior to the exit lobby with extra illumination reveals a Victorian Engineering marvel which has withstood 175 years of Dartmoor weather extraordinarily well. The construction looks like a ‘cut and cover’. The foundations and side walls supporting large granite slabs for a length of around 10m. At the end of the tunnel it looks like it bends around to the rightExploring the exit lobby – note the close proximity of the LydGetting up close and personal with the exit lobby to take photographsBack to the wheelpit. Of interest is that the exit lobby (the location of which is indicated by the walking pole), does not ‘line up’ with the wheelpit. This probably accounts for the apparent ‘turn’ of the tunnel observedBetween the large circular Buddle and the Wheelpit on a flat area is probably where the 8 head of stamps were located. The ore was probably delivered by a small track above the Dressing Floor wall.Walking upstream from the main complex on the west side of the river, just below some earthworks (and trial pits), a potential adit was located. The picture (courtesy of Matthew Johnson) was the author investigatingIt looks like an adit. Location SX53297 85259Close up of the potential adit entranceInside the adit, which has collapsed. The location is consistent with mine plansRelocating across the Lyd to identify where this 19th century watercolour of Wheal Mary Emma wheel was painted from and work out how much ‘artistic licence’ there was.The possible location of the 19th century watercolour was just above the Tinners’ Mill. The sides of the valley (especially the east side) appears in the watercolour to have been hugely exaggerated and the wheel is higher up the hill than it actually was locatedDoe Tor Green / Wheal Mary Emma 16th / 17th century Tinners’ Mill. Thought to be a Blowing House as tin slag was found here in 1984. The possible furnace is where the large slabs are in the centre of the photographSome of the openworks on the east side of the Lyd, which the Victorian miners began to exploit from circa 1856 onwards when the extended sett licence was granted to William Doble and Joseph Matthews of TavistockAcross the Lyd (east side) there are two prominent openworks and adits. The second of the prominent workings on the east side of the LydPossible Adit at SX53338 85206The adit in winter – January 2025Another possible Adit at SX53335 85218East Lyd openworks looking upstreamEast Lyd openworks looking downstreamMore openworks on the east sideLooking back at the west side of Wheal Mary Emma from the east side.Possible shaft which in 1858, was said to have reached 12fms below surfaceLeaving the mine behind and following the Lyd upstream to the north a number of interesting feature can be found. Black Rocks (south) are a prominent featureBlack Rocks (south) from the east side of the Lyd. Located at a prominent bend in the riverKnown to some as Black Rocks waterfallBlack Rocks (north)Black Rocks (north) viewed from the east side of the LydA memorial plaque to Captain Nigel Duncan Ratcliffe Hunter can be found on Black Rocks (north). The memorial has the badge of Royal Engineers embossed within Nowy head and there are two sprays of ‘mares tails’ embossed in bottom right and left hand corners between which is a poem and dedication to Captain Hunter.Close up of the memorial which reads: IN LOVING MEMORY OF CAPTAIN NIGEL DUNCAN RATCLIFFE HUNTER, M.C. (AND BAR) ROYAL ENGINEERS WHO WAS KILLED IN ACTION AT BIEFVILLERS, NEAR BAPAUME ON MARCH 25TH 1918, AGED 23 YEARS. HE LOVED THE MOORS OF DEVON, AND ON HIS LAST VISIT TO LYDFORD, HE WROTE THE FOLLOWING LINES:- “ARE WE NOT LIKE THIS MOORLAND STREAM SPRINGING NONE KNOWS WHERE FROM, TINKLING, BURBLING, FLASHING AGLEAM BACK AT THE SUN; ERE LONG GLOOMY AND DULL, UNDER A CLOUD, THEN RUSHING ONWARDS AGAIN: DASHING AT ROCKS WITH ANGER LOUD, ROARING AND FOAMING IN VAIN? WANDERING THUS FOR MANY A MILE TWISTING AND TURNING AWAY FOR A WHILE THEN OF A SUDDEN ‘TIS OVER THE FALL AND THE DARK STILL POOL IS THE END OF ALL. “IS IT” I THOUGHT AS I TURNED AWAY AND I TURNED AGAIN TO THE SILENT MOOR. “IS IT?” I SAID, AND MY HEART SAID “NAY!” AS I GAZED AT THE CROSS ON WIDGERY TOR”.Rectangular enclosure opposite Black Rocks (north) where the bank of the river appears to have been protected by a low concrete wall. The enclosure is most likely related to farming. Also here, there is some pipework which can be found in the river. The pipework / low concrete wall may relate to an entry by Eric Hemery in ‘High Dartmoor’ (pages 935-936) where he states when describing Black Rock crags: “Opposite the first (smallest) is an oblong enclosure on the left bank and the remains of a weir, each a part of the former intake for Lydford village water supply; the well-laid coping on the enclosure wall is now breaking away in places”.The enclosure with Brat Tor beyond. The enclosure does not appear on the tithe mapEnd on view (north to south) of the enclosure


Colin Allen August 14, 2024
Hi,
On the east side of the ford at Wheal Mary Emma there is what appears to be a partly buried valve and a pipe leading into the Lyd.
Do you know if this is related to the mining activity or to the later water extraction attempts?
SteveGriggDartmoor August 15, 2024 — Post author
Hi Colin,
I have seen the buried valve and pipe which you refer to and like you I’m unsure as to the origin.
Kind Regards
Steve (Dartmoor Explorations)