A collection of walks, discoveries, insights and pictures of exploring Dartmoor National Park
May 23, 2022
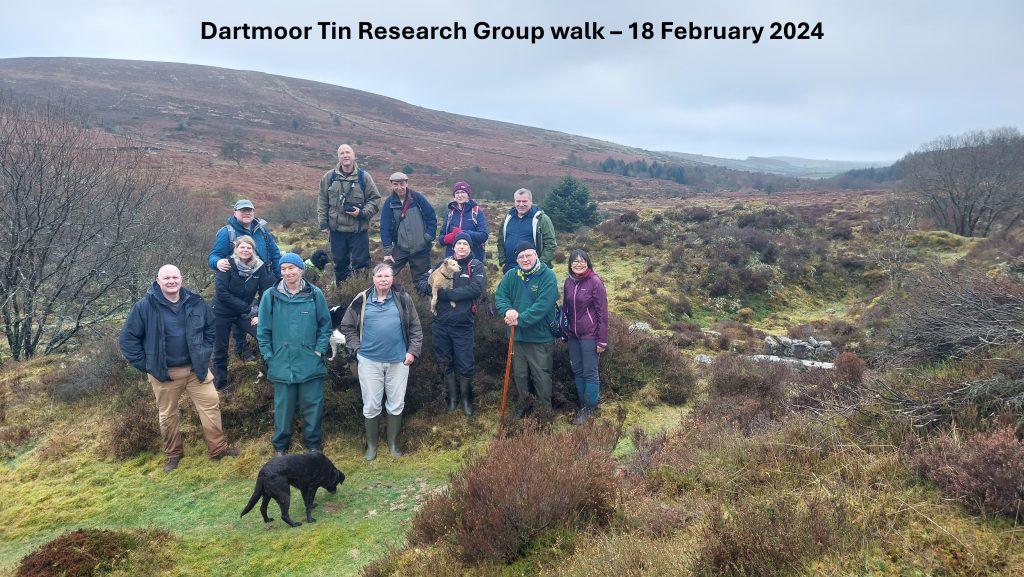
Birch Tor and Vitifer Mine (and miners)
The Birch Tor and Vitifer Mine was originally separate mines on opposite sides of the Redwater Valley, with Vitifer on the west side and Birch Tor on the east side. That said, they were mostly worked together. The mine was the most profitable mine on Dartmoor with 1177 tons of Black Tin extracted between 1852 & around 1928. However, total production may have been around 2000 tons if unrecorded successful operations from the 18th and early 19th century are included.
The deep open workings on the backs of lodes in this area were extensively worked in the late Medieval period around the 16th and 17th centuries, after which the mine was worked from the mid-18th century (Burch Tor bounds recorded in 1757). The mine was then worked by the Dartmoor Mining and Smelting Company in the 1780s. By 1796, it is recorded that 13 shafts had been sunk and that 40 men were employed. The mine was profitable until 1820s when there was a slump in the tin price. Shortly after this (around 1834), Captain John Paull (or Palk) acquired the lease at a knock down price having reputed to have kept his knowledge of the most profitable lodes from the owners.
In the early 1860s the mine had a revival with 150 people employed following a change of ownership. The peak of production appears to be around 1864 with 150 tons of black tin being sold. The mine declined after the peak and closed in 1882. There was a mini-revival in the early 20th century between 1903 and 1913 and was moderately successful employing 35 people. After the first world war there was a small amount of both surface work and underground work until the mine was finally abandoned around 1939.
This post and information contained herein has made reference to The Dartmoor Historic Environment Record (HER), two superb books, namely: “Tin Mines and Miners of Dartmoor” by Dr Tom Greeves and “Dartmoor Atlas of Antiquities – The North” by Jeremy Butler and finally a 1883-84 map, which the author was given with most of the lode and shaft names annotated to it . To add to the post, the author has added a few letterboxing stamps, which his father created in the 1990s.
Bibliography
Newman, P., 2002, Headland Warren and the Birch Tor and Vitifer Mines (Report – Survey).
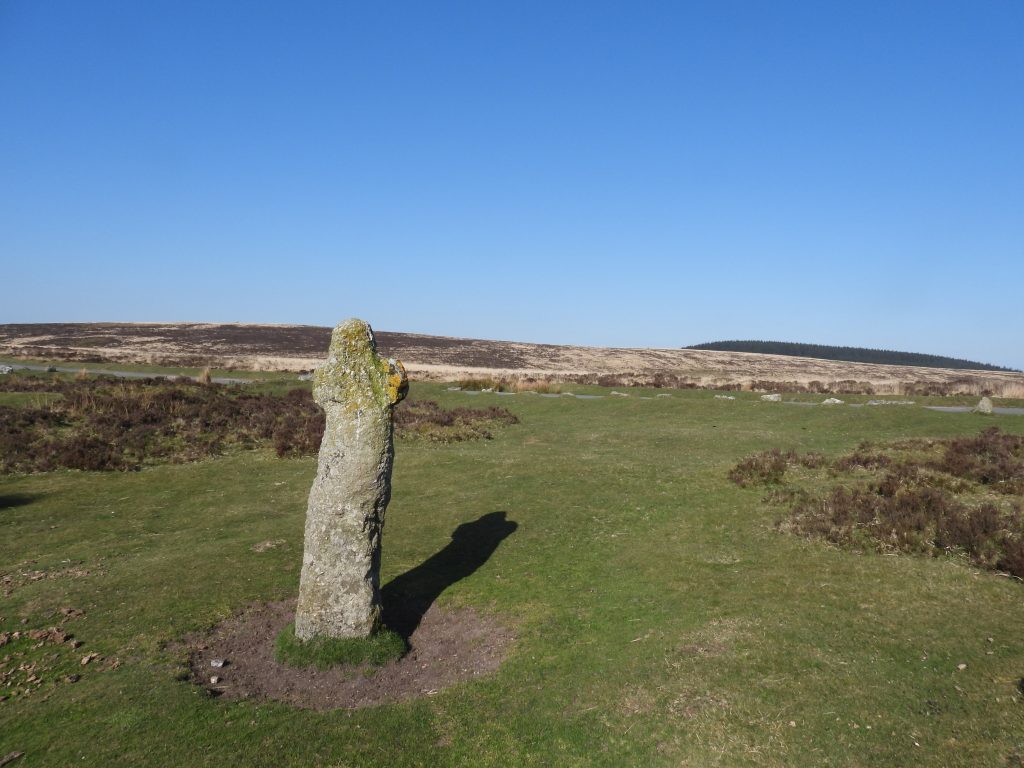
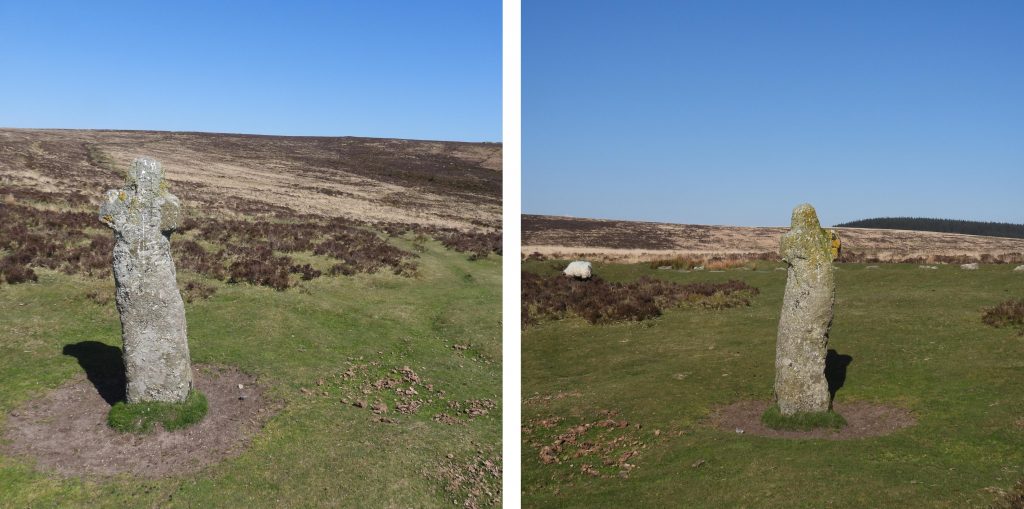
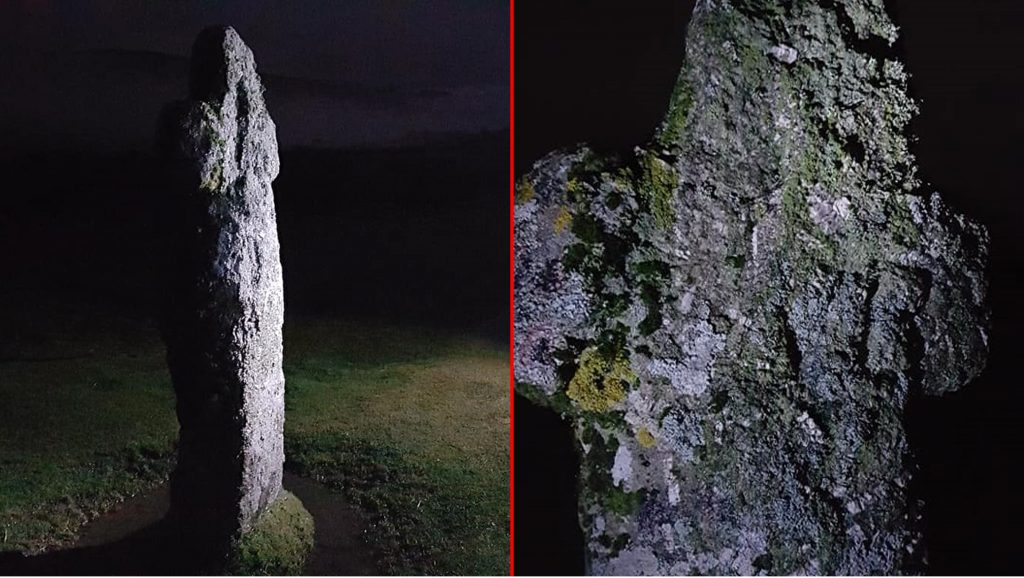
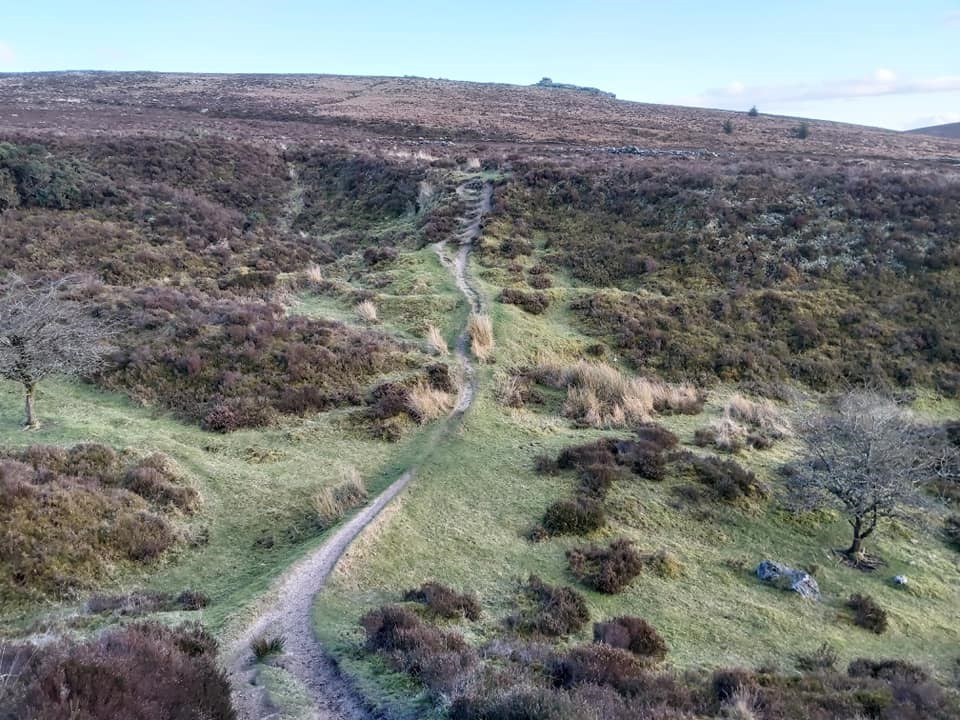
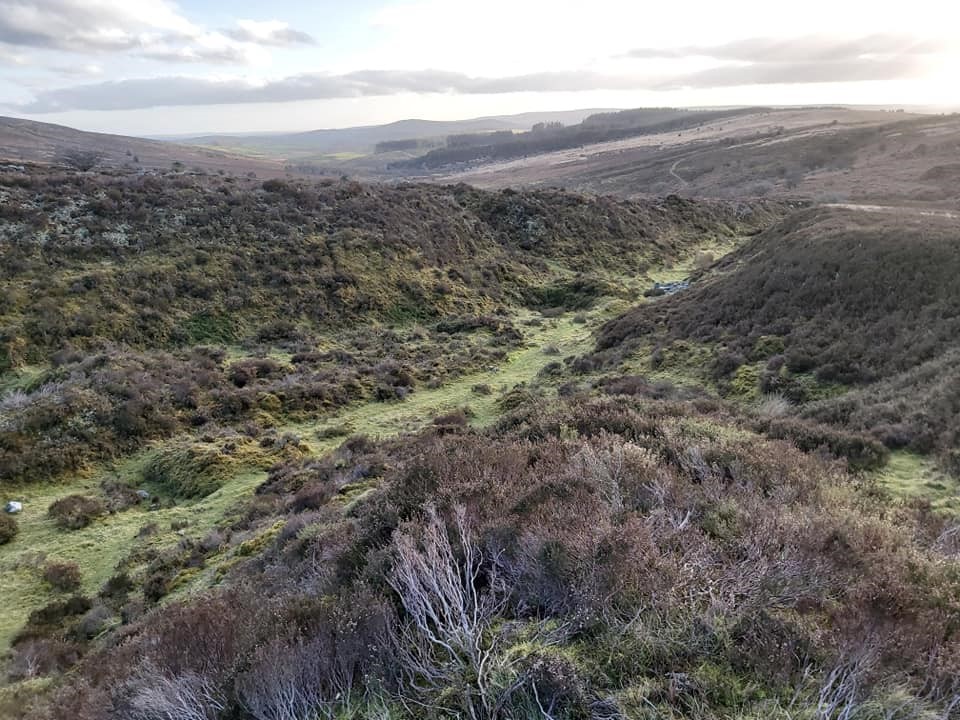
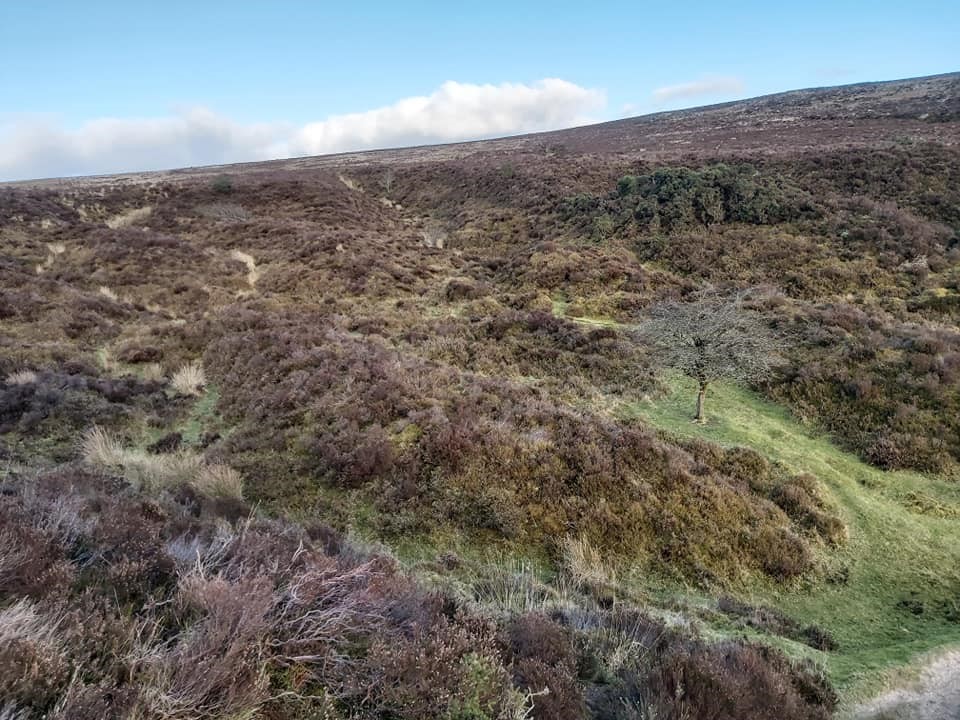
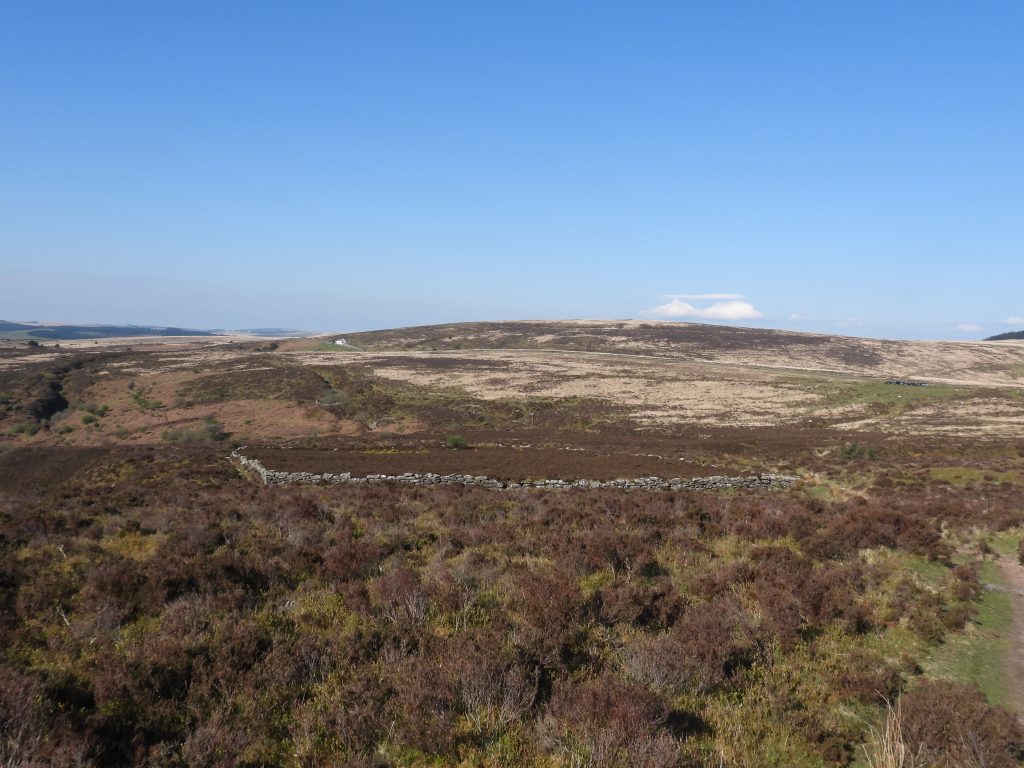
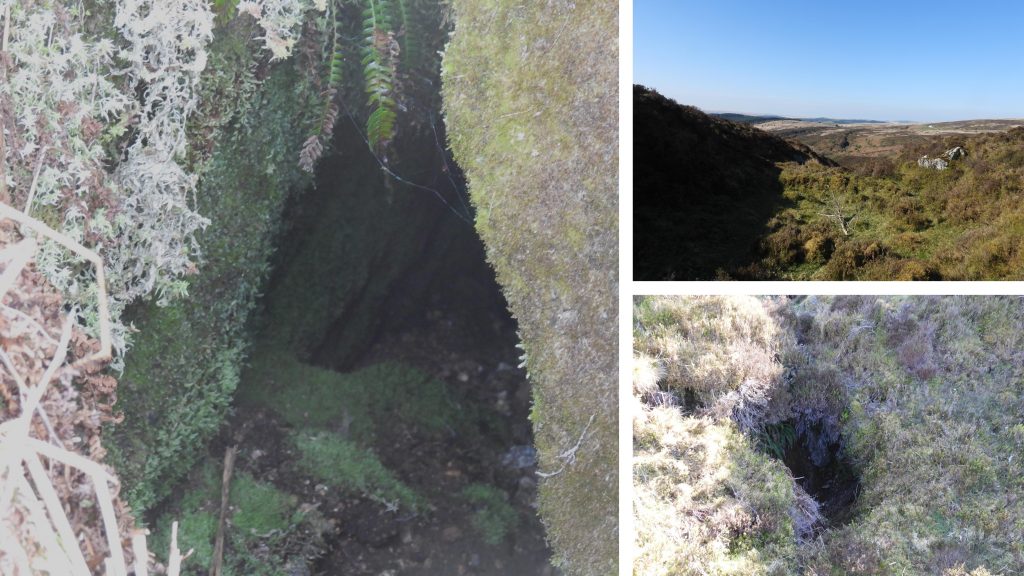
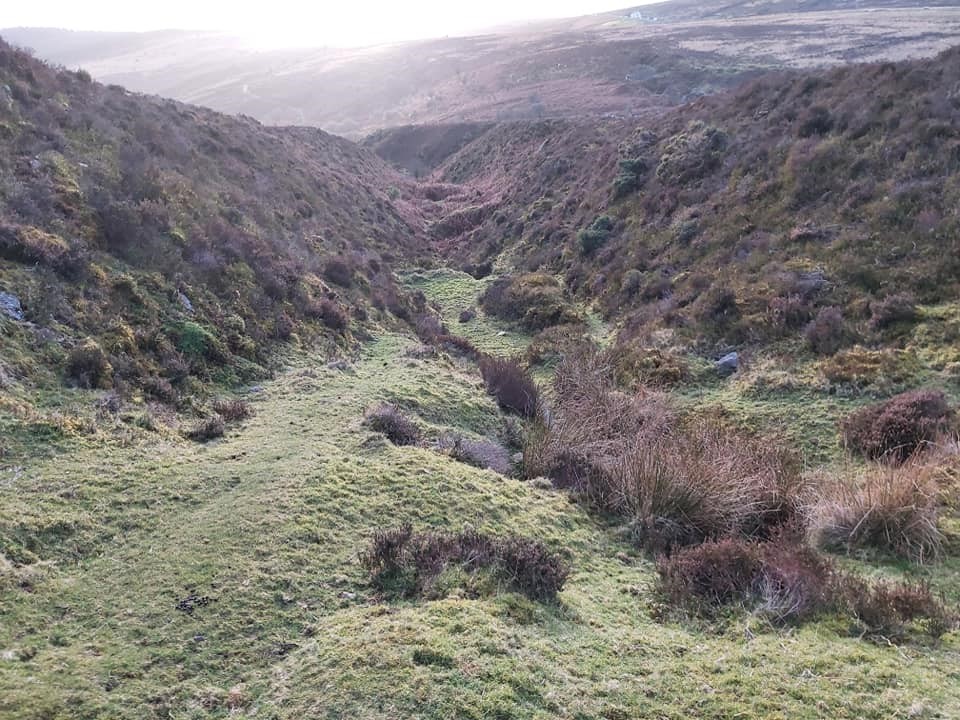
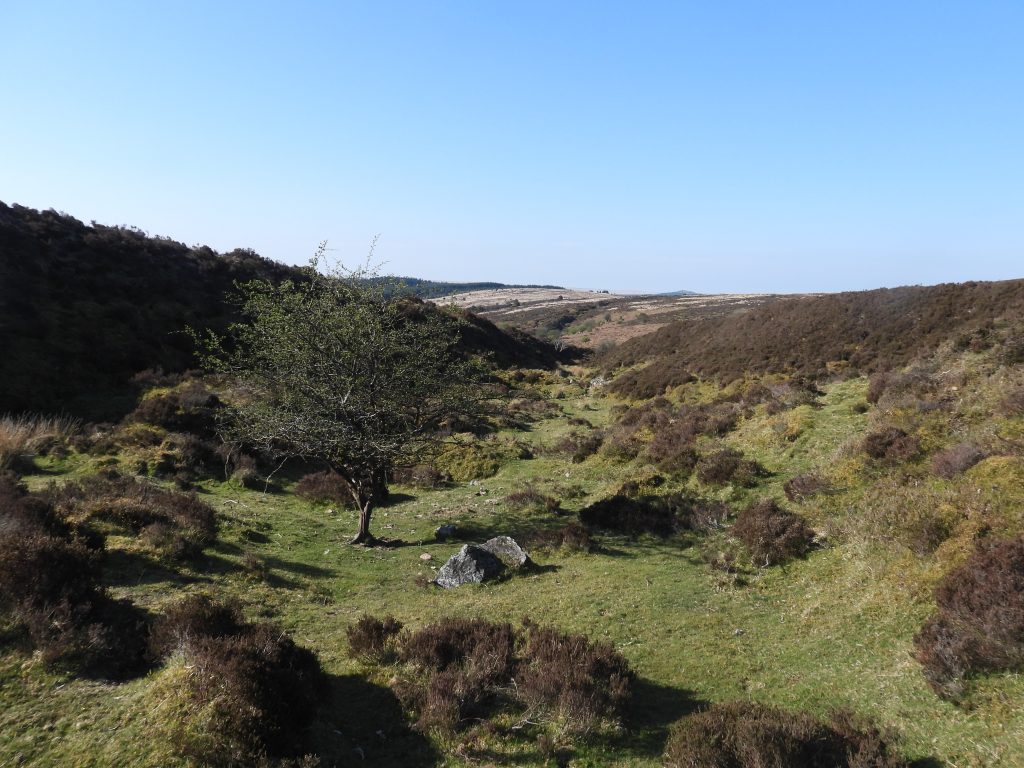
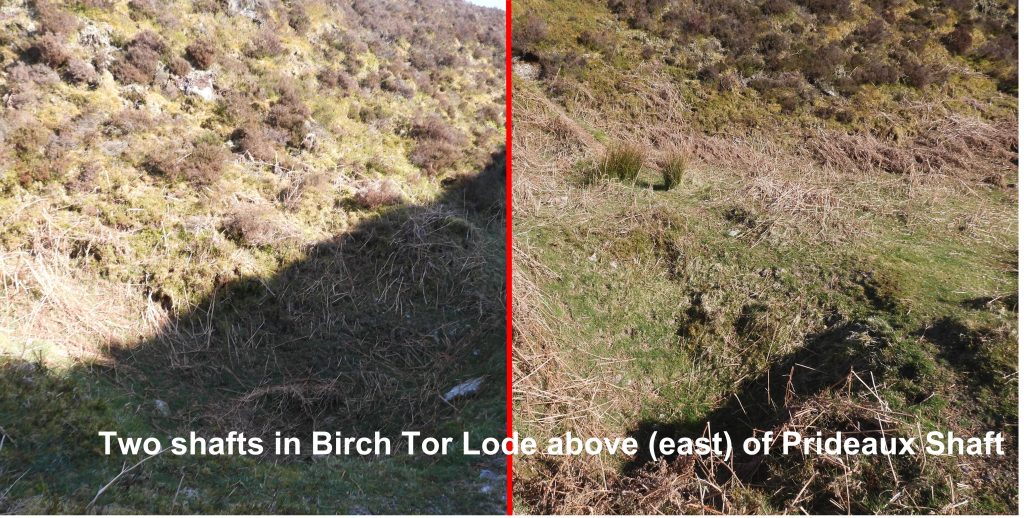
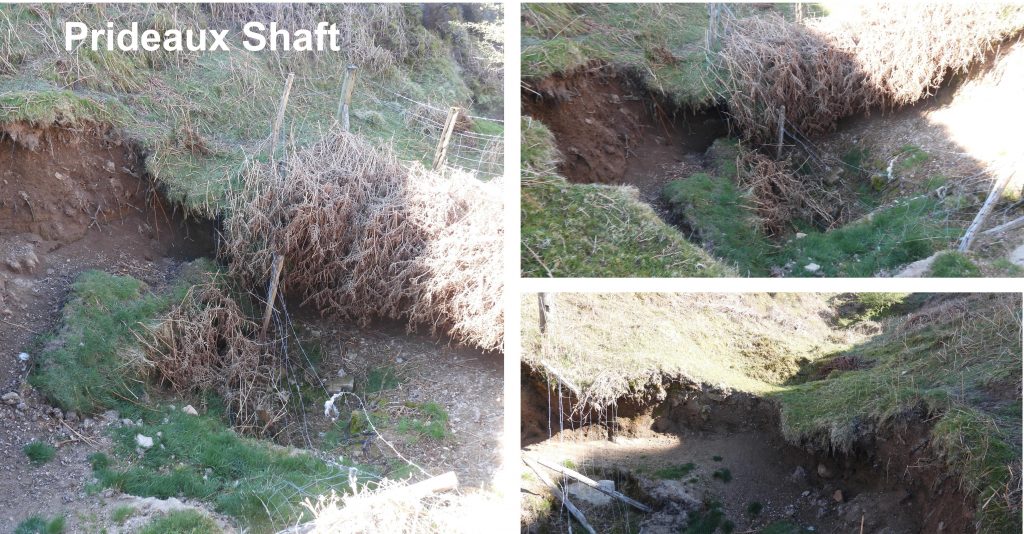
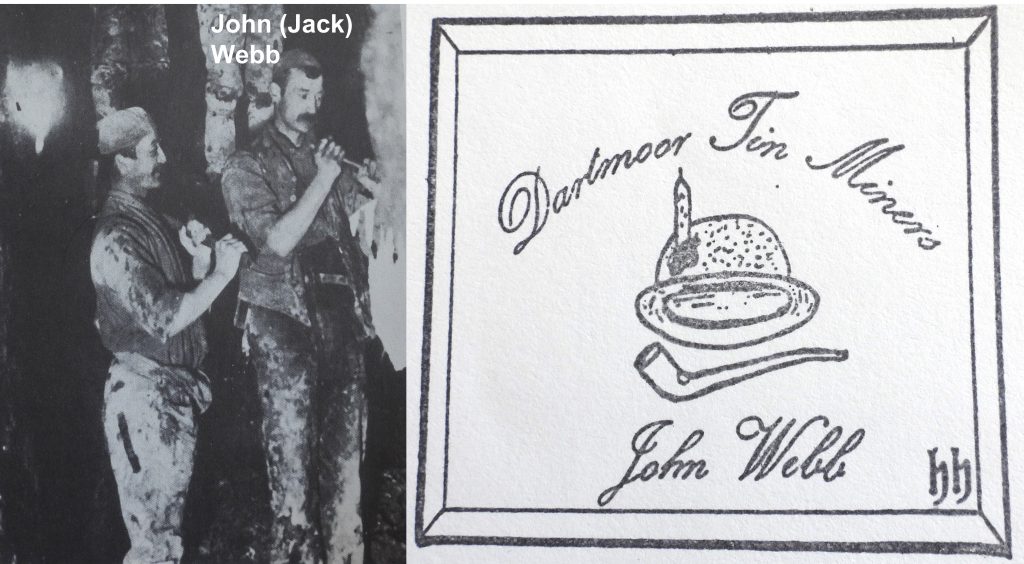
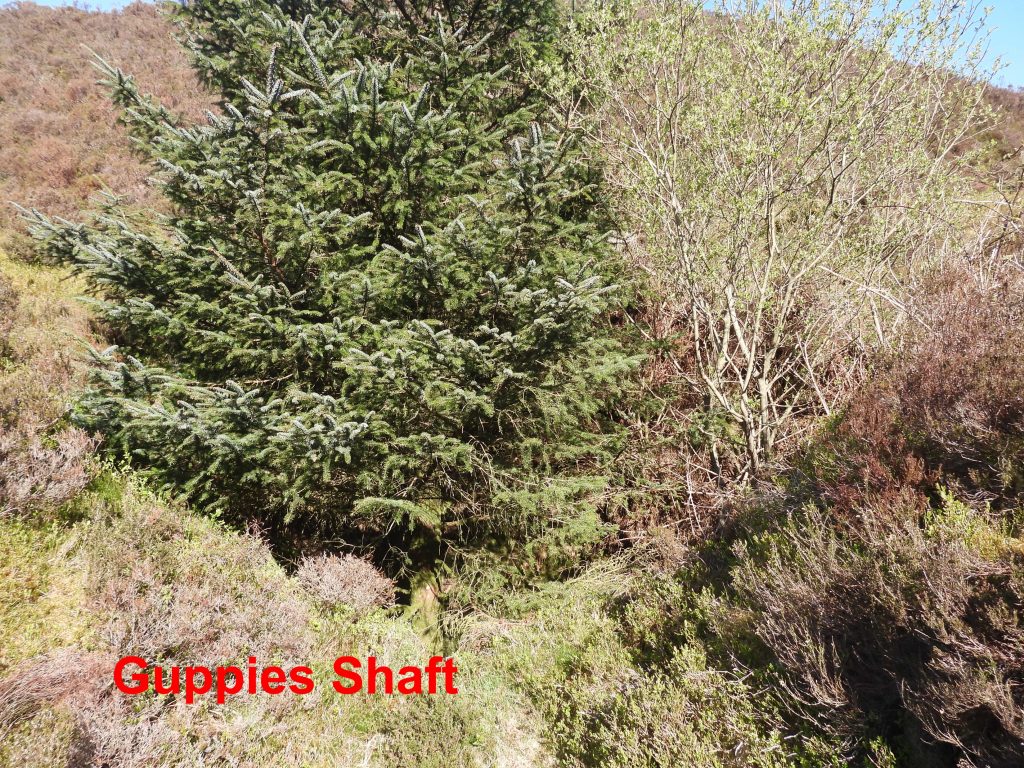
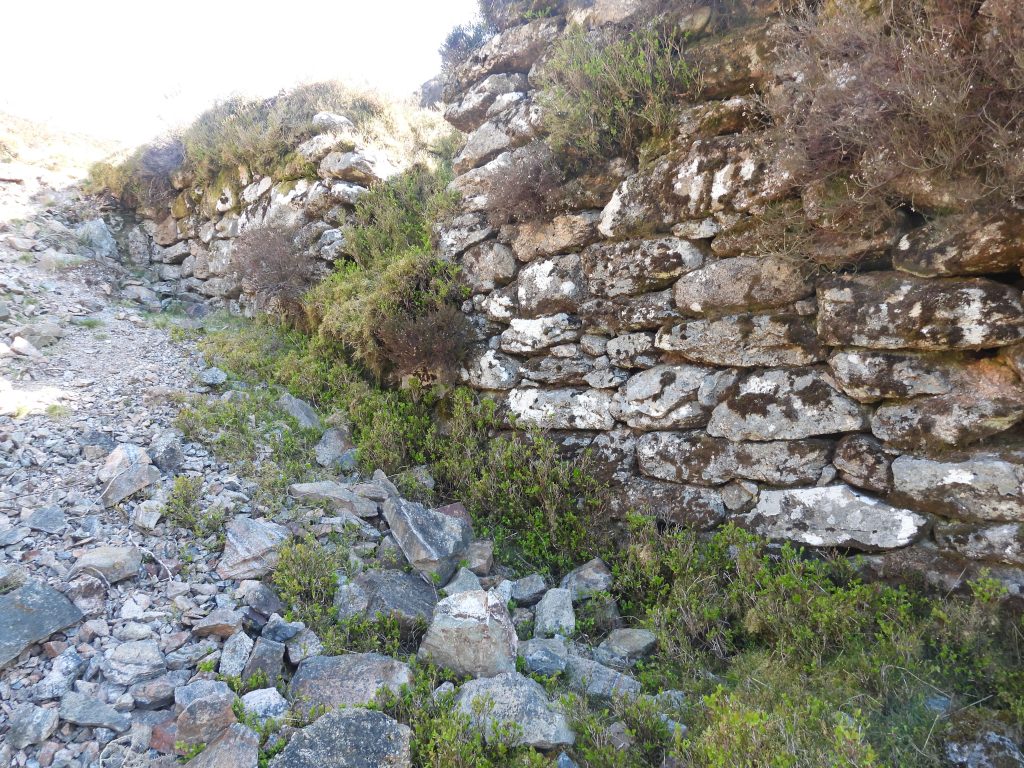
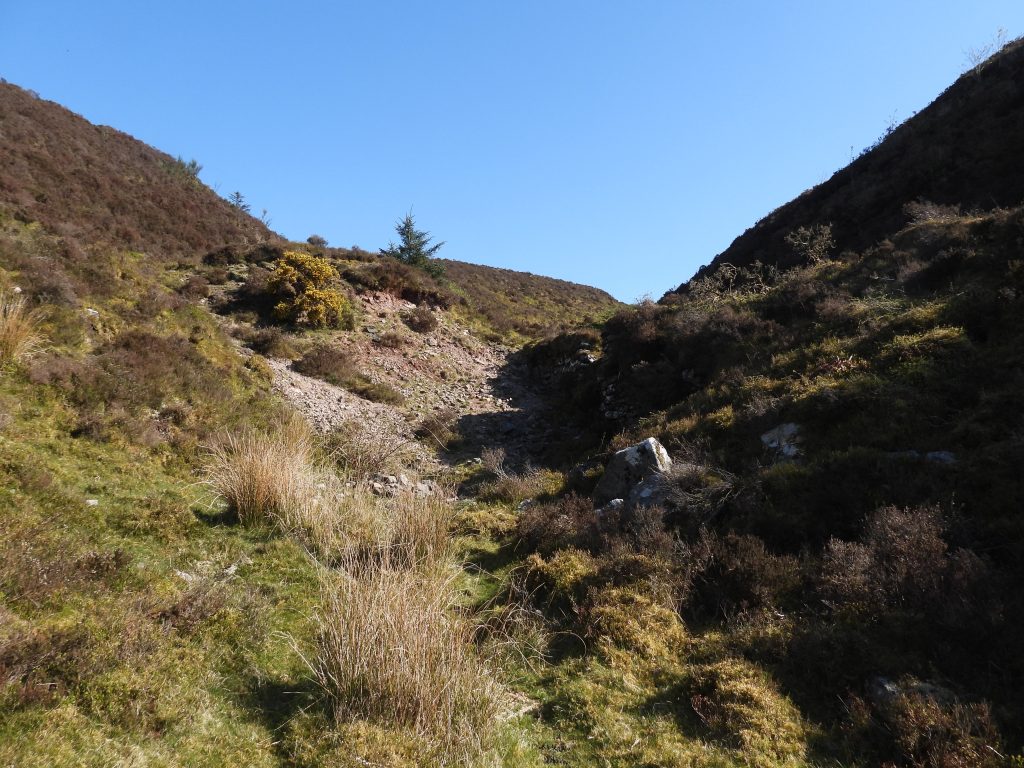
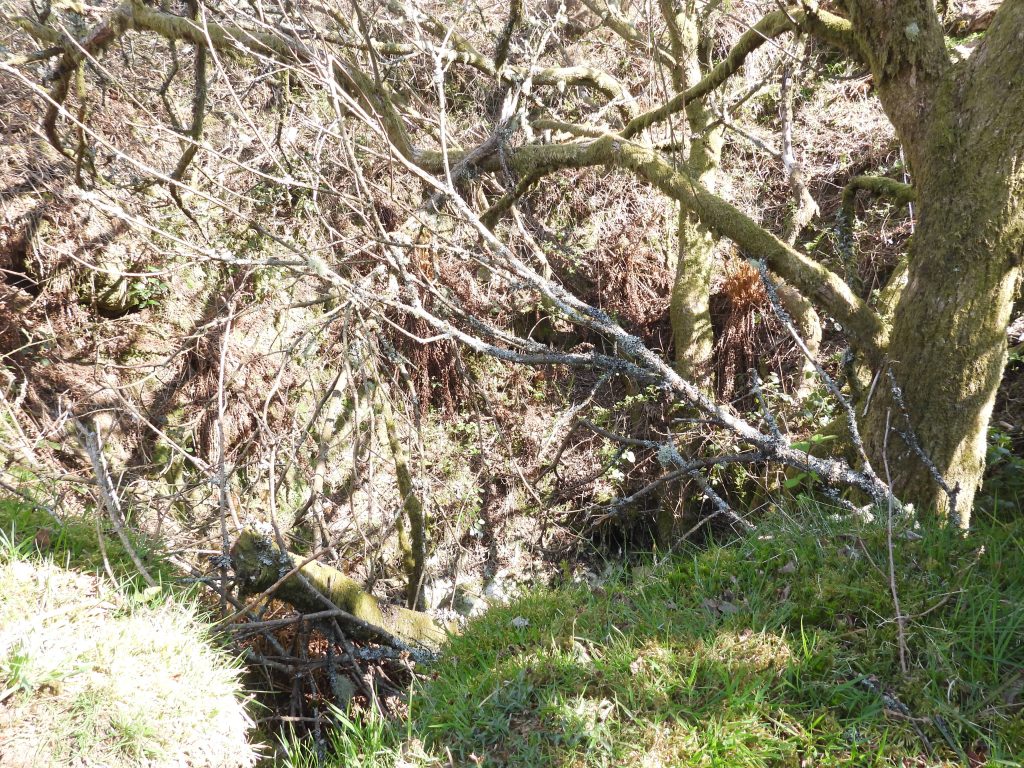
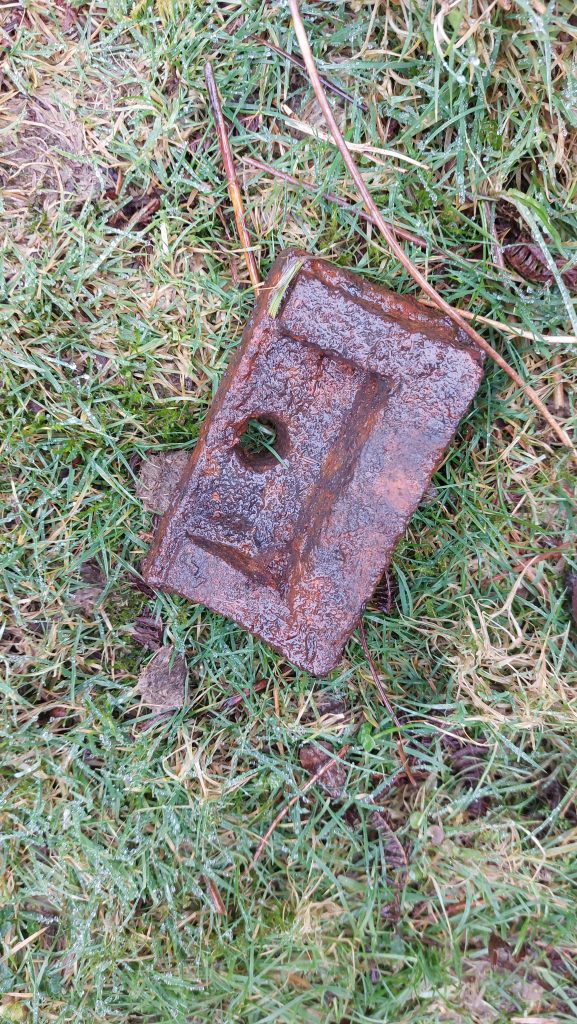
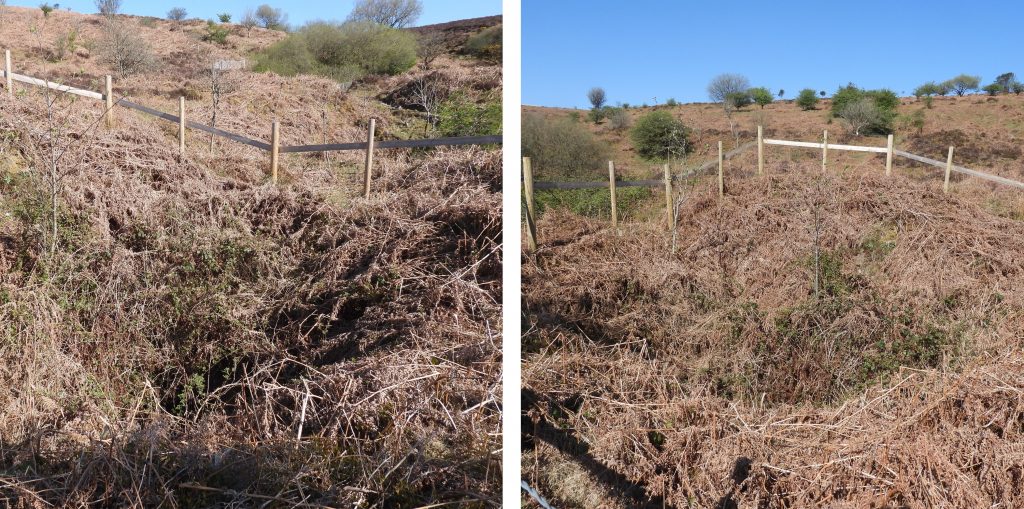
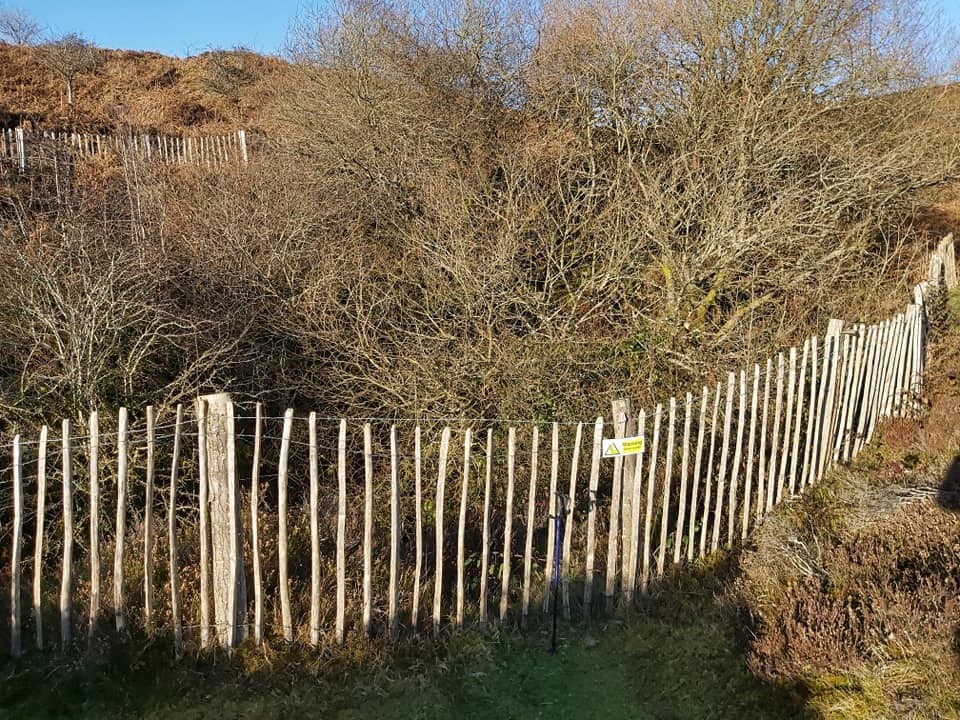
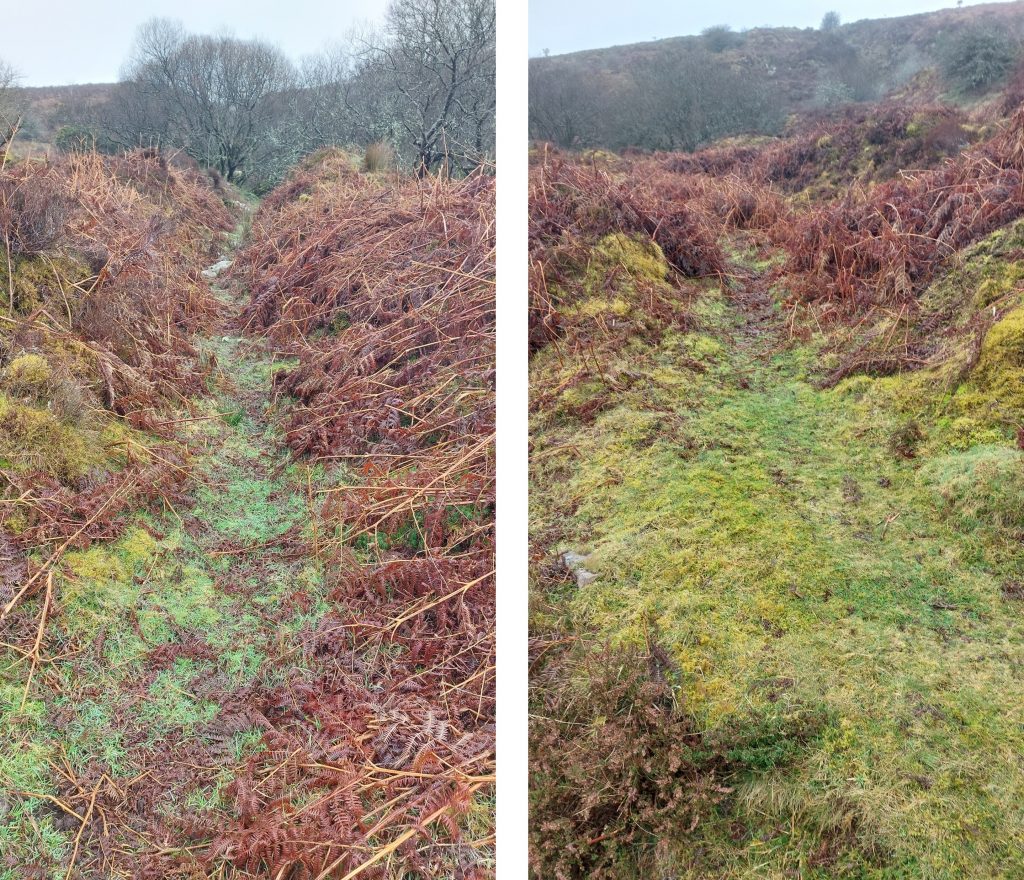
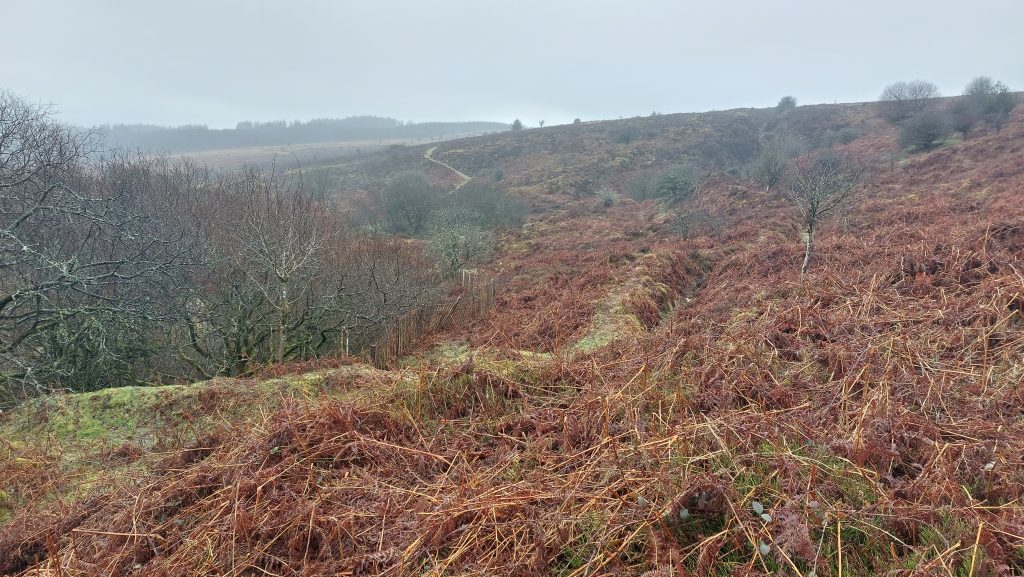
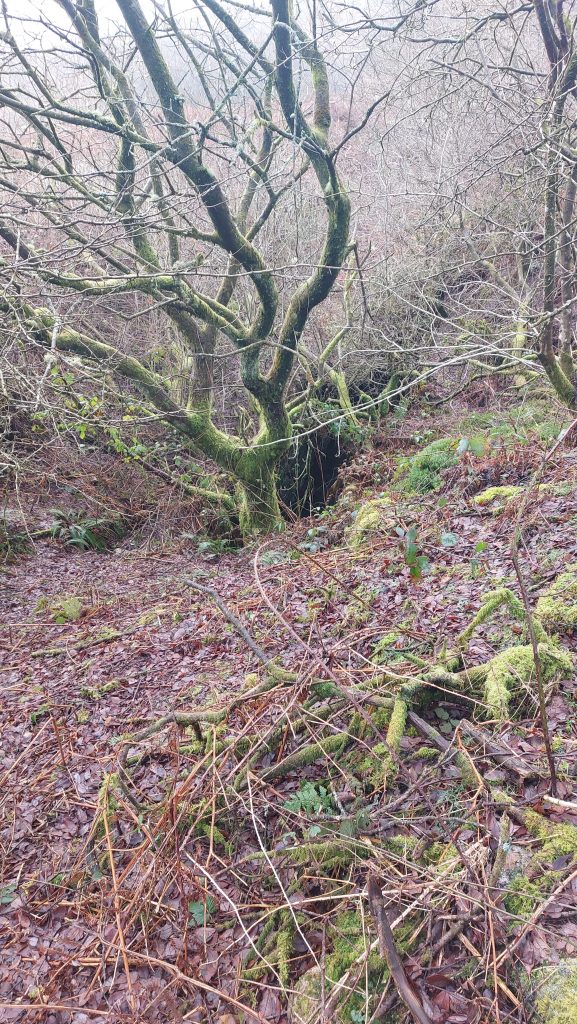
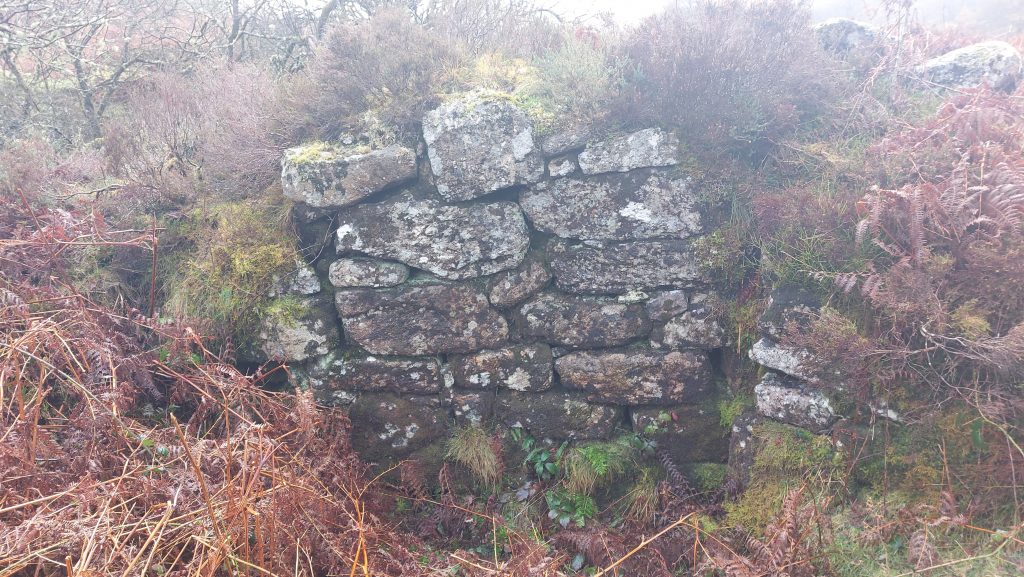
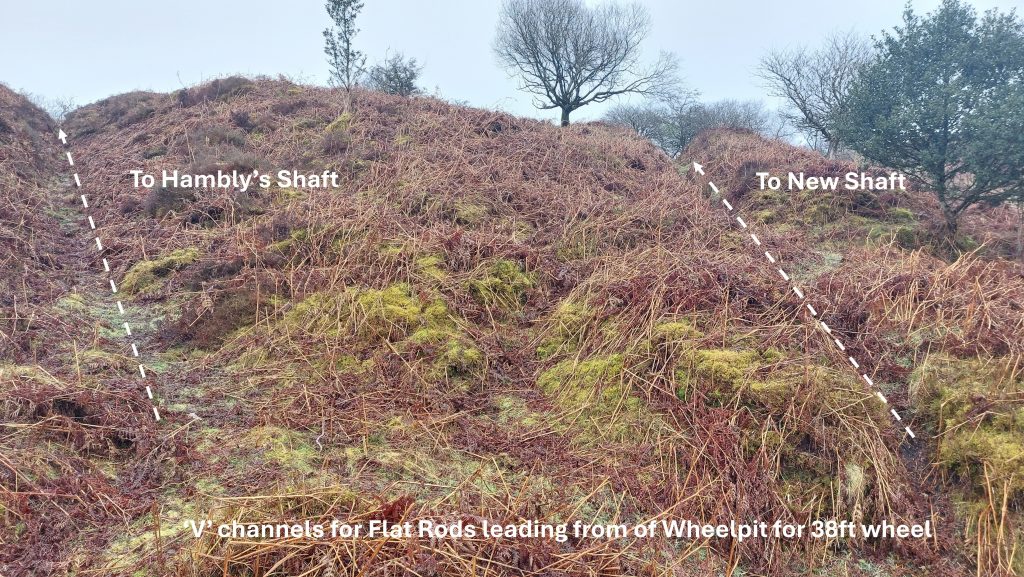
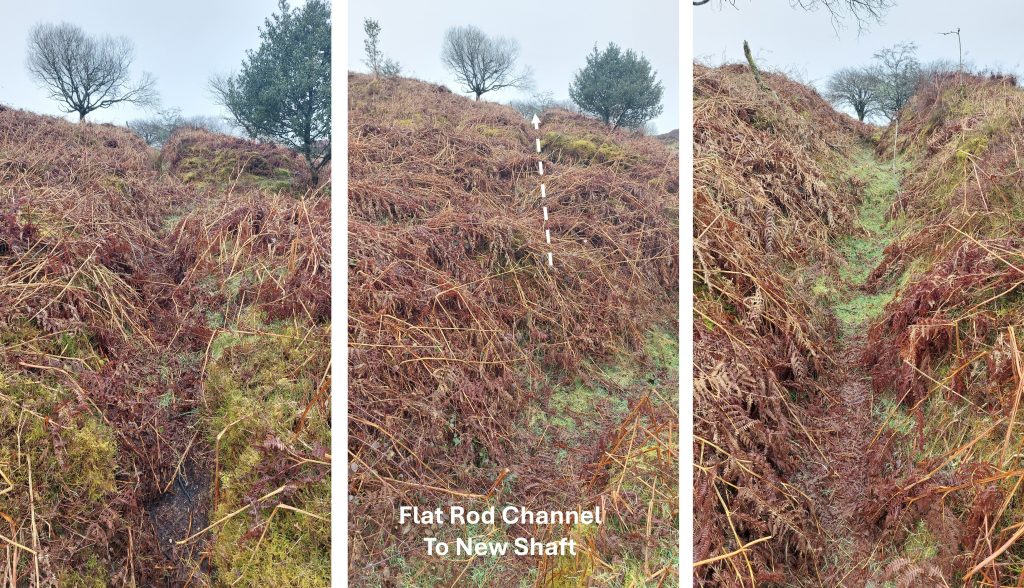
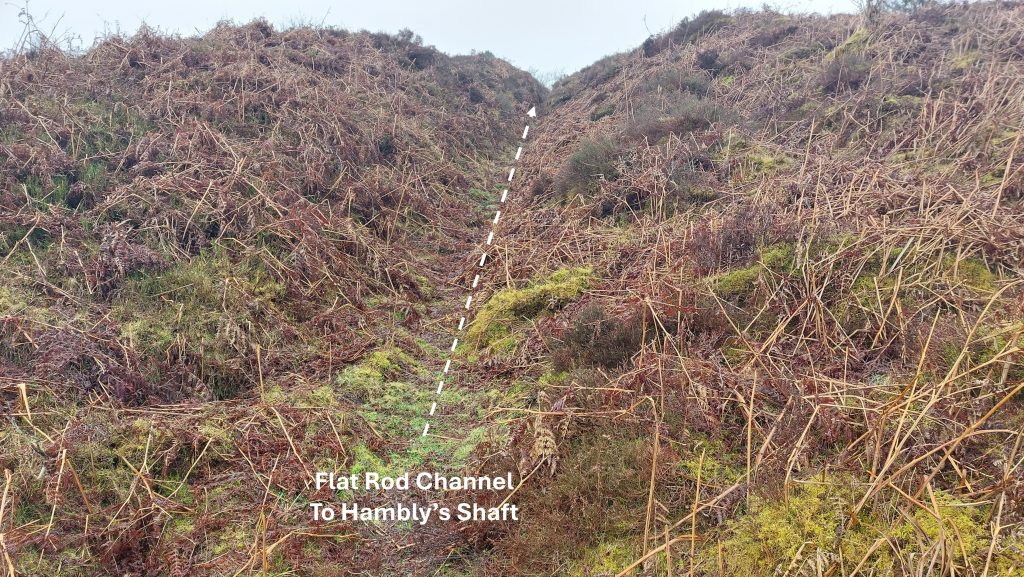
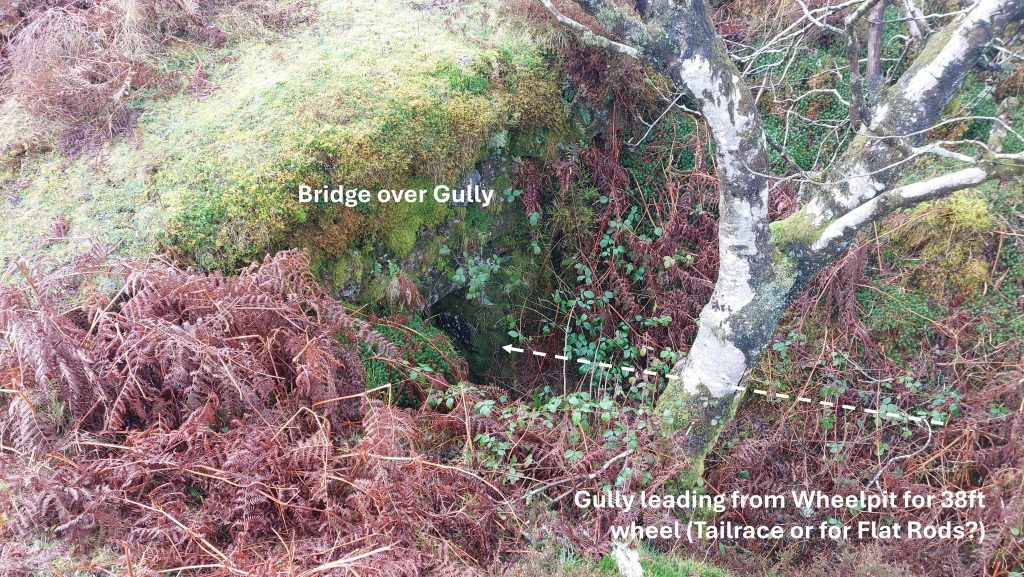
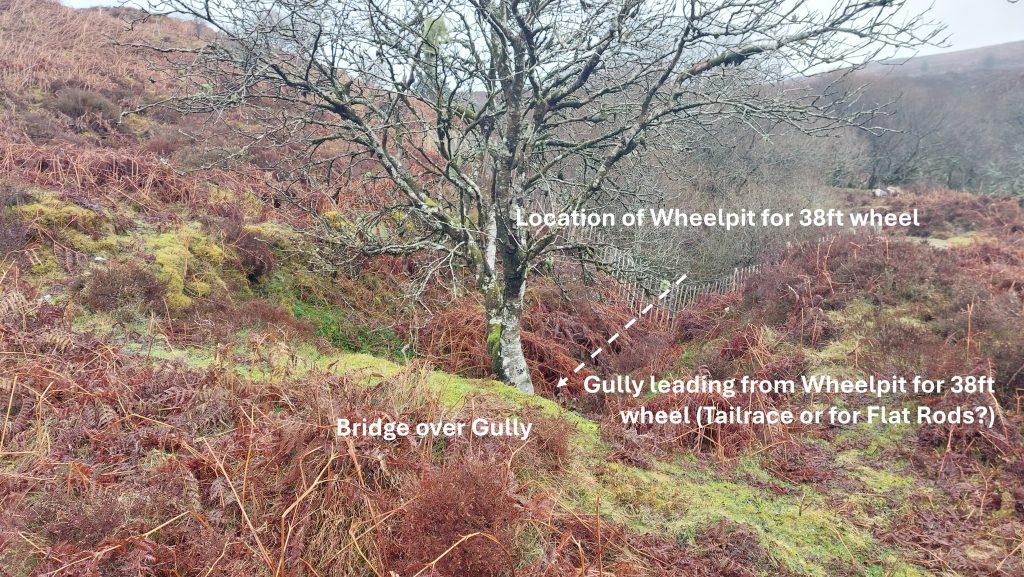
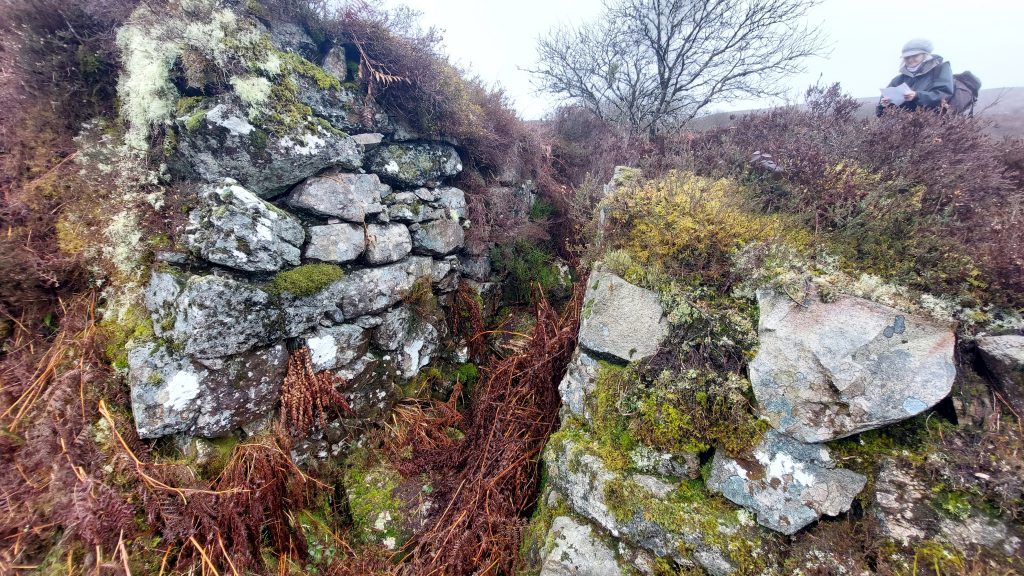
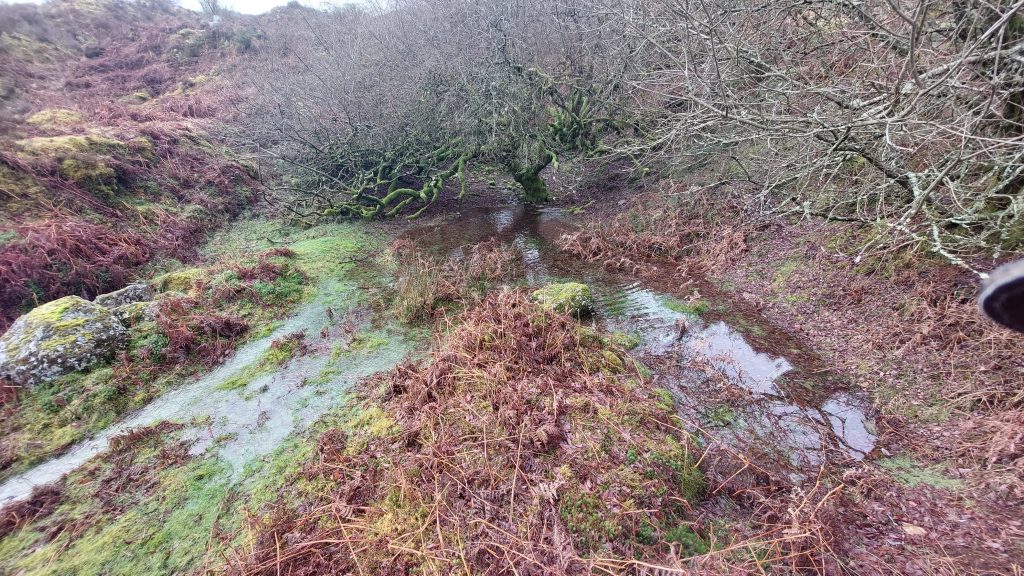
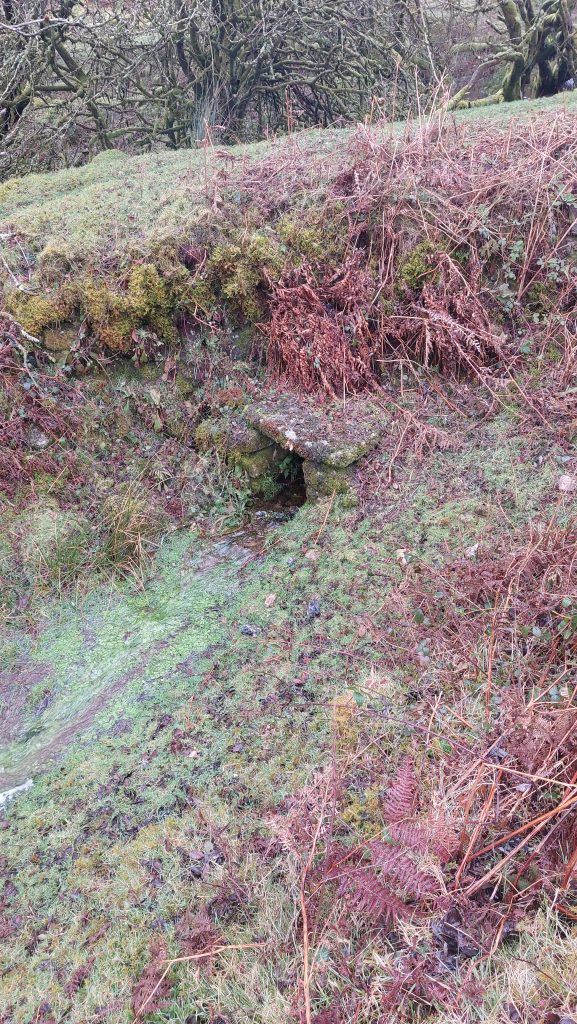
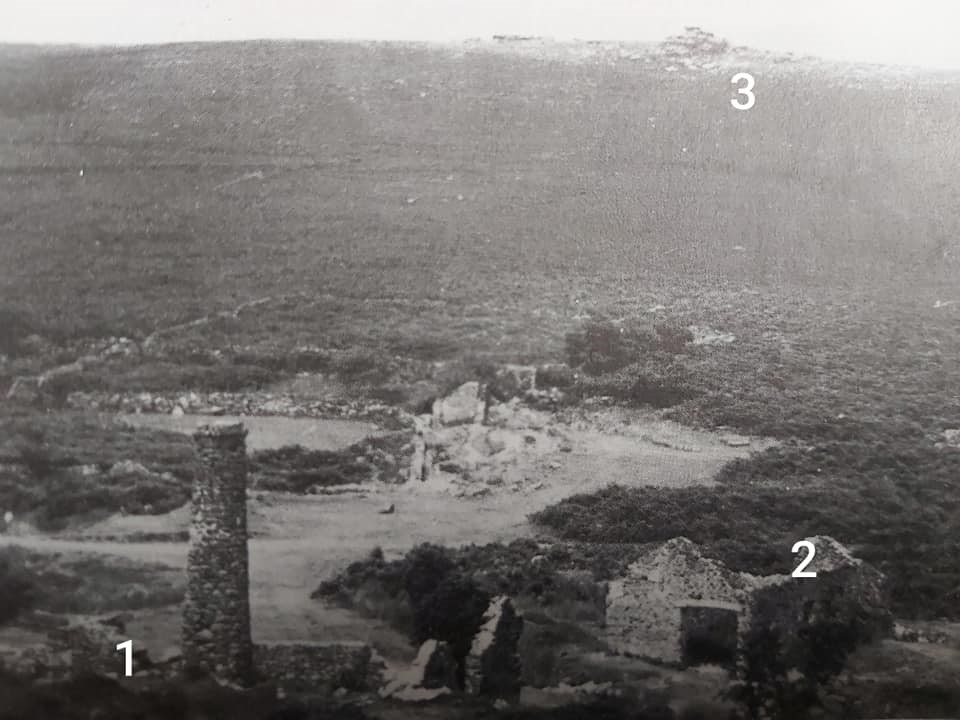
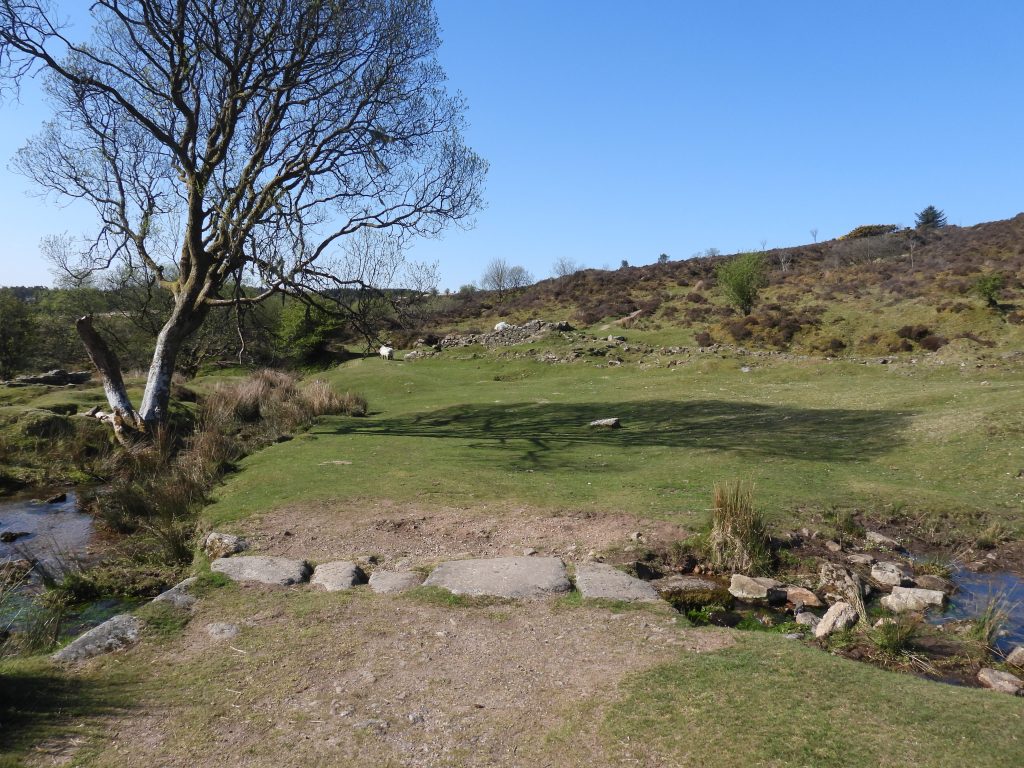
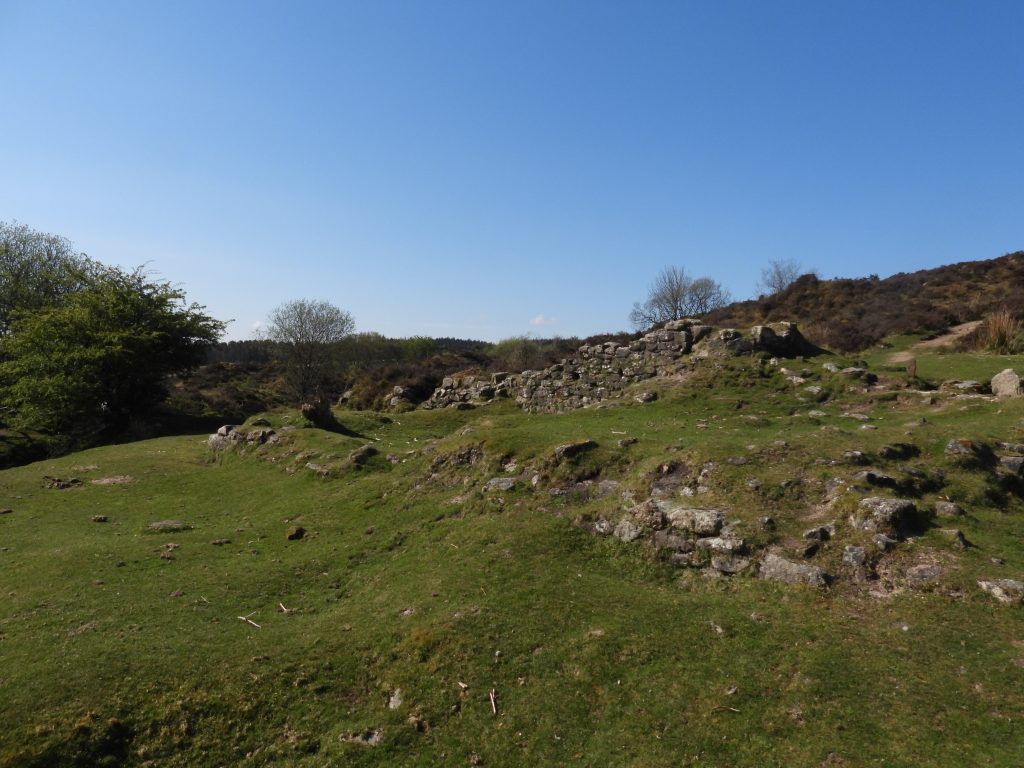
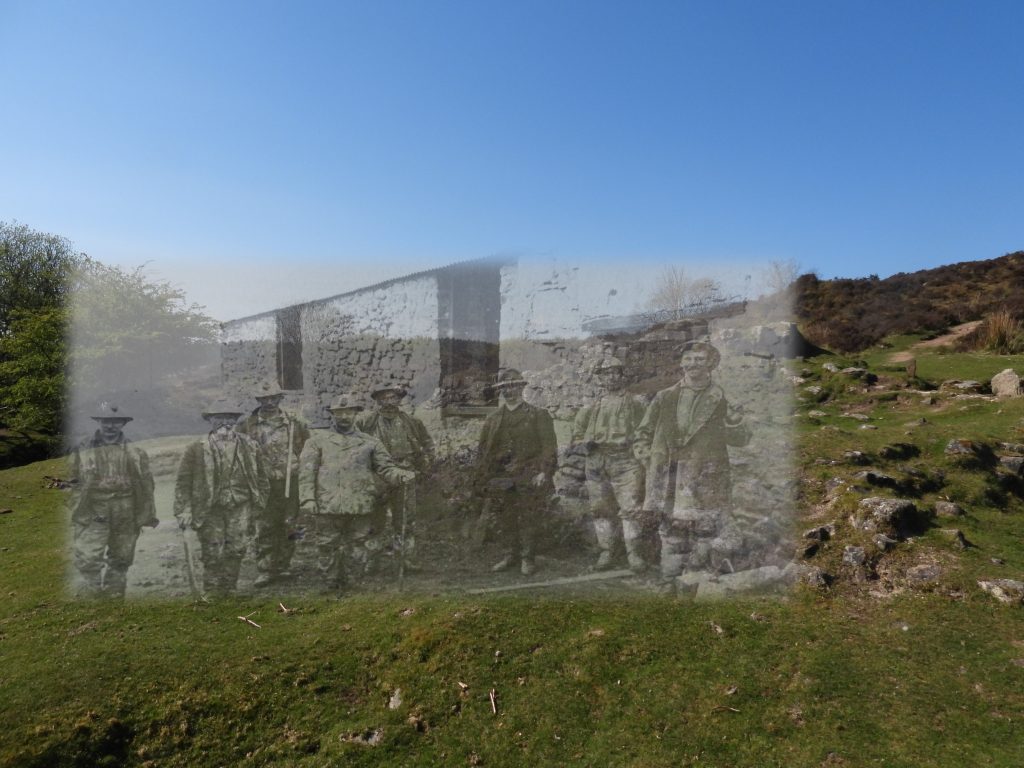
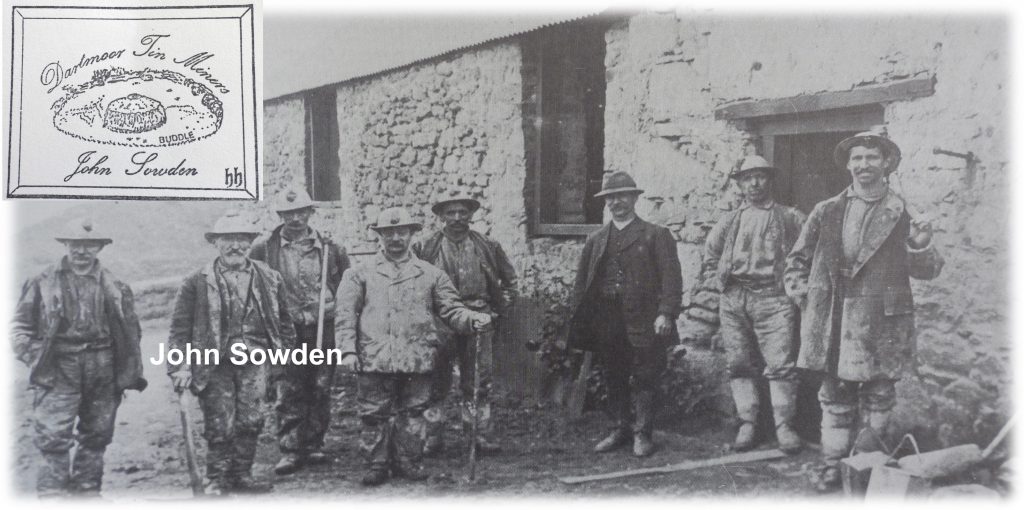
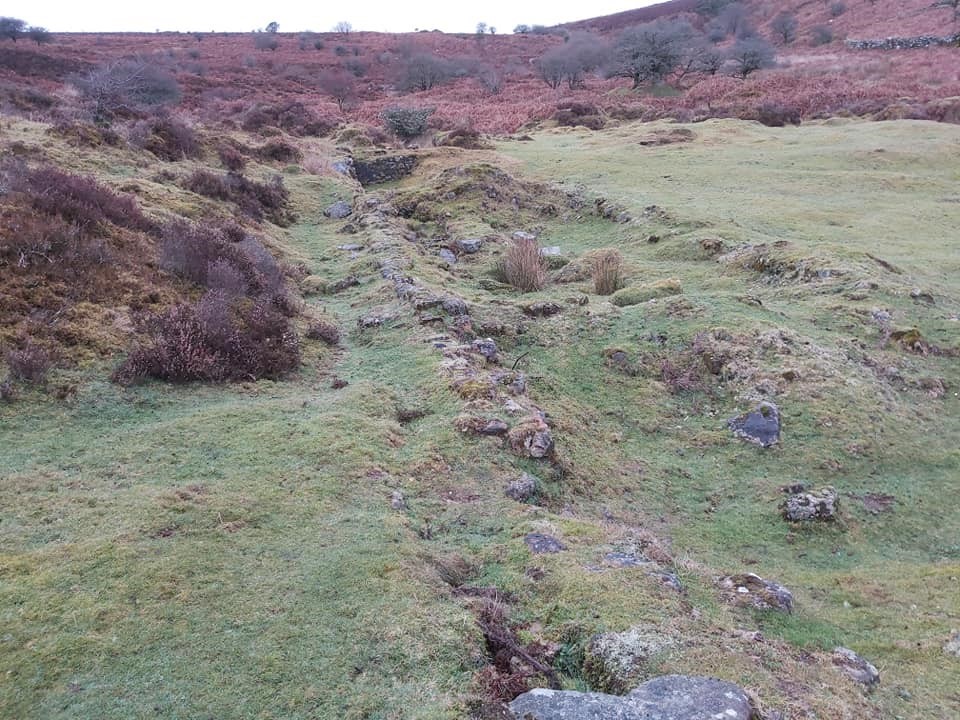
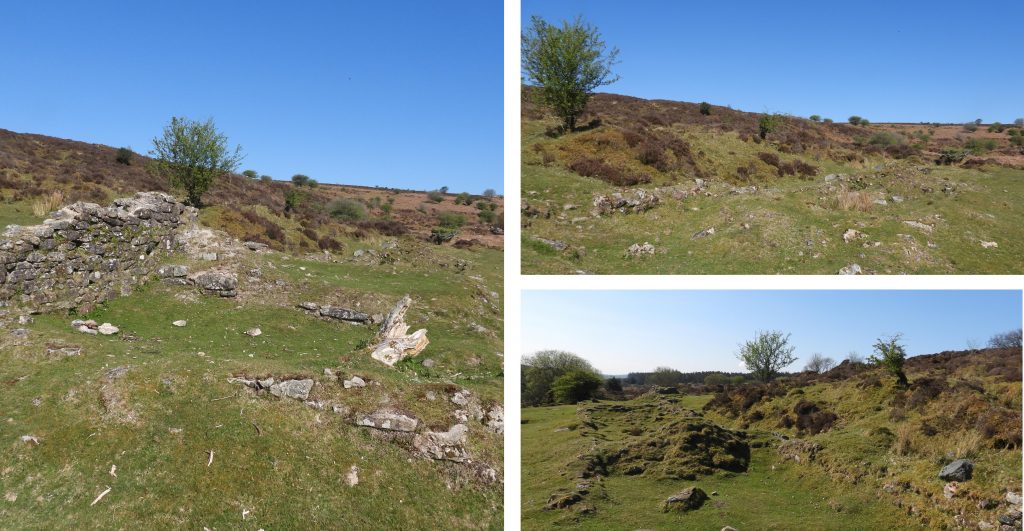
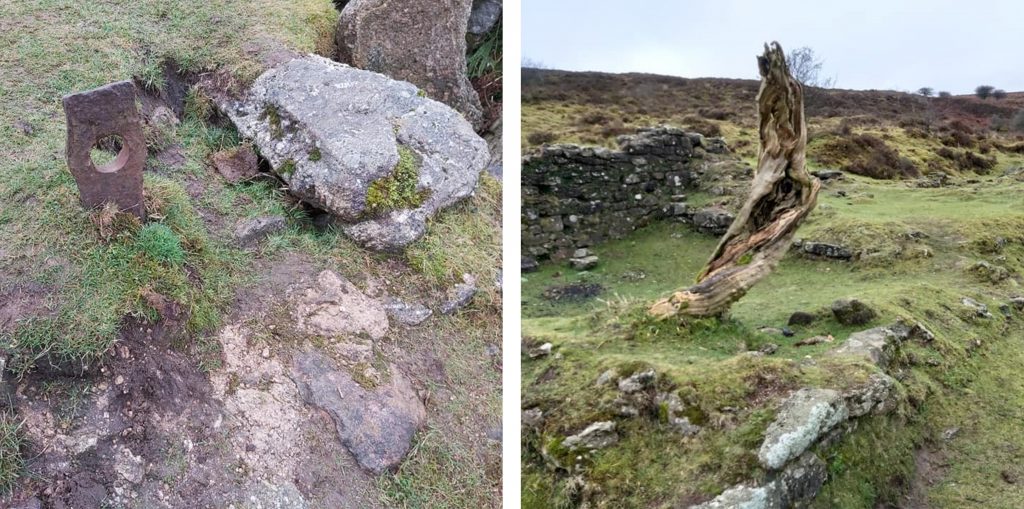
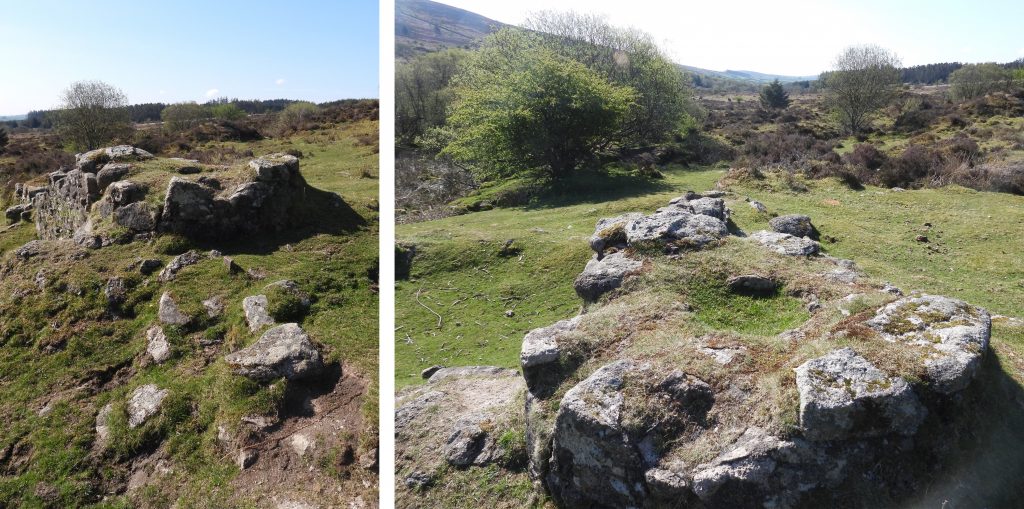
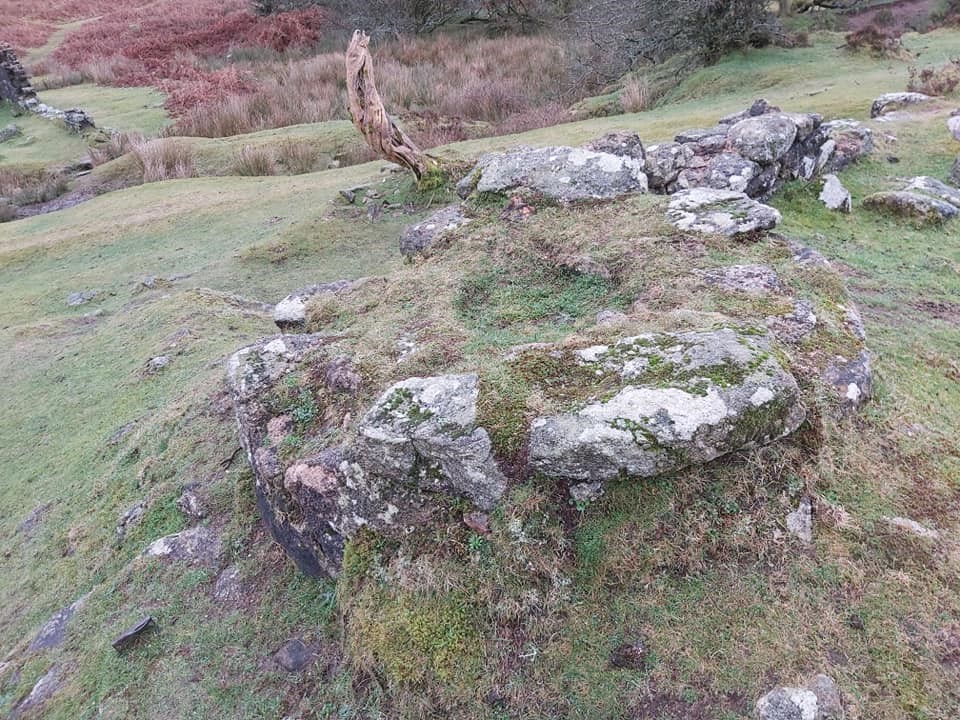
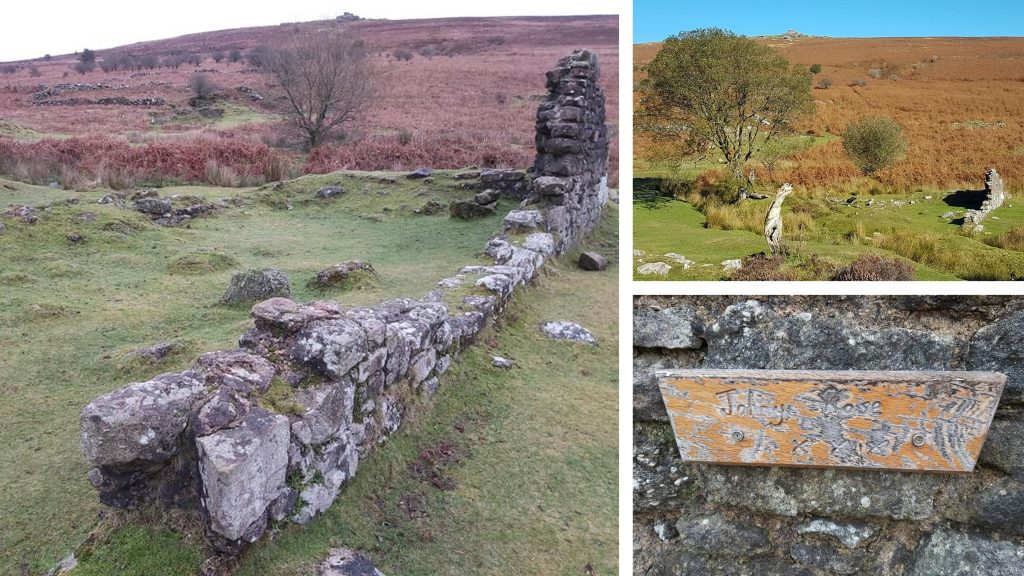
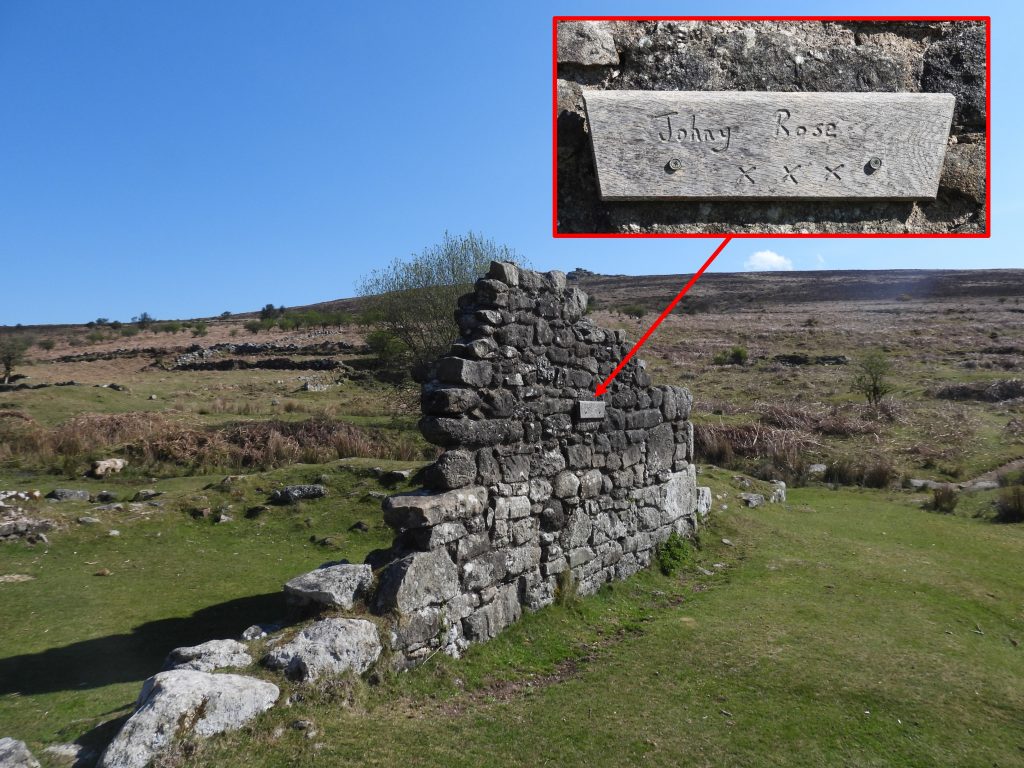
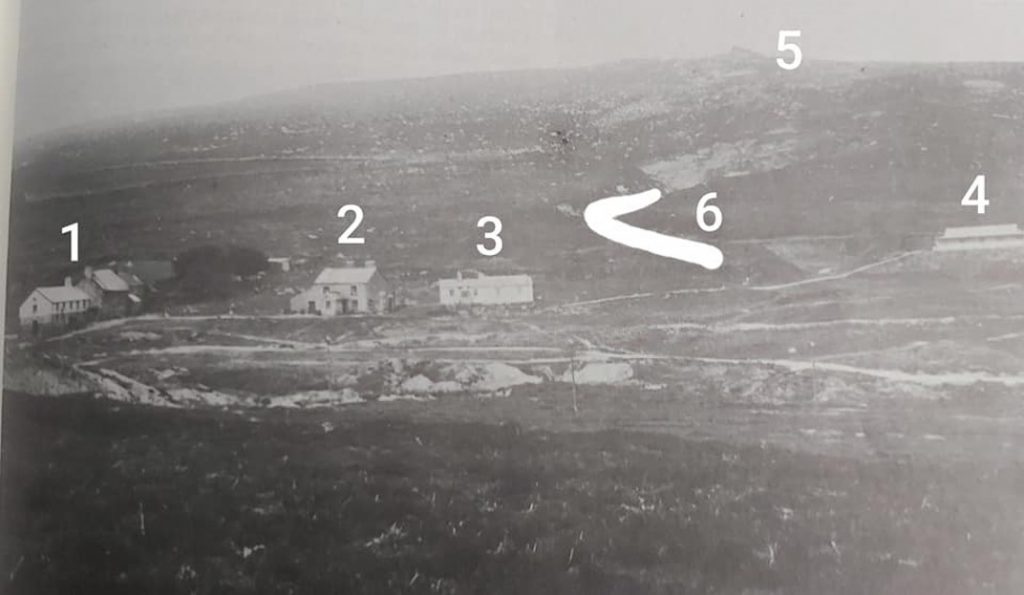
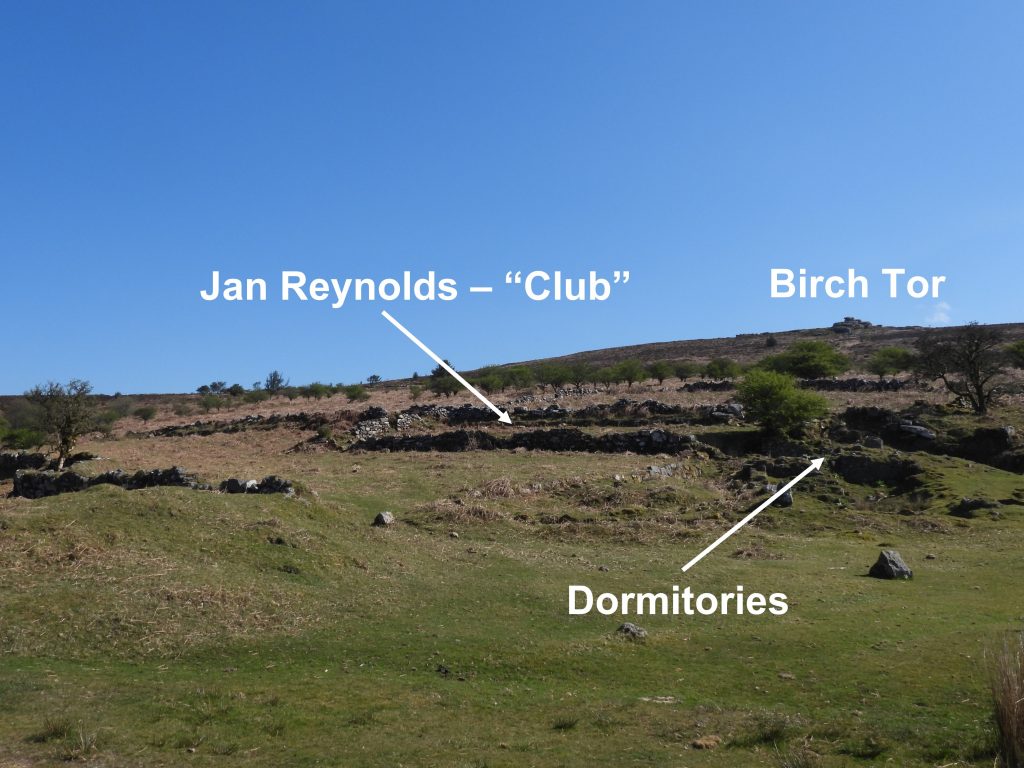
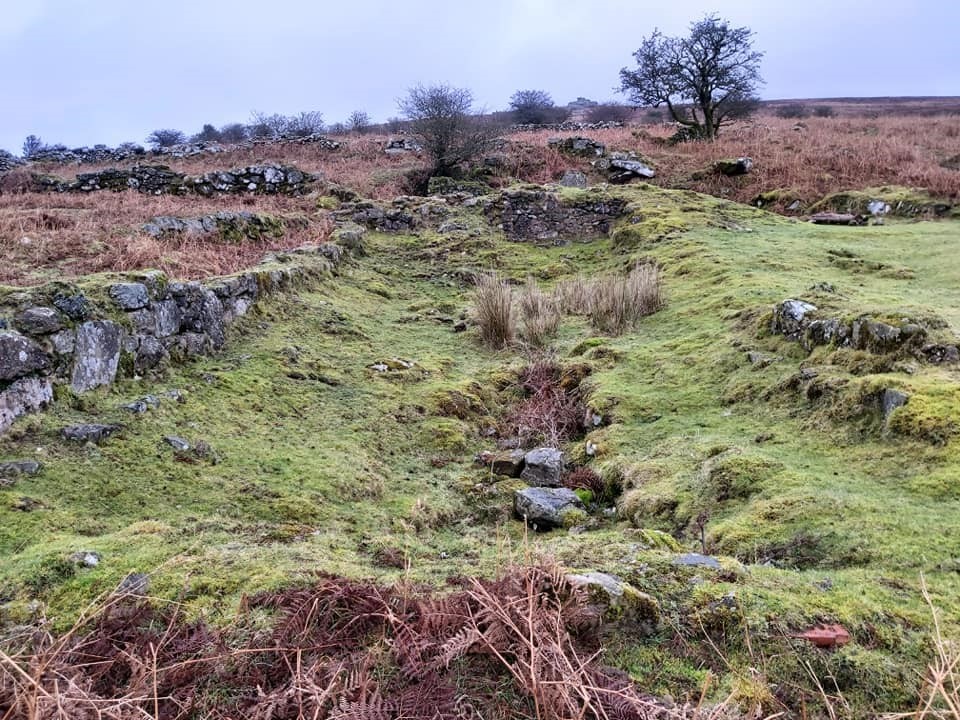
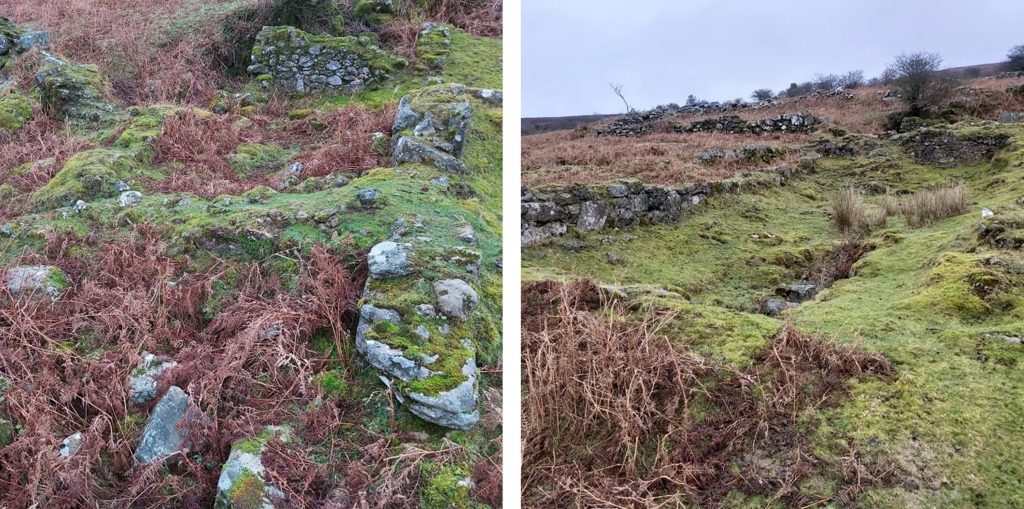
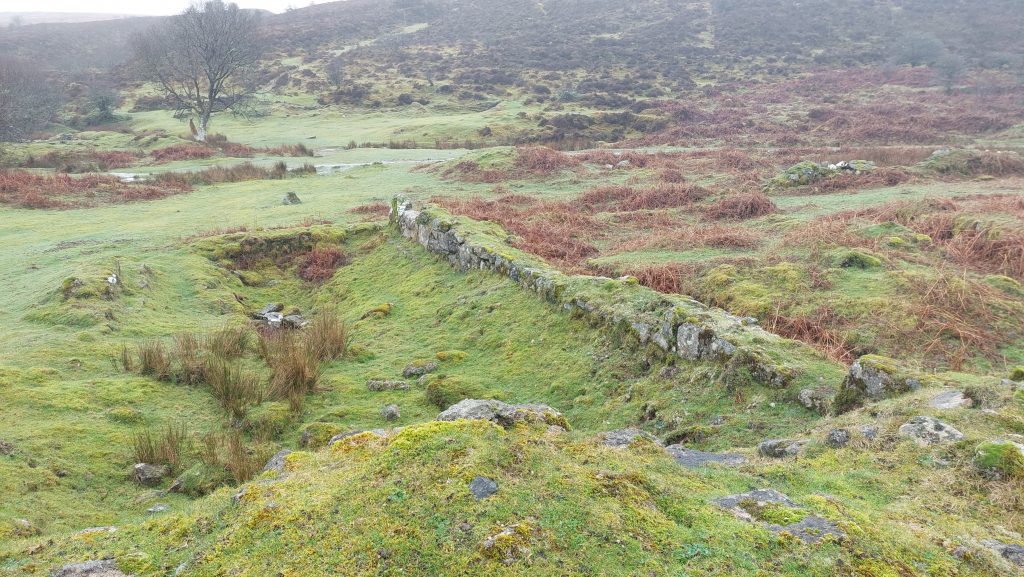
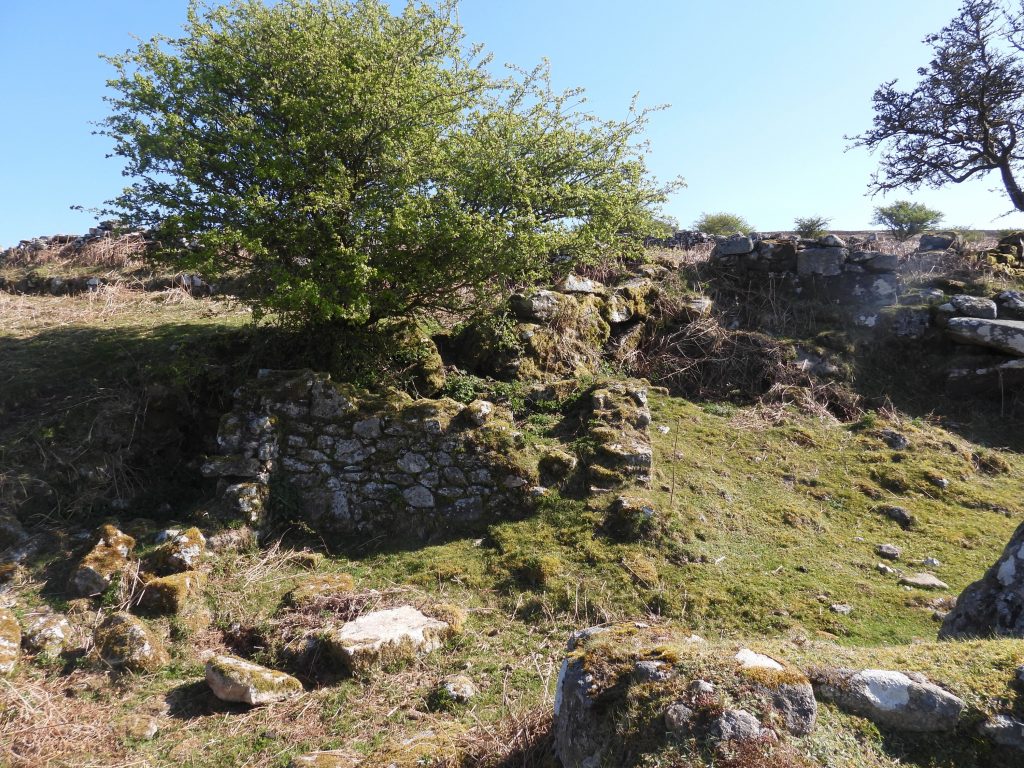
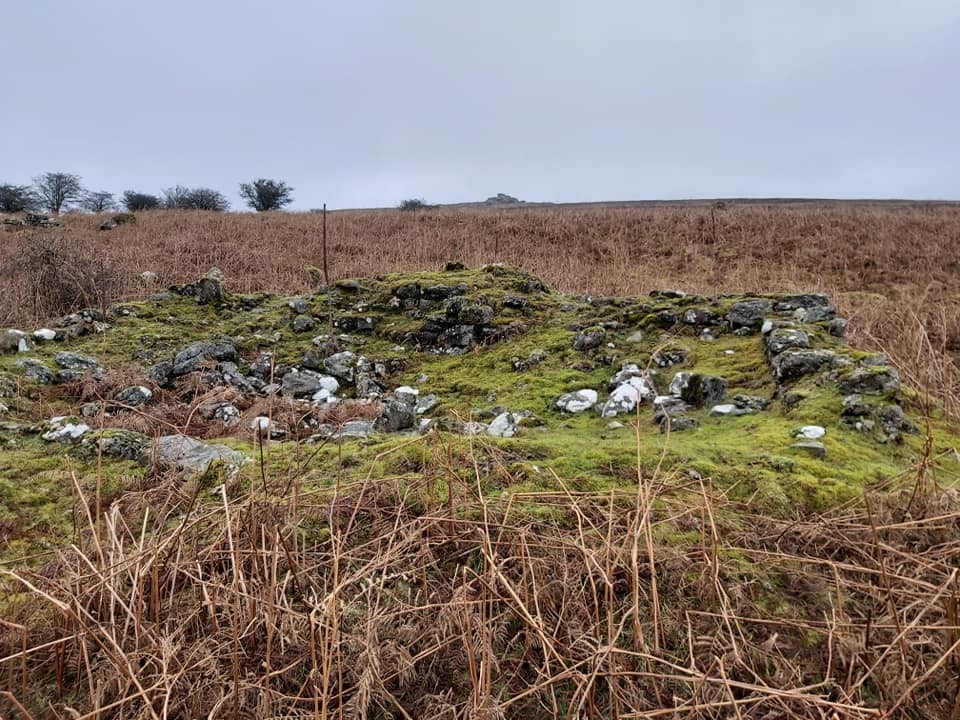
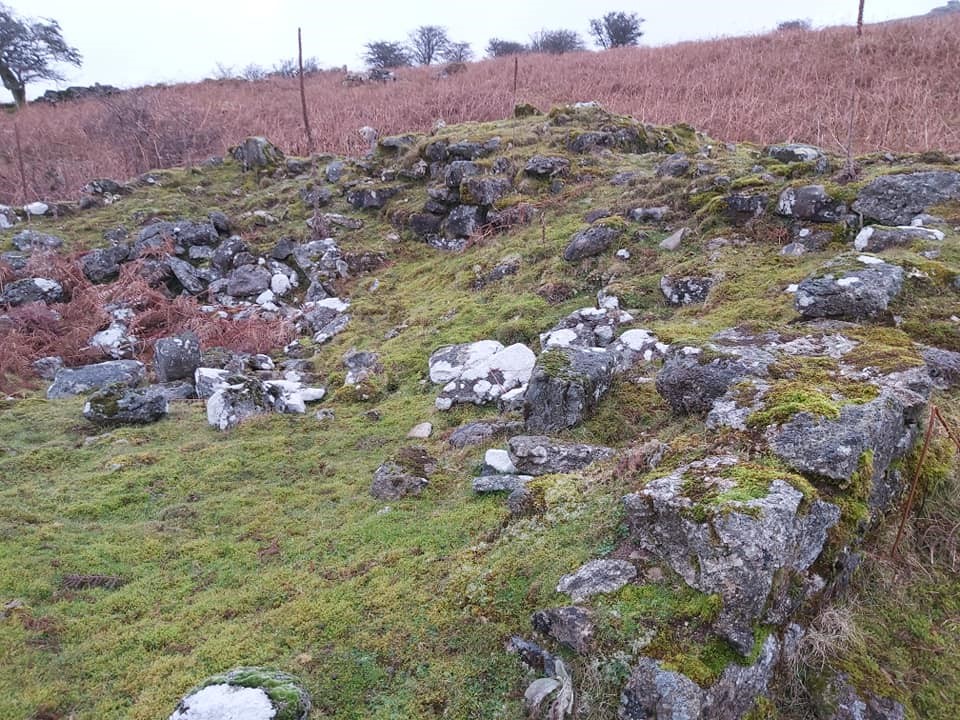
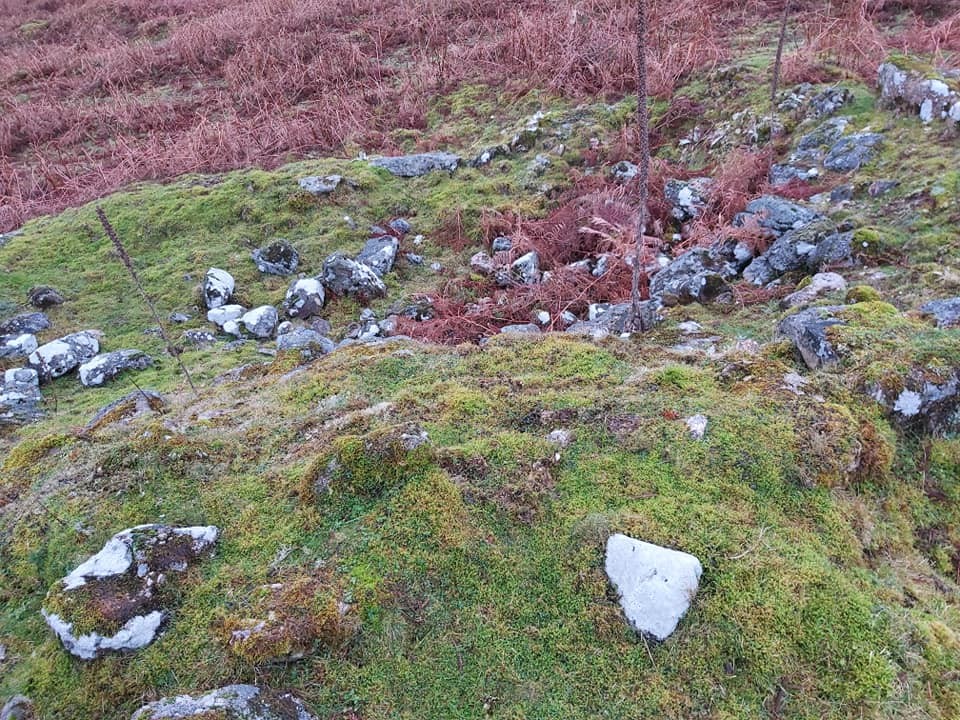
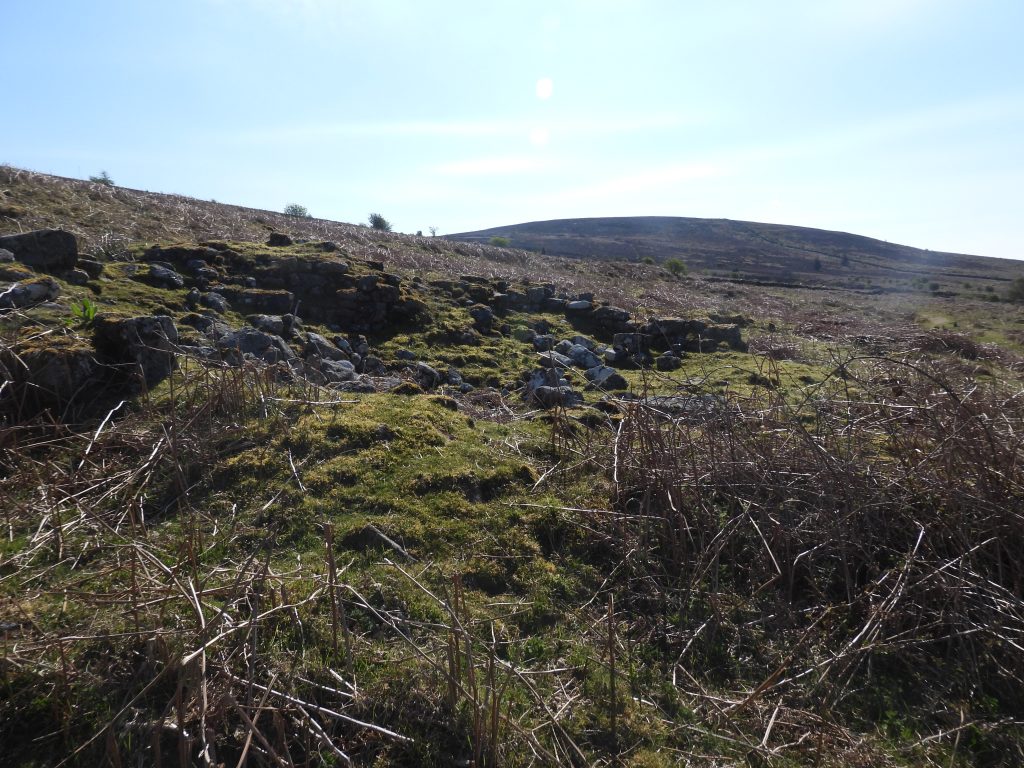
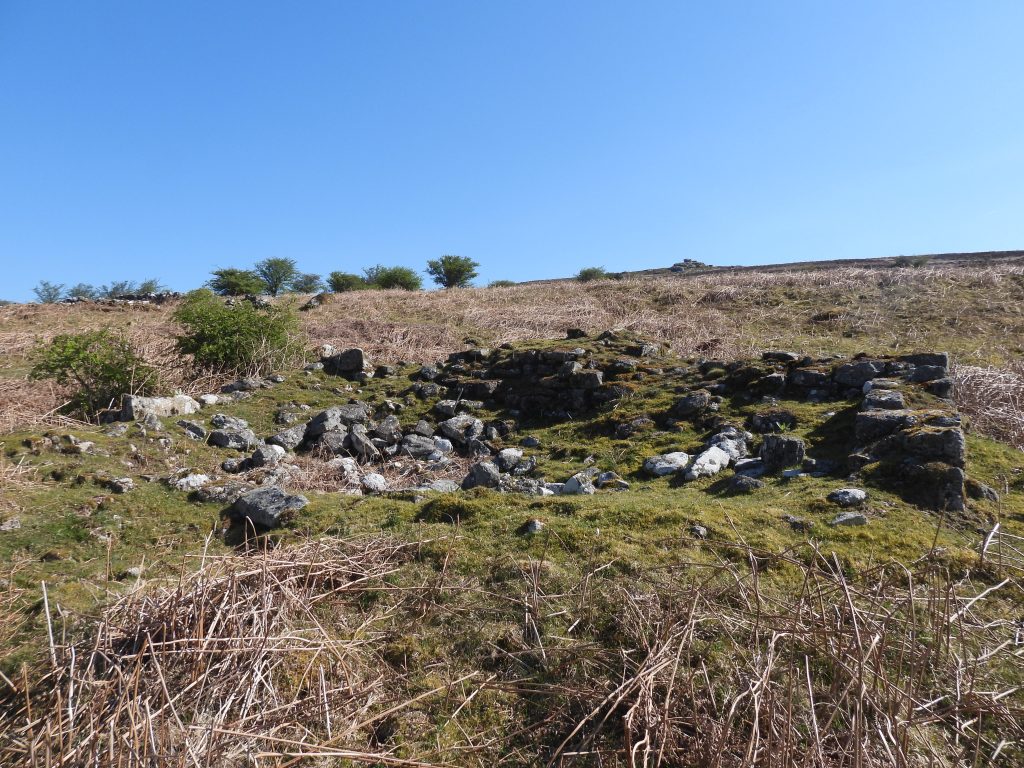
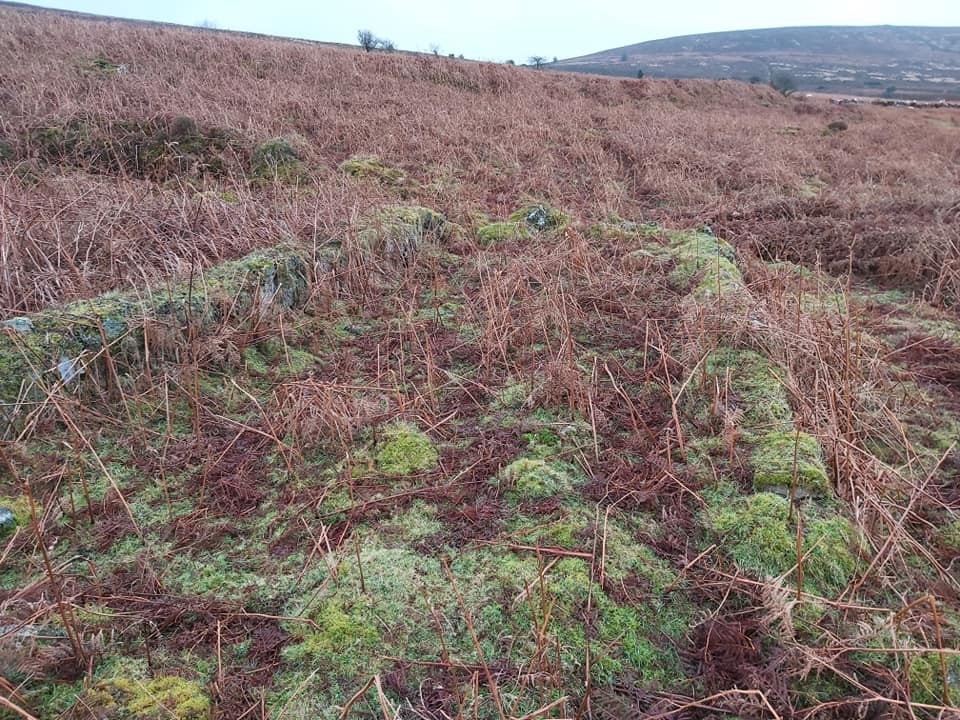
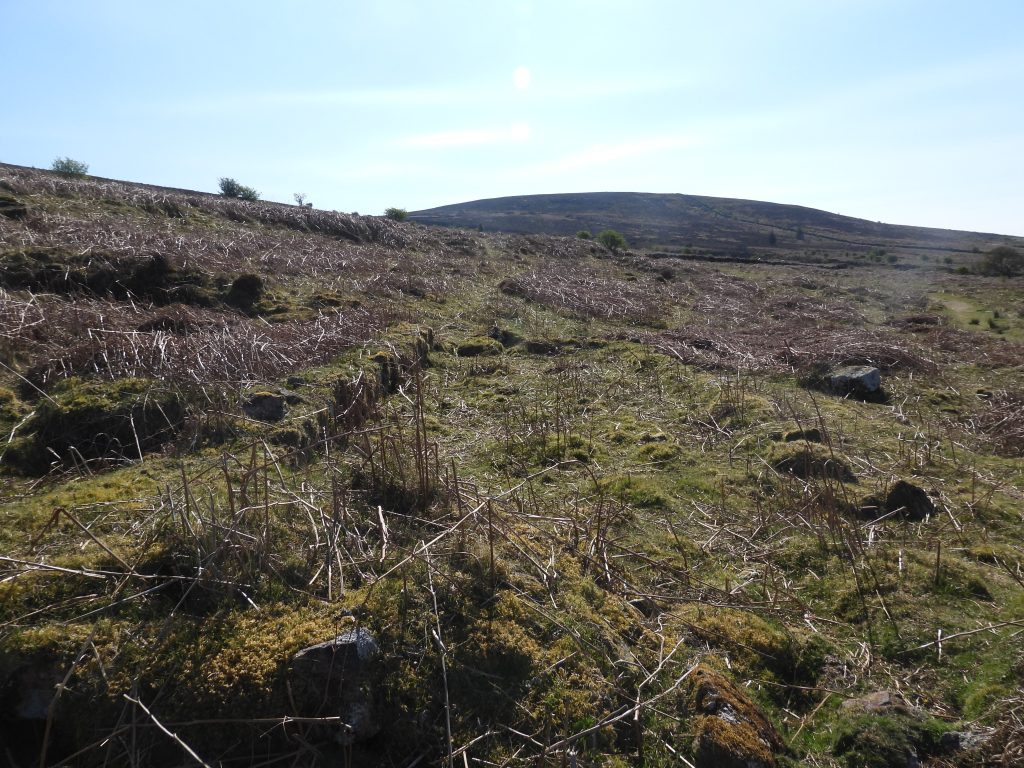
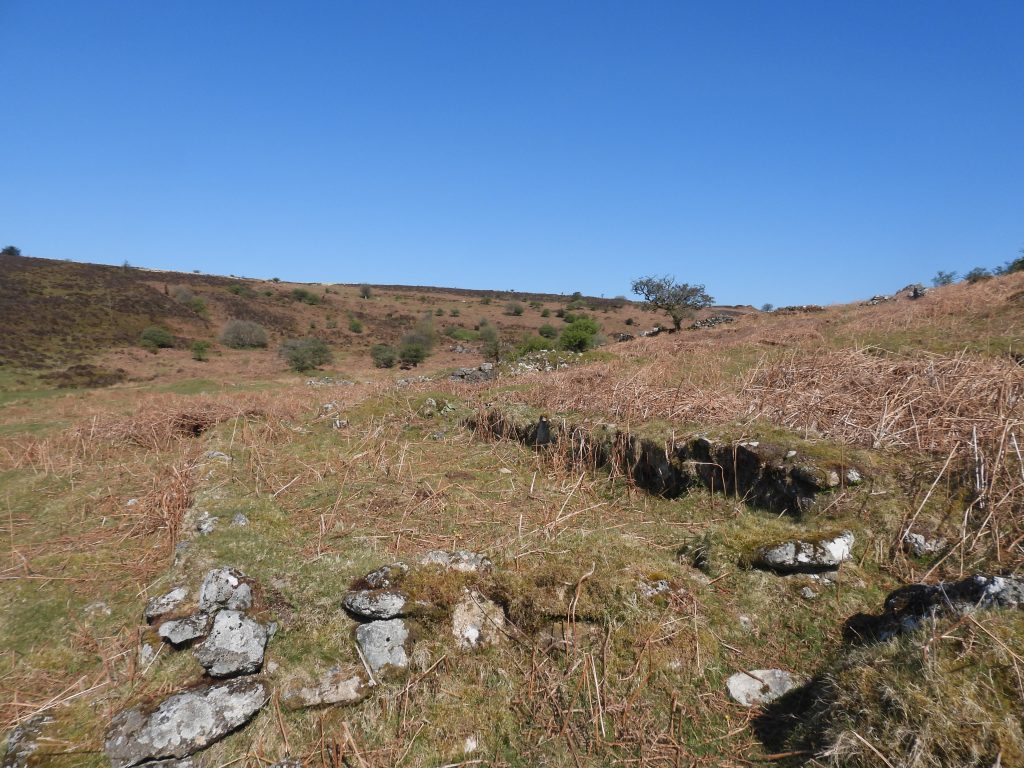
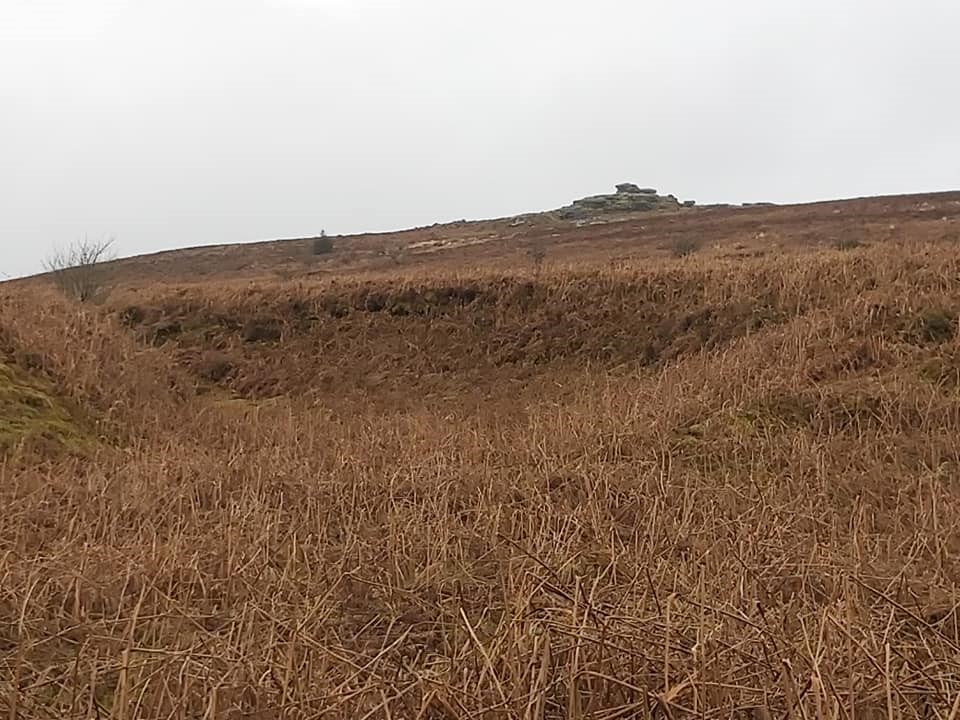
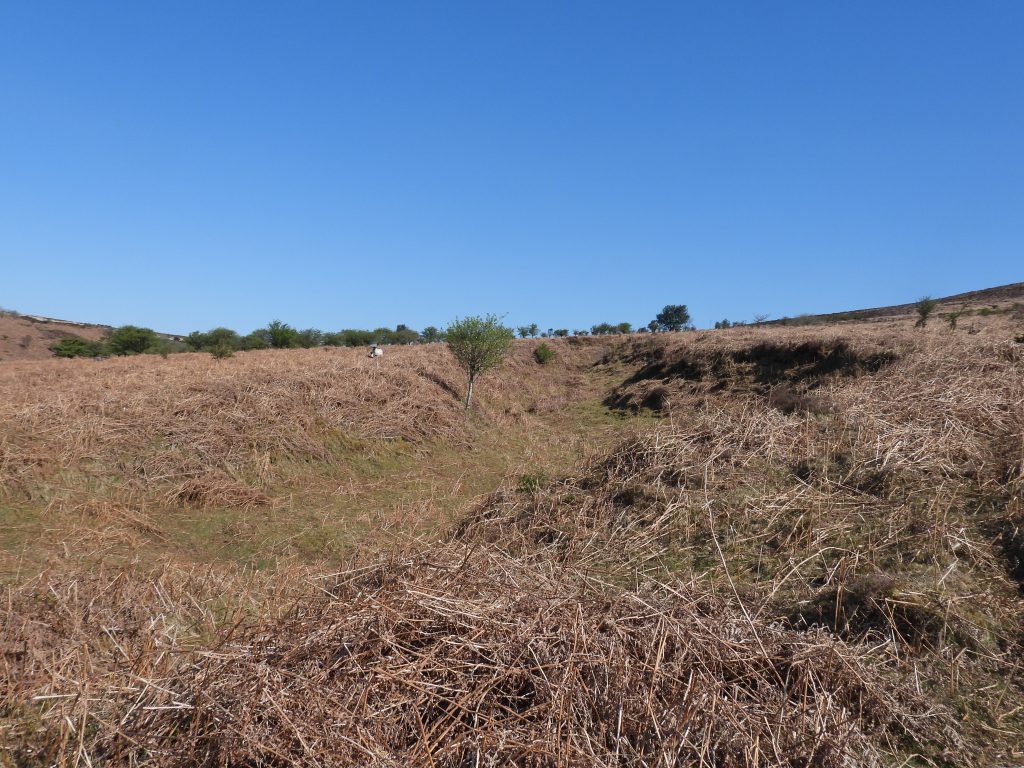
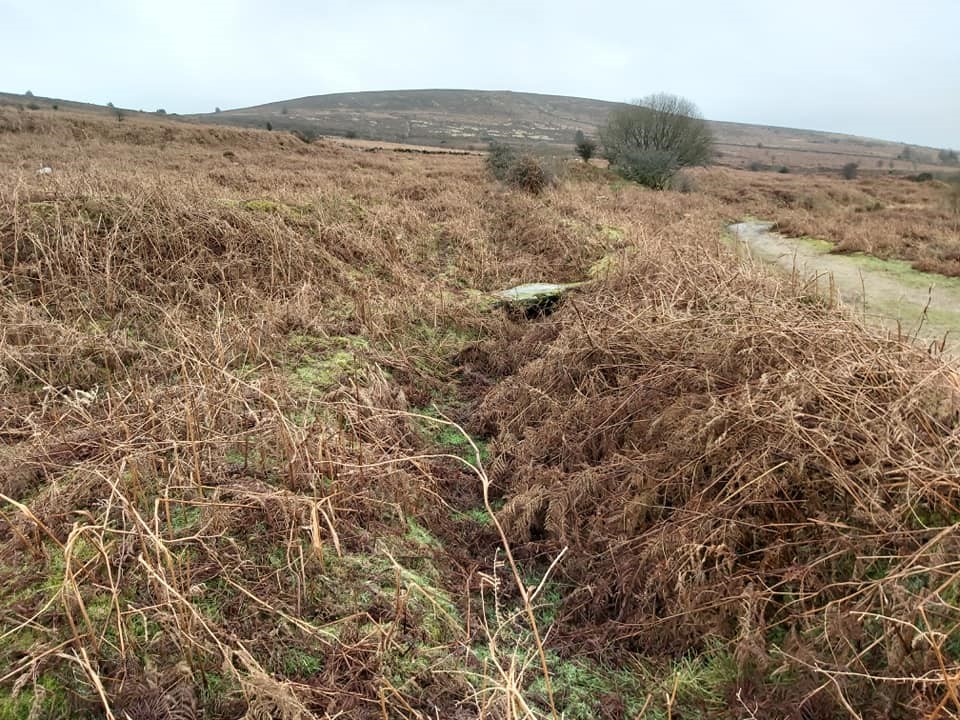
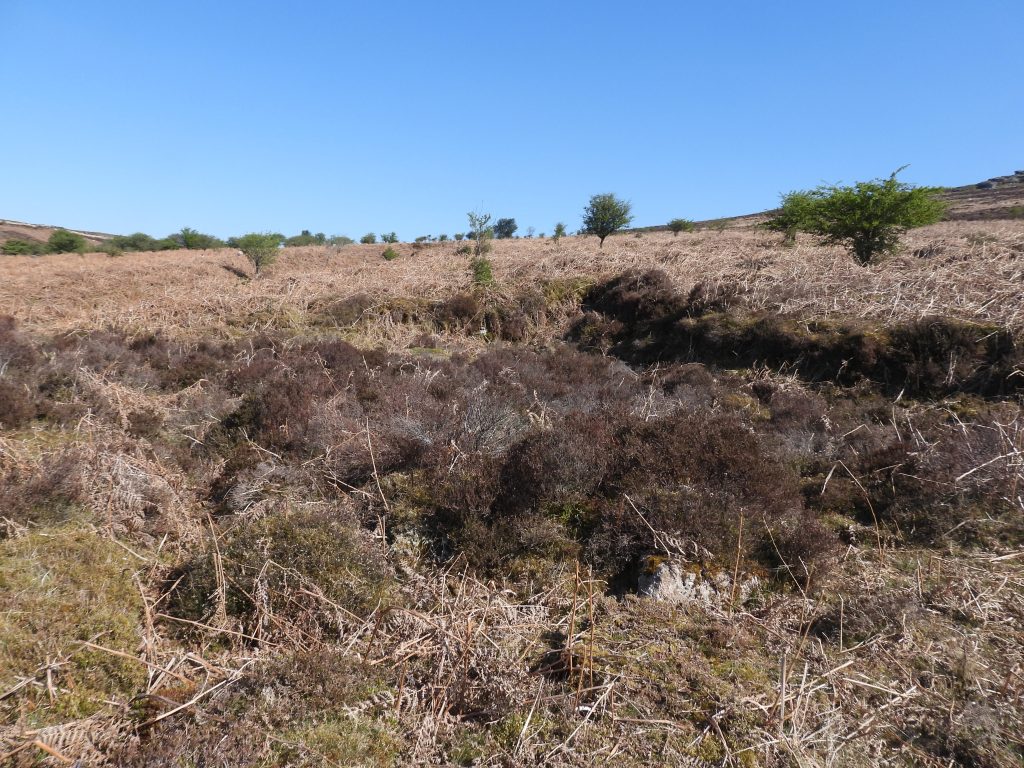
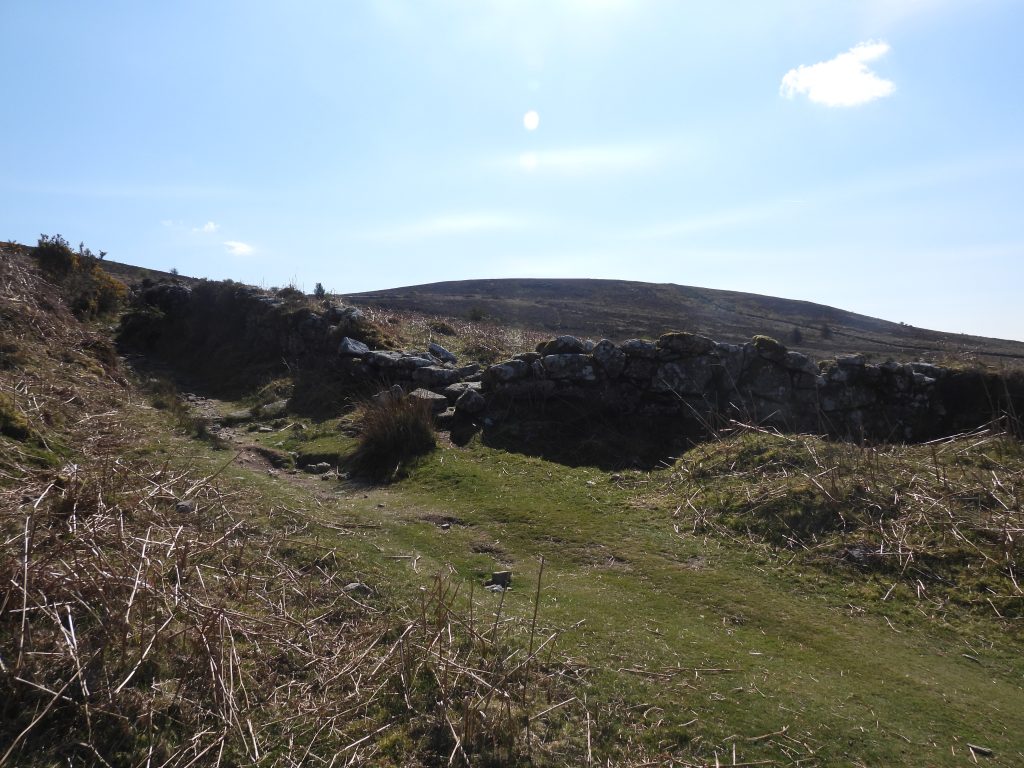
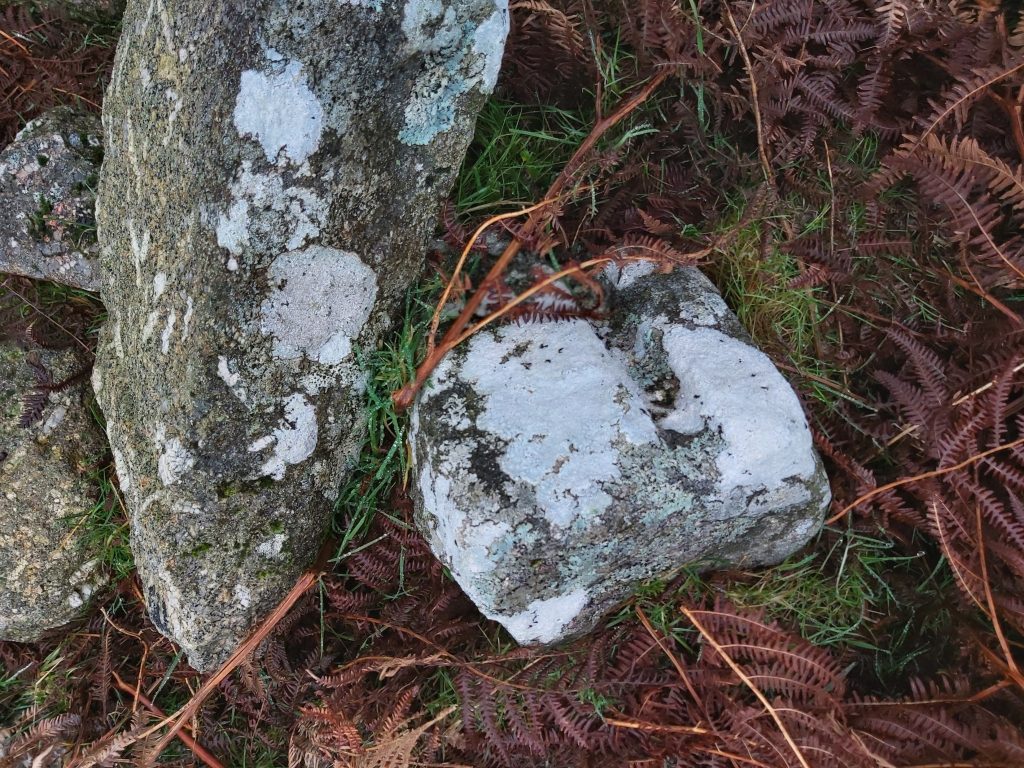
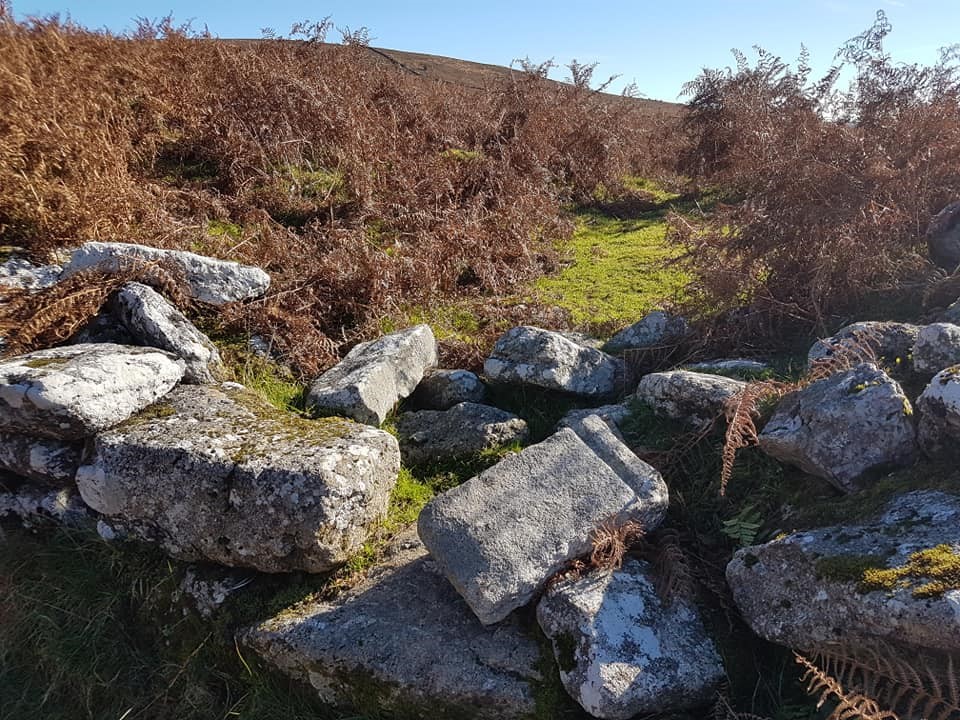
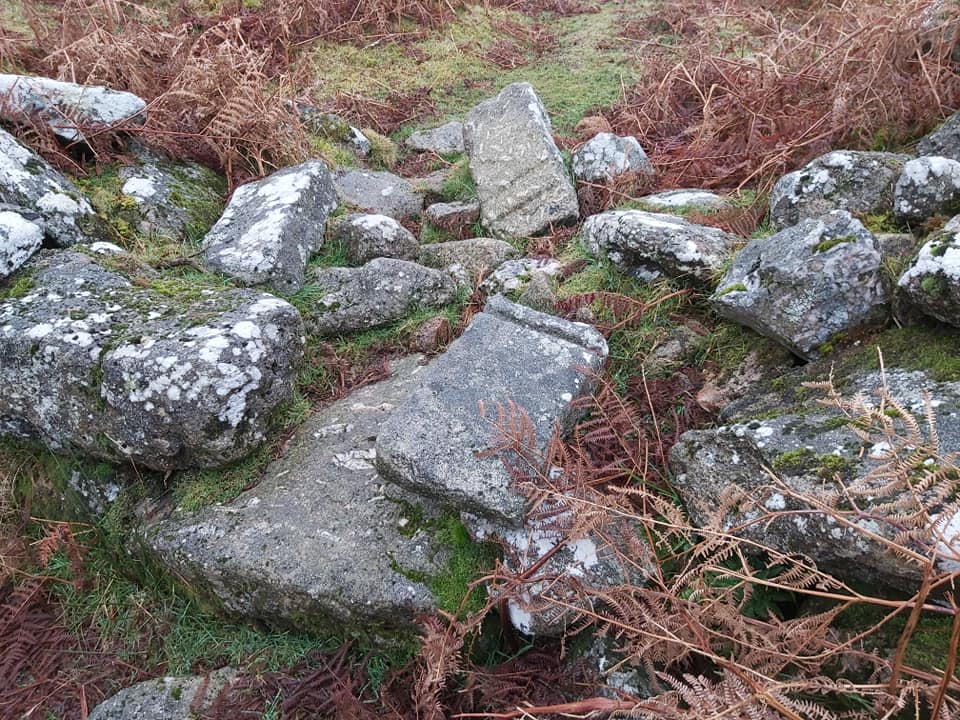
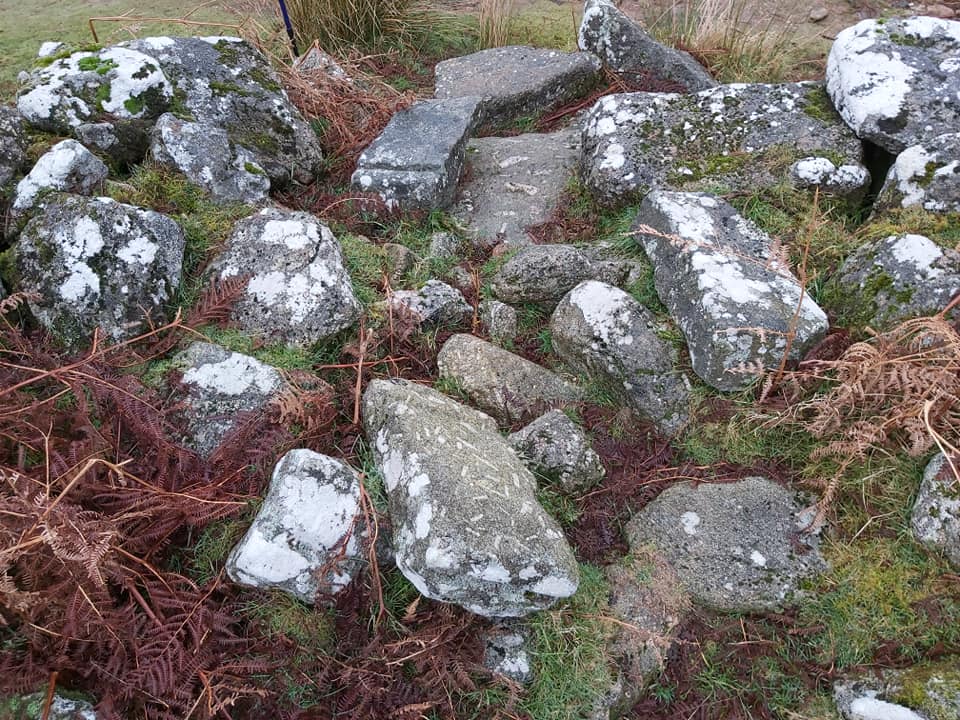
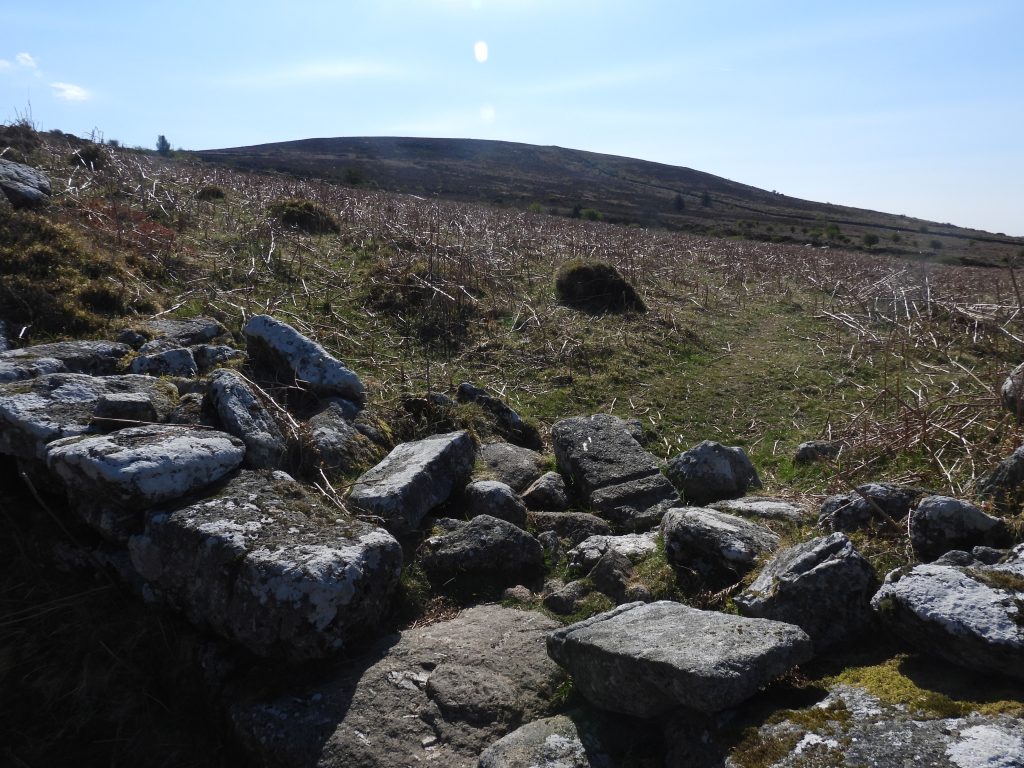
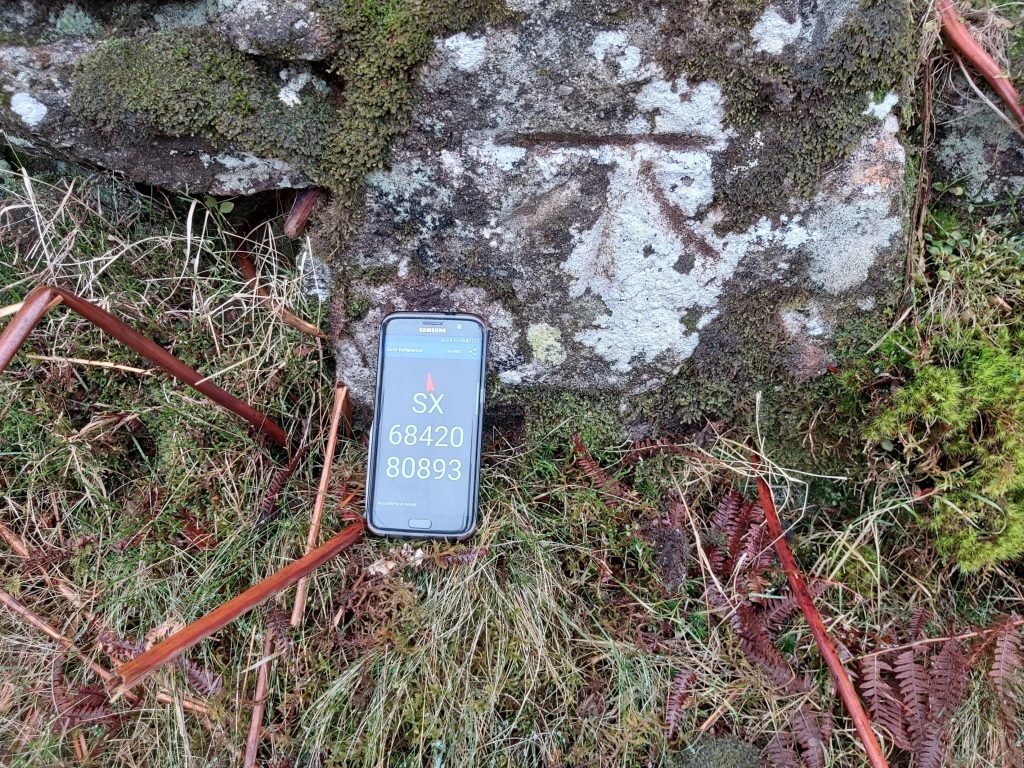
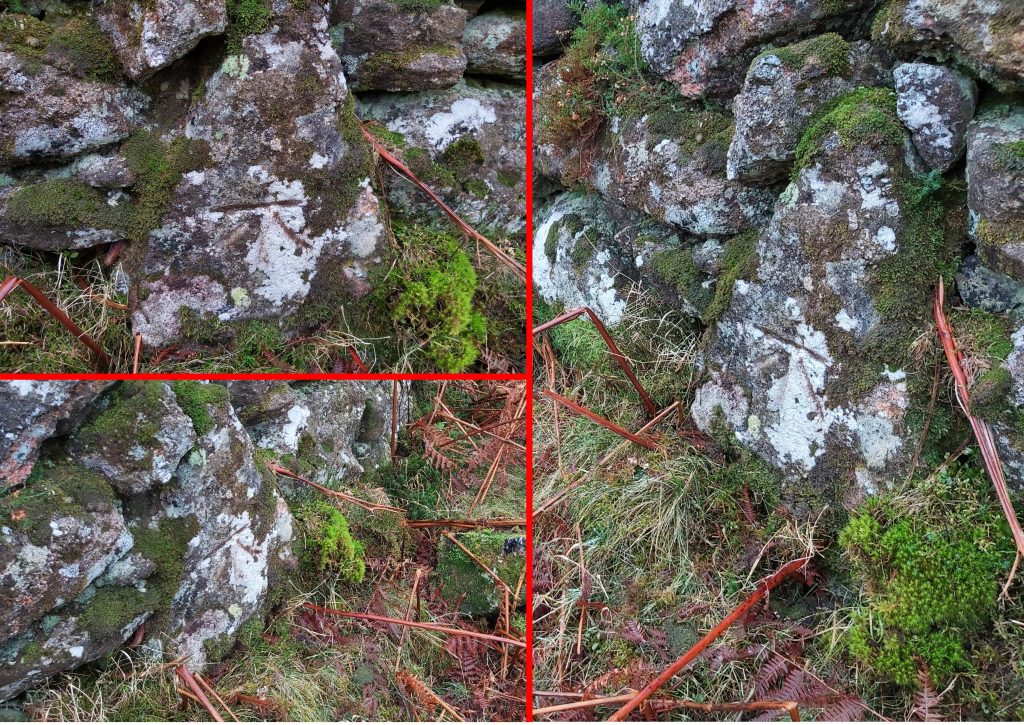
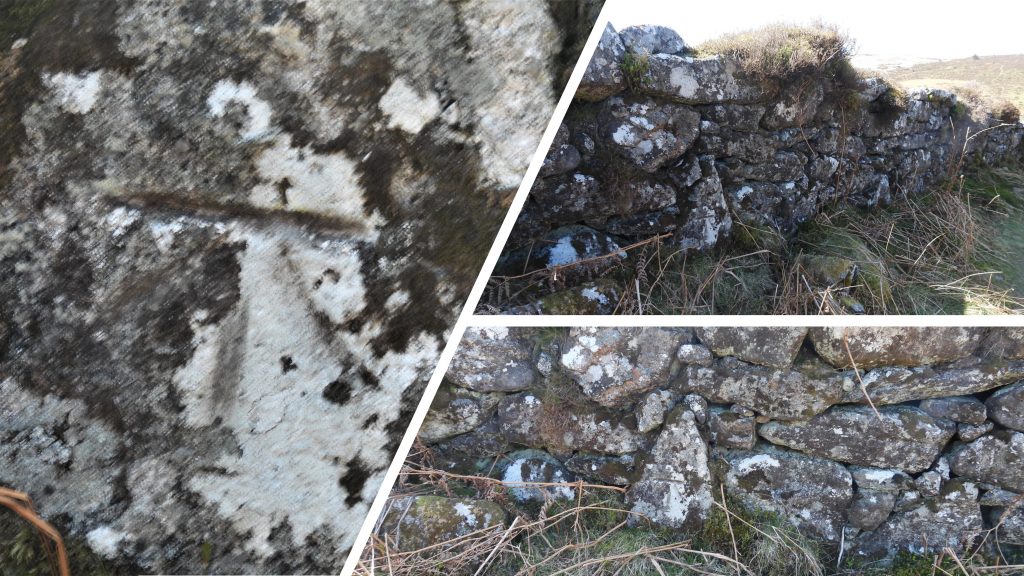
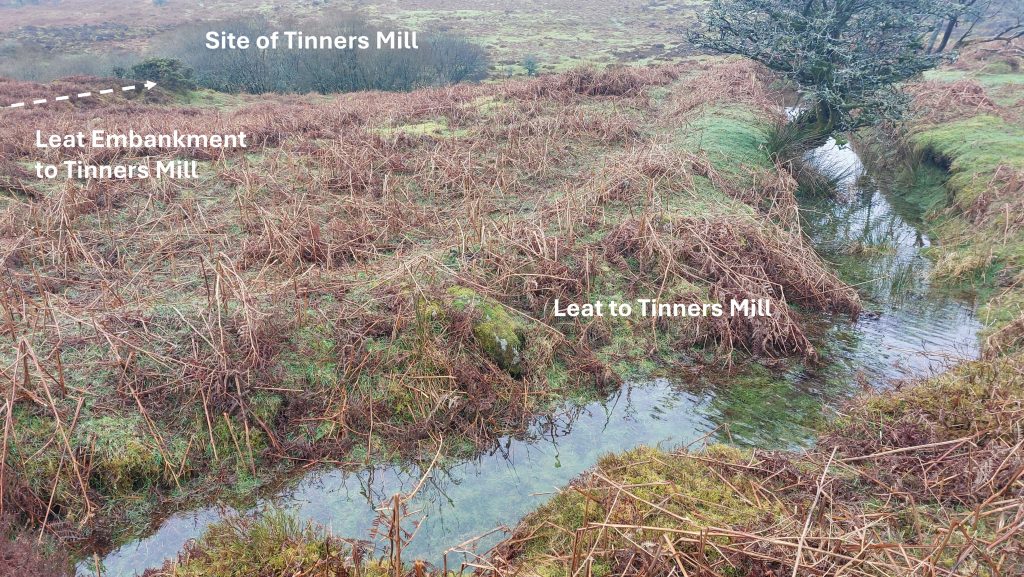
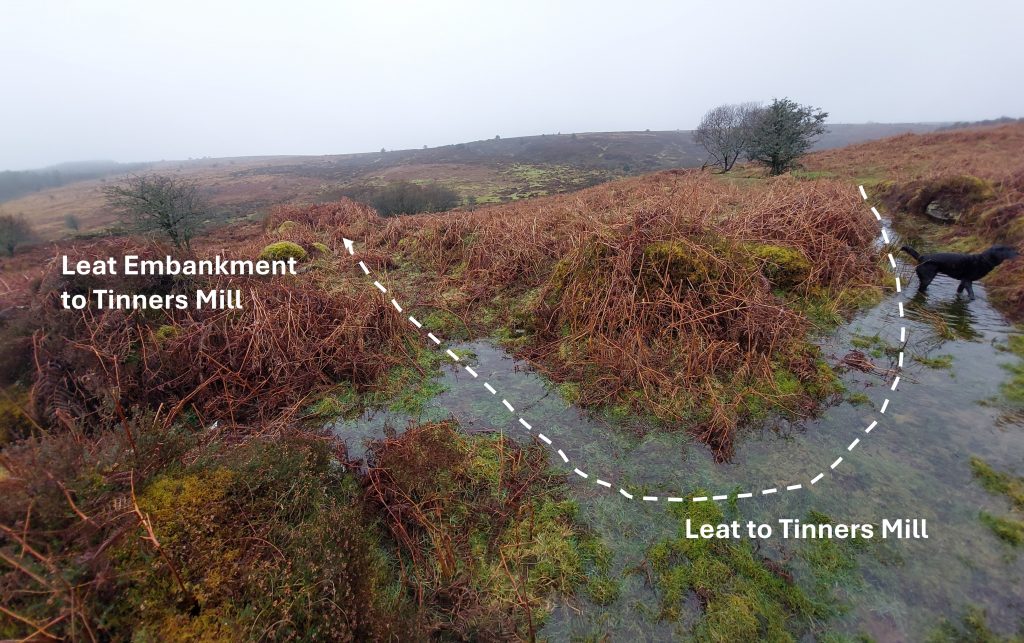
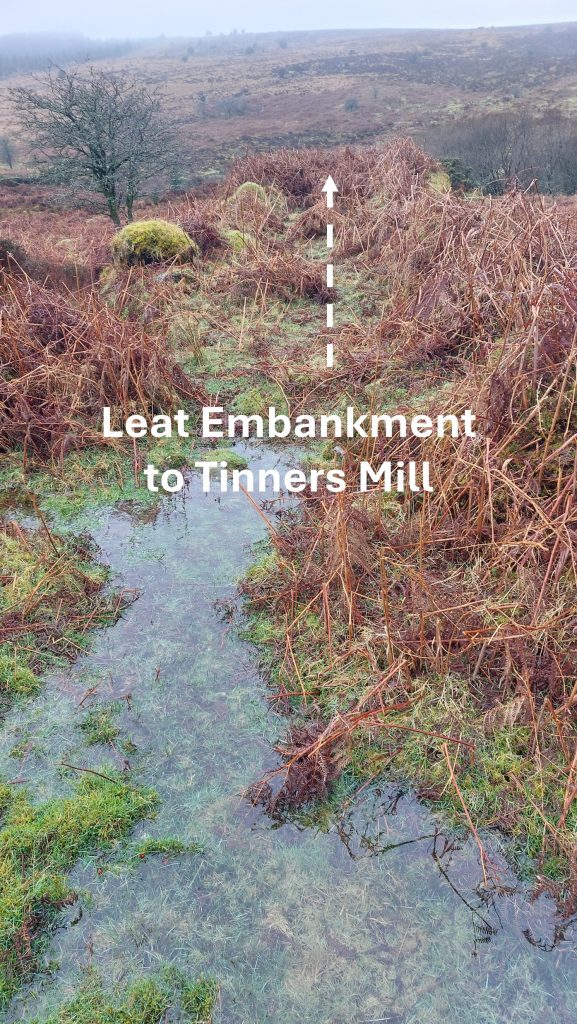
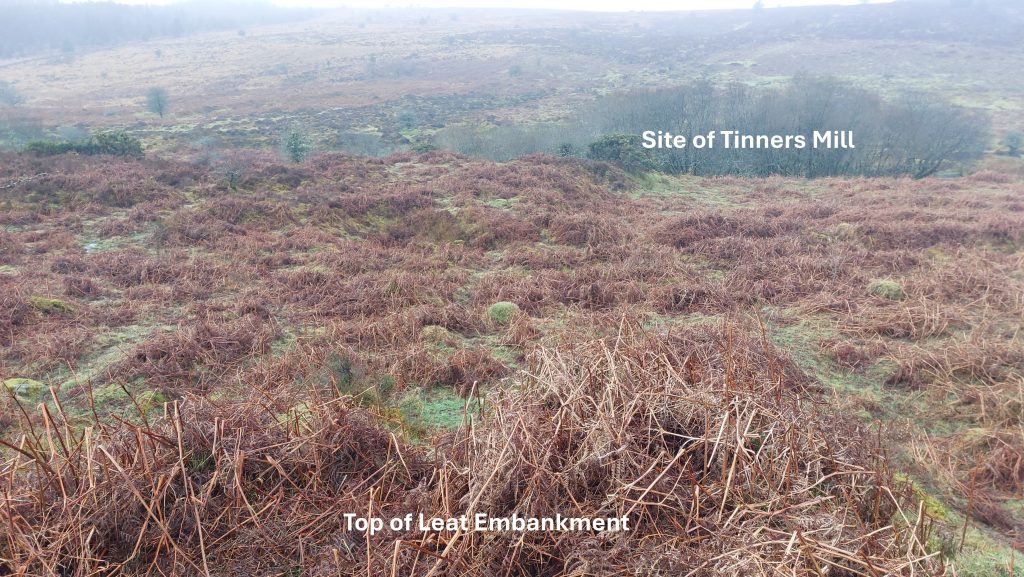
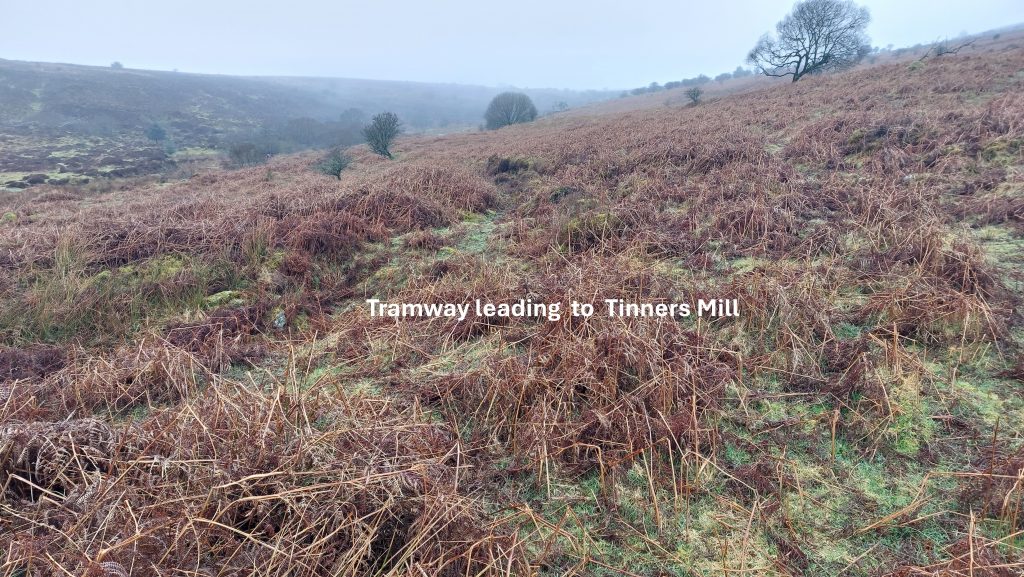
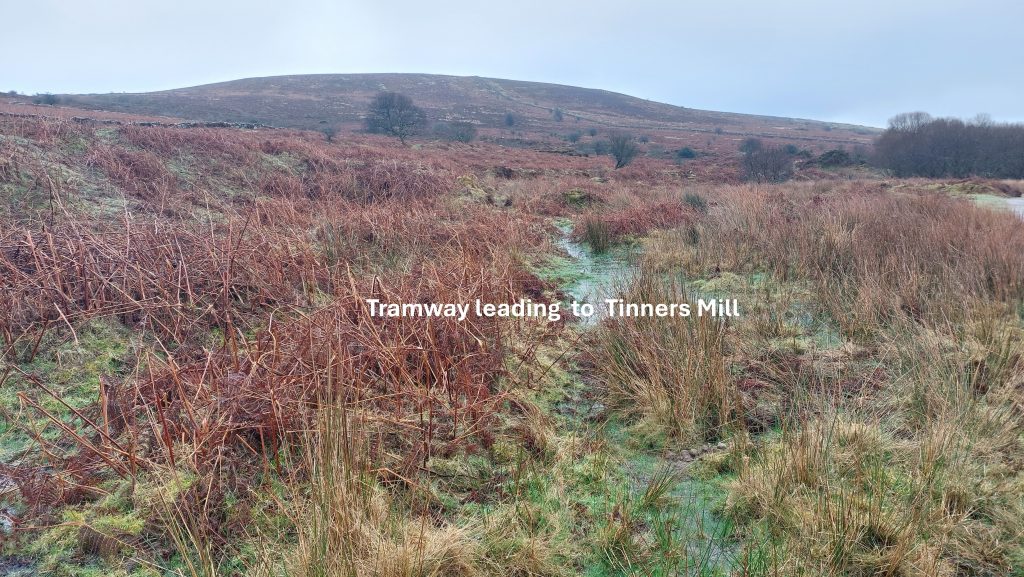
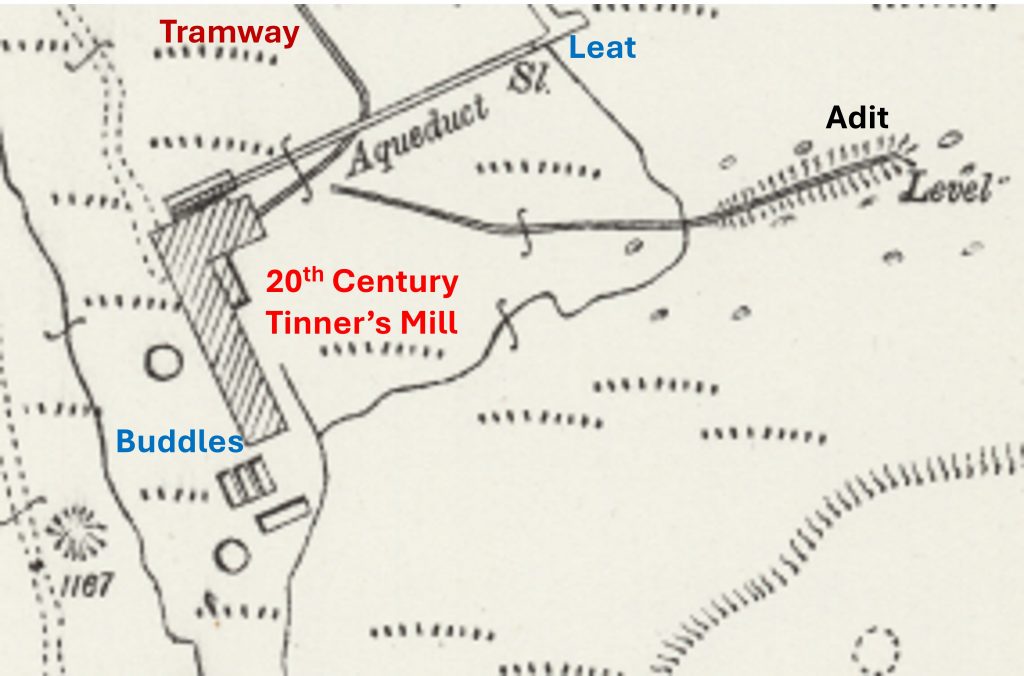
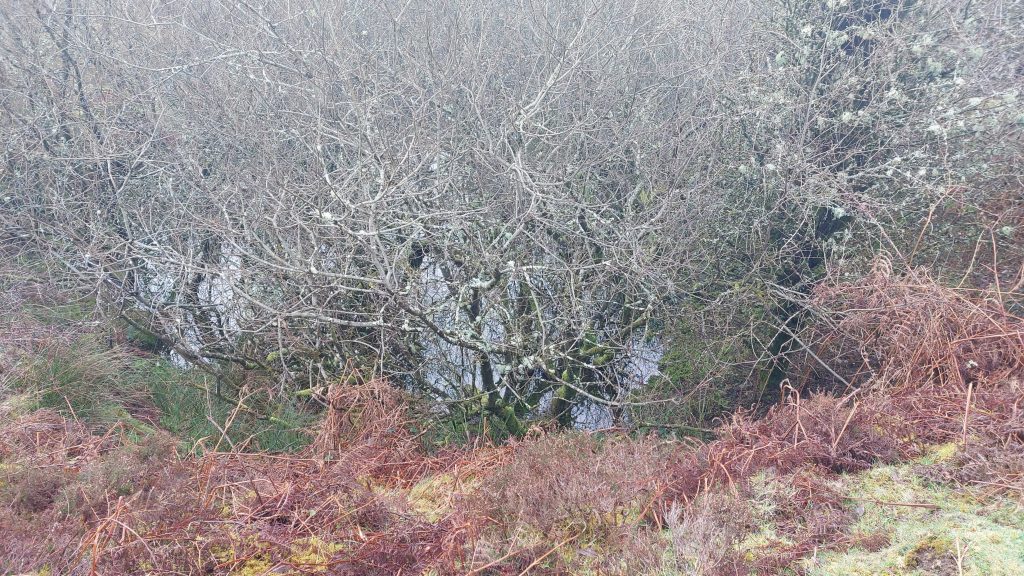
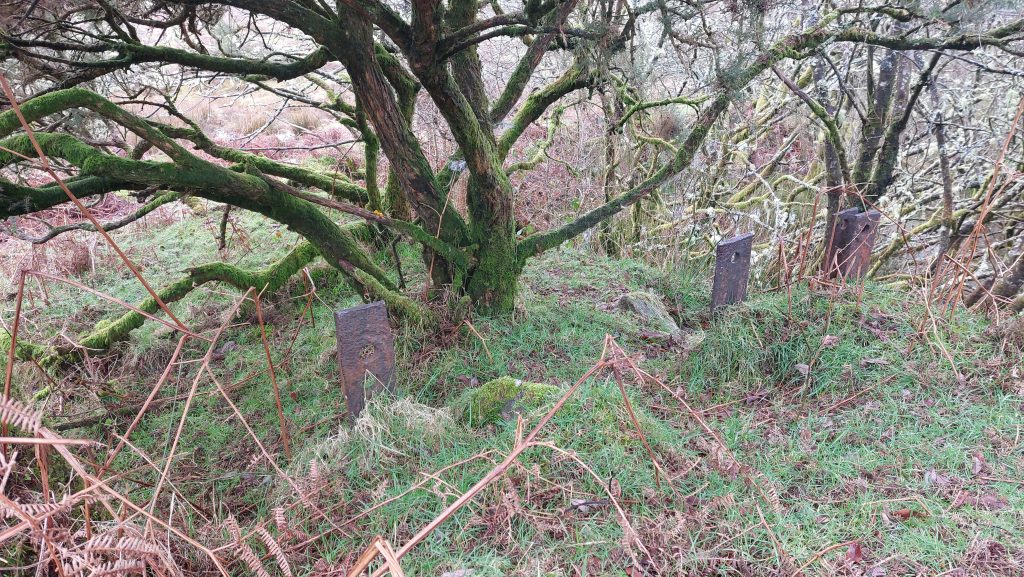
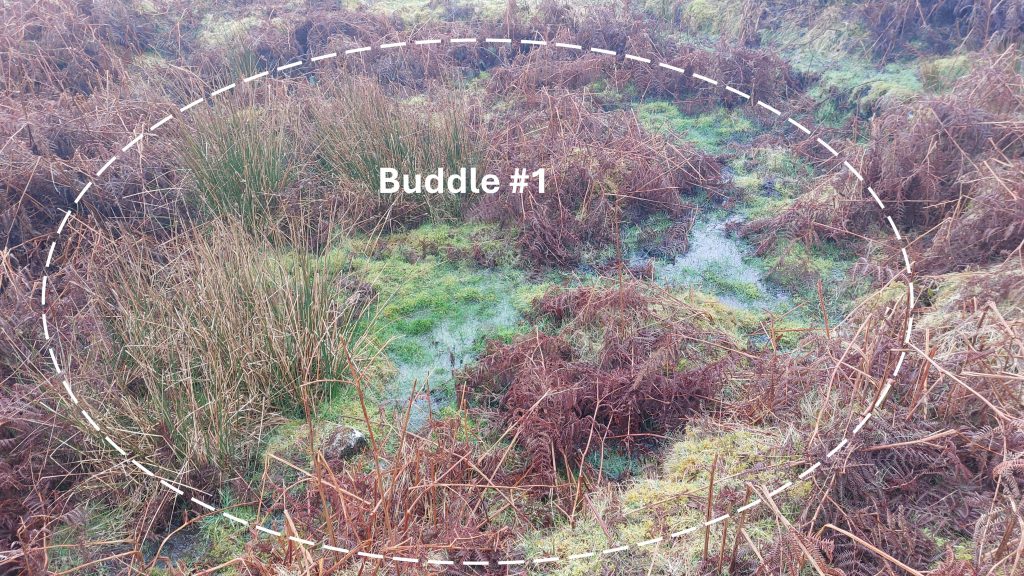
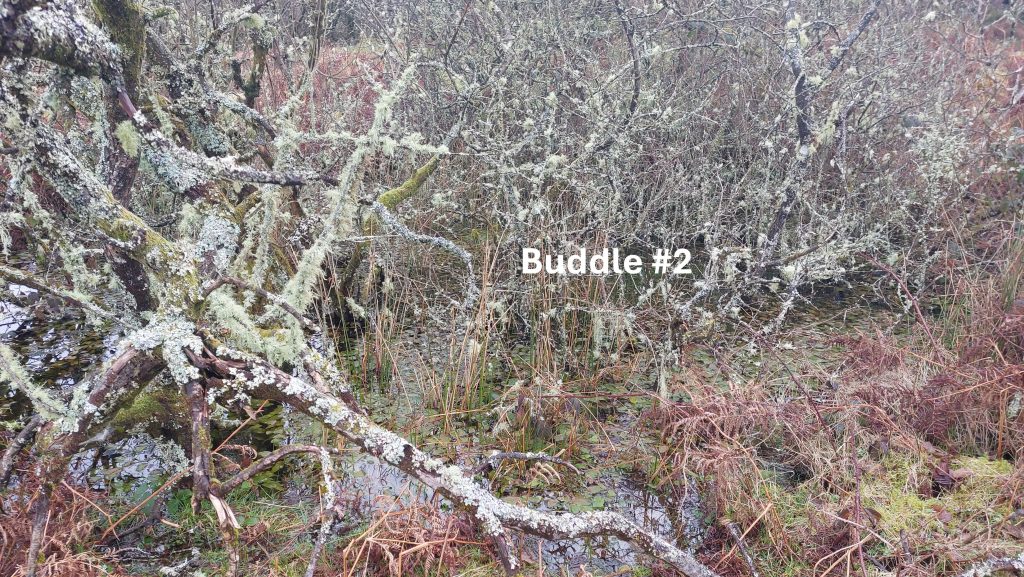
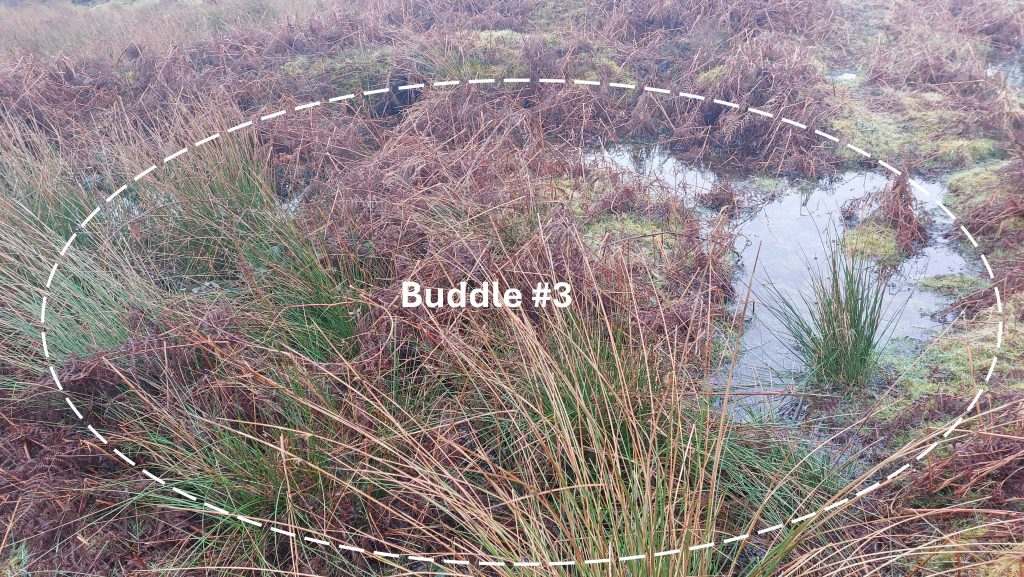
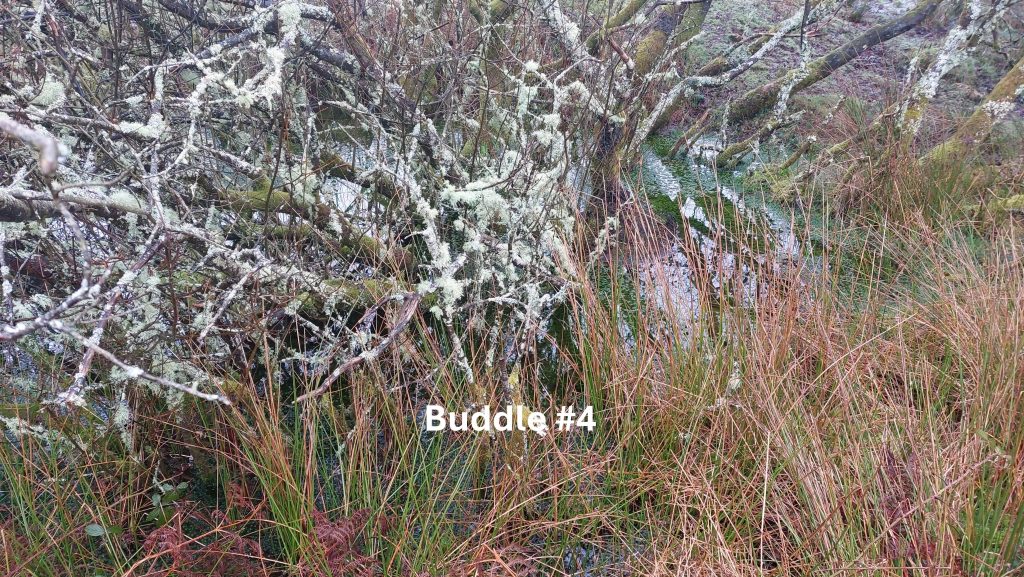
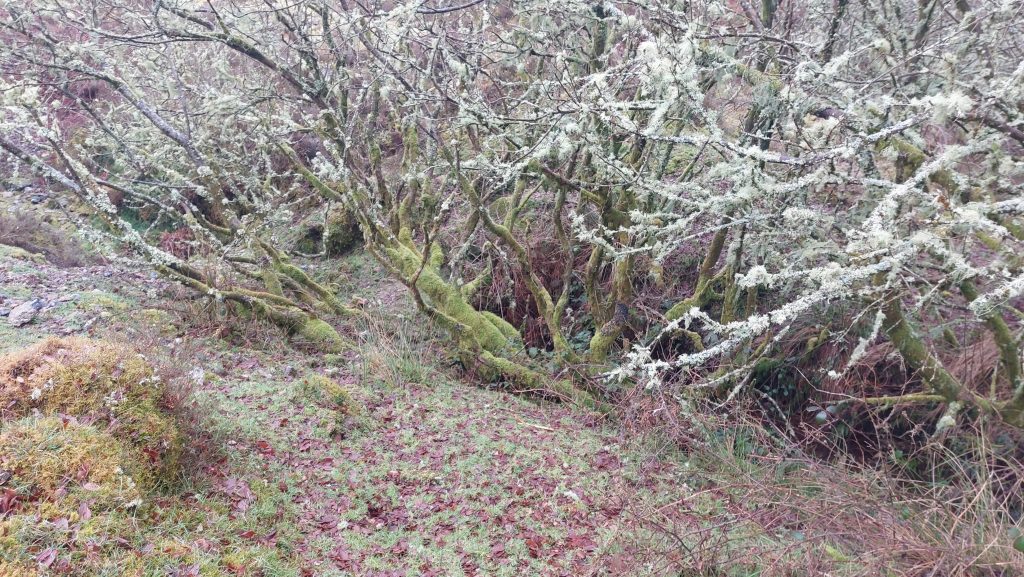
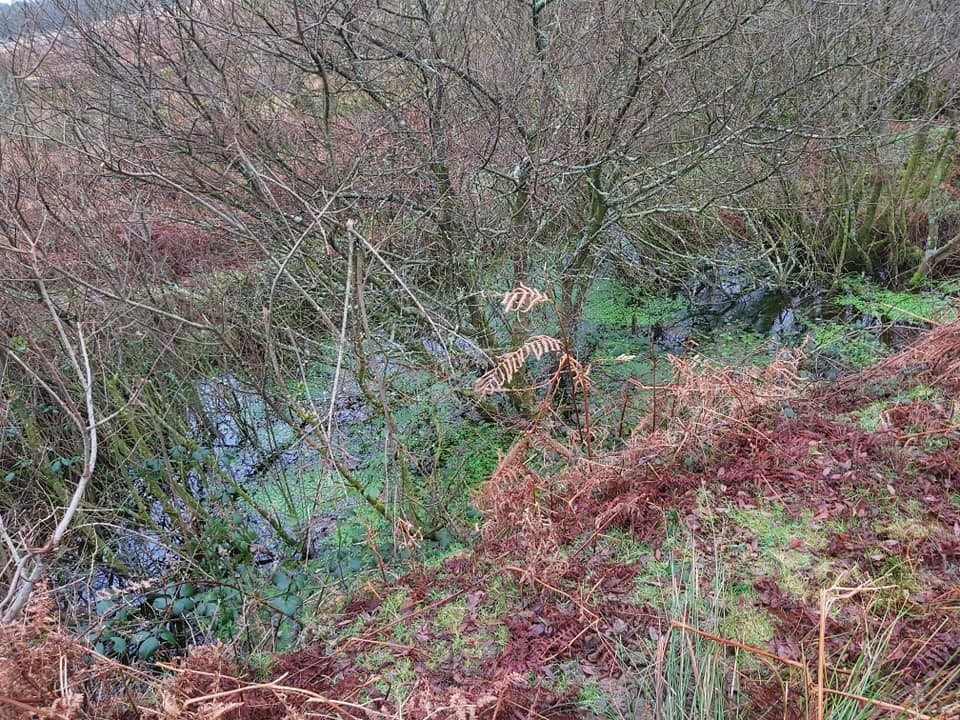
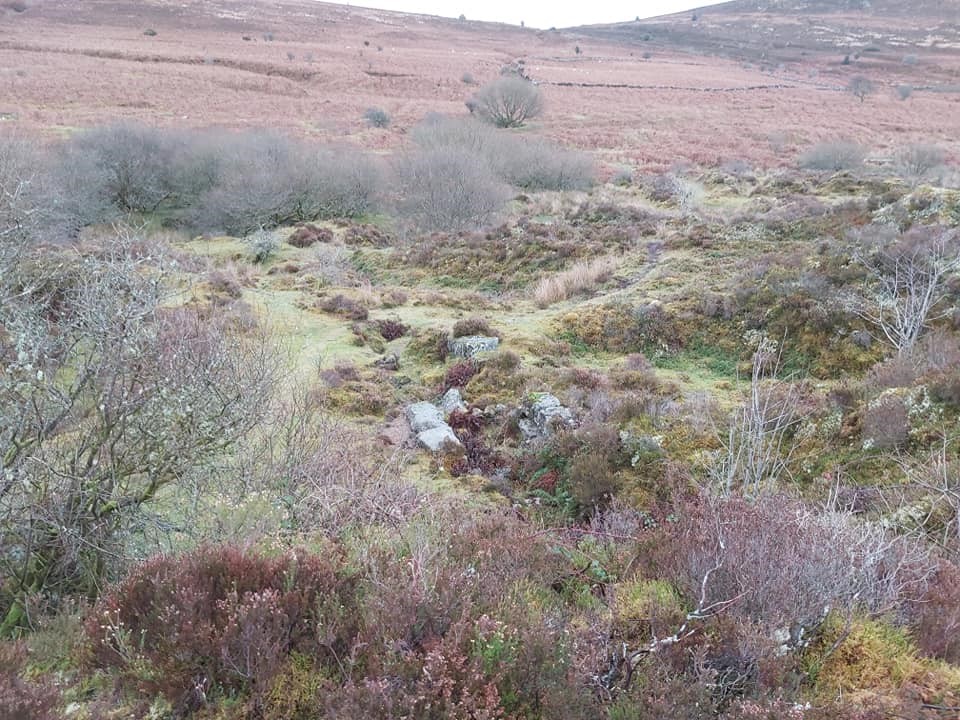
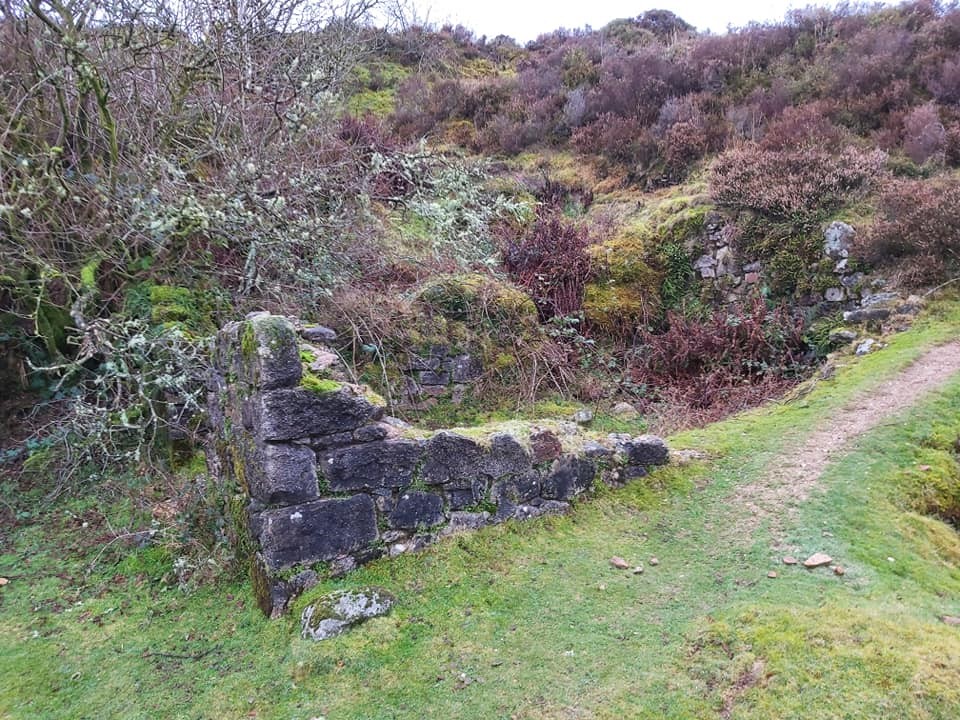
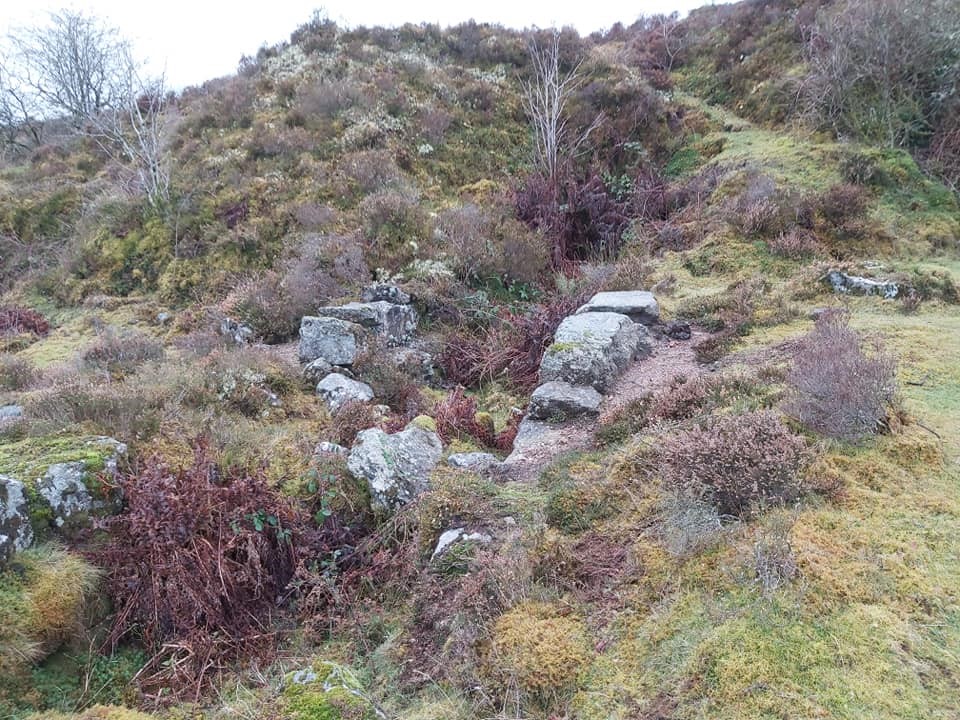
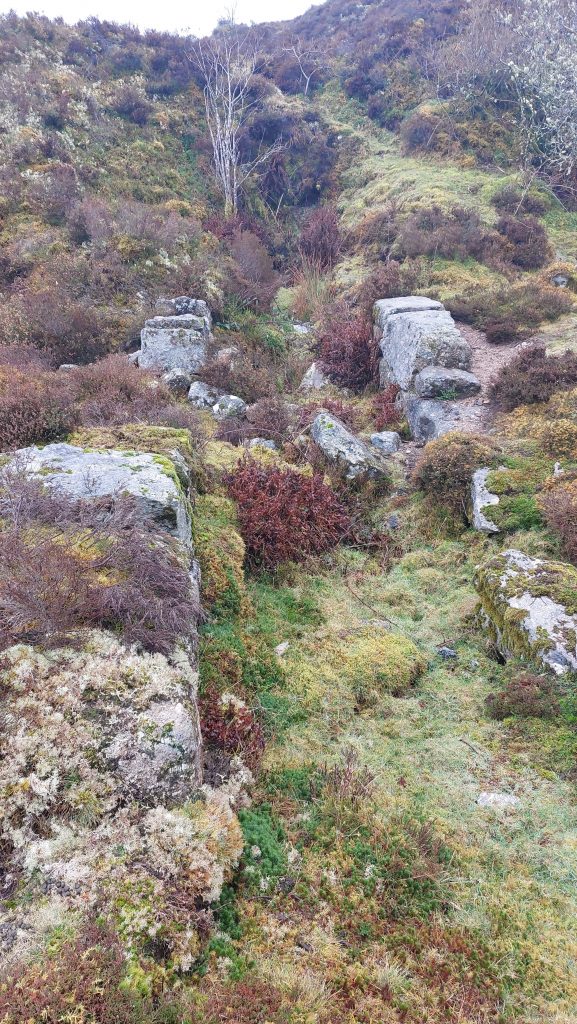
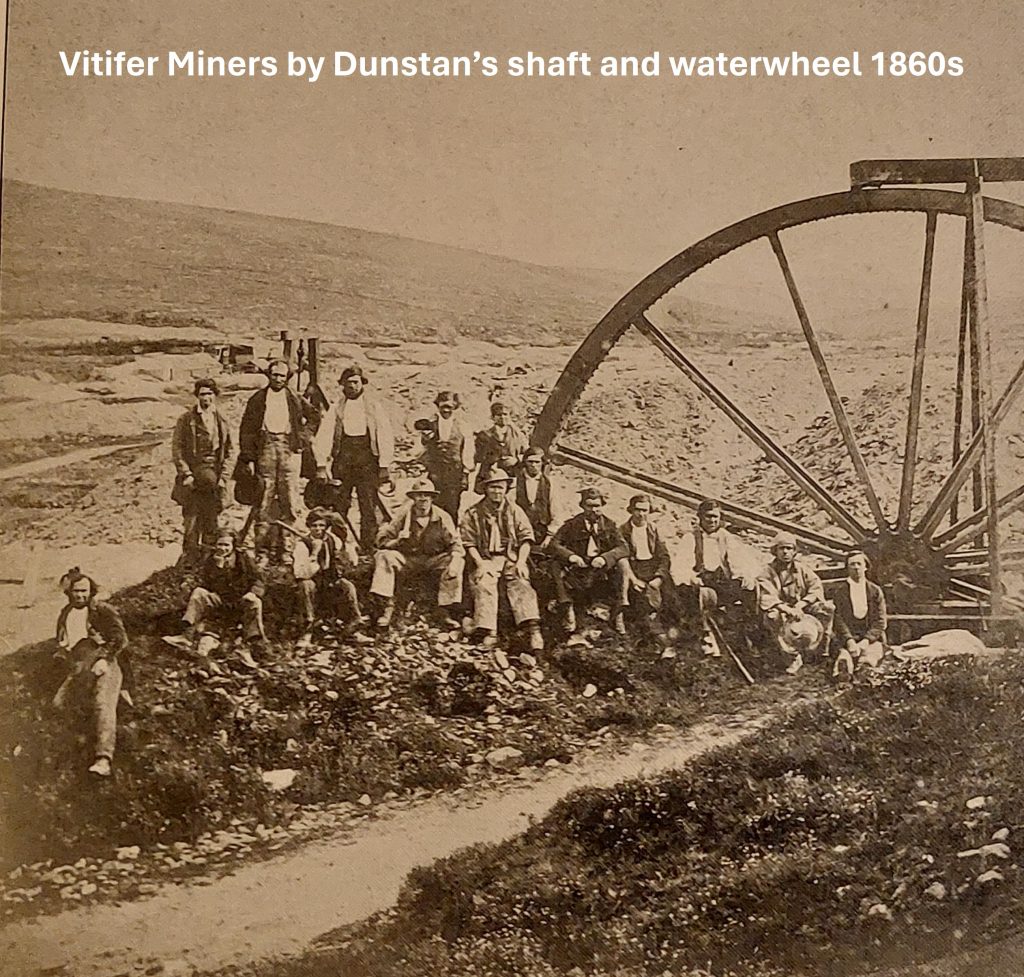
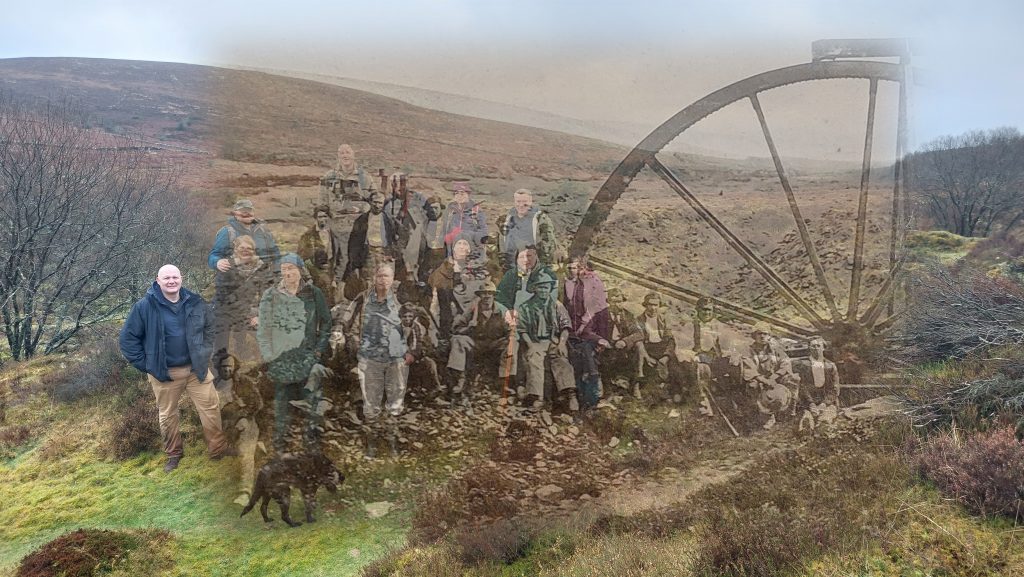
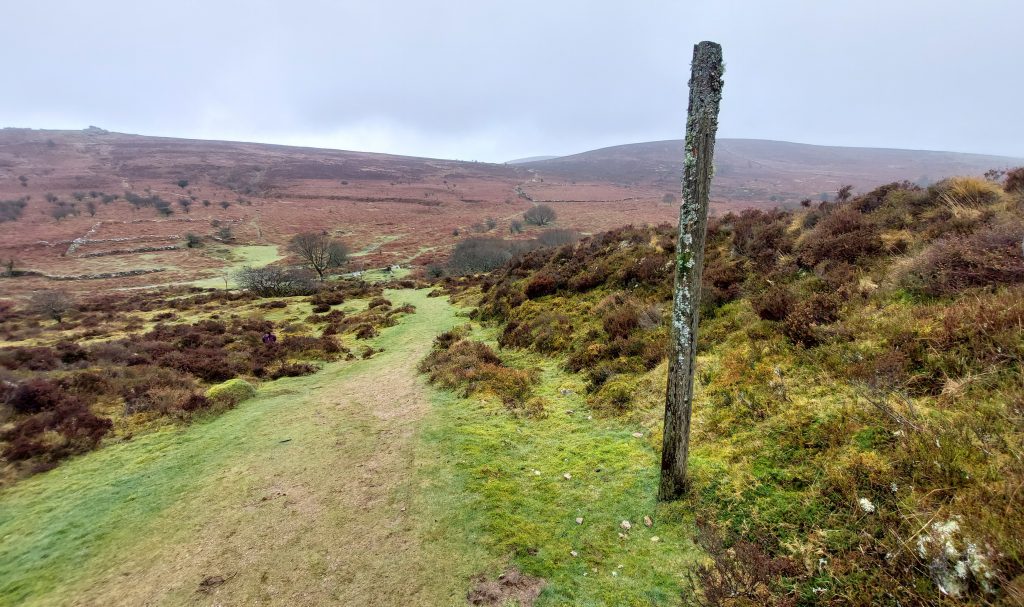
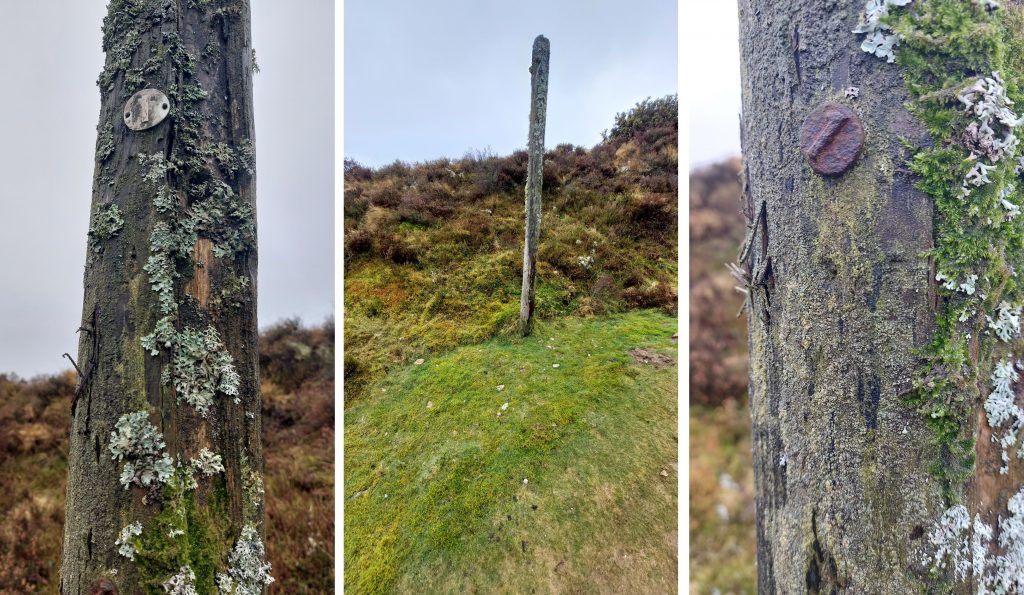
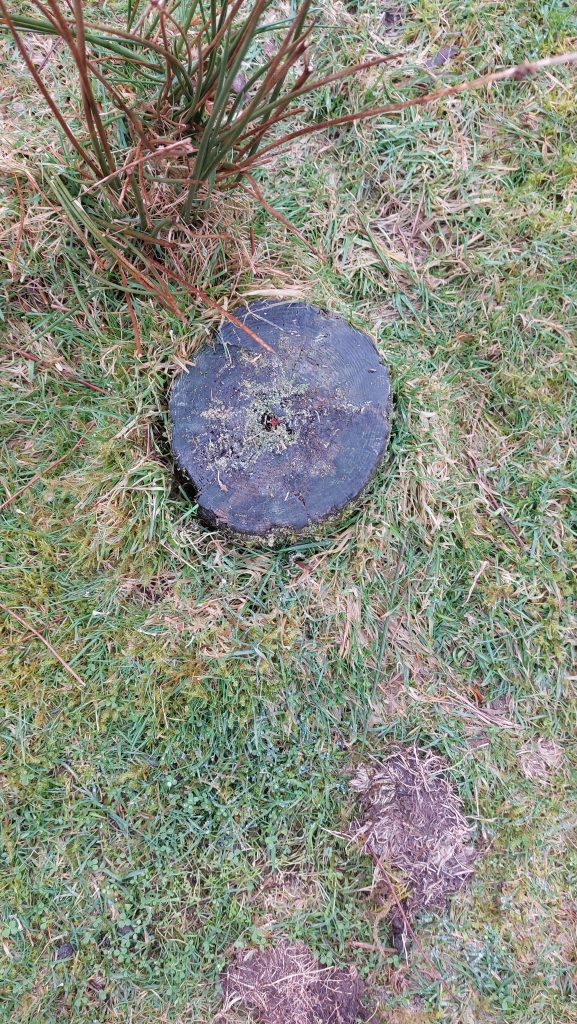
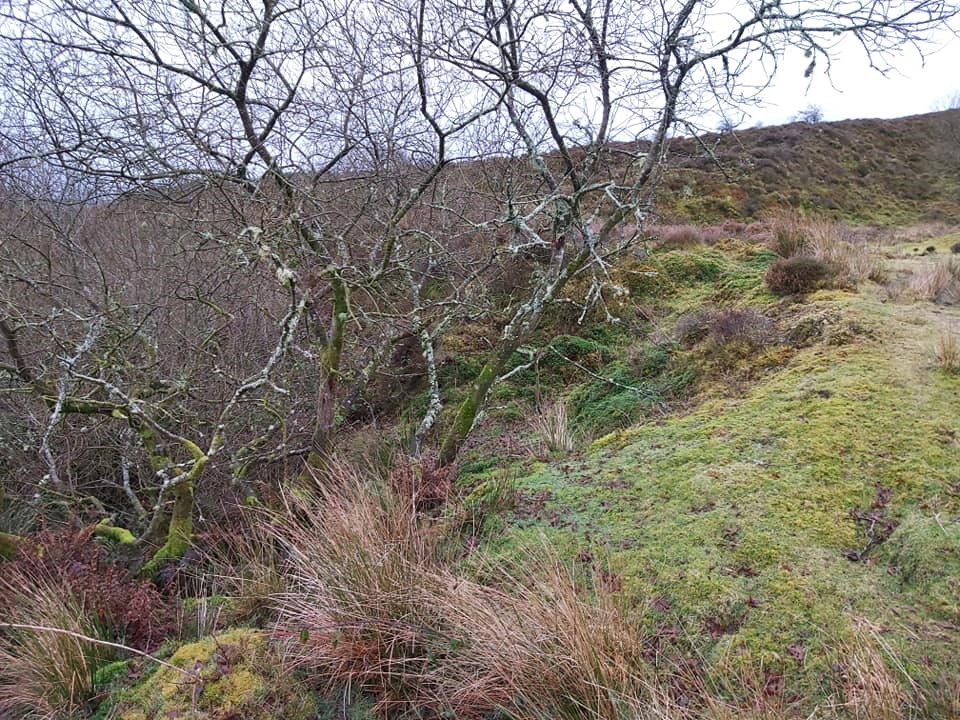
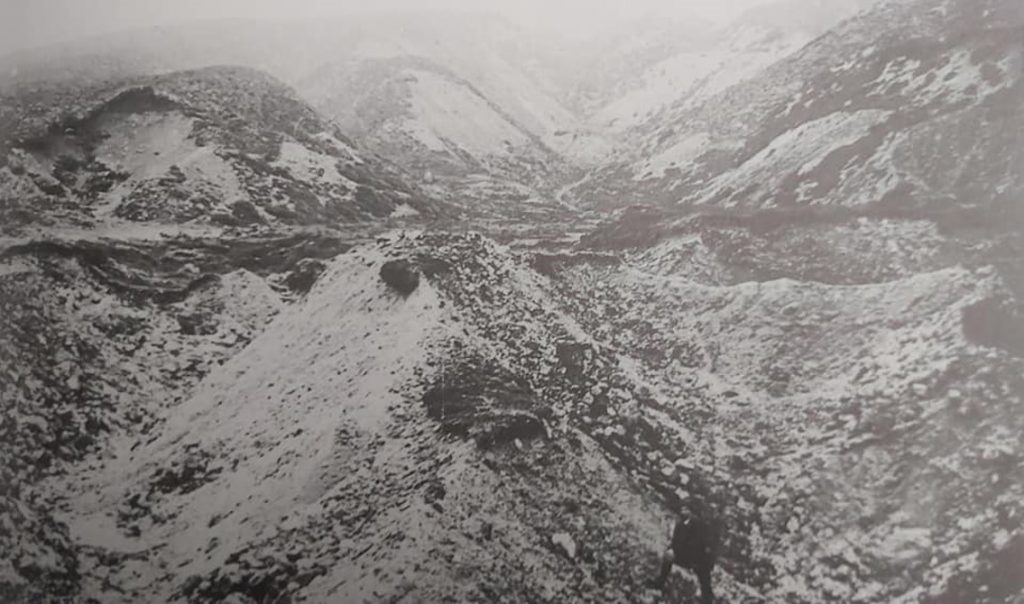
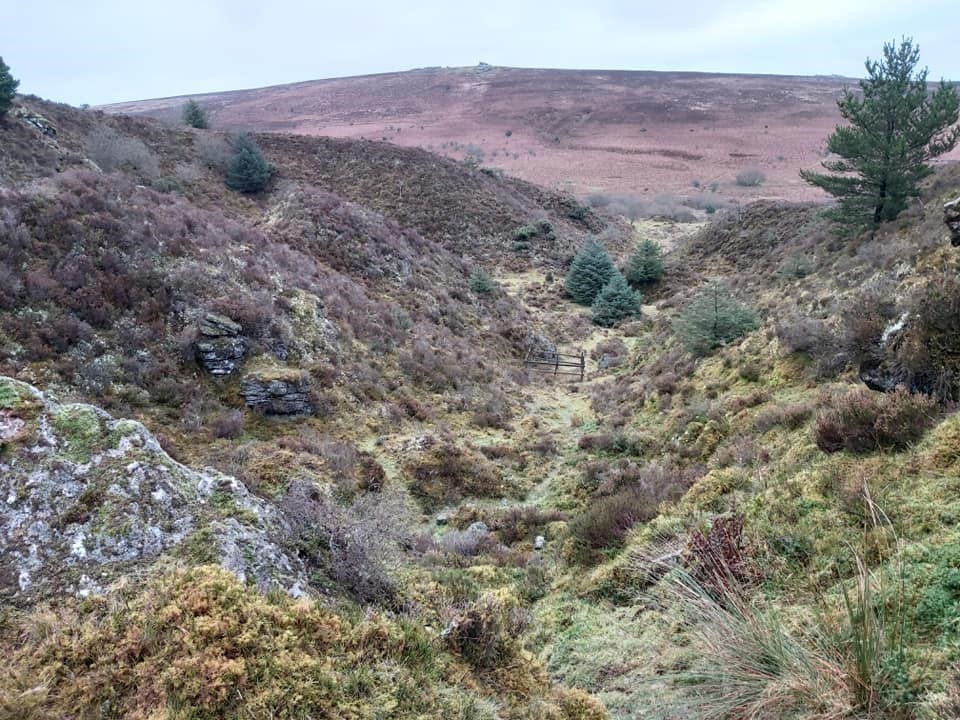
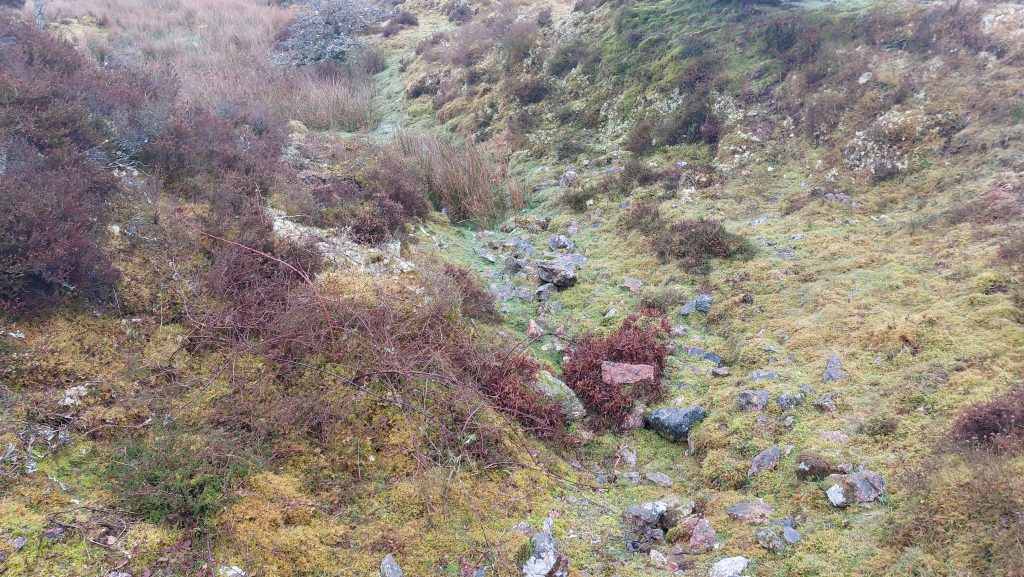
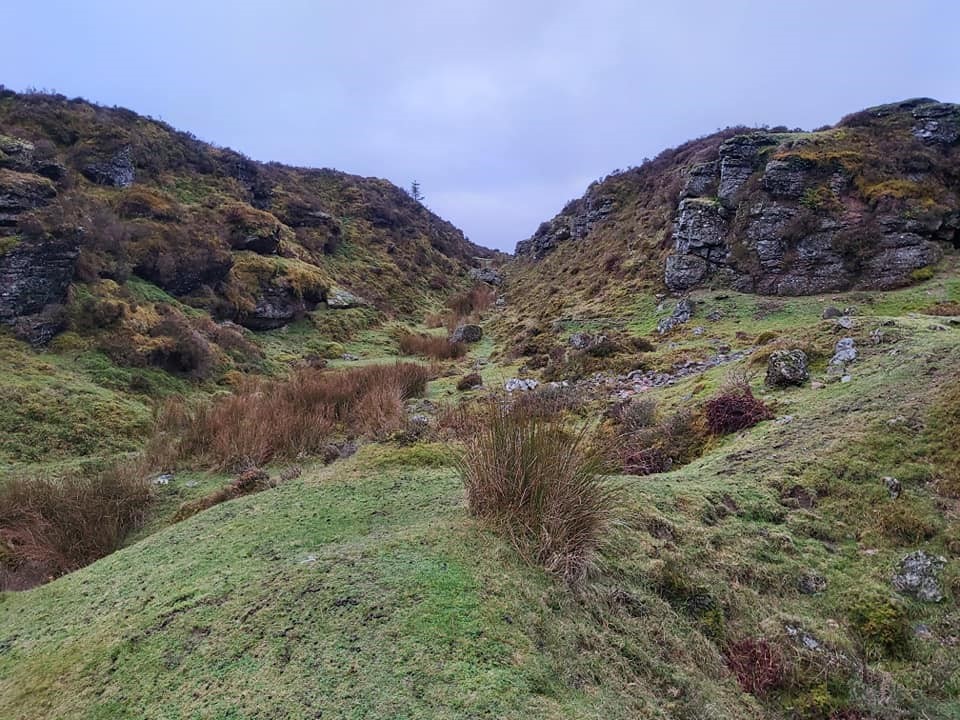
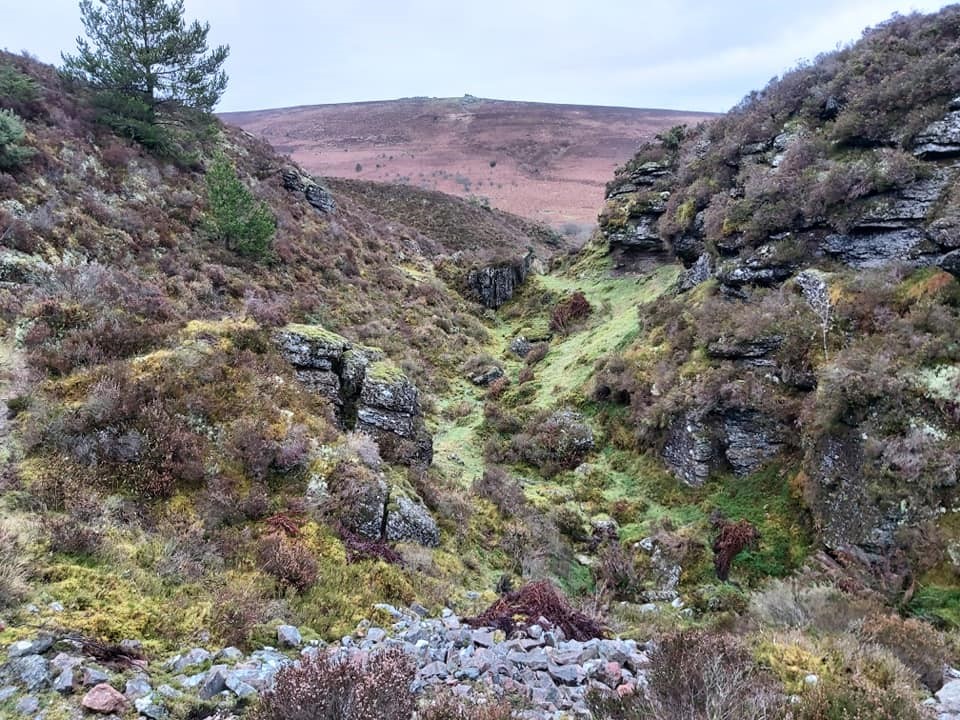
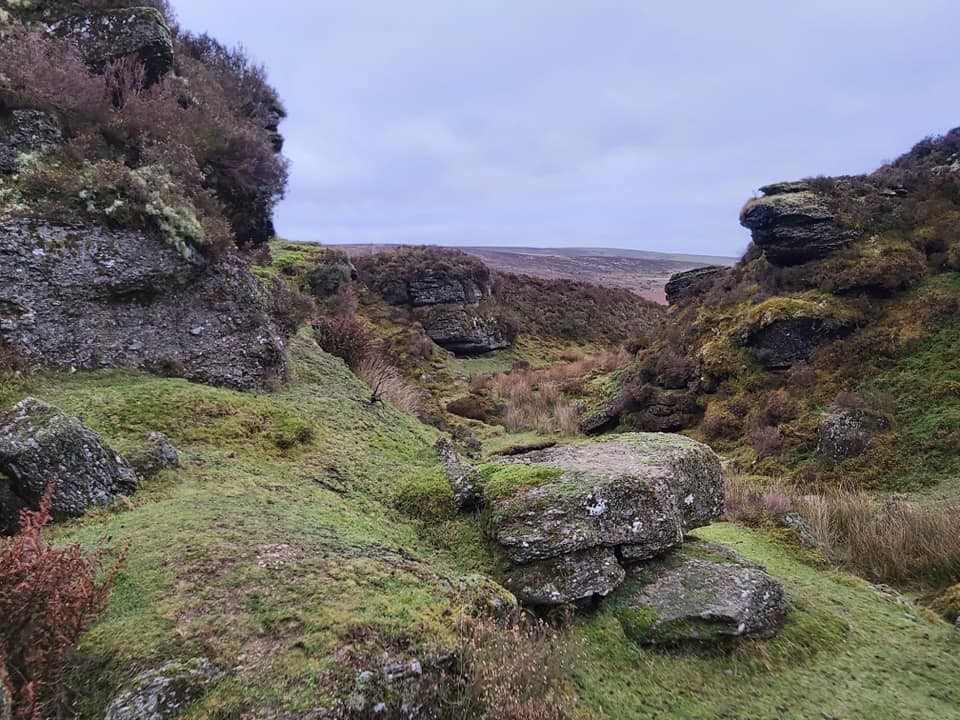
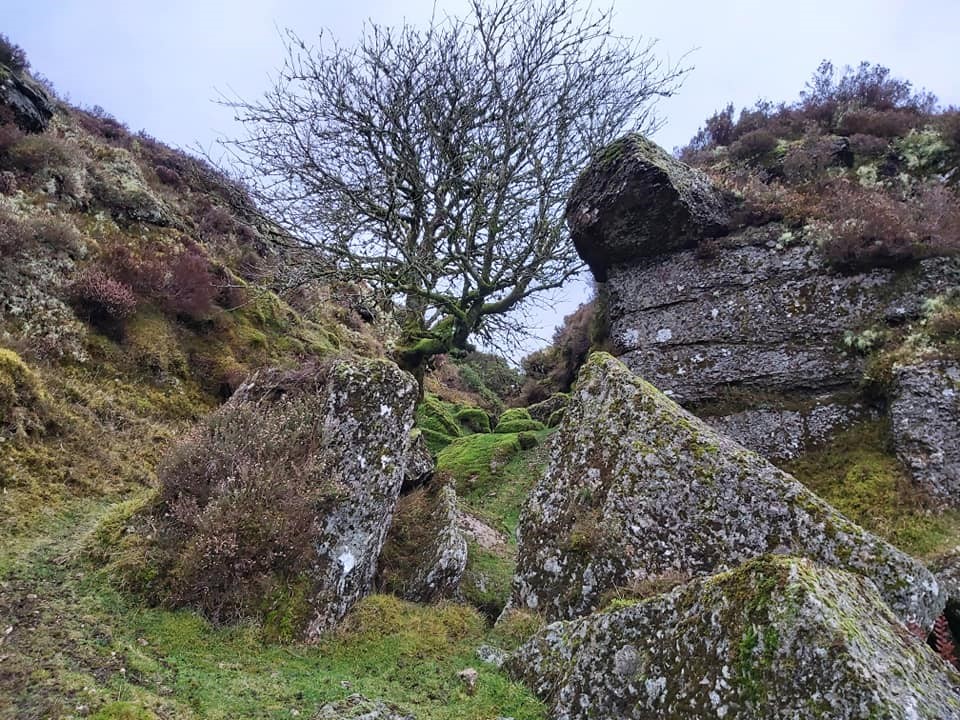
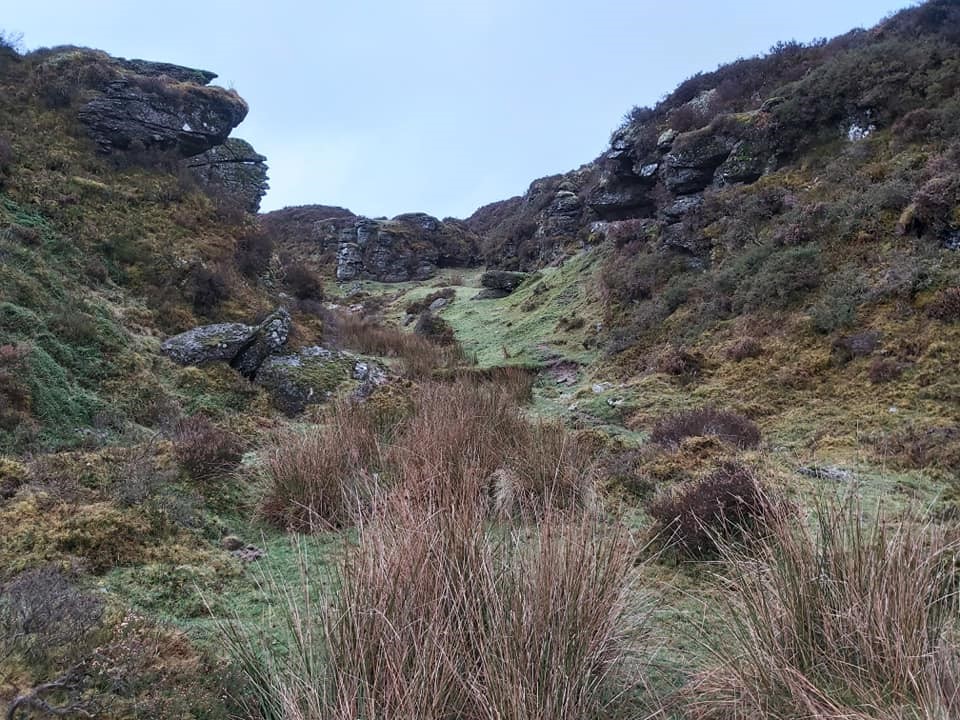
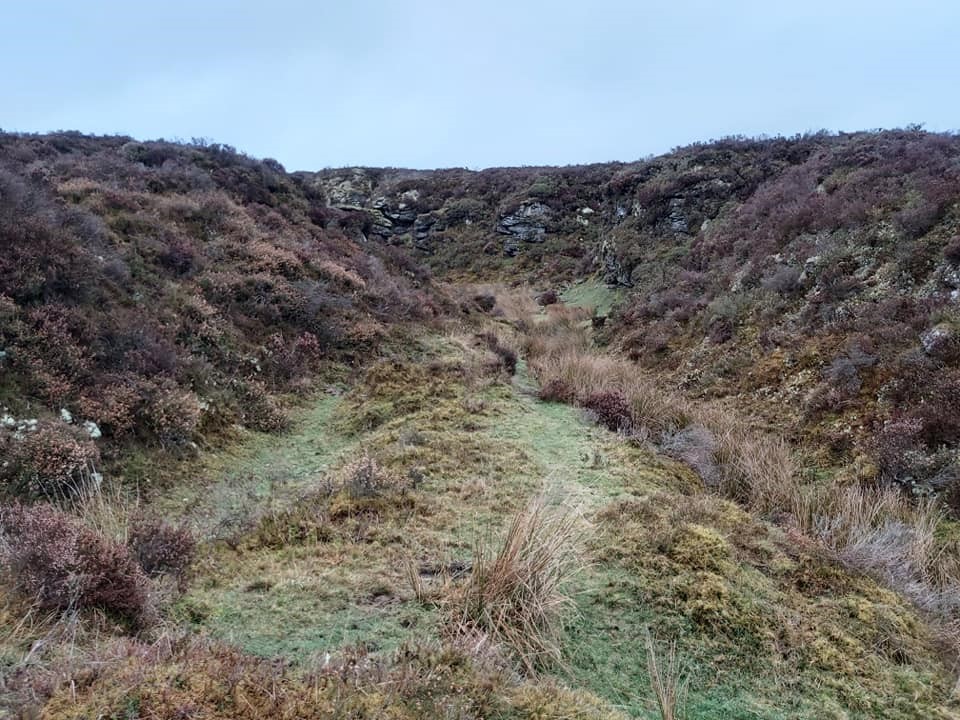
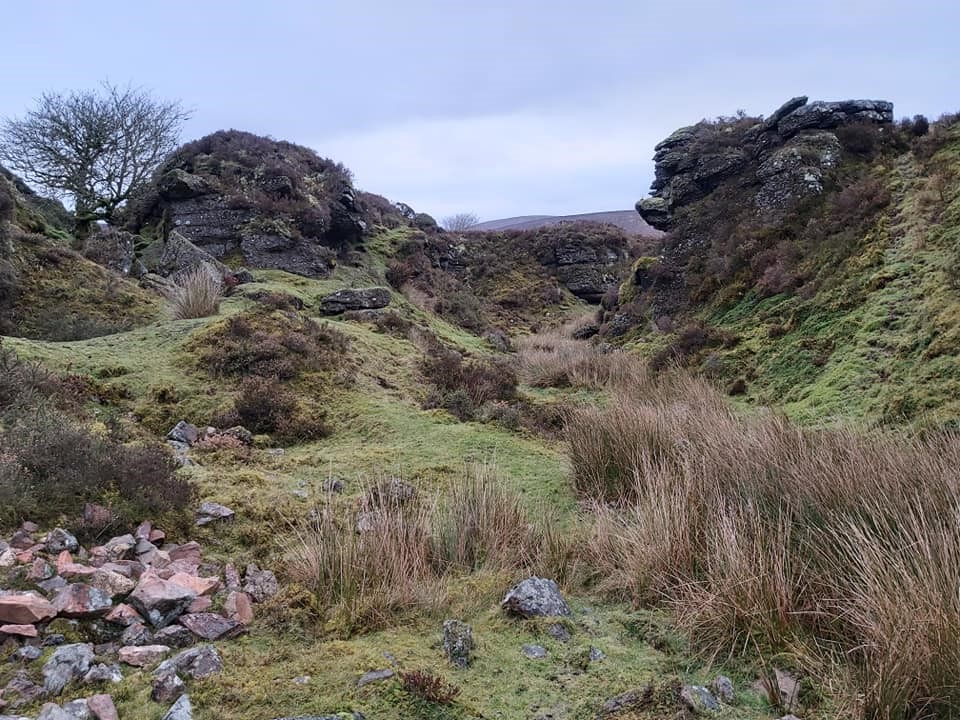
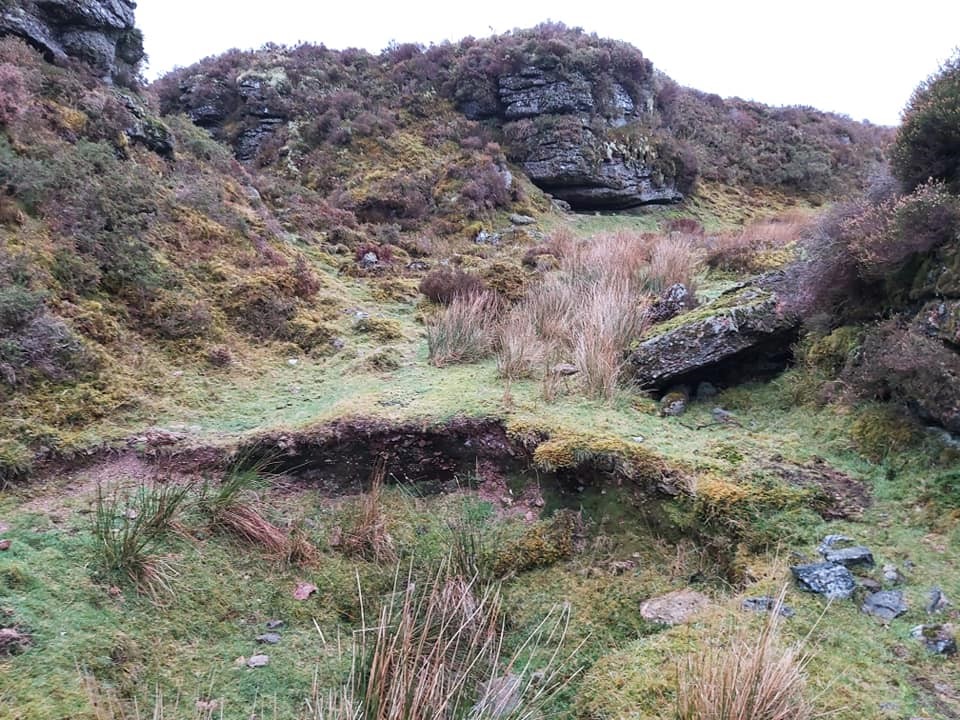
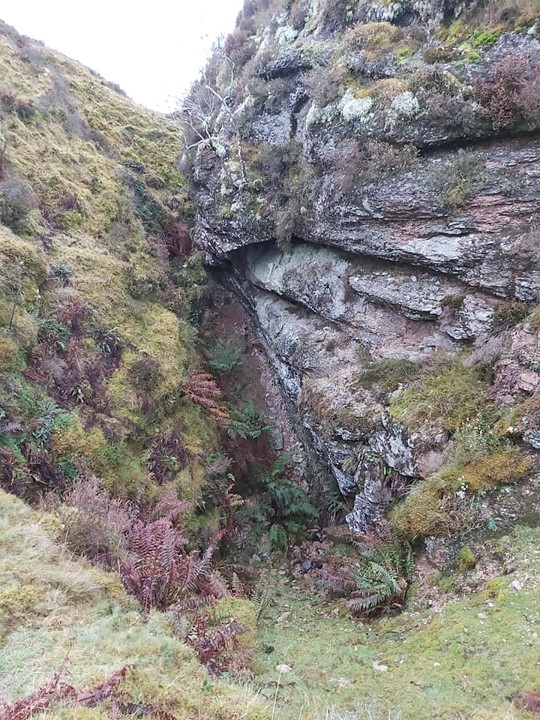
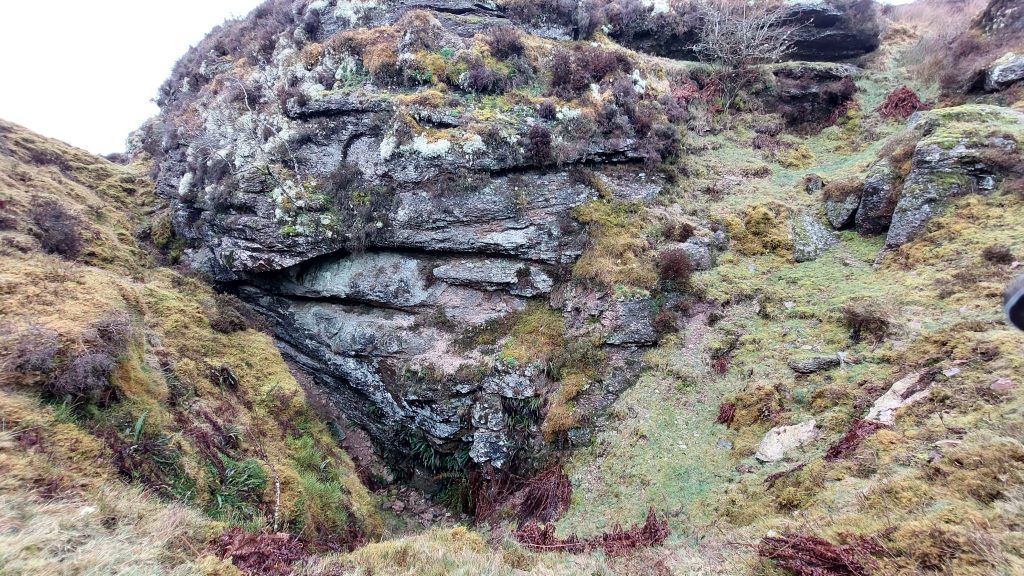
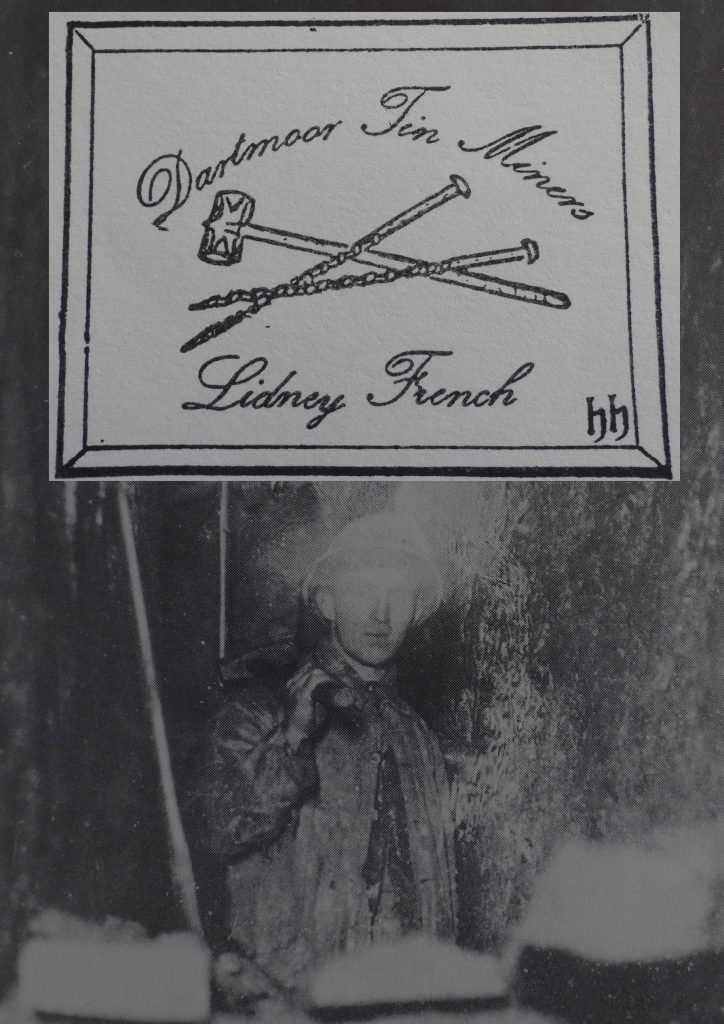
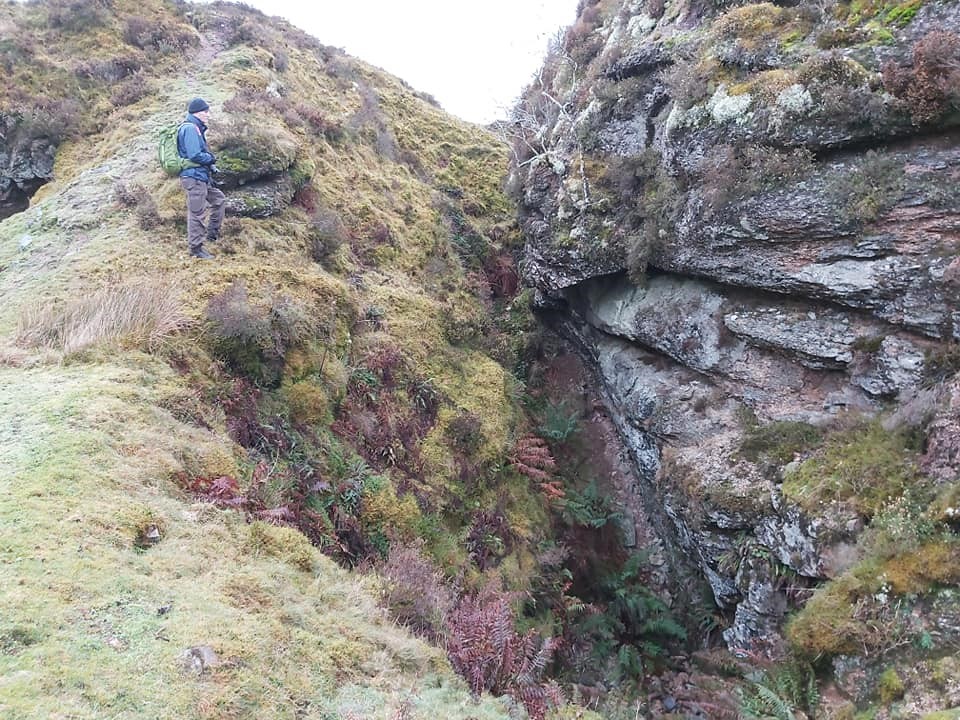
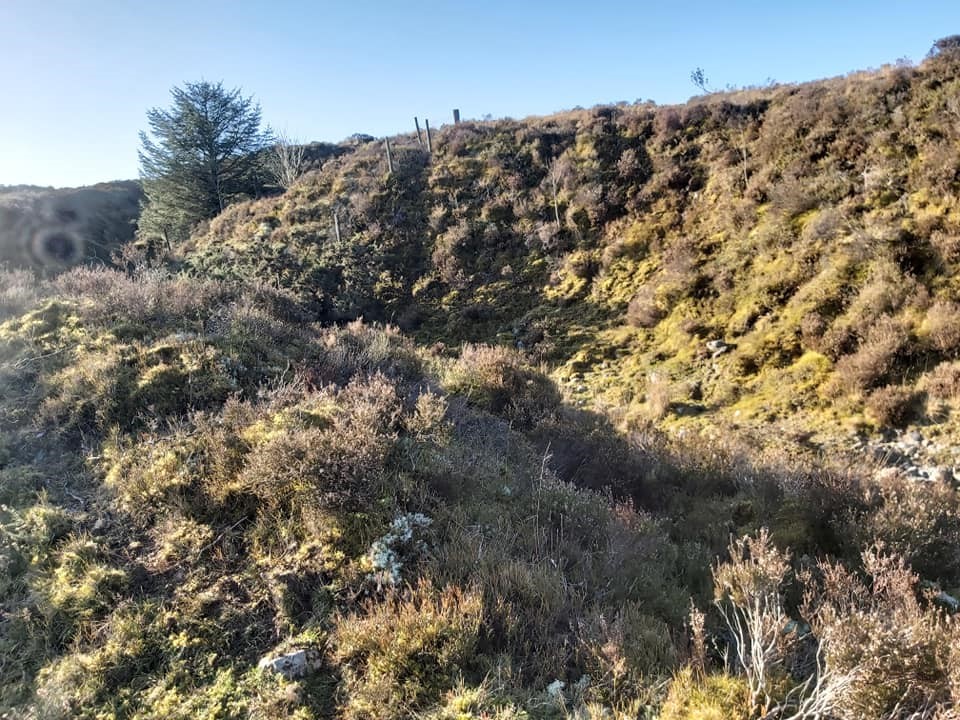
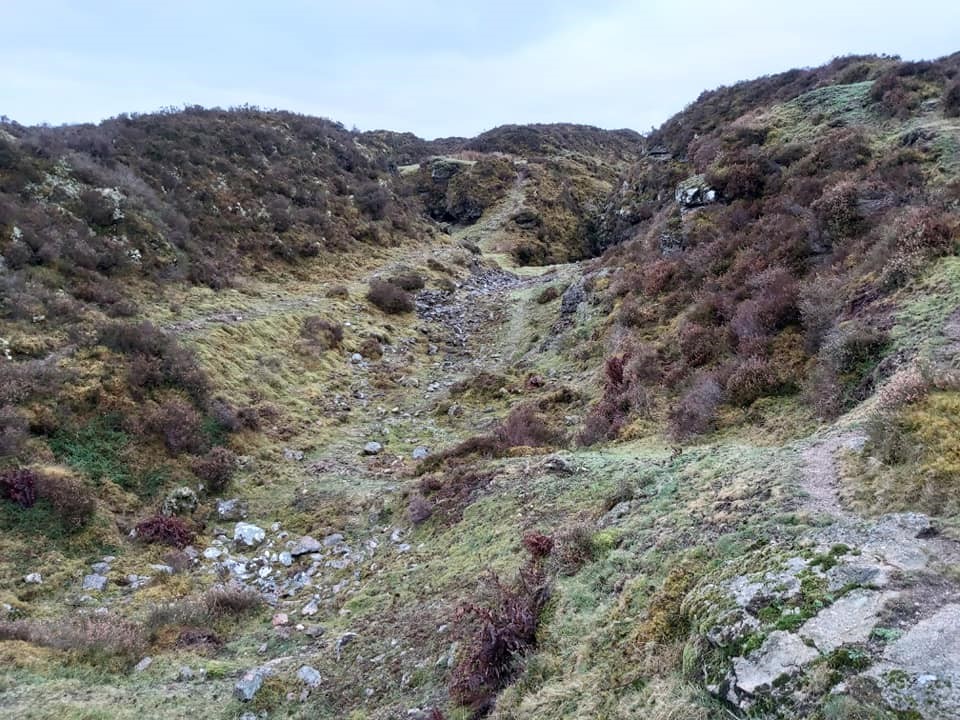
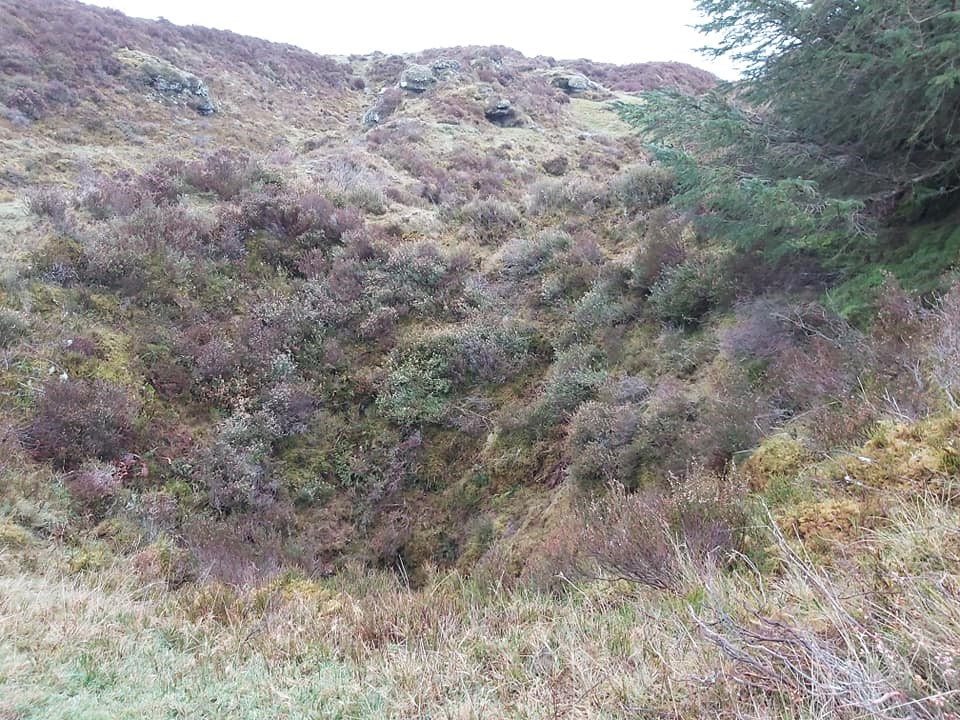
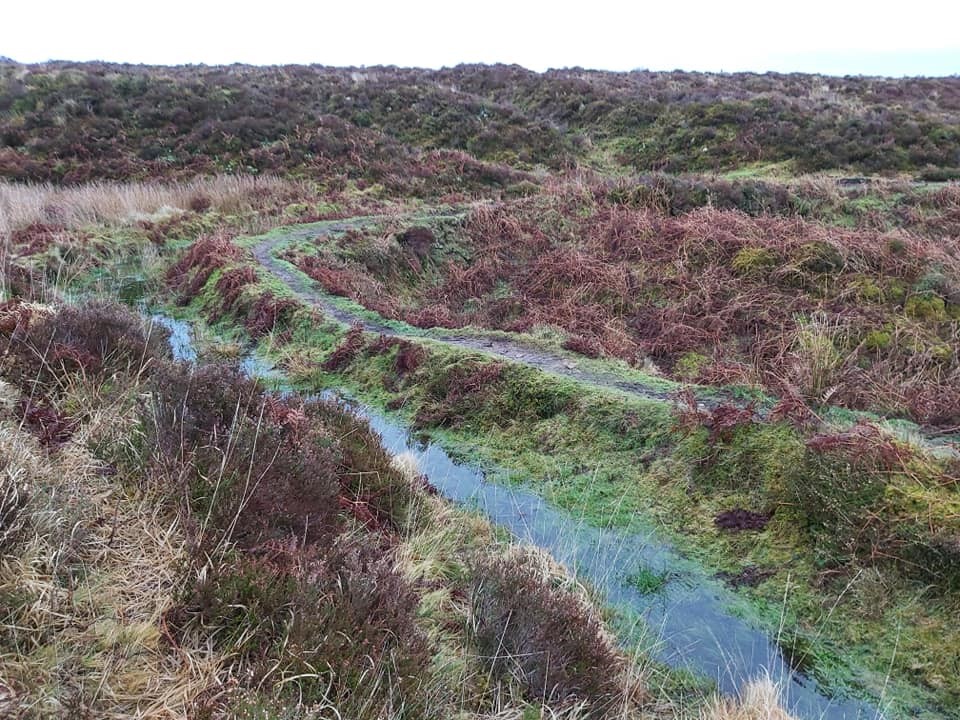
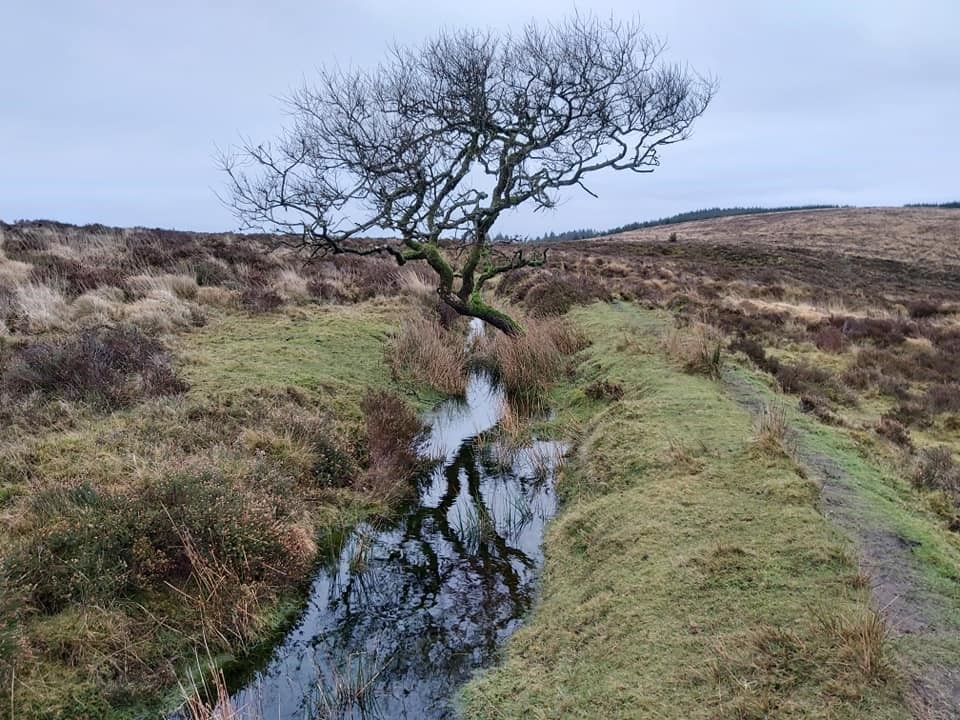
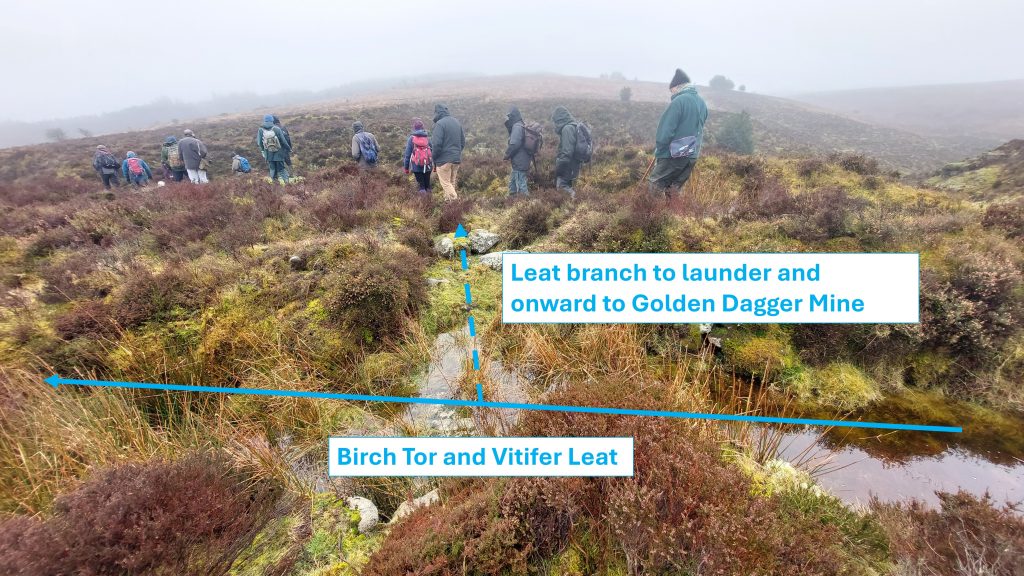
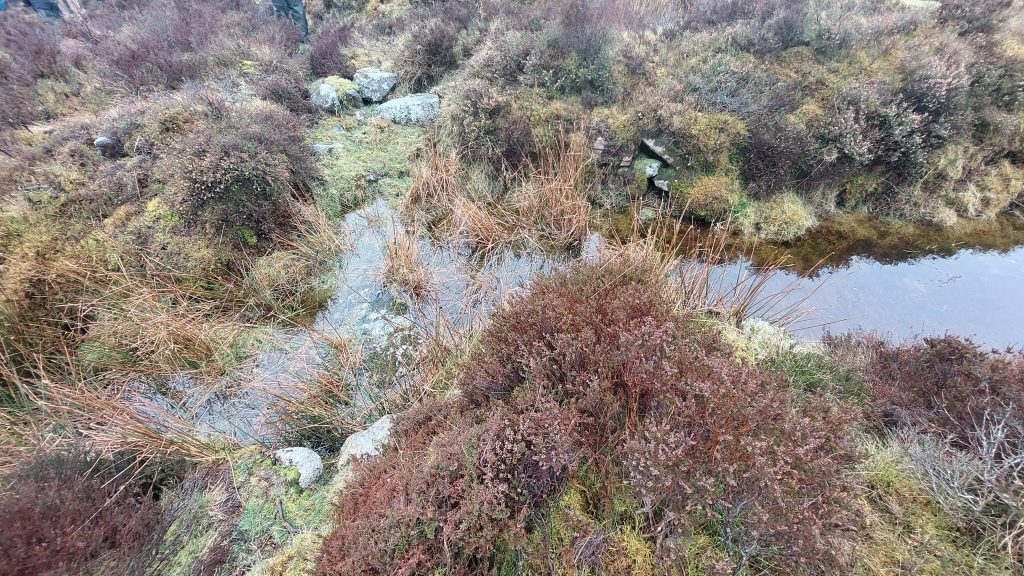
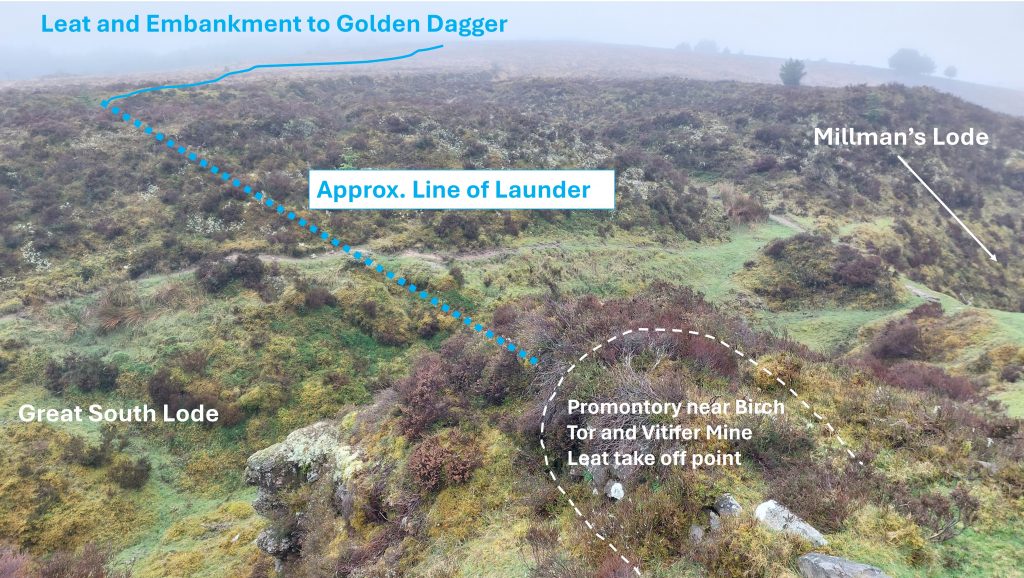
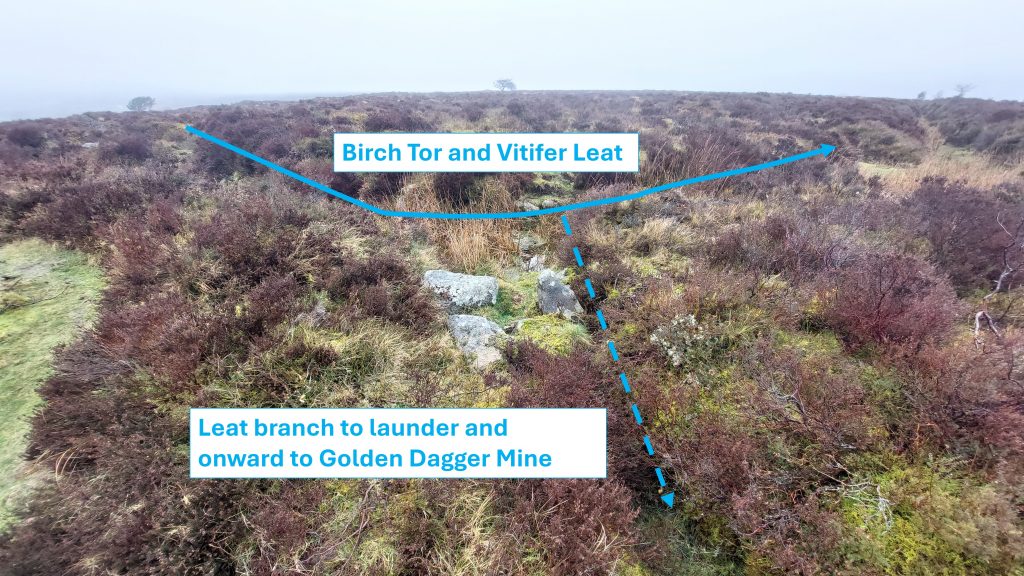
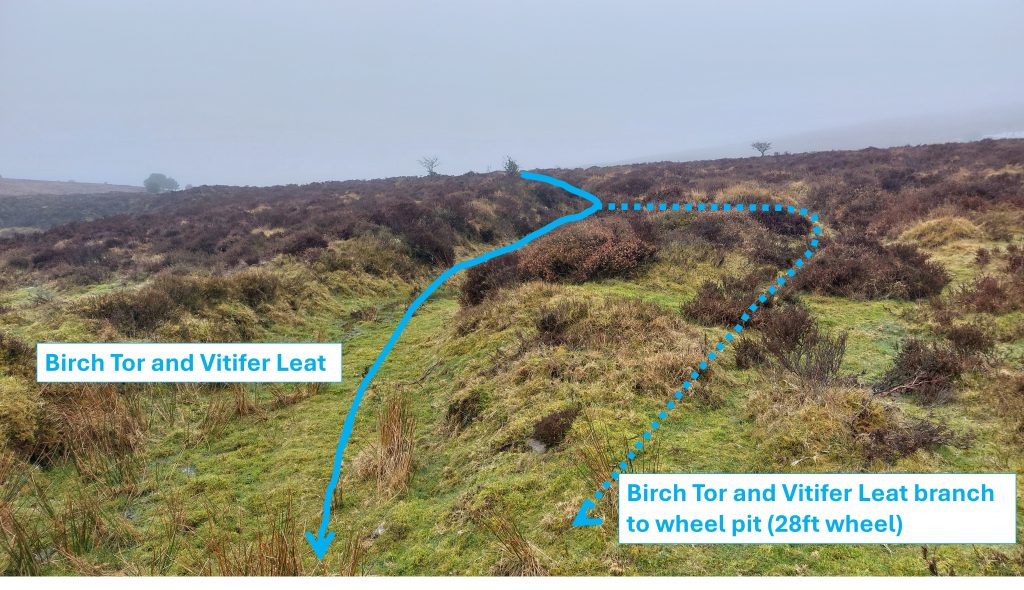
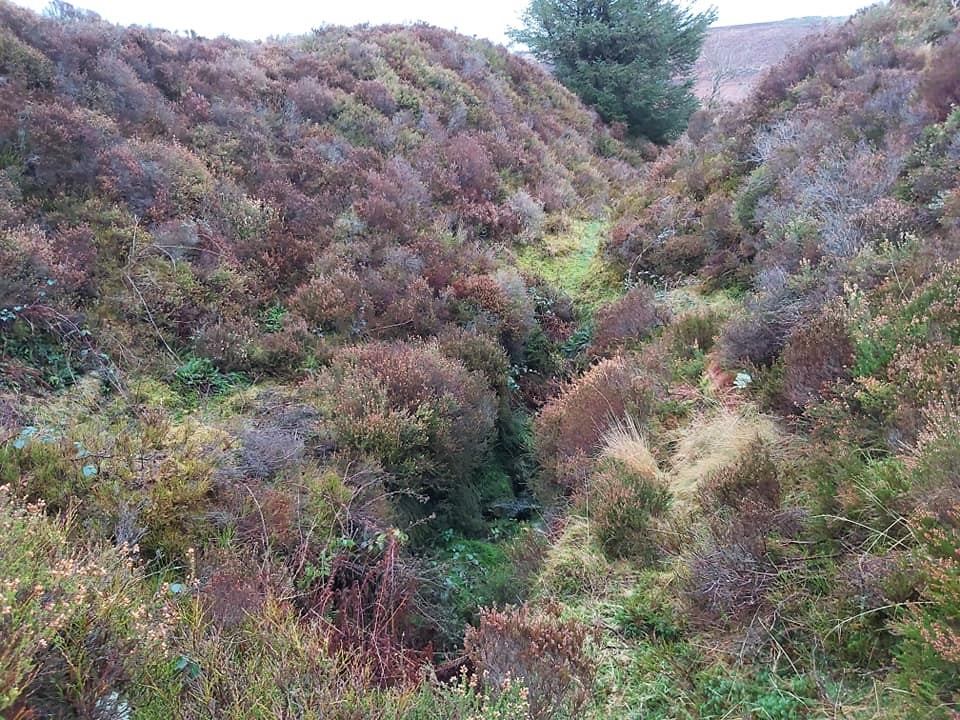
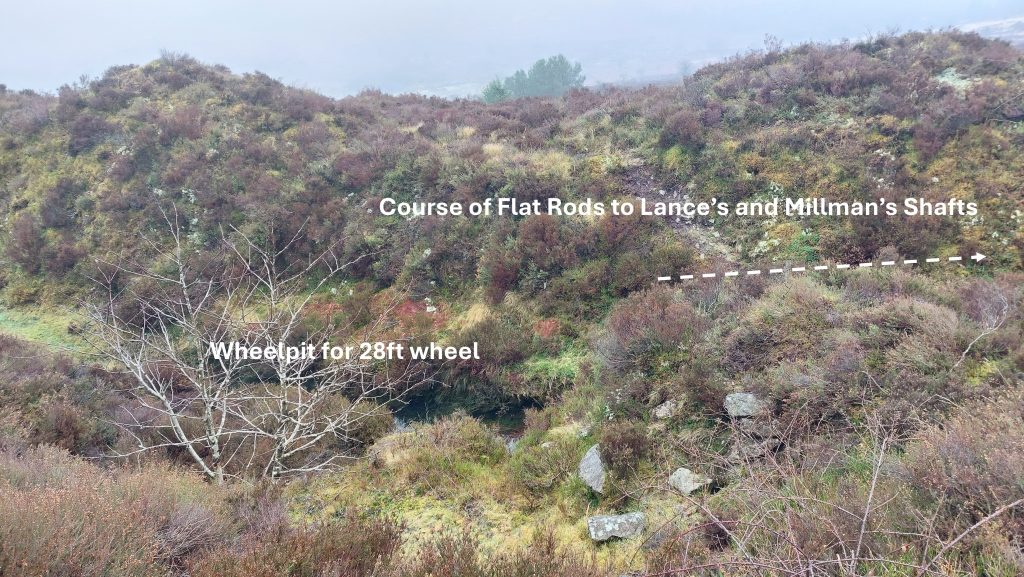
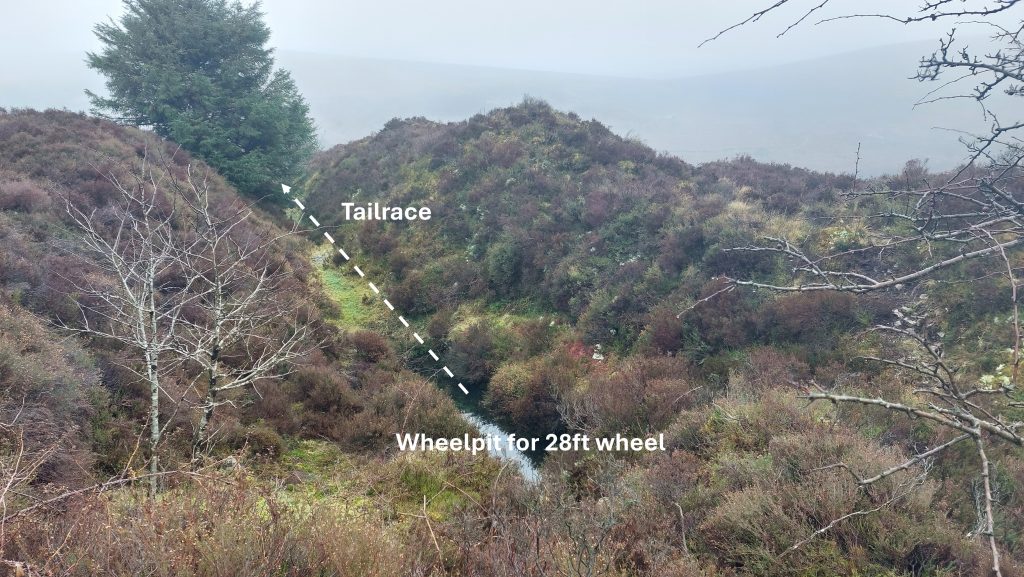
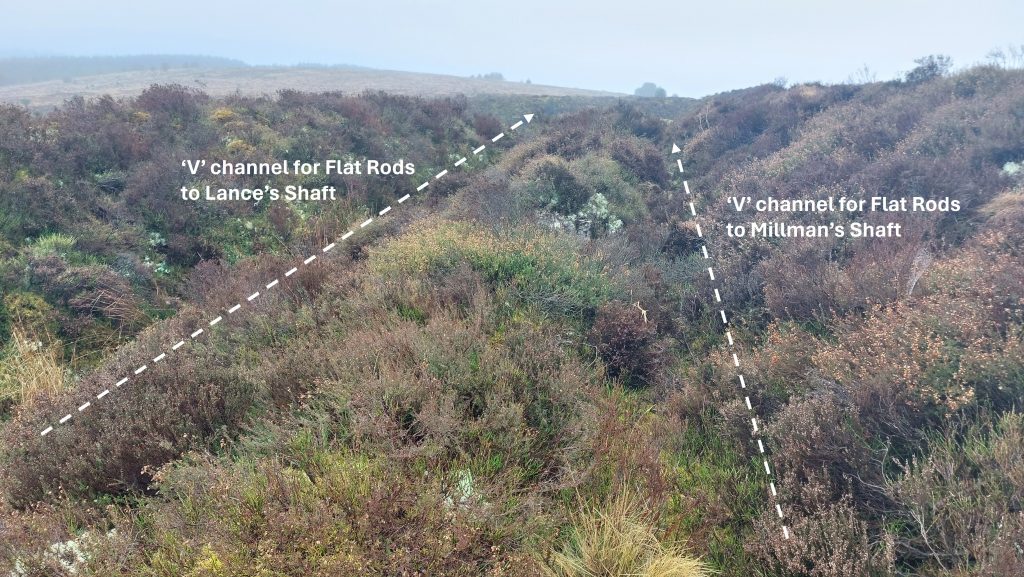
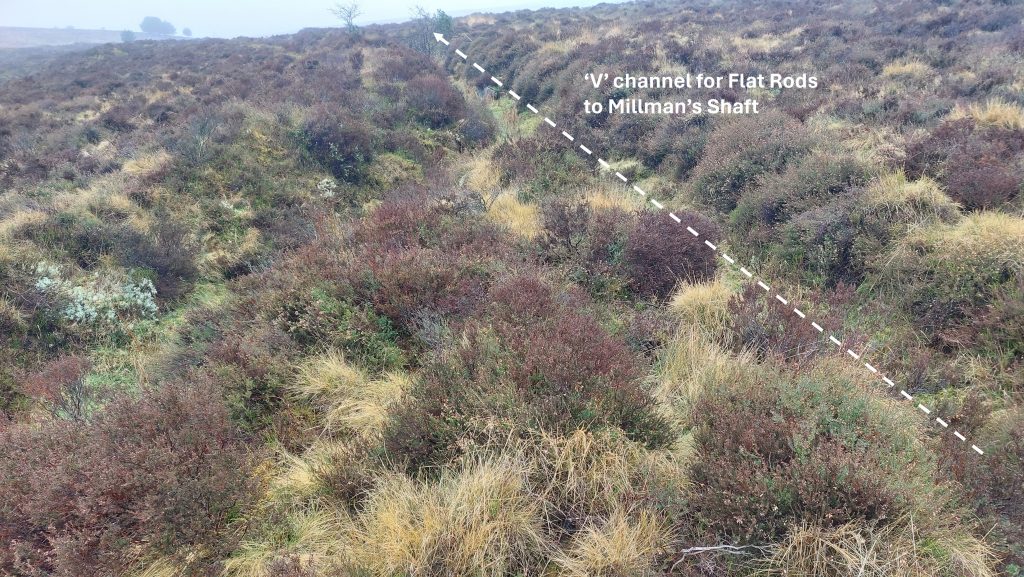
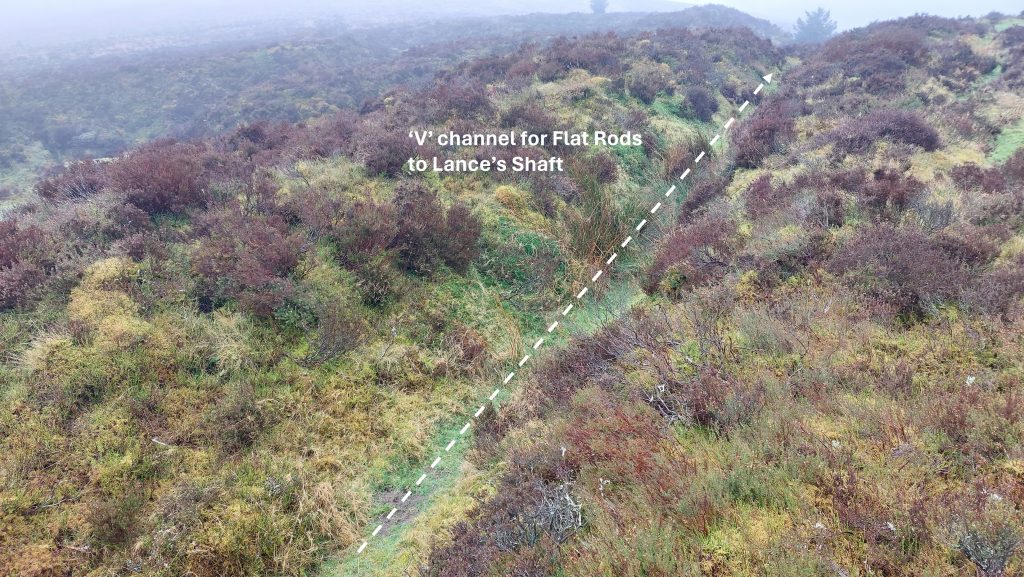
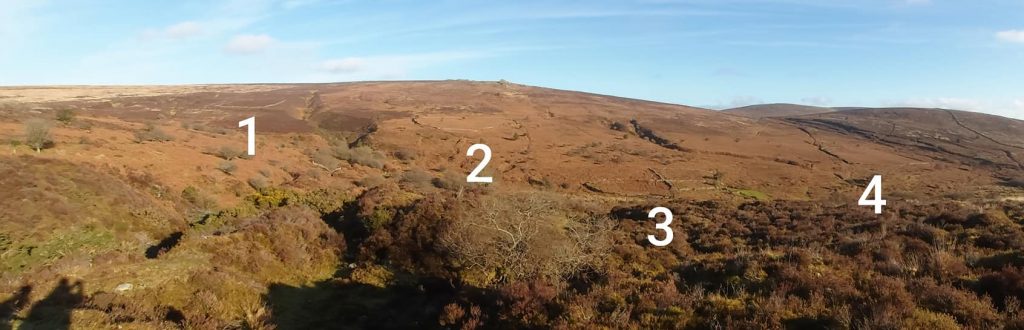
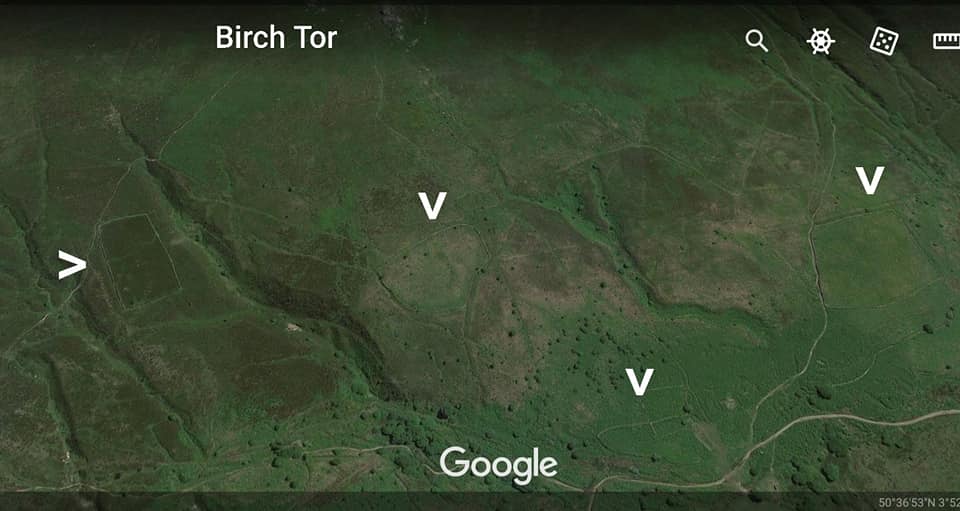
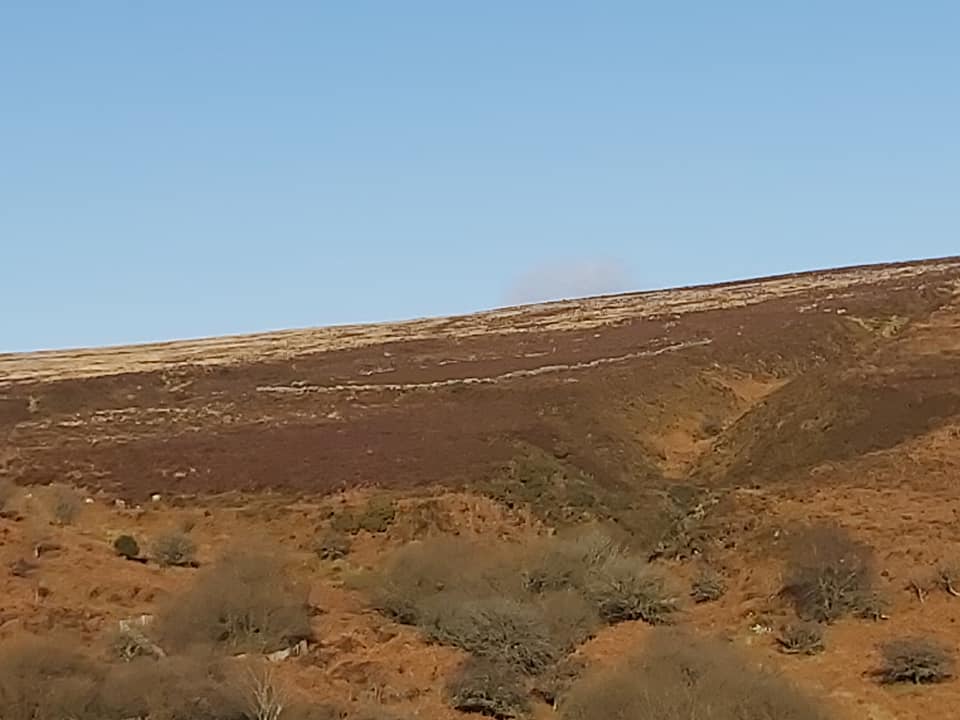
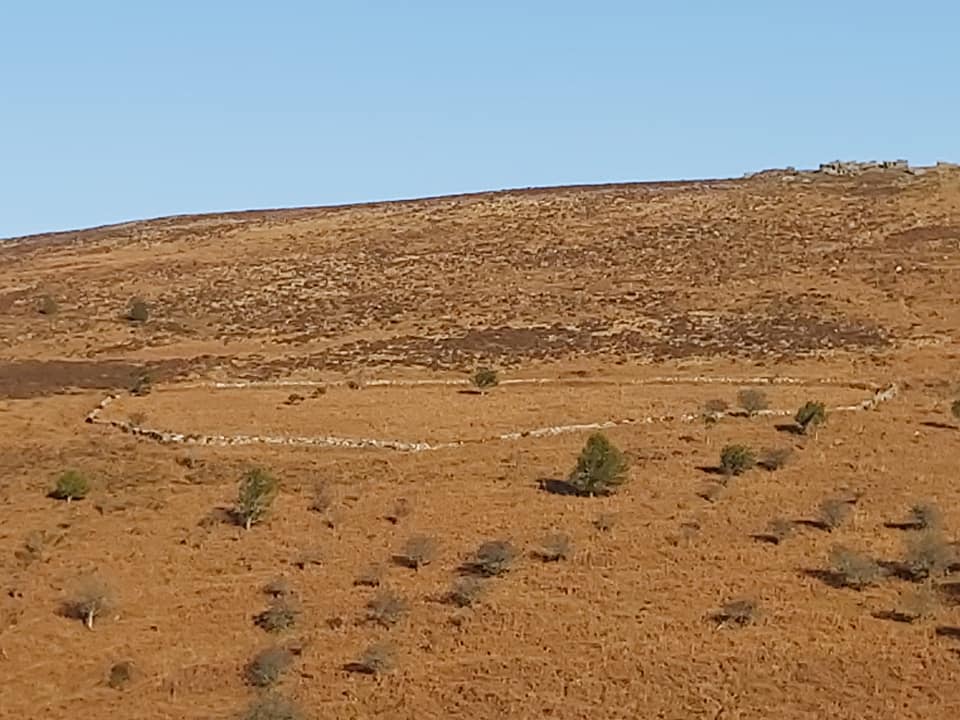
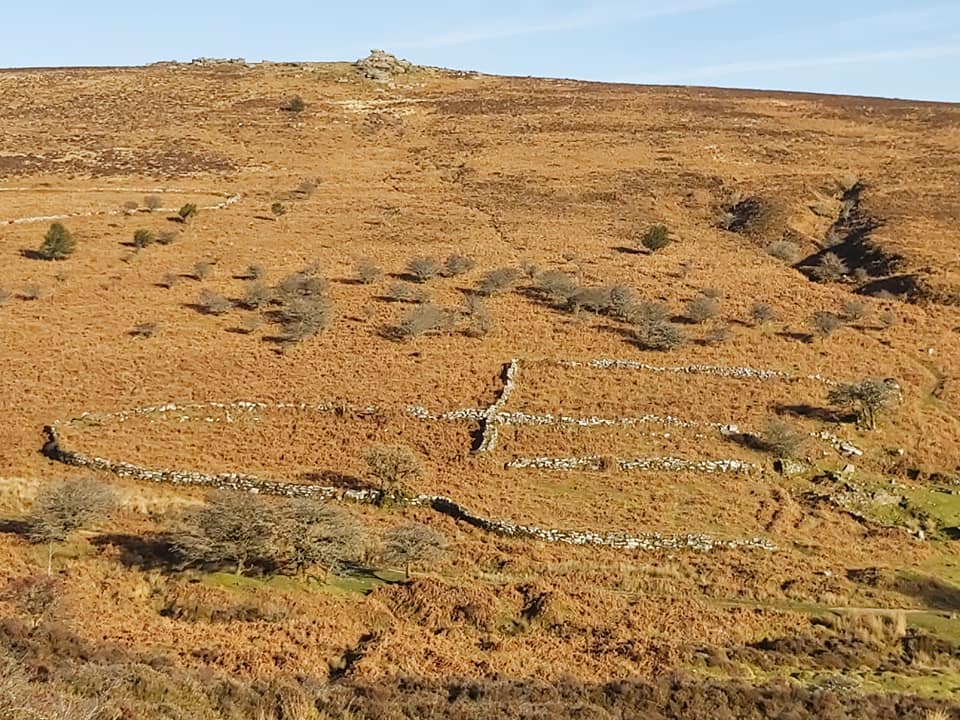
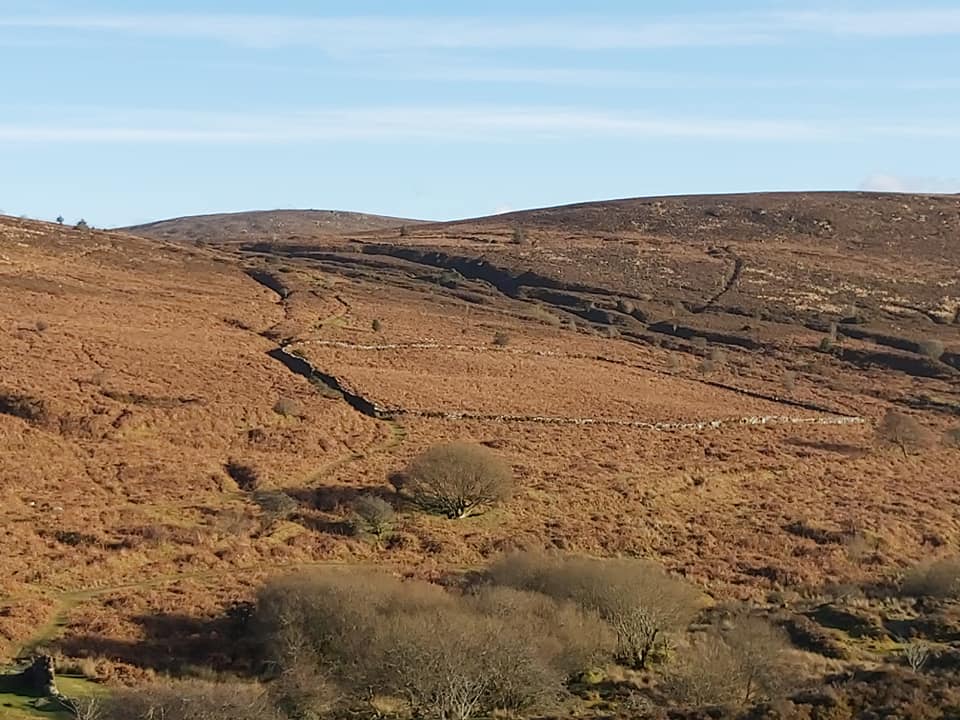
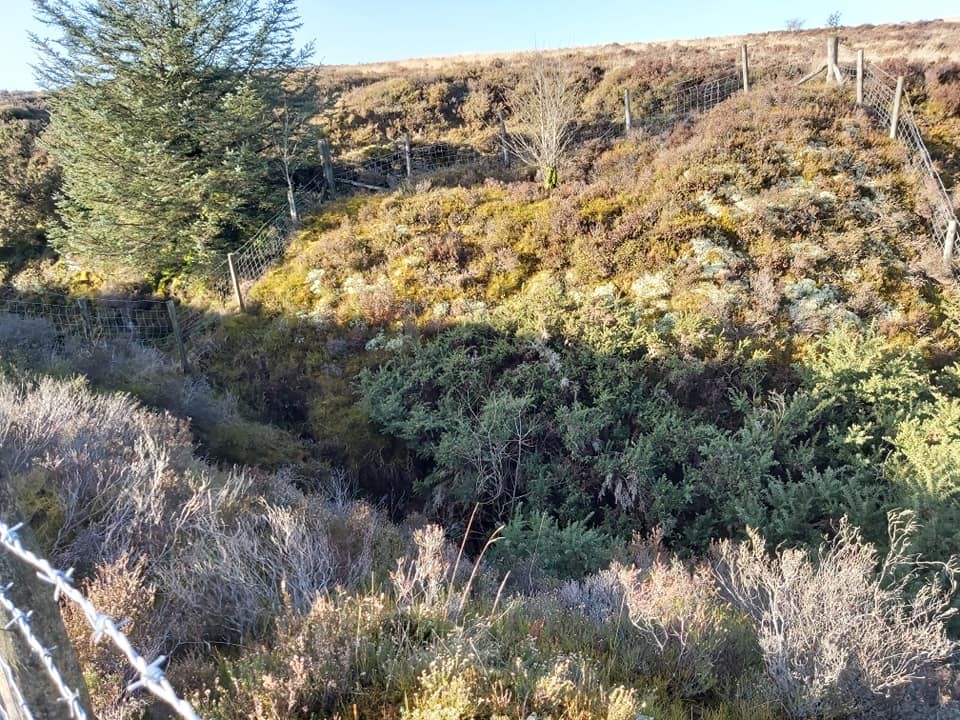
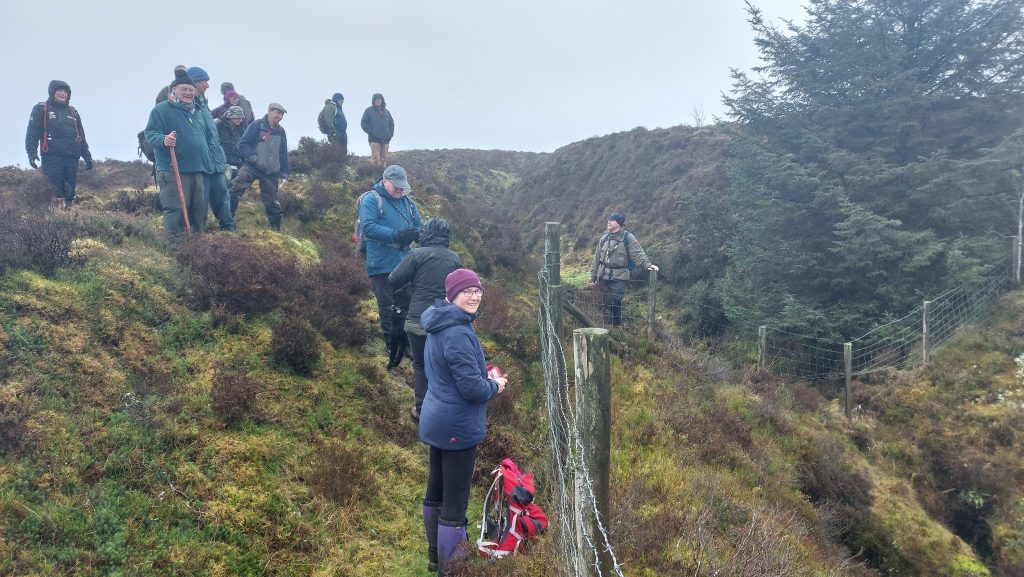
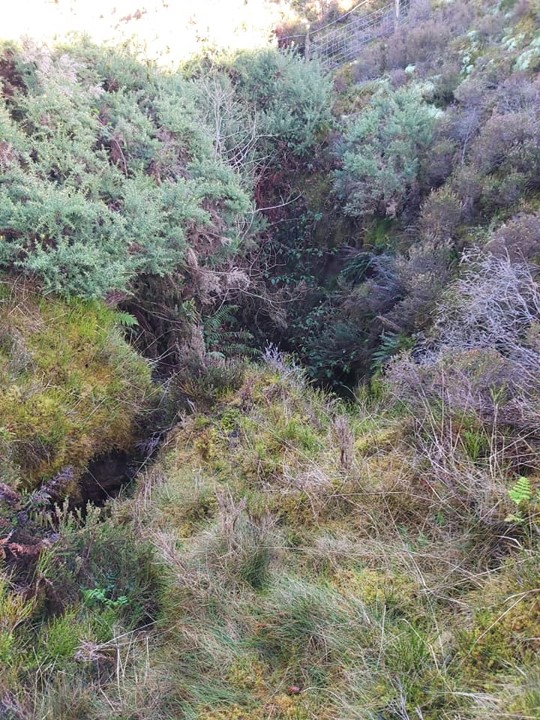
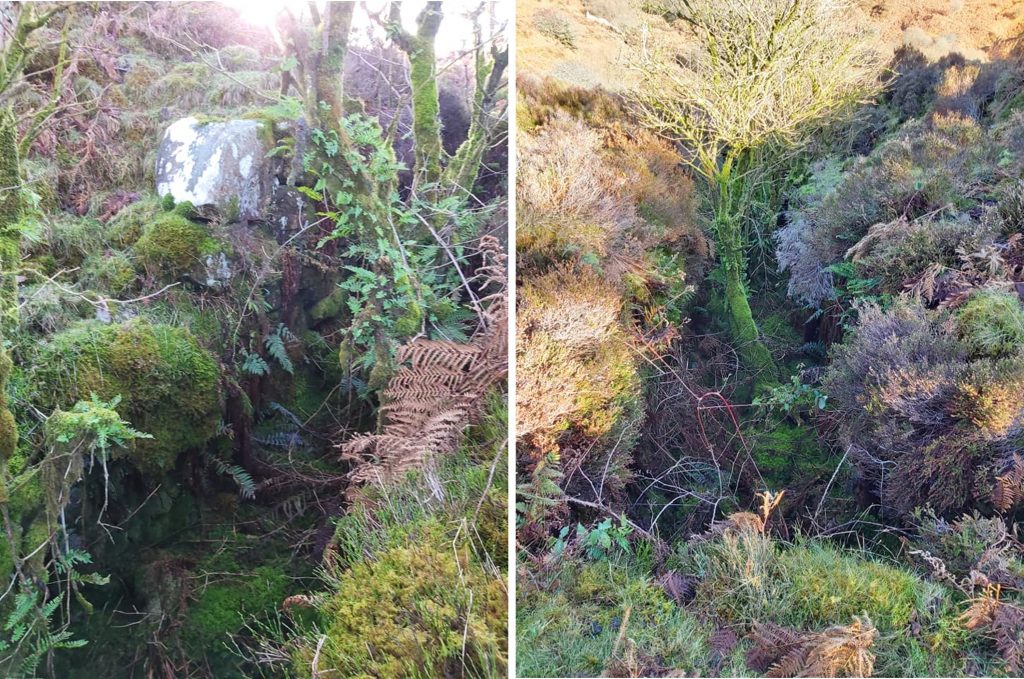
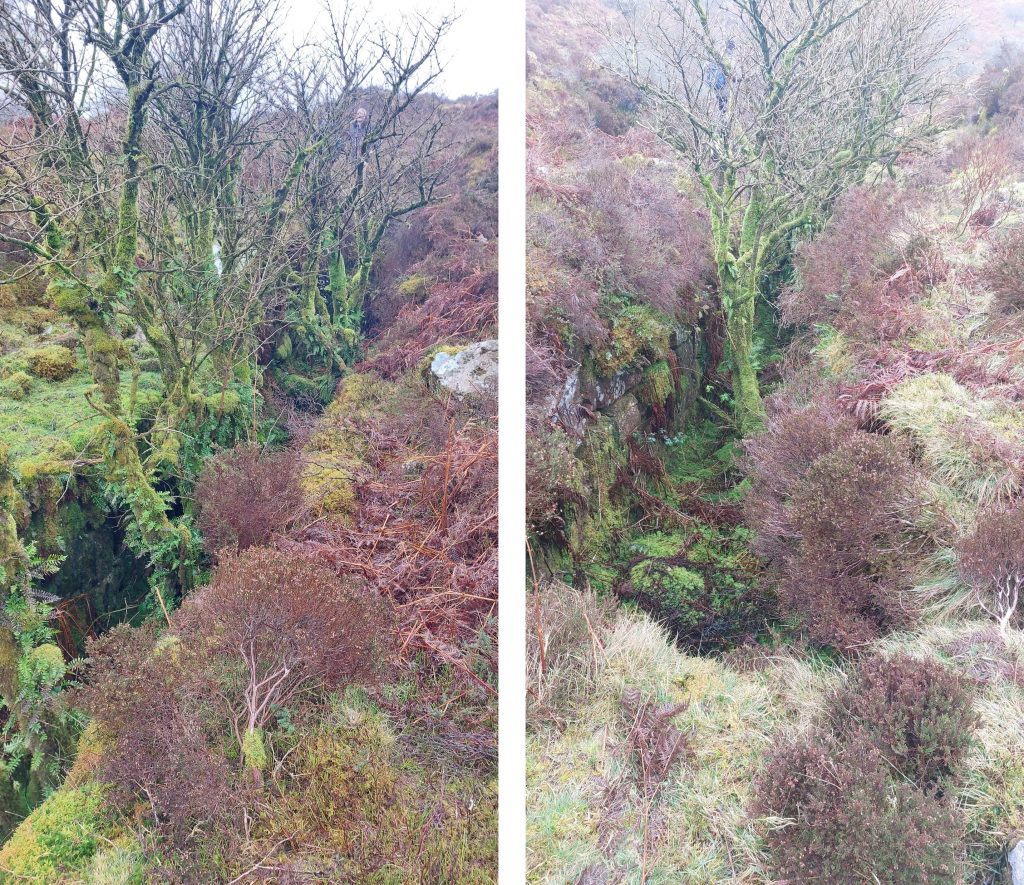
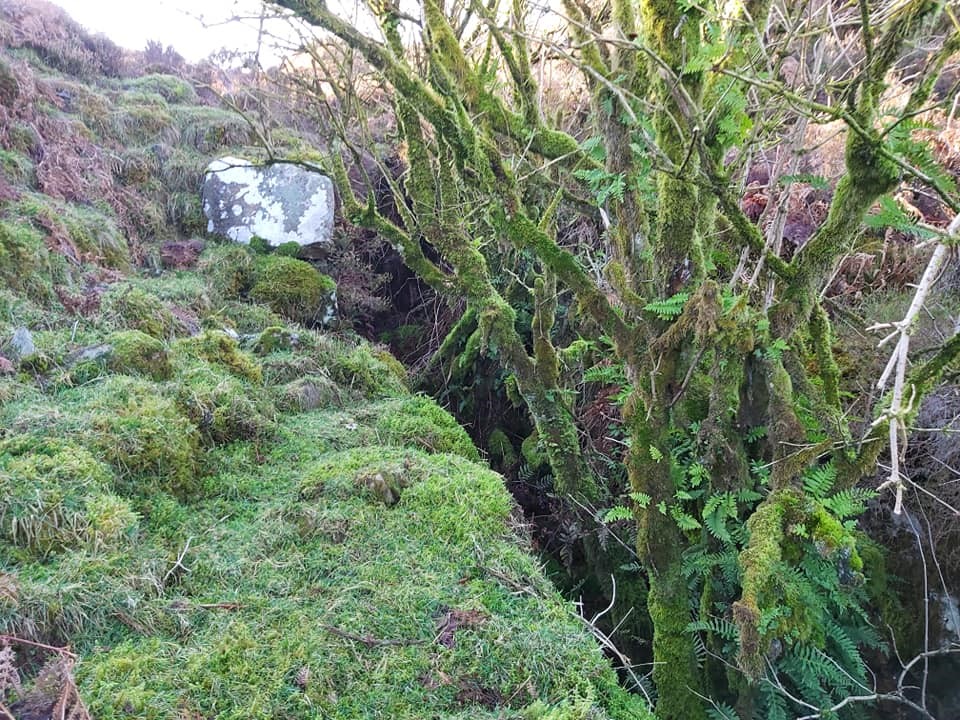
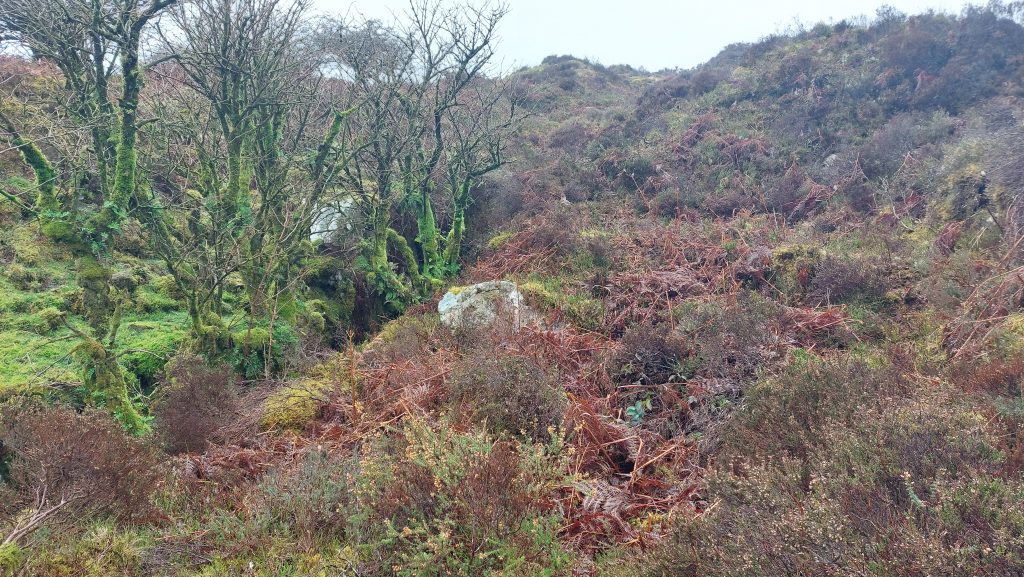
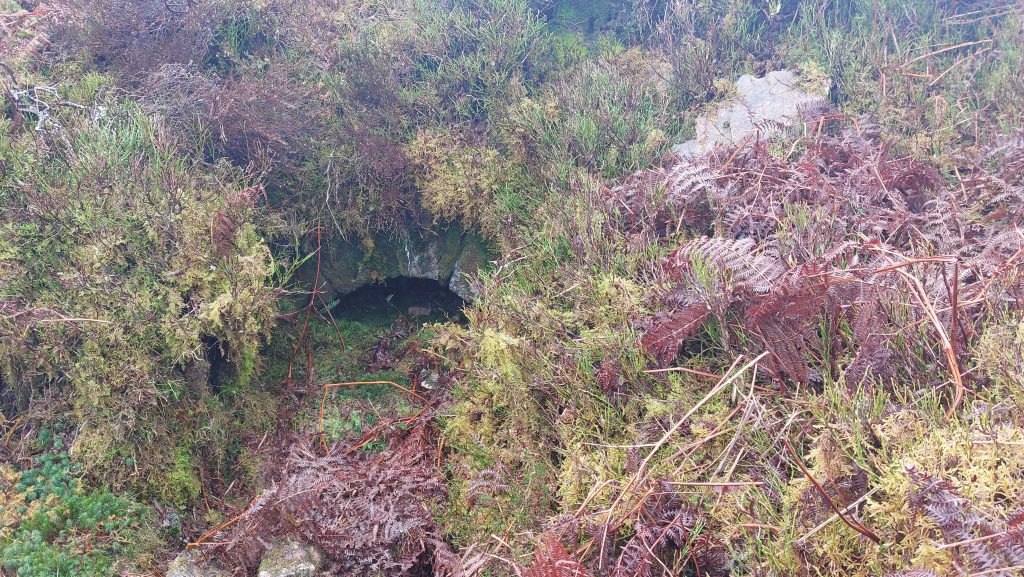
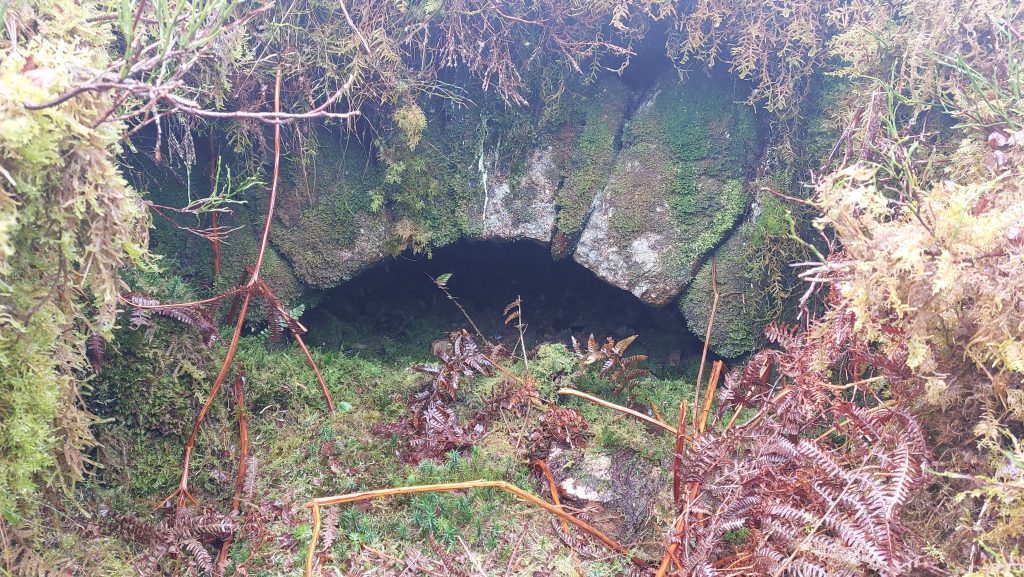
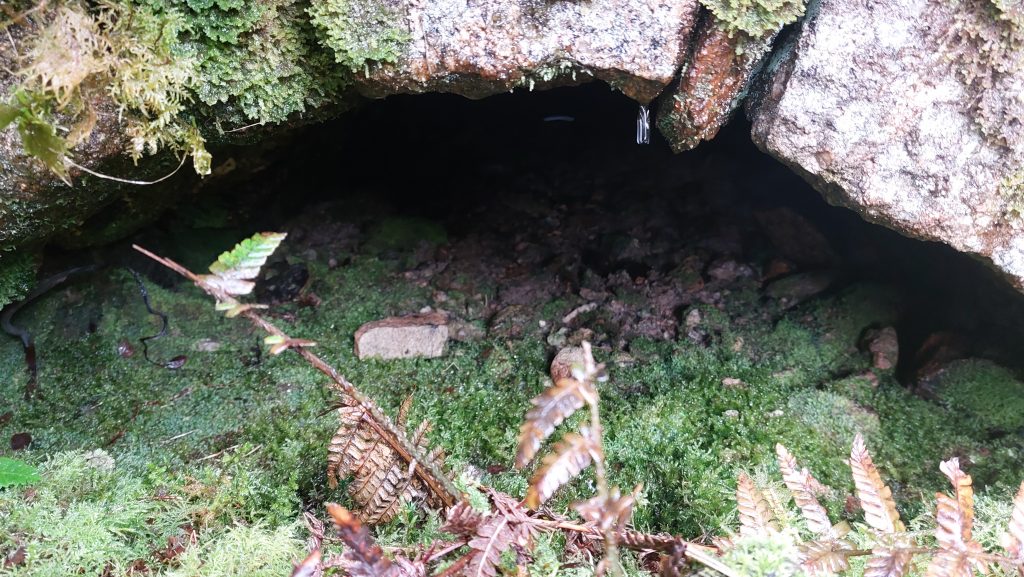
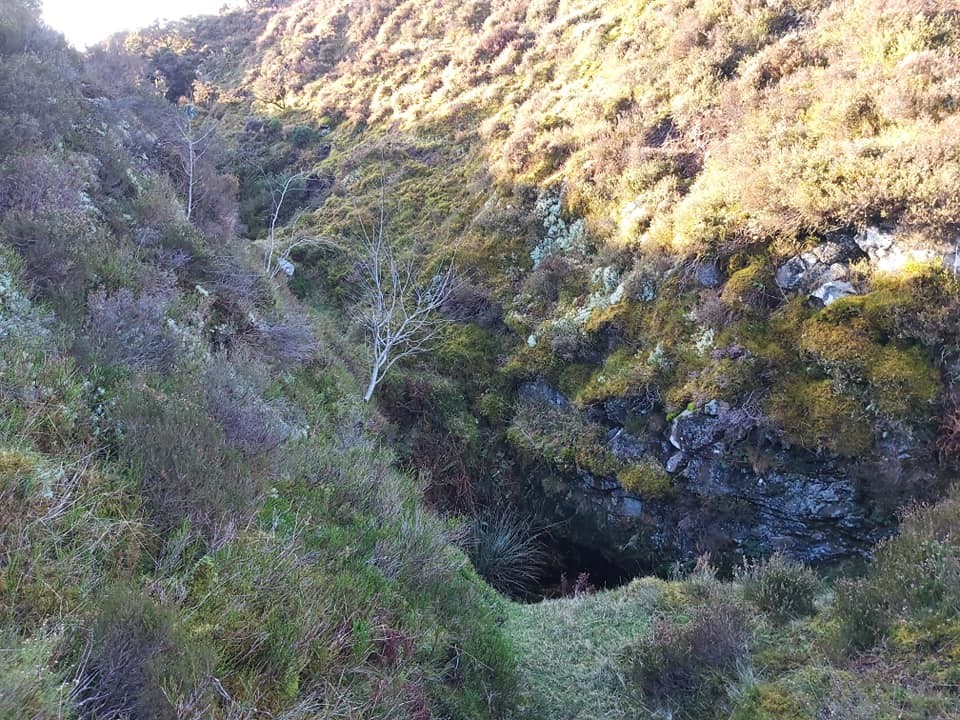
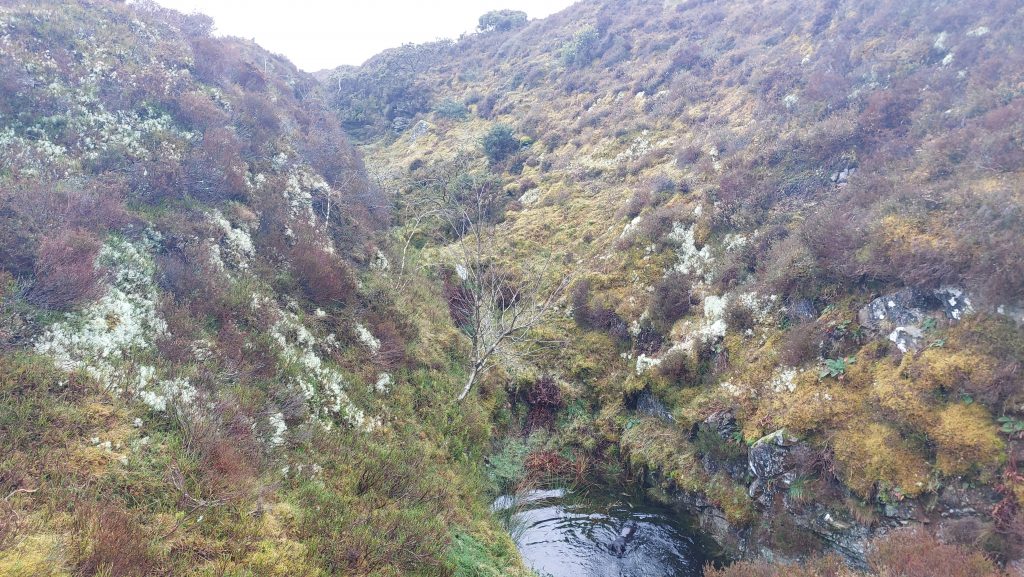
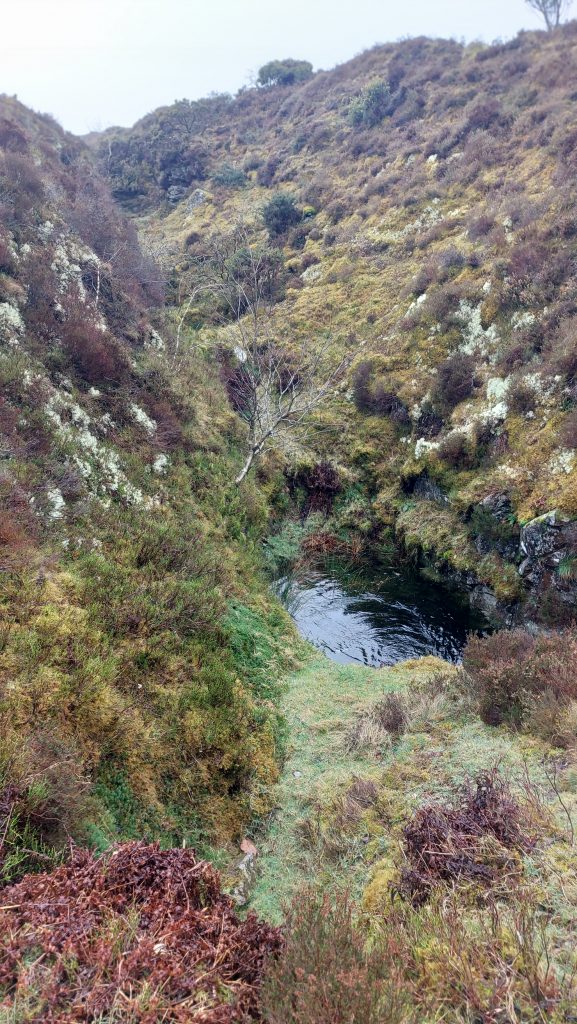
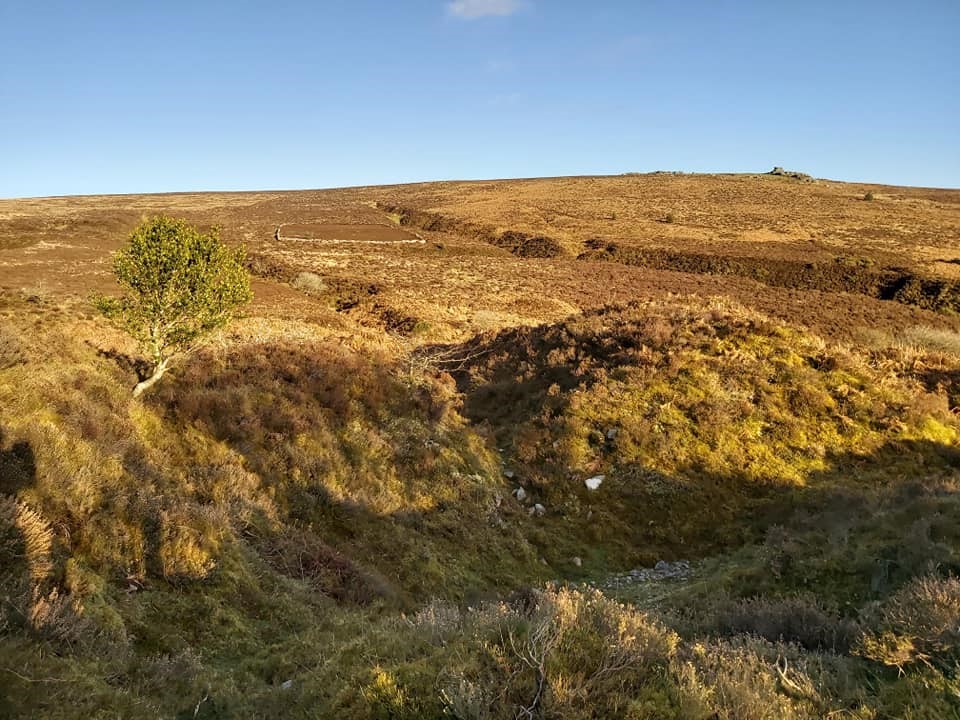
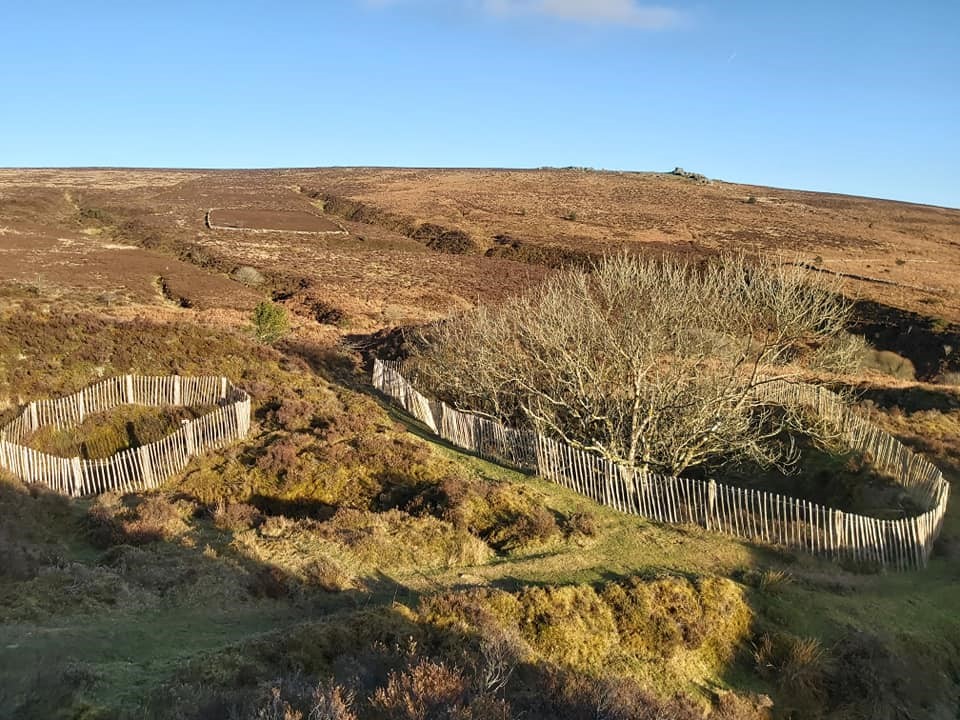
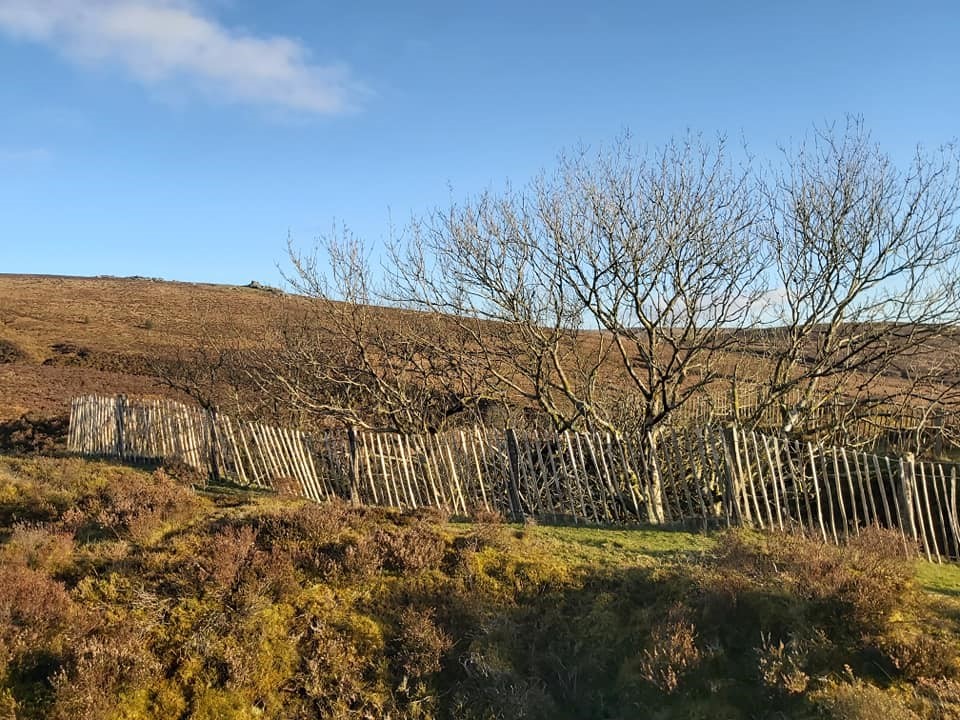
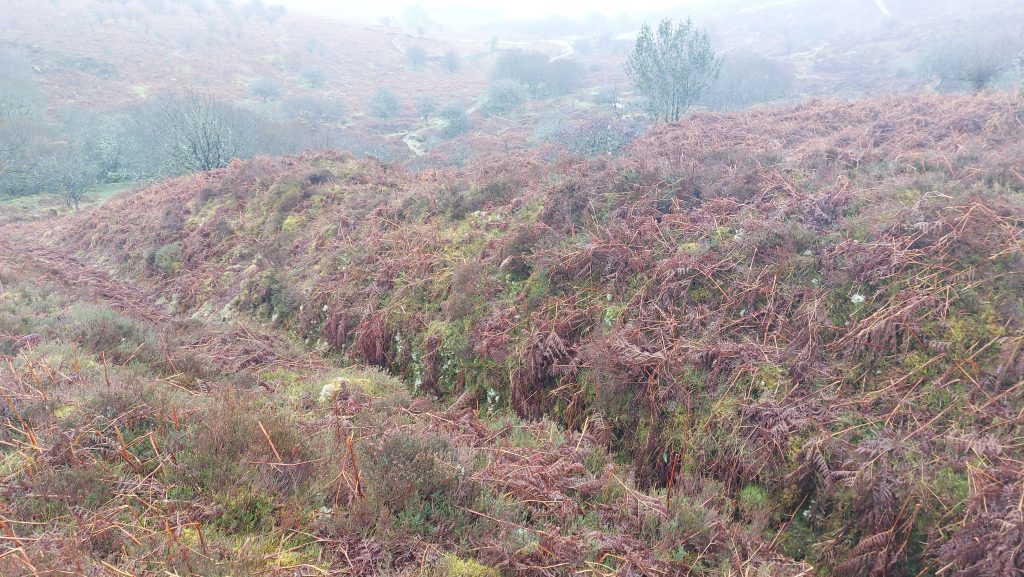
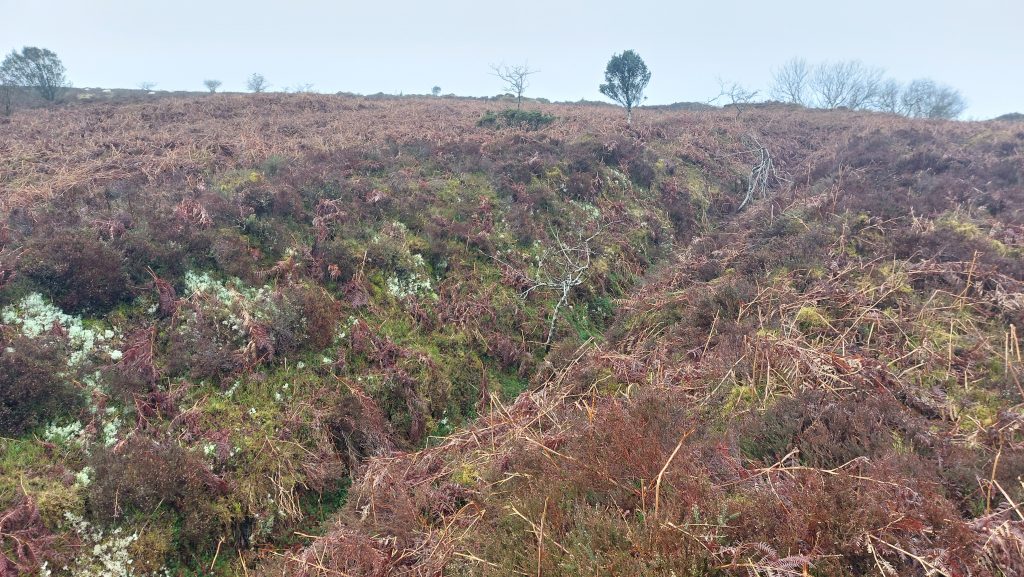
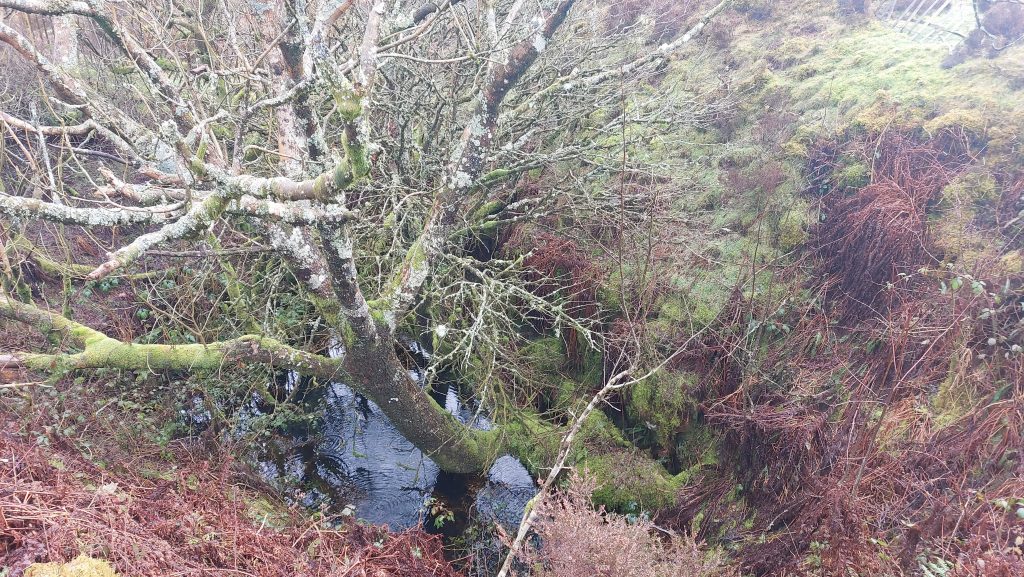
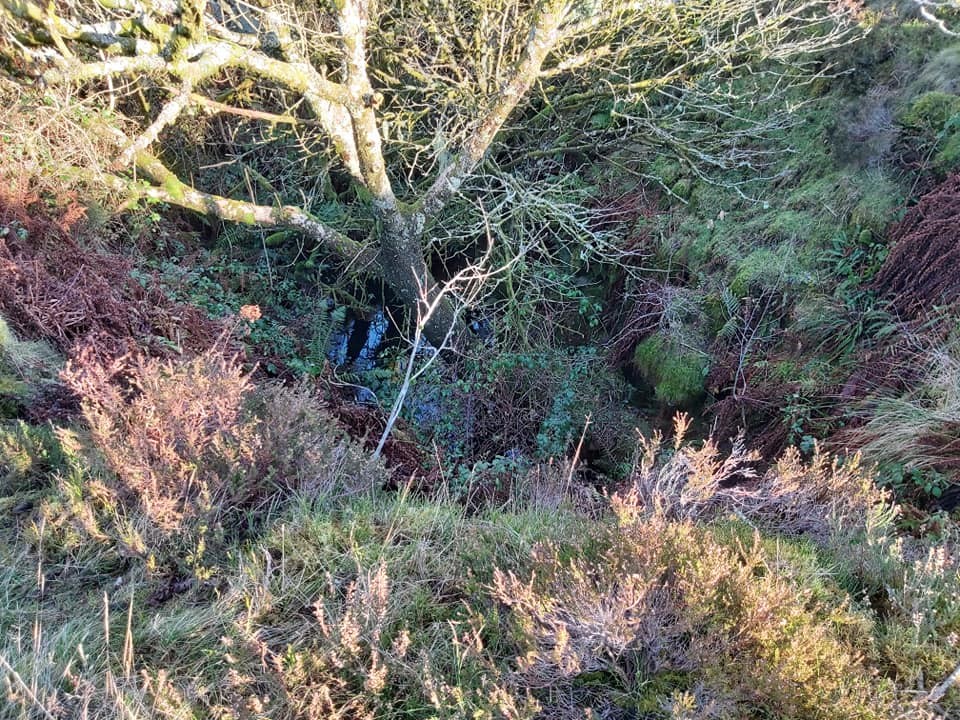
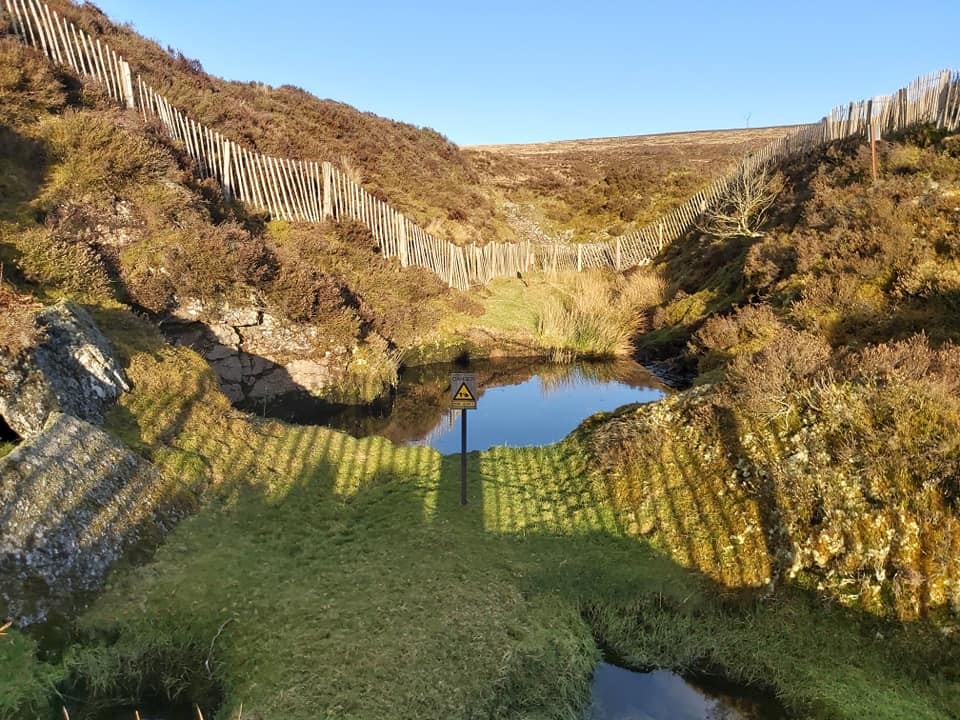
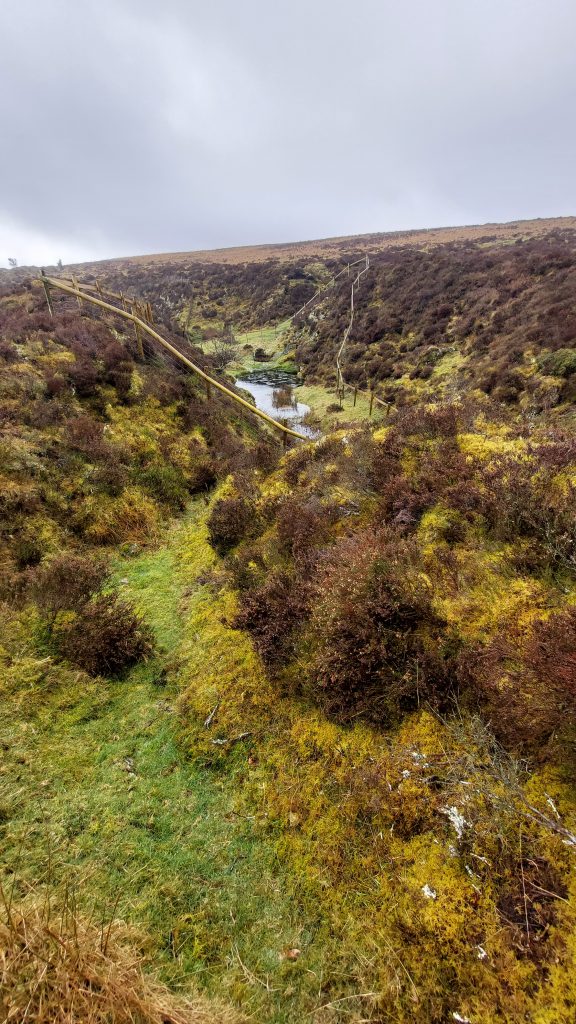
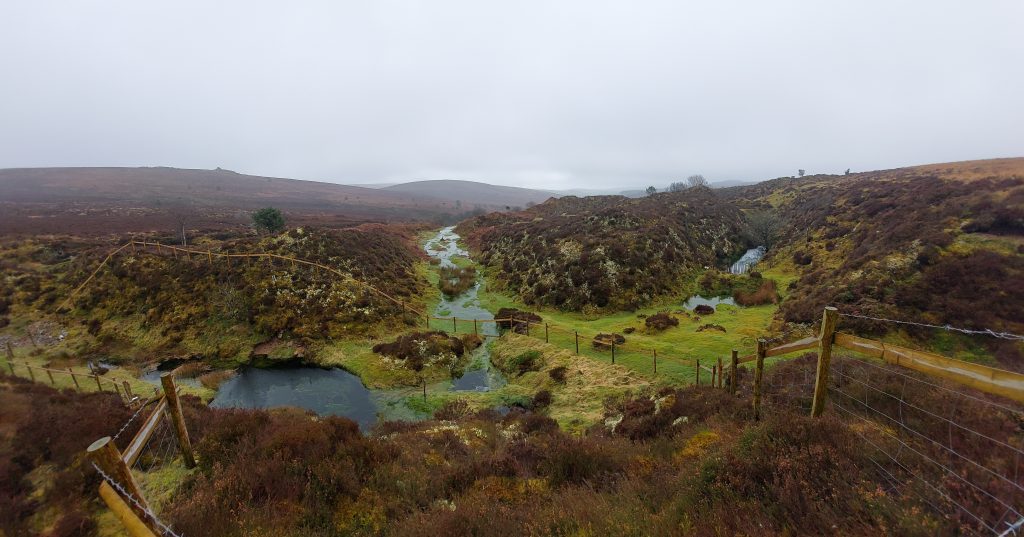
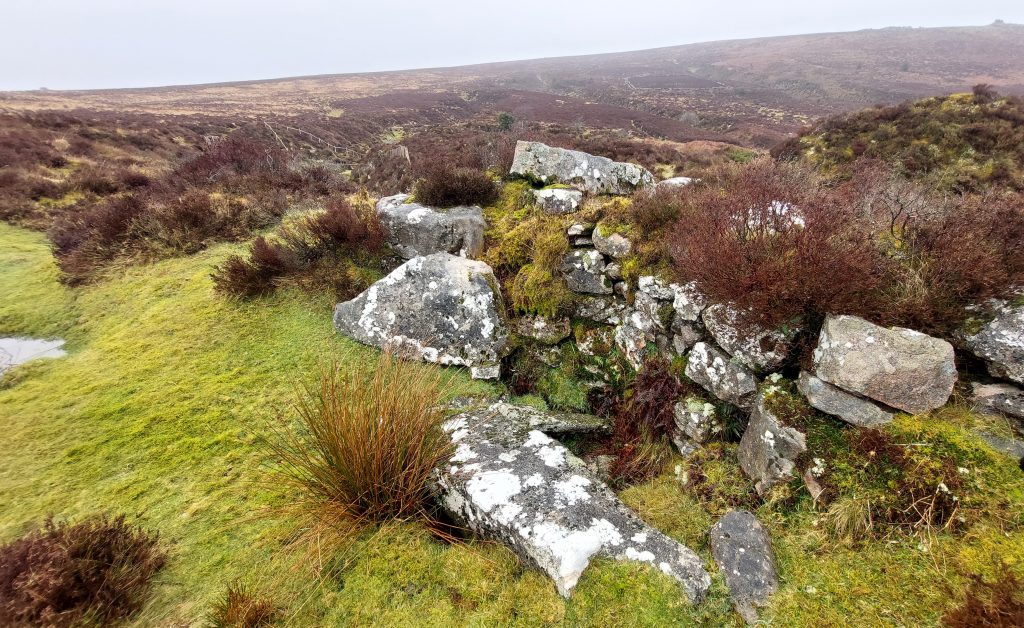
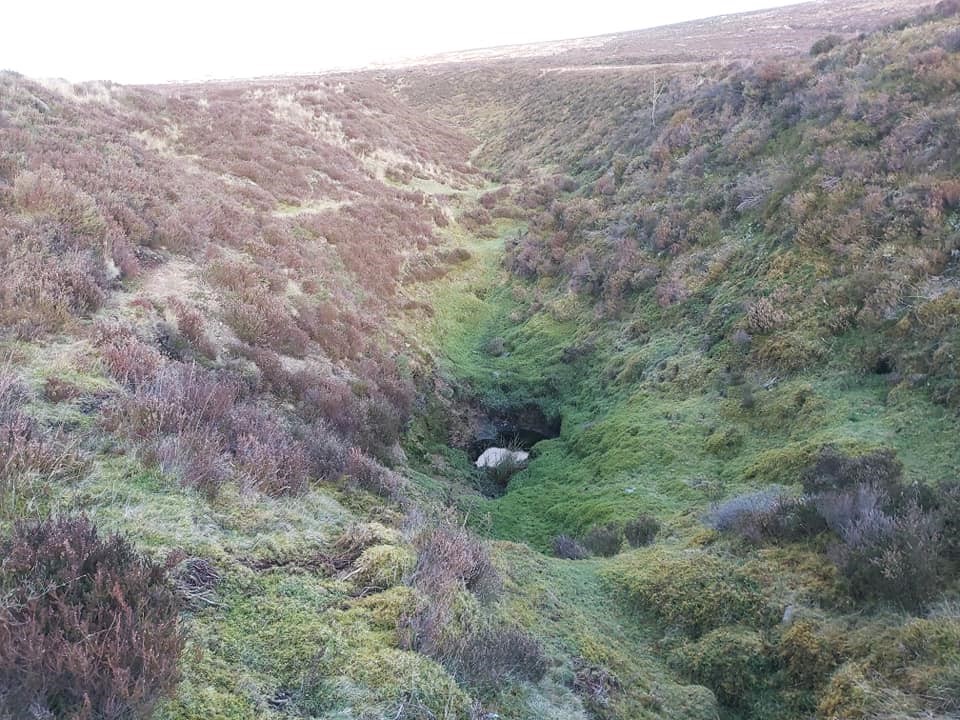
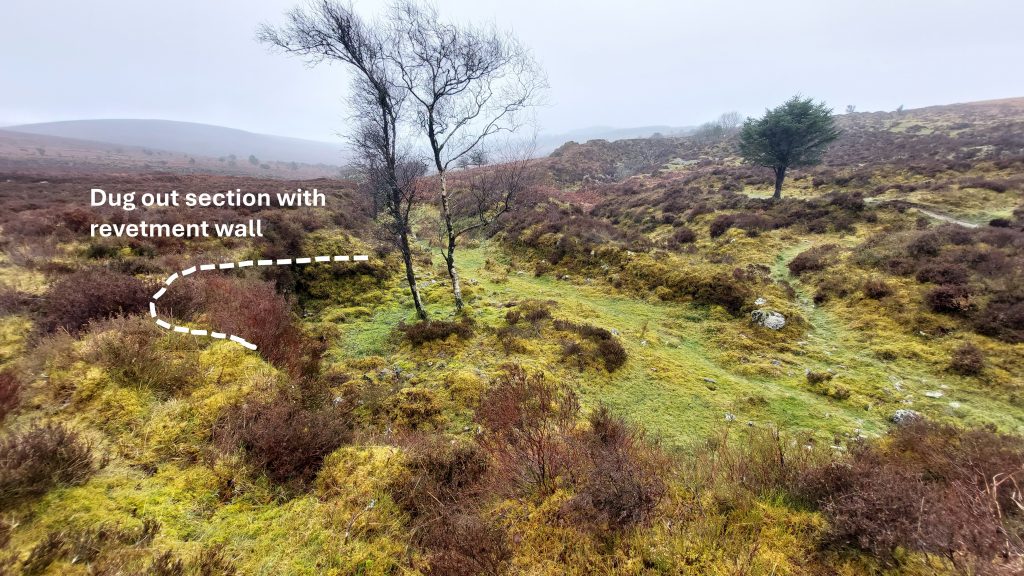
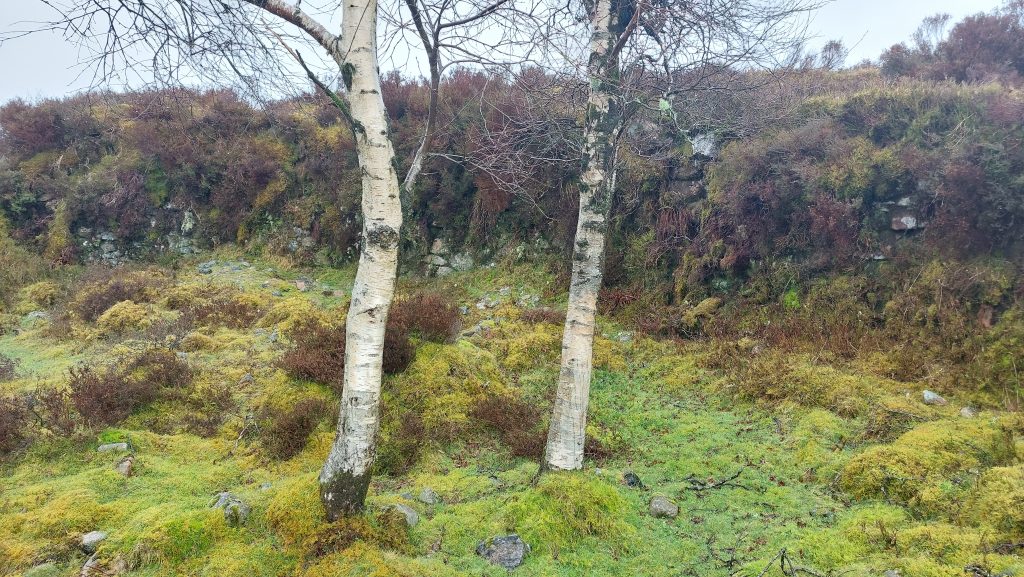
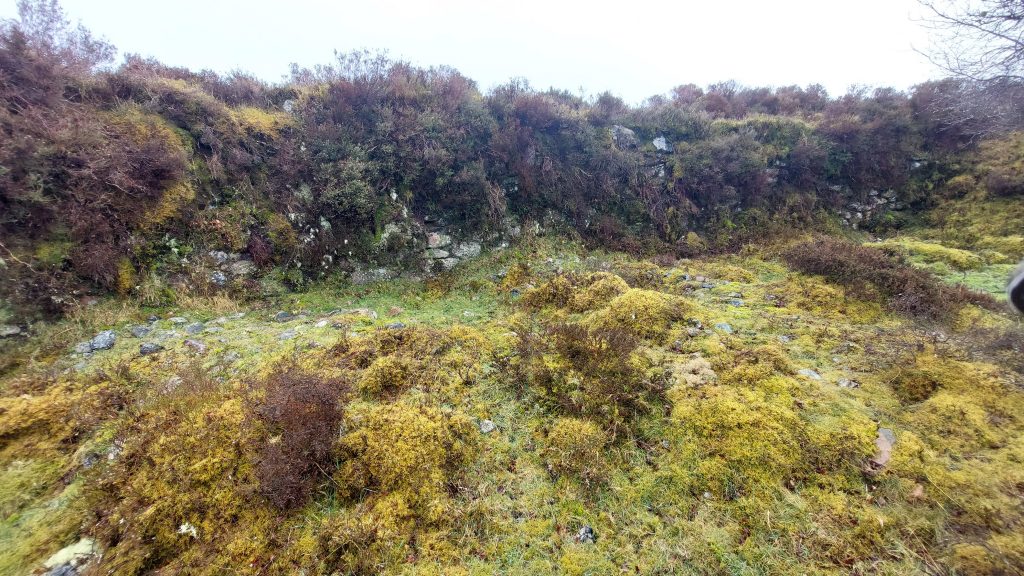
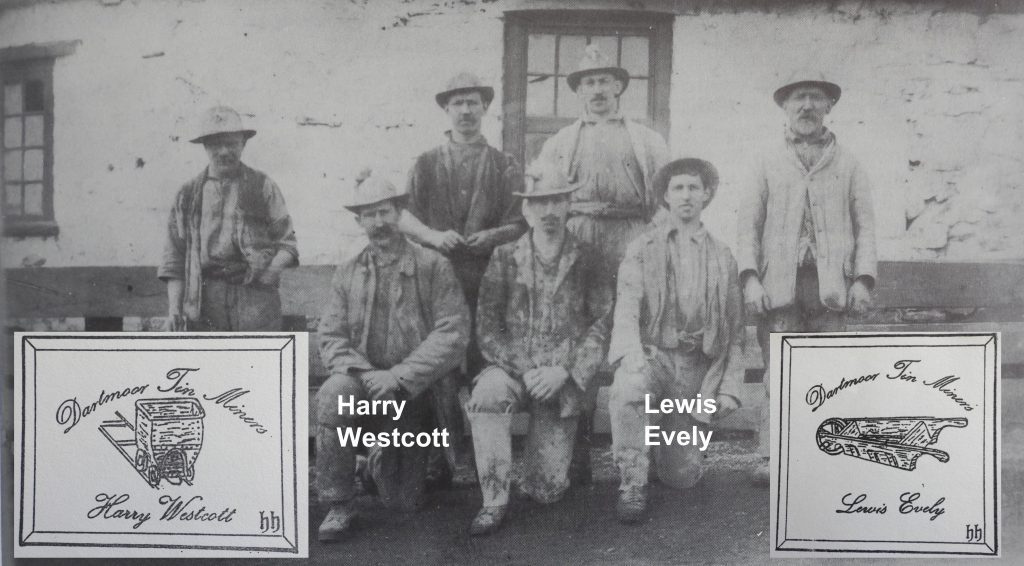
This sketch map shows all the key features covered in this post. Bennett’s Cross is oddly misshapen and is probably one of the most photographed crosses on the moor. It is a good starting point for exploring Birch Tor and Vitifer mine workings in the Redwater Valley.Bennett’s Cross is also a boundary stone between Chagford and North Bovey parishes.Bennett’s Cross has been used as a boundary stone for Headland Warren as it has “WB” (Warren Bounds) inscribed on its north face, which is evident in the above (right) photograph taken on a night walk by the author.The dotted red arrowed line shows the route (photographs) shown in this post. The photographs are from visits to the area by the author at various times of the year, hence the variation in light conditions and the apparent change in vegetation seen.Top of Hamblys Lode (East) where footpath crosses before passing the field known as Jan Reynolds Ace (Diamond). The path then crosses Birch Tor Lode en-route to the granite outcrops of Birch Tor.Looking down Hamblys Lode (East)Looking up Hamblys Lode (East) from the footpathJan Reynolds Ace – Diamond as viewed from the path between Bennett’s Cross and Birch Tor. There is a further description of the “Jan Reynolds Aces” later in the post.Birch Tor Lode Adit. This can be found at SX68458 81555, near the highest point of the lode and close (20m up) from where the modern footpath between Bennett’s Cross and Birch Tor crosses the workings.Birch Tor Lode Adit on closer inspection (and at a different time of year than the first picture) shows access today is still possible (albeit not recommended unless with an experienced group). The adit descends at a steep angle into the hillside. There are great views looking west (down the lode) towards Warren House InnLooking down Birch Tor Lode (in winter)Birch Tor Lode in SpringDescending Birch Tor Lode from the footpath, the explorer will pass two old shafts en-route to Prideaux Shaft.Prideaux Shaft can be located about one third the way down Birch Tor Lode from the footpath to Redwater Valley.Prideaux Shaft was recorded at SX68329 81422.The picture showing miner John (Jack) Webb shows the method of hand drilling c1912, where miners would work in pairs, one would hold the drill and the second would hammer it. Alongside John (Jack Webb) is Freddy Warne. John (Jack) Webb is recorded in “Tin Mines and Tin Miners of Dartmoor” (by Dr Tom Greeves) as coming from Postbridge and who was killed during the First World War The letterbox stamp was designed by the authors father with “hh” being his nom-de-plume.Guppies Shaft lies in Birch Tor Lode between Prideaux Shaft and the Redwater Valley floor. Guppies Shaft is now engulfed by a fir tree and can be found at SX68286 81364.Further down Birch Tor Lode from Guppies Shaft is a quite spectacular retaining wall. It is located at SX68285 81342. Ore from Birch Tor Lode was transported up the south side of the gully on a tramway, which was buttressed at its lower end. The author surmises that the picture is the aforementioned buttress.Looking back up Birch Tor Lode with the retaining wall in shadow (just to the right of the area of rubble). The “line” towards the top right hand side of the picture could be the tramway location previously described.Pond at the bottom of Birch Tor Lode. The author is unaware of the use of this – it could be a flooded shaft or possibly a tinners’ reservoir used provide supplementary water to a waterwheel further down the valley.Next to the pond at the bottom of Birch Tor Lode amongst some trees is another shaft. This shaft is at SX68230 81271.Found in February 2024 near the bottom of Birch Tor Lode where it meets Redwater Valley. This piece of ironwork looks like a ‘chair’ used to secure a rail, which probably was used on a tramway at the mine.Shaft in main Redwater Valley at SX68165 81173.Site of large wheel pit (number 3 on map) in centre of Redwater Valley at SX68175 81220. The wheel would have been 38ft in diameter and used to help pump out the New Shaft at North Lode and Hambly Shaft at Hambly Lode using flat rods. The wheel would have been supplied by the Birch Tor and Vitifer Mine leat and supplemented by a branch of the Redwater spring.Bottom end of Birch Tor and Vitifer Mine Leat leading to waterwheel 3Another angle of the bottom end of the Birch Tor and Vitifer Mine Leat looking west. The footpath leading down into the valley from the Warren House Inn area can be seen near the centre / top of the photograph. Soussons Plantation can be seen in the distance.Close up (Winter view) of wheelpit 3Stone structure near wheelpit 3 at SX68183 81228 is possibly part of the two flat rod systems which turned near this point from the water wheel up to Hambly’s Shaft and New Shaft respectively. Just north east of wheelpit 3, two ‘V’ channels where flat rods leading to Hambly’s Shaft and New Shaft would have been located. It is unlikely the two flat rod systems would have been operational at the same period in time.Flat rod ‘V’ channel leading to New ShaftFlat rod ‘V’ channel leading to Hambly’s ShaftLeading away (west) from wheelpit 3 is a deep gully which has a bridge constructed over the top (SX68152 81207). The conjecture is that the gully was either a tailrace or was for a third set of flatrods leading away from the wheelpit.Contextual view of the gully leading westwards from wheelpit 3 – used as either a tail race or possibly flat rodsContinuation of the gully from wheelpit 3 from beyond the small bridge. It would seem strange to have made such an effort to build these walls (at SX68146 81201) simply for a tailrace, which leads thoughts to perhaps this was for flat rods. If so, there is no obvious shaft they would have lead to and shortly after this point the gully makes a right angled bend.Adit to the west of Wheelpit 3Leat tunnel below Wheelpit 3, which would have fed water further down the valley towards the buildings. This is located at SX68210 81230Remains of the course of an old tramway in Redwater ValleyIn the centre of the Redwater Valley is the “mining village” complex. Most of the buildings today are now reduced to their foundations. The photo from c1950 showing some of the mine buildings ruins. 1 = Blacksmiths shop and miners dry, 2 = Carpenters shop, 3 = Birch Tor.Redwater valley clapper looking west towards the blacksmiths shop and miners dry. The carpenters shop is just visible to the left (and behind) the tree.The ruins of the Blacksmiths Shop and Miners Dry. The building was over 40m long and was subdivided into five or six compartments.20th Century miners superimposed outside the 21st Century ruins of the Blacksmiths Shop and Miners Dry.John Sowden was known as “Captain” Sowden and is recorded as being a regular chapel man at Postbridge, ref : “Tin Mines and Tin Miners of Dartmoor” (by Dr Tom Greeves). The letterbox stamp was designed by the authors father with “hh” being his nom-de-plume.Blacksmiths shop and miners dry can be found at SX68175 80956General views of the Blacksmiths Shop and Miners Dry.Part of Blacksmiths shop and miners dry. The piece of iron with the hole can be found at SX68175 80956The remains of the chimney at the Blacksmiths Shop and Miners DryRemains of chimney stack at Blacksmiths shop and miners dry at SX68175 80956Ruins of the Carpenters Shop, as recorded following an archaeological field survey in 2001 is 4.6 metes wide, comprising two compartments. The two compartments are 9.8 metres long and 3.2 metres long. ref Dartmoor HER.Carpenters Shop wall with “Johny Rose” plaque attached to the remaining south wall. A modern addition whose history the author is unaware of.Another general view of the Redwater valley “mining village” complex, with all buildings intact, taken c1912. 1 = Dormitory, kitchen, canteen, mine captains house and a cottage, 2 = Mine offices, 3 = Bungalow for miners families, 4 = Managers House, 5 = Birch Tor, 6 = Garden LodesJan Reynold’s Ace – club (field) from Redwater Valley with the ruins of the miners dormitories complex.Remains of the miners dormitory, kitchen, canteen, mine captains house and cottage next to one of Jan Reynolds aces (the “club”). The building was constructed in the early 20th century at the time of the 1903-1913 period of operation of the mine.The complex of buildings included a dormitory. The upper floor had a central corridor divided into cubicles.Looking down onto the ruins of the dormitories (which once housed 16 men) and across to the miners dry, blacksmiths shop and the carpenters shop.The complex of buildings included a dormitory where the miners would have lodged for the week having walked from villages from around the edges of the moor. The ground floor had a kitchen range and a canteen. Behind the dormitory were two buildings, comprising the Mine Captains house and another cottage where a mining family lived.The Mine Captains House is the oldest building in the area and is believed to date from the late 18th century. It had four bedrooms upstairs and 3 rooms downstairs, when occupied by Captain Richard and Anna Jory in the late 19th century. It had a small garden. There was a kitchen, sitting room and a pantry but no toilet (which was in the garden).These foundations are the remains of the mine office building, where the accounts were kept and wages were paid. Between 1896 and 1906 it was also the home of John Coaker and his family.The dimensions of the mine office is recorded on the Dartmoor HER as 13.5 metres by 5.3 metres. The mine office had two main compartments and a lean-to structure on the rear east side.The mine office can be found at SX68271 80992The mine office was constructed from mortared stone.This building foundation is the remains of a single-storey timber bungalow. It was L-shaped on plan.The miners bungalow is recorded on the Dartmoor HER thus: “The main building plinth measures 10 metres by 3.5 metres and the smaller section, which may include the entrance is approximately 5.3 metres by 2.8 metres”.The miners bungalow is located at SX68277 80970Bottom of the Garden Lode with Birch Tor in the background.The Garden Lode is the smallest in the area and is located near the Managers House.Outline of Managers House slightly above the track heading towards Headand Warren. Challacombe Down on the horizon on the other side of Chaw Gully.The Managers / Directors house is recorded as having been rather an imposing bungalow with a veranda of wood and glass. It was built for a Mr. W.A. Padfield (Mine Director). The building was burnt down before the first world war.Corner of Jan Reynold’s Ace (4) – spade (field). Challacombe Down in the background.Part of Vermin Trap found at the corner of the Jan Reynold’s Ace- spade (field)The part vermin trap comprises three individual stones each with a linear slot. Vermin traps were constructed out of granite with slate shutters to catch weasels and stoats and so to protect the warrened rabbits (at Headland Warren). Vermin traps can be found around the moor predominantly in the area of upper River Plym.The vermin trap is located in the corner of one of the Headland Warren enclosures (aka Jan Reynolds Ace – spade)This part vermin trap can be found at SX68382 80896.This vermin trap was probably associated with Headland Warren.Benchmark on the outside of the wall of the spade field. As seen on the phone this benchmark can be found at SX68420 80893.The benchmark reference is B.M 1249.1The benchmark can be seen from the footpath alongside the wall which is en-route to Headland Warren from Redwater ValleyLeat to the 20th century Tinner’s MillThe leat to the Tinner’s Mill taking a 90 degree bend before passing over an embankment from which a launder would have taken the water over an overshot waterwheelLeat embankment leading to the Tinner’s MillTop of leat embankment (at SX68390 80751)Tramway to Tinner’s Mill, which seems to have originated close to Dunstan’s ShaftTramway to Tinner’s Mill taken from near the main track leading to the Golden Dagger MineTinner’s Mill Map showing leat, tramway, buddles and nearby aditThe site of the 20th century Tinner’s Mill is extremely overgrown and is barely discernible. The edge of the mill was recorded at SX68456 80728. The Tinner’s Mill was destroyed when unexploded WWII bombs were brought from Plymouth to be detonated here.Within the Tinner’s Mill are some old metal posts which might represent part of an old stamps area. This is located at SX68335 80714The Tinner’s Mill appears to have had at least four buddles. Buddle #1 is located at SX68331 80700Buddle #2 is located at SX68321 80706Buddle #3 is located at SX68335 80774Buddle #4 is located at SX68339 80669A short distance from the Tinner’s Mill at SX68456 80728 is an adit (collapsed), which was driven over 1300 feet east on D lode with cross-cuts to other lodes. This was dug near the end of the life of the mine not long before the company suspended operations in 1914 due to a lack of labour. Wheelpit (number 5 on sketch map) can be found in the centre of the Redwater Valley close to the buildings. It is quite hard to discern and is at SX68254 80918View from the bottom of the South lodes overlooking the wheelpit (Dunstan’s) at SX68166 80917 and part of the Redwater Valley complex. The wheelpit is labelled as number 4 on the sketch map in this post.Turbine House at SX68166 80917. The Turbine House would have held a pelton wheel where electricity had been generated to light the mill and to run a magnetic separator.Dunstan’s Wheelpit at SX68166 80917Dunstan’s Wheelpit had a 45ft wheelPhotograph from 1860s of miners believed to be the oldest in existence of miners alongside a waterwheel (Dunstan’s)The Dartmoor Tin Research Group (DTRG) recreating the 1860’s pictureCombining photographs taken 160 years apartClose to Dunstan’s Wheelpit on the main track is an old telegraph pole, which once carried wires across the valley to Headland Warren FarmThe telegraph pole has two ‘1’ metal tags on it. It is located at SX68092 80932A possible cut off telegraph pole is located at SX68142 80935Most probable location of Dunstans Shaft at bottom of South Lodes at SX68134 80899 located near to a wheel pit (pictured in previous photographs). This shaft was named after the mine captain and was started in 1846 reaching 40 fathoms. It is difficult to photograph with the tree now in situ. Looking up South lodes from near Dunstans shaft.South Lodes from c. 1913South Lodes provide a very interesting exploration. The lodes are 0.5km long and up to 80m wide. Looking east down South lodes with Birch Tor on the horizon.Great South LodeNarrowing point of South lodesJust over half way up South Lodes – Birch Tor prominent on hillside opposite. The lode getting narrower as the hill is ascendedSouth lodes becomes more like a canyon as the hill is ascended and is characterised by large granite outcrops. The medieval miners had to work hard for their tin.South lodes were excavated by the “old men”, probably from the 16th century. More views of South lodes looking west (uphill)Nearing the summit point of South lodesSouth Lodes just down from Lances Shaft. The South Lodes have marooned “islands of rock” along its length.Shaft close to Lance’s Shaft – was this an air shaft ?18th century picture, which the author thinks may be from the top of the South LodeIs this the location of the 18th century picture ?Lance’s Shaft (ref Butler – Dartmoor Antiquities North) at SX67830 80768. Pump (flat) rods for draining the shaft ran back to the small water wheel (28ft), located at the wheel pit at SX67885 80829. Date shaft dug believed to be late 1840s.Lances ShaftLances Shaft in the sunshineSidney French (1889-1976) came from a farming family (Middle Merripit) and had 8 brothers and sisters. He began working Vitifer Mine when he was just 13 years old, initially as a “buddle boy” on the surface before going underground at the age of 17. ref : “Tin Mines and Tin Miners of Dartmoor” (by Dr Tom Greeves). The letterbox stamp was designed by the authors father with “hh” being his nom-de-plume.Providing some scale for Lances Shaft. South Lodes above Lance’s shaft close to modern footpathPaths crossing the top of South lodesMillman’s Shaft in Millman’s Lode at SX67736 80747Looking west towards Millman’s Shaft Just down from Millman’s Shaft is a ruined building or tinners’ hut. It is sited within an area of streamworking on the east side of the Walla Brook.The tinners’ hut walls are built from moorstone and are 1m thick and up to 1.5m high but are now covered by heather.The tinners’ hut internal dimensions are 3.5m by 4.7m and there is a centrally placed entrance of 1m wide on the south wall.The tinners’ hut is located at SX 67655 80704Vitifer and Birch Tor mine leat. Its source is taken from the East Dart and North Teign rivers and is 12.2km in length with slope average of around 1 in 150.Vitifer and Birch Tor mine leat approaching South LodesThe ‘col’ between the Great South Lode and Millman’s Lode is where there once was a spur of the main Birch Tor and Vitifer Leat, which crossed over an aqueduct / launder and continued across an old raised embankment, which can still be seen taking water onwards towards Golden Dagger Mine.Location of spur which fed water across the launder is located at SX67777 80777Promontory on the ‘col’ between Great South Lode and Millnan’s Lode where launder carried water across to an embankment and onwards to Golden Dagger Mine. The promontory is located at SX67780 80761Another view of the ‘Golden Dagger’ leat branch off the Birch Tor and Vitifer Mine leatThe Birch Tor and Vitifer Leat had a short branch (which fed the water which provided the power for the flat rods for Lance’s and Millman’s shafts). The branch was dug slightly to the north before crossing back across the main leat (by a short launder). The photograph illustrates how the branch was dug.Wheelpit (labelled 1 on map) fed by Birch Tor and Vitifer mine leat at SX67885 80829. The wheel fed two flat rod systems for pumping Lances Shaft and Millman’s Shaft, albeit unlikely at the same period of timeWheelpit for 28ft wheel which powered flat rods for Lance’s and Millman’s shaftsThe tailrace from the water wheel and the main Birch Tor and Vitifer leat continued downhill to the next water wheel near Wall’s shaft (where another set of flat rods were located)The two ‘V’ channels leading to the west from the 28ft wheel (number 1 on sketch map) allowing the course of the flat rodsFlat Rod channel to Millman’s ShaftFlat Rod channel to Lances ShaftView of the Jan Reynolds Aces. The Dartmoor myth involves a heavy drinking and gambling tin miner who had a brush with the devil in the 17th century. The enclosures are supposed to resemble four aces from Jan Reynolds card hand he had. The enclosures were first recorded on a map of the warren in 1797. In the authors opinion : 1 = diamond, 2 = heart, 3 = clubs, 4 = spade. Jan Reynold’s Aces from Google earthJan Reynold’s Ace (1) – diamond. The purpose of these field is presumed to relate to the trapping and harvesting of rabbits as part of Headland Warren,Jan Reynold’s Ace (2) – heart.Jan Reynold’s Ace (2) – club.Jan Reynold’s Ace (4) – spade.Paulls Lode looking across at Birch Tor LodeThe Wall’s shaft (ref Butler) around the area between Wall’s Lode and Paul’s Lode can be found at SX67984 81040DTRG visit to Wall’s shaft. This was possibly Engine Shaft from 1846 sunk to 84 fmsClose up of Wall’s shaftWheelpit (labelled 2 on map) in Paull’s Lode at SX68076 81114.Walls Shaft water wheelpit (42ft) would have had flat rods used to provide power to pump the shaftClose up of wheelpit in Paull’s lodeAnother view of wheelpit in Paull’s lodeThe area to the right (north) of the wheelpit (number 2) would have been where the flat rod drive mechanism (crank) would have been locatedExit ‘tail race’ portal from Wall’s shaft wheelpitThe exit portal from Wall’s shaft wheelpit is located at SX68077 81114Close up of Wall’s shaft wheelpit tail race portalInside the wheelpit portal – picture courtesy of Matt JohnsonInside the wheelpit portal – picture courtesy of Matt JohnsonInside the wheelpit portal – picture courtesy of Matt JohnsonHambly’s Lode (West) from near Hambly’s Shaft. Birch Tor and Vitifer Mining Company worked Hambly’s Lode between 1845 and 1858. At this time, the mine operation employed no more than 20 (Greeves).Winter view of flooded shafts near Hambly’s ShaftFlooded shafts near Hambly’s Shaft. The water was disturbed by a dog just before the photograph was taken. Another view of Hambly’s Lode (West).Hambly’s Shaft at SX68067 81322 with Birch Tor behindHambly’s Shaft was operational during the most prosperous period of the mine, in the 1860’s and 1870’s. Flat rod ‘V’ channel leading to Hambly’s shaft from wheelpit 3Another view of the flat rod ‘V’ channel leading to Hambly’s shaft from wheelpit 3Close up of Hambly’s shaft in WinterLooking down Hambly’s Shaft (Summer) which, in particular proved to be a rich source of ore.Shaft at junction of Hambly’s Lode and North Lode at SX68084 81424, is the probable location of New Shaft.Fenced off New Shaft – February 2024New shaft and North Lode areaUnknown structure above North Lode and New Shaft at SX68047 81347. Possible shaft in North Lode at SX68132 81470Dug our section and revetment wall near New ShaftClose up of the revetment wall near New ShaftClose up of the revetment wall near New Shaft at SX68127 81433Harry Westcott (b.1861) wasn’t a local man having come from North Molton. It is interesting that he originally was a cobbler and harness maker before becoming a miner. Lewis Evely (b.1884), was one of 15 or possibly 16 children and came from Whiddon Down before moving to Shilstone Farm for a period. He was also a local preacher. ref : “Tin Mines and Tin Miners of Dartmoor” (by Dr Tom Greeves).The letterbox stamp was designed by the authors father with “hh” being his nom-de-plume.
Just came across this page. I spent many hours when I was younger exploring the mines at Birch Tor and Vifter looking for rocks and minerals (I spent a lot of time at Challacombe Farm) but never really understood where everything was and what it was for. Thank for this. Now it all makes sense and I will definitely have to take a trip back there.
I spent a lot of time searching for mines o Dartmoor (without much success most f the time) so this is really nice to find.


Mike Jeffery December 16, 2022
This is a brilliant study of Vitifer and Birch Tor, and area I am very interested in
SteveGriggDartmoor December 18, 2022 — Post author
Thank you
Andrew Knight August 21, 2023
Just came across this page. I spent many hours when I was younger exploring the mines at Birch Tor and Vifter looking for rocks and minerals (I spent a lot of time at Challacombe Farm) but never really understood where everything was and what it was for. Thank for this. Now it all makes sense and I will definitely have to take a trip back there.
I spent a lot of time searching for mines o Dartmoor (without much success most f the time) so this is really nice to find.
Thank you
SteveGriggDartmoor August 22, 2023 — Post author
Hi Andrew,
Many thanks for you comments, much appreciated
Kind Regards,
Dartmoor Explorations (Steve)